
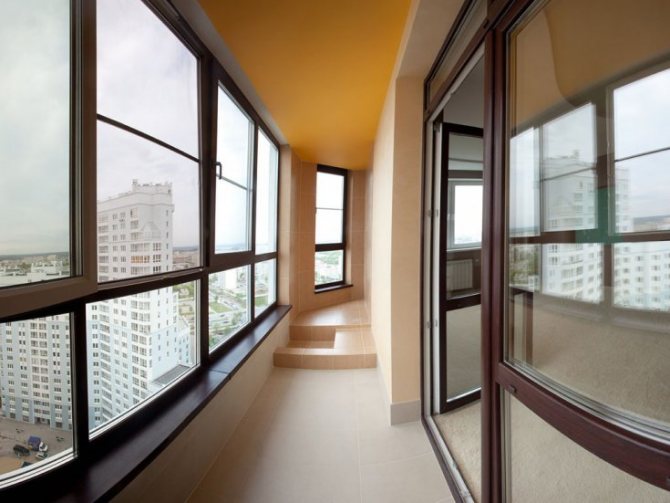
Blog> Balconies and loggias> How best to make a ceiling on a balcony
25.02.2020
The ceiling on the balcony can be decorated when warming the room with different types of building materials. Popular finishing methods are metal ceiling slats, wood paneling, plasterboard, plastic panels, and waterproof paints.
Types of stretch ceiling
A fabric structure fixed under the main ceiling using prepared profiles is called tension. As a canvas for the ceiling, PVC films or fabric can act. Each of these materials has advantages and disadvantages. Let's analyze each of the types separately:
PVC foil
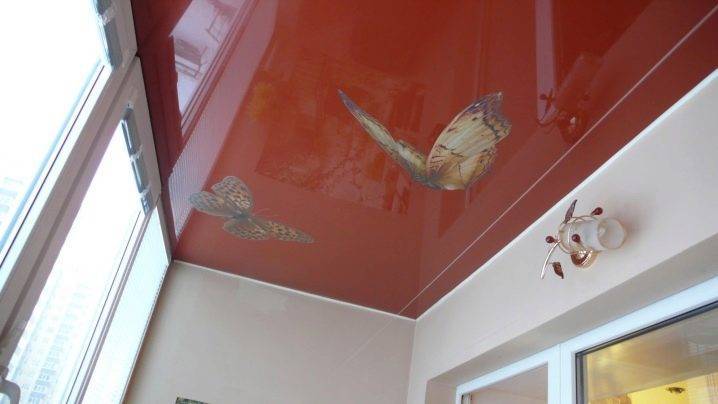
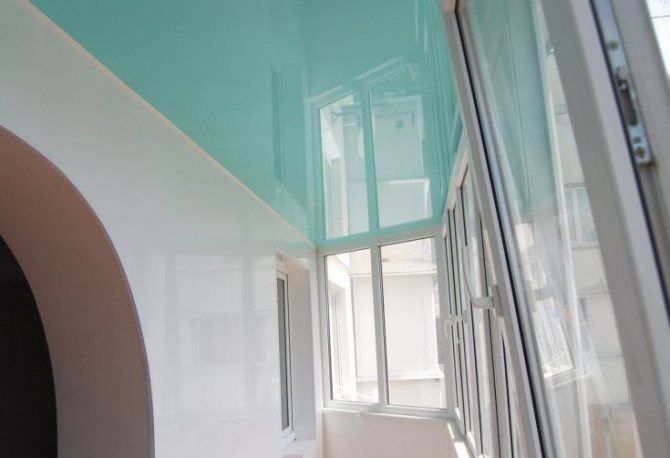
The ceiling of such a material is most often made to individual dimensions and welded from strips with a width of 1 to 5 meters. The film is mounted by heating it to a temperature of 60-70 degrees using a gas gun and fastening it to pre-prepared profiles. After the PVC film has cooled down, the ceiling is perfectly flat. Among the huge variety of textures, 3 types of films are in frequent demand - matte, glossy and satin.
Satin ceiling
- The glossy surface of the ceiling can visually increase the space. A distinctive feature is a mirror image, due to which this effect occurs. The only negative is the more noticeable seam line on the surface in a large room.
- The classic option is matte film. It has no special properties, but it goes well with rooms of various designs.
- The satin surface has a smooth texture, which enhances the reflective characteristics, so that a white ceiling can be obtained from a white ceiling, and a mother-of-pearl from a colored one.
It should be noted that PVC films have a wide variety of colors, which is great for the creation of various design projects.
Advantages of a PVC film ceiling:
- Waterproofness is one of the main advantages of PVC film. Such a coating is able to withstand a huge amount of water in the event of flooding.
- A wide range of colors allows you to create original, design projects.
- Due to the small width of the roll, it is convenient to arrange ceilings in small rooms.
- The ability to perform multi-level ceilings.
- Possibility of temporary dismantling with subsequent restoration.
- Not susceptible to odors and dust.
- Not subject to deformation.
The disadvantages include the following:
- Fear of sudden temperature changes.
- Cannot be mounted in cold rooms.
- The installed luminaires must be of reduced power, or have good thermal insulation.
- Although the film can withstand large amounts of water, it is very susceptible to sharp and sharp objects.
- Cleaning the ceiling must be careful because of their fragility.
- Expensiveness is another drawback of stretch ceilings.
Textile
The main and indisputable advantage of fabric stretch ceilings is the absence of seams. The canvases are made in rolls up to 5 meters wide, which is usually always enough for arranging the ceiling in a room without resorting to connecting seams. Installation is also different, in which you do not have to warm up the fabric. Ceiling canvases are made of polyester yarn and impregnated with a polyurethane mixture, which gives them many useful properties.
The color range of this type of canvases is slightly poorer in comparison with PVC film, but this is compensated by the technical characteristics of the fabric. It has a higher strength and is not susceptible to cold. Due to the absence of suture joints, it looks more aesthetically pleasing.
All these types are equally well used in application, although they have different characteristics from each other. For comparison, we list the advantages and disadvantages of each of them.
Advantages of a seamless ceiling:
- Strength is an order of magnitude higher than its counterpart, so the fabric can withstand stronger mechanical stress.
- Not afraid of temperature extremes, it can be used in cold rooms.
- The large width of the canvases allows you to get seamless ceilings in spacious rooms.
- Treatment of the fabric with antiseptics makes it dust-repellent.
- The ability of the fabric to breathe helps to maintain air exchange in the room.
Of course, in addition to the pros, the canvases have their disadvantages:
- A modest choice of color palette.
- Due to their advantages, the canvases cost several times more than PVC film.
- When flooded by neighbors from above, the fabric will allow water to pass through.
- Impossibility of temporary dismantling with subsequent restoration.
- If the width of the canvas is not enough to finish the entire area, a connecting profile is required, which is more noticeable than the seam of a PVC ceiling.
The choice of this or that option depends on many factors. The main defining moment is the room in which the stretch ceiling will be mounted. It is necessary to take into account the temperature regime of the room, its size, functionality, and then make a choice in one favor or another.

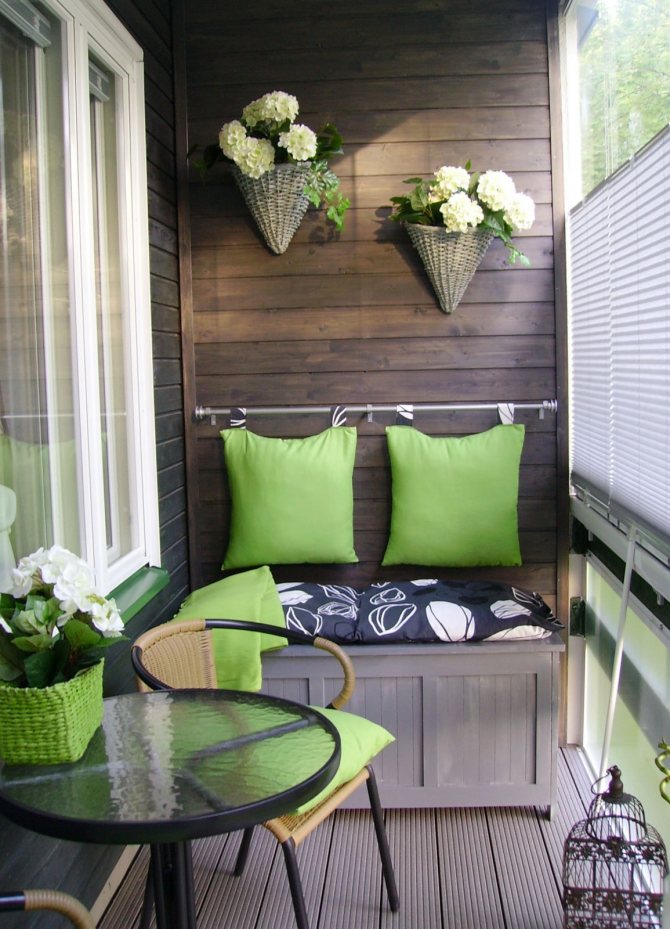
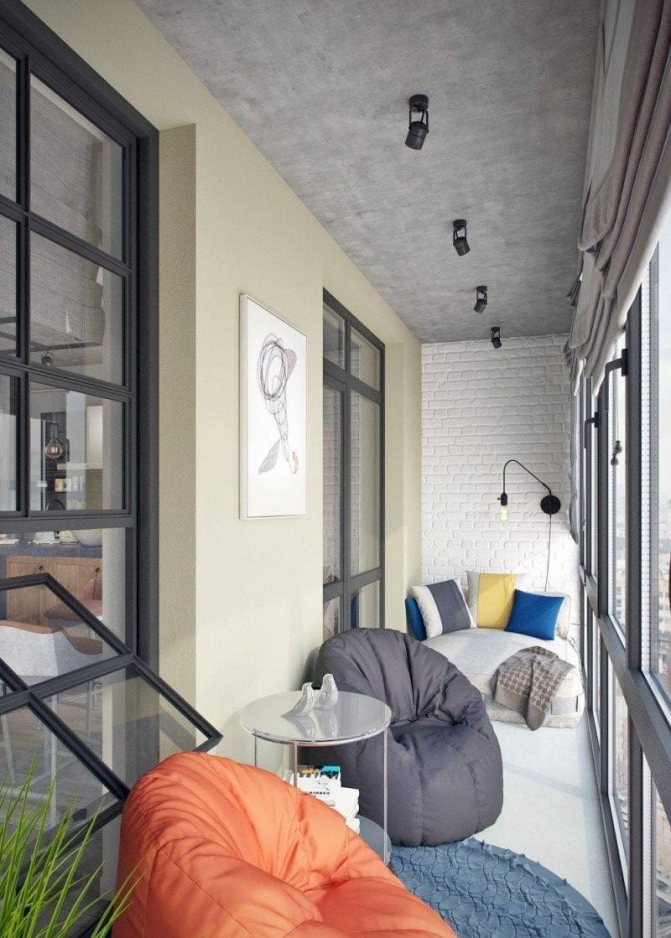
How to visually enlarge the space?
The main task in finishing a small balcony is to make it more spacious, at least visually. If the visual increase in the area is not enough, change the layout of the apartment and attach the loggia to the room. However, this way you will lose an additional, albeit tiny, room. In addition, the cost of work and materials will not come out small.
See an example of attached kitchens and bedrooms.
To save time, effort and money, we suggest going the other way: by visually increasing the area. The main rule is light color. White is best suited for maximum reflectivity. Alternatively, consider a light gray, beige, delicate pastel.
Important! Consider the temperature of the shade: warm ones fill the room with the sun, suitable for northern small balconies. Cold, on the contrary, pleasantly cool, will be appropriate on the southern, southeastern side.
Another color trick is a combination of light and dark tones. It is used when arranging a small elongated balcony. The short sides are colored dark (any, up to matte black), and the long ones are colored light.
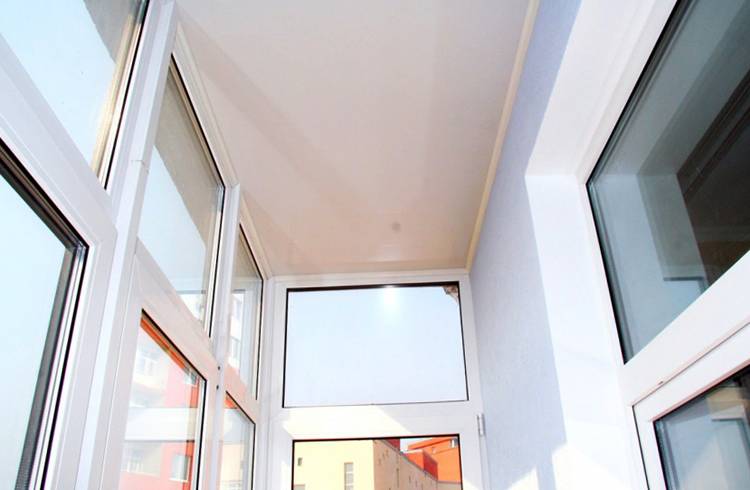
Finishing types
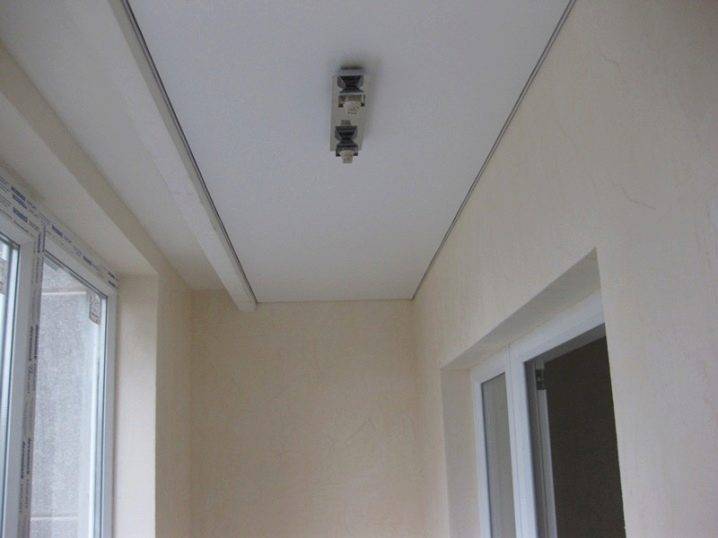
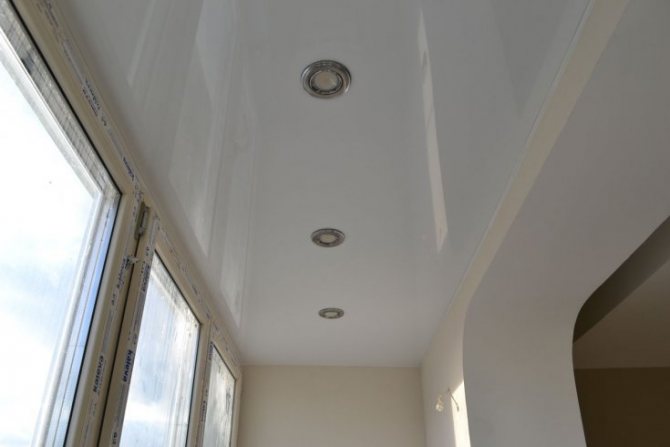
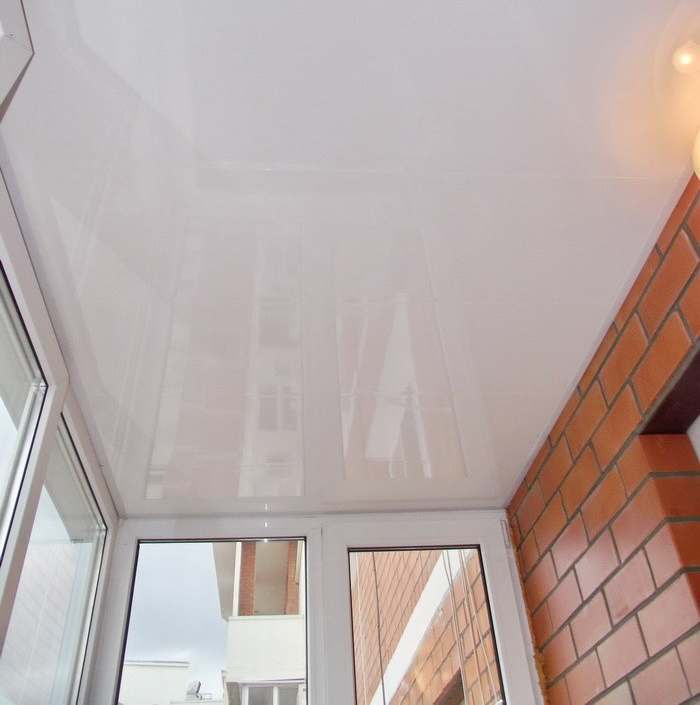
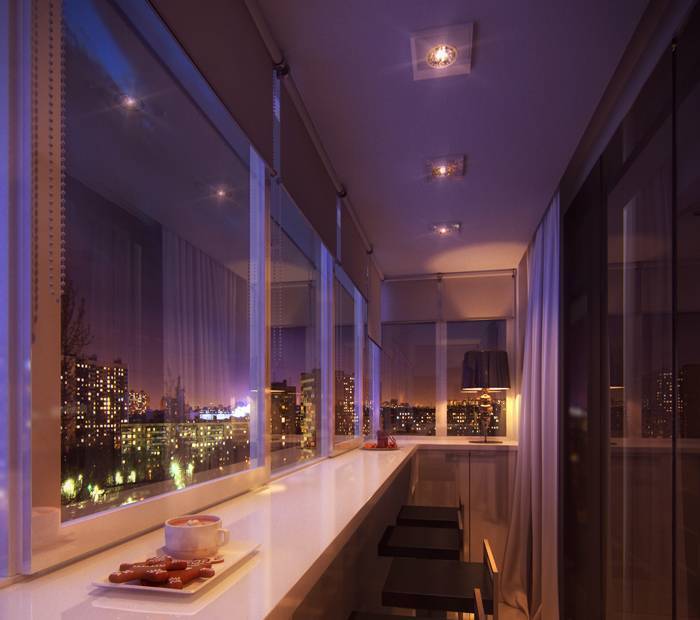
Stretch ceiling
Contrary to the well-known opinion that such systems are used only in rooms with a large area, otherwise - "does not look" - a long-standing delusion. Even on 1-1.5 m2, it is quite possible to make the very tiers that are painted so brightly in designer brochures. Convenience for installation is that all aluminum bases will be small, and not 5 meters long, as in a spacious living room or bedroom with an improved layout.
The advantages that some types of stretch ceilings have:
- Gloss increases the space and smooths out all the irregularities;
- Polyester is moisture resistant, nonflammable and does not fade in the sun;
- The coating tolerates severe frosts and temperature changes;
- The material does not grow moldy and repels pathogens.
Suspended ceiling
How is this type different from the previous one? In short - to everyone, because as the main working material they use not polyester fabric, but PVC panels or any other material, at the request of the customer.At the same time, the installation process is accelerated several times.
The key advantage of such a system is saving height, which is especially important for typical high-rise buildings of the 80-90s, where the ceilings are not too high anyway. The hollow structure of the panels and their specific design makes the entire system lightweight, flexible and durable.
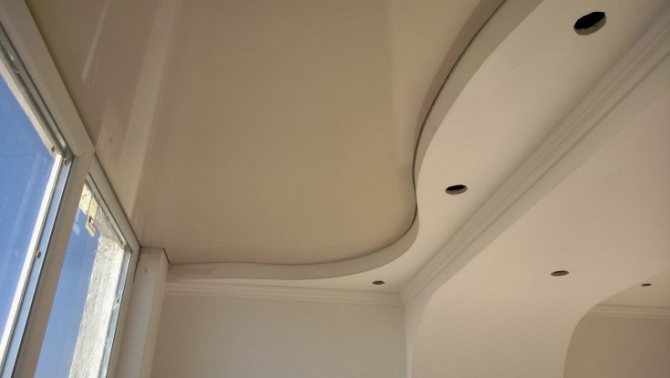
Drywall
Is it possible to do, and generally consider such an option? Yes, you can, but with a number of reservations, the first of which says that the balcony, like the apartment itself, should not be in a region with high humidity, since it is the main enemy of fragile material.
You should not believe the manufacturer, who will tell you that it is his plasterboard ceilings that have exceptional moisture resistance and increased strength characteristics. All this concerns only moments with an accidental hit of a small amount of water, but "in the long term" you still have to think about preserving a dry balcony.
Of the unconditional advantages - a reliable frame made of aluminum strips, under which the wiring is calmly mounted, and lighting is made out, even with decorative LED bulbs, at least a full-fledged chandelier, depending on the desire and funds.
There are a little more cons, and they are not limited to moisture sensitivity:
- The need for regular painting;
- Vulnerability to low temperatures;
- Decrease in height due to the frame;
- The need for putty, reinforcement and installation of skirting boards.
Excluding the aforementioned disadvantages, it is drywall that is considered the most affordable and at the same time reliable material, the correct installation of which will provide many years of service.
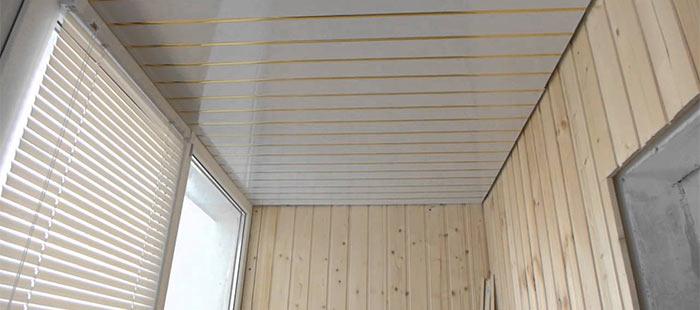
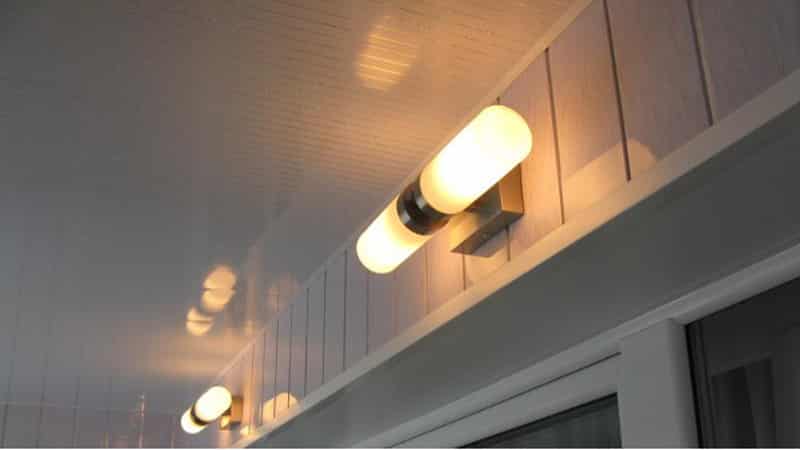
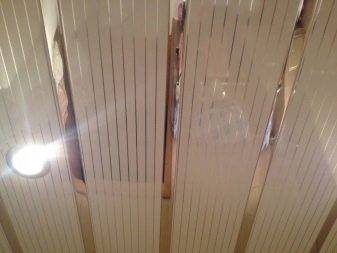
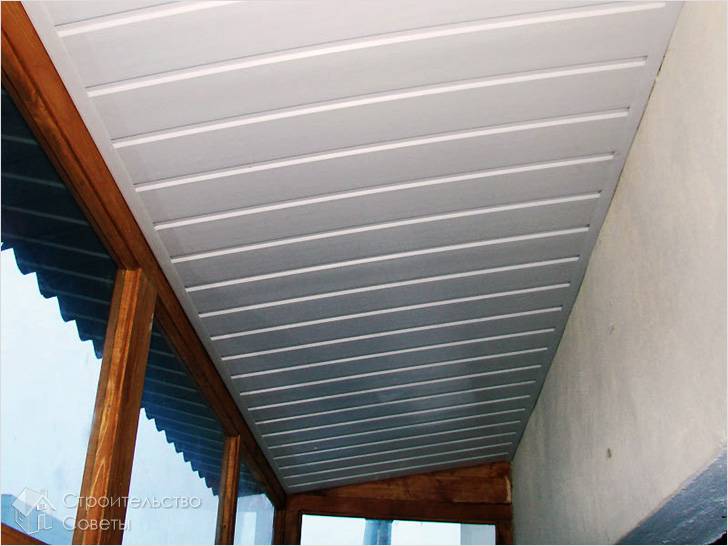
Rack ceiling
It is jokingly called bath style, or retro style decoration. Both names have the right to be, if only because the principle of installation of wooden slats, or lining, is similar to the design of the interior of a sauna or bath.
A very important point is forgotten - the slats are not only made of wood, but also from any suitable or desired material, including the same aluminum or PVC. The only difference is in the further installation process - open or closed type.
The first option is familiar to most - the slats are installed at a distance from each other, and the hollow areas create a characteristic "striped" pattern, inside which LED backlighting, including multi-colored, is often carried out. Some craftsmen prefer to cover the cavities with decorative strips, and holes are then cut for lighting.
The closed installation method implies a "smooth" ceiling, but it is not suitable for non-standard shapes due to the laboriousness and unjustified use of a large amount of materials.


We carry out installation
To keep the balcony cozy for a long time, and the ceiling to please with its appearance, the work is carried out taking into account the technological features. Pay close attention to the fastening system. It is controlled how close to each other the fasteners are placed, with the help of which the decorative material is held.
Technological features or we carry out the installation correctly
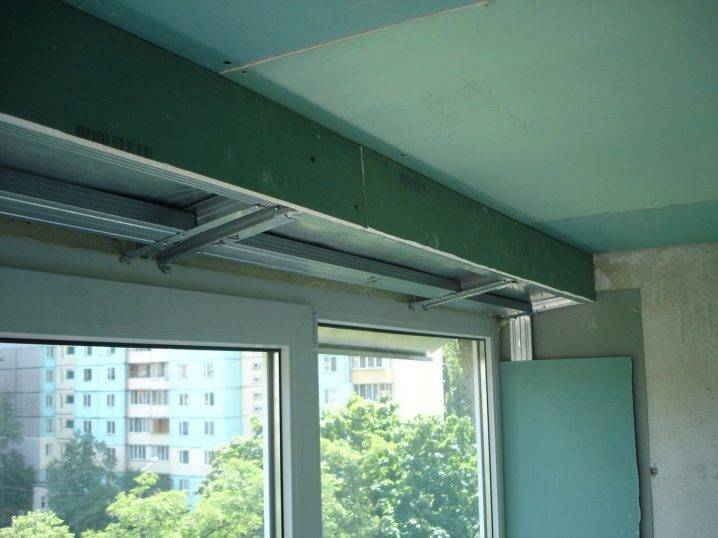
The work begins by determining how far from the ceiling the system is located. As a rule, installation is carried out in such a way that the slatted ceiling is located at a distance of 4 cm from the rough surface. As a result, the balcony is reduced in height.
Attention! If additional lighting is provided, the distance will have to be increased based on the shape and parameters of the built-in lamps, which are selected individually for each balcony.
Before the installation of the wall corner profile, it is prepared by drilling the holes for the fasteners. They are placed every 30 - 40 cm so that the system installed on the balcony has sufficient rigidity and strength. Additional holes are made in the corners, 5 cm away from the edge.If the surface of the walls is finished with ceramic tiles, the attachment points are aligned with the seams.
How to decorate the ceiling
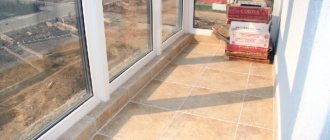
The ceiling on the balcony is decorated with a variety of materials. To improve the ceiling surface, plastic, wooden lining, plasterboard sheets, aluminum slats, stretch ceilings, suspended structures are used. The options can be very different. How to sheathe the ceiling on the balcony?
Only an insulated surface can be veneered. For cladding, you can buy fairly cheap ceiling tiles. But after a while, it can change its shade. The material often turns yellow or dark when exposed to sunlight. So you need to think about whether to sheathe the balcony with such tiles.
Drywall is also a frequent guest on our loggias and balconies. It is durable and practical, it is convenient to use. This material is easy to process. It can be easily cut and sawn, drilled and bent. To bend it, you need to roll it over a piece with a needle roller and moisten it. After a while, the gypsum inside softens and the sheet can be bent using a template. After drying, it retains its new shape.
For finishing the ceiling of a balcony or loggia, it is better to choose moisture-resistant green sheets. You can also decorate the ceilings with plastic plates. These panels are well mounted on pre-built metal or timber battens. The ceiling is easy to clean and clean. It does not grow fungus and mold. Holes can be made in the surface of the ceiling and lighting fixtures can be inserted into them.
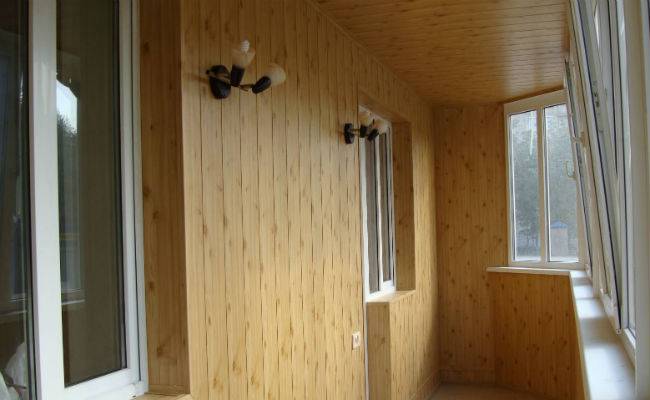
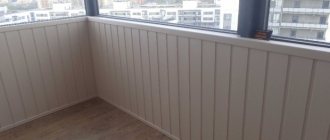
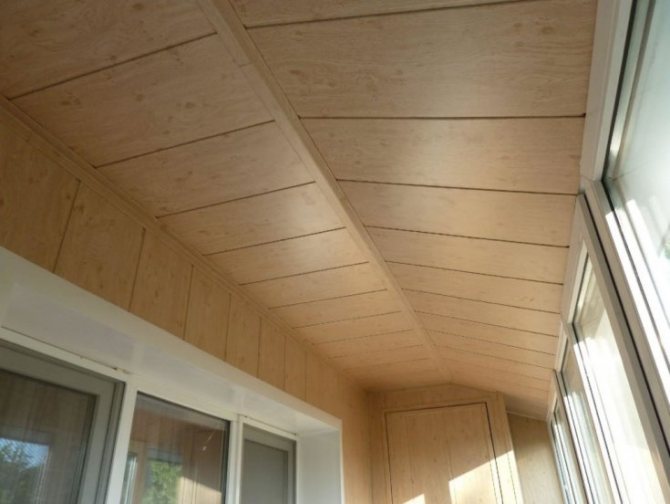
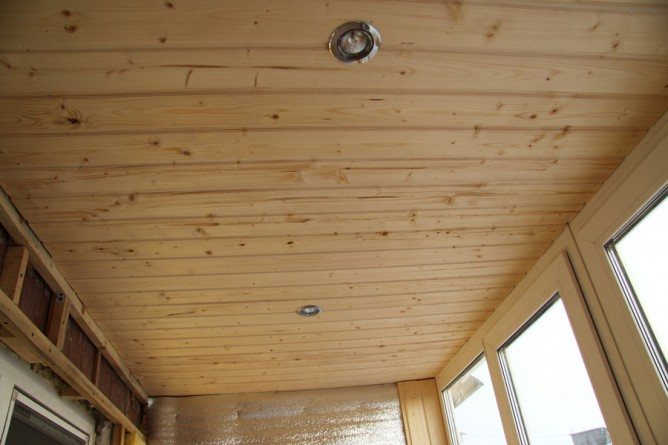
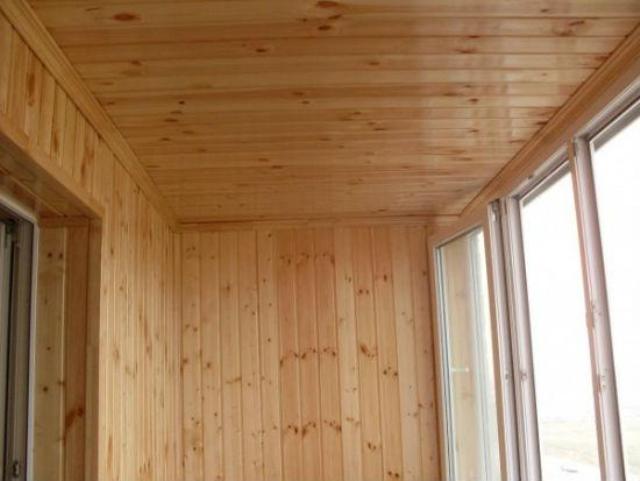
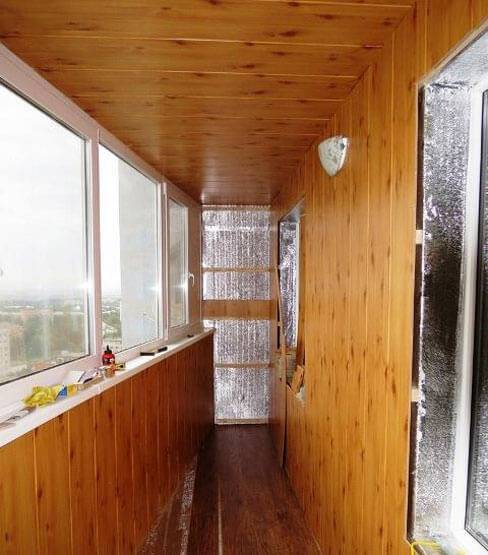
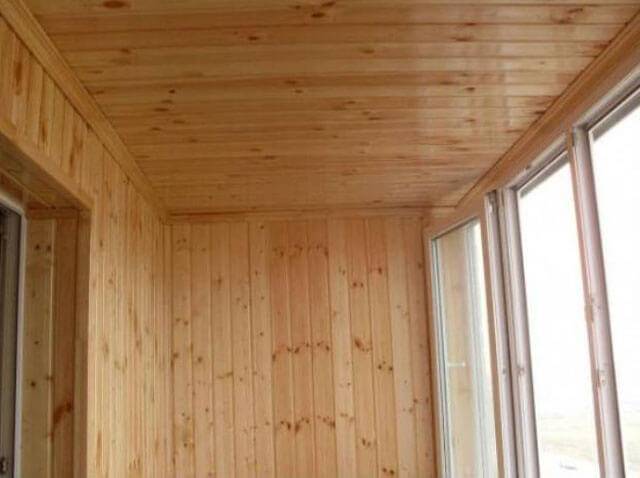
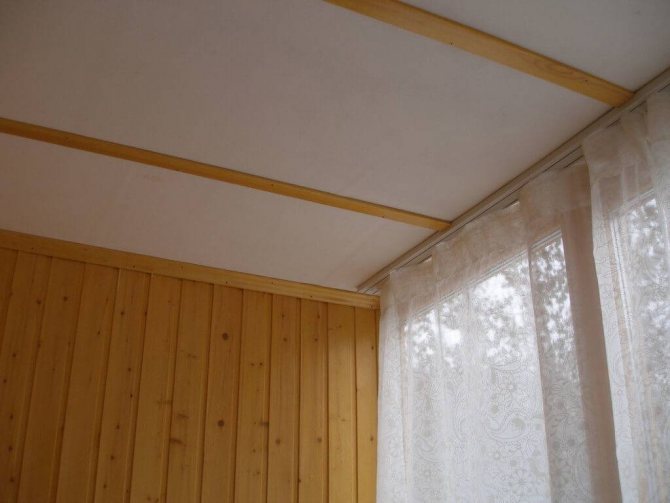
The classic option for finishing the ceilings of the loggia and balcony is cladding with wooden slats and planks (clapboard). It's cheap but looks pretty. At the same time, we must not forget that the tree requires special care from the owners. The coating sometimes needs to be treated with special fluids. You can paint it in any color or cover it with several coats of clear varnish.
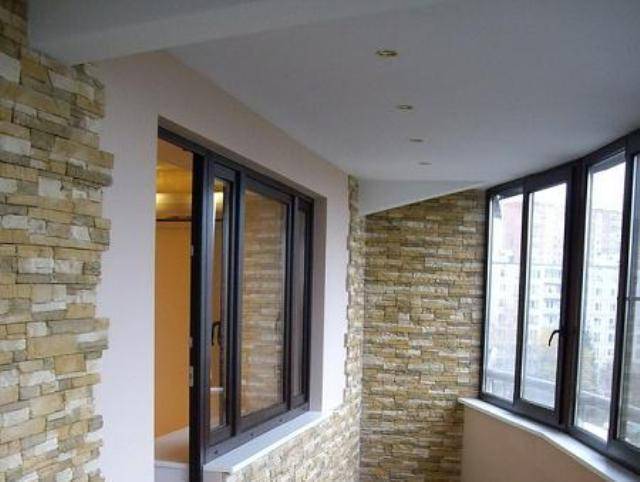
A practical material is the metal rail. Aluminum or steel parts create a very attractive shape and a beautiful appearance. This material is very durable. You can create a ceiling covering of any complexity from it. The metal can withstand temperature extremes and is very resistant to moisture. It is the ideal finishing material for balcony ceilings.
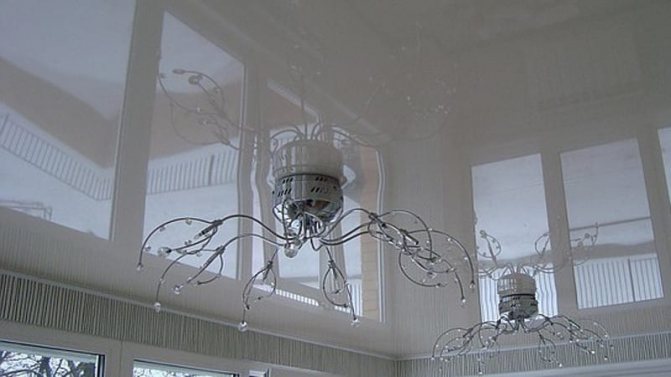
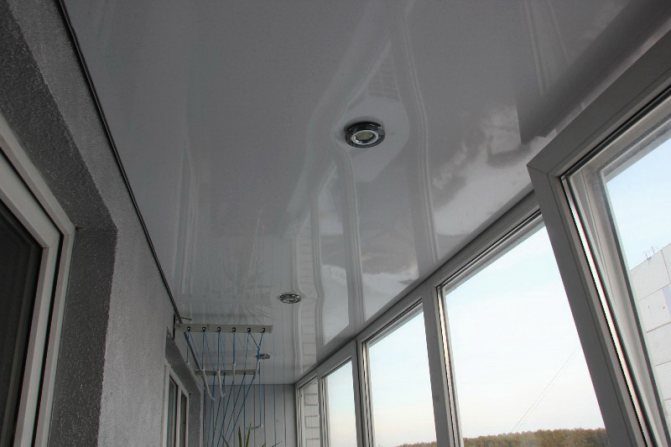
Tension structures have also begun to be used for balconies. They are good because they can hide all the unevenness of the top plate. Any communications can be hidden behind them. This material has good frost resistance. It does not require special care and is moisture resistant. It is difficult to install such a structure with your own hands, but the craftsmen will mount it in 1-2 hours. You can choose a canvas of various colors and shades. Lighting devices are inserted into it.
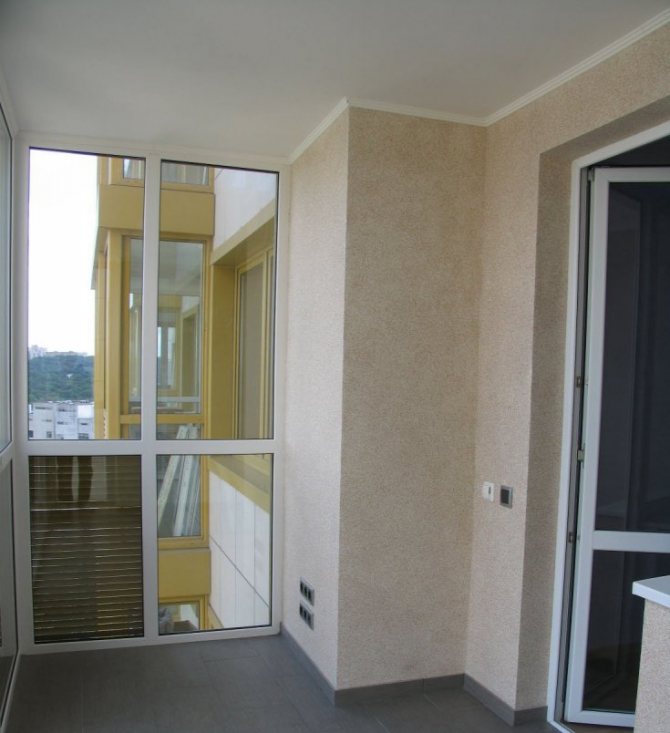
Requirements for finishing materials for the balcony
This part of the apartment is characterized by significant temperature fluctuations and high humidity. The surface of the walls and ceiling is more intensely exposed to direct sunlight. Therefore, materials must meet the following requirements:
- compliance with sanitary safety standards - do not emit harmful substances;
- moisture resistance - do not lose properties at high air humidity, prevent fungus and mold from appearing on the surface;
- resistance to temperature extremes, especially if the loggia is not glazed or insulation is not planned;
- style - in harmony with the design of the walls.
A prerequisite is the low weight of the finished structure. A balcony is a platform adjacent to the facade on one side. Therefore, the materials should not load the slab. The loggia can withstand a little more, since the overlap on the sides rests against three load-bearing walls.
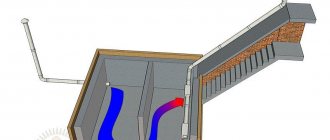
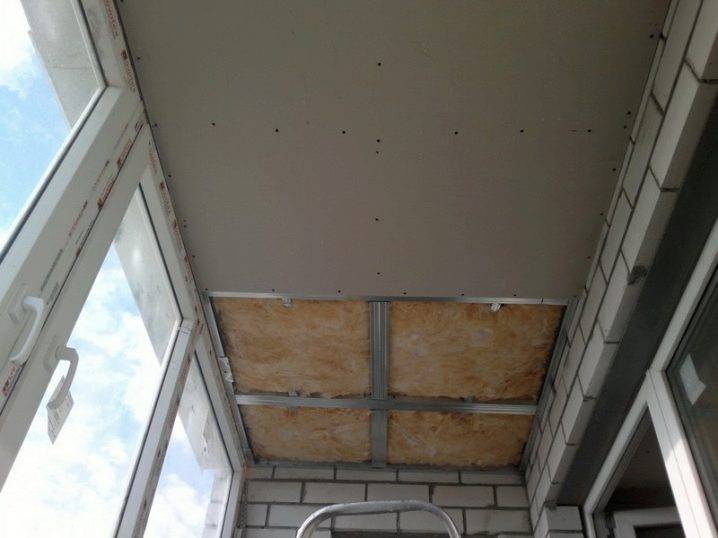
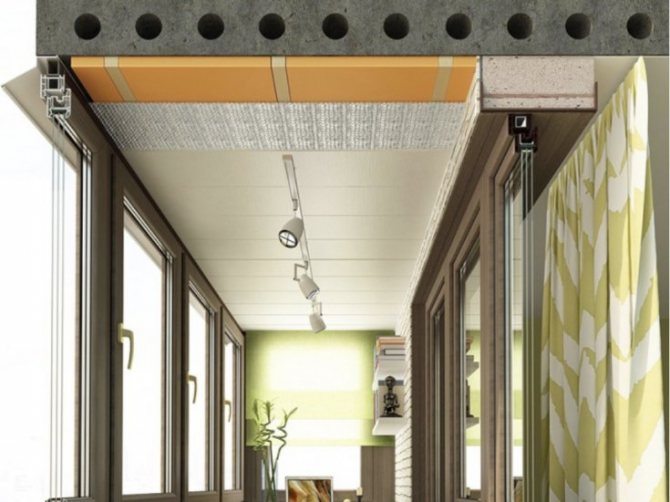
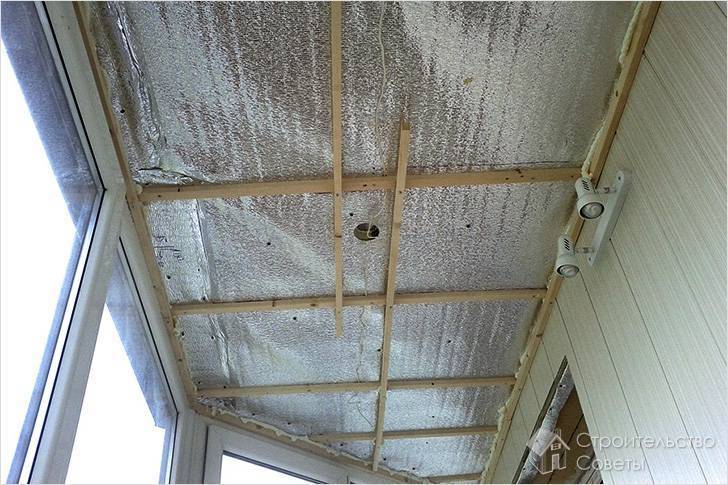
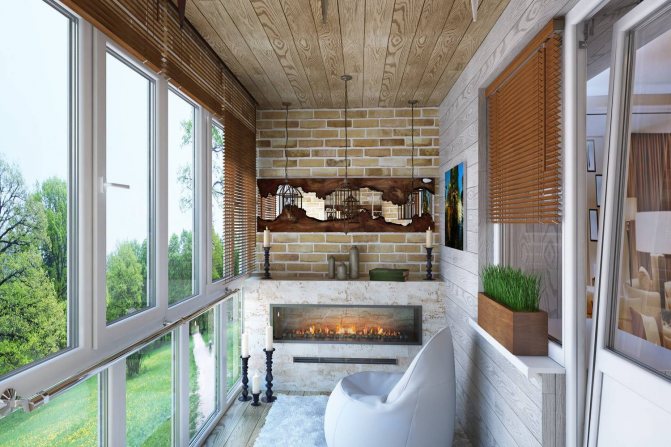
Warming
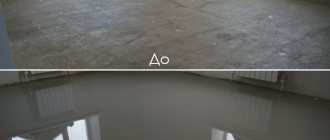
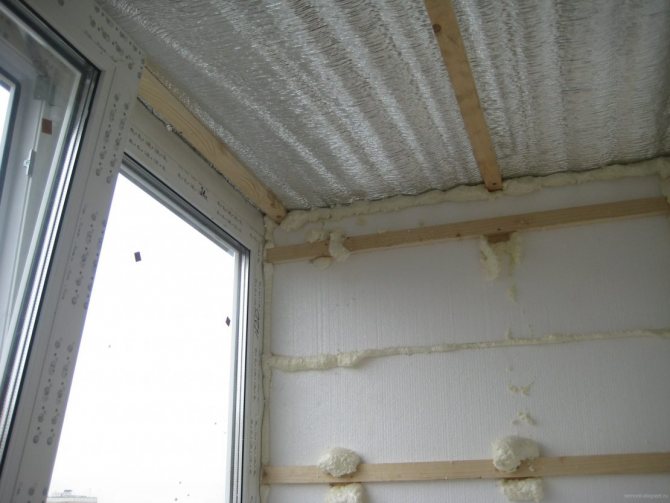
To create a favorable microclimate on the balcony, simply glazing it will not help. After waterproofing, you can start insulation. The balcony is insulated not in separate zones, but completely. After all, one cannot count on the consciousness of neighbors.
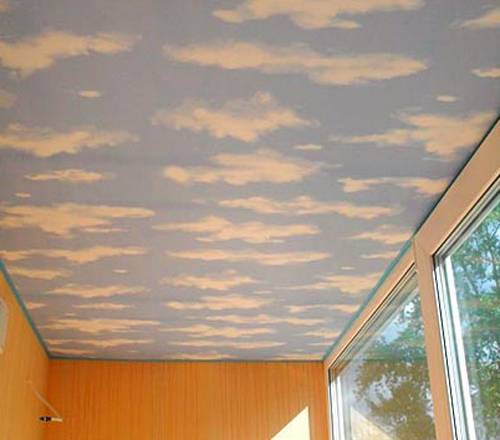
Thermal insulation of the balcony. Photo 3
Suitable for insulation:
- Sprayed polyurethane foam. A material that is great for balconies. It adheres perfectly to any surface and creates a completely water and vapor tight seamless coating with good thermal insulation properties. Cons: the need for special equipment, work experience. The price of such insulation is higher than using other materials.
- Minvata. A fairly common material, however, has a number of disadvantages. Mineral wool is highly hygroscopic. It is able to absorb moisture even from the air. To prevent the material from getting wet and the development of mold, moisture and steam should be excluded from the insulation. It is recommended to close minwat with a special barrier made of foil or film.
- Styrofoam. This material has a lot of disadvantages. When decomposed, it emits toxic fumes. The very structure of the material is rather fragile, brittle. But all the disadvantages are covered by a huge plus - polystyrene has an affordable price, and it is sold in almost every store. Expanded polystyrene has a homogeneous structure, does not allow air, steam, does not absorb moisture, and is more durable than foam. The material is classified as low-flammable.
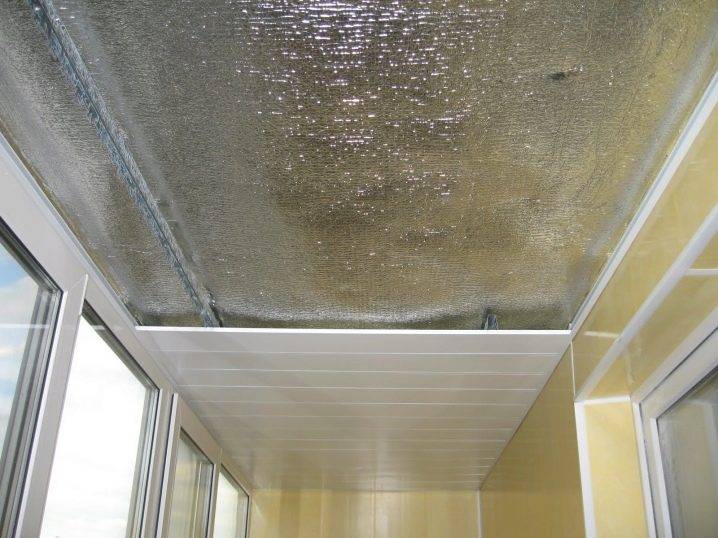
- Penofol (rolled polyethylene foam. Its thickness is varied: from 0.3 to 2 cm. For insulation of a balcony, 0.4-0.5 cm is suitable. The foam base is covered with a layer of foil on the outside, which helps to retain heat in the room. The material is excellent for a balcony in all characteristics. Small thickness does not take precious centimeters and so a small space. Penofol is often used in combination with other heaters. The foil layer has good vapor, water resistance, thermal insulation. Perfectly complements the mineral wool.
Sprayed polyurethane foam. Photo 4
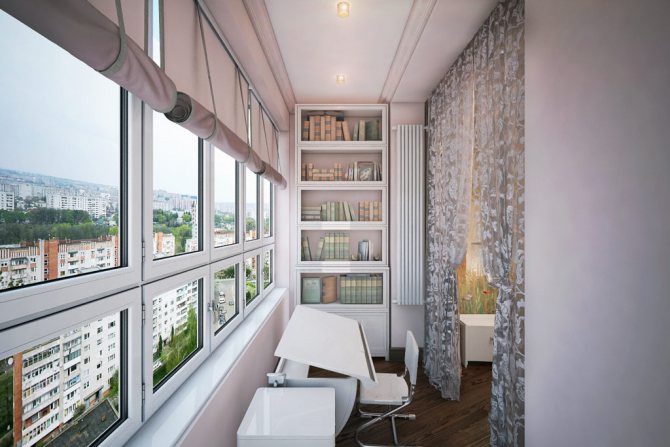
What kind of furniture should you use?
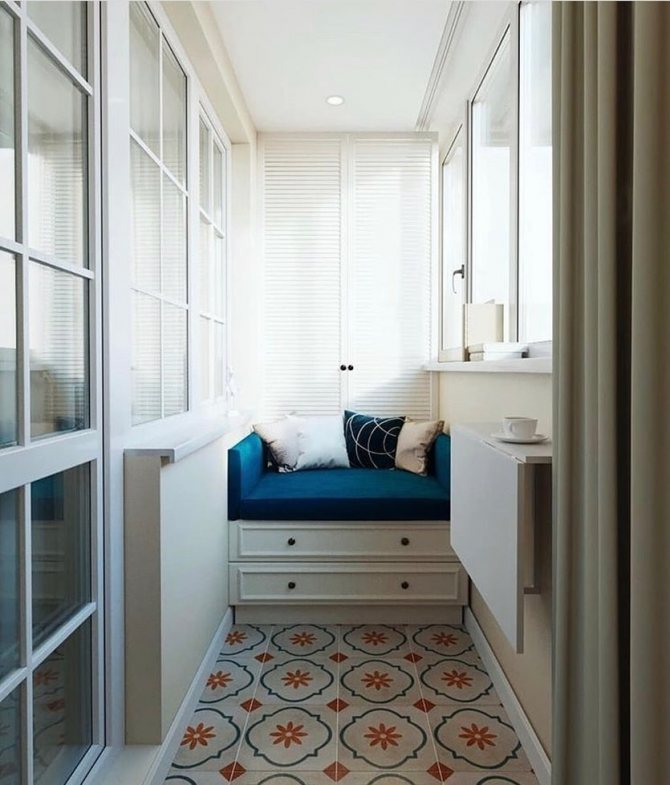
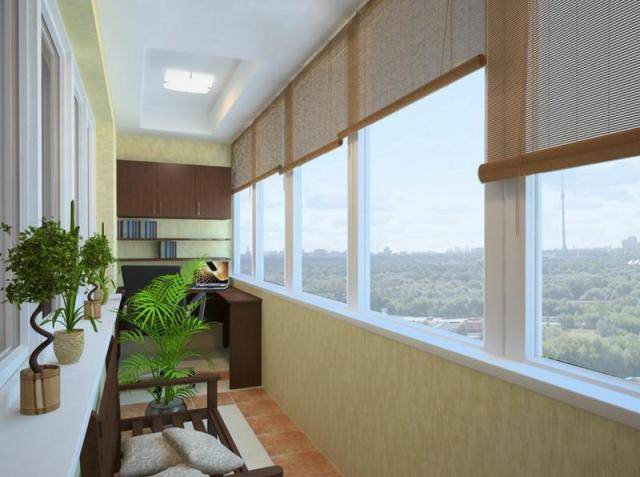
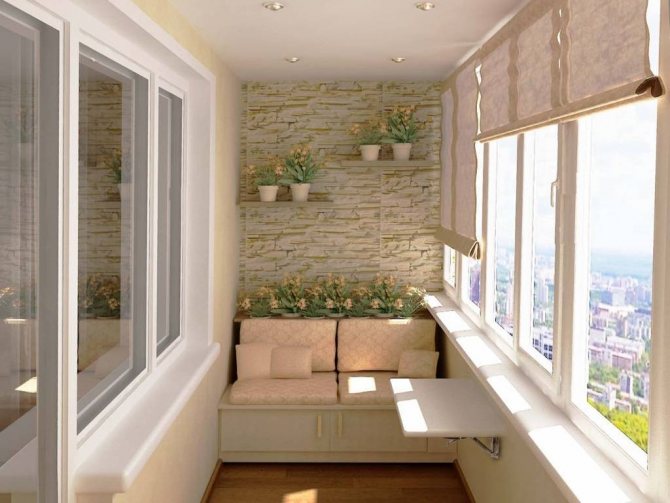
It is impossible to equip a small balcony without furniture. Choosing cabinets, shelves, armchairs, chairs, tables, give preference to two types: built-in or folding.
For example, it is best to put a wardrobe built-in: it allows you to use all the available space in a niche as efficiently as possible and turns out to be more spacious than a standard purchased one. The only negative is that built-in furniture is more expensive, but you should take into account that it will serve you for more than one year.
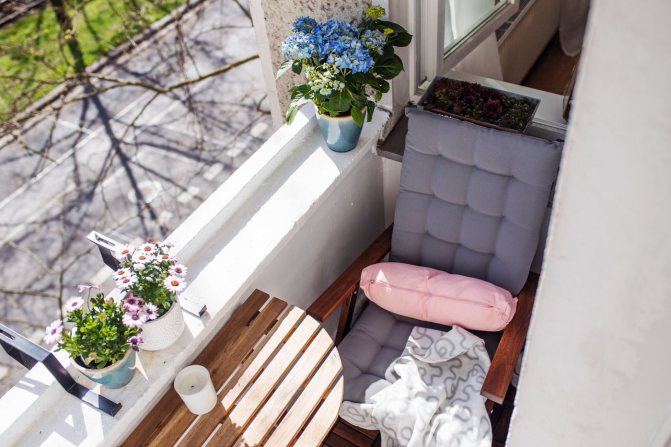
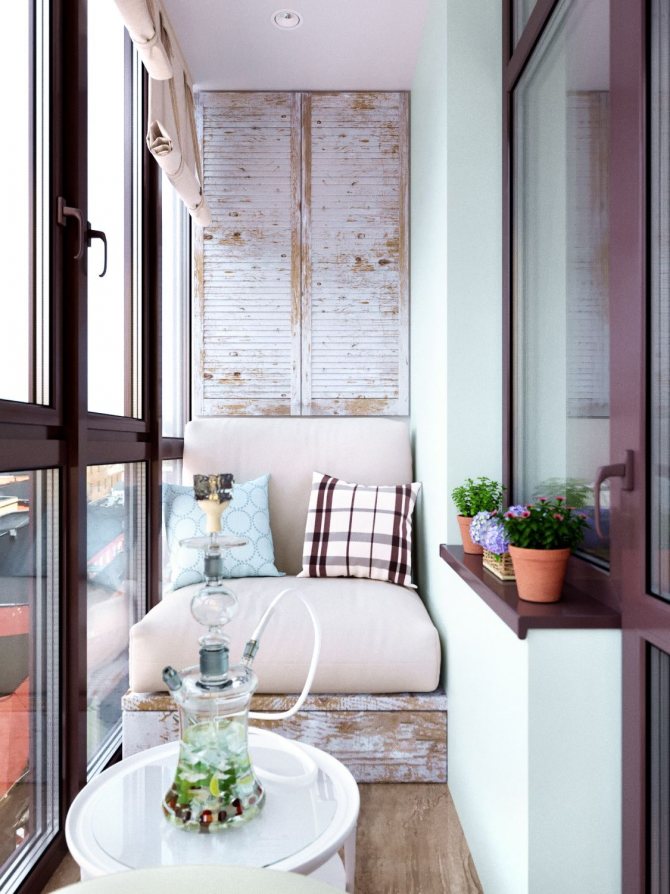
If you're looking to turn your balcony into a seating area, pay special attention to the seating area. The purpose of the lounge zone can be different, hence the seats should be chosen:
- to drink coffee in the morning or enjoy the view of the city at night with a cup of tea, a pair of wicker or folding chairs is enough;
- it will be convenient to relax with a book on a frameless armchair or a lounger made to the width of your balcony;
- it is convenient to work with a laptop on an ergonomic office chair (as a permanent office) or sitting on a beanbag chair (as a temporary option or for breaks).
Advice! To save space and make the seat more functional, order drawers to fit your niche and place comfy cushions on top - they can also be ordered by your size from a furniture company.
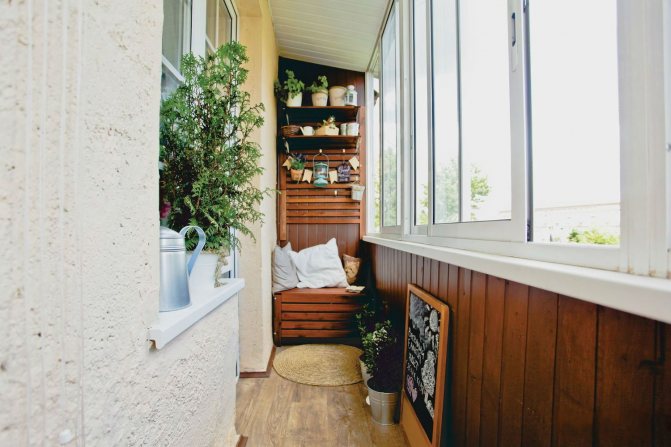
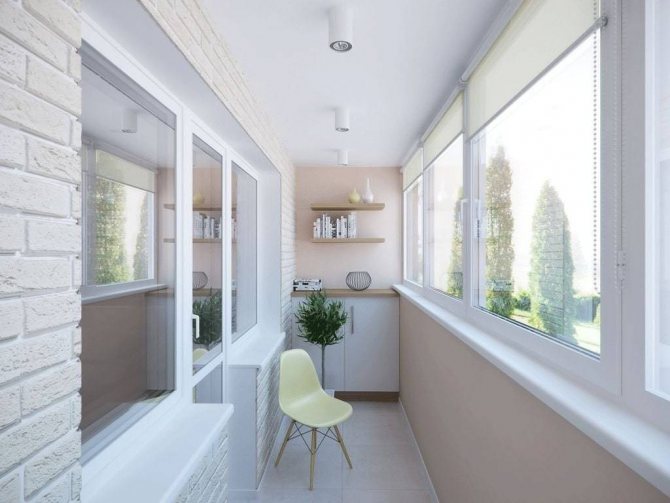
In the photo there is a small folding table on the loggia.
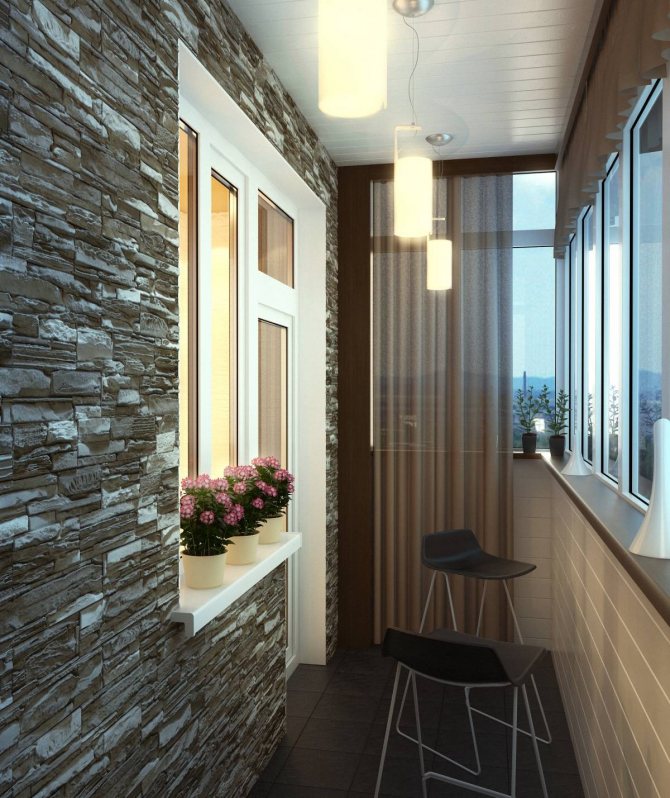
The third important element of the interior is the table. Putting a cup with a fragrant drink, putting a book, phone or work laptop - it will definitely come in handy. In a square loggia, you can make a wide window sill, which will simultaneously replace a table and a shelf for something you need (for example, indoor flowers).
See how the bar counter looks in the interior of the balcony.
The best solution for a narrow small balcony would be a folding console - it is easily installed when needed, and when folded does not interfere with movement.
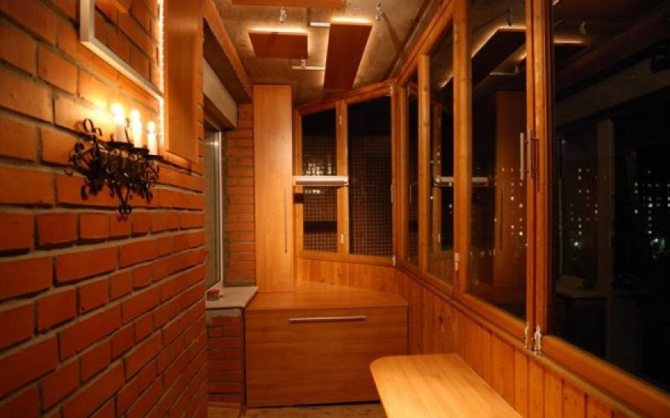
In the photo, the walls are decorated with dark wood
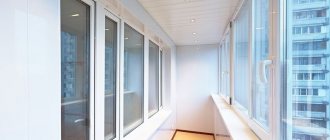
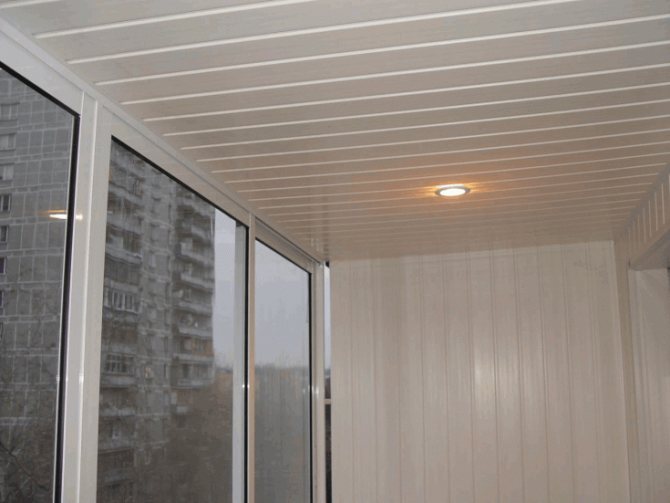
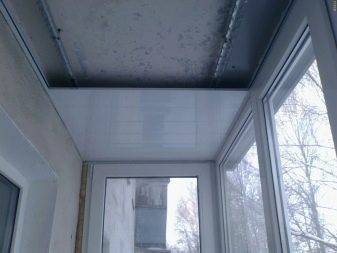
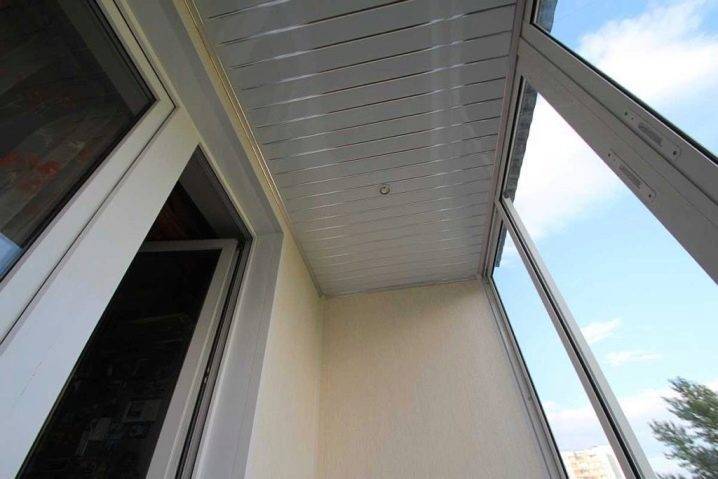
Plastic panels
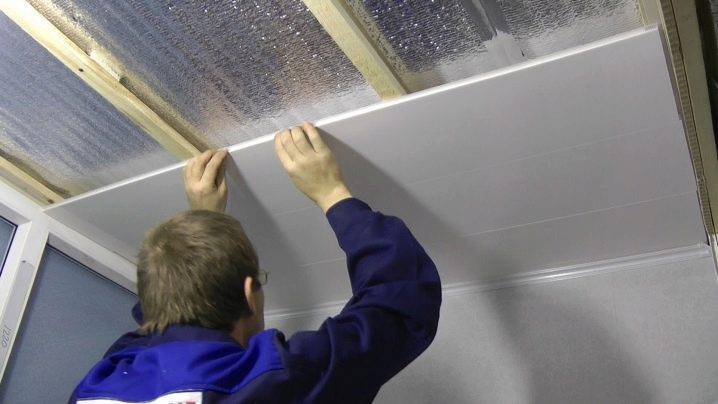
Plastic ceiling is almost the most economical method of finishing the ceiling on the balcony. Due to its technical characteristics, plastic lining is excellent for balconies. Even if the ceiling is not insulated, moisture and dampness does not threaten it. Considering the low weight of each lamella, its installation, which includes the manufacture of a lightweight frame, is quite simple. For the frame, you can also use wooden blocks or an aluminum profile.
Installation of plastic panels
To work, you will need the following material and tools:
- ladder;
- roulette;
- jigsaw / hacksaw for metal;
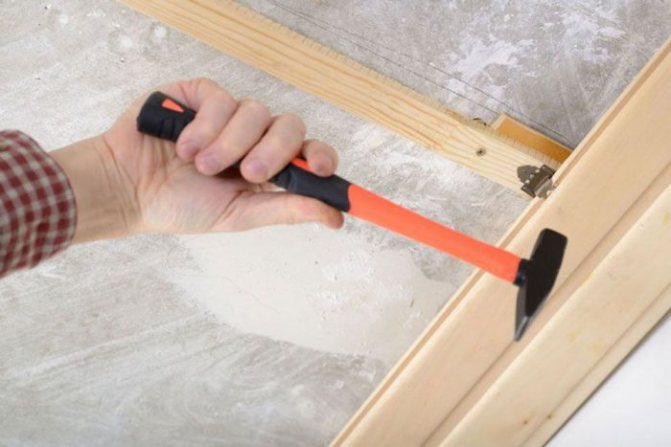
- a hammer;
- ceiling plastic skirting board;
- stapler / staples or studs (if the frame is made of a profile, then self-tapping screws);
- timber or profile for the frame;
- level;
- panels.
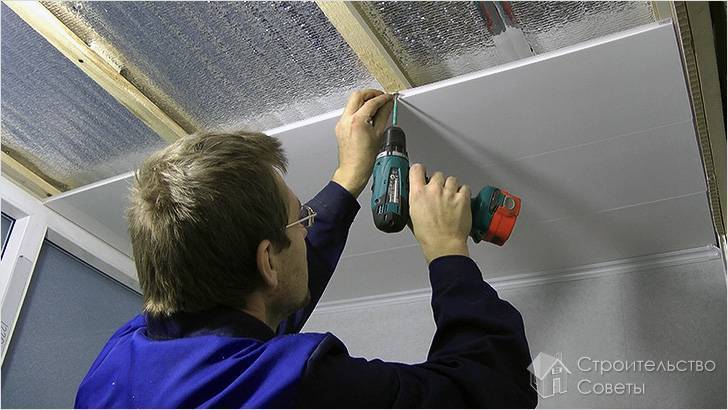
The work itself looks like this:
- Make a frame according to the level.
- As in the previous case, the ceiling is insulated.
- There are two ways to fix the panels. Install a plastic ceiling plinth around the perimeter. Then measure and cut the panels to the required size. The panel is simply inserted into the guide, and in the middle it is fixed with a self-tapping screw to the crate. Another option is to install all panels and then fix the ceiling molding / molding.
- When joining the panel, make sure that the seam has no gaps. If the model provides for the presence of a small gap, it should be the same everywhere, if not, then the ceiling should turn out to be seamless.
As you can see, the process of installing plastic panels is very simple.
How to make it stylish and practical?
Making a tiny space forces you to solve several problems at once: to make the interior beautiful, practical and save space as much as possible. Here are some tips to help you design:
- High-rise placement. Usually we do not use the space under the ceiling, but on the balcony it is quite appropriate: after all, the things that are stored here are not used so often. And the closet to the ceiling will be much more spacious than the standard 2-2.2 m high.
- Advanced storage. If the height of the walls allows, make a niche above the floor or under the ceiling in full length and width. It is convenient to store winter or summer tires in the underground, and seasonal equipment such as skis or swimming fins is on top.

- Compact models. Choose miniature yet comfortable furniture. For example, a table 10-15 cm smaller than the standard one copes with its function, saving you a little space.
- Mirrors. Reflection has an expanding ability, why not use this knowledge in the arrangement?
- Matching the mind. Can you only see a noisy and dusty street from the window? Protect yourself from the hustle and bustle of the city with pots of plants by creating a jungle-style balcony. If there is already a forest or grove outside the window, you can refuse home flowers in favor of a more industrial decor.


It's easy to create a stylish balcony! Clean out the room, get the finishing touches, and put up some pretty furniture - your private corner of tranquility is ready!
How to finish
All materials to be used in the renovation must withstand the cold well, be moisture resistant enough to withstand changes in humidity, and complement the rest of the renovation aesthetically. These are basic requirements and must be followed.
Polystyrene ceiling tiles
Ceiling tiles will be one of the most economical options. Anyone can stick it, and the cost will be very low. But, it is not always possible to use this design option. Plus, it has both pros and cons.
pros
- Low cost
- The ability to hide minor defects in the ceiling
- Speed and ease of installation
Minuses
- Low weather resistance.The coating will quickly lose its "marketable" appearance and become unusable
- The inability to hide sufficiently large defects in the ceiling, of which there are many on the balconies
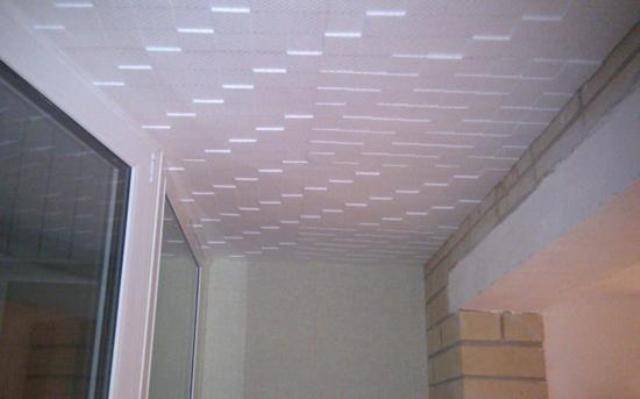
For all its advantages, it is better not to use this type of design. Unless with a very limited budget. It looks too simple, and besides, the appearance deteriorates quickly.
Plastic panels
When finishing the ceiling on the balcony may be one of the best options. They will easily fit into the rest of the design. It will take some installation work, but the result will be decent.
pros
- Great appearance
- Not too high cost
- Easy to assemble and install
- The ability to hide large defects and "ugliness" on the ceiling
- They are easy to wash or wipe
Minuses
- You will need to slightly reduce the overall height of the room
- Some tool handling skills are still needed
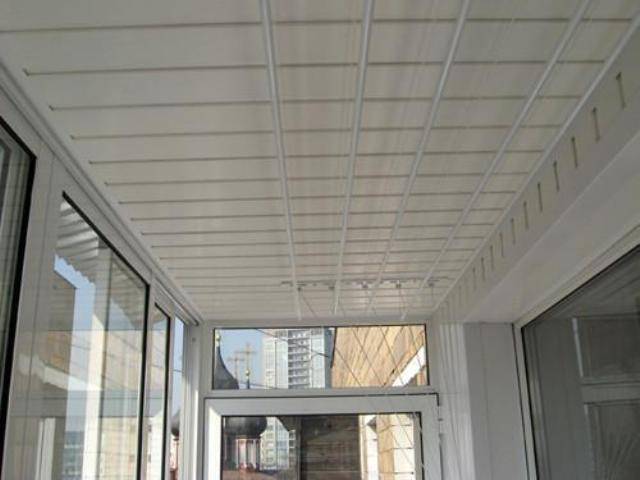
This design option is one of the most attractive in terms of price-quality ratio. When finishing insulated loggias, lamps can be built into such surfaces by hiding all the wiring in the ceiling space. You need a minimum of tools, and no special skills are required.
Drywall
Can also be applied. The material has long been known and understood. But the installation is no longer as easy as mounting plastic panels, or gluing tiles.
pros
- Looks great
- The resulting surface can be painted, treated with plaster, in general, to give it the desired appearance, which will better fit into the rest of the design
- It will be possible to install lamps
Minuses
- Installation is quite difficult. It will take a little special knowledge and skills
- The price after complete finishing will be acceptable, but quite high
- The height of the room will decrease, although not very much
- It is advisable to perform work with an assistant
The option of using drywall for ceilings can be very good for heated rooms. The price will be quite high, so it makes sense to use this method to decorate the ceiling when the entire room will be decorated by a designer, or at a high price for the rest of the repair.
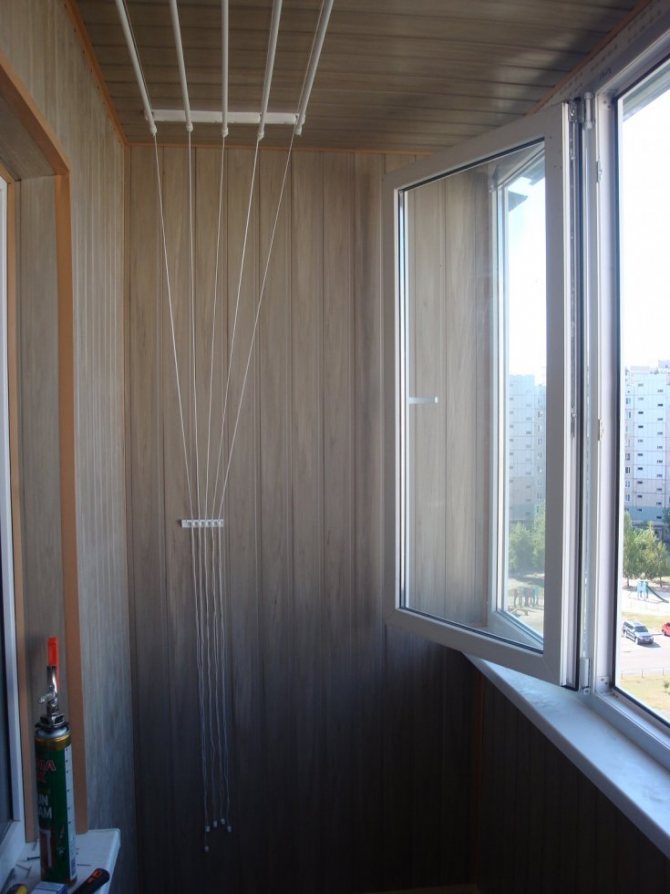
Lining.
One of the versatile materials that are suitable for decorating almost any room - from rooms to basements. She can be seen very often on the balcony.

pros
- Very easy to assemble
- Serves long enough
- The price is in the middle range, makes the material very affordable
- No special skills required for work
- The lining is very environmentally friendly
Minuses
- The tree will require special treatment and constant care. Otherwise, the material can quickly lose its beautiful appearance.
- This type of design was considered morally obsolete, although recently, it began to come into fashion again.
- Without painting, or other additional processing, it looks pretty dull
- The cost will not be the smallest
The tree will always be in place. Especially if you use it to repair the entire space, as is usually done. You can see how the balcony is finished with clapboard with your own hands in the video presented:
Everything is shown in sufficient detail, and this video can be used as a small instruction when performing repair work.
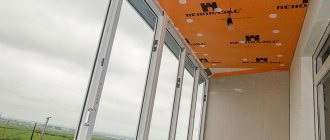
Tension cover
It will be a rather expensive solution. However, at its price, this way of decorating a room is the most aesthetic, and has a lot of other positive qualities.
pros
- Look very nice
- Installation does not take much time
- Very high weather resistance
- Possibility to build in lamps
- Minimum space required for installation
Minuses
- Quite high cost
- Inability to do all the work yourself
With a lot of advantages and disadvantages, it has only two - the price and the need to contact a special company that will make the coating.But the second point cannot be considered a disadvantage, since all the work will be performed by special masters, thereby saving the owners from the need to do something. A balcony or loggia decorated in this way looks great.
Lining ceiling
The advantages of this material:
- naturalness and environmental friendliness;
- variety of colors;
- long service life;
- good thermal insulation properties;
- ease of installation;
- affordable price.
- possible deformation due to temperature differences;
- exposure to moisture;
- it is necessary to cover with antiseptics and protective impregnations.
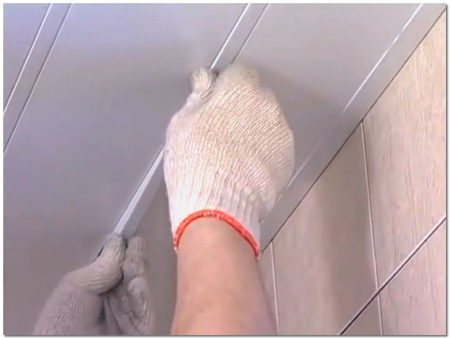
Instructions for installing a ceiling from a lining with your own hands:
- Preparation of the lathing. We determine the lowest corner of the balcony for this, from the ceiling along the wall, it is necessary to postpone the installation height of the frame. You should not lower the level of the ceiling right next to door and window openings, as in the process of natural expansion or deformation of wood, the ceiling may drop by a couple of millimeters. The best option is to make a gap of 1.5-2 cm between the ceiling finishing material and the upper border of the window profile.
- Transfer the resulting mark to all other corners of the balcony and connect the points with a horizontal line - this is the border of the lathing fasteners.
- Install a wooden beam along the lines using dowels.

- We cut the material to the required length with the expectation of a technical gap of 1 cm between the finishing material and the walls of the balcony.
a source
How to make wood trim
First of all, you need to prepare the following materials and tools:
- Finishing boards, timber profiles 40x40 or 50x50 mm.
- Fasteners - dowels, screws or anchor bolts. They are needed to fix the timber to the base base.
- Self-tapping screws, clamps or nails. Fixtures for fixing finishing elements.
- Antiseptics, flame retardants and a brush for their application.
- Perforator (drill), jigsaw and hacksaw for working with lumber.
- Measuring tools - tape measure, square, building level.
- Marker or pencil.
If additional thermal insulation of the floor is expected, you will also need a slab insulation (expanded polystyrene or foam), a cement-based adhesive, an umbrella-shaped dowel for additional fixing of the insulation and an assembly knife. After insulation, condensation will not settle on the ceiling surface. This phenomenon provokes a temperature difference, especially if the neighbors' balcony from above is not glazed.
Operating procedure:
Preparing the base plate. This includes removing old finishes and treating with an antiseptic primer. Marking the fixation points of the guide bars. They are placed along the perimeter of the walls at the very edge of the balcony slab. This will make it possible to lay the ceiling panels on the balcony in the transverse direction. Production of the necessary lengths of sections from the bar for the guides. The bars are equipped with a series of holes with a pitch of 50-60 cm: they will be used to fix the profile to the floor slab. When choosing the diameter of the drill, they are guided by the parameters of the fasteners - anchor bolts or dowels. Marking the fixing points of the guides to the ceiling. To do this, alternately apply the bars to the base and put marks through the holes: it is at these points that drilling will be carried out. An impact drill or hammer drill is required as a tool. Installing the guides
When screwing the bars, it is important to achieve the formation of one plane. To smooth out all the unevenness of the base, use wooden linings.
Horizontal check is carried out by means of a building level. If necessary, the space between the bars is filled with insulating material. It is most convenient to use slab insulation by cutting it with a sharp knife. A special dry compound is used to fix the plates: before starting work, it must be diluted in water and stirred. The finished substance is spread on the base with a thin layer, after which a heater is applied. For reliability, the slabs are tacked with plastic umbrella dowels: holes are drilled directly through expanded polystyrene. The starting point for laying the finishing panels is to select an area near the far wall. On the first plate, you need to cut the spike, which will make the fit to the wall as tight as possible. Subsequent elements are tightly inserted into each other, achieving a complete connection of the lock. To fasten the lining to the frame, self-tapping screws, nails or clamps are used. The finished cladding needs additional processing. To do this, use wood paint, varnish or Penetex liquid of the desired shade.
We prepare materials and tools
Before starting the installation, they calculate and acquire building material. The quantity is determined by the type of rack structure and the area of the balcony. There are three types of systems installed on the balcony (they can be found in the photo):
- Open. Inserts located in the gaps between the panels are used as decor. Their width is 14-16 mm.
- Closed, formed by grooved strips: panels overlap.
- Creviceless. Each panel fits snugly against the neighboring ones, without going over them.
Open system
Material: features and requirements
The slats purchased for the balcony must have a flat surface. Dents and scratches are unacceptable. It is enough to take one photo to understand how much it can be seen after the balcony has been completely renovated.
Important! The protective film, which each panel is coated with during production, is removed immediately before mounting on the ceiling.
So that the work is done efficiently, and the balcony pleases its owners, in addition to the rails themselves, they acquire:
- corners or U-shaped profile with which the wall plinth will be attached;
- guides: stringers, combs and traverses. The specific list depends on the type of balcony finishing. For their manufacture, a steel profile with a length of 4 m is used;
- adjustable suspensions;
- anchor, nail dowel or wedge anchor.

Fasteners
Finishing options
Balcony ceiling
Before buying the materials from which you are going to make the ceiling on the loggia, it is better to familiarize yourself with all possible options and find out their positive and negative qualities. Now there are such ceiling options:
- Colored
- Hanging or hemmed
- From ceiling tiles
- Tension
Each option has its own pros and cons. Let's consider each finishing option separately. What materials to use to make the ceiling is up to you.
Colored
Loggia ceiling decoration
For those who do not want to insulate the ceiling, the paint option is ideal. To make such a ceiling, you need exactly facade paint. She is not afraid of temperature changes that all non-insulated loggias are subject to. And the choice of colors is quite large, and you can easily choose the most suitable option. In addition, over time, the ceiling can be tinted.
However, this finishing option requires preliminary preparation. The ceiling should be leveled before painting - this will make it more aesthetic. The primer must be used appropriately.
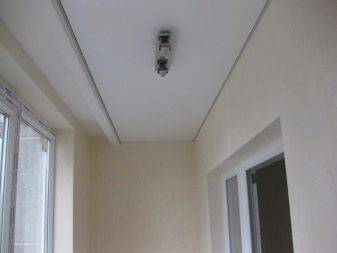
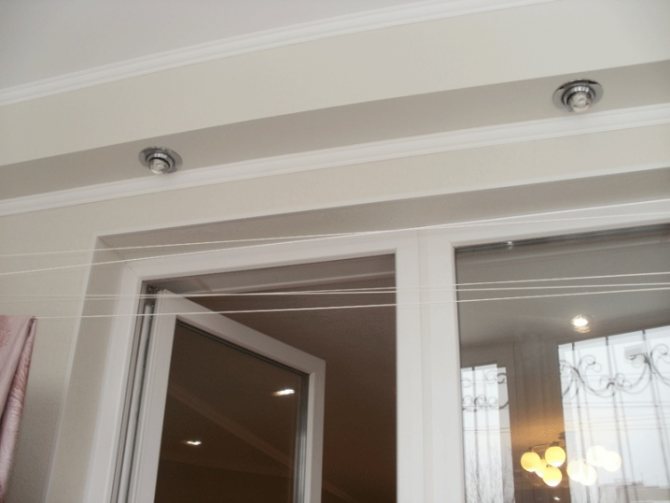
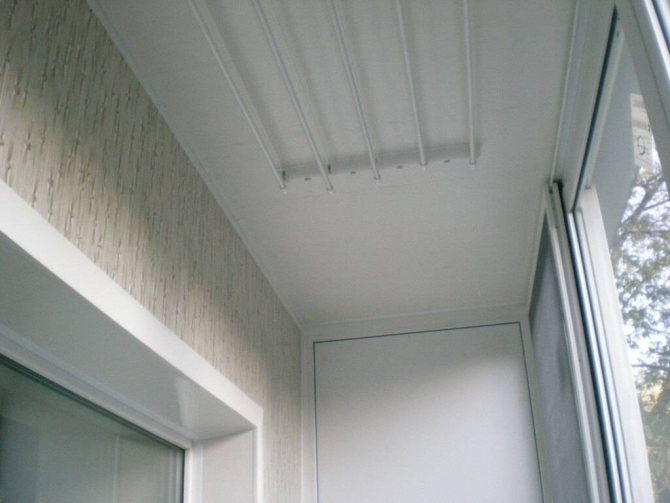
Hanging or hemmed
These systems are very economical and easy to install. Making such a ceiling with your own hands is not difficult. Of course, you can use suspended ceilings on the balcony, but hemmed ceilings are ideal. Their difference is in the method of attachment and the height to which they can be lowered.
There are such types of hemming systems:
- Metal slats
- Plastic panels
- Wooden lining
- Plasterboard
If the repair on the loggia takes place in unfavorable weather, then the option with metal slats will be ideal. Although it can be used even with insulated balconies, this type of finish looks very impressive. In addition, you can make a ceiling of any shape and style from them.
Do-it-yourself ceiling on balconies and loggias
Plastic panels are resistant to sudden changes of weather and are not afraid of humid air. You need to mount the panels on the crate of a wooden or aluminum profile. They are practical for cleaning - just wipe them with a damp cloth, they are durable in service and are very easy to install.
Another option is a wooden lining. This type of finish has been used for a very long time. The wooden ceiling looks impressive and harmonious, it is environmentally friendly and easy to install. In addition, it has soundproofing properties. And the exterior creates a warm and comfortable environment.
Often, during repairs on the loggia, plasterboard ceilings are used. Such material is durable, and even beginners can cope with its installation. However, it should be borne in mind that, despite its declared moisture resistance, it may not cope with weather conditions. You can make a ceiling using such materials if you are sure that the loggia is reliably protected from the weather. All existing cracks must be repaired and dirt removed. In addition, after the installation of such an overlap, a finishing finish is required. If you have a fairly spacious and glazed balcony, then the painted plasterboard ceiling will perfectly fit into the design of your apartment.
Ceiling tiles
Decorating the ceiling of the loggia with your own hands
Of course, the answer to the question of what to make the ceiling from depends on the further use of the loggia and the preferences of the owner. One of the simplest types can be called ceiling tiles. It hides the imperfections of concrete slabs well and is very easy and quick to stick. It looks aesthetically pleasing and sometimes even plays the role of insulation.
Tension
Filing and finishing of ceilings on balconies and loggias
Recently, more and more often people use stretch ceilings during the arrangement of their loggias. They are installed quickly, have a large color gamut, and even order with photo printing is possible. This option hides all the flaws of the ceiling space, most importantly, it is very easy to clean. Before installing such ceilings, it is imperative to put a layer of insulation. With such a design, the loggia will look very attractive. When choosing such a finishing option, it is better to trust the professionals or attract assistants.
Primary requirements
An ordinary balcony has a limited area, which means that repairing it will not be too expensive, neither in time nor in terms of money.
The ceiling forms the overall impression of the interior of the balcony space
There are some requirements that must be met during the renovation or renovation process:
- If we are not talking about cosmetic decoration, but about the reconstruction of the ceiling on the balcony, then mainly pay attention to waterproofing. It is important to completely exclude leaks from above and the capillary spread of moisture through reinforced concrete slabs. Believe me, not paying due attention to these measures, as a result, money for expensive repairs will be wasted.
- If you plan to use the balcony not only during the warm season, but also in winter, consider the thermal insulation of the ceiling. After all, even if only the walls and the floor are insulated, warm air, rising upward, will "meet" a cold concrete slab, and, as a result, unjustified heat loss will occur. With any heating system, without ceiling insulation, money is wasted.
- When the issues with waterproofing and thermal insulation are resolved, there is only one thing left - the decorative design of the room. In this matter, the preferences of the apartment owners play a key role.The main thing is that it is pleasant and comfortable to be on the balcony.
Options for finishing the ceiling on the balcony or loggia. Their advantages and disadvantages.
Plaster. Pros and cons.
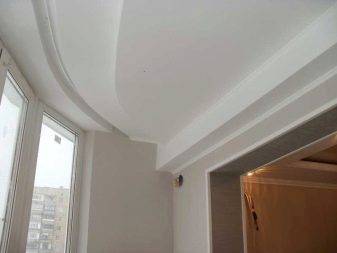
Painting and plastering will create a high-quality, temperature-resistant coating. Acrylic, water-based paints or gypsum plaster are suitable here. You can paint and plaster both glazed and open rooms. The materials are among the most budgetary ones, they are distinguished by good fire resistance and allow you to create any unique ceiling design - from traditional monochromatic to complex curly shapes.
Such coatings require regular updating, which is their significant disadvantage.
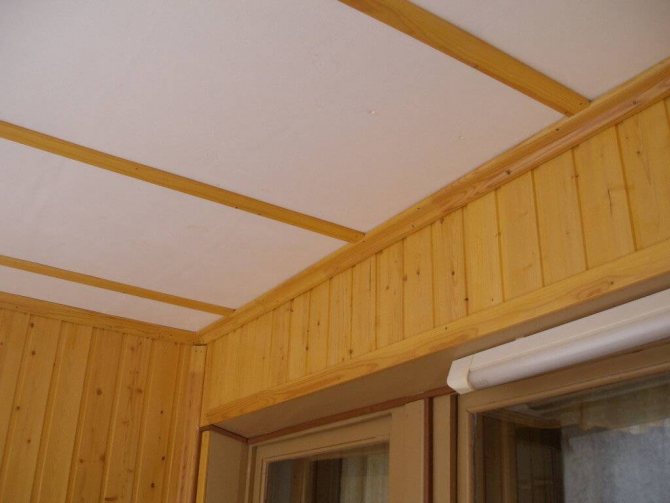
Wood trim.
Wooden lining allows you to decorate a room in eco-style or country style. The durable material is easy to install, has heat and sound insulation properties, makes it possible to give the balcony a neat, spectacular look. It is an environmentally friendly material that does not emit toxic substances during the heat.
The disadvantage of this cladding is the instability to inflammation and poor tolerance to high humidity. From time to time, wooden lining must be treated with special protective equipment.
Plastic panels.
Plastic panels make it easy to level and insulate the ceiling without creating additional stress on the floors. The material does not lend itself to rot, does not deteriorate when exposed to moisture and has a low cost.
But, at high temperatures and exposure to ultraviolet radiation, the plastic quickly burns out. It can even catch fire, releasing toxic substances. At low temperatures, the panels are deformed, which does not allow them to be used on open balconies.
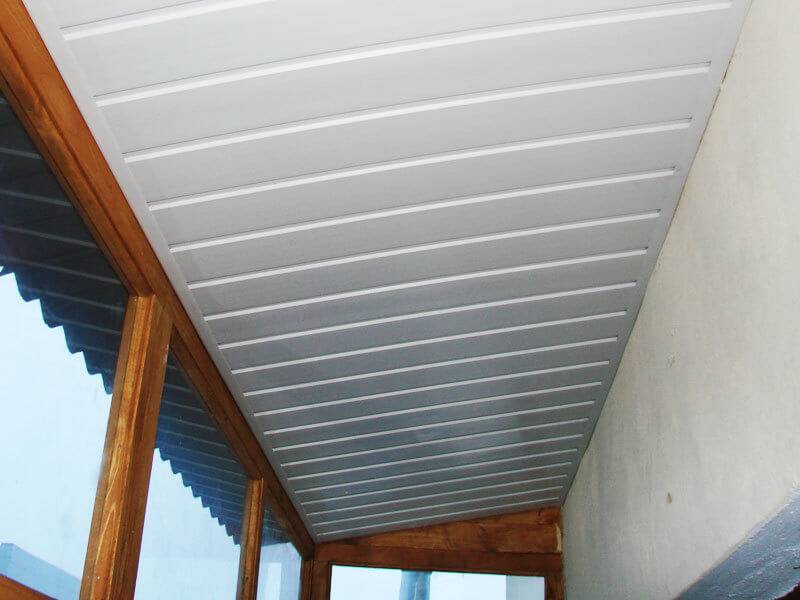
Finishing the ceiling of a balcony or loggia with metal.
Metal slats perfectly tolerate temperature changes, high humidity, and are resistant to microorganisms. The space between the cladding and the rough ceiling makes it possible to remove all communication elements from the eyes. The material is simple in installation. The metal ceiling is washable. It is completely non-flammable.

Of the shortcomings, it is worth highlighting only the high cost of finishing material.

Plasterboard on the ceiling of the balcony and loggia.
Drywall is suitable only for a glazed loggia or balcony, as it does not tolerate moisture.
Installation of drywall sheets does not require preparatory work. And the finished coating can be finished according to your own taste, in accordance with the overall design of the room. A smooth surface can be painted or whitewashed, pasted over with wallpaper, revetted with decorative plaster. The material has a low cost and allows you to create unique interiors. All communication details can be hidden between the rough ceiling and drywall sheets.
Painting a concrete slab
Trying to understand how to decorate the ceiling on a loggia or an open balcony, you can consider the option of painting a concrete slab. This is useful when you need to change the level of the ceiling, equip lighting fixtures or carry out heating work. The advantages of this finishing method are:
- Affordable cost of materials.
- Ease of installation. It is not difficult to implement such a finish with your own hands.
- Resistant to high and low temperatures, precipitation, rain and snow.
But, in addition to the advantages, there are also significant disadvantages, including an unpresentable design, as well as the need to perform repair and paint work. To successfully paint the ceiling, you should choose a composition that is intended for outdoor use. He is not afraid of freezing and exposure to ultraviolet rays.
Also, a good solution is to use facade paint on plaster, which not only preserves its integrity, but is also presented in a wide variety of colors, textures and designs.