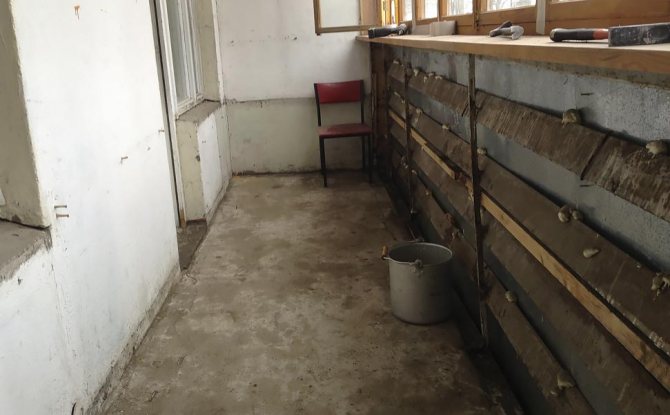
Interior decoration of a balcony is an event that is used to create a comfortable atmosphere in a given room and to expand the living area of an apartment. Work begins with the choice of material. It should be noted right away that whichever option is chosen, it is important that the material is of high quality, therefore it is better to refuse dubious purchases in the markets and from hands.
DIY construction, calculation and installation of a balcony
In some types of houses, balconies on the first floors are not provided. However, you have every chance of getting this extra space. You can attach a balcony with your own hands. It can be suspended, on struts, or supported on piles. In this article, we will describe the construction of balconies on the first floor: suspended and piled.
Do-it-yourself balcony installation may seem like an impossible undertaking. This is not true. Homemade balconies are, of course, troublesome: you will have to physically work and tinker with papers.
First, you will have to draw a sketch, and then draw up a draft of the balcony on the first floor, then coordinate it with the authorities responsible for these issues. For the extension on the second floor, the design is done in the same way. The work itself will not take very long.
Do-it-yourself hanging balcony extension
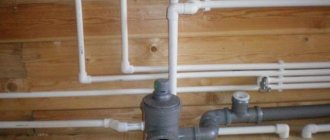
Before starting the extension, we take the project of the future balcony and go to order the balcony glazing and the inner window block. Until the company delivers the frames with double-glazed windows, we do not start work.
Installation of struts and base frame
The construction of the balcony will be held on welded struts. You can make them with your own hands from a 50x50mm metal corner. One of the sides of the braces should protrude 50mm up and down, these will be additional places for fastening. The distance between the struts should be about 100 cm, based on this, we consider the required amount. We carry out installation to the wall using anchors.
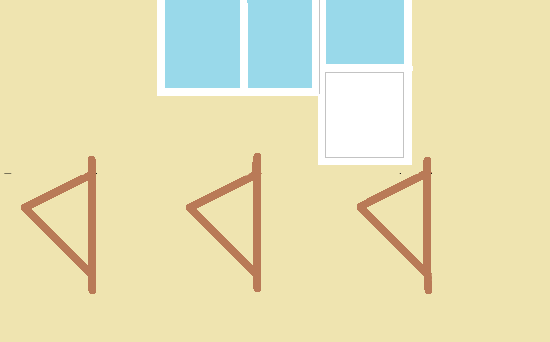
Extension of the balcony on the first floor: installation diagram of the braces
Now we make the strapping, we use the same metal corner for it. Do not forget to make jumpers across the resulting rectangle. The side that adjoins the wall is additionally fixed to it with anchors.
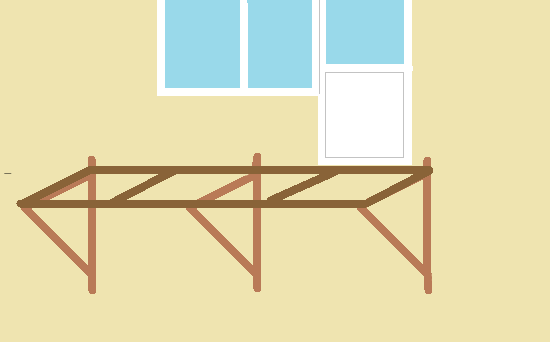
Do-it-yourself hinged balcony on the first floor: how to attach a strapping to the struts
Installation of the floor and glazing frame of the extension
We organize the floor. Due to the fact that the bearing capacity of the resulting base of the extension is limited, pouring a slab of solid concrete will not work. You have two options:
First. We attach metal sheets under the base frame. We fill in expanded clay with a layer of 3 cm.Now we take a reinforcing mesh from a bar (5mm) and put it on the frame. We tie the mesh to the jumpers with wire, weld it to the strapping.
We lay a damper tape around the perimeter of the strapping and fill everything with a liquid cement-sand mortar so that the reinforcing mesh is covered by 2 cm and leave to harden. After the screed dries well, we carry out waterproofing and sealing of the base.
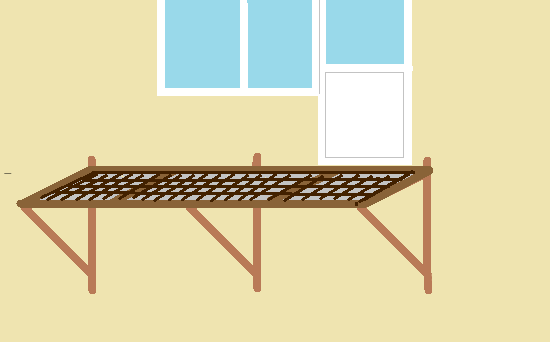
Making balconies with your own hands: flooring
Second. We put any sheet metal into the base frame, lay a layer of waterproofing on it, and then boards. We fasten everything with self-tapping screws. Next, we attach the logs to the floor, lay a layer of insulation between them, close it with a vapor barrier and lay the subfloor.We pass with a waterproofing and then a sealing agent the joints of metal sheets on the underside of the slab.
We cook the frame for the glazing of the balcony separately, on the ground, then install it on the base of the extension. We fasten the side posts of the frame with anchors to the wall. We do the same with the upper lintel adjacent to the wall. This will reduce the load on the base of the extension. Do not forget that the weight of the balcony insulation and finishing materials will still fall on it.
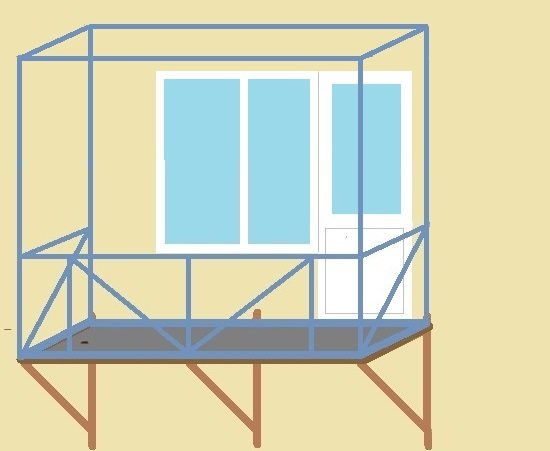
Suspended balcony on the ground floor: how to make a parapet on an extension
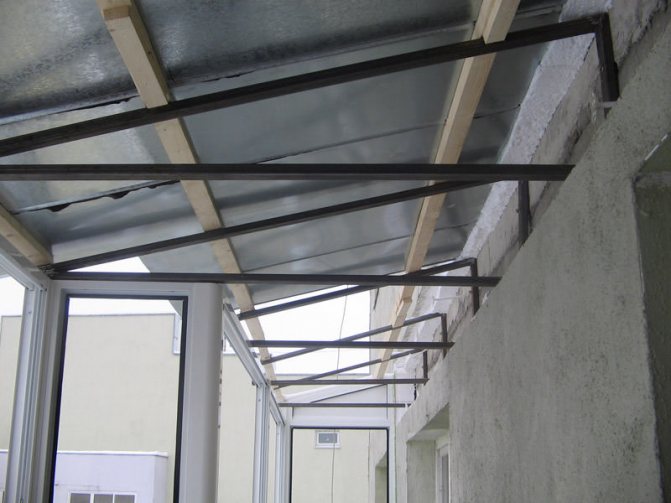
Roof frame installation
The roof frame can be made of metal or wood. In this case, the roof frame made of wood is more preferable, because it is lightweight. Logs made of wood for such a frame can be purchased ready-made. The front plank should be two meters high.

Scheme of external cladding of a balcony with OSB panels
First, you will need to make the roof support. Two meters of lags are attached vertically to the wall. Between them, the lags are nailed horizontally. Bars are nailed on both sides. A board is attached at the height of the bars. It should be flush with the edge bars on top. After that, vertical supports should be made at the corners of the balcony. They are attached to the railing trims with corners.
The supports are covered with bricks from below and coated with cement mortar. After that, using metal corners, a horizontal beam is attached. After that, you can fix the inclined beams. It is important that they are on one side of the support beam, and the other on the board on top of the door. A bar is attached at the level of the beam.
The sheathing process should be started only after the construction of the sheathing frame!
It will serve as an additional support. Finally, the structure is covered with wood stain and varnish. After you have made the roof frame, its finishing, insulation, ceiling sheathing may follow. You can do all this with your own hands. Ceiling decoration can be done using various materials.
Whitewashing or painting is the simplest finishing of the ceiling, it does not require large financial costs. Installation of a stretch ceiling can also be performed. Such ceiling sheathing will cost more, but it will look attractive. It is better that the ceiling is finished with moisture resistant materials. This ceiling finish will not be afraid of rain or melting snow.
Diagram of the device of beams for a wooden balcony


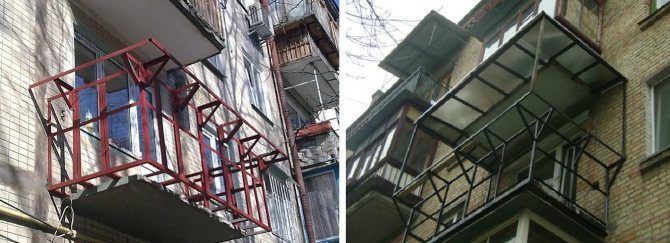
Balcony on stilts with your own hands
It is more difficult to obtain a permit for the construction of a balcony of this type, because it involves excavation in the immediate vicinity of the foundation of an apartment building. Less problems will arise if you make such an extension on the 1st floor. For a similar structure on the 2nd floor, it is more difficult to collect paper.
However, despite all these difficulties, this type of construction has a number of advantages. Most importantly, the bearing capacity of the base of this extension is significantly higher than that of a suspended balcony. You will not be constrained in choosing double-glazed windows for balcony glazing and insulation materials.
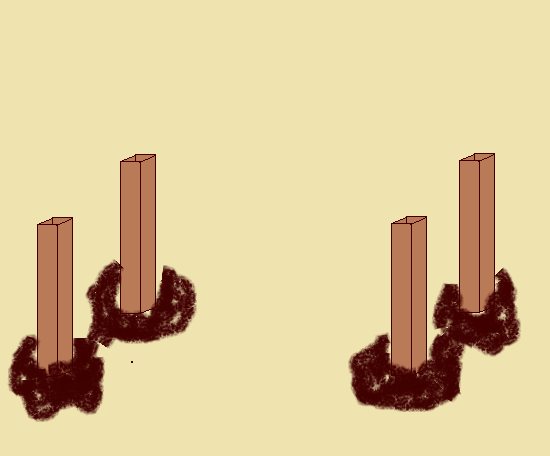
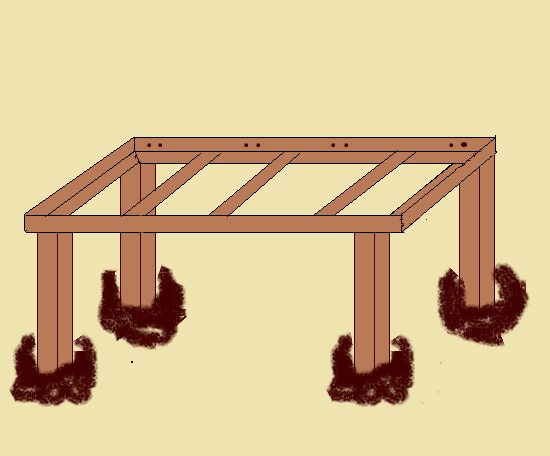
Installation of support piles and installation of the extension frame.
We need four 10cm steel piles. When calculating the length, we take into account that the supports of the extension will be buried in the ground by 50-60 cm. Pits for piles are made either by hand or with the assistance of special equipment. We expose the supports in the pits, checking with the level, we fix them perpendicular to the ground. Pour the solution and cover the fresh concrete with pieces of cellophane.
Loggias with their own hands: making supports for the base plate of the extension
After the concrete hardens, it will be necessary to make the strapping of the extension supports. The back of it is made from a channel, which will need to be attached to the wall. We mark the installation site, drill holes for the anchor in the wall and in the channel bar, fasten it.Now we tie the piles with a metal corner by welding, fasten them with a channel. From metal strips we make jumpers across the extension support. The distance should be approximately 70-80cm.
How to make a balcony with your own hands: tying the supports of the extension
Pouring the extension base plate
We collect the board from the boards and attach it to the lower side of the frame. These boards will then have to be dismantled, so we just prop up the shield with bricks stacked in a column. Now laying the reinforcing mesh. We tie it with a wire from a bar with a cross section of 5 mm. We weld the mesh to the strapping, and tie it to the jumpers with wire.

Drawing of a balcony, completion: installing a formwork shield and reinforcing mesh with your own hands
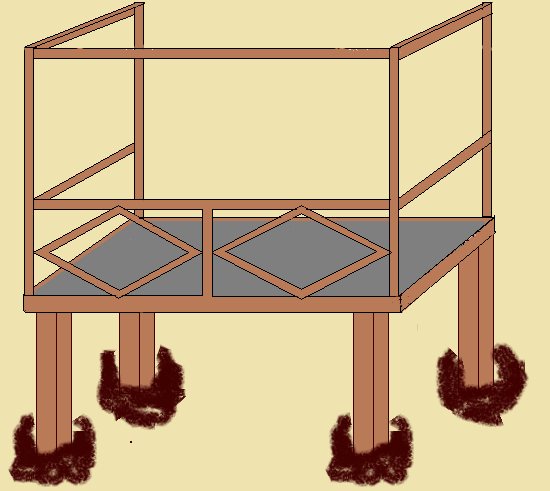
Now you can pour the cement-sand mixture. The installation of the frame for installing the balcony glazing can be started immediately after the base plate of the extension has hardened. The frame can be with or without extension - the construction of the extension allows both options. Even brickwork can act as a parapet. And do not forget to waterproof the slab before installing the insulation.
Important: the position of the reinforcing mesh in the thickness of the slab. The net should not lie on the bottom of the frame. In order to raise it, you need to install special plastic supports. The height of the props should be 4.5-5cm. The concrete is poured so that the reinforcement is closed by 2.5-3 cm.
Do-it-yourself balcony construction from scratch
A little about roofing for balconies
There are two types of roofs for balconies: dependent and independent. The dependent roof rests on the balcony frame, which means it gives it additional load. Independent - mounted on the wall of the house on the basis of struts, there is no pressure on the frame of the extension.
For a balcony resting on piles, there is no difference in the form of a roof; it can withstand a very heavy load. But for a hinged balcony, it is better to use an independent structure and lightweight roofing material.

Balcony with your own hands: a photo of the superstructure of two types of roof
Balcony with your own hands: a video on how you can make an independent roof.
DIY construction and installation of a balcony
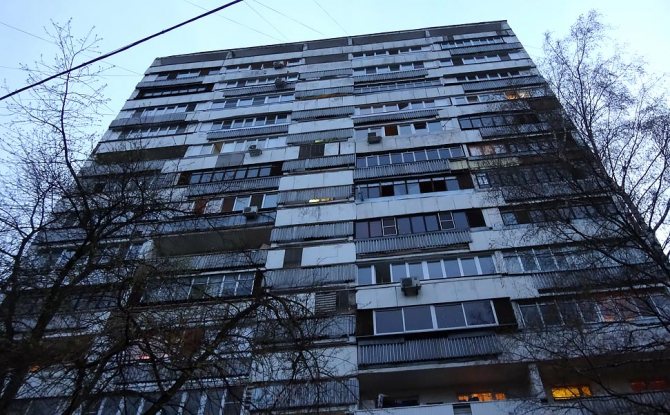
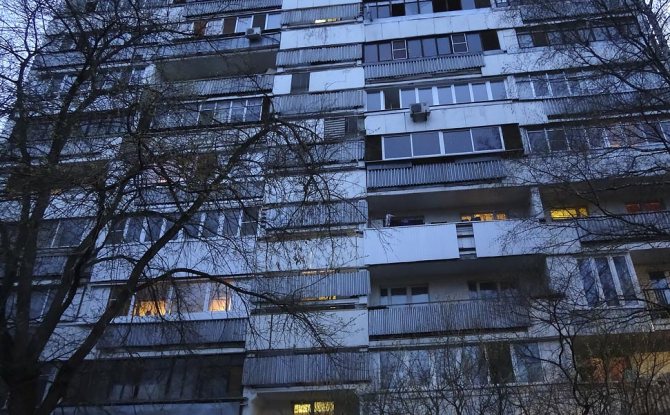
According to the project, many apartment buildings do not have loggias on the first (sometimes even on the second) floors. The owners of such apartments are deprived of additional space, which can be converted into a rather cozy multifunctional living area. Some tenants are thinking about the possibility of adding a balcony with their own hands to the wall of the house. The addition of a balcony on the ground floor is a very real undertaking. Even on the second floor, a home-made balcony is being successfully added to an apartment building.
Fixing the frame support on the floor
Produced after:
- Fasteners to all previous surfaces.
- Cleaning unnecessary items unnecessary for installation.
DIY frame
It is a finishing work after fixing the skin to hide all the flaws and small irregularities from below.
How to make a balcony from scratch
Let us immediately focus on the issue - the manufacture of balconies without obtaining permission from the relevant authorities ends in major troubles and a decree on the demolition of the constructed loggia. Unauthorized extension of this structure to a multi-storey building is prohibited.
Therefore, it is not worth starting an extension without formalized documents.
How to get permission to build a balcony or loggia
On this issue, it is better to consult a specialist. They will conduct an agreement with the necessary authorities. If you nevertheless added a balcony without permission, experts will explain how to legalize this extension.
List of documents required to obtain permission to build a balcony:
- On the ownership of the apartment.
- BTI reference with the floor plan.
- Housing and communal services resolution.
- The consent of the tenants (neighbors) to the extension in writing.
- Redevelopment project.
- Coordination with utilities.
- Coordination with the Department of Architecture.
- Application to the district administration.
We do not recommend obtaining documents on your own - it will take a long time and may end in failure, and you will not be able to build anything.
Project preparation
Construction cannot begin without preliminary design. First, draw up sketches of the future building. Remember that your balcony should be harmoniously attached to the facade of the house. Then you make a competent drawing of the balcony, according to which you do all the necessary calculations, taking into account the materials used.
If you do not know how to calculate your future building correctly, entrust this responsible business to construction specialists.
Remember: you must build not only a beautiful structure, but also a solid structure.
Balcony design options
Consider what type of balcony device is, how it is attached to the wall. In the diagram below, we see five structural types of fastening the base plate:
- With cantilevered slab. The most common fastening in multi-storey buildings.
- With slab on cantilever beams. It is often used in the construction of private cottages.
- With plate on brackets. Such a mount, with the correct calculations, can withstand a large load.
- Leaning against the wall of the house and the column. Mainly used for long overhang base plate attachment.
- Attached (attached) option. A structure that is attached to the building and does not have direct attachment to the wall.
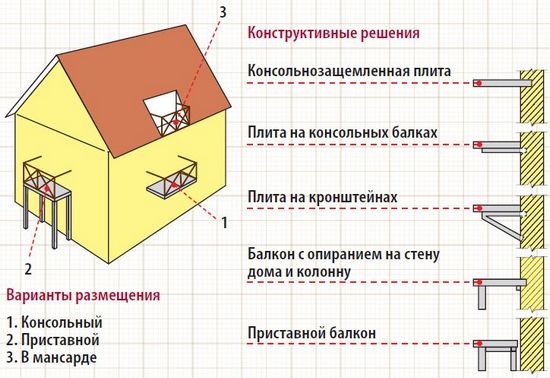
Balcony structure scheme
When self-built, two types of fastening are used - on brackets (or hinged) and attached (attached). They can be built within 1-2 months.
Consider in turn these options for mounting a balcony, loggia with our own hands.
Construction of balconies on the ground floor
As a rule, residents of the first floors are deprived of such additional convenience as a loggia. Therefore, we will consider the process of manufacturing structures suitable for an extension on the lower floors.
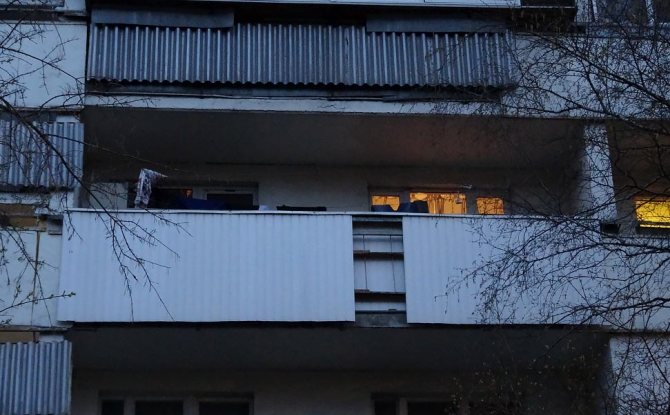
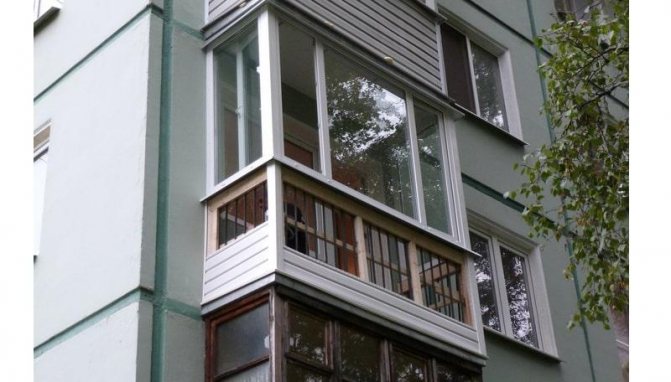
Suspended balcony extension
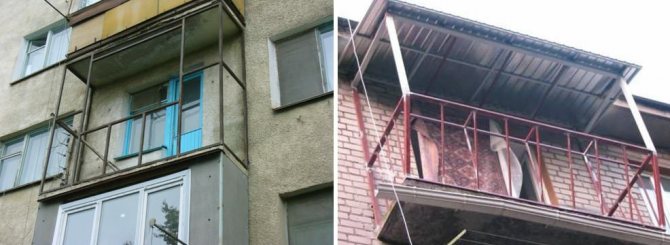
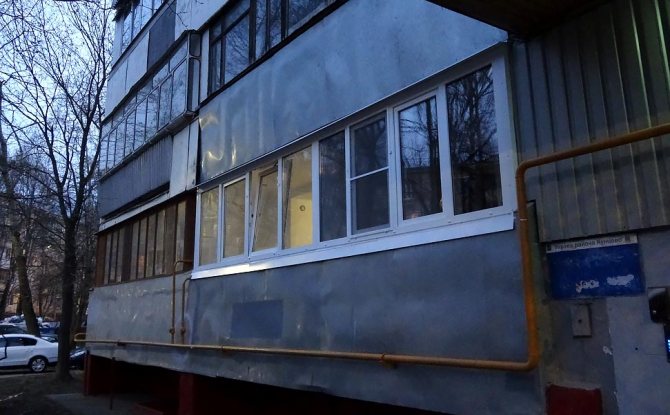
The considered project of the balcony on the ground floor implies a suspended mounting structure. What a suspended balcony looks like is shown in the photo below.
This is how you can build a suspended balcony on the first floor.
The structure we are considering consists of a metal frame attached to the wall of the building.
Note: an extension to the building of a suspended balcony is possible not only on the 1st floor, but also on the 2nd floor (with high-quality welding of the structure and reliable fastening).
We start the construction by making a frame from metal corners. For the base, corners of 60x60 mm are used, for the parapet 45x45 mm. The base is an isosceles right triangle.
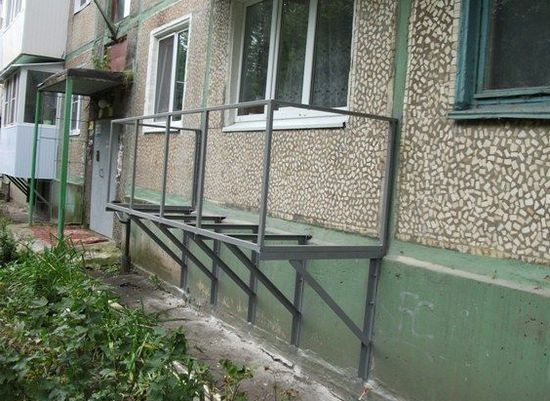
Suspended frame device
After finishing the welding work, we fasten the base to the wall with anchor bolts. A metal frame is welded onto the upper shelves of the base - a support for the balcony floor. Next, you need to attach the parapet.
We dismantle the window block and select the opening for the door block, it is necessary to install pre-prepared blocks in them (how an opening in the wall is made can be found on the Internet).
The foundation of the suspended structure is now complete. The following works are left:
- Floor covering - we lay wooden logs that serve as the basis for the floor covering, for example, OSB board. We insulate the floors, lay out the decorative coating.
We weld a metal sheet under the base, which serves as protection against arson and penetration.
- Fastening decorative exterior cladding. You can apply a professional sheet.
- Glazing of the constructed balcony, its insulation. These works are carried out as on ordinary balconies.
In addition to the standard form, a balcony can be built with a take-out - expansion of the balcony room.
Also, when building, one should not forget about the aesthetic side.Your building will look more complete when you decorate its support frame.
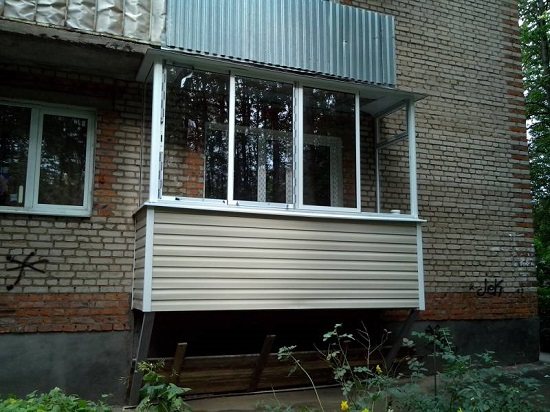
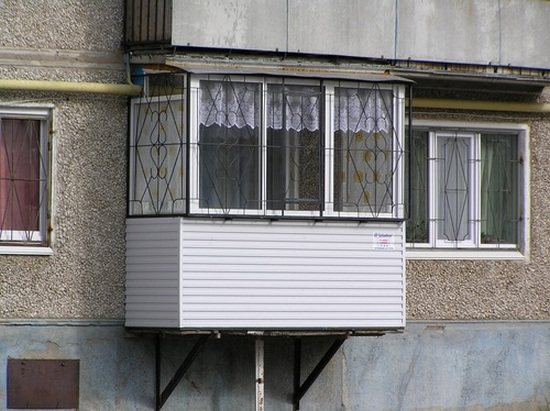
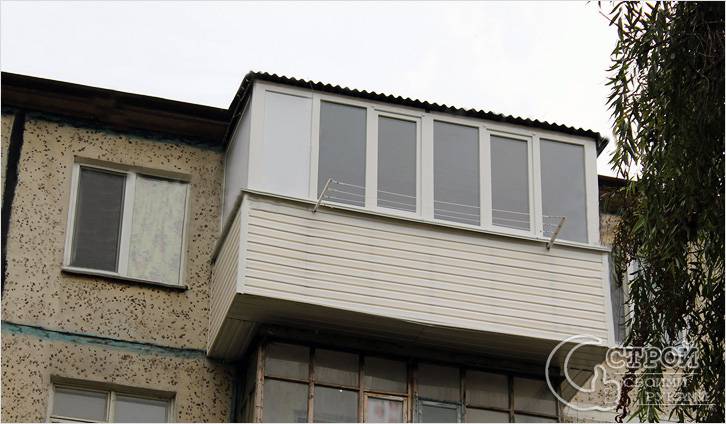
Suspended (or hinged) balcony on the ground floor
Extension of an attached balcony with a foundation
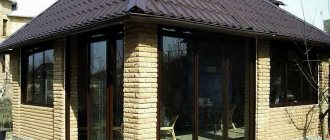
The most common option for building a balcony with your own hands is an attached one. In this case, the entire constructed structure rests on the foundation and is attached to the front wall of the building.
What does such a self-built balcony look like? The photo below is one of the options.
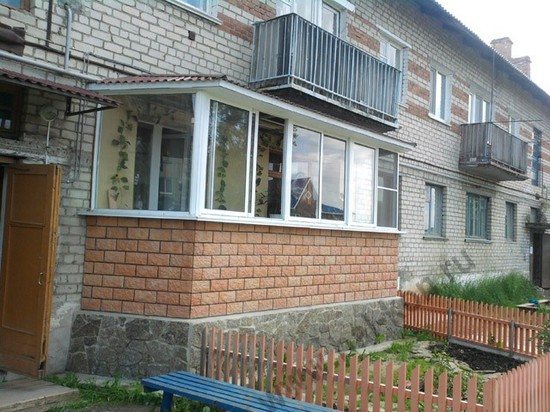
Side balcony on the ground floor
We start the extension from the foundation. We make the markup, check its correctness along the diagonals. We dig a pit and install foundation blocks there. The load on them will be small, so we use the standard 2400x60x30 cm.
Attention: the depth of the foundation pit must exceed the depth of soil freezing. The height of the balcony foundation should be at the level of the house foundation.
The decorative finishing of the basement of the extension should be made in the style of the building - lined with stone or plastered.
Further, the construction consists in the erection of brickwork, which forms the walls of the balcony. Its height should not be lower than the height of the building's balcony board. The optimum brickwork thickness is 250 mm. It must be attached as tightly as possible to the wall of the building.
Be sure to carry out waterproofing work - it will protect the balcony walls from destruction by underground waters. When building a cellar, double waterproofing must be provided.
The balcony slab of the second floor can be used as a roof. If the structure you have built exceeds the standard dimensions, you will have to attach an independent roof.
Now the completion consists in cutting the doorway, installing a new window and door, glazing and insulating the constructed balcony.
When equipping an outlet, it is necessary to provide for the option of transferring heating radiators - they must be attached to a previously prepared place.
Remember: regardless of the type of balcony built, its doors must open inside the room.
The time for the construction of a balcony of this type is at least a month.
We have considered the main types of self-built balconies attached to the building. In fact, there are many other varieties. We offer you to get acquainted with the self-made balcony in the video at the link
Stages of outside balcony cladding
It is recommended to ensure safety as it is dangerous to work even on lower floors - the risk of falling is high. Climbing equipment is required, which is not always possible to implement. For this reason, they often turn to firms that offer services for finishing the balcony outside. Self-execution is possible if the parapet is durable and does not need to be replaced. An important preparatory stage is the fence of the construction site with tape on the sidewalk.
To trim the balcony outside, you will need tools:
- building level;
- electric drill;
- a hammer;
- Bulgarian;
- hacksaw for cutting metal and wood;
- construction stapler;
- screwdriver;
- puncher.
All work can be conditionally divided into 3 stages:
- preparation;
- installation of the base - frame;
- finishing.
Preparatory work. What is being done:
- Removal of old structures (window frames, parapet with railings).
- Restoration of the metal frame: removal of rust, protection with primers.
- Leveling the concrete base. In a new house, it is often inappropriate to restore the overlap, since negative processes have not yet begun to develop in its structure and surface layers, as, for example, in the old building. It is enough to remove the dust. If the concrete floor is deformed in places, crumbles, it is leveled.
At this stage, the external finishing of the balcony is not yet carried out. It is necessary to create conditions for outdoor work. The strength of the rest of the structure will depend on the properties of the base.
Then the installation of the lathing is carried out. The frame can be made of metal or wood. The first option is preferable, since it is characterized by increased strength, does not deform under the influence of moisture, precipitation, and lasts longer. However, the metal has disadvantages: rusting when the protective coating is broken and the weight of the concrete base of the balcony. In addition, a welding machine is required for the work. The tree is much lighter, but withstands moderate loads, expands when moistened, dries for a long time (if a leak appears).
The main stages of finishing:
- The starting profile is being installed along the perimeter of the concrete floor.
- The first sheet of finishing material is attached to it; for this, the building level is used. Fixation is carried out using self-tapping screws for metal, wood or anchors (if there is a concrete parapet left). Work starts from the corner section.
- Further installation of the protective coating is carried out, while using the building level. Skewed trim sheets are unacceptable.
In the case when the loggia is facing, the lathing will be located only on one side. The balcony is also protected on the sides. The finishing material is fixed in different ways: according to the thorn-groove system or overlapping, it depends on the configuration of the sheet, the presence or absence of locks. At the last stage, when the installation of finishing materials is completed, they proceed to the installation of decorative elements. They also have a protective function. Use corners that will close the joints of materials with walls and protruding corners of the balcony.
If the floor is upper, you will also need to install a frame made of metal pipes.
Then a new visor is fixed, corners are installed, which will perform a decorative and protective function. Any form is chosen. You can use a straight or arched visor.
If you need to finish the attic with a balcony, installation is further simplified. This option is implemented in different ways, depending on the type of construction:
- inner pediment;
- outer pediment;
- roofing.
The installation of the battens can be performed according to the standard scheme. The sidewalls are fastened to the walls or roof.
Do-it-yourself balcony
The most common way to increase the usable area of a city apartment is to take out the balcony. After all, an additional warm room with excellent sound insulation and insulation will always come in handy for owners of residential real estate. In addition, you can make a balcony with a take-out with your own hands and, as a result, save time and significant financial resources for finding workers and paying them. Usually, the increase in the volume of the balcony is made from the front of the house by shifting all external structures. Removal work also makes it possible to increase the reliability and durability of the balcony, improve the strength of all elements of the balcony slab and the enclosing parapet. The main thing is to carefully prepare for this important process before carrying out all general construction work.
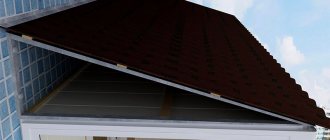
Manufacturing of frame for balcony roof and glazing system
When the balcony is on the top floor of the house, the owners have to make the roof to the balcony on their own. Special canopies provide protection from rain and sun. The most popular option for finishing construction is metal sheeting.
If the balcony is on the top floor, then you will have to take care of installing the frame under the roof
To make the base of the roof, professionals recommend using profiles (50-60 mm).
They are installed in the form of 2 triangles on both sides of the frame. Better to use an aluminozinc coating material. It is also important to make sure that the sheet protrudes 5 cm at the sides.
Preparing the room for glazing
Before carrying out work on the glazing of the balcony, you need to take care of the manufacture of the frame. But before proceeding with its installation, you should decide on the choice of material for the structure.Wood or metal materials are suitable for such work. Experienced craftsmen prefer metal frames. This choice can be easily explained by their high reliability and durability.
To carry out welding work, you can purchase special inverter machines. There is no particular order for welding parts of the structure, because the entire installation depends on the characteristics of the balcony railing.
For high-quality glazing, a strong frame will also be required.
But what if the fence protrudes noticeably beyond the concrete slab?
It is necessary to align the vertical fence on the same level with the surface of the slab and find metal strips (embedded balconies) at the base of the room.
In cases where a slab protrudes beyond the balcony fence, you need to remove the old structure and free access to the mortgages. After further strengthening them, it is important to take care that the slab does not protrude, and then install a new frame. Before welding the horizontal, the excess vertical protruding parts should be cut off.
Preparatory work
Before equipping the balcony, you should draw a drawing of the future structure in advance, on the basis of which it will be possible to easily calculate the required amount of consumable, building and decorative materials, draw up a work schedule and order translucent structures. Experts advise to decide in advance on the area of the balcony glazing and the complete set of double-glazed windows. The choice of a window model directly depends on the further operating conditions of the room, its location relative to the cardinal points, area and heating possibilities. At the preparatory stage, the following tools and equipment should be prepared:
- a welding machine, which, if necessary, can be rented for a couple of days or asked from friends;
- a hammer;
- mount;
- drill and drill set;
- grinder;
- building ruler and level.
For the manufacture of the metal structure of the base of the balcony, profile pipes with a section of 40x40 mm, steel corners and anchors of 200x250 mm are used. To protect the metal from the negative effects of the environment, it is primed and painted with facade paint.
Frame making
From the profile pipe for the base of the frame, two blanks of the same length are measured. The distance between the window lintels is left taking into account the thickness of the glass units (not less than 400 mm). An old metal profile is cut off with a grinder, leaving the supporting pillars. New pipes are attached to the attachment point and the joining segments are fixed by welding. Similarly, the remaining elements are mounted along the entire perimeter of the structure.
Note!
When carrying out work, it is imperative to follow with the help of a building level the horizontal and vertical arrangement of all elements. If there are any deviations, then at the initial stage they should be removed with a pry bar or hammer blows. After checking and adjusting the pre-welded structure, it is secured by welding thoroughly.
All welding seams must be made in compliance with welding technology and safety regulations.
At the next stage, jumpers are prepared, which in width should coincide with the dimensions of the profile. Having determined the installation locations of the jumpers on a real object, they begin to weld them from all sides, not forgetting to constantly check the level of the structure and the correct connection of the elements. Installation of the structure is continued by forming the outer frame. The construction of the balcony adjacent to the wall is fixed with special anchors. After the installation of metal structures is completed, they are thoroughly cleaned from rust and welding residues, and primed with a special compound for external work.
Types of loggias and balconies and their sizes
The nature and national culture were so distributed that balconies and loggias in different countries have their own unique features.And many of them have successfully taken root in Russia and Ukraine.
- Style "Italiano" - designs of this type are distinguished by various forms and the use of multiple decorative techniques. Elegant, but complex forging is used as fences.
- "A la France" - this style prevails in the houses of the Soviet era. These are small structures that are more decorative than functional. Doors can be decorated with an elegant twisted lattice.
- Spanish Gothic - rectangular or square terrace with austere and laconic decor. The perimeter railings are framed with a concrete parapet or a modest lattice.
- Americano - structures of this type are located around the entire perimeter of the house, separated by thin bridges, the railings are lower than the standard. Relevant in individual buildings, hotels and tourism facilities.
- Portuguese veranda - found in low-rise construction, can be open or closed, in demand in preschool institutions and dispensaries.
- The Swedish balcony is the most common type of construction in our country. It differs in a narrow rectangular protrusion beyond the line of the facade; metal crossbeams are provided as fences. The parameters depend on the building series (see table).

The dimensions of such loggias completely depend on the type of building and the climatic zone. In the middle and northern latitudes, the protrusions of the structures are usually small. This allows you not to limit the passage of natural light. This is especially true in multi-storey construction, where the upper balcony space forms a shadow for the lower one. Loggias provide more shade, so they are smaller in the northern areas than in the southern ones.
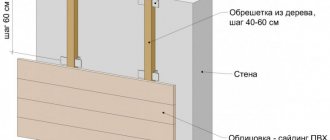
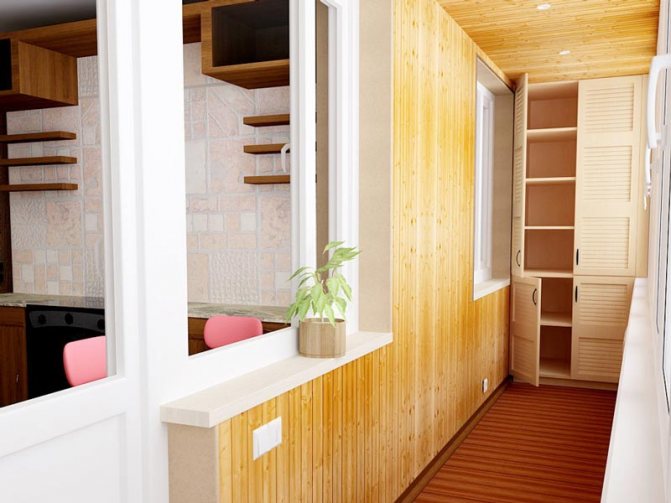
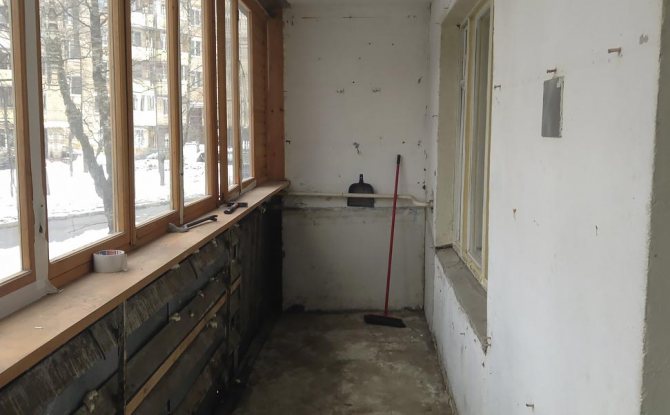
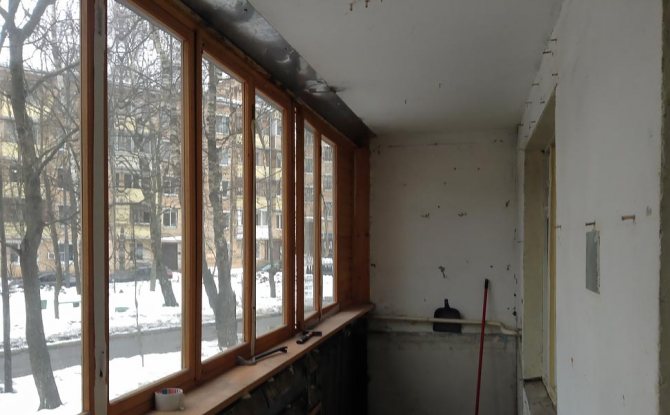
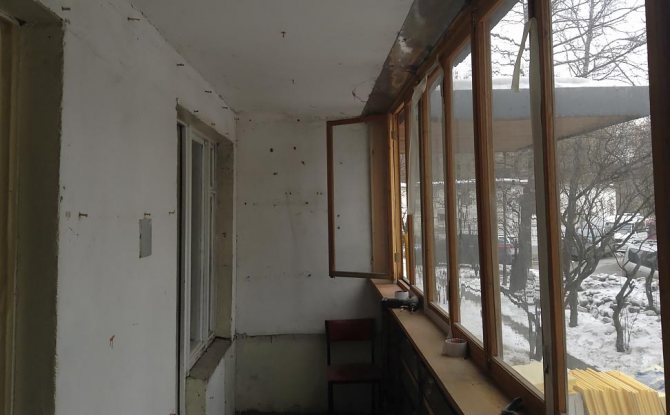
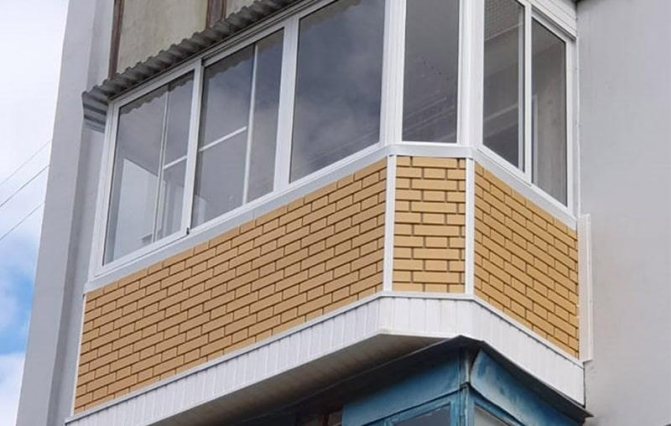
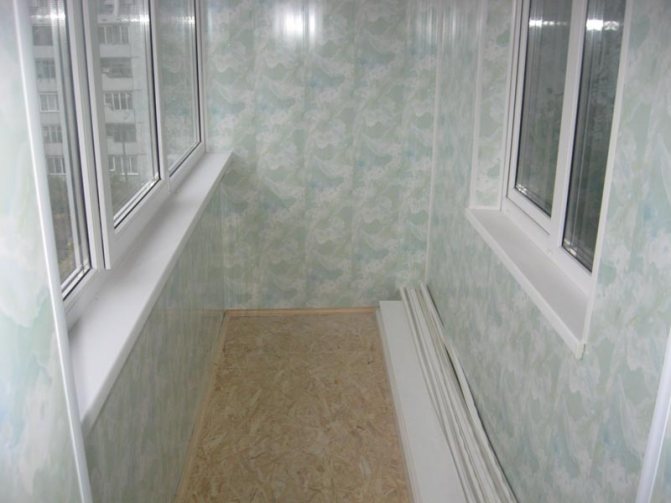
Cladding
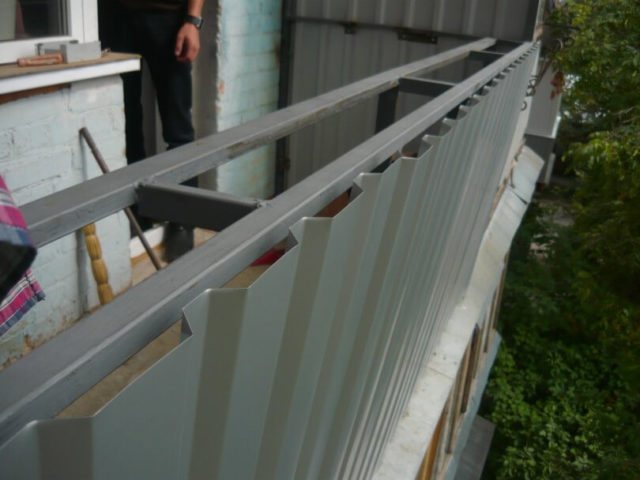
The finished metal frame is sheathed before installing the double-glazed windows. Usually, to perform facade work today, consumers prefer reliable and durable siding, corrugated board or other lightweight materials, in the structure of which layers of insulation, hydro and vapor insulation can be laid.
In order to sheathe the frame of the balcony, a crate is made with a minimum step of 500 mm.
Note!
All elements of the lathing, which can be made of a wooden bar or a metal profile, are tightly attached to the metal structure to increase the rigidity and strength of the structure.
First, siding is attached to the finished base from the facade of the house, then after laying the insulating materials, the crate is closed from the inside.
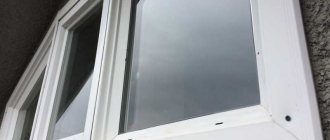
Before installing the windows, to facilitate installation work, the double-glazed windows are removed from the supporting profile. Window frames are inserted into the prepared openings and fixed with special screws and fixing plastics. Next, they regulate all the elements of the windows, proceed to the installation of the ebb and the window sill. Having inserted double-glazed windows into place, all assembly seams and cracks are sealed with special foam.
At the final stage, all internal elements of the balcony are finished, the lighting system is laid and the room is heated.
How to make a remote balcony
Have you ever thought what affects the cost of housing? You can name a dozen factors, but the main one is the square meters of the apartment. They are well added by a remote balcony.
Indeed, in the cramped conditions of a multi-storey building, expanding an apartment without oppressing neighbors can only be done outside. In our market time, the cost of square meters is growing. Therefore, the money spent on the expansion of the balconies can be safely considered a profitable investment.
In principle, everything can be done by hand. You just need to carefully study the issue, watch photos and videos, consult with an experienced builder. In this article, we will give you some helpful tips.
Useful theory
The removal of balconies or loggias is a complex of construction and installation measures, as a result of which we not only increase the space of the apartment, but also strengthen the structure of the slab.The process involves the removal of the enclosing structures both forward and to the sides.
Be sure to carry out the installation of balcony glazing to provide warmth, silence and comfort in the new room. But if we mount the glazing with an extension from the original edge of the slab, then in any case the top of the glazing “looks” into the sky. We solve the problem of fixing the window frame together with the roof device.
There are two ways to take out the balcony.
- Carrying out on the windowsill.
- Carrying out along the base of the slab.
In the first way, you can expand the balcony by 10-35 cm. But when expanding, only the glazing is removed. The lower part - the parapet remains at the same level. As a result, the parapet and glazing are not located in the same plane.
In this way, we increase the volume of the balcony. Also, the positive side of this extension is the ability to install a window sill over the entire width of the stem. Paired with sliding windows, it can be used as a shelf, table or shelving unit.
Removal along the window sill is easier and cheaper than removal along the base of the slab, but this method of expansion has one significant drawback - the floor area does not increase. This imposes a limitation on the use of the extended balcony as a new room.
How to extend the balcony to a greater distance? The second method allows lengthening up to 0.5 meters. Note that this is the maximum safe size for the extension. Moving to a greater distance leads to a heavier expansion structure, an increase in the load on the balcony slab and problems with fixing to the wall.
A distinctive feature of the removal along the base of the slab (or removal along the floor) is the displacement of the parapet along with the glazing by the amount of expansion. The window frame rests on the parapet and is located in the same plane with it.
The main positive property of the removal along the base of the slab is the increase in the area of the balcony. Thus, we turn it into a full-fledged room.
Is it possible to enlarge the balcony in another way?
Our people are resourceful and resourceful. He quickly combined both methods to achieve the greatest expansion result.
We will consider this combined version of the balcony with a take-out in more detail.
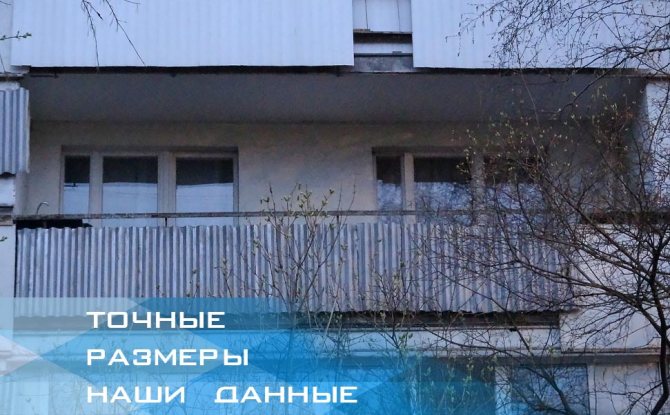
Balcony plan (scan) with dimensions in real proportion
For you, the People's Windows made a drawing in real proportions. Measurers usually use such sweeps. Here, the dimensions of the walls, floor, ceiling are indicated. These are internal measurements. Everything is in millimeters - as in the drawings. The information is ours and has been collected over the years.
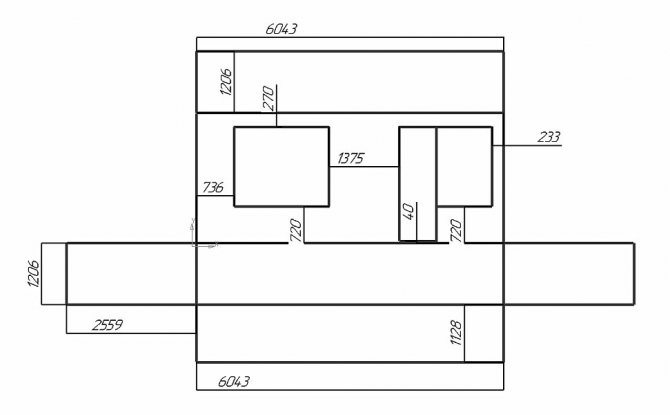
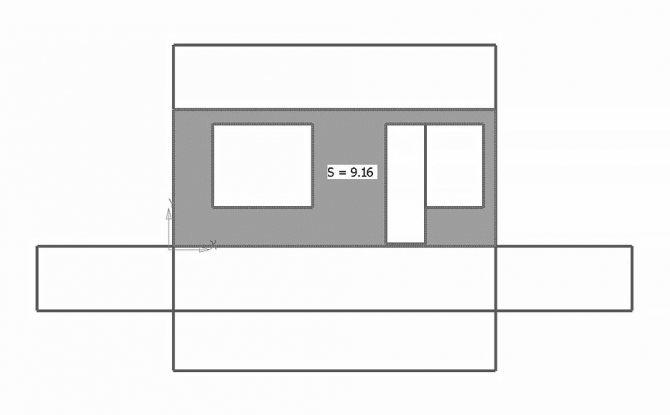
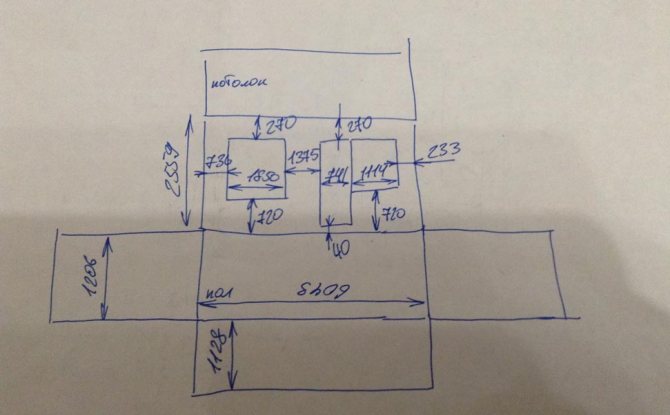
This loggia can be safely attributed to the large ones. Its dimensions are 6043 mm wide, 2559 mm high, 1206 mm deep. Most loggias are less than 6 meters long and less than a meter deep.
The dimensions of the front wall are 6043 mm by 2559 mm. The width of the slope is about 13 cm. There is a moderate sill of 100 mm. And it occurs if the floor in the apartment is raised. On these loggias, during joining, it is possible to make the floor level such as in the room. The area of the facade is 9.16 m2.
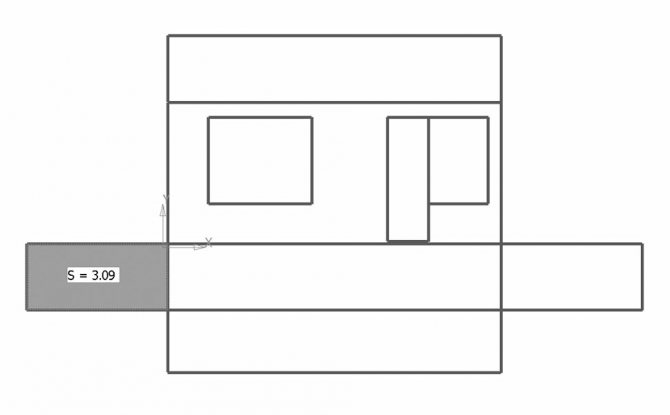
The right wall and the left one are the same. The height of the walls is 2559 mm, the width is 1206 mm. The walls do not go up to the parapet - the parapet is slightly shifted to the street. Therefore, when installing the glazing frames on the parapet, holes appear. Here we put L-shaped white strips. The area of one wall is 3.09 m2.
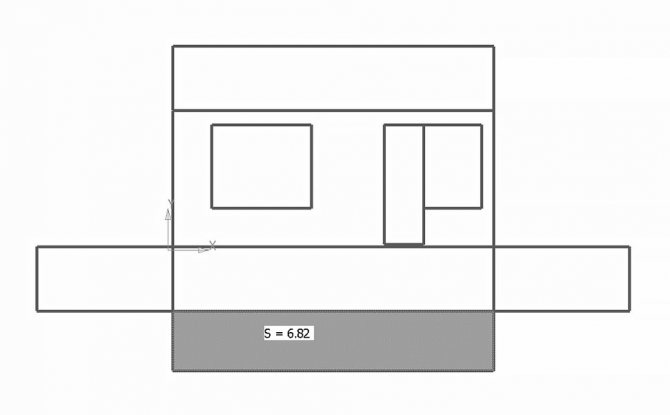
The parapet of these loggias is 1128 mm high, so the glazing is often low, of the order of 1330 mm. And often the neighbor's parapet hangs over your parapet, and then you need clever visors. By the way, the parapet in your loggia is strong and can easily withstand the weight of PVC glazing. Masonry in this case is optional. The area of the parapet (and masonry, respectively) is 6.82 m2.
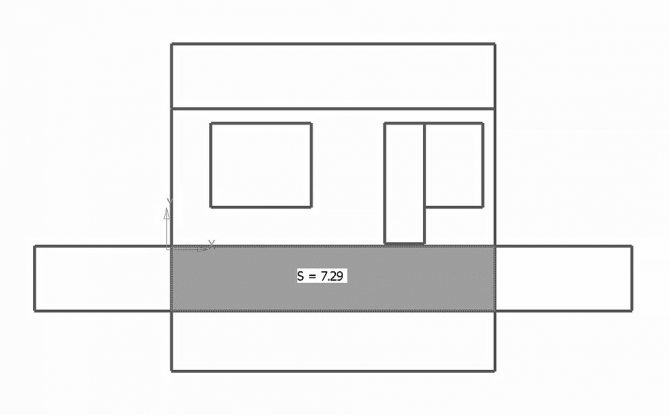
The floor and ceiling are the same. Length 6043 mm, width 1206 mm. Yes, if you remove the screed on the floor - this is definitely superfluous. The floor area is 7.29 m2.
The total area of the walls and the ceiling is 29.4 m2. This information is useful for those who will consider the material for finishing.
The area of the entire loggia will be 37 m2.

Preparatory work
Before starting work on the removal of the balcony, you should thoroughly prepare, think over and calculate everything. Thus, we will save time, money and nerves in the restructuring process.
Before starting the expansion, you need to answer yourself two questions:
In other words, to plan the final result and figure out which balcony extension structure will be able to realize our expansion plans. After that, we select materials, tools, devices, an assistant for practical work on the removal.
Before starting, you should draw a drawing or a detailed diagram of the installation of a balcony with an extension. It is even more correct to order an extension project. So we can accurately calculate the type and amount of materials required for the removal of the balcony.
Tools and equipment:
- welding machine;
- mount;
- a hammer;
- perforator (drill) and a set of drills;
- angle grinder (grinder);
- building level and tape measure.
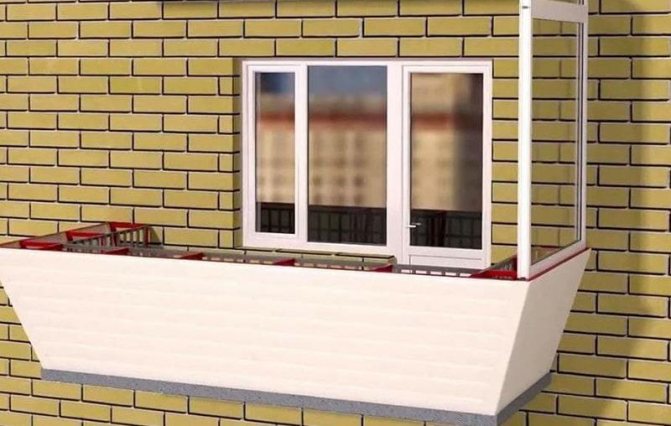
As a material for the manufacture of the expansion frame, we use a rectangular pipe 100 × 50 mm.
Installation work
First of all, we free the balcony from all things, disassemble the floor covering to the base. We cut off the old fence with a grinder and proceed to reinforce the edge of the slab. Regardless of its condition, the edge must be closed with a metal corner 50 × 50 mm. It will serve as the basis for the bottom attachment of the stem frame.
We cut off two profiles from the pipe, as long as the new width of the balcony along the facade. We put one profile on the slab, the floor and the wall and fasten it to it.
Along the side edges of the slab, we install two profiles to the width of the remote balcony, weld them to the wall profile and corner.
We weld the second element to the ends, which is similar in size to the wall expansion profile.
We prepare two side profiles. Their size is the width of the balcony plus 2/3 of the wall thickness. We make holes along the edges of the wall profile in the wall in such a way as to start and weld the side frame elements. The result is a rectangle - the floor of the future balcony with a take-out. In its inner part, we weld the logs. The base of the first part of the balcony expansion along the base of the slab is ready.
Next, we put kerchiefs - vertical elements of the parapet structure. With their help, we solve the question of how to make a take-out along the windowsill, thereby combining both methods of expansion. To reduce the weight of the structure, we make the elements of the take-out along the window sill from aluminum profiles.
We mount horizontal braces, fencing and floor elements. The latter, being the rafters of the roof of the balcony with an extension, serve as fastening elements for the entire spatial expansion frame.
The frame is fixed to the wall with anchors.
Frame for glazing system
Before glazing, you need to install a frame that will hold the windows and cladding. It can be made of wood or metal. A metal frame for a balcony will cost you more, but it will be much more reliable... And 2-3 times more expensive if you did it yourself. But if you have made up your mind, then you should know the following.
The metal frame in front of the glazing and cladding is often installed
Now in specialized stores, small inverter welding machines are sold. They work from a regular outlet. And even a beginner will be able to cope with such a device. Such a device costs from 4000 rubles. With it, you can plug a hole in the boiler, weld pipes or put up a metal fence for a summer residence.
Before starting work, we put on a mask to protect the eyes. Be sure to warn your neighbors about the beginning of welding and put a sign under the windows for passers-by. The order of welding is dictated by the peculiarity of the balcony fence.
The guardrail protrudes over the edge of the concrete slab. Then:
The vertical fence, if it is firmly fixed, is level with the surface of the slab. At the base of the balcony - right in the slab - you will find metal strips. These are the so-called embedded balconies.A vertical side rail must be welded to them.
The slab protrudes beyond the balcony railing. Then:
We completely cut off the old fence with a grinder. We free access to mortgages by breaking concrete at the base of the fence with a hammer. If the mortgages are not securely fastened, secure them additionally with reinforcement or metal corners. We will weld a new fence to the mortgages so that the slab does not protrude. The excess verticals are cut off before the horizontal is welded.
You can watch a video about this operation here
Installation of glazing
For balconies, it is best to use PVC glazing or sliding systems. The removal of the balcony with PVC glazing has better thermal insulation, but the sash opening inward overlaps the window sill. This does not allow us to use it to the fullest.
Sliding systems do not overlap the window sill, as the sashes move along the plane of the window. But these windows have less thermal insulation compared to PVC windows.
Having assembled the glazing frames, we install the external ebb and the internal window sill according to the expansion structure. Then we install double-glazed windows or sliding doors, depending on the type of glazing.
Siding
The wide range of colors, ease of installation and durability of the siding did their job. And now siding is a popular and convenient material for outdoor balcony cladding.
The fact is that the installation of siding goes from the bottom up, the boards engage with each other. But if an ebb is installed, it will be impossible to install the top siding board.
It is impossible to consider in one article all the nuances of expanding the balcony. But remember the main principles: measure seven times, cut once, be friends with logic and do not violate safety regulations.
Plastic panels
To sheathe the balcony inside with your own hands, plastic panels are sometimes used. This building material is inexpensive and easy to install, so it has gained popularity among domestic users. It consists of PVC sheets equipped with a joint system.
Advantages of plastic material for finishing loggias and balconies:
- Wide range of colors. Thanks to this feature, you can create a unique interior on the balcony.
- Easy maintenance. It is enough to wipe such a coating with a damp cloth or sponge.
- It can last up to 30 years. At the same time, it is resistant to temperature extremes, water and sunlight.
- Low cost. Plastic panels are currently considered the most affordable option for interior cladding of balconies.
As a budget finishing material for finishing the balcony, you can use plastic panels.
Installation technology
The preparatory work is exactly the same as in the previous cases:
- Removing the old coating and preparing the rough surface.
- Measurements of the area, marking, installation of the lathing.
- Purchase of material with a 10% stock.
- Acquisition of sound and heat insulation.
The first profile is fixed with a self-tapping screw on the ceiling lathing. You need to start from the top to make it easier to work. After that, you need to fix the profile in the center, which will be the guide. Under the installed elements, wiring is laid, as well as insulation. The entire ceiling is covered with panels using a tongue-and-groove system. The last panel will most likely need to be trimmed. Walls are trimmed similarly. Plastic plugs are used to decorate the corners.
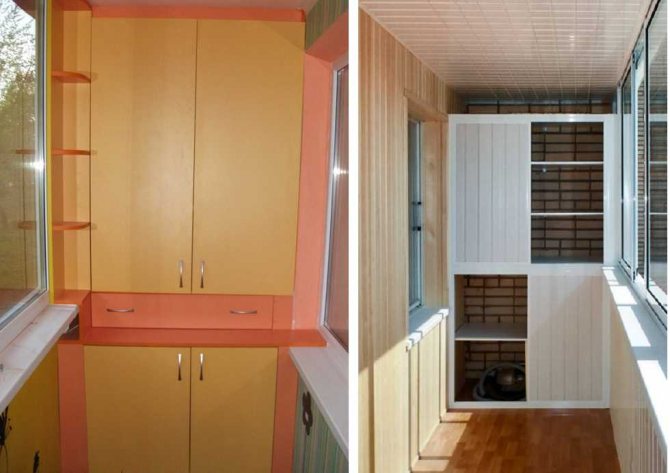
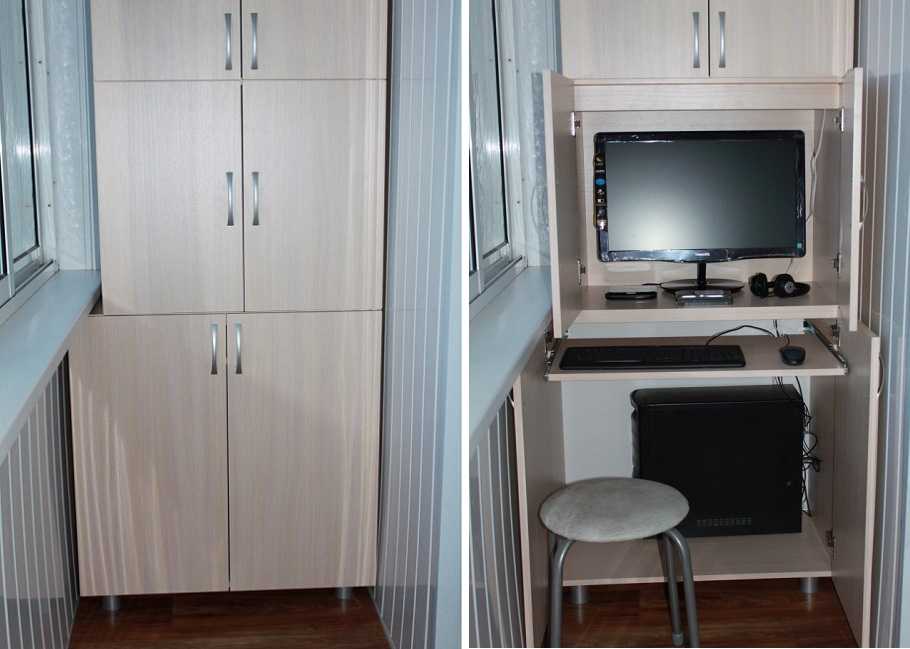
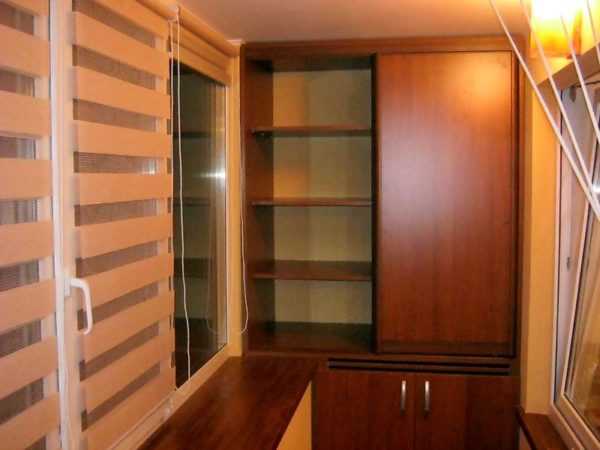
What can be cabinets for balconies and loggias
Cabinets can be of two types:
- A cabinet cabinet, which is an independent structure and is not attached to the walls of the balcony in any way. Such a cabinet takes up a lot of space, but at any time it can be moved or removed.
- Built-in wardrobe, which, as a rule, is created according to an individual project, therefore fits perfectly into all the "inconvenient" places of the loggia or balcony.But in such a cabinet, the walls of the house are used as load-bearing elements of the structure, to which the side racks and shelves are attached, so it is impossible to move or remove it without completely dismantling it.
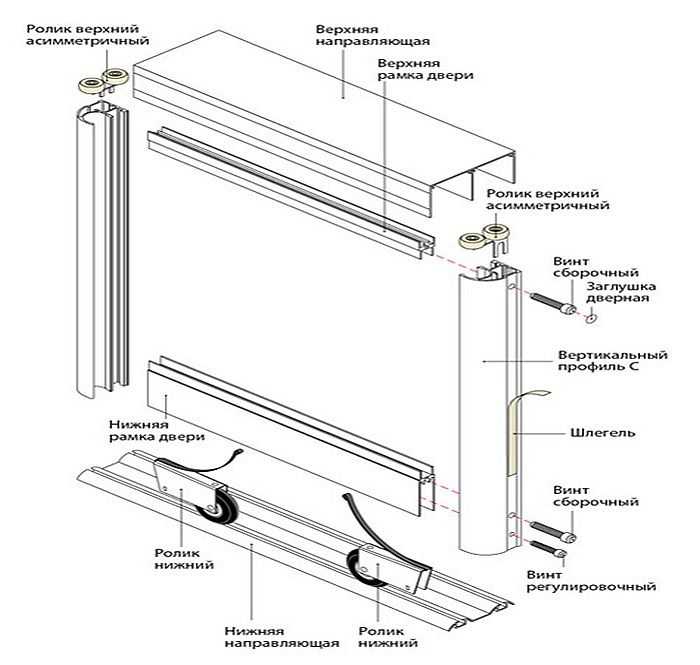
The doors of the following types are used in the cabinets:
- compartment doors;
- accordion door;
- roller shutters;
- swing doors
The final choice of the appropriate option depends on the specific conditions. For example, a built-in wardrobe can be installed in the loggia. In this case, the walls will simultaneously serve as a back wall for him. But on an open balcony it is better to put a regular cabinet cabinet.
A correctly placed wardrobe will streamline the space on the balcony or loggia
Particular attention should be paid to the choice of doors. If there is not enough space on the balcony, it is more practical to install roller shutters, compartment doors or an accordion. Hinged doors will be more convenient in a large loggia, where you do not need to save space and you can access all the shelves at the same time by opening the closet. The doors can be installed in the entire height of the cabinet, but sometimes it is more convenient to divide the structure into 2-3 functional zones, each of which will have its own doors.
Swing doors are the simplest and cheapest. To assemble them, you only need door panels and hinges, and self-installation in the opening will not be difficult. Sliding systems are more expensive and time consuming to install. In addition to door leaves, guides and rollers are required for them. But when opening, such doors do not go beyond the dimensions of the cabinet, which can be attributed to the advantages of such a system.
The most expensive door option is roller shutters. They are custom made and assembled by the manufacturer.
Door options - photo gallery
The most suitable and cheapest materials for building and arranging cabinets
Before starting the manufacture of the cabinet, it is necessary to decide on the material from which it will be made. The most popular and accessible materials are:
- plastic;
- Chipboard - chipboard;
- wood;
- drywall.
When choosing a material, they usually take into account the general design concept of the balcony, as well as their own financial capabilities. Plastic is very convenient here - it is practical, goes well with the interior of the balcony and is easy to use.
In the general case, the structure of the cabinet is a frame, doors and so-called filling - shelves, drawers, hangers. If there is a side post, then sheathing is also needed for it. All of these components are often made from different materials.
How and from which lumber to build a frame for a cabinet
Most often, the racks of the cabinet frame are assembled from a wooden bar with a section of 40x40 or 50x50 mm. It should be borne in mind that the wood changes size under the influence of moisture - the timber swells, deforms, the joints shift, therefore, for unheated balconies, such a cabinet will not be the best option.
Here, a frame made of galvanized profiles, which is not subject to deformation at high humidity, can help out. Plywood, drywall, chipboard and other materials are easily attached to it.
Shelves can be made from thick plywood, chipboard, or OSB. If it is assumed that there will be heavy things in the cabinet that will provide a load of more than 5 kg (for example, cans with conservation, heavy tools, dishes, books), then it is better to use a wooden board.
Original, beautiful and easy-to-manufacture built-in furniture on the balcony - photo gallery
What are the best materials to choose
For finishing work, a variety of materials can be used, providing an excellent result of the work. The following options are considered the most popular.
| Material | Specificity of its application |
| Wooden lining | Decorating balconies and loggias with clapboard is considered the best solution. This material is made from natural wood and also has a beautiful look. Photos of this design are very beautiful.The material is simple to work with, but not cheap. |
| Siding | Its installation involves not only improving the appearance of the balcony, but also additional work is being carried out related to the insulation of this room. The siding is available in numerous colors, and during the production process it is equipped with special fasteners that guarantee a simplified installation procedure. |
| Moisture resistant drywall | It is mounted on the crate, after which all the resulting joints are sealed. Such a covering can be covered with wallpaper, paint or other materials for decoration. This option will not require a large investment in the repair work for the loggias. |
| Plastic panels | They are a good choice for a balcony, however, they do not have the required vapor permeability indicator, so an airtight finish is obtained. They are produced in numerous colors, so with their help an interesting and bright design is obtained. |
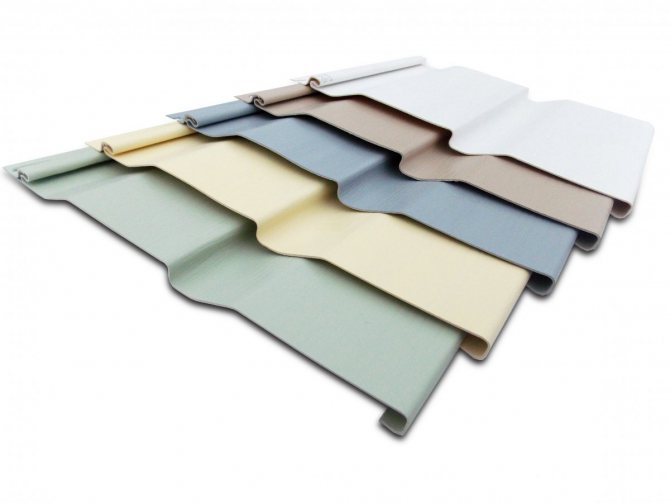
Siding
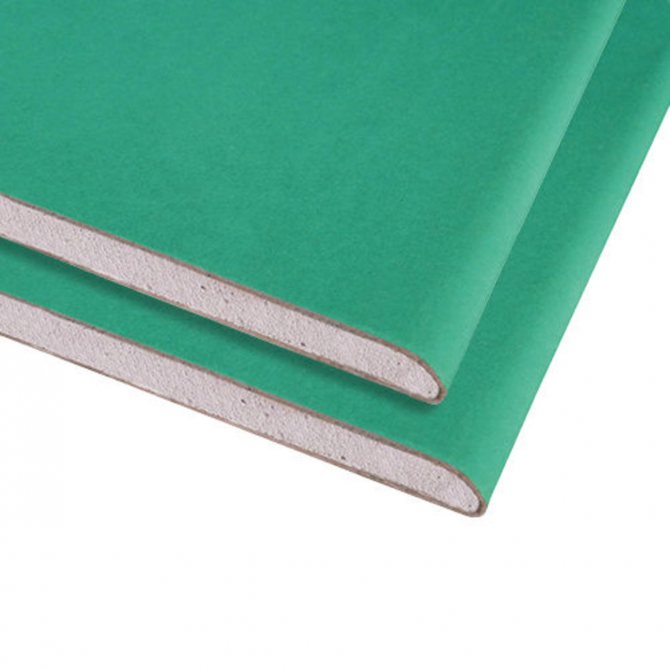
Drywall
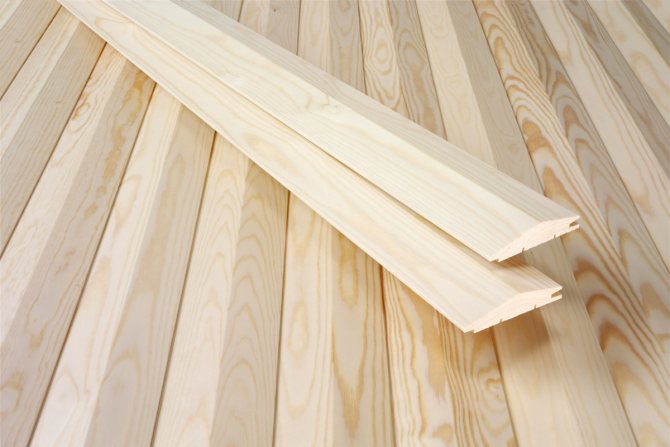
Wooden lining
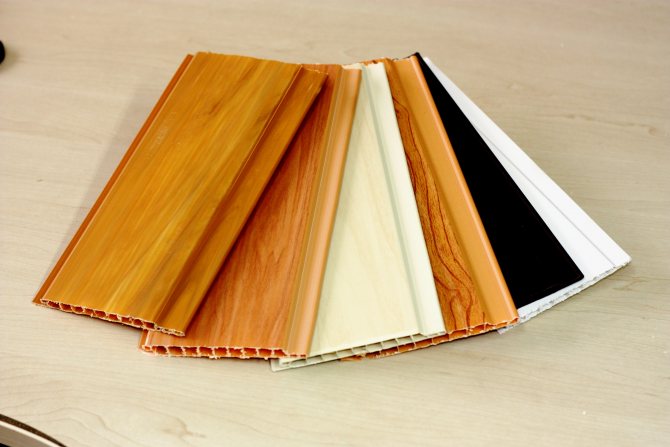
Plastic panels
The above materials are considered the most relevant and often used in the process of finishing balconies. Long-lasting and beautiful coatings are obtained from them. Anyone who does not have experience in this direction can perform all the work on their creation.
Most often, lining is chosen for loggias, which forms a beautiful coating. It is easy to work with, and in production conditions it is treated with special protective compounds that prevent possible rotting or the development of microorganisms. Photos of such a finish are widely presented in the selection, so you can be sure of the correct choice of cladding for the balcony surfaces.
Ideas, diagrams, drawings and step-by-step instructions for assembling balcony cabinets
After you have decided which type of cabinet will be most convenient for you, you need to start creating the most accurate drawing. Below are several designs for your attention, designed just for installation on a loggia or balcony:
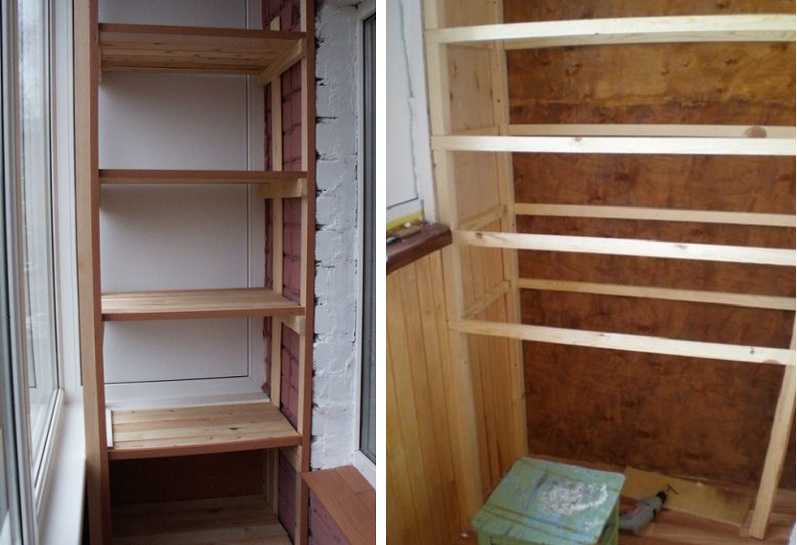
- The simplest version of a rack, consisting only of shelves. This model does not imply the installation of doors, but you yourself can calculate their dimensions and mount them, fixing them to the front frame.
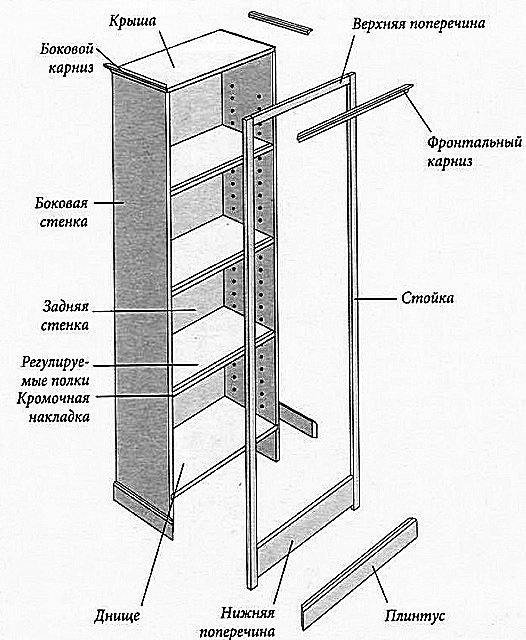
Simple built-in shelving scheme
![]()
Drawing of a wardrobe for a large loggia
Wardrobe rack with hinged doors for narrow balconies
After reviewing the presented drawings, you can easily draw up your project by changing or adding some parameters in accordance with the dimensions of your balcony.
List of tools required for carpentry work on the arrangement of wooden cabinets.
- screws, dowels, nails;
- a hammer;
- chisel;
- jigsaw or hand saw;
- electric drill with attachments for woodworking;
- screwdriver (set of screwdrivers);
- ruler, pencil, tape measure, plumb line, square and building level.

You will need a drill, screwdriver, screwdrivers, hammer, chisel and other tools
Here are some more simple tips before building a closet on the balcony:
- On a pre-glazed balcony, the wood finish will not suffer from dampness, it will retain its attractiveness and good quality longer.
- It is advisable to pre-repair the floor on the balcony, or at least that part of it, on which the cabinet will be installed.
- It is advisable to eliminate all cracks and crevices, insulate the walls and floor of the balcony, which will provide protection against temperature changes and drafts and significantly extend the life of the cabinet. For insulation, you can use foam, PVC, or mineral wool.
After the measurements are made, the type of cabinet is selected, the drawing is drawn up, you can start directly to work.
Why do you need finishing the balcony outside?
In each case, the goals are different. Most often they decide how to sheathe the balcony outside when the tasks are:
- reduction of heat loss in the room;
- improvement of external characteristics: replacing the old parapet makes it possible to increase the attractiveness of the structure from the outside;
- protection from external factors: precipitation, wind load, small debris and dust;
- an increase in the service life of concrete floors, which is due to a decrease in the level of humidity in the glazed room due to the external finishing of the balcony.
The need for additional protection of the balcony structure arises even in a new building, and not only in an old building.