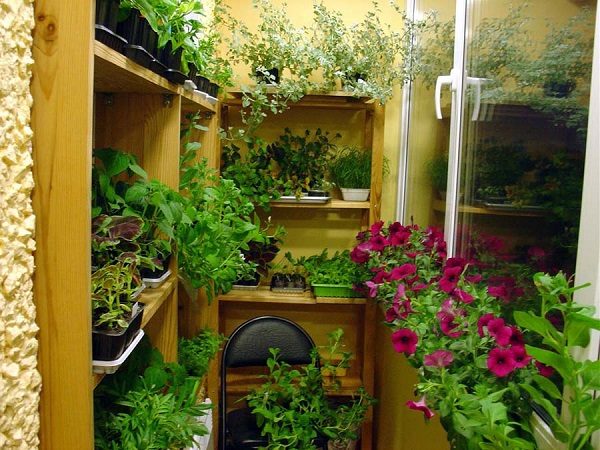
Suburban garden plots have not lost their popularity and demand. If the goal is to get an excellent harvest, many people prefer to grow seedlings of plant varieties on their own, the yield of which is beyond doubt. A greenhouse for a balcony - becomes a way out of this situation. The only problem is that it is quite difficult to create an optimal microclimate within the balcony space. But with the right approach to business, you can equip a greenhouse for seedlings on the balcony on your own and at a minimum cost.
How to build a simple seedling greenhouse
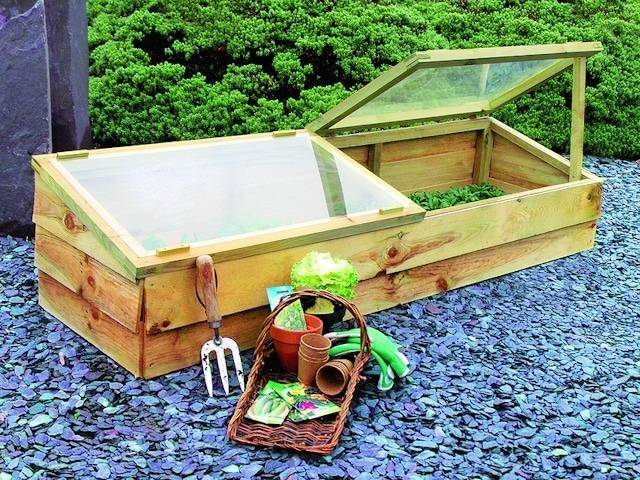
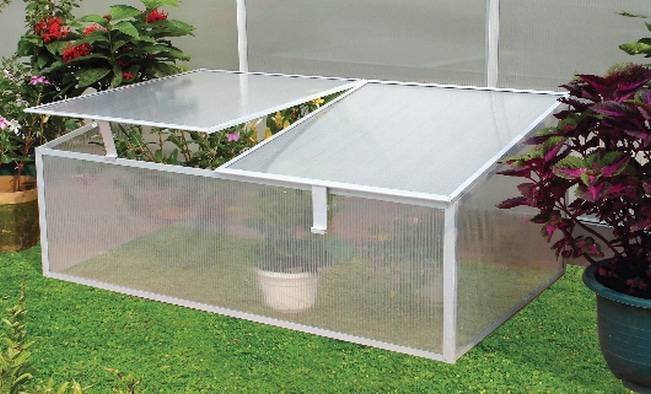
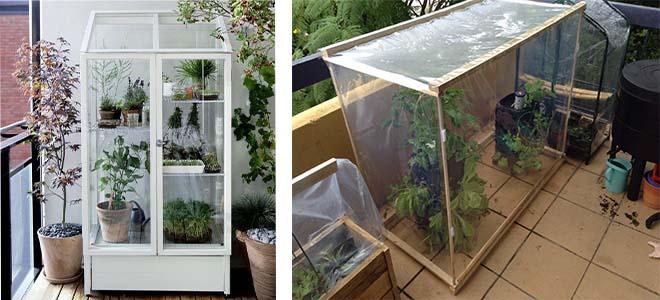
If you are first thinking about how to make a greenhouse yourself, then the simplest model with a pitched roof will do. Such a box is made of wood or polycarbonate. Since a greenhouse is installed on the floor or a curbstone, and then containers with seedlings are placed in it, the bottom in the box is not made. It is also convenient for using the structure in the country - the box is simply installed on the garden bed.
Tools and materials for manufacturing
It is better to make a greenhouse with your own hands from a high-quality board - so its service life will be long, and if necessary, it can be disassembled and assembled. So, you will need:
- boards with a thickness of 20 mm (the number and length are calculated based on the size of the greenhouse);
- timber 40x40 mm;
- rail 20x10 mm;
- window glazing beads for attaching glass to the frame;
- hinges for fastening the frame;
- glass or polycarbonate according to the size of the hinged frame - 2 pcs;
- insulation material;
- hooks and loops for hooks;
- self-tapping screws or screws;
- glass cutter;
- saw;
- screwdriver or screwdriver;
- oil paint or enamel, means for protecting wood from decay.
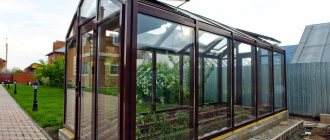
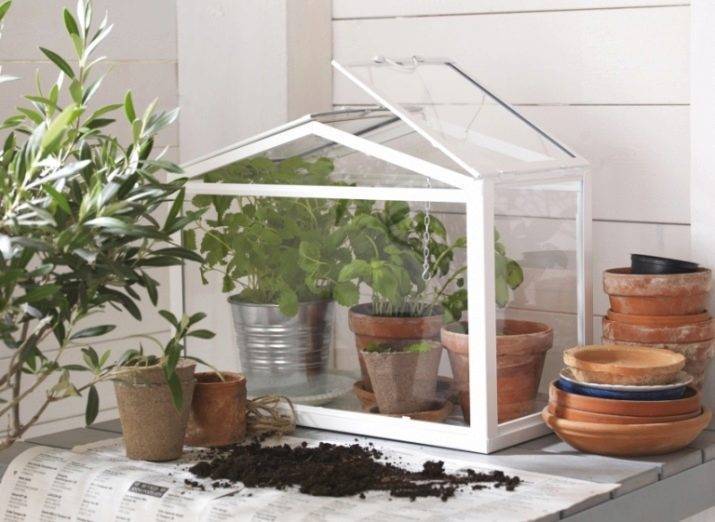
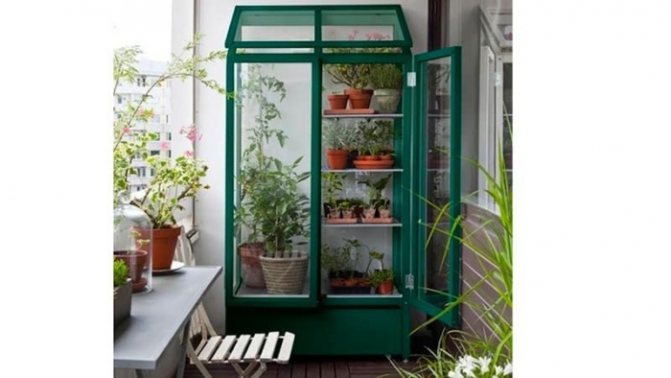
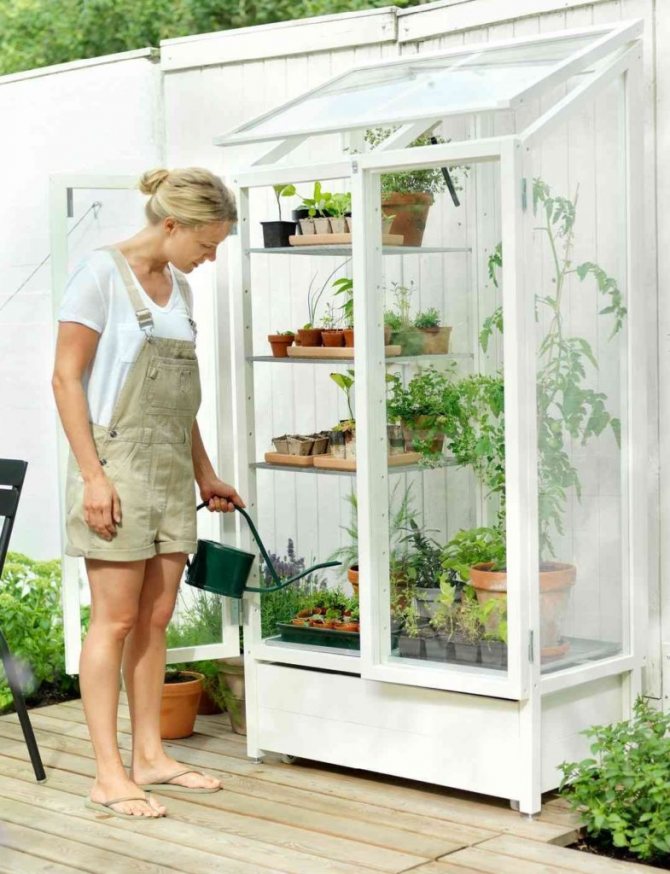
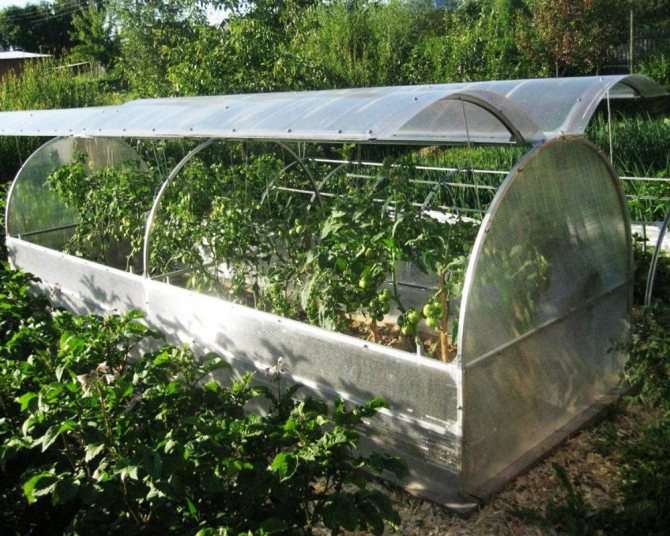
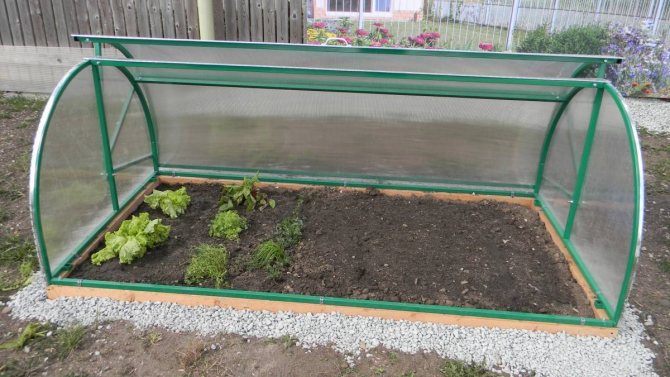
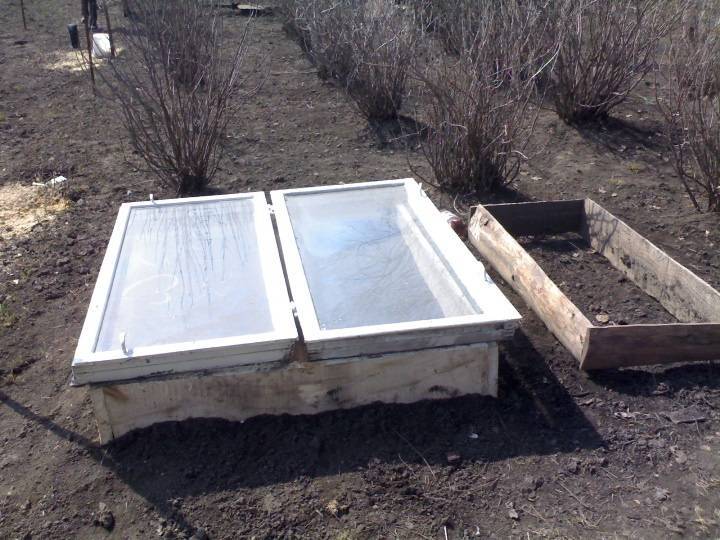
A lean-to greenhouse with a glass or polycarbonate frame is suitable for balconies and summer cottages
Preparation for the installation of a greenhouse
First of all, to install a small greenhouse on the balcony, you need to choose a suitable place. Please note that the plants will need to be cared for, so access to them should be convenient. Also check the lighting conditions - on the southern balconies, the box can be placed along any wall, in other cases, position the greenhouse so that the plants are well lit in the morning.
Then decide on the dimensions of the box and draw an auxiliary marking drawing
Be sure to pay attention to the presence of insulation - if you sheathe the box with foam plastic from the outside, then lay in the dimensions of the allowance for the sheathing immediately. If this is not done, then the finished box may simply not fit in the allocated space.
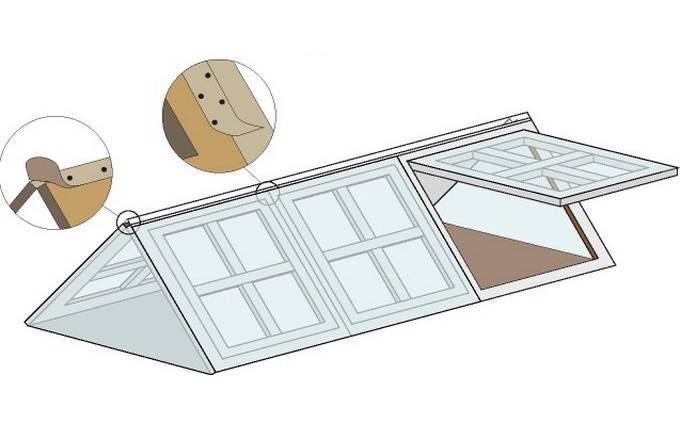
If desired, a wooden greenhouse with a glass lid can be made double
Think carefully about the system for draining excess water. If these are trays with seedlings, then be sure to install them on pallets. If you plan to simply cover the box from the inside with a film into which the soil will be poured, then make sure that the floor on the loggia is tiled with ceramic tiles and has a slight slope towards the street (for water drainage).
Step-by-step greenhouse assembly
After all the preparatory work, you can proceed to the installation of the greenhouse.
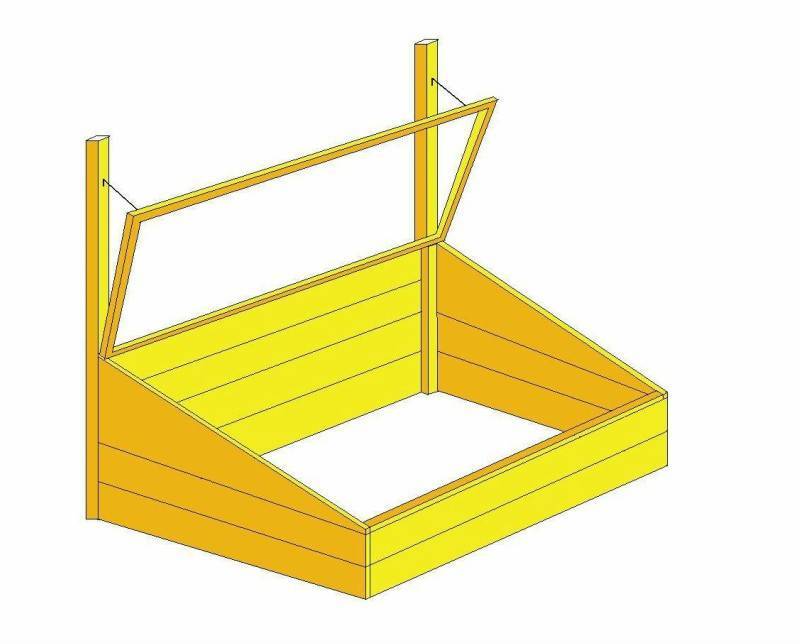
- Mark and cut out the details according to the drawing:
- 2 front pillars;
- 2 high rear pillars;
- 4 parts for a folding frame (from a bar 40x40);
- boards for covering the box.
- Treat wooden parts with anti-rotting agent and paint.
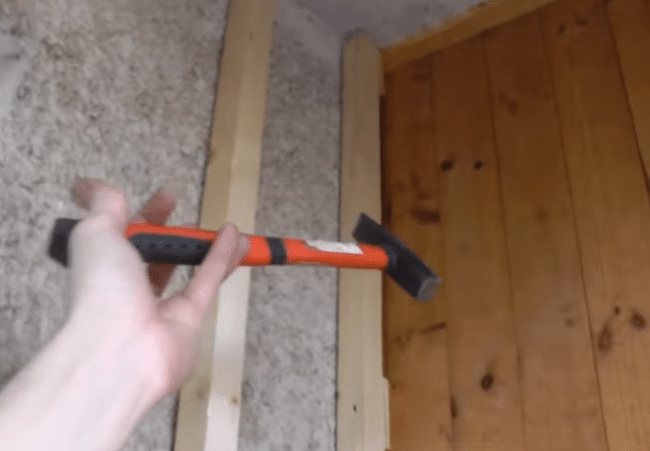
- Attach the boards to the uprights with self-tapping screws or screws.
- Sheathe the box with thermal insulation.
- Fasten the frame bars end-to-end.If possible, immediately saw through the grooves for installing glass on both sides of the frame (top and bottom). If not, place glass or polycarbonate on the frame (sheet size 40 mm smaller than the finished frame) so that 20 mm is left on each side to the edge of the frame.
- Attach a 20 mm rail along the perimeter of the frame. You will get an impromptu groove.
- Secure the glass with glazing beads. Then do the same for the underside of the frame. To keep the frame warm, place a layer of putty under the glass on top of the frame.
- Place the frame on the box and screw the hinges to its back wall.
- Attach the safety hooks to the top of the C-pillars. Hooks of different sizes can be made - long hooks for fixing the frame during airing, and short hooks for attaching the cover when caring for seedlings.

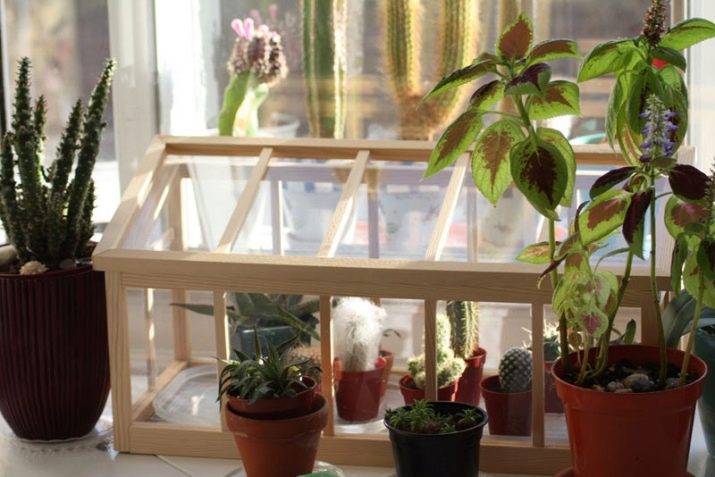
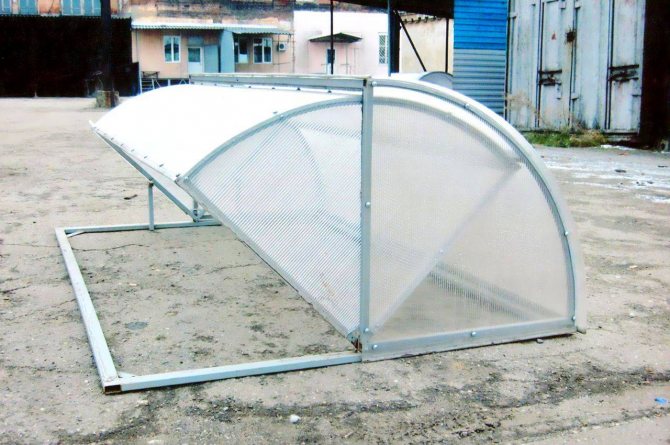
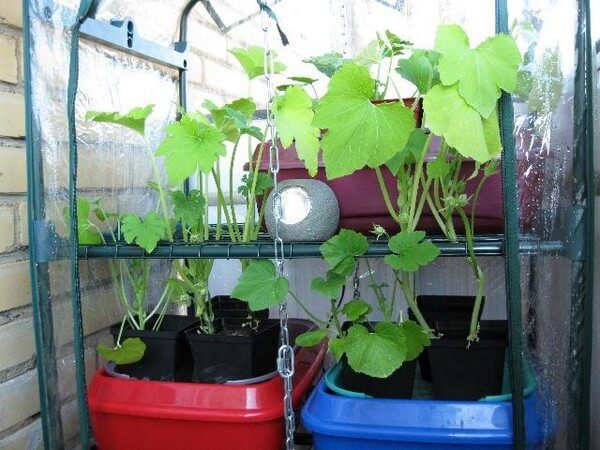
Single-pitched greenhouse made of polycarbonate on a table-stand
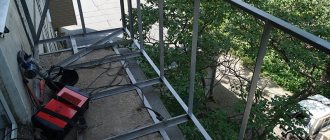
The same greenhouse can be completely assembled from polycarbonate. Wooden bars, plastic pipes or a metal corner are suitable as connecting posts. The finished greenhouse can be installed on the balcony on the floor or on a special table.
Mini greenhouse on the site
How to mount a stationary mini greenhouse on a loggia
Do-it-yourself equipment of a comfortable greenhouse opens up a unique opportunity to safely grow any crops on the balcony - vegetables or berries, exotic plants.
To design a greenhouse with opening doors, you will need to stock up on boards of small thickness, wooden bars, metal hinges. You will need glass to make the shutters, but it is safer to replace it with polycarbonate. Do not forget about fasteners (screws, corners, nails), as well as heat-insulating material (if desired).
Frame installation work
- Cut the bars according to the planned dimensions. They will be needed for the frame of the base of the future greenhouse, as well as doors and covers.

- Make the frame of the floor box from the bars, attach a solid bottom made of boards to it.
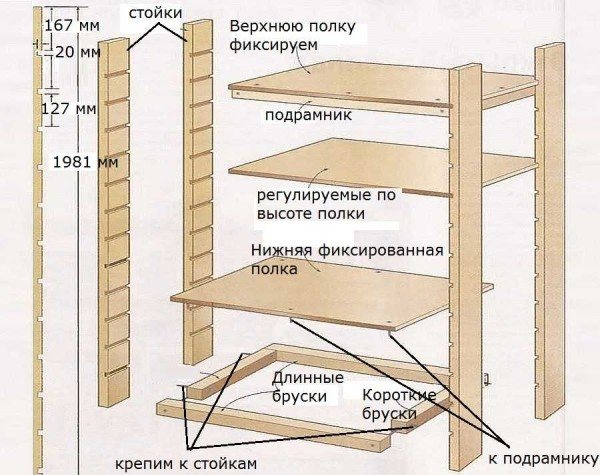
- On the locally installed wooden box, mount 4 vertical posts (two on each side).
- Make shelves of the required size and quantity from the boards, they will be inserted into the grooves equipped on the racks.
- Cover the greenhouse structure with a prepared lid, fixing the joints with corners, the doors are hung on hinges.
Cover preparation, door installation
For the manufacture of the lid and side walls of a home mini greenhouse, stock up on plastic wrap. Experts consider the most durable material of high quality to be a sheet of reinforced polyethylene or sheets of cellular polycarbonate.
How to build a cover:
- If polyethylene is selected, the panel prepared in size is attached to the top of the greenhouse structure. On a wooden frame, the film is fixed with staples using a construction stapler. The frontal canvas should be opening, by analogy with the mobile version of the greenhouse.
- When choosing polycarbonate for covering a stationary greenhouse, a front surface is equipped from a rigid material like swing doors. Blanks are cut out of sheet polycarbonate according to the dimensions of the front perimeter, and they are attached to the frame beams with a special tape.
Despite the fact that the porous structure of breathable acrylic will allow plants to develop in a favorable microclimate, cellular polycarbonate sheets are called the ideal choice. By choosing this material, you can realize the idea, even without hammering a solid frame made of plastic pipes or wooden beams.
DIY greenhouse
If you have favorable conditions on the balcony for installing a greenhouse, then you can either install a ready-made one, or create it yourself. This process is actually not as complicated as it seems.
Before turning your ideas into reality, it is advisable to create a drawing of your future mini-wig on paper. Think about how many floors it will have and how it will fit into the dimensions of your balcony.

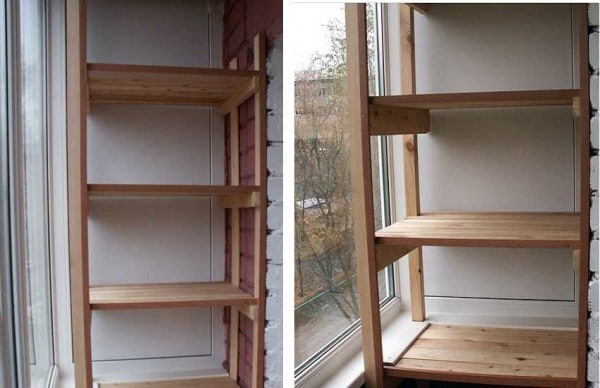
It is not that difficult to create a wooden structure. To do this, you only need smooth boards and the right amount of nails. Chip the boards together properly to get a stable and practical shelving unit.
Transparent polyethylene is attached to the back of this finished structure. This should already be done not with nails, but using staples and a special stapler. Strong glass can also be used instead of film or polyethylene.
If possible, it is also advisable to install several lamps on the sides of the greenhouse. They will keep your plants growing and developing normally. You can buy these lamps at almost any hardware store. And installing them is not such a difficult process.
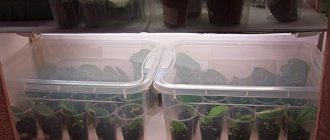
When the base of the greenhouse is ready, you can start planting plants. Prepare the ground first. Do not use only clean soil. For plants to grow quickly, the soil must consist of several layers. At the bottom of the box in which the plants will be planted, sand is laid out, which is covered with drainage and only then with a thick layer of soil.
8photos
After that, the plants themselves are planted in the prepared soil. One shelf of a simple rack usually holds about ten standard boxes of plants. But, depending on your individual calculations, the figure may be different.
When the plants are arranged, the front of the greenhouse is covered with foil or glass. This is done in order to create an ideal microclimate inside. However, if you have installed lamps, then this is not necessary.
A greenhouse on the balcony is an ideal solution for those gardeners who live in a small apartment and do not know where to apply their talents. This type of balcony design receives extremely positive feedback from gardeners. Therefore, you can safely design your balcony in this way, using it with maximum benefit.
What types of greenhouses are installed on loggias
Mini greenhouse designs for installation on a balcony are similar to stationary greenhouses, only they are smaller. The frame of a miniature structure, usually rectangular in shape, is crowned with a pitched or gable roof. The side surfaces and the top of the home plantation are covered with foil or polycarbonate, and the roof slopes are mounted on hinges for easy plowing.
Engineering thought does not stand still, and the designs of balcony greenhouses are being improved. The most popular among summer residents and gardeners today are the following options:
- Mobile greenhouses of various sizes with several tiers. It is easy to change the place of installation of buildings, as well as to provide a comfortable temperature for plants. Watering (manual) and additional lighting will have to be taken care of separately.
- In buildings of an automated type, control together with the regulation of the processes necessary for plants to develop is carried out automatically. Such a plantation relieves the owner of the additional hassle of lighting it.
- The display cabinet option allows you to freely control the development of the planted plants. A modern design with shelves under a transparent cover will brighten the balcony, but the greenhouse rack will need external lighting.
In addition to stationary and mobile balcony buildings, there are shelves covered with foil, hinged greenhouses under covers, traditional elongated structures. But the most practical model is recognized as a factory-made mobile greenhouse. Self-made greenhouses are being erected according to individual sizes, taking into account the space available on the balcony, but the structure will already be stationary, and not portable.
Self-production of a film greenhouse
A greenhouse that is not inferior in functionality to those on sale can be made by hand.
Preparation of materials and calculations of dimensions
To create a balcony greenhouse, you will need materials:
- aluminum, steel or metal-plastic pipe d 10-25.4 mm;
- mounting fasteners (plastic sheet 20-30 mm);
- bolts with nuts and washers - d 6-8 mm;
- polyethylene film (preferably reinforced);
- double sided tape;
- Velcro tape;
- plastic or metal grid for shelving.
Plastic pipes for the frame
Instruments:
- saw for metal;
- pipe cutter for m / n pipes;
- drill screwdriver;
- a set of drills for metal;
- file;
- screwdriver with a set of bits;
- retractable construction knife.
The size of the greenhouse is chosen arbitrarily, taking into account the size of the balcony (loggia) and the estimated number of seedlings that you are going to grow.
Given the design of balconies, most of which have a parapet that blocks natural light, light film greenhouses should be placed not on the floor, but in such a way that the lower tier of plants is located at the level of the upper edge of the parapet. If the greenhouse is planned to be placed on the floor, you will definitely have to arrange additional lighting for the lower shelves.
Assembling the frame from pipes
Do-it-yourself assembly of a greenhouse on the balcony is made from previously prepared (cut to size) pipe sections. If metal pipes are used, it is convenient to use rectangles, sawn from sheet plastic, 20x40x40 mm in size as fasteners, in which holes are drilled at the ends equal to the diameter of the frame pipes. The ends of the pipes are inserted into the holes of the plastic fasteners and, if necessary, fixed with short self-tapping screws.
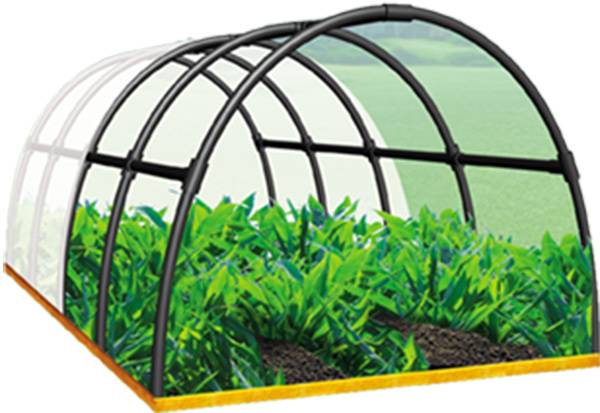
Arched frame option
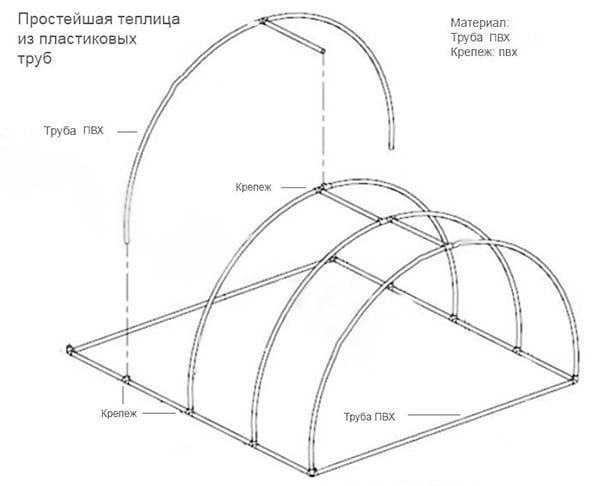
Diagram of a mini greenhouse made of PVC pipes
The shelter is cut out according to the assembled frame. The allowances should ensure free, effortless installation of the shelter on the frame and its easy removal.
Roof fabrication and installation
The roof of the greenhouse for the balcony is made flat, since there is no threat of water accumulation on it after precipitation. Four strips are cut out corresponding to the width of the sides of the frame. With the help of double-sided tape, they are attached to the roof sheet with one side. Between each other, three canvases are fixed with double-sided tape.
Assembling the frame - step-by-step instructions
The front strip of the film is made folding. To do this, a Velcro tape (fleecy part) is glued to it on the sides with double-sided tape. Additionally, it should be fixed by stitching on a sewing machine or using staples with a stationery stapler. In the same way, the second part of the Velcro tape with hooks is attached to the edges of the film webs.
In the area of \ u200b \ u200bthe roof, four ribbons are glued with tape for tying up the front sheet of film twisted upward when watering, weeding, airing.
As a basis, you can take a reduced scheme of a garden greenhouse
The self-made construction will be in no way inferior in its characteristics to the "industrial" greenhouses bought in the store. Its big advantage will be its size, taking into account the size of the balcony and the number of plants.
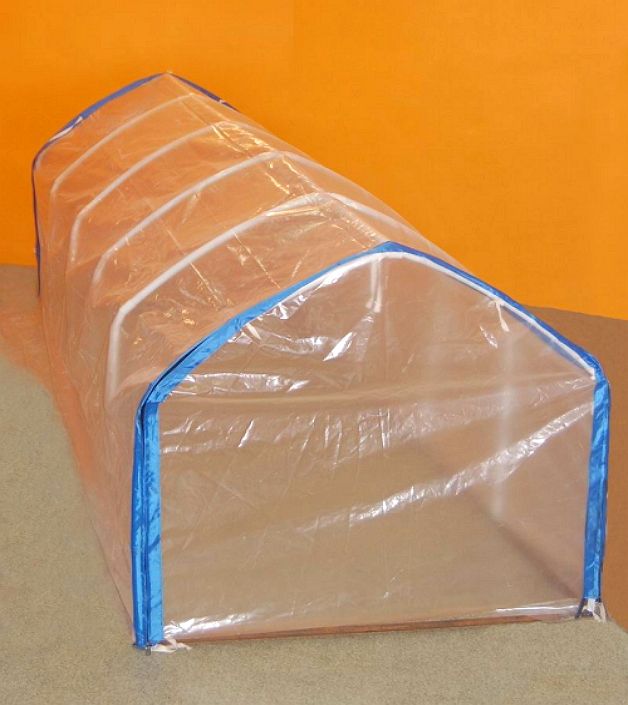
Homemade zippered hat
Advantages and disadvantages of greenhouses on the balcony
As you can understand, based on the calculation of the standard sizes of balconies in apartment buildings, a mini-greenhouse for growing seedlings on a balcony will have a relatively compact size. The occupation of a limited space by a greenhouse is due to the fact that the balcony should retain its original function, namely, a place to rest.
If you combine all the advantages of balcony greenhouses into a single list, then it will look like this:
- compact size;
- ease of installation and dismantling;
- relatively low cost;
- the ability to use the minimum space for growing plants.
The arrangement of greenhouses on the balcony is simple, due to which, in the warm season, the structure can be very easily dismantled. So, it becomes possible not to occupy space on the balcony during the season, when the main work on growing plants is carried out in suburban areas. Usually, the majority of greenhouses offered for installation is a structure of several shelves. That is why it becomes possible to grow simultaneously the most different types of plants.
A greenhouse for a balcony also has a number of disadvantages that should not be taken seriously if growing vegetation is not just a hobby, but the goal in itself of arranging a structure is to get an excellent harvest.
These disadvantages include:
- the need to regularly monitor the level of soil moisture;
- the need for constant ventilation;
- arrangement of additional lighting on the balcony in certain regions.
All these disadvantages pale in comparison with the advantages of a greenhouse, thanks to which you can enjoy an amazing view of plants all year round. This opportunity appears if you devote enough time to the greenhouse.
Back to content
Organization of lighting and watering
Regardless of what is planned to be grown on the loggia - seedlings, herbs or vegetables, it is important to take care of the correct microclimate
What kind of lighting is suitable for a balcony greenhouse
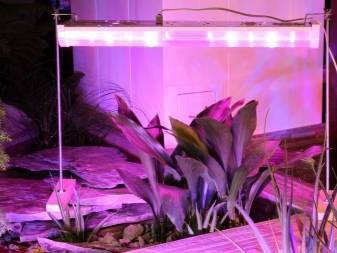
A balcony greenhouse requires additional lighting in the spring months. In April-May, daylight hours in the middle lane are not long enough for the development of subtropical plants (tomatoes, eggplants, sweet peppers). Artificial lighting is especially relevant for balconies oriented in the north and northwest directions.

Industrial phytolamp
The most economical type of artificial greenhouse lighting is LED. It is they, in a certain combination of colors, that make it possible to achieve the spectrum necessary for the normal growth of plants, approaching in wavelengths to sunlight.
The cost of purchasing components for making a "fitolamp" with your own hands is about 2-2.5 times less than when buying a finished product.
The power of the phytolamp is calculated based on the data on the packaging of the finished product, which indicates the lighting area. In case of self-production - by calculating the total power of the LEDs used. A typical LED combination is 2/1/1 where: 2 - red LEDs, 1 - blue LEDs, 1 - additional LEDs (UV, IR, green, white).

Homemade phytolamp several times cheaper
When arranging an artificial lighting system, take care of thorough waterproofing of the tiers in the greenhouse. So that excess water flowing out of the drainage holes in the bottoms of the pots does not get onto electrical appliances.
Drip irrigation device
For trouble-free watering of seedlings in a greenhouse on the balcony, so as not to break or damage the stems, the plants should be watered from a pallet or using a drip irrigation system. The second of the systems is more convenient, since it allows you to significantly automate the process and thereby reduce the time for caring for plants.
On the balcony, you can arrange both a manual system, for which you will need to place a container with water above the level of the plants, or an automatic one. In this case, the barrel can be located on the floor or in any other place of the loggia.
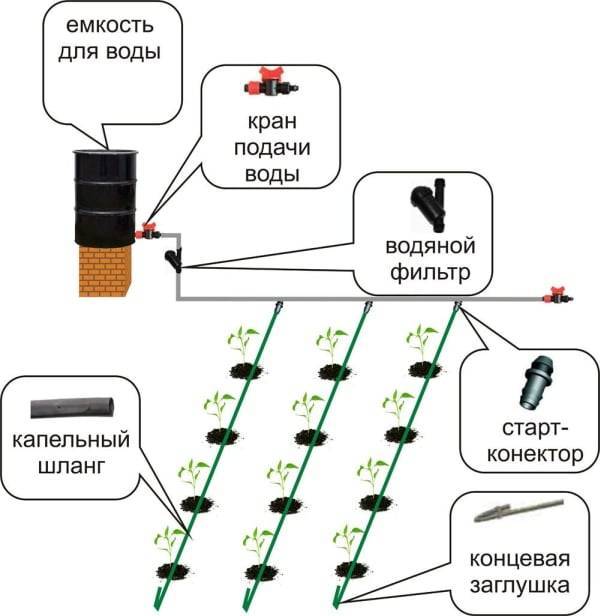
Drip irrigation device diagram
When installing an automatic irrigation system, a small submersible pump is used, a large assortment of which can be found in gardening equipment stores in the departments for the sale of indoor and garden fountains.
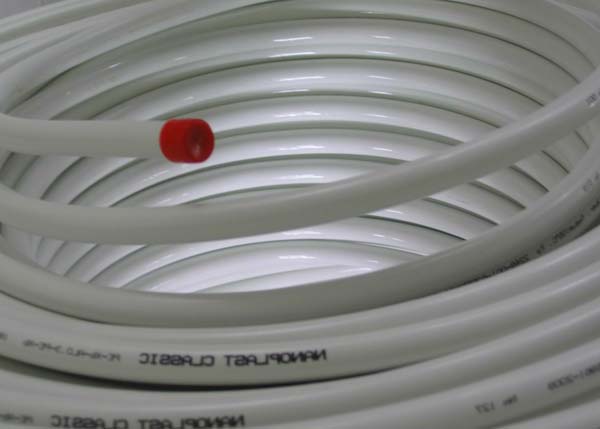
Taking into account the small volume of balcony greenhouses and the modest water needs of plant seedlings, tubes from medical diffusion systems - "droppers" are quite suitable for assembling a drip irrigation system. Connections for these can be purchased from your local aquarium department at any pet store. The on-off programmer is a simple Chinese-made electronic relay with a price of 250-600 rubles.
A greenhouse or a greenhouse on the balcony is indispensable for lovers of gardening and home gardening.
What vegetables can be grown on the balcony
When you want fresh greens in winter, or there is simply no summer cottage with your own garden, grow vegetables and create improvised beds on the balcony, having built a special greenhouse, a greenhouse.
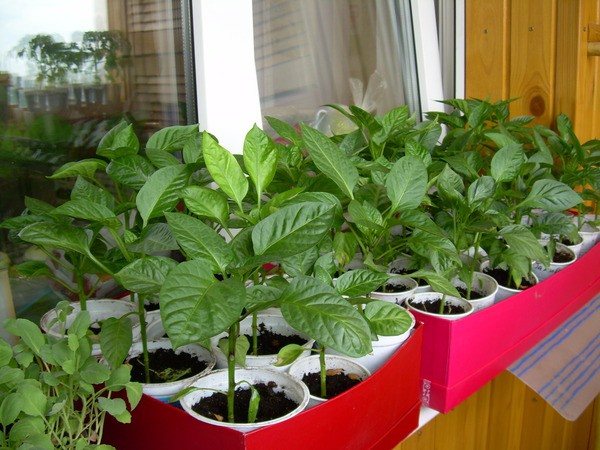
The following vegetable crops are suitable for growing on a glazed loggia:
- Cucumbersgrowing fairly quickly (7-9 weeks) after planting. An inexperienced apartment summer resident can easily cope with this task. The main thing is to find the recommended cucumber varieties. Any self-pollinated early-maturing hybrids are suitable for a balcony garden bed. They must be shade resistant. Such varieties as "Marinda" F1, "Masha" F1, "Connie" F1, "Debut", "Gribovchanka", "Babylon" have proven themselves well. Read more in the article "Cucumbers on the balcony".
- Hybrid Tomatoessuitable for a home garden apartment. Tall varieties for a loggia will not work. But undersized varieties, such as the "Balcony Miracle", "Alaska", "Japanese Room", "Bonsai", "Pinocchio" tomatoes are suitable for growing on a windowsill in a greenhouse. Preference should be given to small-fruited tomatoes.
- Eggplant - Another great option for balcony growing. Preference should be given to undersized and medium-sized varieties. For example, Thin Jim, Red Ruffled, Mixed Patio. Sprouted seedlings should be taken immediately, since growing from seeds is not an easy undertaking, long, requiring a lot of experience. Eggplants on the balcony, the cultivation of which requires a "gardener", are tasty, get enough light and at the same time do not burn like in a regular garden bed.
- Sweet bell pepper... The southern juicy vegetable takes root well in balcony greenhouses. Perennial plants will delight with ripe fresh fruits for 2-3 years. Early maturing universal hybrids with self-pollination are more suitable for growing pepper on the balcony. For example, sweet peppers such as Patio Ivo, Oda, California Miracle, Swallow, Winnie the Pooh.
- Broccoli - a heat-resistant vegetable feels great in warm greenhouses. And the fruits look quite aesthetically pleasing if grown on a windowsill next to flowers. But not all varieties are suitable for a balcony garden. For growing broccoli on the balcony, the type "Vitamin" and "Tonus" are suitable. Early maturing vegetables are famous for their high yield.
Also, on a glazed or open loggia with a built greenhouse, you can grow hot peppers, carrots, beans, peas, zucchini, beets. The main thing is to provide the cultivated plants with optimal conditions. Many people prefer to buy ready-made seedlings right away.
But it happens when summer residents in balcony greenhouses germinate seeds for further planting strong seedlings in open ground. In this case, you should use simple guidelines for organizing this process.
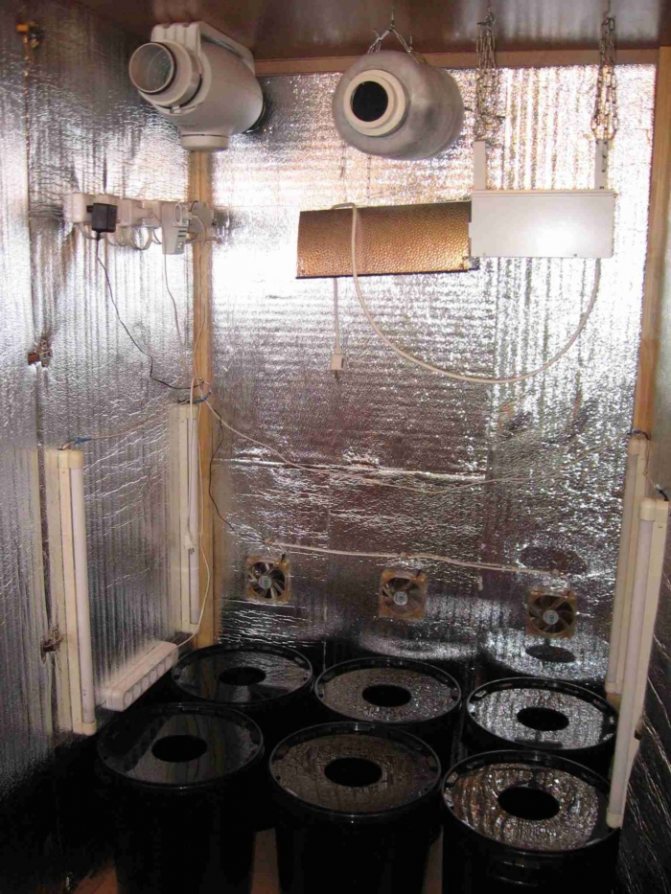
Automated mini greenhouses
This system has a cost slightly higher than simple greenhouses, but the process of growing seedlings in such a design is simplified as much as possible. They are equipped with ventilation systems. Watering and lighting with phytolamps.
Such a greenhouse can be installed in any room. Such mini-greenhouses are called "Grobox". The structure covers an area of four square meters.
An important feature of such greenhouses is the ability to choose the optimal moisture, temperature and illumination for different crops.Full automation of the process of growing seedlings in such structures is a guarantee of the result
Requirements for greenhouses on the balcony
At the beginning of the article, we briefly described the basic requirements for choosing a place that will be occupied by a mini-greenhouse for a balcony. But serious demands are made on the greenhouse itself, its condition and functioning. If the purchased options have certain "factory" characteristics, then with the independent construction of a greenhouse on the balcony the following factors should be considered:
- the most comfortable conditions;
- access for watering;
- access for weeding;
- aesthetic appearance;
- strength and reliability of the structure.
The most comfortable conditions mean ideal conditions:
- optimal humidity;
- illumination;
- suitable temperature conditions.
The availability of watering and weeding is another critical factor that must be considered.
An unpresentable looking greenhouse will not give its owner any pleasure, so you should definitely take care of the appearance.
Only strong and reliable structures make it possible to grow plants for several seasons.
Back to content
Organization of lighting
Usually, seeds are planted for seedlings in late winter, or early spring. It is during this period that plants will need a sufficient amount of additional light for active growth. If we talk about eggplants, bell peppers and tomatoes, then daylight is not enough for them even in late spring. Artificial lighting is ideal for regions in the north or northwest.
- The most common and cheapest option is the use of LEDs. With a certain combination of colors, you can create the desired spectrum for normal plant illumination, which practically does not differ from daylight.
- It is very convenient to use a ready-made "phytolamp". It can be purchased at a specialty store or made by hand. It contains a whole set of LEDs in one bulb. The power of the phytolamp is adjusted depending on the area of the greenhouse.
- If you make it yourself, then you need to calculate the total power of the LEDs used. Usually this combination is used: two red, one blue and one additional white or green LED.
- When installing an additional light system, it is worth considering the waterproofing of each level in the greenhouse. Excess water that may flow from the drainage holes of the pots must not get onto electrical appliances.
What are they used for
In the balcony greenhouse can be grown seedlings of any plants... Just do not place plants that need different conditions in the same greenhouse together. Tomatoes and eggplants can be grown together in one design. But cucumbers need to be planted along with zucchini. It is also not worth growing peppers with tomatoes, since they need different humidity.
To increase illumination, you can use phytolamp illumination in mini-greenhouses.
IMPORTANT. Conventional incandescent lamps will not work for these purposes.
In winter, the greenhouse freed from seedlings can be used for storage indoor flowersat this time at rest (cacti, gloxinia, etc.).
On an average balcony, when equipped with several greenhouses, about two hundred bushes of seedlings of various crops can be grown.
Heated mini-greenhouse with biofuel
Biofuel will help to insulate the greenhouse and provide it with additional heat. Its role is perfectly fulfilled by manure, straw, old leaves. It is quite simple to equip such heating in a greenhouse in the country.
Step 1. In the place where the greenhouse will be arranged, make a small hole or trench in the shape of the future structure.

First you need to dig a small hole
Step 2. Fill the pit with the biofuel mixture about 2/3 full.To do this, mix leaves, straw, manure with soil.
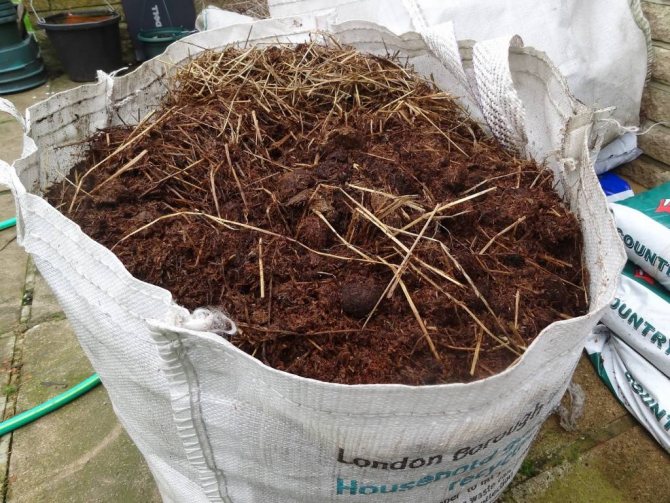
Biological fuel
Step 3. Spill the "bed" with water and cover with fertile soil, filling the trench to the brim.
Step 4. Place a greenhouse on top of the structure.
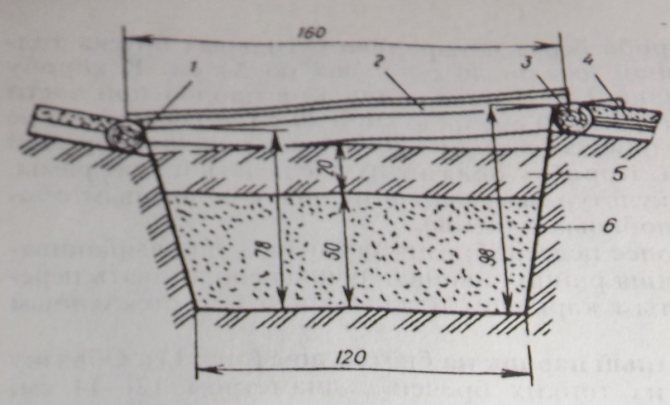
Greenhouse scheme
Due to the decomposition processes, biofuel will heat up and give off heat more actively, and the greenhouse will accumulate it. This is how the natural heating system will operate in any greenhouse.
Greenhouse for a balcony: types, shape and sizes
- Most often they build a greenhouse with 3 shelves. The size is taken as standard 50 × 80 × 120 cm.If the balcony has sufficient area, then the shelves are made larger. The standard size shelves are not heavy by weight - no more than 5 kilograms, so you can quickly assemble and disassemble the structure.
- A mini greenhouse with 4 shelves is even more compact, the dimensions are chosen as follows: 50 × 60 × 150. Seedlings will fit even more, but in fact the same amount of free space will remain, since the number of shelves increases in height.
- If you buy a greenhouse, then manufacturers offer portable options. They are lightweight and can be moved from one place to another.
- Automated greenhouses are also on sale. They are connected to a system that itself controls lighting, watering, temperature. The hostess only needs to plant the plants and sometimes keep an eye on them. This option is good for those who have little free time, but love to enjoy the winter garden on their balcony.
- You can actually make a portable greenhouse yourself, but this will be the place where you can only water the plant, and it grows at a certain temperature, humidity and light.
- You can purchase a greenhouse showcase. It differs in that it is easy to observe the state of its plants through a transparent film. There are several shelves on the base, on which you place your containers with seedlings or flowers. But such a greenhouse requires lighting, for this it is enough to install a light bulb.
Self-made greenhouse
Not every apartment owner can afford to buy a wonderful greenhouse, since the choice of the most popular models is associated with certain costs. At the same time, industrial mini-greenhouses are in great demand in the market. Greenhouses allow you to achieve excellent results associated with growing seedlings. Even with minimal maintenance, the harvest in a mini-greenhouse on the balcony will always delight the owners.
The main advantage of the design is protection against direct UV radiation. The use of a greenhouse allows you to provide the necessary microclimate for plants. Without the use of mini-greenhouses on the balcony, seedlings are very difficult to grow on time, so many enterprising gardeners have begun to grow seedlings for sale. Various types of greenhouses for a glazed balcony allow not only to survive the crisis, but also to make money on the sale of seedlings.
In this case, it is necessary to choose the best option for solving issues related to the location of the greenhouse on the balcony. The greenhouse should allow for cleaning and washing windows. You should take care of a convenient passage and a seating area in advance. This will make it possible to provide complete plant care, especially when the balcony is on the south side. If exact observance of all dimensions of the structure is required for a more convenient arrangement of the balcony, then a mini-greenhouse can be made with your own hands.
Features of options for balcony greenhouses
Usually, with the beginning of spring, flower growers and summer residents begin to prepare for the summer season, filling not very spacious window sills with containers and pots with seedlings. If the apartment has a loggia or an outdoor balcony, the equipment of a greenhouse or greenhouse in a limited space will be the best solution to the problem.
Comment.It is advisable to build a mini greenhouse on a glazed balcony with a stable air temperature and the possibility of regular ventilation. On open balconies, especially on the north side, the greenhouse venture will end in the death of the planting material.
Self-made greenhouse
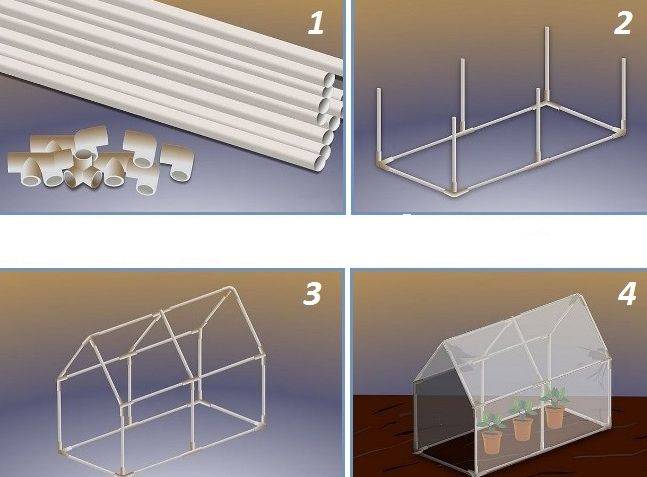
To make a small greenhouse with your own hands, you do not need a lot of cash or material costs. Fantasy and a little experience in the use of tools and materials will help to create a convenient design. Bars or worn out wooden frames can be found in every home. Pipes, glass, plastic wrap are ideal for this type of product. A self-made mini greenhouse can have a unique configuration, and the materials for its creation can be very different.
A greenhouse made of a wooden box will not require unnecessary work associated with the assembly of the structure. It is enough to equip it with an upper cap, which opens with one movement of the hand. Since this product is based on a wooden box, a gable roof can be created from the side walls. For the manufacture of a greenhouse cover, you can use polycarbonate, a sheet of which must be screwed in the center of the entire structure. It is necessary to install boxes or other containers with seedlings inside it.
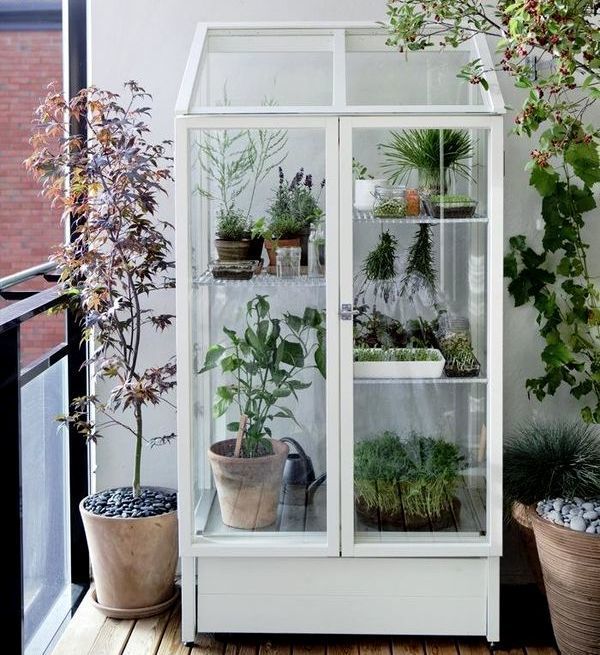
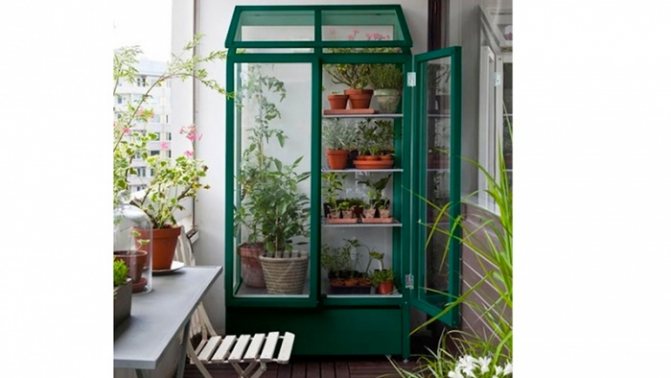
To create a mini-greenhouse with your own hands, you can use an old cabinet if it has glass doors. It is brought out to the balcony and placed with the back wall against the wall. To provide the best light for the plants, the cabinet should be made more accessible to sunlight. In this case, it will be necessary to dismantle its rear wall. You can tighten it with transparent film or polycarbonate sheet.
During the day, the greenhouse doors can be kept open, which will give the best illumination to your balcony under normal temperature conditions. In such a greenhouse, you can not only grow plants, but also breed chicks. To provide plants with illumination on cold days, you need to use a phytolamp. The seedlings grown in a mini-greenhouse will be hardened. This will ensure the resistance of plants to unfavorable external conditions when they will already grow in the open field.
Types of balcony greenhouses and their use
Window sill problems
The only way out for city residents in such circumstances is to set up a kind of greenhouse on the windowsills of the apartment.
But even in this case, one cannot do without difficulties, not every apartment has window sills of appropriate sizes, and all these jars, pots and boxes not only do not decorate the apartment, but cause a lot of inconvenience, spoiling the appearance and contributing to a change in its internal microclimate, by the way say, not entirely healthy for people.
- Plants suffer no less.
- Trying to grow as many seedlings as possible, we strive to place the pots with it close to each other, from this plant they turn out to be elongated and stunted.
In short, there is nothing good about it.
The solution to the problem is a mini greenhouse
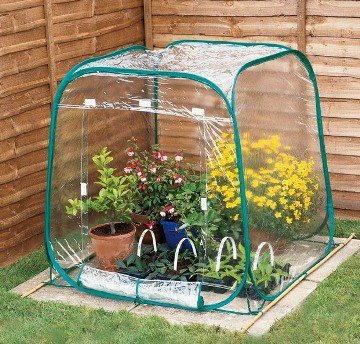
Photo of a mini greenhouse.
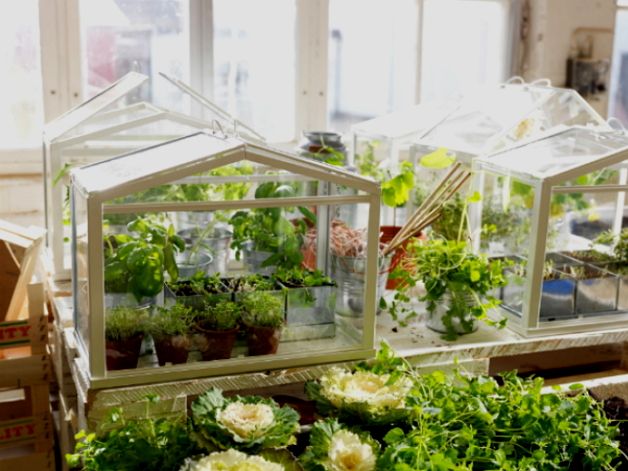
- Recently, home mini greenhouses have appeared on sale, designed to solve this issue.
- You can place them almost anywhere in the apartment.
- The balcony in this case is the most profitable option in terms of good lighting.
The advantage of these structures is:
- Compactness
- Ease of assembly - disassembly
- Low price
- Ability to grow a sufficient number of plants in a small area
Using mini
Watching videos about exotic countries, you have probably admired the bizarre architecture and balconies with lush vegetation more than once.

Flower garden.
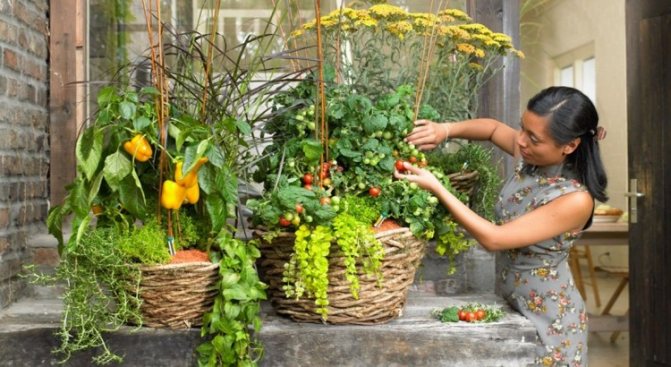
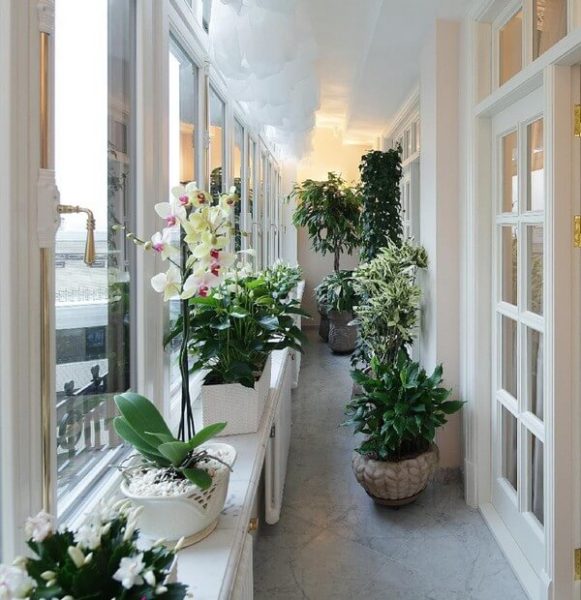
You can use a mini greenhouse on the balconies not only as growing seedlings for subsequent planting in open ground, you can grow thermophilic flowers there and keep flowers that decorate your balcony in the summer.
All the benefits

Greenhouse - rack.
- A mini greenhouse for a balcony is arranged according to the principle of a rack with a transparent greenhouse film.
- On numerous shelves, you can successfully place a lot of different plants and seedlings.
- At the same time, the balcony greenhouse can be easily dismantled in the warm season.
- When assembled, it does not take up much space, and if desired, it can be freely transported to the dacha using not only your own car, but also using public transport.
- The weight of the structure varies, depending on the brand and manufacturer, within 3 - 5 kg.
Device - as easy as shelling pears
- The balcony greenhouses are arranged very simply, on the assembled frame is stretched, created to fit its size, a covering made of transparent plastic film.
- As in any other greenhouse or greenhouse, this design provides a device that allows you to care for the plants inside.
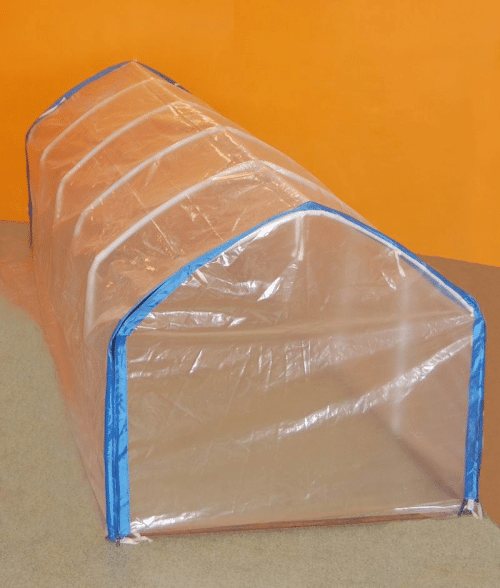
- The manufacturers did it very simply by arranging a folding cover sheet on one side, which is fixed with two zippers in the closed position.
- By purchasing a balcony greenhouse, everyone can choose the size based on their needs and the size of the apartment or balcony.
The standard dimensions of such structures are as follows:
- Height from 980 to 1870 mm
- Width from 690 to 890 mm
- Depth from 390 to 490 mm
A mini greenhouse for a balcony of the smallest size has two shelves for placing seedlings, and the largest one has five.
The balcony is like a greenhouse - we say yes
Seedlings on the windowsill.
Someone might think that this greenhouse is completely useless for those who have a wide and roomy window sill. This is a complete delusion.
We have already said that an enclosed space allows you to create a good and healthy microclimate for plants, even for the likes of lemon (see Growing a lemon: some useful tips), a microclimate that cannot be recreated in an apartment.
Berries in winter.
- A mini greenhouse on the balcony can be used not only for storing flowers and growing seedlings, but also for year-round use for growing greens or berries. (See Growing strawberries all year round)
Imagine how pleasant it will be for the New Year to treat your loved ones with self-grown berries.
Of course, it will not be possible to grow many berries, but it is quite possible to provide your family with green onions, parsley, dill and other herbs all year round.
- To provide plants with a sufficient amount of sunlight in winter, it is enough to purchase and install a phyto lamp in the greenhouse.
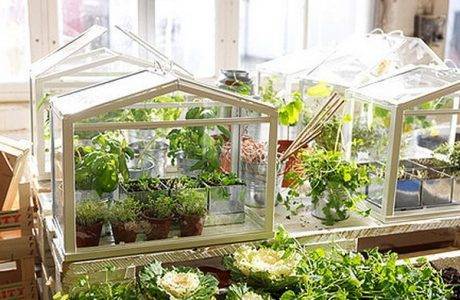
DIY greenhouse for seedlings on the windowsill
For a long time, gardeners have grown seedlings at home without the use of special structures. To obtain high quality and healthy plants, it is advisable to use small greenhouses. Such a indoor greenhouse creates the necessary microclimate for growing plants, which will maintain the necessary lighting, temperature and air humidity.
Important! When using these structures, it is necessary to constantly monitor the air humidity, which is their only drawback.
It is recommended to use the following windowsill greenhouses:
- "House". A miniature copy of summer cottages with a rear or front opening. This type is better suited for the germination of dived seedlings, and it is also possible to grow the necessary greens in it throughout the year.
- "Breadbasket". These greenhouses are made of transparent materials with a front opening for plant care.
- "Container". For such a design, containers for storing food are suitable.It should be deep, with a drainage system to drain excess water.
Materials for making greenhouses in an apartment
If you do not have a desire to spend money on purchasing an automated greenhouse, you can design it from improvised home materials. For these purposes, you can take an old aquarium or containers for storing food. Homemade racks are also suitable, which are covered with protective materials to create the necessary microclimate.
For successful plant cultivation, all home mini-greenhouses must meet the following requirements:
- providing a stable and favorable microclimate for growing plants;
- high strength of structures for use over several years.
Important! The most popular and practical option is a window-mounted rack, which should be made from plexiglass for better light penetration. For this, it is recommended to purchase sheets with a thickness of 10–12 mm.
Step-by-step manufacturing instructions
A home greenhouse or other structure can be built in a few hours. To do this, you must follow the generally accepted algorithm:
- Choose a suitable location for your home greenhouse.
- Prepare a place for a greenhouse. To do this, it is necessary to take into account the season and the room temperature.
- Choose the type of greenhouse you like.
- Draw up the necessary drawing and prepare all the components.
- Prepare all elements of the frame and roof, if you need it.
- Connect all frame elements with glue or nails.
- Seal the joints with sealed material.
- Cover the frame with foil or glass.
- If necessary, you can hang phytolamps and a thermometer to measure temperature.
Operation and care
A home greenhouse should be easy to operate so that it can be washed, changed control or programmed at any time. All the plants that are in it should be clearly visible, it should be easy to get to them. In order for the greenhouse to serve for a long time, it must be installed correctly, and, if necessary, properly dismantled, and also not to violate the operating rules.
How to grow seedlings on a heated and unheated balcony
If the room is heated, you should make a comfortable rack (read more in the article “How to make a rack on a balcony with your own hands cheaply and beautifully”), where you will place boxes with soil for germinating seedlings. Manufactured or purchased containers are covered with a film on top, which is removed after germination. Watering, lighting, complementary foods, temperatures are selected, taking into account the characteristics of the cultivated crop. Difficulty may arise when a glazed heated loggia exits to the north side. In this case, you will have to make lighting on the balcony (lighting with fluorescent lamps).
If the loggia is not heated, then you will have to pay special attention to the temperature conditions. In order for the seeds to sprout, containers with seed are first kept in a heated living room. As soon as the shoots appear, they can be transferred to the loggia. The second solution is to create a greenhouse with optimal temperature conditions. The emerging seedlings, along with the boxes, are rearranged into an erected bookcase under polyethylene or a purchased mini-greenhouse.
The main thing is that the shelter is reliable and well-retaining heat. A fluorescent lamp is hung over each seedling. If necessary, the greenhouse is ventilated.
Home garden with arugula and spinach
Arugula on the balcony
The sowing caterpillar (aka arugula) is a type of plant in the cabbage family. Gourmets eat fleshy and jagged leaves. The piquant taste is appreciated by culinary experts all over the world. So, having such a culture at home is not a bad idea. Its peculiarity lies in almost 100% germination, which favorably distinguishes it against the background of basil and parsley.
The most suitable varieties are Rocket, Rocco, Poker, Euphoria, Sicily.
How to grow arugula on the balcony:
- Choose well-lit window sills (which is important in the summer). In winter, you will have to take care of lighting the balcony greenhouse.
- A rich harvest is possible only from May to September. It is recommended to plant new portions of seeds on the loggia at intervals of two weeks.
- Use fertile soil - ready-made substrates for growing seedlings, universal soil mixtures.
- Water your beds regularly. If there is not enough water, the vegetation will be disrupted along with the nutritional value of the arugula leaves.
As containers for planting, you can use any boxes, pots made of plastic or wood. The soil layer should reach 15 cm. Before planting the seeds, special holes are made in the soil. The distance between the rows should be about 3 cm. The buried seeds are sprinkled with a layer of fertile soil.
Arugula on the balcony will delight the gardener with the first shoots after 3 days. The first week is to spray the soil with a spray bottle.
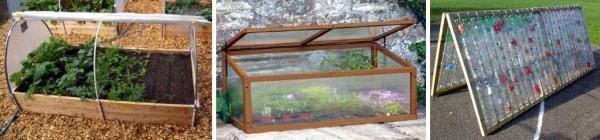
Greenhouse types
Greenhouses for summer cottages come in a wide variety of forms. To determine what type your greenhouse will be, you should get acquainted with the main ones.
Table. Types of greenhouses.
| Greenhouse type | Description |
Breadbox | A greenhouse that opens like a regular breadbasket. It can be factory-made or home-made. Convenient in that the lid does not strive to fall down and does not need props, unlike, for example, the "butterfly". |
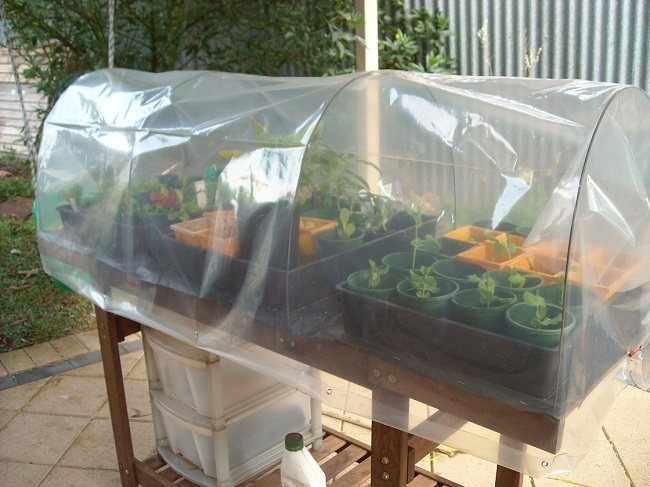
Arched, arched | One of the simplest greenhouse options. Several plastic or wire arcs are stuck into the ground along the bed and covered with spunbond or polyethylene. It is quickly disassembled and assembled, moreover, this process can be carried out by almost any gardener. |
Thermos | The lower part of this structure - the base - is sunk into the ground, on the surface there is only a greenhouse cover. This way of arranging a home for plants allows you to keep warm inside the structure for longer. |
Butterfly | An arched greenhouse or a house, has two doors that open outward. Can be factory made and DIY. Provides uniform access to plantings from both sides. |
House, gable | One of the simplest types of greenhouse is two battens connected in a ridge and covered with polyethylene or other material. It is quick and easy to install, but it is unstable and is used more often as a temporary portable structure. |
Each of the above types has certain variations, supplemented by one or another element. For example, an ordinary greenhouse-bread bin can be installed not on the ground, but on the base, thereby making it higher. There are also a lot of greenhouses made with your own hands from scrap materials - for this, ordinary sports hoops, window frames, bed backs and much more are used. Sometimes it is enough to delve into the shed in the country, where unnecessary things are put up, and find several items that will easily get a new life in the form of a greenhouse frame. This requires only a little skill and imagination.
Greenhouse-bread bin on a wooden base
Cheap greenhouse from scrap materials
Greenhouse from an old barrel
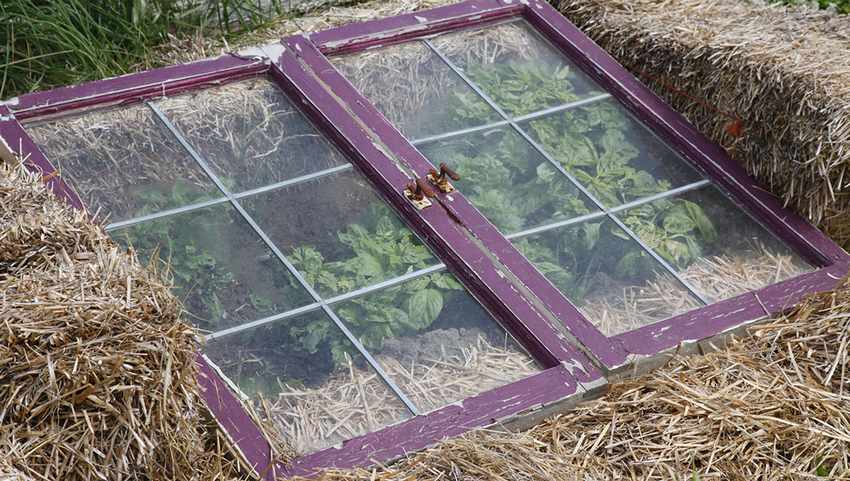
Greenhouse made of straw and glass frame
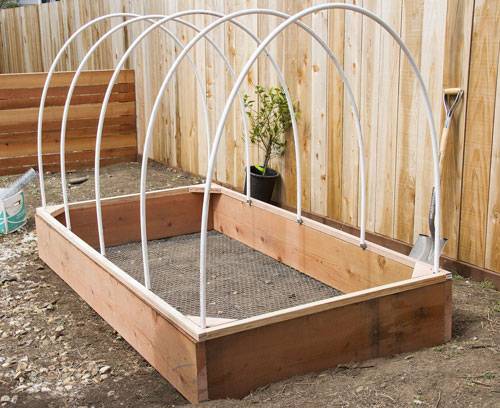
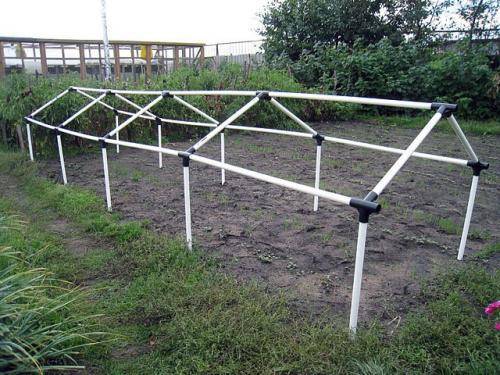
Using plastic pipes for a greenhouse device
Oddly enough, but plastic pipes are just perfect for making a greenhouse for a balcony. With this use, plastic will have a number of advantages:
- All structural components are available from the hardware store;
- Plastic is resistant to a wide variety of weather conditions, decay and corrosion, so the structure is guaranteed to be durable and have a good appearance;
- The plastic is very light, so no extra load will be exerted on the supporting tile of the balcony;
- The average assembly time for plastic paint for a greenhouse is 1-2 hours.
Some difficulties can arise when welding plastic pipes and attaching them to each other. This issue can be solved in three minutes by watching the video below: "Connecting pipes without a soldering iron."
The shelves in the greenhouse can be made of any materials that are available, but the best option is to buy special plastic trays designed for planting plants that will look great in plastic construction. Shelves can be fastened using conventional fittings.
Almost any structure can be assembled from plastic pipes.
Option for mini - greenhouses with a frame made of metal pipes
If you want to make a real greenhouse on your loggia, you can consider the option involving the creation of a metal frame. You can attach such a frame to the wall of the loggia, then close the finished structure with polycarbonate film.
This option is ideal for creating a greenhouse on an insulated balcony. A film made of polymer material will protect plants from wind, precipitation, and moisture drops. In addition, such a greenhouse will receive a sufficient amount of sunlight, without which plants cannot fully develop.
Such a greenhouse on the balcony can have different sizes, depending on the free area of the loggia. The algorithm for creating such a greenhouse greenhouse for a balcony involves the following steps:
- balcony layout;
- installation of the frame;
- film stretching
Advice! To prevent cold air from entering the greenhouse through the film, the film is attached to the frame on double-sided tape or fixed with additional slats. It is undesirable to make a greenhouse more than three meters in length.
Do you want to figure out how to make a greenhouse on the balcony to enjoy the greenery all year round, enjoy the flowers? On the Internet, they offer a lot of different options, we will analyze the most common types of greenhouses for balconies.
Sequencing
- First you need to clear a place for the greenhouse, if necessary, level the floor on the balcony.
- Further, the selected site is covered with mesh, film, or special fiber.
- Do not forget about organizing a special drainage layer inside the contour so that there is no stagnation of moisture, otherwise the roots of the plants will rot.
- Fertile soil is placed on the finished drainage layer.
- In hot weather, instead of a film, you can use a net, growing tomatoes, cucumbers, peppers on your loggia all year round.
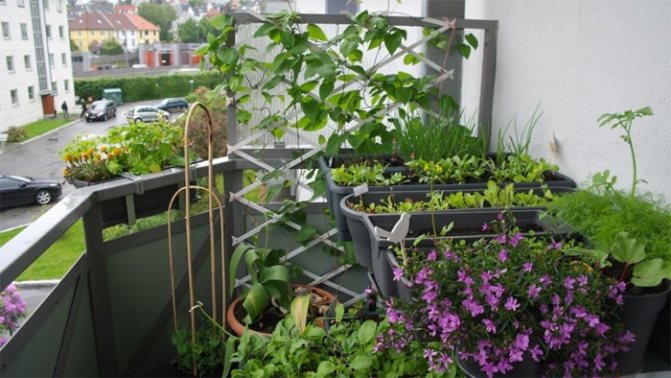
- For climbing plants, for example, for growing stock roses on the balcony, special supports are required.
If you wish, you can choose one of several options for organizing some of the parts that are most suitable for you in the greenhouse. For a greenhouse, you can come up with a folding film canopy, make a closing lid, create a rising window.
Advice! To prevent corrosion, metal arcs can be replaced with plastic pipes, thus reducing the overall weight of the structure.
Greenhouse for growing seedlings
If the owners of the dacha do not have the opportunity to make a greenhouse on the site and grow seedlings of vegetable crops on it, a balcony can be adapted for this. This is the simplest version of a greenhouse, since the premises are used as a greenhouse only for a short period of time, for example, from March to May. When the plants are planted in the open field beds, the balcony is used for other purposes.
On a heated balcony
It is especially easy to make a greenhouse if the room is heated. Boxes with soil are placed on the racks, and seedlings of the necessary crops are grown in them. The boxes are simply closed on top with a film, and after the emergence of seedlings, the shelter is removed, and the plants are cared for according to the specific culture.
The advantages of growing seedlings on the balcony:
- Watering is carried out in a timely manner;
- Diseases and pests are detected at the first sign;
- Seedling care can be done daily;
- Seedlings are always under supervision.
Difficulty can arise only if the balcony faces the north side or is shaded by tall trees. Then the lighting is arranged with fluorescent lamps, which are suspended directly above the boxes with seedlings.
About the possibility of installing balcony greenhouses and greenhouses
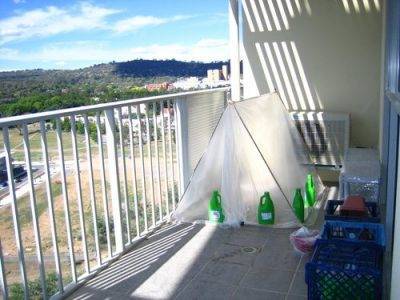
Closer to spring, containers and trays with seedlings appear on the windowsills of summer residents and home gardeners. However, the area near the windows is limited, and the plants do not have enough space. A better place for germinating seeds or permanent cultivation of crops is a balcony or loggia. An open structure is not suitable due to the low temperature in the cold season, and a glazed and insulated room is ideal.
There are many ways to improve the conditions for the growth of vegetables, herbs and flowers, traditional greenhouses are recognized as one of the most rational ones. They differ in shape and size, but the purpose of all structures is the same - to make the process of growth, flowering and ripening of crops comfortable. The quality of development, fruiting, and ultimately the yield depends on this.
In fact, the insulated balcony is already a greenhouse.
The space of closed loggias, verandas and balconies has the characteristics necessary for growing plants:
- maximum natural light;
- the possibility of arranging effective ventilation;
- sufficient free area to accommodate mini-greenhouses;
- proximity to the place of residence, which means guaranteed regularity of care.
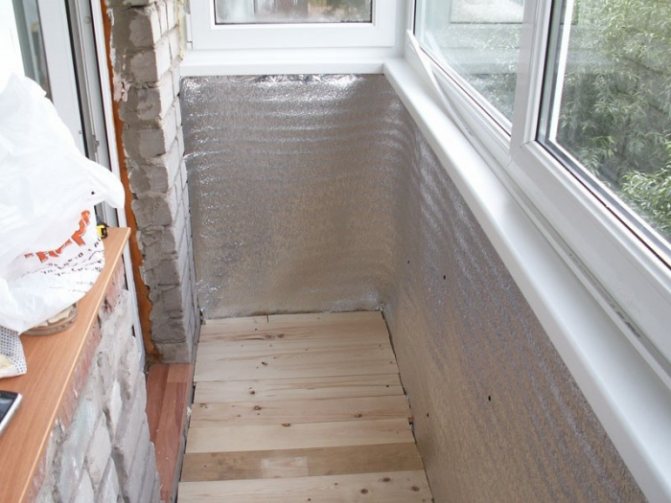
In regions with a temperate and cold climate, insulation is mandatory: double or triple glazing, insulated walls, floor and ceiling. In addition, it is necessary to high-quality waterproofing of the concrete base, since the irrigation process is associated with the risk of flooding the neighbors.
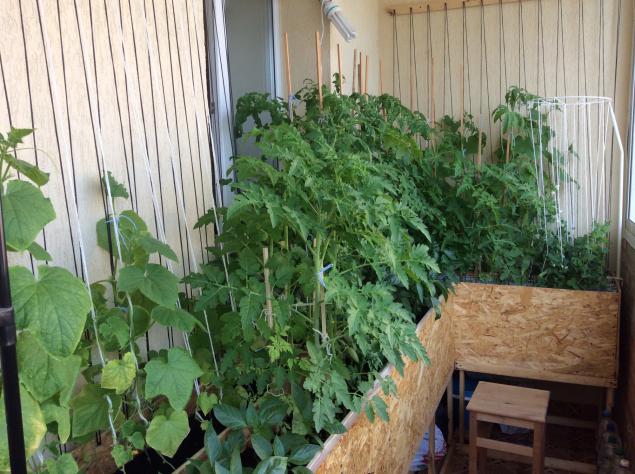
Cucumbers, squash, and tomatoes love the extra warmth and moisture
If you allocate only one wing of the room for plant cultivation or growing seedlings, you can put a table with an armchair in the second. Thus, to combine a useful activity with a pleasant rest.
Thus, balcony greenhouses are used for various purposes:
- only for growing seedlings for summer cottages;
- to grow berries or vegetables all year round;
- for summer plantings or for the care of a flower garden (winter garden option).
Videos about mini-balcony greenhouses and greenhouses
Advantages of ready-made greenhouses (greenhouses) and video instructions for assembly:
Economical mini greenhouse for seedlings:
Plants, especially at the initial stage of development, need special care, warmth, and good lighting. Having made a small greenhouse or a greenhouse for a balcony on your own, you can create excellent conditions for the growth of dozens of seedlings or adult plants. An alternative option is purchased collapsible models with convenient unfastened PVC film covers.
Probably few of the avid gardeners can boast that they have their own greenhouse on the balcony. Most often, summer residents do not have suitable conditions for growing seedlings and other plants in an apartment. Of course, the only sure way out in this case is the garden on the balcony, the device of a small mini - greenhouse in the apartment.
True, in such situations, gardeners are faced with quite serious difficulties:
- Window sills are rarely wide;
- A lot of plants in the apartment are inconvenient;
- The abundance of pots, plastic containers scattered around the windows spoil the appearance of the room;
- The internal microclimate of an apartment is changing, and not for the better for a person.