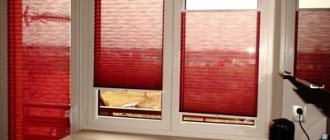
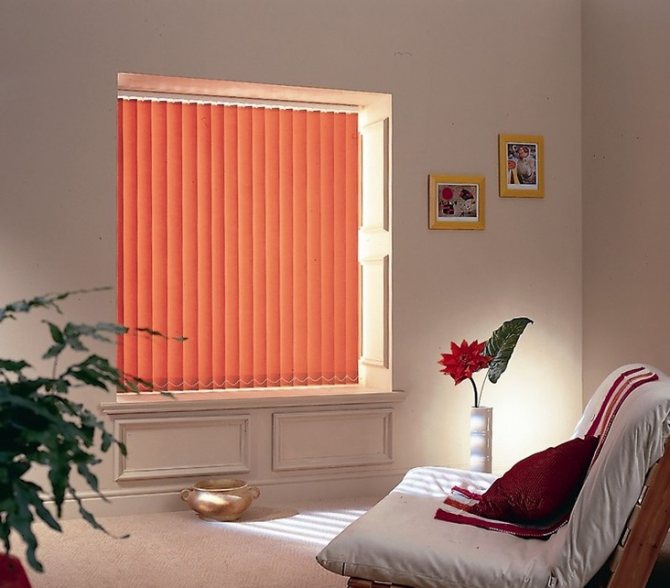


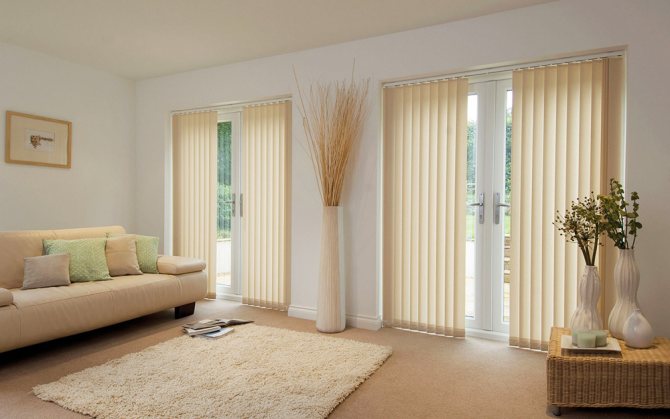
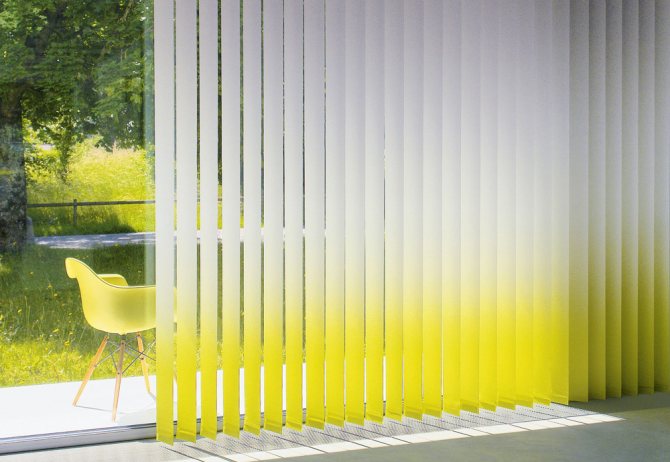
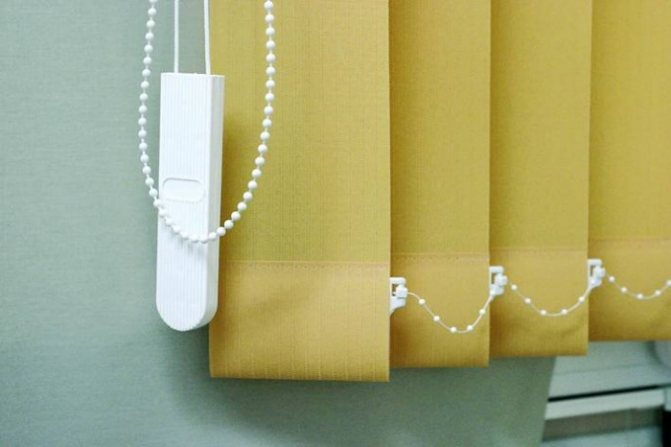
Blind-type curtains differ from the classic version of fabric curtains in their design, functionality and the additional ability to regulate the amount of penetrating daylight. This is achieved by changing the location of the lamellae.
If they are placed perpendicular to the glass (for vertical and horizontal structures), then the illumination is maximum, if in parallel - the complete dimming of the sun's rays. Not everyone can buy expensive factory products, but everyone can make them from improvised means.
Features and Benefits
These blinds are common and have many good characteristics. With their help, you can visually expand the space of the room and increase the height of the ceilings, and this is just very convenient for small rooms. They also have the great advantage that they can be placed on openings of absolutely any shape - oblique, arched, curved or round. The cornice can be not only straightforward.
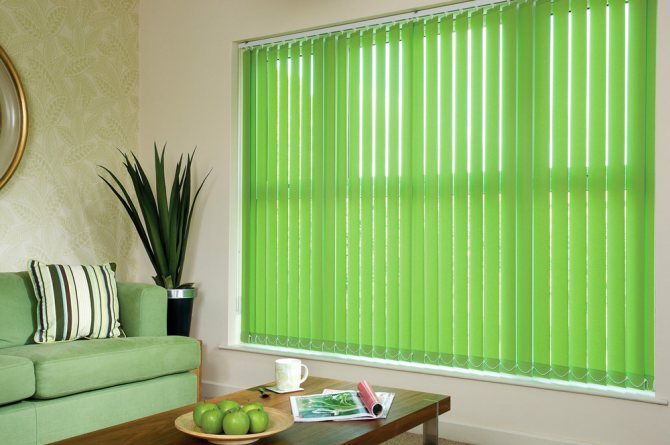
You will be surprised by the variety of shapes, shades, colors and textures of vertical blinds. In addition, they can be made to order according to your individual preferences.
They are very easy to maintain, they do not need careful maintenance. They are quick and easy to assemble and disassemble. They will be excellent decorative elements for your interior, letting in scattering rays and preventing the penetration of too bright light. And also they are easy to manage, they have mobility, simplicity and practicality.


Where to begin?
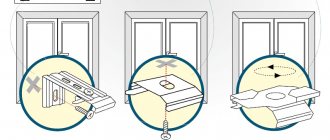
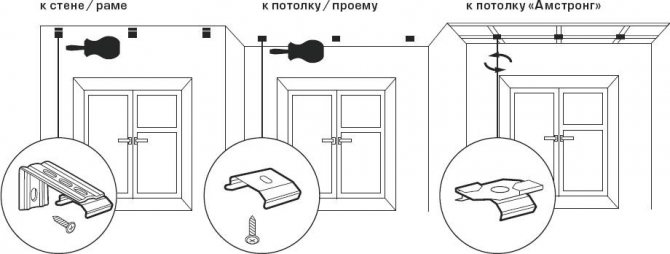
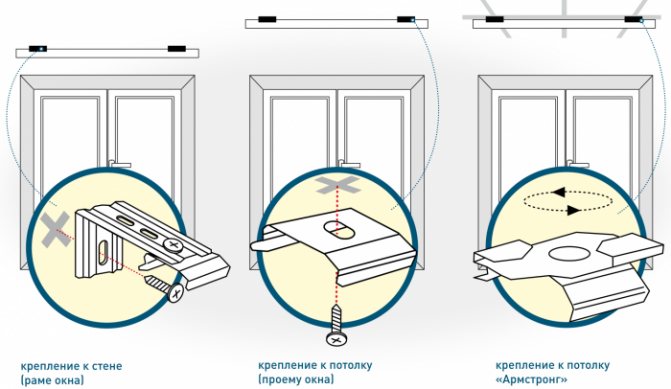
The scheme of attaching the blinds to the window.
It will be easier to make vertical blinds, so let's dwell on the description of their technology. We select the roll of paper so that it is 2 cm narrower than the width of the window opening.

We measure from the bottom cut 3 cm and bend the sheet. It is necessary to fold the length of the paper equal to the height of the window with an accordion. We place the accordion under the press for 2-3 hours.
Now you need to find the middle of the folded paper.
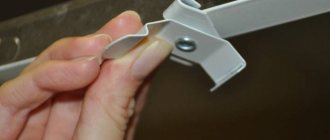
On both sides of the middle, at a distance of 3 cm, through punctures need to be made. An awl will do quite well for this purpose. A wooden strip with symmetrical holes should be placed on the top of the vertical blinds. The paper is attached to this strip with tape or simply glued.
Design
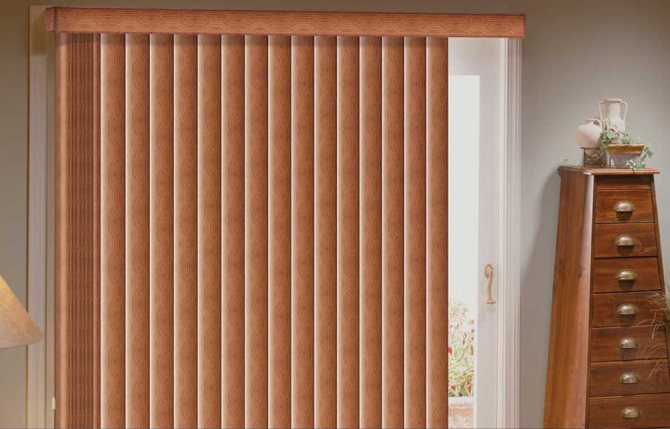
In the manufacture of blinds, various materials are used, such as plastic, fabric, wood, bamboo.
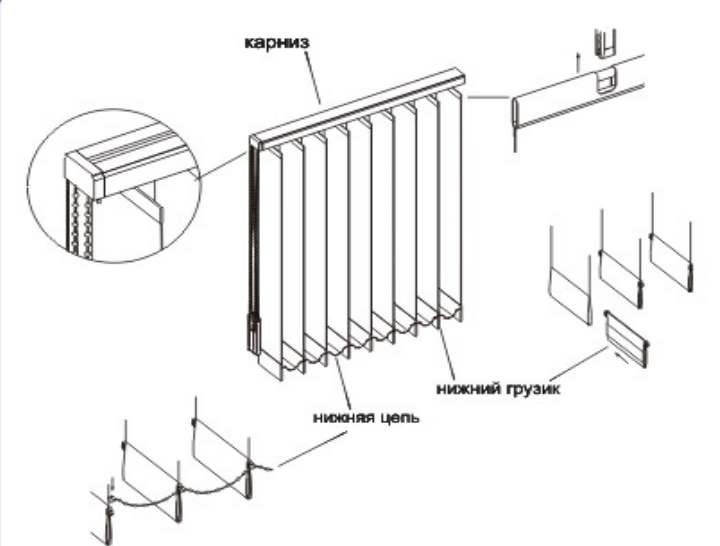
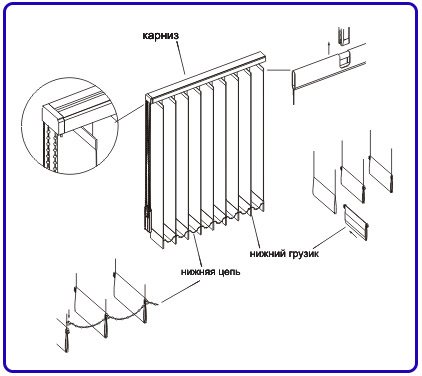
The design of the blinds includes the following details:
- plates covering the window;
Lamels- Frontons control elements is the basis of the device, on which the lamellas are fixed. The main material from which the profile is made is considered to be aluminum. Less common are plastic counterparts, but they are not practical and capable of deformation;
- Runners is plastic devices in the cornice, with the help of which the cornice and lamellas are connected. Thanks to them, the lamellas are able to spin and move. As a rule, there are as many runners as there are slats;
- Weighting agentplaced at the end of the strips - lamellas. They serve to prevent the blinds from being blown by the wind and to hang evenly. Each lamella is equipped with it;
- Chainfastening the lamellas from below.


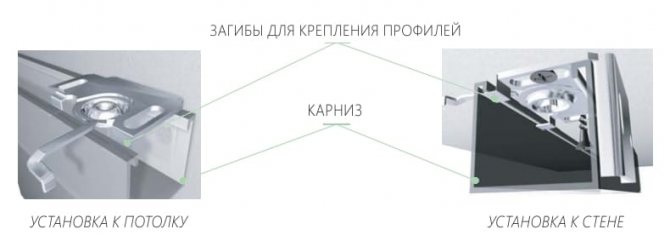
Ceiling installation option
Like the ceiling version of the curtain rod, it is possible for curtains to install the curtain rod on the ceiling surface as well.This placement is entirely justified and perfectly decorates the interior of any room, especially the ceiling mount when the slats are up to the floor.
However, the installation of the cornice to the ceiling cannot always be carried out, for example, when installing a stretch ceiling, it is impossible to install latches through the surface of the covering sheet.
With the ceiling version, it is often necessary to install latches on an not entirely flat surface, while when the cornice itself is installed, it will not always fit snugly to the ceiling, if these are small errors, then you can use a decorative strip glued to the cornice. When the differences are very significant, then, as an option, alignment with the help of linings is provided, but in this case this option should also have reasonable limits, because the decorative molding, although it is a flexible plastic tape, is not able to hide large differences.
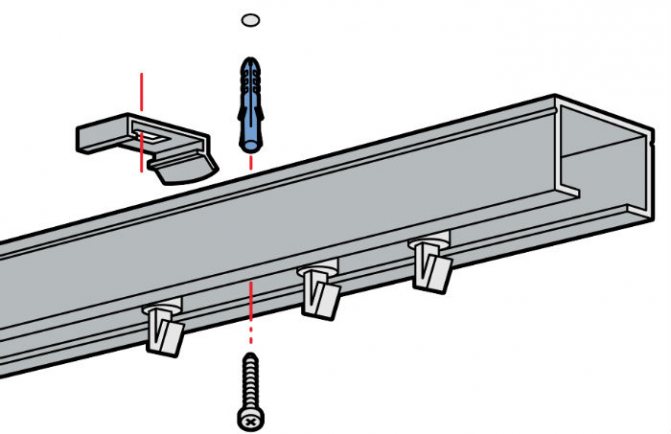
In general, the work is carried out in the following order:
- the distance from the wall at which the installation of the latches is planned is determined;
- using a marking cord, the line for installing the latches is bounced off;
- the number of latches is calculated, and the places of their installation are marked;
- using a perforator, holes are drilled and plastic plugs are installed;
- latches are installed with screws;
- then the cornice is attached.
Special mount for installation on armstrong ceiling rails
The peculiarities of installing latches to the ceiling surface appear only when it is necessary to install a cornice to a plasterboard structure or an Armstrong-type ceiling. Here you need to use special butterfly bolts for installation in the cavity of the ceiling space, or special clips that are attached to the rails, otherwise the installation process is identical.
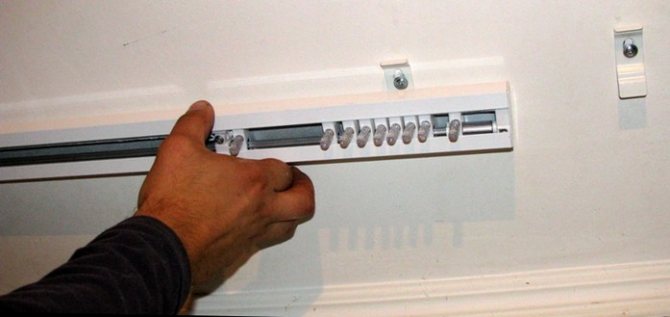
Assembly instructions for vertical blinds
To assemble the blinds, you will need to stock up on a screwdriver, a drill with a perforator, a tape measure, a stepladder, a screwdriver and fasteners.
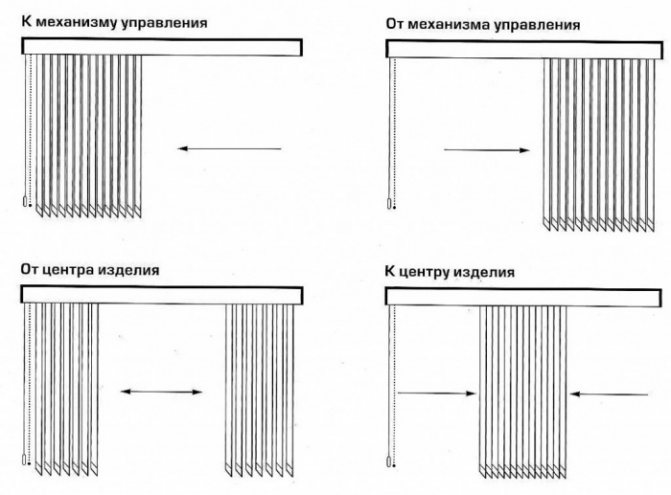
In addition, you should decide how the lamellas will move along the cornice.
There are several ways:
- The lamellas are extended from the controlled element, sliding towards the element;
- Extending the slats to the control when they are on different sides;
- Extension of the slats from the center on both sides;
- Collect to the center of the product.
You can choose the option that suits you best and suits you.
How to hang vertical blinds on a window
There may also be several options for attaching the cornice:
- on the wall;
- on the ceiling;
- on the window frame.
Next, you need a tape measure, a pencil and a building level to outline a straight line for the location of the brackets.
On a note: Runners are special devices for hanging lamellas on the cornice.
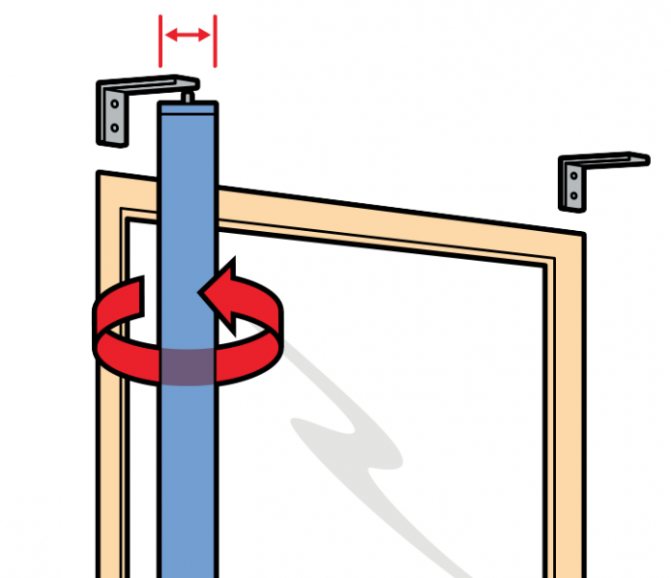
First you need to outline the desired height. For more accurate measurements, use a building level. Using a tape measure, you need to find the midpoint at which the cornice and the window are combined to determine the place to which the cornice will be located. For a 2-meter cornice, two brackets will be sufficient, and if it is larger, then at least three should be made.
Fasteners should recede from the walls to prevent the lamellae from snuggling to the battery, otherwise yellowness may appear on the lamellae. Brackets should be attached to the designated places to measure the required hole, and then fix them using a screwdriver or screwdriver. The holes are drilled about seven centimeters deep, and dowels are driven into them. The cornice is installed using special bracket clips, with which the profile is simply snapped into place.
Important: You need to carefully approach a flat horizontal line, and also that the indents from the window are the same.
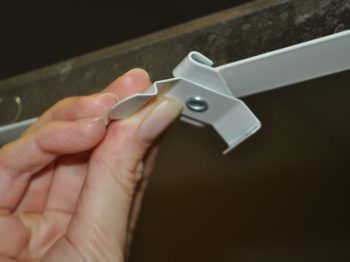
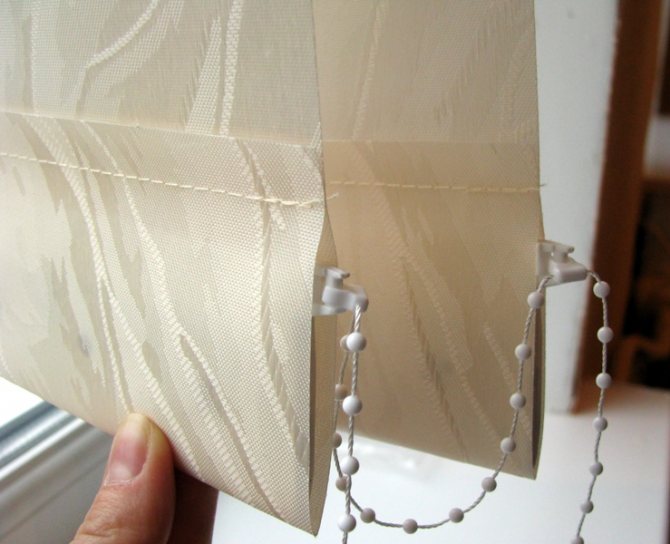
Next, the sliders unfold at a right angle relative to the window.Slats are inserted into them. The runner also has a special clip or seam into which the tongue at the top of the canvases fits.
From below, a weighting agent is installed on each lamella and the canvases are fastened with the help of a chain. The operation of the device is checked by rotating and sliding the blinds with a control element. All installation work has been completed.
Subtleties of installation
The practical process of how to assemble vertical blinds step by step consists of the following operations:
- Plastic dowels inserted into the holes are cut to the level of the surface for a snug fit of the support strip of the brackets.
- Screw in the screws, check the horizontal position. The planks can be bent slightly for accuracy if necessary.
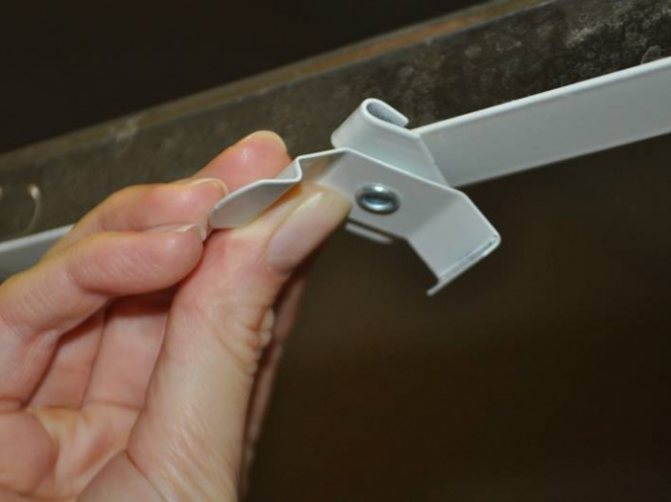
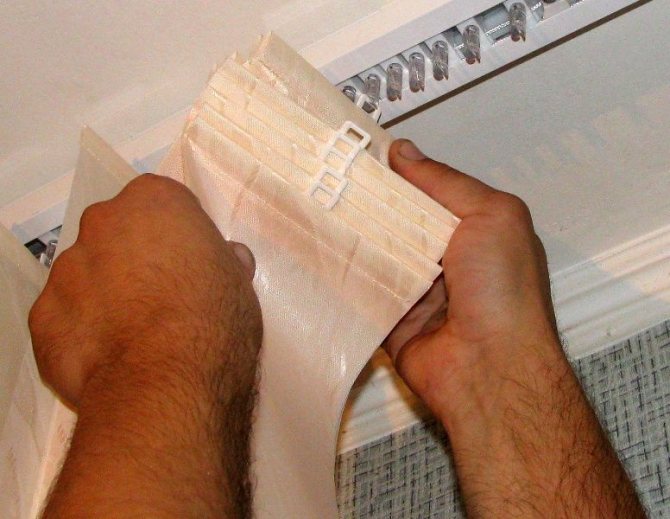
- Snap the guide into the mountings. Drive the runners to the open position.
- Begin to insert each lamella into the slider lock until it clicks. It is better to do this in the same order in which they are folded - this is how the pattern on the ribbons will match.
Slide each slat into the slider lock until you hear a click - Weights are attached to the bottom of each tape. The pockets for them are already ready, if the order was made according to the size. Otherwise, you will have to hem it yourself. It will take 5 - 7 cm to roll up the fabric (depending on the size of the weight). The first product must be attached to the installation site and check what is obtained before finally installing the blinds. The rest of the lamellas are made according to the pattern.
- Connect the lower ends of the hanging strips with a chain. For information on how to assemble the runners on vertical blinds, see this video:
Thus, the assembled mechanism is checked for smoothness of movement, uniformity of operation of all elements of the actuator. For details of the installation of vertical blinds, see this video:
If there are any comments, you must immediately contact the seller to maintain the warranty and possible replacement.
Exploitation
Blinds need proper care. There are a few rules of thumb for what not to do to prevent unwanted reduction in service life and breakdown. If there are animals or children in the house, care must be taken not to pull the blinds. Damage to the mechanism is possible if the blinds are pulled open and closed frequently. Children can play around in this way, so it's best to keep the control out of the reach of children.
Over time, the blinds will get dirty and dusty. Blinds made of plastic, aluminum or wood are wiped with a damp cloth, and canvases made of the material can be washed by disassembling the structure beforehand.
How to check mobility
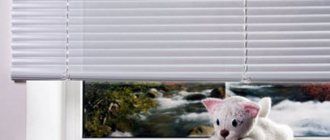
Blinds assembly options.
Next, we check the mobility of the vertical blinds. If a fishing line was used as a thread, then the mobility will be ideal: we pull the thread down, and the vertical blinds smoothly slide up. The clamp was fixed and the required position was obtained.
The edges of the bottom of the vertical blinds will sag. To eliminate this small flaw, you can equip the lower part of the blinds with a thin plate made of any material, gluing it with double-sided tape. For lovers of more sophisticated interior elements, it is recommended to connect imagination.
It will turn out very attractive if both lower edges are brought together and fastened with glue or the same tape. The result will resemble a heart. Isn't it an option for lovers?
Preparation
Before installing the blinds, you need to prepare a minimum of tools:
- construction pencil; level (the longer the better); tape measure; puncher; screwdriver (screwdriver).
Anchors Ø 6.8 mm are required if they are not included with the vertical blinds brackets.
To imagine step by step how to hang up, in what order the parts and tools will be required, you need to open the packaging of the blinds, lay out all the parts visually, check the completeness with the passport, determine the need for additional materials (according to the chosen method of fastening).
Where can homemade blinds be used and how to repair them?
The device of vertical blinds.
It is clear that do-it-yourself blinds are made for use for a short period of time. This is usually done before the start of the repair.So you will be able to regulate the amount of light entering the apartment and keep the finishing materials from burning out.
Homemade blinds are suitable not only during the renovation period. They can be considered as an excellent alternative to manufactured products in country houses, garages and utility rooms. Homemade vertical blinds are used seasonally: in the summer, they prevent light from entering the apartment, which helps to escape the heat.
It is also easy to repair home-made vertical blinds. It consists of replacing paper (you will have to make a new accordion). When assembling a new product, follow the same procedure.
Diagram of movement of vertical blinds.
Do-it-yourself blinds do not have to be made of paper.
Home craftsmen advise using ordinary starched fabric for this. This makes sense: the material is thinner, the accordion is easy to make with an iron. The fabric can be easily removed and washed, making the vertical blinds more durable.
You can also experiment with the lower part, giving the product completeness at your discretion. But when using fabric for vertical blinds, you need to slightly weight the lower part of the product.
Usually, for this purpose, the lower edge of the fabric is folded in half and sewn about 5 mm from the bend. In the future, a metal (aluminum) wire is inserted into this hole. This will make the blinds heavier and keep their bottom edge horizontal.
Repair for fabric blinds is only needed if the thread that adjusts the height has damaged the fabric itself.
This can be avoided if the edges of the holes are glued with tape or processed with metal rivets with holes. You can overcast holes with regular thread. The edges of the holes will be more durable, which will make hand-made vertical blinds even more durable.
Factory-made vertical blinds can be repaired according to the same rules as described for homemade products. But the replacement of a certain part of such blinds will be visible even to the naked eye. It will not work to hide the flaw, since it is very difficult to choose the material of a certain color scheme.
And there is no need to do this: it is enough to replace several elements at once during the repair. It will turn out very nice and elegant. It will look as if blinds and curtains were specially combined.
Vertical blinds are excellent light protection of the room, they are simple, reliable and almost universal, suitable for decorating not only straight, but also complex openings. Next, we offer detailed instructions on how to install vertical blinds with your own hands.
Where to mount
It is not difficult to hang vertical blinds on your own, but it is important to decide where to attach them, there are only two basic installation options:
- on the ceiling or on the upper horizontal slope of the opening, that is, the cornice is installed on a surface perpendicular to the plane of the window; on the wall - fastening is done on the upper or side walls of the window, here it is necessary to choose the right brackets so that there is sufficient extension of the canvas from the vertical plane, and the lamellas do not cling against the wall.
Installation on non-standard openings
Vertical blinds can be installed on beveled and non-standard openings, they are also actively used in space zoning.
To form a curved opening, flexible guides are used to suspend the lamellas; to fix them to the surface, holders must be installed every 200-600 mm, depending on the shape of the bends and the weight of the blinds.
When installing vertical blinds with your own hands on a beveled opening, it is important that the slats move during the opening of the canvas from the high side to the low. Installation is carried out as follows:
- we collect the blinds and hang the slats; apply in place, outline the line along which to cut the strips; remove the slats from the runners and adjust to size; return the strips to the runners; apply the assembled blinds over the opening; mark the place for the lower bracket; make a hole, insert a plastic element dowels, we attach the lower bracket; we hook the guide with the canvas and, moving it up / down, adjust the position of the upper bracket so that the lower edge of the curtain is strictly parallel to the window sill or the floor.
It is better to trim vertical slats on beveled openings to size after the blinds are installed
And be sure to watch the video review of vertical blinds in the interior.
After choosing the model, color and size, the installation of vertical blinds with proper skill takes no more than 1 hour. All operations described in the instructions attached to the product can be performed independently by 1 person without special professional training and skills. When implementing this measure, it is important to take into account the features of the product and correctly install all structural details.
Where to hang?
If vertical blinds are to be installed on the ceiling, any indentation can be made.
There are limitations for wall mounting as the standard bracket is up to 150 mm long. In both cases, in order to save useful space, the curtain is hung as close as possible to the plastic window. Here you should pay attention to the ledge of the window sill, the distance is calculated as follows:
- draw a visual line from the edge of the window sill to the ceiling, you can put forward a tape measure for clarity or use a long stick, mark a point; add half the width of the lamella and +10 mm to the mark away from the wall / ceiling interface.
Example: the width of the lamella is 128 mm, the projection of the sill along the ceiling is 70 mm. We calculate: 128: 2 +10 + 70 = 244 mm - the minimum distance from the ceiling / wall interface.
How to properly fix the brackets on the wall
If the blinds are mounted in the opening of a plastic window, then the ledge of the window sill is not taken into account, therefore, the indent to the cornice: 128: 2 + 10 = 74 mm.
The length of the lamellas must also be taken into account. If the blinds are to the floor, then a gap of 10-30 mm should be left below for free movement of the canvas. If the canvas is up to the windowsill, then the minimum allowable gap is 5 mm.
For wall mounting of blinds, it is recommended to install the cornice 50-100 mm higher than the upper horizontal slope.
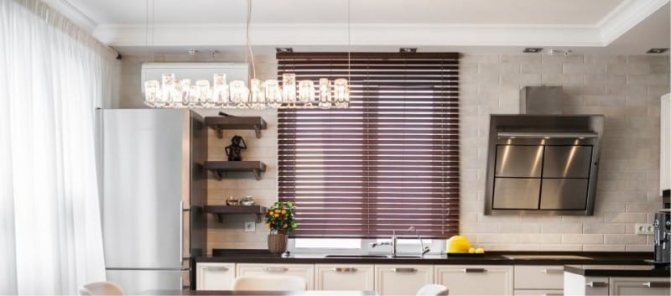
Ceiling mount is optimal if you need to visually increase the height of the room