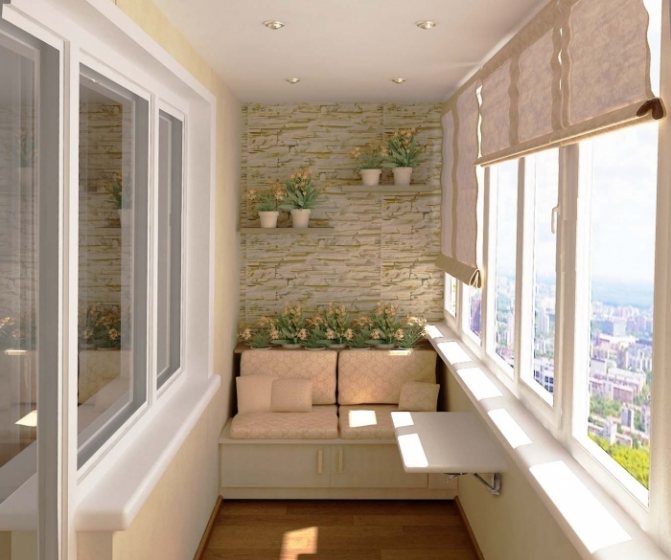
It is possible to lay a warm floor on a balcony or loggia only after full insulation of the floor, ceiling and walls. An important condition is the installation of heat-saving plastic windows. If this is not done, the underfloor heating system will be ineffective. Also, the final goal of the work is determined in advance - so that the legs are warm or just to heat the room. In the second case, it is better to buy a heater. Do-it-yourself floor insulation on the balcony is quite simple. The main thing is to follow the instructions.
What is it - a water heat-insulated floor?
A water-heated floor is a heating system that includes the presence of a pipeline, as well as a coolant mixing unit. In this system, the heat source is water circulating through a special flexible pipe.
Advantages of warm water floors:
- Creation of uniform heating throughout the entire balcony area at the same time.
- Lack of external heating devices, which can spoil the aesthetic appearance of the room.
- Creation of a normal level of humidity in the territory of the balcony, which prevents the formation of mold.
- Easy maintenance of warm floors, in contrast to the care of radiators.
- Possibility of self-regulation of heat exchange in the room or on the balcony.
- In the absence of visual contact with the heater, it becomes possible to plan any design in the room.
- The use of a warm water floor, in contrast to radiators, can save up to 20% of electricity.
- Safety of this heater.
- Long service life.
All of the above makes the installation of a water-heated floor on a balcony (loggia) attractive.

Heating cable
First of all, in the process of insulating the balcony floor, the preferable solution is to install the heating cable in mats: in fact, it is the same cable. But fixed by the manufacturer on a polypropylene mesh. In the conditions of large rooms, this option is not very convenient, since it does not allow bypassing permanently installed pieces of furniture and household equipment. But on the balcony it is the best solution, since it provides fixing of the cable without purchasing and using a mesh or mounting tape. Also on the modern market, you can find sets of cable floor heating, which immediately include a thermostat and a temperature sensor.
The step-by-step process of installing an electric balcony floor heating system includes the following steps.
| Stages | Actions |
| Unfolding mats or cables. | It occurs along the surface of the floor, starting from the point of connection of the power supply. Laying mats in width or length is selected depending on the dimensions of the balcony room. |
| At the end of the cable placement, a temperature sensor is integrated into the system. | To do this, in the wall, from the floor mats to the temperature regulator, a groove is cut into which a corrugated pipe located on the floor is hidden. It runs at an equal distance from the coils of the cable and is fixed to the floor mesh at a distance of 50 cm from the wall. A thermal sensor is inserted into the corrugated pipe, after which its end is sealed with tape. |
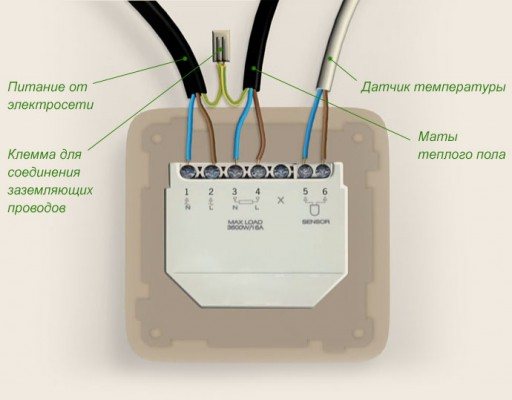
| The power supply wiring is connected to the cable. | The connection point is sealed with the supplied bituminous insulator. The wiring to the thermostat also fits into the groove. Power supply and wires from the temperature sensor are connected to specific terminals in accordance with the instructions. |
| The thermostat is set to a temperature of 25-26 ° C. System power is turned on. | For several minutes, they test the performance of the system and the quality of the insulation, after which they turn off the heating. |
Screed underfloor heating
Finally, the underfloor heating is screed, using the solution recommended by the manufacturer of the cable system. Such mixtures often already contain propylene fiber, which makes it possible to abandon the reinforcement of the screed with a mesh, and are also quick-drying and self-leveling. At the end of the screed filling, the perimeter of the balcony is glued with a damper tape.
After two or three days, you can start installing the topcoat, if the floor was heated on the balcony under laminate, tile or other material. Until the screed is completely dry, it is strictly forbidden to turn on the floor heating system!
How to make an infrared warm floor
Underfloor heating film systems are supplied as special kits. Select which should be taking into account the area of \ u200b \ u200bthe room of the loggia. This set includes:
- heating film, the minimum power of which is 200 W / m2;
- thermostat and temperature sensor;
- set of cables;
- bituminous insulation;
- instructions on how to lay and connect an electric infrared floor.
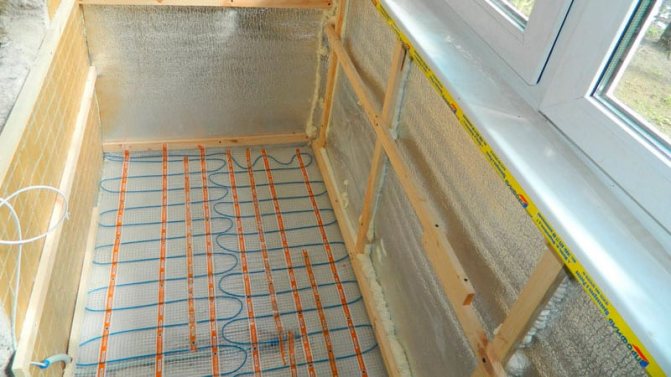
Therefore, the film is spread over the surface of the balcony floor in compliance with several requirements and conditions: distance from the walls by 5–7 centimeters, intervals of 1–2 cm between adjacent strips. And also the location of the busbars on one side only. In this case, the cutting of the film into parts can only be carried out in specially marked areas, it is also important when laying it that its matte side does not face down.
First of all, the installation of the temperature sensor is carried out in the same way as the cable system of a warm floor. In this case, it is necessary to ensure that the end of the corrugated pipe is located between the heating elements. Power cables are connected to the foil in accordance with the instructions. Having cut the layer of infrared film, a contact is pressed into it, after which the electrical wire is connected. All contact groups must then be covered with a bitumen-based insulator. The wires are placed in a groove in the wall. Taking into account the lack of filling the screed, to hide them on the floor, a groove can be cut in the heat-insulating material, the depth of which is 4–5 mm.
The system is connected to the connectors indicated in the instructions. After that, it is necessary to check its operability - similar to checking the cable floor heating system. In case of successful testing, a thick, thick plastic film is laid on the floor. Mainly acting as a waterproofing protection against possible water penetration during the cleaning process on the balcony. The film is laid with an overlap of 15–20 cm. Scotch tape is used for gluing the joints.
The infrared heating system is one of the most preferred options for underfloor heating in a balcony or loggia. Installation work is slightly easier than for electrical systems, with fewer topcoat requirements.
What is the heat source for the water floor?
Install a warm water floor on the balcony with your own hands in an apartment building where there is central heating, almost impossible. Installation of this heater can cause an increase in the hydraulic resistance of the entire system, which is fraught with serious problems. In this case, it is better to use electrically heated floors. A warm water floor is an analogue of a steam heating battery. Therefore, first ask if it is possible to bring steam heating to the balcony by law.
In private buildings or apartments with individual heating, all of the above problems disappear. The warm water floor on the loggia will be more profitable here than the electric one.After all, gas is much cheaper than electricity.
Styling options
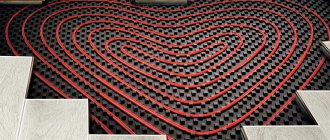
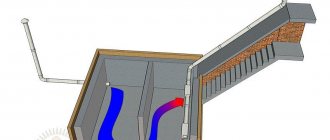
The scheme for laying a warm water floor can have two patterns: snake or snail shape.
The first method is suitable for medium and small balconies. The snake shape is obtained by laying pipes parallel to each other. Since the maximum water temperature is kept only at the beginning of the system, pipe-laying starts from windows or external walls.
The pipes are laid in the form of a "snail" in a spiral manner, that is, the supply and return parts of the pipe will be parallel to each other. This is called a double helix. Here the warm pipe will compensate for the cooling of the adjacent pipe. This option is suitable for large balconies and loggias.
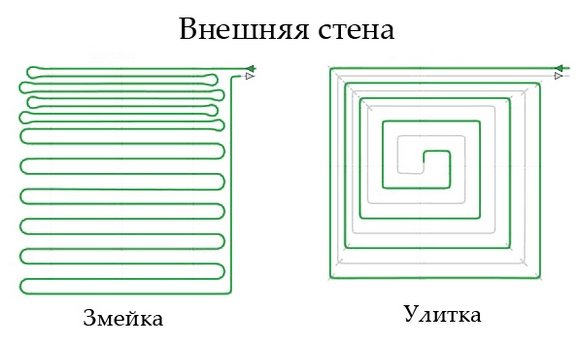
Closer to colder areas, the styling step is reduced
Pipes for underfloor heating
Options for pipe materials for water-heated floors can be of several types:
- Copper... The most reliable and durable pipes. They are the most expensive. In Germany, for example, 80% of pipes are installed from copper. Their service life is 50-200 years.
- Reinforced plastic... The aluminum inner layer of these pipes makes them particularly durable. The high cost of such pipes is offset by their flexibility, strength and excellent shape and temperature retention.
- Polyethylene pipes are much cheaper than metal-plastic and copper pipes due to excessive flexibility and lower strength.
- Polypropylene the pipes are very reliable, resistant to corrosion and are less susceptible to blockages. But at the same time, the installation is complicated due to the lack of flexibility of the pipes.
- Pipes from cross-linked polyethylene... Their wear resistance and strength, incorporated at the molecular level, ensure a long service life.
How to make a water-heated floor with your own hands with this choice of materials? It is important to find quality pipes. To avoid leaks and other troubles, experts recommend choosing between XLPE pipes and metal-plastic pipes.
If you liked the tiles for the balcony floor as a topcoat, then in our article you will find tips for choosing and installing it.
And from our article "Finishing a balcony with a laminate" you will learn that this material is used not only to cover the floor, but also the walls.
Read how to make a balcony rack here.
Floor cladding
After the pouring has been done, it is imperative to level the floor surface. In the case of using such a coating as a laminate at the final stage, it is advisable to purchase special construction cement mixtures. If tiles are to be laid on the floor, then this procedure is not performed.
When performing any work, try to follow the instructions, which must be attached to all types of building materials. This is especially true when you do the heating of the loggia with your own hands.
We agree that underfloor heating can be made on our own, which will significantly reduce financial costs. Although there are certain difficulties in installing them. Electric floors are still considered easier to install.
Collector system
The manifold is a stainless steel comb with thermostats and flow meters. Designed to distribute water through pipes and maintain a certain temperature of the coolant.
The temperature of the heat source of the water floors must be no more than 40 degrees... The set temperature is maintained by thermostats. These devices are:
- electronic;
- mechanical.
Electronic thermostats are programmed to maintain the set water temperature throughout the system. With the help of mechanical devices, you can manually change the temperature of the heat source.
The water collector is installed in a special niche hollowed out in the wall or in a collector cabinet.
Preparatory work
At the beginning of work, it is necessary to decide on a scheme for laying a warm water floor and compile information on the number of necessary tools and materials.
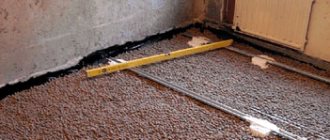
The screed significantly increases the height and weight of the floor
Next, the condition of the balcony slab is checked. Warm floors and concrete screed make the load on the balcony several times heavier... To make it clearer - the load is equal to the installation on the balcony of a large motorcycle. Your task is to assess whether the balcony slab can handle the increased load.
For this, the top floor covering (if any) is removed and the slab is carefully inspected for cracks and collapsed corners. If these shortcomings are present, then cracks and dents are filled with cement mortar, and the missing pieces of reinforcement are welded to the frame. If the balcony slab is very uneven, a leveling concrete screed must be made.
To understand what the thickness of the screed is for a water-heated floor, it is necessary to calculate how much the entire structure, consisting of an insulating layer, concrete screed and floor covering, will raise the floor level. The optimal distance between the lower border of the window and the floor on the balcony according to GOST should be at least 110 cm.
Important: If a balcony or loggia is combined with a room, when calculating, it must be borne in mind that the floor must be the same level everywhere.
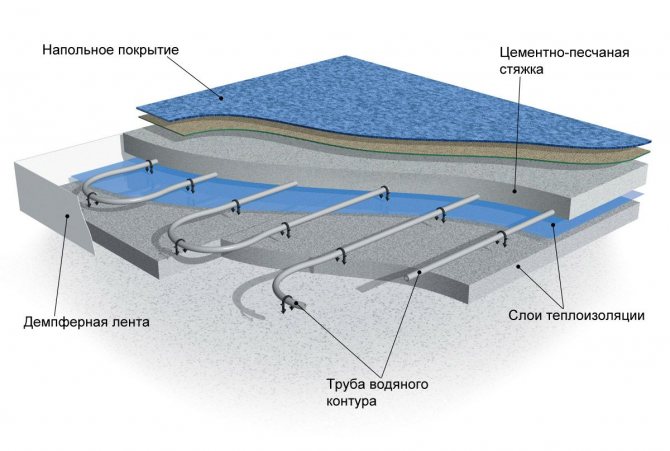
Concrete screed device
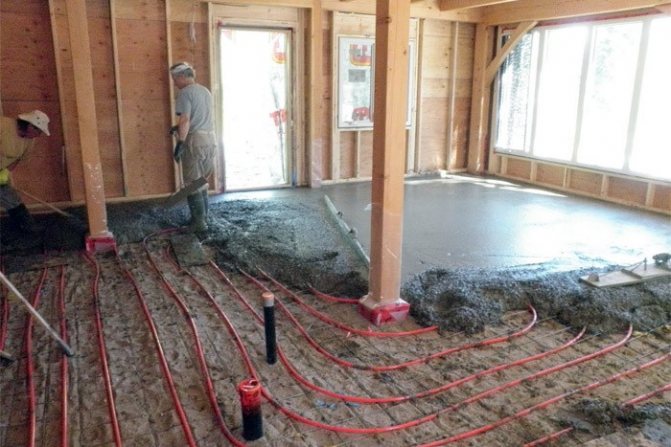
Screed device over pipes of water heating of floors
The concrete screed protects the pipes from mechanical damage and is an excellent conductor of heat from the pipes to the floor covering. But not ideal, so the thickness of the screed should not exceed 5 - 7 cm.
If there is a ceramic tile on top, then from pipe to tile should be 1-3 cm. If not tiles, then 3-4 cm. To make a screed, use high-quality mixtures, sift out large stones.
You can add a plasticizer - it prevents cracking. If the area of the room exceeds 6 square meters, then incisions should be made in the drying screed to a third of the depth so that the screed does not crack during shrinkage.
Quick floor on the balcony
In addition to the screed device, there are several more options for leveling the floor on the balcony. Some of them are described in the article "A few easy ways to make a balcony floor." How much will it cost you to install a warm floor on the balcony? Find out about prices and performers on our website. One of the main materials for underfloor heating is ceramic tiles. Read how to lay tiles on the balcony here: https://oknanagoda.com/balkony-lodzhii/remont-otdelka/vybor-ukladka-plitki.html
You can read about how the screed is laid in the article on our website "Making the floor on the loggia, balcony with our own hands with a screed."
Installation of a warm water floor
Do-it-yourself installation of a water-heated floor takes place in the following sequence:
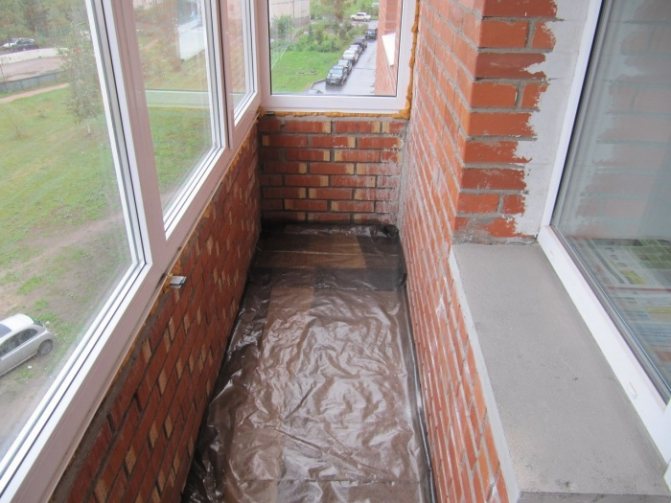
- After complete hardening leveling concrete screed for a warm water floor, a waterproofing layer must be laid on its surface. The edges of this layer should protrude 10 cm above the level of the screed. For this stage, plastic wrap is an excellent option, but other waterproofing materials can be used.
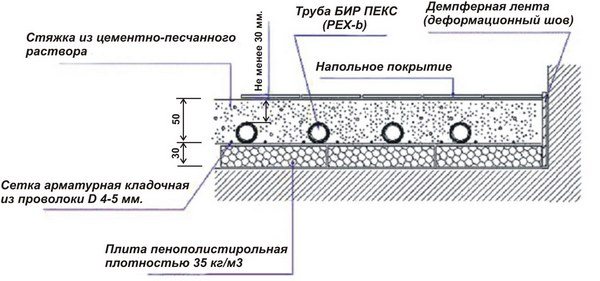
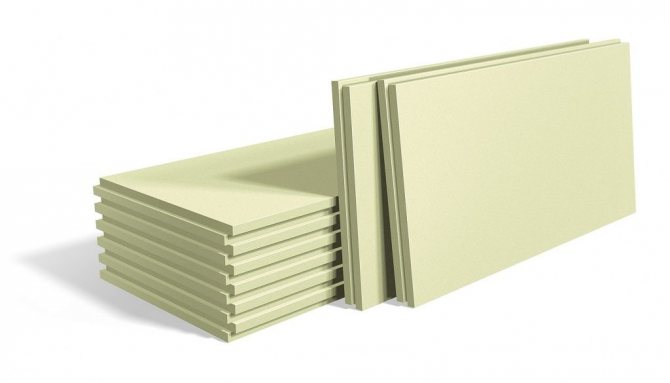
- Next, the insulation layer is laid. Penoplex has the lowest coefficient of thermal conductivity. Therefore, it is better to use this material for the balcony.
- The next step is to glue the damper tape along the walls around the entire perimeter of the balcony. Its functions include compensation for the thermal expansion of the concrete screed during floor heating.
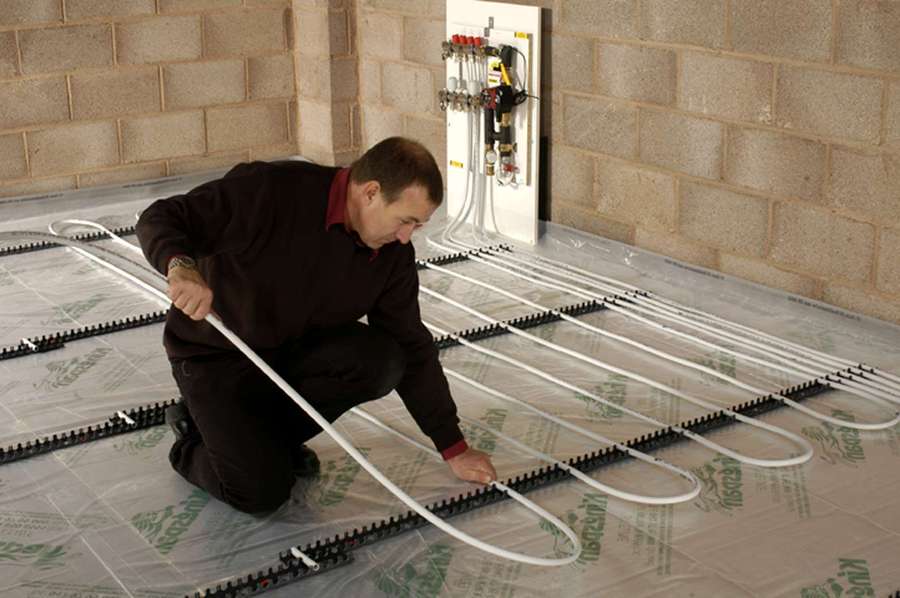
- Then a reinforcing mesh is placed, necessary to prevent displacement of reinforced plastic or polypropylene pipes. For this, the reinforcement laid out in a certain order is fastened with wire.
- The heat carrier pipes are placed on the reinforcing mesh.Flexible pipes are fixed (not tightened) with clamps. The distance between the clamps should be about a meter, between the pipes - at least 10 cm, maximum 30 cm. Pipes should be laid from the location of the collector.

Installation of a water heated floor with a concrete screed - Further, a collector is installed in the designated place. The ends of the pipes, suitable for the collector, are put on in a corrugation. The entire system is connected to a water manifold.
- An obligatory step is to check the operation of the heating system under a water pressure of 3-5 bar during the day. This control is necessary to identify possible leaks.
- At the end of the day, the system turns off, and water filled pipes are poured with concrete, the level of which should rise 3 cm above the pipes.
- The last stage includes the installation of the final floor covering. Often, a water-heated floor is installed under a laminate or tile.
Heating mats
The cable is laid in this type of underfloor heating with a step of 5 cm, each heating core is made of a material that has a high degree of resistance. The main advantage of the system is that high-quality mats have a low electromagnetic field, which increases the safety of such a warm floor for humans.
Other advantages of the system:
- the thickness of the floor increases slightly;
- if necessary, the mat can be cut into several pieces - it is important not to damage the cable;
- heating mats are a ready-to-install structure.
You can install the warm floor yourself. The concrete base is used as a backing. It is thoroughly cleaned from dirt and dust. To ensure the best grip, the base is grounded.
Before performing work on the installation of a warm floor, the mats are checked for operability using an ohmmeter. Next, they equip a place for the room of the thermostat. Grooves are made for wires in the floor and wall. The temperature sensor is installed directly in the floor. It must not be placed near the heating cable.
After all the steps have been taken, you can start laying the mats. They are placed directly in the glue paste under the tiles. After the completion of the work, the performance of the mats is checked.
Other styling options
If the construction of the balcony is not able to withstand the large weight of the cement screed, then you can resort to the following methods of installing the heating water system:
- wooden modular;
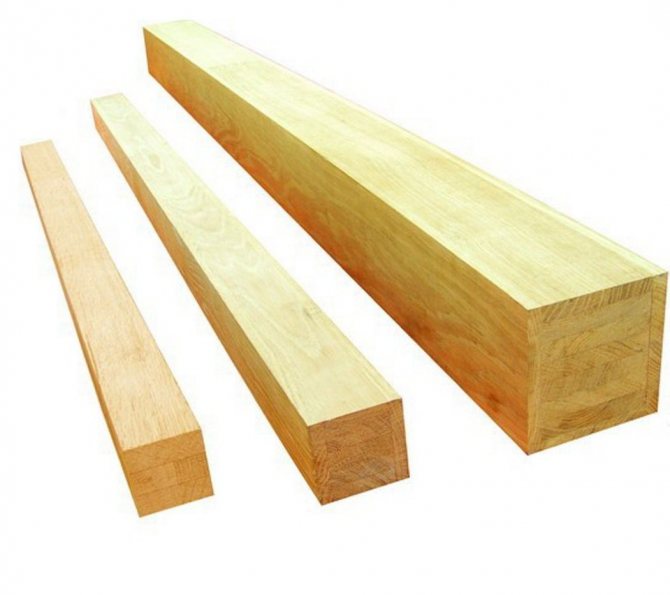
- wooden on logs (slats);
- polystyrene foam method.
In the first version, chipboard sheets are used, in which there are special channels for laying pipes. The sheets are laid with a gap of 5 cm on a pre-leveled wooden base, to which they are fixed with self-tapping screws. Next, an aluminum profile is placed, in the grooves of which the pipes are laid. These structures are completed with another layer of chipboard.
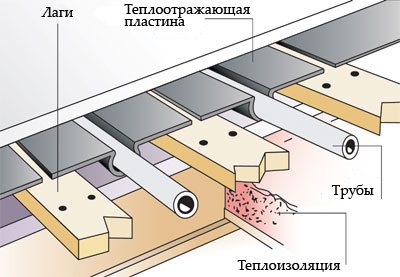
The second option involves the placement of wooden battens with a heat-insulating layer. With the help of a building level, they are aligned strictly horizontally. An aluminum profile is placed between the slats, in which the pipes of the water floor are laid. The space between the profile and the strips is filled with heat-insulating material. A subfloor and topcoat are installed on this whole cake.
Installation of a water-heated floor using a rack method
In the third version, polystyrene foam plates are used, which have ready-made grooves for laying pipes and serve as a heat-insulating material. Plates are laid from the corner of the balcony, special aluminum plates are placed on them, and then pipes are laid in them. After checking the operation of the heating system, GVL sheets and the finishing floor are mounted on the structure.
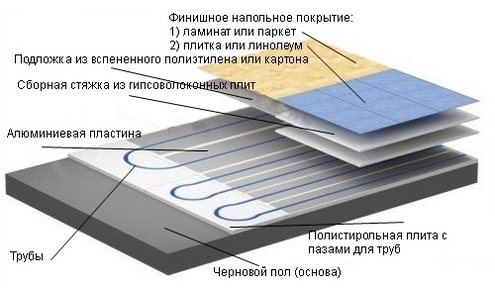
Laying a warm water floor using the polystyrene method
Installation of an electric floor
Installation of this type of floor consists of the following stages:
- First, the cement-sand screed is laid. Its thickness should be at least 4-5 cm.
- Then a layer of insulation is laid. In order to avoid the formation of condensation, the insulating material must be protected by a special vapor barrier film.
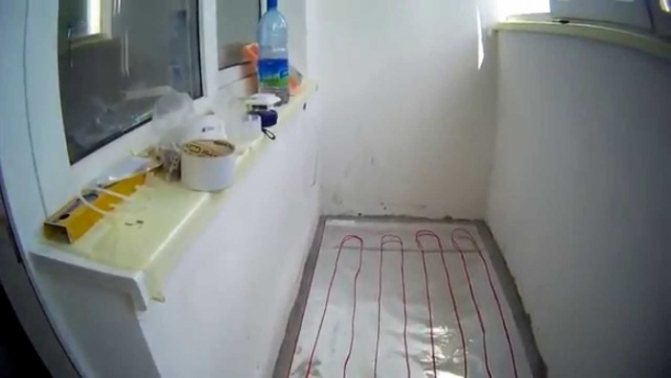
- After that, the cable of the warm floor is laid on the insulating material with a snake, as is the case with water floors.
- The final stage is the laying of the floor covering. It is better to use ceramic or tile for this, since their thermal conductivity is much higher than in other coatings.
Heating of the balcony with electric underfloor heating
Infrared heater as a heat source
An infrared heater is an excellent device for heating small spaces such as a loggia or balcony. Long-wave infrared radiation is a good source of heat. The main advantages of such a heater are recognized:
- efficiency in comparison with convection heaters;
- affordable price;
- fast warming up of the room;
- no preliminary work and the ability to use the heater at any time.
Electric heaters
The most popular heating means among the population is the electric heater. With its help you can really:
- quickly heat the room;
- maintain the required temperature;
- and such a device is inexpensive.
But at the end of the month, for the comfort that was created quickly, you will receive a corresponding bill for the electricity used (and believe me, it will be considerable). In addition, such a device is considered very fire hazardous, so we do not recommend leaving it unattended for a long time.