Let's figure out what needs to be prepared, what materials and tools will come in handy, how to pick up blocks, make a window directly and install it along with a window sill and an ebb.
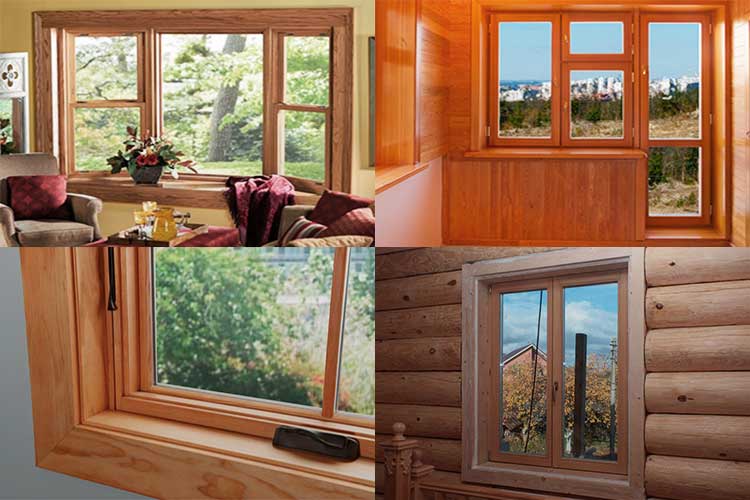
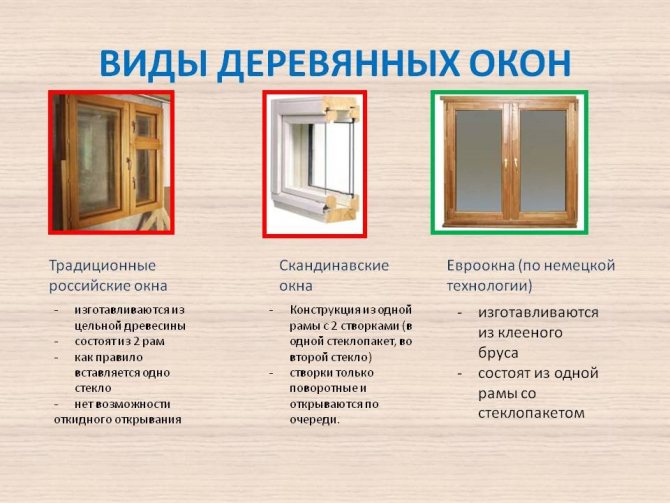
It should be noted that more often wooden windows are installed in wooden houses, however, they can also be inserted into concrete and brick walls. Why is the tree so important for a private house? Usually in small buildings in an area where there are many trees around and there are bodies of water, high levels of humidity. Natural wood will serve for a long time and will not deform if it is processed correctly.
Among other things, it is the tree that is considered a sign of chic and prosperity. Today, companies engaged in the production of PVC windows and wood, it is the wooden products that are valued more expensively.
As for fire safety and lack of dampness, modern technologies come to the rescue - there are special formulations that help protect the material from negative factors.
Opening: cleaning, measurements, preparation
What's up there?
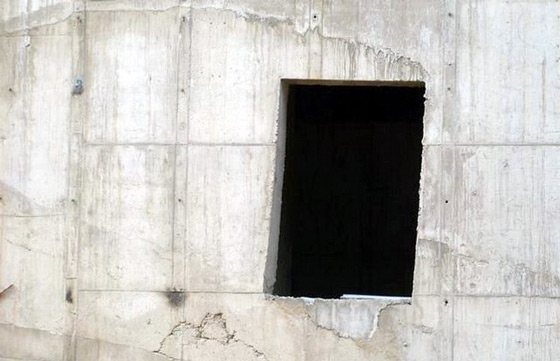
First of all, if the house is stone, we knock down the slopes and plaster along the top of the window opening. Purpose: to find out if there is a lintel in the opening, or if a section of the load-bearing wall lies just on the casing of the window; this is a common construction "hack".
If the house is stone and there is no lintel - alas, you cannot continue to work, but you need to consult with the builders to correct the defect. It is simply dangerous to live in such a house, especially if it is two or more floors. But do not be alarmed if in a very old house, instead of a lintel, there is a castle made of bricks or stone: this is in the order of things, it is quite reliable, and the work can be continued. Also, in block houses, lintels, as a rule, do not exist: reinforced concrete slab monoliths are already made on reinforced concrete structures with window openings.
As for wooden houses, they are either assembled on a frame, or they are made with a felling. In them, window openings either do not carry a load at all, or are weakly loaded, and you can not really think about the lintel.
Mortgages
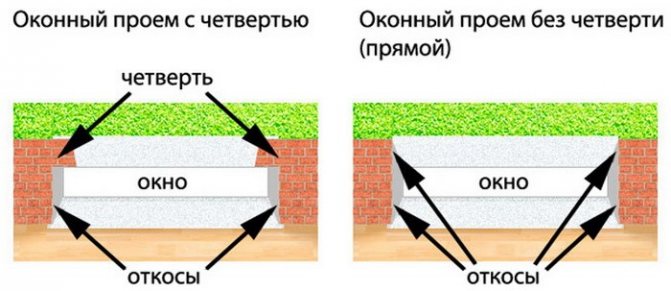
Now you need to knock down the slopes around the entire perimeter of the window, inside and outside, and remove the window sill. If a quarter is provided in the opening - an influx of masonry from the outside onto the opening, this is very good. But now we need to check the presence and condition of the mortgages: wooden beams embedded in the masonry of the wall specially for the installation of the window.
If the mortgages are in place, we check their condition: we stick an ordinary shoe awl into the tree by a third of the length of the rod and pull it back. If it does not go a third from pressing by hand, or it is impossible to pull it back out without swinging or grabbing the rod with pliers - this is good, the mortgages are strong. If not, they will have to be replaced.
And if there are no mortgages at all? It's also okay, it is possible to insert wooden windows into openings in a stone wall without them.
Measurements
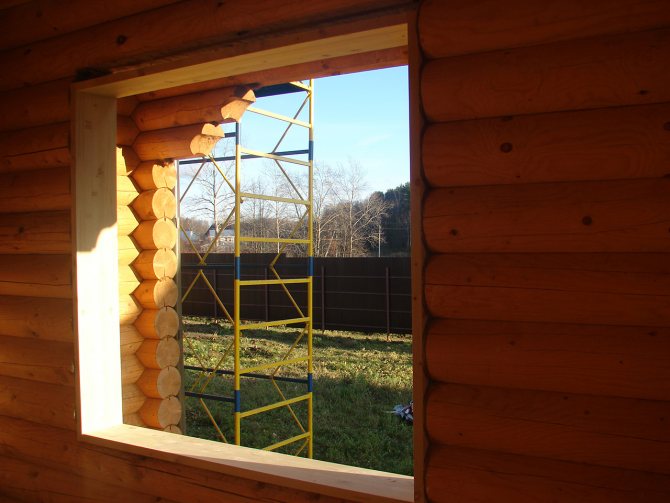
The window opening cleaned before masonry (or before casing in a wooden house) must be carefully measured. If several windows are to be replaced, clean and measure all openings. The goal is to determine the configuration of the opening, and from it - the dimensions of the new window.
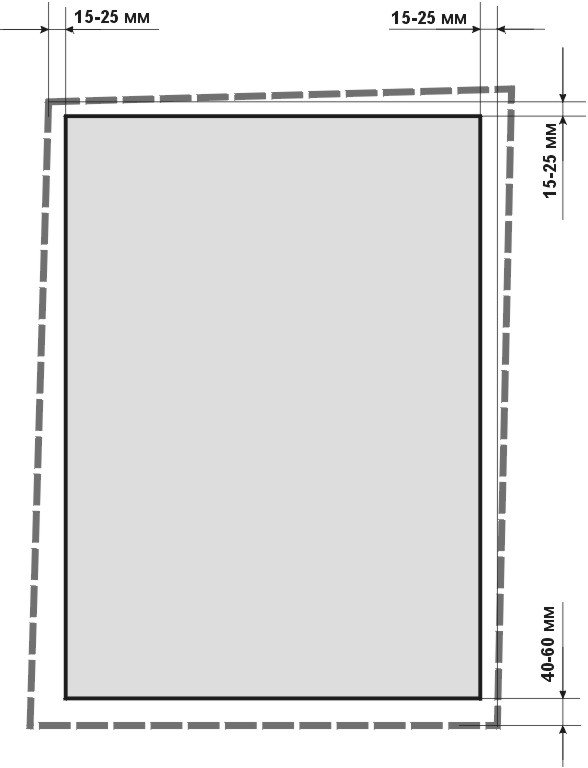
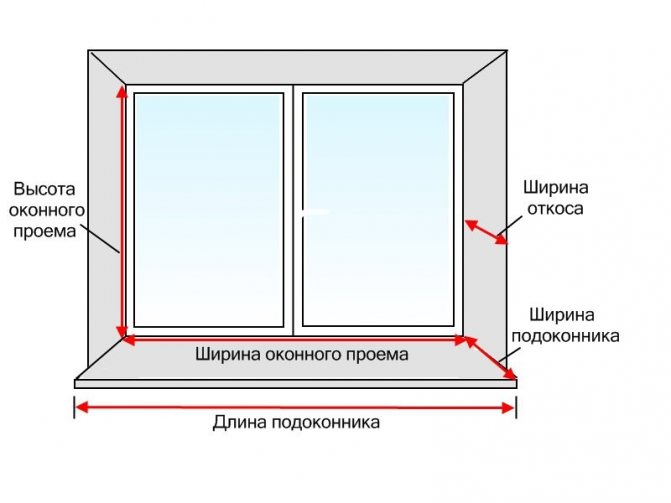
Even a house built by the most conscientious builders shrinks over time, and it is never absolutely uniform. The new window should be slightly smaller than the rectangle inscribed in the opening. The clearances that must be maintained are shown in the figure: 15-25 mm at the sides and top and 40-60 mm at the bottom.
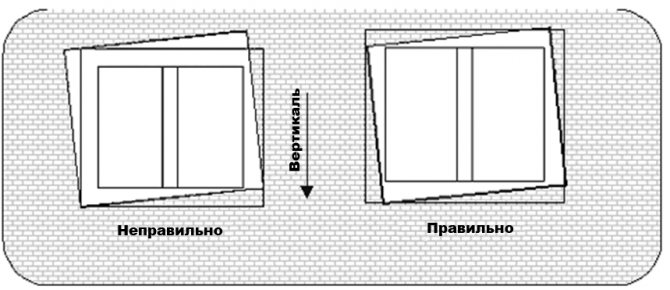
Measurement must be carried out relying on true horizontals and verticals.Without any hassle, it is done with a laser tape measure. If it is not there, on the wall above the opening we draw a horizontal line along the level, and on the side along the same level or plumb line - a vertical line.
To guarantee, you can beat off the second horizontal on the bottom, the second vertical on the other side, and measure the diagonals of the resulting rectangle. If they are equal, everything is in order, the measurements will be accurate. Now you can order windows using them.
Taking measurements
After you have removed the old window, it is imperative to measure the opening from the inside and outside so that there are no situations with the window falling out. If the opening is severely skewed, you will need to use an additional profile to help avoid the formation of cracks, or to increase the window dimensions. The question "how to enlarge the window opening" is rather complicated. Therefore, you should not undertake this work on your own, entrusting it to professional installers.
The best option would be the difference between the internal and external dimensions of the opening of 25 mm. This range will allow for the insulating layer. Taking into account the thickness of the window sill at the bottom, it is worth measuring about 6 cm of the stock.
It is essential to make accurate measurements of the window, since it is physically impossible to achieve ideal proportions for wooden products. In the future, a comparison of the calculations of the obtained measurements is made. One important note: the distance between the edges of the opening and the box must be identical on both sides.
In order to avoid additional distortions, it is recommended to open the window frame from the outside, and not deepen it into the wall.
How to fix windows?
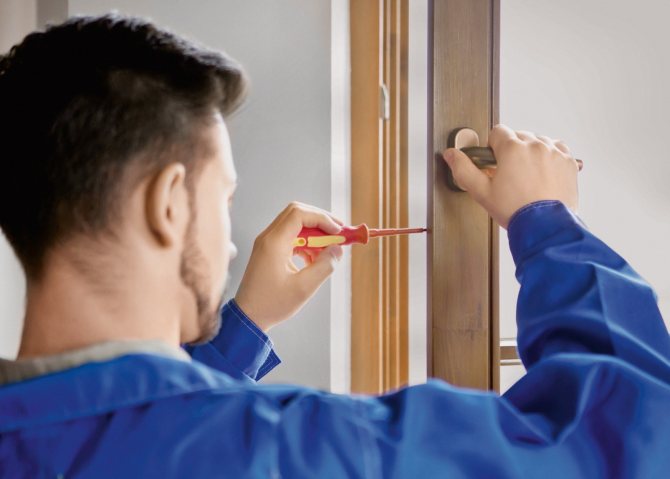
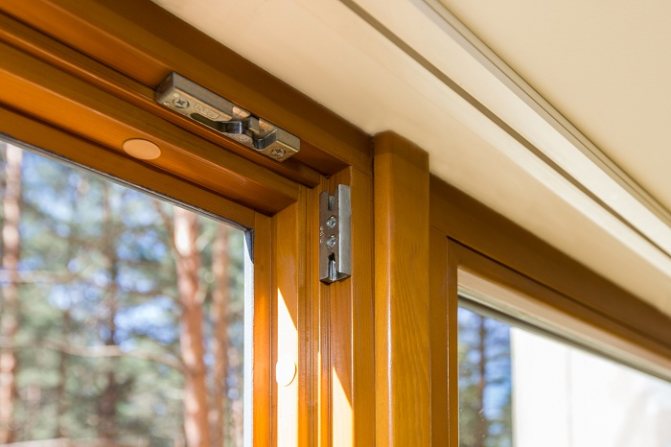
Before ordering or making windows on your own (see below), you need to decide how the windows will be attached and how they will be opened. In a wooden house, there is no choice regarding the method of fastening: through the frame to the casing.
If in a stone house in the window openings mortgages are provided, and the opening itself did not lead very much, then it is better to fix here in the same way. The selection criterion will be the value of the difference in the length of the diagonals of the clean opening: if it is no more than 10 mm per 1 m of the length of the diagonal, we fix it through and through. If it turns out more, you need to fasten it with anchors to the wall.
For example: the size of the opening is 90x120 cm. The estimated length of the diagonal is 150 cm (according to the rule for a rectangle). The real lengths of the diagonals are 1507 and 1494 mm. The spread is 14 mm, and at 1.5 m, 15 mm is permissible. Can be fastened through.
There is also no choice in the apartment of an old, damp, block reinforced concrete house (in Khrushchev): only with anchors to the wall. In block houses, mortgages for windows are not made. But in a block house with a technical floor or an attic, you can fix it through and through.
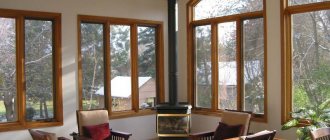
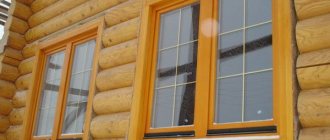
Benefits of installing wooden windows
A huge segment of the market is occupied by PVC windows and balcony blocks. This is due to the lower cost of plastic windows, ease of installation and long service life. However, the owners of apartments and houses, who are interested not only in the practicality of the structure, but also in its quality and safety for health, are not ready to refuse the installation of wooden windows.
The advantages of natural wood products are obvious:
- presentable appearance;
- the ability to paint the profile in different colors;
- the material "breathes", so the room is always fresh;
- the service life of the structure is up to 50 years.
Important! Experts say that with almost identical characteristics, plastic windows are significantly inferior to wooden ones in terms of reliability.
How will the window open?
If the window opening allows for fixing through and through, the window opening mechanism can be any, even when hung on anchors. If it is decided to fasten with anchors due to a skewed opening, then it is better to limit ourselves to opening in one plane: swing leaves, one swing flap, flap or tilting flap or horizontal swing flap.
The fact is that the wooden frame can be distorted from uneven loading. Very slanting window openings indicate that the building gives an uneven shrinkage. Fastenings through the frame are rigid connections of the window with the wall, and the opening mechanism in two planes can jam from a much smaller skew of the frame than a simple one.

Siege
Special design, which is a wooden box without a bottom crossbar, the purpose of which is a reliable fastening of the window and the preservation of the shape of the window frame regardless of the degree of shrinkage of the house is called casing or casing.
There are several types of this design:
- Solid. It is made from a specially processed solid material.
- Sticky. The individual components are made of type-setting boards connected by means of micro-grooves and glue. All burrs and small knots are removed.
- Mixed. Part of the casing is made in one piece, and the other part is made using glue. Upon completion of the installation, the window is coated with varnish. This type is suitable for using large window sills.
The window is made according to the size of each window. Moreover, if an internal lining is planned, then a sample can be made for it. When facing on both sides, the sampling is not performed.
Casing assembly can be started after the window opening has been prepared.
Its manufacture is carried out as follows:
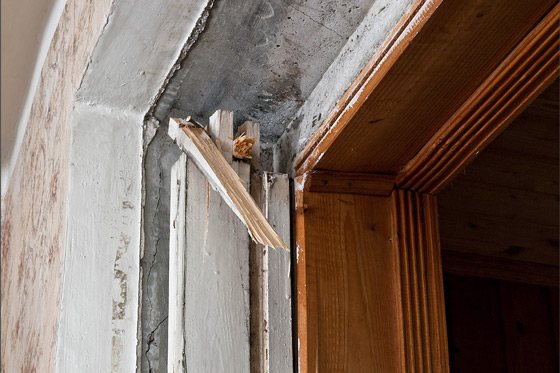
- In the base, which is adjacent to the window hole, grooves are grinded. A bar of the same size is inserted into them, which serves as the side of the casing.
- First, a bar is placed at the bottom of the opening., which will prevent displacement of the side elements.
- A sealant is placed under the timber from linen tow.
- A sealing material is placed in the grooves and mount the side boards.
- The final stage is fastening the top board of the structure.
- Above the window, a space is left for wood shrinkage and it is filled with a sealant. So in the process of shrinking the logs, the load will not affect the window opening.
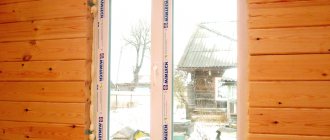
How long (“thick”) is the frame needed?
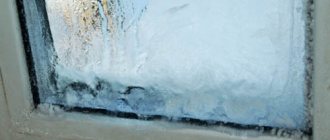
The length ("thickness") of the frame must be such that the so-called dew point is between the panes. Simply put, fogging of the inner glass is unacceptable. Roughly, the length of the frame in centimeters can be equated to the average annual subzero temperature in degrees of the coldest month (January - February) in your area, but in any case not less than 12 cm and not more than 22 cm.
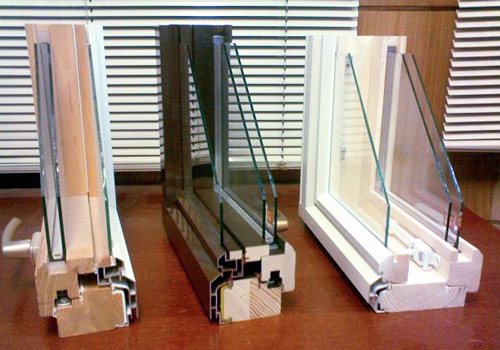
If the length of the frame is more than 22 cm, it is necessary to provide additional thermal insulation in the opening during installation, or triple glazing, as is done in the Far North. It makes no sense to put a thin glass unit in a long frame: then it is better to put traditional glass on glazing beads and putty. But you can put two thin double-glazed windows: you get four-fold glazing, and you don't have to think about the dew point at all. True, it will be expensive for the money.
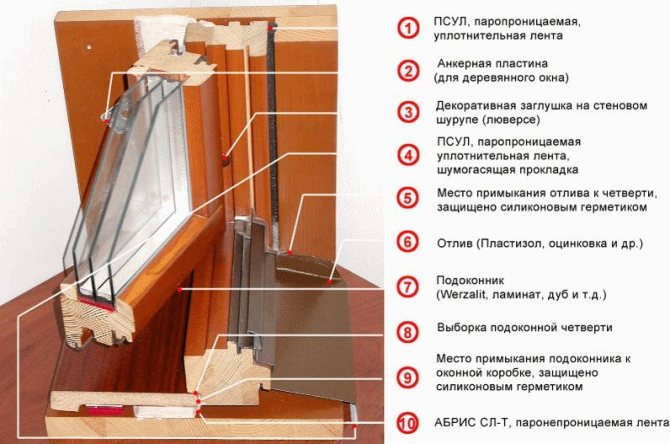
It is also necessary to coordinate the length of the frame with the thickness of the wall: the inner slope must be at least 17 cm; external - at least 10 cm. If the masonry of the opening is with a quarter, and this does not allow making the internal slope of the required width, then the frame can be made shorter: the quarter itself already provides additional insulation.
Installation of wooden windows in stone and concrete
Do-it-yourself installation of wooden windows into the openings of stone and block houses of various types begins with the installation of a window sill. It is better to make a cement pad under it and level its surface to a horizontal plane. The attached (hanging) window sill, mounted after the installation of the window, does not facilitate the work at all, but it holds much less firmly, especially if the walls are thin. Sill thickness 30-50 mm; if the window sill board is thicker, the lower gap in the opening must be increased in advance by reducing the height of the window.
The window sill is nailed with three or four nails to the bottom mortgage or 6-mm mounting nails (dowel nails) to the stone. In the latter case, before installation, it is necessary to drill fastening holes with a diameter of 3/4 of the nail diameter in the window sill, mark the places for holes in the wall for mounting nail sleeves on them, drill holes and drive sleeves there. Three holes in a row are enough with an indentation of the extreme ones of 150-200 mm from the edges of the opening. The outer edge of the sill board should be flush with the outer edge of the frame. The distance of the row of mounting holes from the outer edge of the board is one and a half of its thickness.
Note: if it is supposed to be fastened with anchors (see below), then the window sill is not set in advance - it will interfere. We'll have to suffer later.
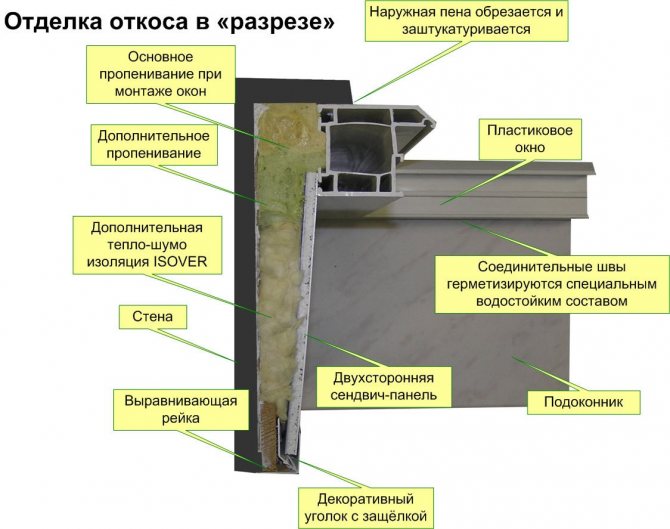
Then, if the masonry is with a quarter, insulation made of roofing material or polyurethane foam is applied to the inner side of the quarter. The insulation can be put on construction silicone: there will be no load on it, and then it will be pressed against the window frame, so there is no point in fiddling with fasteners.
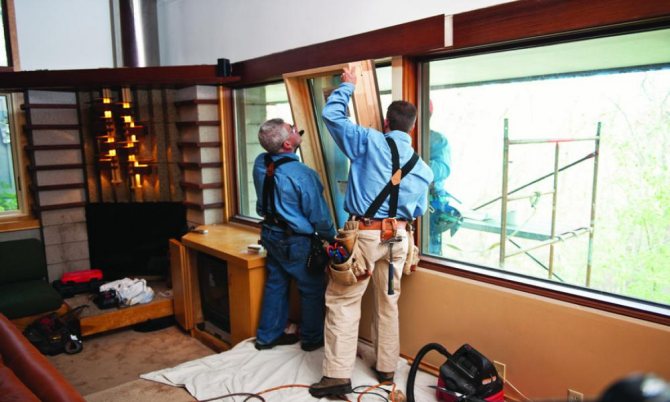
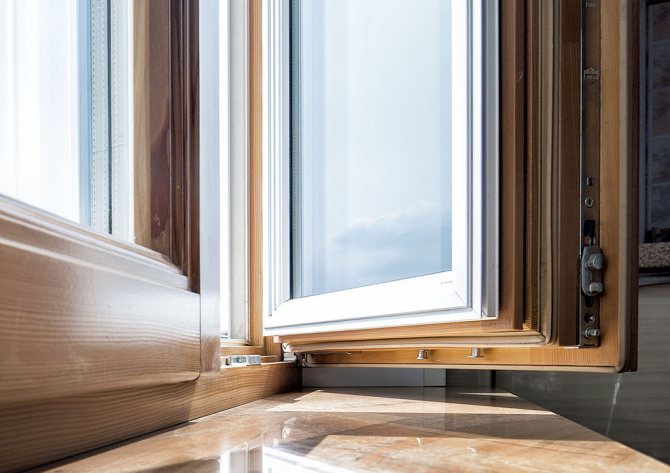
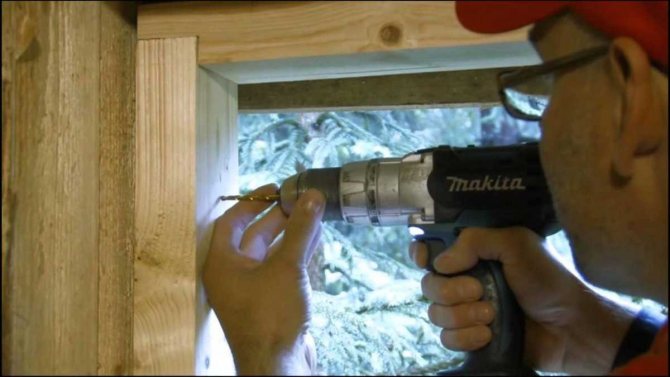
Next, you need to prepare the window: remove the sash with glass, hinges and mechanisms, leaving only the frame. This concludes the general work for different openings.
Option 1: a good opening in a good wall
If the opening is "completely rectangular", and the house is dry block or sand-lime brick, then it is advisable to put the window in the simplest and cheapest way: on the blocks. Mounting blocks are simply pieces of a board or rail that are as thick as the gap between the frame and the wall and are 120-150 mm wide. One wide edge of each block is slightly, not to the point, reduced to a wedge.

The location of the chocks for different types of windows is shown in the figure. First put the support pads; then - spacers. The horizontalness of the frame cross members is continuously controlled by the level, and the verticality of the sidewalls is controlled by a plumb line. The pads shouldn't be too tight; it is necessary that any block can be pulled out with your fingers. If necessary, the pads can be trimmed or the layer of wood can be removed with a coarse sandpaper.
After aligning the frame, the pads are removed one by one, starting with the spacers; construction silicone is applied in the places under them, both on the frame and on the wall, and the block is put back. Leaks and sagging of silicone from the outside are immediately removed with a rag soaked in vinegar.
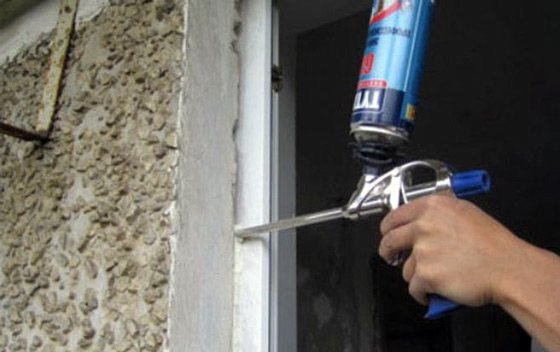
After the silicone has solidified, the gap is blown out with construction foam. How to blow out the gap between the frame and the wall is described below. At the end, the influx of foam is cut off with a mounting knife, slopes are made, sashes with glass are installed - that's it, the window is ready.
Note: if you are sure that you will never have a hurricane, you can do without silicone and immediately blow out with foam. But the foam is not designed to bear the load, and watching the wind squeeze out the window just when it cannot be repaired is a relative pleasure.
Option 2: a good opening in an unimportant wall
If the house is made of ceramic bricks, cinder blocks, shell rock, etc. weak material, but dry, and the opening is flawless, it is advisable to install the window with a fastener through and through. To do this, first of all, holes are drilled in the frame for fasteners: mounting nails with a diameter of 6 mm; hole diameter - 5 mm. The length of the dowel should be 80 mm + gap width + frame thickness. For example, if the frame is made of a fortieth beam, and the gap is 20 mm, then the length of the nails is 140 mm.

On the side of the frame up to 1.5 m long, there should be 3 holes: two with an indent of 150-200 mm from the corners; the third is in the middle. In frame elements more than 1.5 m long, 4 holes are drilled: two extreme holes with the same indent from the corners, the rest - evenly along the length. For very long or tall frames, the pitch between the fixing holes should be no more than 600 mm.
Then the frame is placed in the opening, leveled with pads, as already described, and on the wall through the holes in the frame, mark the places for the holes for the nail sleeves. The holes for the sleeves are drilled, removing the frame, along the diameter of the sleeve and the depth in its length + 30 mm for dust and crumbs.There is no need to drill holes in the windowsill: the frame is simply nailed to it with ordinary nails.
Attention! Holes for fasteners must not go through the pads. If any of them fell on the block, it must be moved.
After drilling, the sleeves are driven into the holes, the frame is put back and, without removing the pads, they are fixed with nails. Then they take out the pads, blow out the cracks with foam, make slopes and put the sashes. This completes the installation.
Note: if the pads had to be adjusted, they are marked at the ends before being removed. When installing in a skewed opening, this must be done.
Option 3: an oblique opening in any wall
It is possible to securely put wooden windows in a skewed opening only on anchors - metal strips with holes. Anchors can be made yourself from strips of tin or galvanized, but the game is not worth the trouble: the price of factory anchors is cheap, and it is much more convenient to work with them.
Anchors are attached to the ends with self-tapping screws along the outer perimeter of the frame so that they stick out inward. These "tails" will then disappear under the slopes. The number and location of anchors is the same as the holes for fasteners through and through.
Note: It is often advised to first attach small intermediate fastening strips to the frame, and by means of them fasten the frame to the anchors. This is justified in professional construction of a large volume: one worker quickly, without losing the rhythm, attaches anchors to the empty openings, and then two, also without losing the rhythm, push in and screw the windows. When installing one or several windows on your own, it makes no sense to spend money on extra fasteners.
The frame with anchors is pushed into the opening to the place and leveled with blocks (do not forget about the level with plumb lines - the opening is oblique!). Then the drilling is marked on the wall through the holes of the anchors, the anchors are bent, the holes for the dowel-nails are drilled, the anchors are bent back and fixed with the dowel-nails.
After that, ALWAYS take out the pads; the window frame should hang in the opening with anchors. The oblique opening indicates either the carelessness of the builders, or the natural uneven shrinkage of the building, so there should be no rigid connections between the window frame and the walls.
Finally, the gap is blown out with foam, a window sill is installed (in the oblique opening, the window sill will be hanging - there is nothing to be done) and, as always, slopes are made and sashes are installed.
Note: sometimes there are tips - to level the opening with a cement screed. Martyshkin labor. No screed will stop uneven shrinkage. Even the most notorious shabashniks still lay not homemade crooked bricks. The negligence of the builders, which led to uneven shrinkage, lurked even during the design. But uneven shrinkage can begin later, when the properties of the soil change with a completely conscientious project.

Installation technologies
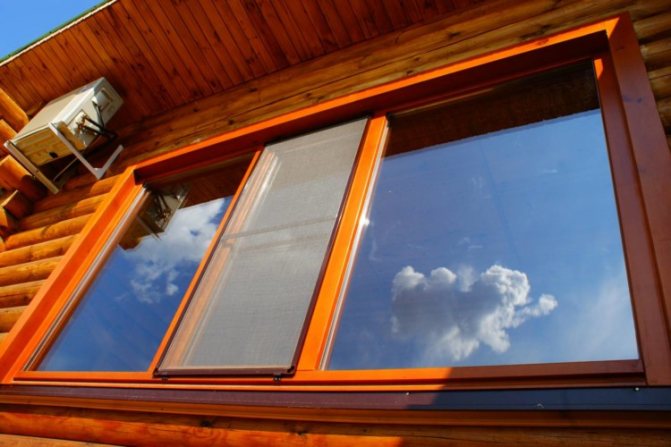
Installation of wooden windows without the involvement of a master is carried out similarly to plastic double-glazed windows. In addition to fixed glazing, there are five more basic options for installing sashes:
- swivel;
- folding;
- horizontally rotary;
- overturning;
- swing-out.
The installation of wooden windows is carried out using wooden blocks. The antiseptic treated mounting block is fixed horizontally. To facilitate the process, you can remove the sashes and install only the box. If your target is not a skewed window, check the horizontal and vertical lines with a level. On which it is installed, and using the wedges, set the desired position.
The second option is to use mounting plates that are attached to the box prior to implantation in the opening. The plates are fastened to the window with screws, and after installing the entire structure - with dowels to the wall.
Wooden window in wood
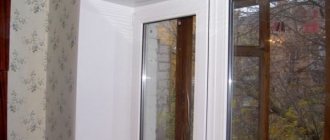
In a wooden house, installing windows is reduced to planting them in a casing with liquid nails.For strength, you can grab it through with nails or self-tapping screws. The slots outside and inside and the holes with the fastener heads are sealed with the same irreplaceable liquid nails, and the platbands are attached to them. But the platbands also need to be strengthened additionally, with ordinary nails or self-tapping screws - there is wind outside.
And what if the cage is oblique, or not in size? In this case, the casing must be sized and aligned. This is done with beams, planks or slats on liquid nails. For alignment, the necessary ones are driven, as required, onto a wedge - on a jointing machine, a small circular saw with a meso-toothed circle or by hand, a hacksaw for metal (yes, yes - you need a very fine tooth, and so that you can cut the fibers obliquely) or an archery saw or a plane. The latter, of course, requires a carpenter's working skills.
About blind windows
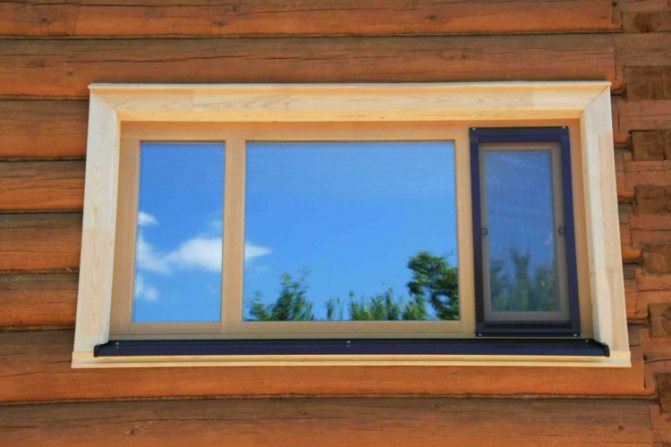
Ready-made windows for installation in houses are used. Making a nice and beautiful window is not an easy task, even for an experienced carpenter. But sometimes - in the attic, in the shed, garage or in the country - you need to make a small blind window. You can make such a window yourself by typing a frame of beams and slats.
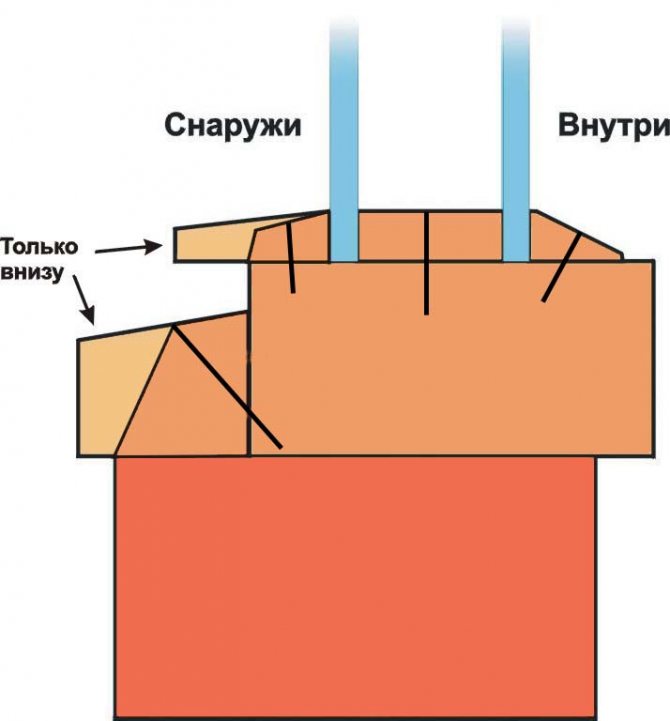
What should be the profile of the window frame can be seen in the figure. Notice the lightest ridges at the bottom. These are teardrop-downs. Their purpose is to prevent water from leaking into the frame. They must be done on the lower cross member of the frame, but in no case should they be done on the upper one: there they will turn into moisture traps. And on the sidewalls they are useless.
***
So, now you know how to install a wooden window into any window opening of any building. As you can see, the work itself is not difficult and not hard, but it requires a preliminary consideration of many different factors, and when it is done - ingenuity and accuracy.
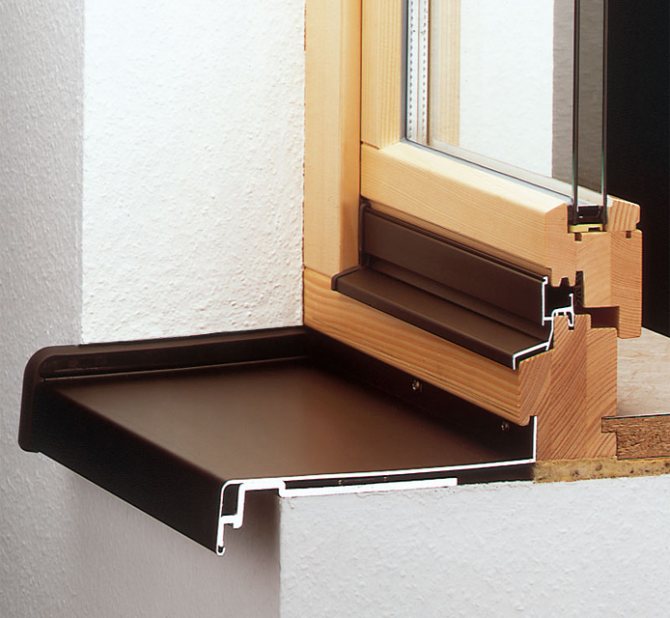
Waterproofing and sealing
After the completion of the installation work, it is worth installing an ebb tide outside so that an accidental leak does not provoke deformation from the inside. Depending on the design features, in addition to the mandatory installation of the drain from the bottom, an option of additional protection along the upper edge is possible. At the connection point, you will need to use a sealant to completely eliminate the likelihood of water ingress.
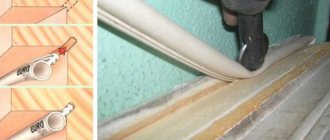
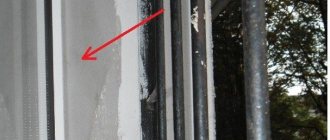
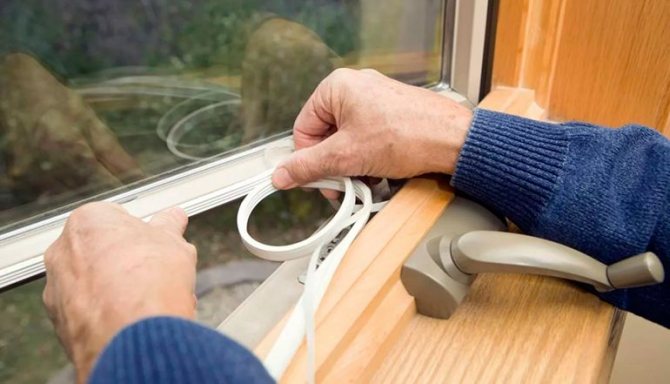
To minimize heat transfer between the internal and external environment, wooden window structures need perfect sealing. This can be done with the familiar polyurethane foam. In addition to excellent thermal insulation properties, it evenly distributes external pressure.
How to use polyurethane foam in work:
- The foam increases in volume many times during hardening. When working, you need to take this factor into account and calculate the thickness of the layer application.
- Prolonged exposure to direct sunlight destroys the foam. It is recommended to cover with an additional coat of paint, plaster or sealant.
- It is better to fix the window block with the points of polyurethane foam. Then, after its complete crystallization, it is necessary to completely fill the sinuses. This will prevent the product from skewing during installation.