Constantly developing technologies give people new materials and products made from them, intended for repair work. Some of the most demanded elements are plastic windows, beautiful, thin, practical and functional. After complex work on the installation of double-glazed windows, it is time to install slopes and comfortable window sills, which become a "haven" for flowers and other small items. Such an operation is within the power of almost any master, if he knows in advance how to install a plastic window sill, to do it correctly and reliably. Familiarity with the instructions, as well as with some of the features of the process, makes it possible not to face problems in the future.
The role of the sill in the window
Before examining the question of how to attach a window sill to a plastic window, you should consider why this structure is generally needed in a modern house?
Window sills functions:
- preventing the penetration of cold air from the junction of the window and the opening;
- reducing the difference between the opening and the frame;
- collection of condensate that will form during fogging of window glass units;
- closing the visible part of the wall in the area of the opening;
- room decoration;
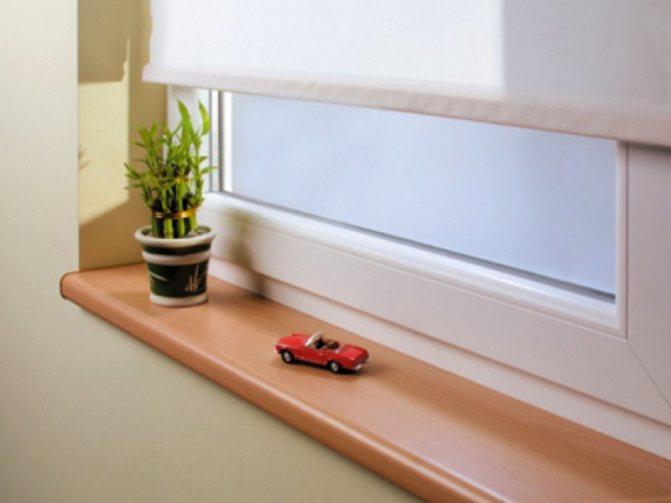
- a place for the arrangement of flowers, other interior items;
- table, workplace for an office, a children's room.
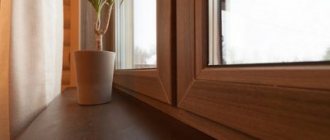
Based on what functions will be required by the owners of the premises, the material of this structural element is selected. It can be a wooden window sill, which will be suitable for wood furniture, or a modern polyvinyl chloride sill that can withstand any impact.
Measurements
In order to correctly measure the board for the window sill, it is necessary to take into account some features:
- To begin with, the type of material and how it is cut are taken into account. If it is possible to cut the window sill on the spot, a whole canvas is bought. This method is applicable only to light materials: plastic, wood, chipboard, MDF. In the case of stone and granite, the size must be measured beforehand.
- To calculate the length take the inner width of the window and add 100 mm. The fixing of the side slopes must be taken into account.
- The width can be from 100 to 850 mm. The main thing is that the board does not overlap the heating devices.
Before installing a new window sill, you need to make special preparations. For this, the surface is thoroughly cleaned, excess debris is removed. Since the window sill plate must be installed at a level, a preliminary cement screed is made for the installation of a product made of heavy natural stone.
Window sill types
You can answer the question of how to fix the window sill after you know what raw material it is made of.
Modern industry offers the following materials:
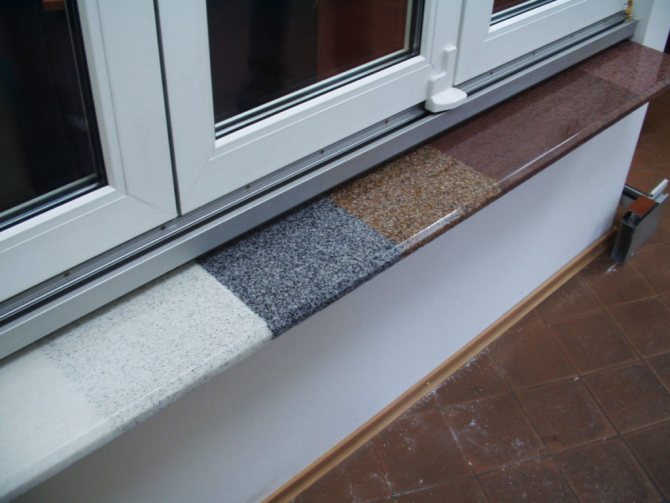
- natural stone (granite, marble);
- artificial stone (made from acrylic, quartz);
- natural wood (larch, oak, pine, cherry);
- composite materials (chipboard, MDF);
- polyvinyl chloride.
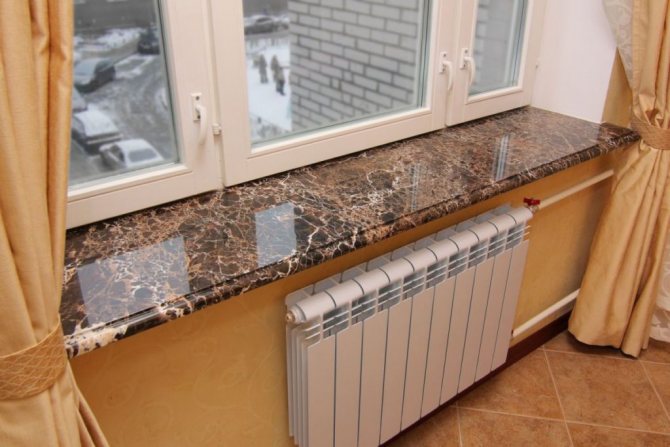
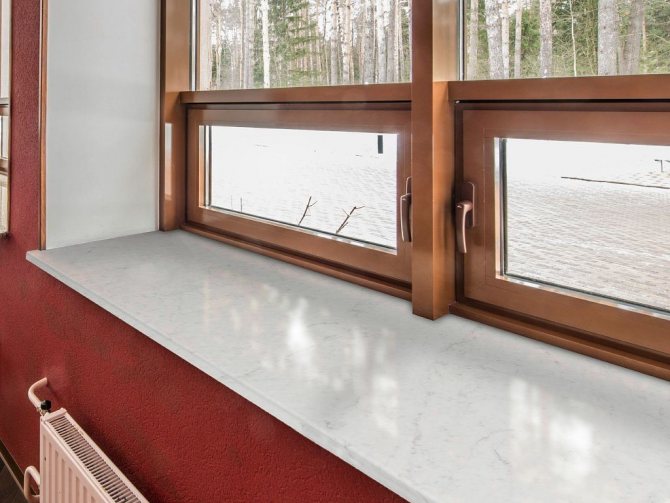
A natural stone
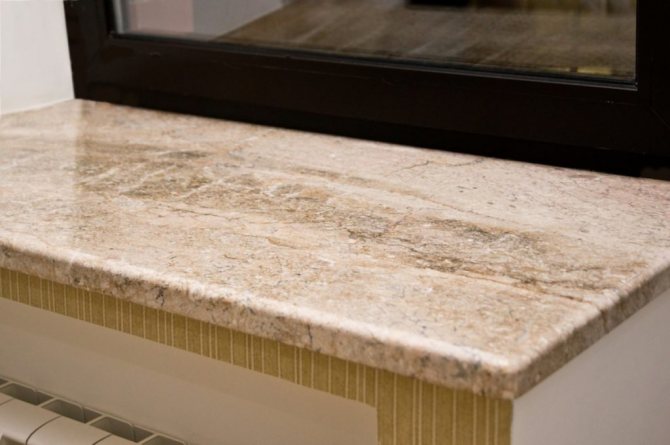
The window sill, made of natural stone, is an excellent decor for the room, vividly demonstrating the wealth of the owners, as well as their good taste.
Advantages:
- high aesthetics of appearance;
- a variety of colors, patterns, allowing it to harmoniously fit into any interior;
- high strength, granite or marble from which such structures are made are second only to diamonds in terms of this indicator;
- lack of any reaction to changes in the atmospheric environment (heat, frost), high levels of air humidity, constant exposure to ultraviolet rays;
- unlimited operational periods.
This material also has some disadvantages:
- the surface of the stone type is distinguished by a polished surface resembling a mirror plane: scratches easily remain here (when it comes to marble, granite can withstand this kind of impact);
- marble is a limestone material, so it can deteriorate under the influence of acid, including acetic acid, it perfectly preserves once-planted tea or coffee stains;
- both minerals easily accumulate radioactive radiation inside (therefore, in regions where the level of radiation is high, it is better to refuse such materials);
- materials have a high level of thermal conductivity (for marble 2.9, for granite - 3.5);
- limited dimensions (large dimensions are difficult to polish, transport, install);
- after accidental damage to the surface, the appearance of cracks, chips, it will be impossible to restore it;
- the design has a fairly high weight;
- a small number of color solutions (however, the natural color of these materials does not require such a variety);
- high price.
Fake diamond
Installing a sill for plastic windows made of artificial stone is not much cheaper than from natural.
Artificial stone includes raw materials made from quartz agglomerate or acrylic.
Advantages:
- small weight;
- ease of transportation and fixation;
- the ability to create any size;
- high strength (slightly lower than that of natural stone, but higher than that of polyvinyl chloride, wood);
- long service life;
- the ability to obtain unique patterns, colors obtained by adding different components to the mixture;
- ease of cleaning;
- the material is not afraid of moisture, does not collect odors;
- artificial stone is always warm, like natural wood;
- amenable to restoration work with glue, grinding, heat treatment.
Disadvantages:
- traces of hot objects remain on it;
- collapses under the influence of aggressive chemical compounds;
- ease of abrasion under the influence of abrasive particles (this is especially visible on surfaces of dark shades, sanded to shine);
- high price, sometimes exceeding that of natural stone.
Important! The damage indicated above can be easily removed by specialists for a considerable fee.
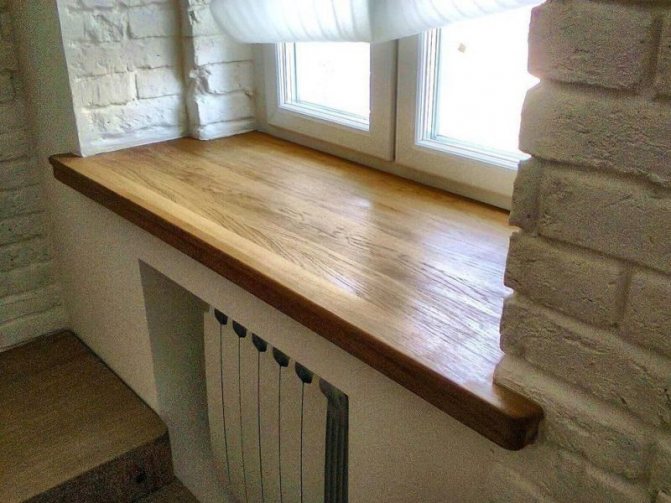
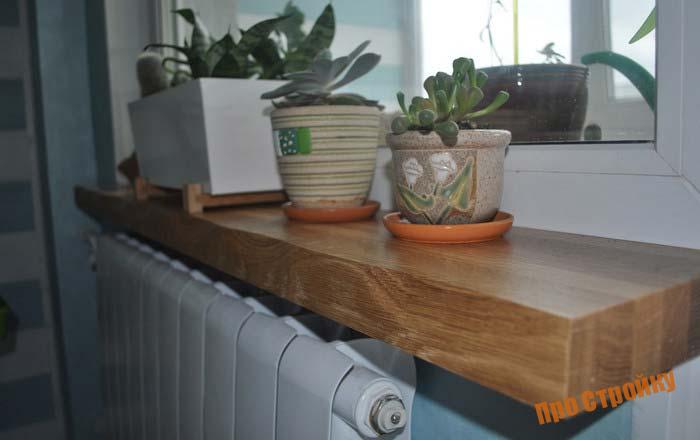
Wood
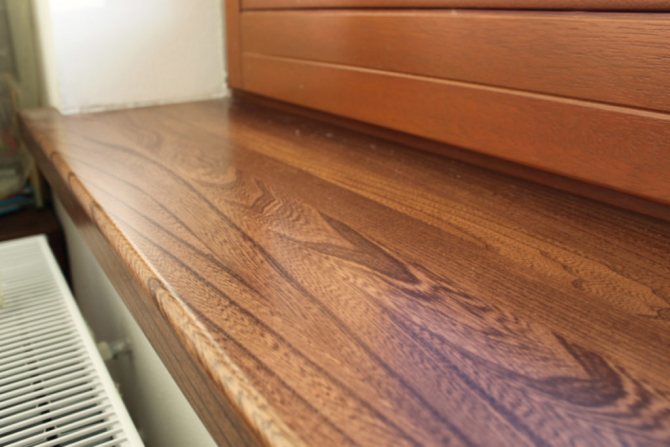
You can always make a wooden sill for the windows. This design has been used for a long time. Despite the declining trend today to install such products, many people prefer them.
Before you install a wooden frame, you should evaluate its merits:
- high environmental friendliness of the material;
- durability of the operational period;
- excellent thermal insulation;
- excellent color and pleasant texture that fit perfectly into any interior, both modern and "antique";
- natural warmth of raw materials.
Installing a wooden window sill has a number of disadvantages:
- fear of water and rooms with a high level of humidity: the surface swells, deforms. Therefore, it is so important to pre-treat the entire plane with varnish, paint;
- the need for constant care, for example, timely and regular repainting;
- deformation due to close contact with central heating radiators or other heat sources. When it is not possible to ensure the maximum distance of these two objects, it is better to refuse wood.
As for the cost, a pine board can be purchased for the price of PVC, and an oak one will cost about the same as granite or marble.
Composite materials
The sill of a plastic window can be made of chipboard, MDF. These composites allow the structure to be installed where needed. Both materials are not very high quality indicators. Despite the fact that the properties of MDF are slightly higher than those of chipboard, both types have the following disadvantages:
- swelling after contact with liquid;
- low protection of the chipboard composite;
- ease of damage to tiles under the influence of sharp objects, high temperatures.
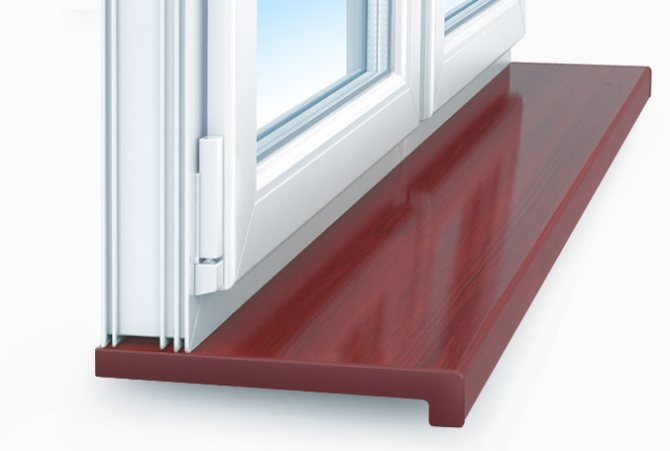
PVC
Attaching PVC window sills is considered the best way to frame a modern window system.
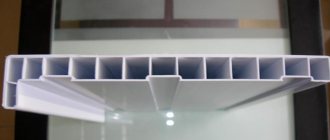
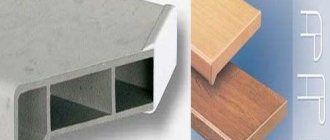
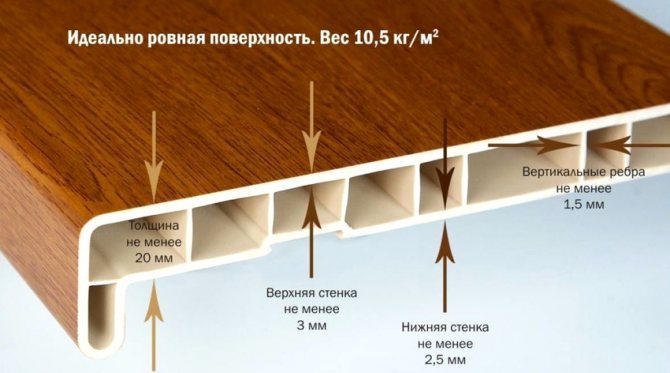
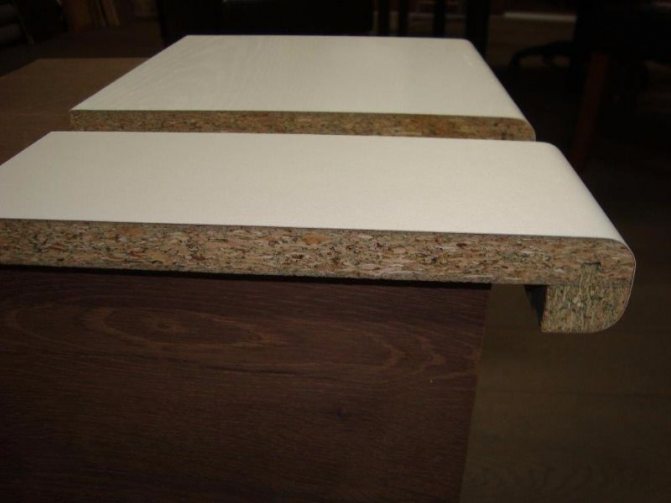
A plastic structure is a panel with a thickness of 2 cm, folded from two thin sheets (one three-millimeter, the other from 2.5 mm). They are connected by stiffening ribs, the more their number, the higher the strength of the product.
The installation of such a product allows you to achieve the following goals:
- save money: their cost is lower than that of stone (artificial, natural), as well as wood;
- get the same service life in comparison with the window system;
- choose any design style that allows you to fit such a design into every interior;
- create excellent thermal insulation of the room;
- insert a durable structure;
- independently carry out all the installation work.
We must not forget about the disadvantages of this type of raw material:
- fear of exposure to high temperatures;
- low strength indicators.
Important! Correct operation of such structures allows you to enjoy their functionality and convenience for a long time.


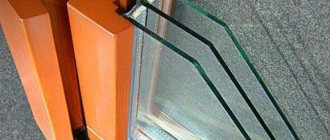
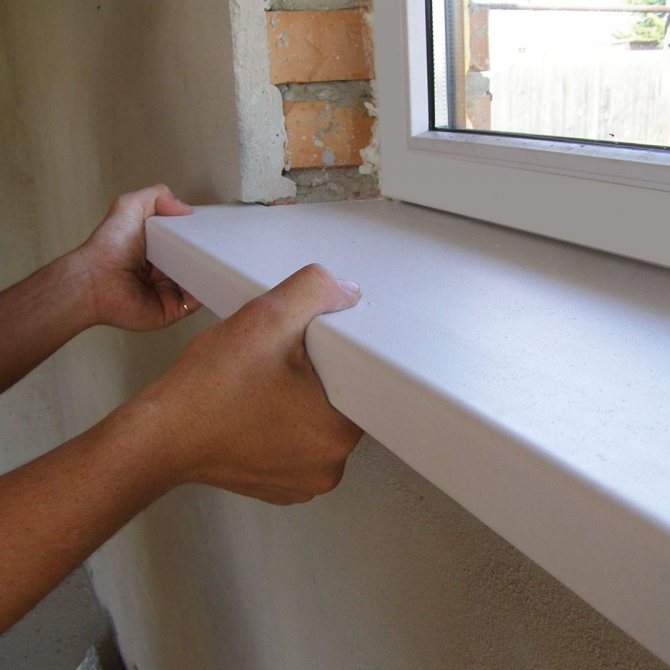
How to install a window sill to a plastic window yourself - supporting elements
In principle, cured polyurethane foam has the required load-carrying capacity. But building codes stipulate that the window sill should be based not only on its layer. Professional installers use mounting wedges as support elements. For narrow window sills (up to 30 cm), they are installed in one row along the edge of the window sill farthest from the window. For wide ones - put the second row along the window frame. Along the length of the window sill, the supporting elements are placed every 50-60 cm.
But both craftsmen and home craftsmen do not always use special wedges. They are successfully replaced with improvised means, scraps of building materials. It is better to use elements not made of wood, but of plastic - they are durable, not afraid of moisture, do not change their dimensions during operation.
The use of supporting elements is convenient for one more reason. - Many craftsmen make the grooves in the slopes wider so that during the installation process the window sill can be slightly raised. In this case, it is easier to fill the part of the space closest to the window with foam. This is especially important if there is no pistol with replaceable long nozzles. Then, in our case, we raise the window sill, blow out the part of the free space closest to the window with foam, and then lower it tightly onto the supporting elements.
DIY PVC window sill installation: tips and tricks

Having considered the features, what it looks like, how this or that material differs, we come to the question of how the window sill is attached to a plastic window. The window sill is considered an indispensable element of the window opening; it performs not only decorative, but also practical functions.
To choose a truly high-quality product, you should follow a number of important recommendations:
- a certificate is required confirming that the product has passed quality control, is safe for human health;
- it is important to study the characteristics of the material: resistance to ultraviolet rays, mechanical strength, resistance to condensation;
- it is better to buy a white device, it will definitely not become paler from constant exposure to the rays of the sun, scratches are hardly noticeable on it (colored models most often suffer and lose their presentation precisely because of these two factors);
- you should not buy the cheapest polyvinyl chloride, it will definitely turn yellow after a while, it is better to purchase goods from the middle price segment;
- prefer plastic with a large number of stiffeners, they guarantee the strength of the product, the ability to withstand high load indicators;
- in order not to make a mistake in the calculations, it is better to take measurements with the help of a professional invited in advance.

How to whiten at home?
For cleaning and bleaching a plastic window sill at home, both special household chemicals and folk remedies are used. When choosing purchased products, you should pay attention to the presence of reagents harmful to plastic (solvents, acetone, acid), and such compositions should not contain abrasive particles that leave scratches on the product.
After installing the PVC window sill, traces of foam, cement and other building compounds will definitely remain on it. You can get rid of them with the help of special commercial pastes and gels, which are applied to adhered particles and left for several minutes.
Attention
The adhered foam and cement are removed from the product with a rubber trowel or a stiff bristled brush. Then the product is wiped with a damp cloth and wiped dry.
Among the purchased household chemicals, the most common effective are:
- Seth.
- Mr. Proper.
- Domestos.
Have you decided to renovate or replace the windowsill in your home? Our experts will give you a huge amount of useful and useful advice on the following topics:
- How to make a concrete window sill?
- How to install a window sill on a balcony?
- When is this part of the window required to be repaired?
- How do I update or align different design types?
Advantages and disadvantages of PVC products
Before you mount a window sill in a window opening, you should evaluate its quality.
Advantages of plastic construction:
- ease;
- external attractiveness;
- long service life;
- resistance to moisture, so the structure will not start to rot under the influence of condensate constantly collecting under the blow;
- regular care allows you to forget about dirt, microcracks, mold;
- affordable level of pricing policy;
- resistance to aggressive chemicals;
- plasticity, due to which the material is easily cut according to predetermined dimensions;
- ease of independent installation work;
- high thermal insulation performance.
Important! PVC products can be coated with a special coating, which prolongs their performance, increases resistance to high temperatures.
The only drawback of the raw material is its not the highest strength, especially in comparison with natural stone.
What you need to know about a plastic window sill
PVC panels for window sills are the leader in terms of sales. And for good reason! After all, their technical characteristics give a large number of advantages during installation.
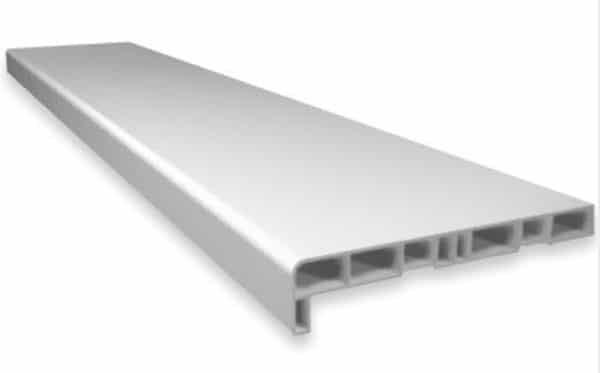
The panel has stiffening ribs
TOP 5 advantages of a plastic window sill ↑
Do-it-yourself installation of a plastic window sill has the following advantages:
- Panel size can be adjusted locally. If acrylic or stone models have a strictly specified size, then PVC window sills are easy to cut. For this, a jigsaw or plastic saw is suitable.
- The material is characterized by steam and moisture resistance (absolute impermeability).It will not be saturated with moisture from possible condensation or rain drops, like a wooden counterpart. An additional advantage is that the design is not sensitive to ventilation disturbances that are common in modern apartments.
- Ease of installation. Installing a window sill with your own hands is a completely feasible task for a beginner.
- Heat insulating properties. Due to its special structure, the panel additionally prevents heat loss.
- Lack of pores, in which dirt and harmful microorganisms usually accumulate.
Video: How to install a window sill with your own hands
How to choose quality material ↑
Before you buy and install a PVC window sill, carefully study its certificate. What you should pay attention to:
- for the PVC content (it should be at least 50%, better - 60%);
- on the percentage of chalk content (permissible no more than 5%);
- the thickness of the stiffeners must be at least 1.2 cm and not more than 3.5 cm;
- the thickness of the panel itself is from 2 cm.

PVC panel "wood grain"
The most durable panels are produced by Germany. The second place is shared by Russia.
Installation methods
How to put a window sill to a plastic window? The window sill in the opening is mounted in different ways:
- Mounting on a special solution: the method was often used several years ago, today there are new, modern technologies that are distinguished by convenience and functionality. Now this method is practically not used.
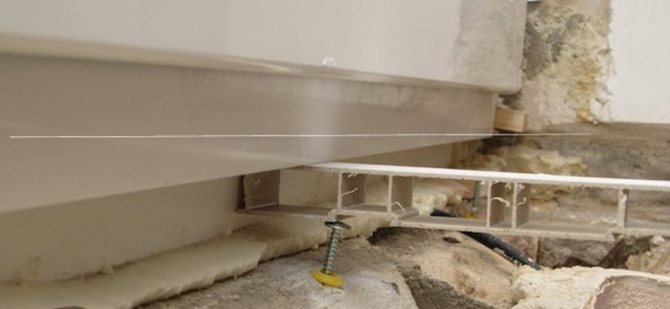
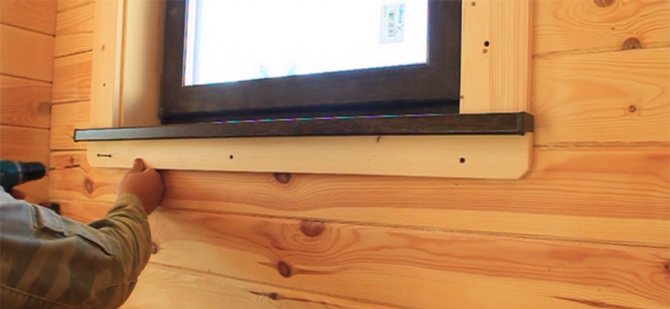
- With the help of spring brackets screwed to the substitute profile with special self-tapping screws. At the same time, the structure is mounted in a special groove located between the window and the bracket.
- Self-tapping fastening: a quick way when fastening takes place directly to the frame.
- Installation without fastening accessories, the work is done with special wedges that press the edges of the slab to the frame. This method is time consuming, but it is highly reliable.
Installation (propene) boards
In order to properly fix the window sill yourself, you must perform the following steps:
- Moisten the bottom of the opening and the slab again.
- Clean the part of the web that will be installed under the slopes from the protective film.
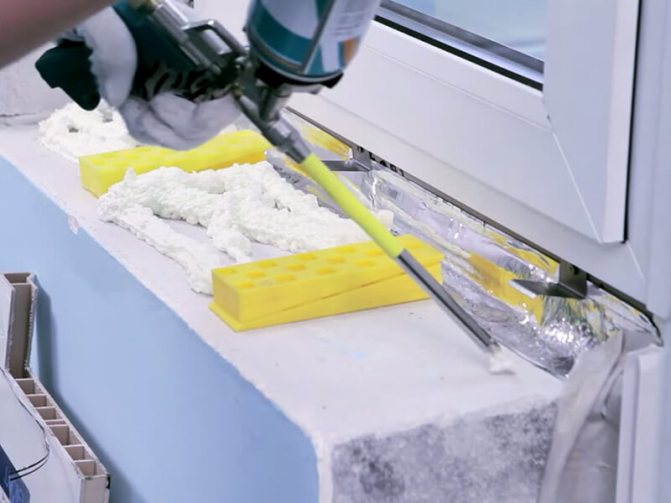
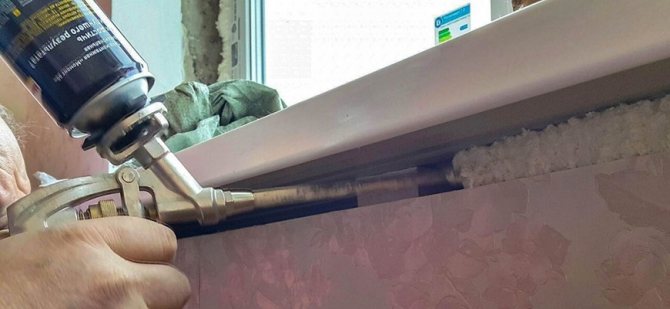
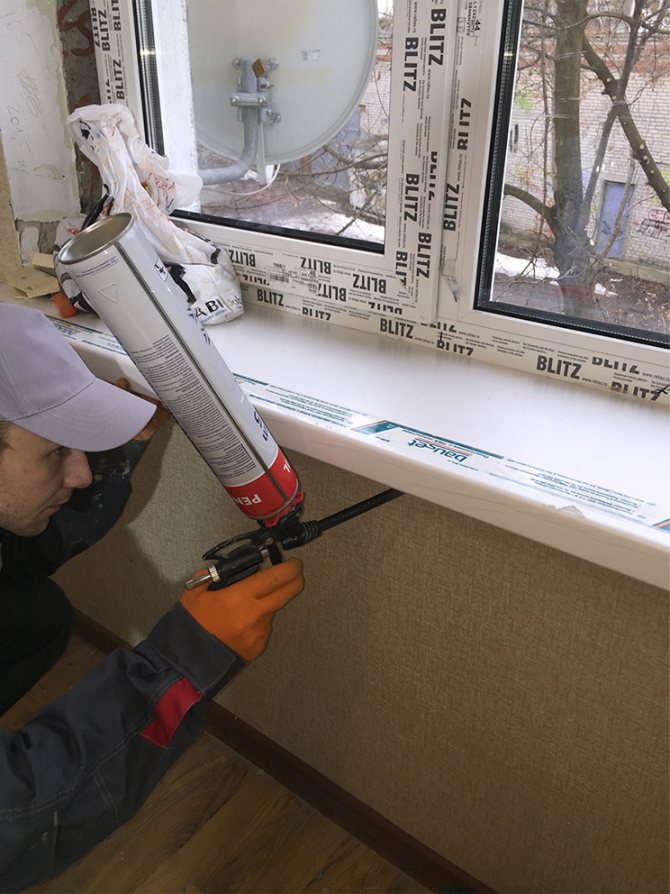
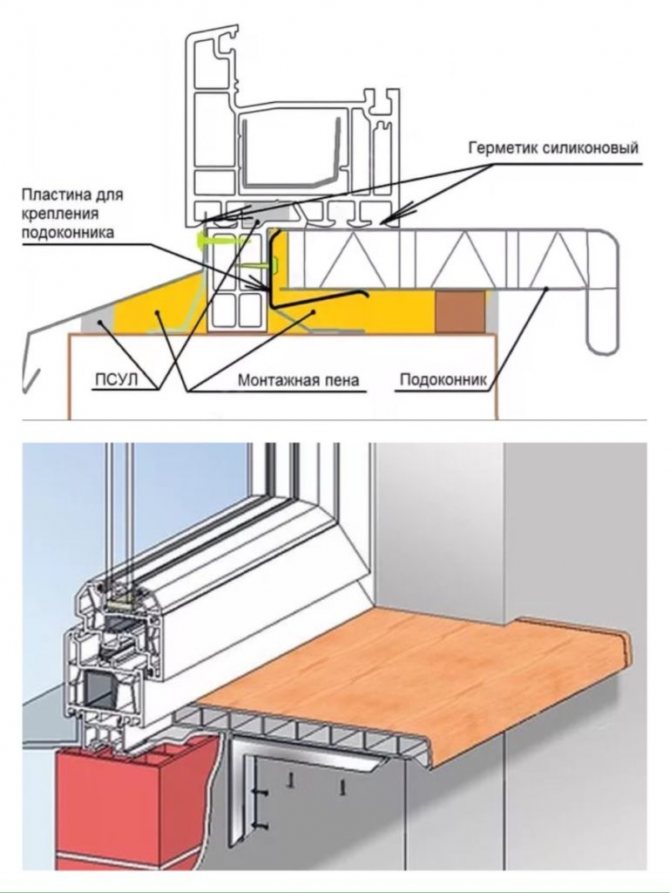
- Then, using polyurethane foam, blow out the gap between the profile and the bottom edge of the opening.
- Then apply a wide layer of foam to the entire surface of the base, especially carefully treat the far corners. At this stage, it must be taken into account that the thickness of the foam should not exceed the thickness of the installed wedges, otherwise, when the material hardens, it can greatly raise the plastic window sill.
- Further, to evenly distribute the load on the plastic window sill, you need to put a load. It is recommended to do this on the inner edge of the board.
- The window sill is installed, now you just have to wait until the polyurethane foam dries.
Required tools and materials
Before you install the window sill on a plastic window, you should prepare all the necessary tools in advance.
To complete the planned amount of work, you will need:
- material of construction;
- construction foam for installation, it is poured into the cavity between the wall and the product;
- silicone sealant, which is used to seal the joints between the frame and the slope panels;
- metal perforated strip, self-tapping screws;
- putty, with which the grooves in the wall are closed;
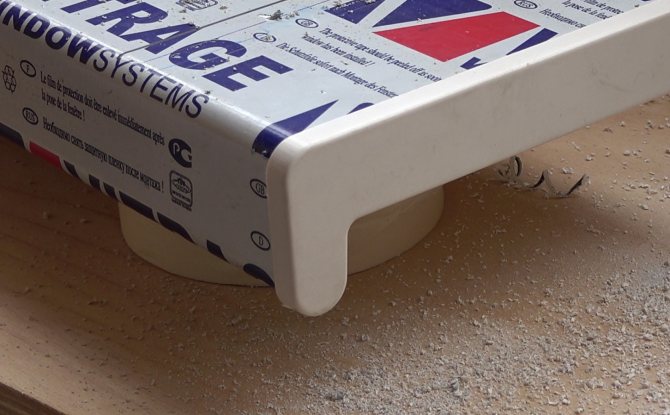
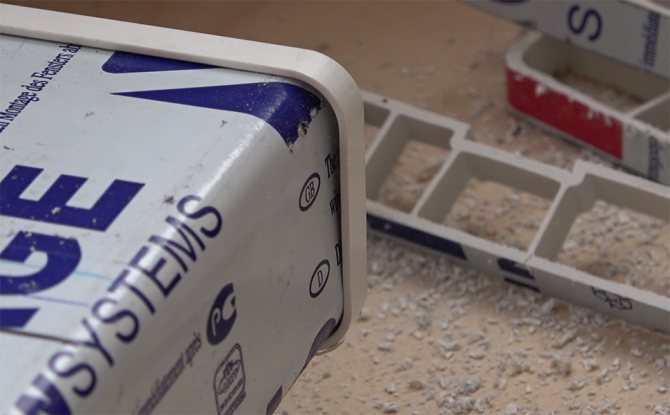
- plugs attached to the ends of the window sill;
- wooden, plastic wedges that are attached under the window sill (three pieces per window block).
Required tools:
- tape measure for making measurements;
- spatula - apply building mixtures;
- rubber hammer or mallet;
- a perforator with which a groove is made;
- level;
- pencil or marker;
- screwdriver;
- Phillips screwdriver
- stationery knife;
- clean rags.
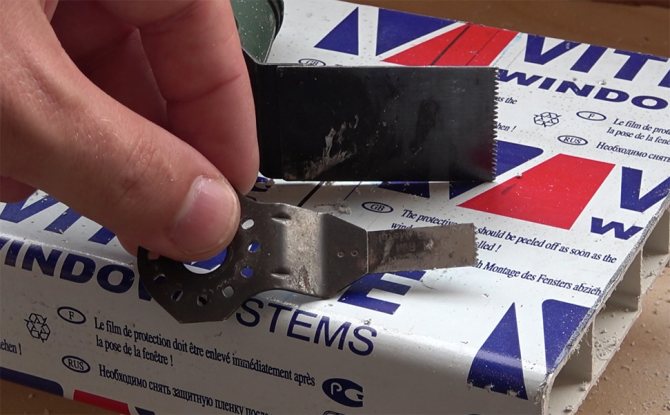
In addition, you will need a device to prepare a plastic profile by cutting it into the necessary parts:
- grinder: works quickly, leaves smooth edges at the cutting line;
- electric jigsaw: a metal file is attached to it;
- hacksaw for metal: found in every home.
Foaming
With this final operation, it is necessary to avoid raising the window sill, which can provoke its deformation. So that the foam that increases in volume does not remain in place, but is squeezed out, any weighting materials that are at hand are placed on the windowsill - dumbbells, containers with water, stacks of books.
Excess frozen foam is eliminated with a knife. Gaps and crevices at the bottom, as well as at the slopes, are eliminated with silicone sealant. The material is applied in a thin strip, then compacted with the most ideal tool - a finger. Excess, without hesitation for a second, wipe off with a damp cloth. Large voids between the panel and the wall are covered with plaster.
Since it is not difficult to install a plastic window sill, special knowledge is not required for this, many people prefer to do the work on their own. However, a lack of tools and materials can be an obstacle, and their purchase is likely to minimize savings. In this case, it is more advisable to contact qualified craftsmen.
The following video will tell you how to install a plastic window sill in order to avoid mistakes and not be upset at the sight of your own creation:
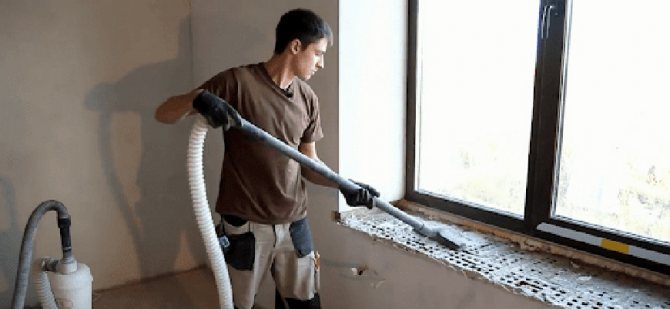
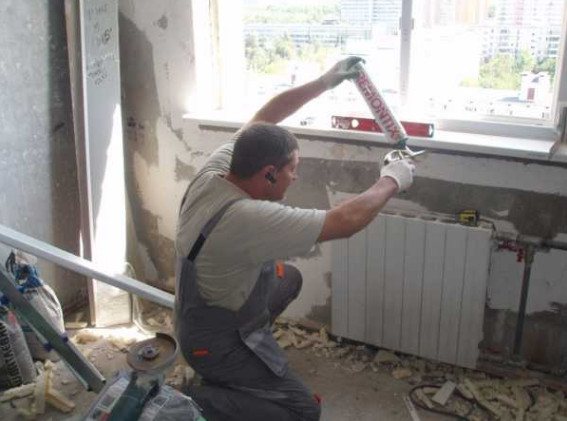
Preparation of the base
Before attaching the window sill to the plastic window, you need to start preparing the base, as the most important place for attaching the entire structure. This is required in order for the construction foam to come into full contact with the walls.
The base of the opening is prepared as follows:
- cleaned from construction debris;
- remove excess foam remaining after installation work on the installation of the window unit;
- cut out particles of foam from under the lower opening, with a depth of up to 3 cm, in order to partially pinch the window sill with the construction of the glass unit;
- cut a recess in the wall with a width of up to 7 cm, a depth of about 2-3 cm, there will be a foam seam where the plastic panel will lie.
Features of replacement in a wooden house
The installation instructions in this case resemble those when working in an apartment.
Installation is performed as follows:
- They remove the existing wooden window sill, prepare the opening. The side slopes are trimmed so that the panel is in the desired position.
- Form the grooves for fixing the plate. To do this, use a hammer and chisel. Sometimes the grooves are already present in the walls.
- Install support attachments. They are fixed so that they do not move during the installation of the window sill plate.
- Align the plastic panel. The element is fixed, the gap between it and the wall is filled with foam. The structure is loaded, leaving it for 2-3 days. Install plugs.
Fastening a window sill in a wooden house.
Installation work
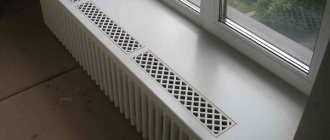
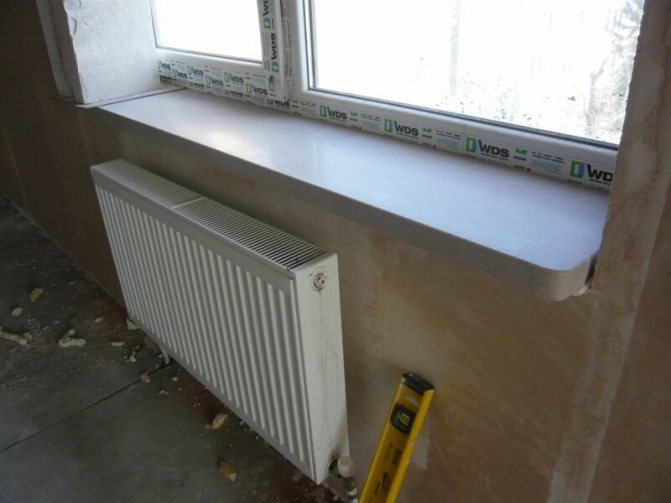
How to put a window sill on plastic windows? Install the plastic window sill inside the room in such a way that this product does not cover the central heating devices in any way. Otherwise, air circulation will be impaired, which will cause condensation to form on glass surfaces.
Installation work progress:
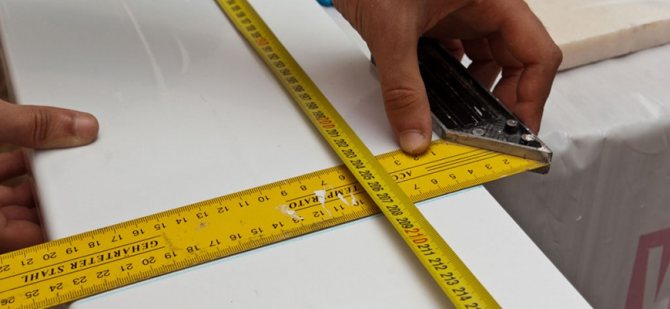
- according to the previously made measurements, cut the canvas with a grinder. Be sure to take into account the protrusions from the wall (from 2 to 4 cm), on each side. When the opening has a complex configuration, you should first make a sketch on cardboard, which you want to try on to the opening. If the system fits well into the groove, the contour is transferred to a plastic panel;
- when the house is no longer new, the opening may be much lower than the groove under the frame. To reach the desired height, wooden blocks are placed under it. Only then the workpiece is inserted into the groove with a depth of up to 2 cm;
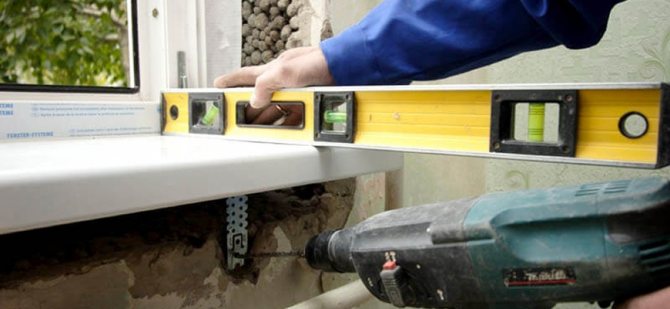
- level regulate the level of the product: you need to change its height using thin wedges made of wood.They are located at a distance of 30 to 40 cm from each other (they will remain there even after the completion of installation work, performing the function of holding tools);
- put a window sill with a slight slope to the inside of the room (about 5 mm), this is necessary so that the condensate rolls down, does not stagnate near the frame;
- foaming the entire cavity under the canvas, it is better to use a two-component composition. If regular foam is used, the surface will have to be loaded with heavy objects;
- when the day has passed, the cargo is removed (if it has been delivered);
- the excess foam is cut off using a clerical knife;
- plastic plugs are mounted on the sides.
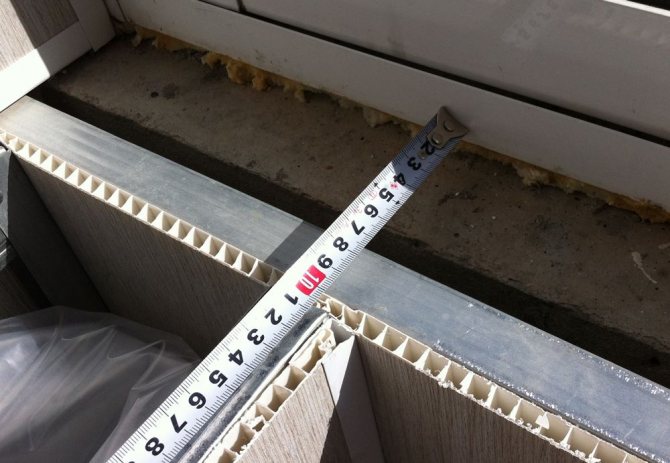
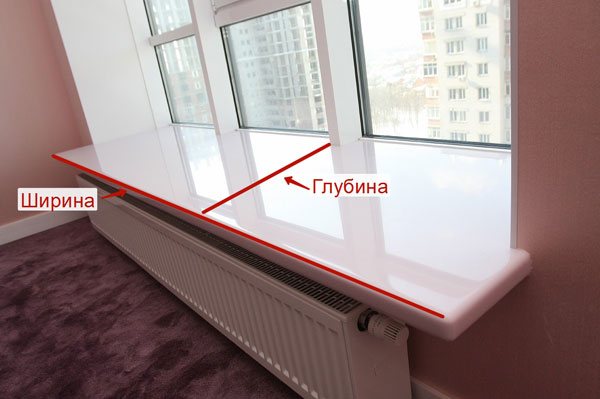
How to properly install a window sill on plastic windows - plate dimensions
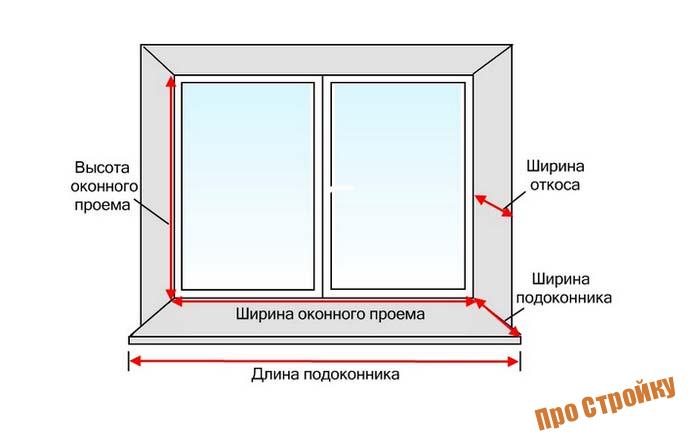
- Length
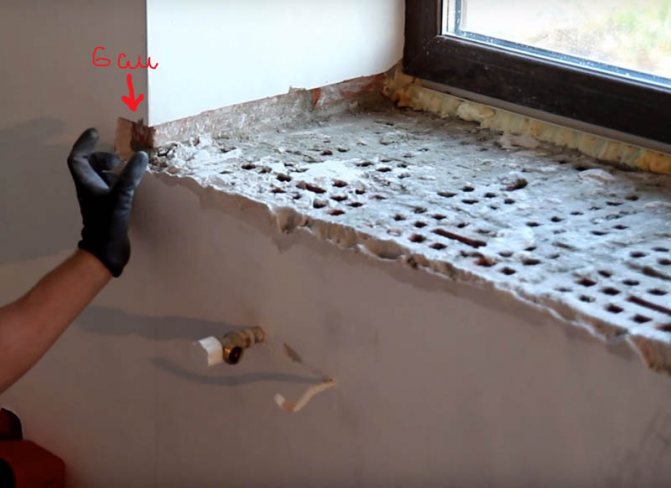
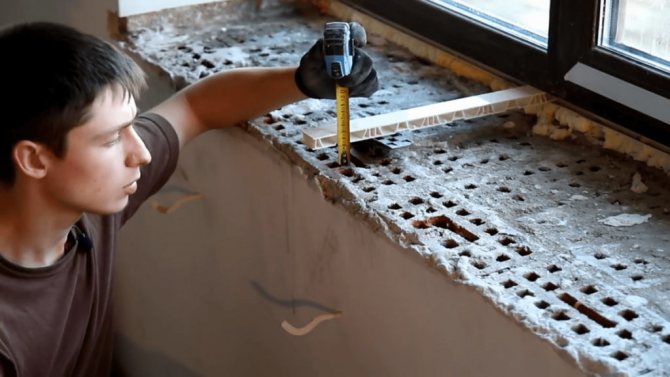
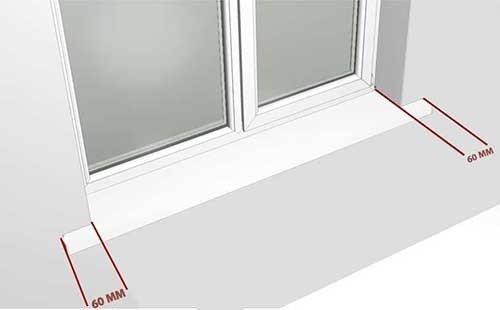
The distance between the slopes is + 10-12 cm. A stock of 10-12 cm is necessary in order to drown the window sill into the slopes and ensure that it goes beyond the width of the window opening (the so-called "ears"). The installers recommend making a protrusion of 5 or 6 cm on each side. In some cases, you may not follow this recommendation, leave a smaller size of the "ears" (we will discuss in more detail below).
- Width (depth)
To determine it, more factors are taken into account. Window installers usually leave a groove under the bottom edge of the frame for installing a window sill. If you did this, we measure the depth of the groove, and take this indicator as the first term. The second term is the distance from the window frame to the angle of the slope and the wall. And the third term is a protrusion from the level of the wall to the depth of the room. Usually the sill protrudes 5-6 cm, but this is a rule, not a dogma.
The main thing that needs to be ensured is the unhindered movement of the flow of warm air from the heating radiator up the window opening. Otherwise, intensive condensation is possible on the glass, the plastic windows will start to “cry”. Therefore, it is important that the radiator protrudes from the wall at a greater distance than the window sill. But all houses are individual, somewhere thin, somewhere wide radiators are used, they may be completely absent, for example, when using warm floors. Therefore, the size of the ledge of the window sill behind the wall is chosen in a larger range than the traditional 5-6 cm. But remember that you should not get carried away, the desire to get a large area, for example, for flowerpots with flowers can lead to negative results, "crying" windows. This must be borne in mind when ordering and installing furniture. For example, today it is fashionable and convenient to mount desktops, kitchen worktops close to the wall and window sill. Nobody forbids doing this, but it is important to provide openings or openings through which warm air will rise to the window.
How to seal up the foam under the windowsill?
Having figured out how to install a window sill, it becomes clear that installing a window sill on plastic windows is not a difficult task. You can close the foam that will be under the structure in one of the following ways:
- A solution of the adhesive used to fix the tiles. When the foam is flush cut, an adhesive is applied on top. With further painting of the walls, the sanded area is preliminarily putty. If you wish to apply wallpaper to this area, the surface is treated with an acrylic primer.
- Cover the foam with a vapor-permeable tape. A decorative strip is placed on top. It can be made of aluminum, polyvinyl chloride, wood.
Window sill care
Plates of their polyvinyl chloride must be cleaned with water and detergents. For wooden parts, it is better to use a well wrung out cloth and no abrasive materials. It is not advisable to clean the wood with abrasive products and moisten it with water. The surface of the window sill must be protected from freezing. Dust is removed with a dry cloth, and every 3-4 years it is required to cover the product with a new layer of varnish, wax or paint.
The new window sill will serve you longer if the following conditions are met:
- Accuracy during work.
- Use of quality building materials and raw materials.
- The correct choice of material from which the window sill is made.
- Installation taking into account all instructions and requirements.
- Gentle handling and regular surface care.
It follows that the installation of window sills for plastic windows, as well as replacing the window sill with a new one, can be done independently. You only need to complete all the steps in the workflow.
Useful Tips
Attaching a sill to a plastic window contains a few tips from professionals that should be considered in order to avoid common mistakes.
Important recommendations:
- When working with a hammer drill, be sure to use protective glasses and gloves to prevent injury.
- The plastic sheet should not go beyond the slope line by more than 6 cm, otherwise the air circulation will be disrupted, which will cause the insulating glass units to fog up.
- Construction foam will attach faster and will hold more reliably when the surface where it is applied is pre-moistened with water from a spray bottle.
- It is impossible to apply a lot of foam: when it dries, it expands, pushing the panel up, even when loaded with mass. To avoid such a reaction of the composition, small cavities are left between the bands of the substance, which will necessarily close with its natural expansion.
- When cutting the PVC plate, you should check the measurements several times and, only then, cut the canvas.
- When the canvas cannot be brought into the slopes, under the profile, it must be precisely brought inward. The connection points are sealed with a colorless silicone sealant.
As you can see, the installation work on the installation of the plastic window sill is not distinguished by a high level of complexity. Every person who knows how to hold construction tools in their hands can cope with this task.
Truth in size - choose the optimal parameters ↑
Do-it-yourself installation of a plastic window sill should begin with careful measurement. How to choose the optimal parameters? Focusing on the following conditions:
- Depth. On average, this indicator ranges from 20 to 50 cm. There is only one regularity: the narrower the panel, the more reliable and stronger it is. And, the more weight it can withstand when pressed.
- Width. To paraphrase the classics, even the windowsill has "ears". This is the name of the projections on the sides of the window. They are necessary, firstly, to fix the slopes. Secondly, to compensate for the thermal expansion inherent in plastic. And thirdly, for a more complete and aesthetic appearance of the window.
Measurements should be taken from the concrete base.
Advice! When measuring the depth, add 15 mm for the overhang and 50 mm for the overhang. These are the optimal sizes of the window sill.
Window sill dimensions
Correct location:
- install at least 10 cm from the radiator (battery);
- the panel overhang should not overlap the heating source by more than ⅔;
- the sill board should not be at an angle of 90 ° to the window - an inclination inside the room of at least 1 ° is required.