SHARE ON SOCIAL MEDIA
FacebookTwitterOkGoogle + PinterestVk
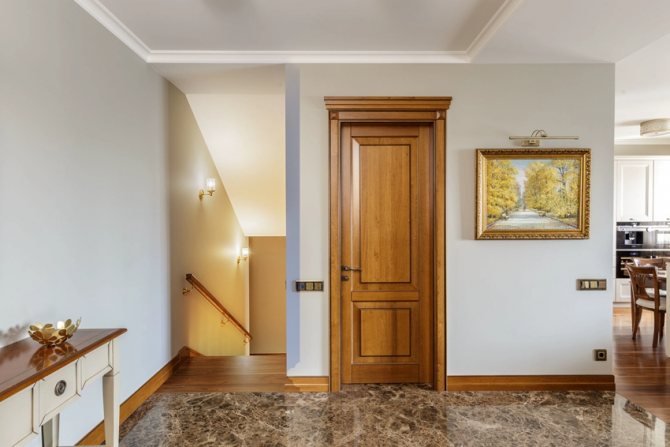
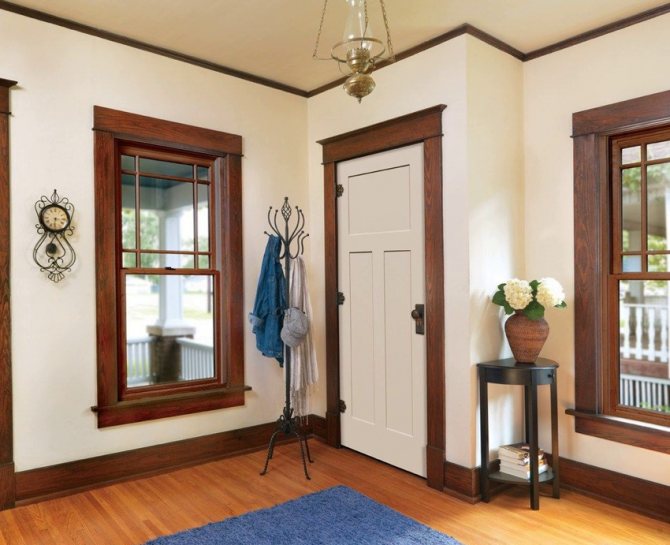
Doors are an integral part of any premises, both residential and industrial. They serve for space zoning, as well as for protection and preservation of heat. At the same time, the installation of the door leaf also provides for the installation of the casing, which gives the opening a complete and aesthetically attractive look. Platbands for wooden doors differ in a variety of shapes, sizes and installation methods. This is what this article is about.
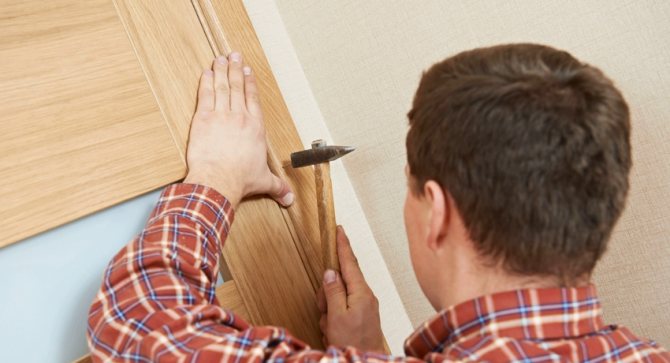
Installation of platbands - the final stage of door installation
What is platbands
The appearance of this uncomplicated device is well known to everyone, without exception. It's so good that we often don't pay attention to the door decor and have long considered it a part of the door block.
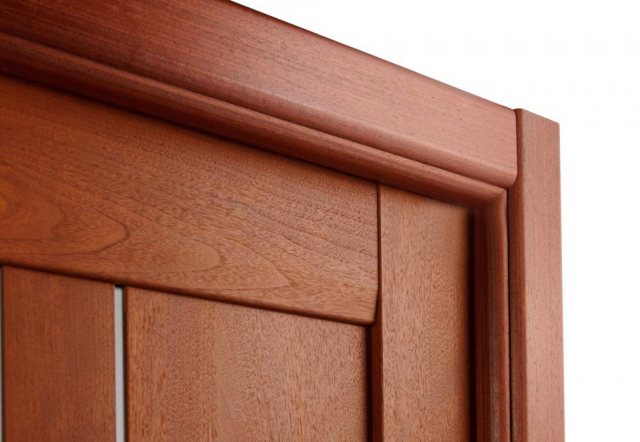
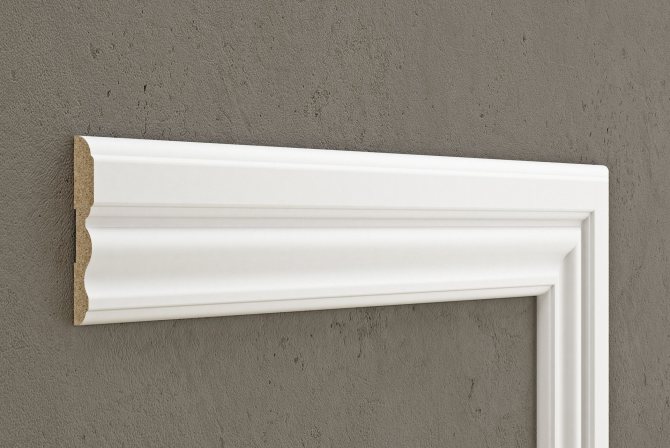
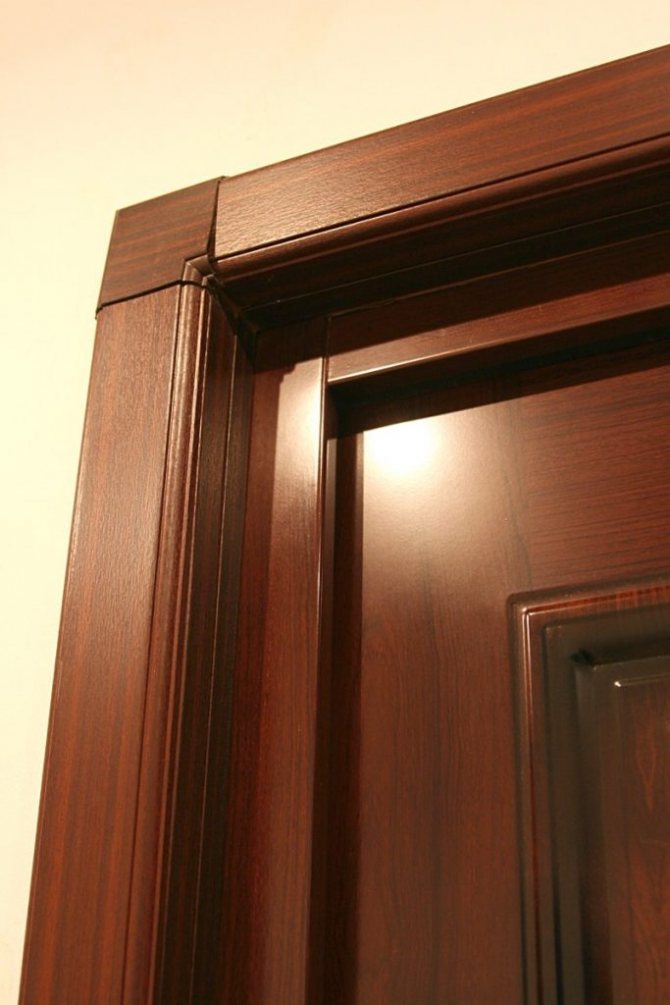
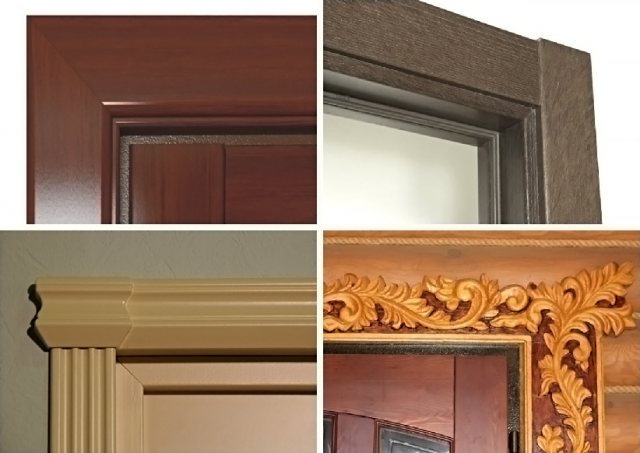
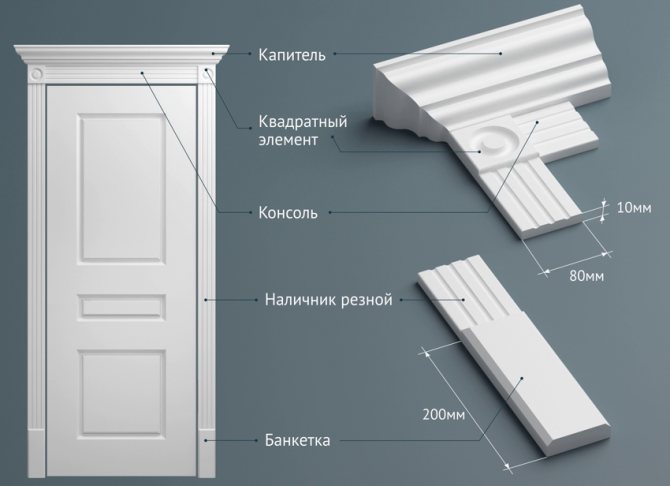
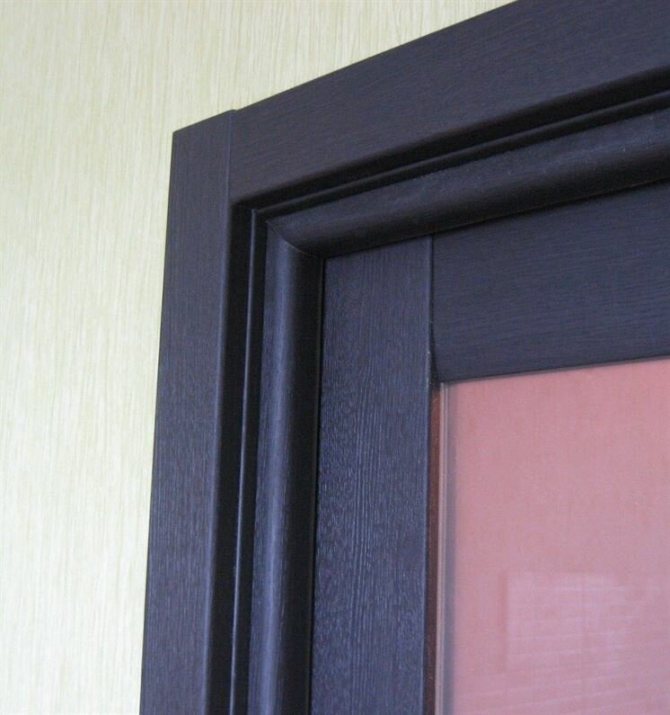
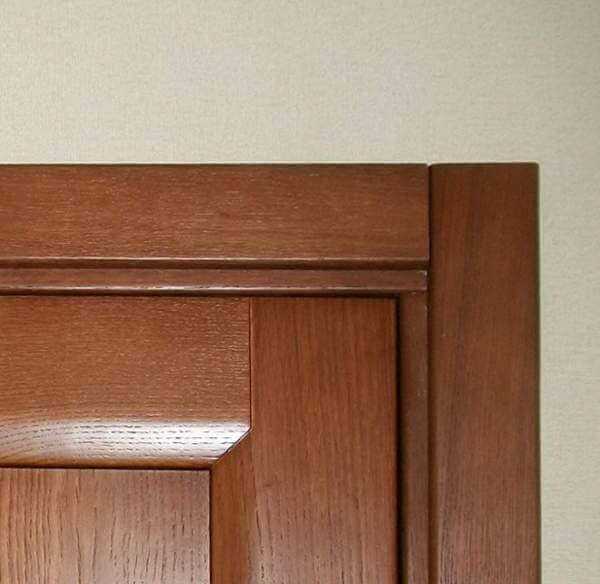
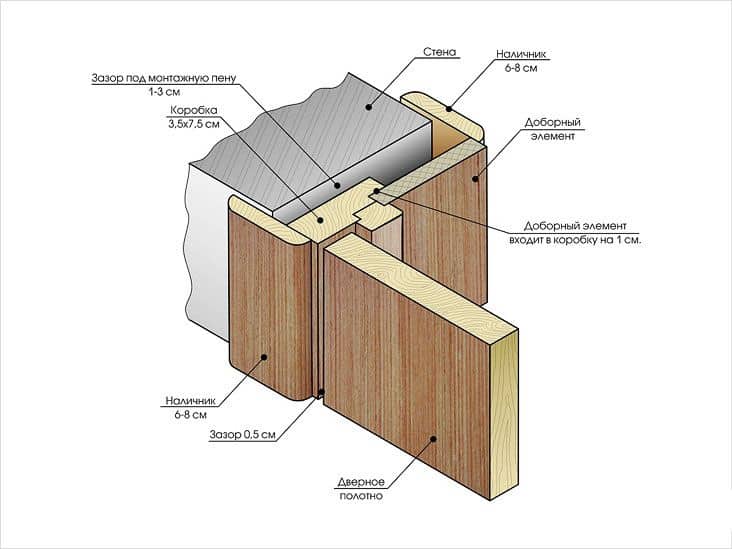
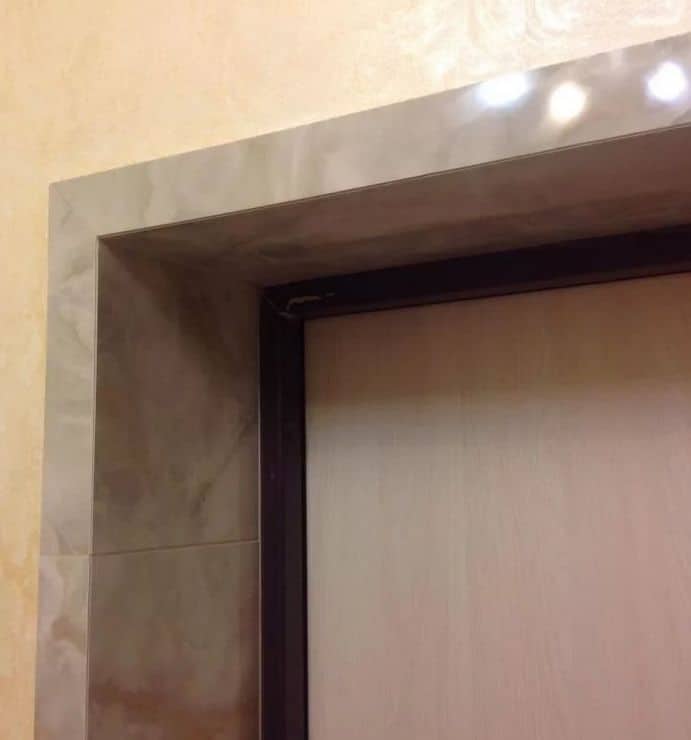
Structurally, the platbands on the door, photo, represent the edging of the supporting frame in the form of a narrow strip, usually protruding above the plane of the wall and the outer surface of the door frame.
Overlays in their modern form appeared relatively recently and were originally used for purely decorative purposes. Modern designs, in addition to purely decorative purposes, are used to solve more practical problems:
- Correctly installed platband visually aligns the interior door frame. Even if the frame was installed in the doorway with a slight mistake, you can always install the platbands on the door at a right angle so that the whole structure looks perfectly flat;
- Interior door frames cover the gap between the wall finish and the outer edge of the door block. In this case, it is possible to close pieces of polyurethane foam, fasteners, wiring or television cable.
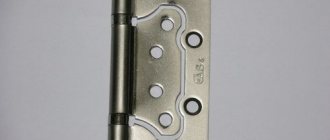
Important! With the advent of closed types of door sheds, the mating part of the hangers installed on the shed is masked with the help of overlays.
Simply put, with the help of an overhead decor, it is possible to correct and mask all the irregularities and technological consequences of the installation of interior doors. But, even remaining a completely utilitarian and practical detail, decorative qualities remain the main function of the door edging.
Modern technologies make it possible to install interior doors quite accurately and with very high accuracy. Why, in this case, does it occur to the owners to put curly platbands on the door, if the canvas and frame are installed with millimeter precision? Because the interior door is part of the living space, and you always want its interior to be more comfortable.
Sawing and measuring platbands
How can you install the platband yourself? Naturally, the simplest option will be to choose a door in which the platbands will already be included as a component, however, it will be much more profitable to purchase individual parts on their own. The difficulty of this method lies only in the correct selection of colors. But the manufacturing process itself is quite simple and everyone can cope with this work, the main thing is to find the necessary materials and have a great desire and interest in the upcoming work.
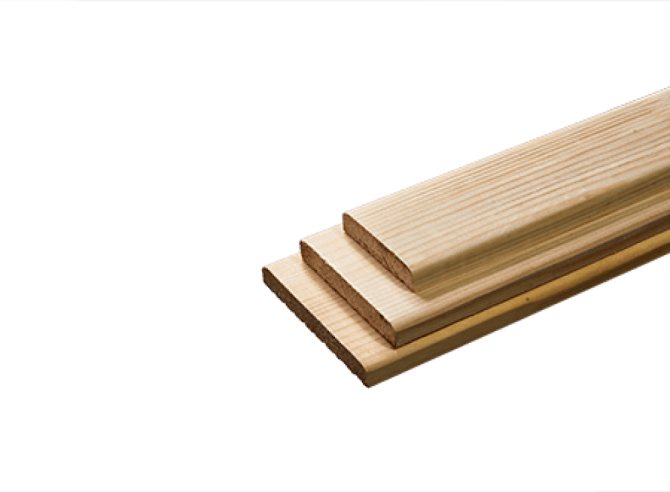
All we need for this is wood planks. In specialized hardware stores, you can easily find a tree with figures and cutters that has already been pre-processed.
In the event that you prefer to do all the work related to the cutouts yourself, then you will need to achieve a very even and smooth surface. After the first treatment, the platbands must be cleaned of dust and other contaminants, and then, using the required color, the platbands must be covered with a stain or paint.
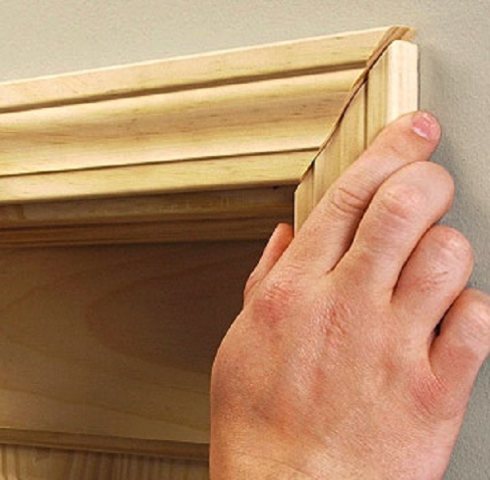
When using trimmed parts, this step will be very important. All measuring work for straight platbands must be done as follows: first we measure the height of the side parts, then the top, the edges that need to be articulated with the outer lines. Everything goes according to the exact measurements.
In such models, where it is imperative to make cuts at a certain angle, the vertex is measured. All borders are marked from the inside. From this point, a cut is made at forty-five degrees in the direction of increasing magnitude. The same manipulation is carried out with the side parts, the elements must also converge when cutting, forming a portal.
It is quite difficult to cut the platband qualitatively and evenly, so you need to resort to the help of special equipment for sawing. We put the platband in the miter box. The dimensions of the connector are forty-five degrees, we put a hacksaw. Thus, each element can be filed with ease.
So, how many platbands are required for the door? To frame one portal, you need three parts: the top and side two pieces. Sometimes, when designing an interior in the styles of antiquity or using Japanese design, a capital is additionally installed.
When sawing the casing, you need to take into account some indicators: this is the slope and the side of its direction. All these conditions must be taken into account in order to articulate all the details of the future design.
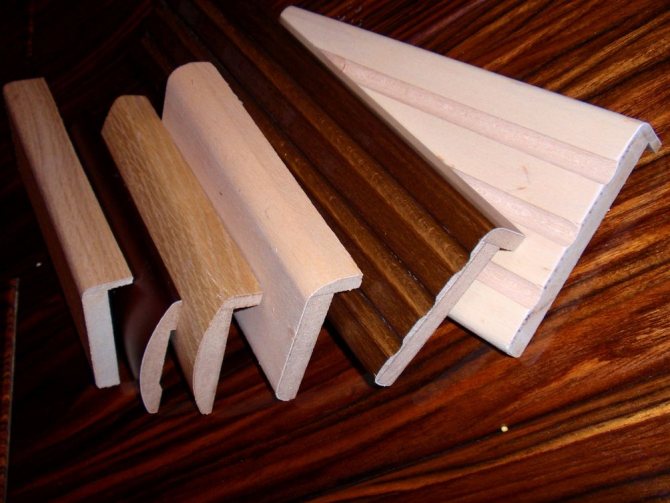
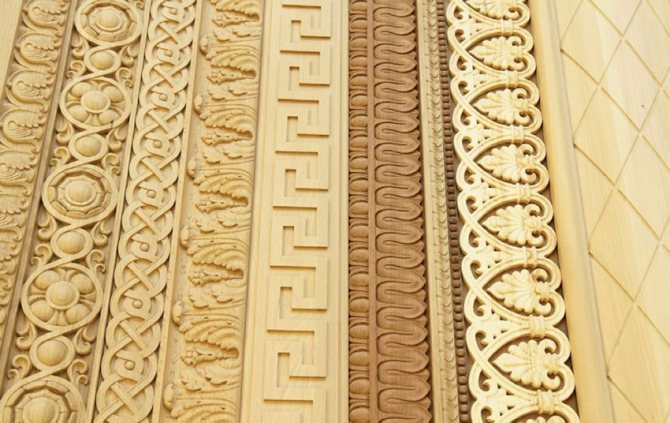
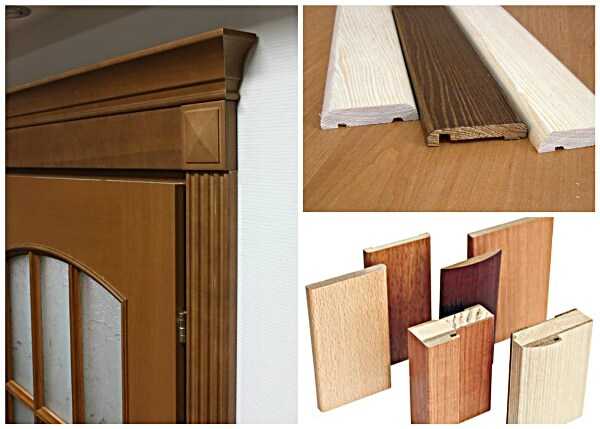
Types of platbands for interior doors based on materials of manufacture
A lot of options for decorative overlays have been invented and created for today. For almost any type of door block, its own version of the best shape and size of the interior door trim has been developed. Cover plates are made from the same materials that were used for the front part of the door leaf:
- Wooden decorative strips, both from solid wood, and pressed from cellulose fiber and faced with veneer, film, textured paper;
- Plastic strips in white or brown with a smooth PVC or PP surface. Plastic can be textured under a tree or any other type of finishing material, depending on the design of the interior passage;
- Anodized and painted metal door strips. Usually metal is used as an addition to glass and mosaic door panels.
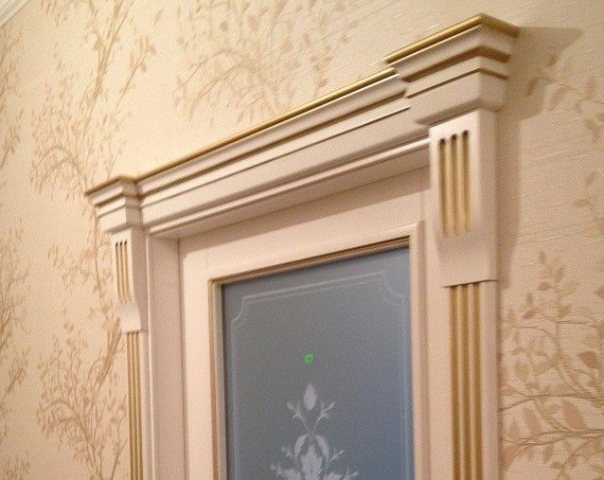
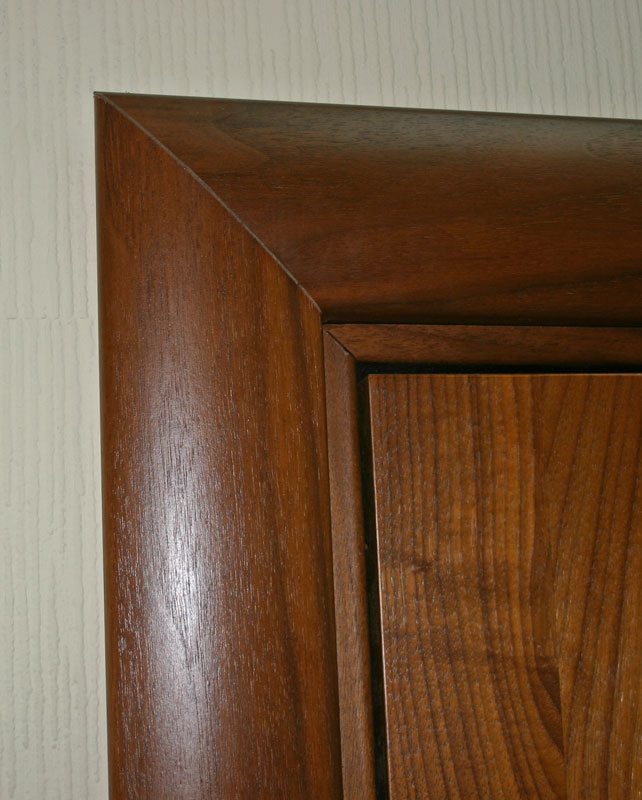
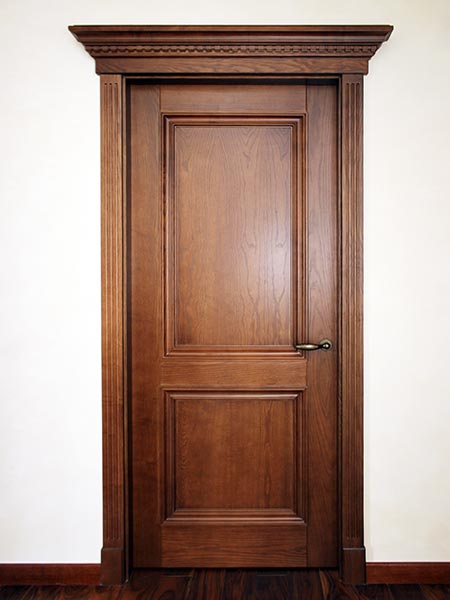
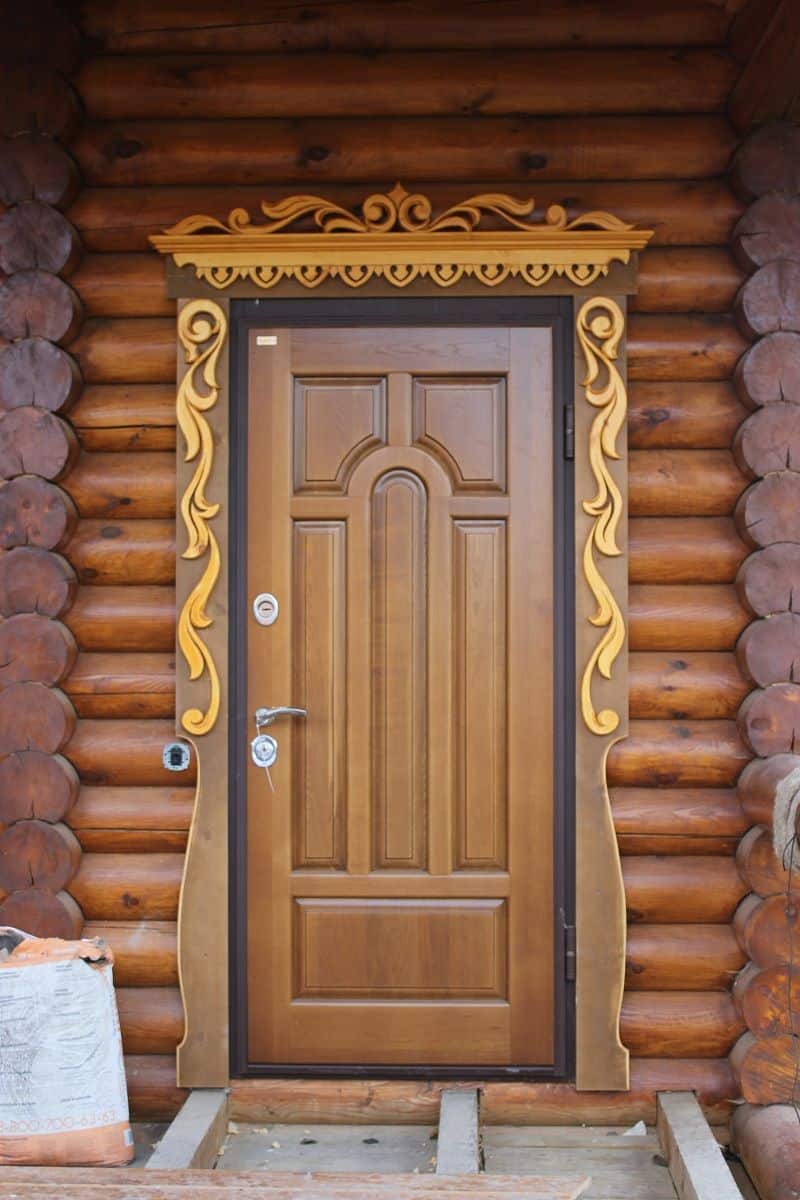
The most expensive are handmade platbands. Handcrafts made from precious woods with brass and polished copper inserts can cost more than an ordinary wooden interior door.
Such details are planned and assembled only in conjunction with the door block and door leaf. If, for example, a Victorian-style interior is built in an apartment, then platbands for a heavy oak interior door will cost $ 30-40 per meter of length.
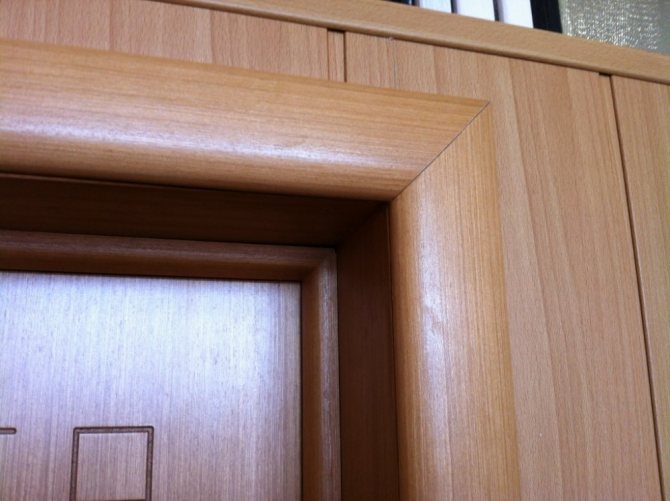
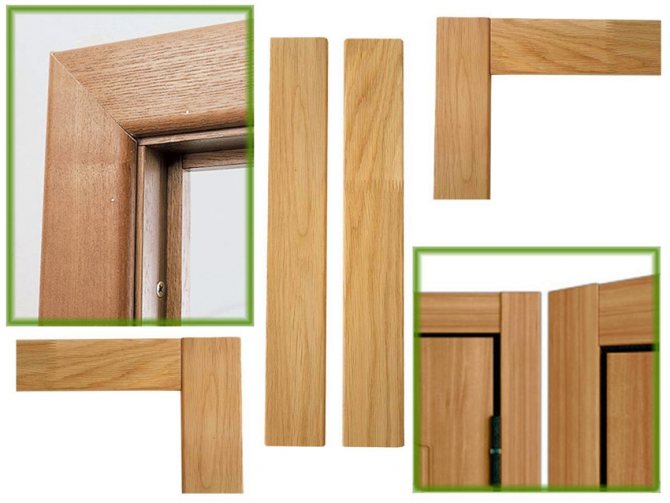
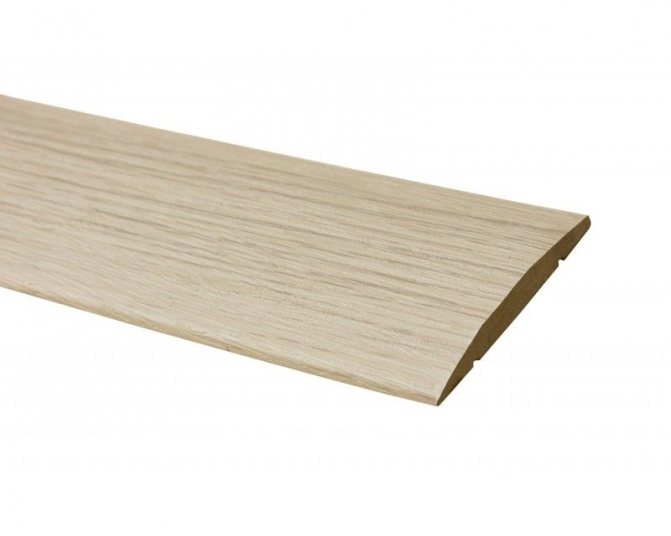
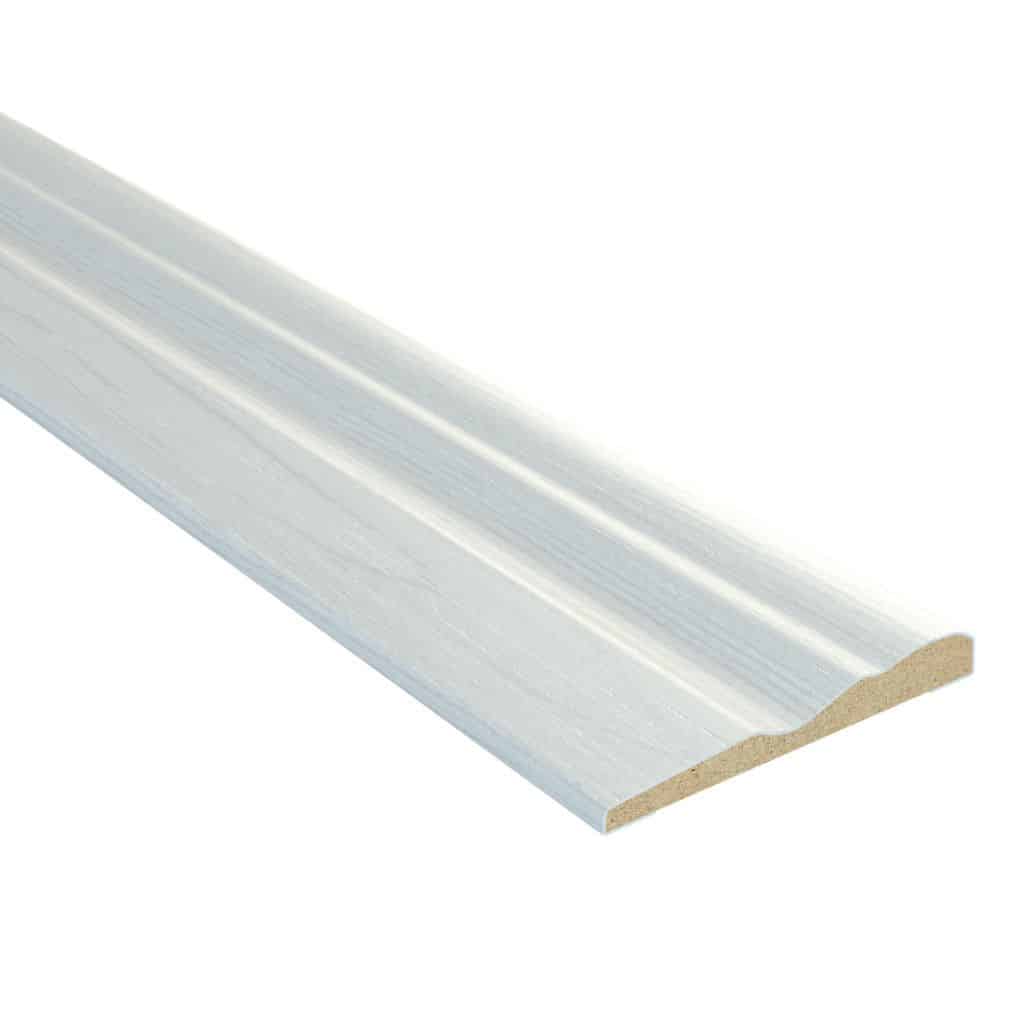
Wooden platbands on the door
Fortunately, ordinary wood trims for ordinary door blocks cost an order of magnitude less. But even in this case, in order to choose the material for installing platbands on interior doors with your own hands, you will need to try pretty hard. You will have to choose the shape, size and material of the wood.
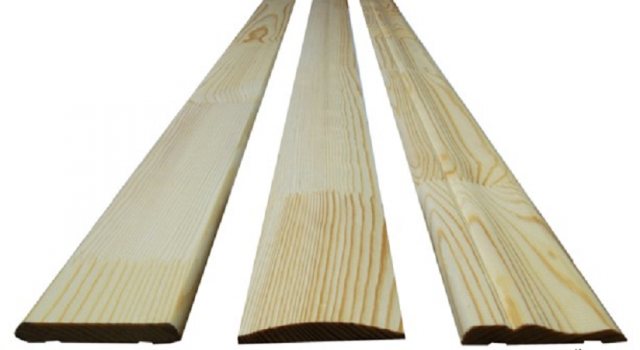
To frame the box of an interior door, wooden platbands of four standard sizes are used - 40 mm, 50 mm, 60 mm, 70 mm. The width of the plank depends on the dimensions of the door leaf and frame. For example, for a block of 2050x680 mm with an interior door width of 2000x600 mm, you can use wooden strips with a section of 40 mm.For a wooden door 2000x900 mm with a block of 2050x900 mm, platbands of 70 mm and even 100 mm in width are used.
Important! The cost of a set of strips for arranging a decorative outline is approximately 70% of the price of the door block.
Wooden platbands are made mainly of high-quality young Karelian pine, oak, ash and walnut. Veneered versions of MDF boards with a textured coating will cost almost half the price. For example, 70x15 mm oak material costs $ 3.5 per square meter, while an interior door trim made of an eco-veneer with a width of 64 mm will cost only $ 2.5. The exception is MDF-platbands coated with natural oak veneer. Such pads cost an average of $ 5 per meter.
Metal door trims
It would be surprising if, with a large assortment of metal doors, metal frames were not used for interior openings. The shape and profile of the linings are usually semicircular or flat. Metal plates are installed together with interior doors on an aluminum frame with a glass insert - a window.
Structurally, the overlays are a stamped profile made of aluminum or thin sheet galvanized steel, so decorative overlays serve perfectly in the most difficult places of a house or apartment. For example, for a balcony door, at the entrance to an unheated room in a house or apartment.
Metal platbands are difficult to mark and cut to size on their own, so most manufacturers complete frames and blocks of interior doors with ready-made products. You only need to properly fix the material around the perimeter of the doorway.
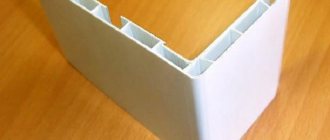
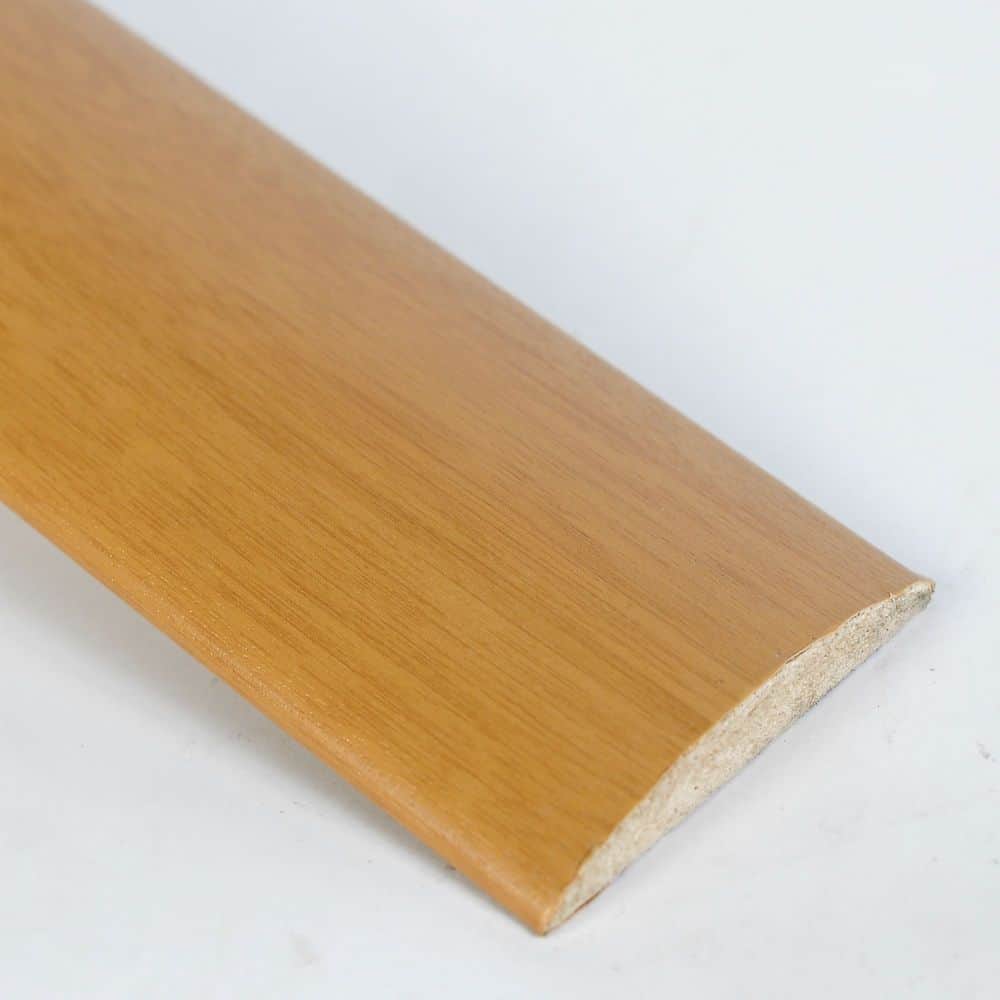
Plastic door trims
Today, decorative plastic overlays are considered the most practical and easy to install. The plastic does not fade and does not lose its surface pattern. The profile of the plastic casing is not afraid of moisture and drafts, therefore, the interior doors leading to the bathroom and to the kitchen are completed with polymer linings.
There are two types of plastic trims. The first ones are cast in the form of a hollow profile with a large number of ribs and partitions. Such material is easy to cut, but when cutting and fastening, it is necessary to handle the plastic decor with extreme caution, because of the risk of cracks and pricks. The second type is a dense monotonous material, in appearance and properties reminiscent of the wood of African oak or young linden. Such parts can be cut, sawed, drilled without any restrictions.
PVC platbands for doors
Most of the decorative cladding for the interior door frame is made of polyvinyl chloride. The width of PVC trims corresponds to the dimensions of wood trims. Most often, plastic decor is used with a width of 70 mm and 80 mm.
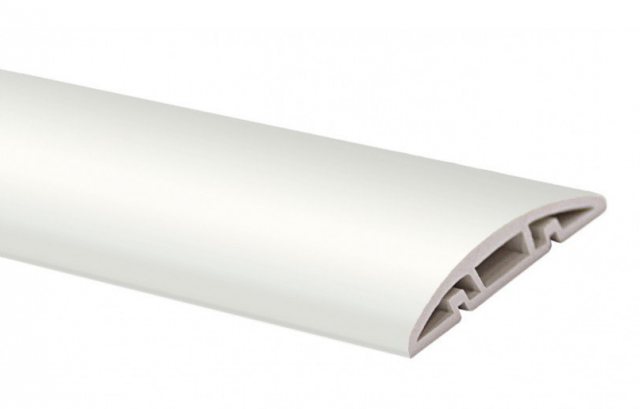
The most common is a rectangular hollow profile 80x16 mm, it is the lightest and cheapest of all models of PVZ-platbands, the average price of the material is $ 3-3.5 per meter.
If the door frame of interior doors is made "wood-like", then a semicircular profile with a textured surface imitating the pattern of alder, walnut or chestnut wood is best suited.
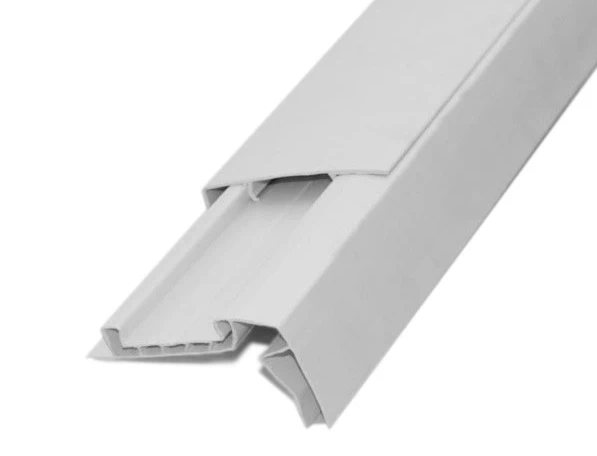
Platbands are made with a central groove on the back of the profile, which greatly simplifies the installation of the material on the wall.
A special technology for the production of PVC decor frees up most of the internal volume, which can be used for laying cables and wiring. Such platbands are made detachable, with a lid and a bottom part. Such material is inexpensive, $ 2.2 per meter, however, additional elements will have to be purchased for it in order to close the ends on the lining of the interior door.
Polyurethane door trims
The decorative frame made of molded polyurethane is fundamentally different from PVC linings. Platbands are made not by extrusion, but by pressing the foam material in cast iron molds.
This technology provides two main advantages of polyurethane trims:
- You can make decor with a very complex surface, imitating woodcarving, stucco or even metal casting;
- It is very easy to attach polyurethane platbands to the interior door frame;
- The material is easily cut, drilled, painted.
Important! Polyurethane platbands can be glued with ordinary shoe glue, painted with alkyd and acrylic paints. For PVC decor, you will have to buy special adhesives and dyes.
Therefore, polyurethane platbands are used for interior openings in cases where it is important to recreate a complex door design, to imitate stucco molding or stone carving.

Preparatory stage
The first step in this stage will be sawing and installing platbands. The next step in the preparatory stage will be to determine the method of fastening. Based on what decision you make for yourself, you may need the following things to work:
- Stapler, construction staples
- A hammer
- Nails
- Self-tapping screws
- Screwdriver
- Mounting foam
- Rubber mallet
- Primer mix
- Liquid Nails
Of course, you will not need all of the above things at the same time. For work, you need only those elements that will be needed in a particular case. Nails, screws are required for metal and wooden platbands. They are used to provide better adhesion of elements. However, in this case, you will also have to think about masking at the attachment points. So that no spaces are visible, you can use a primer mixture or other known masking methods.
Liquid nails are most often used for lighter models. It will not be difficult to glue the platbands, it is really easy and quick work, but it will be much more difficult to fasten them. It is also necessary to avoid damage in the coating itself, but the use of glue in this case will allow you to keep all the elements in their original form and not spoil the details.
Types of platbands for interior doors by type of fastening
According to the installation method, it is customary to divide the door decor into two independent groups:
- Simple, invoice or independent type of platband;
- Telescopic or prefabricated overlay option.
The choice of the shape and size of the decorative element is based on the dimensions of the doorway and the thickness of the walls. In the latter case, an additional strip can be added to the casing, providing a smooth transition from the outer surface to the door frame.
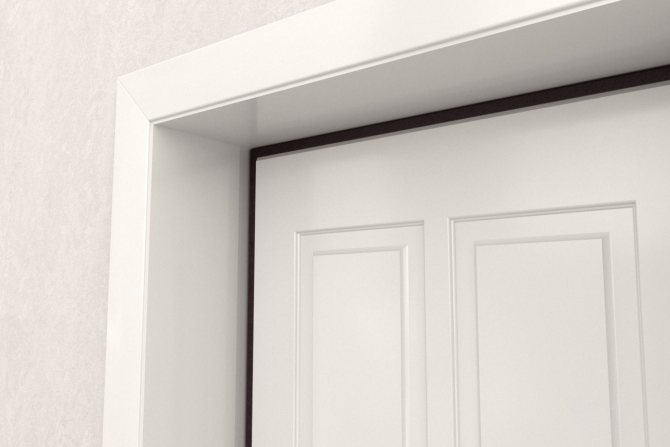
Independent door trim
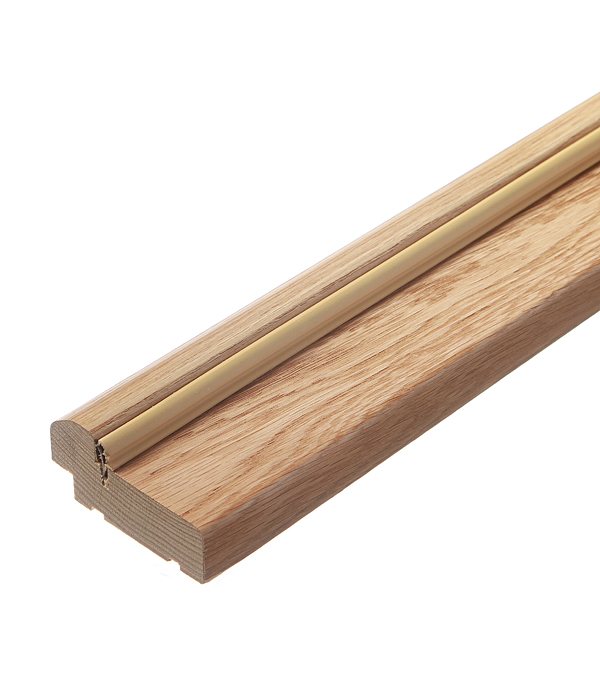
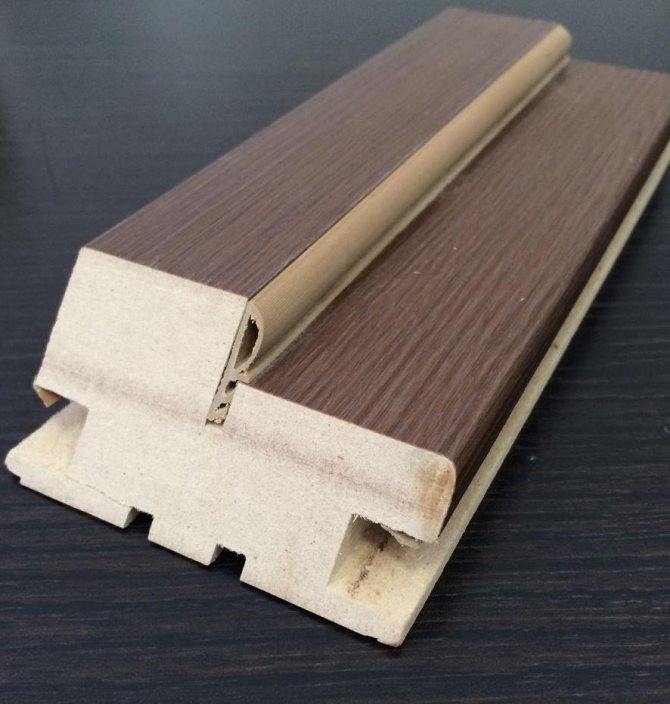
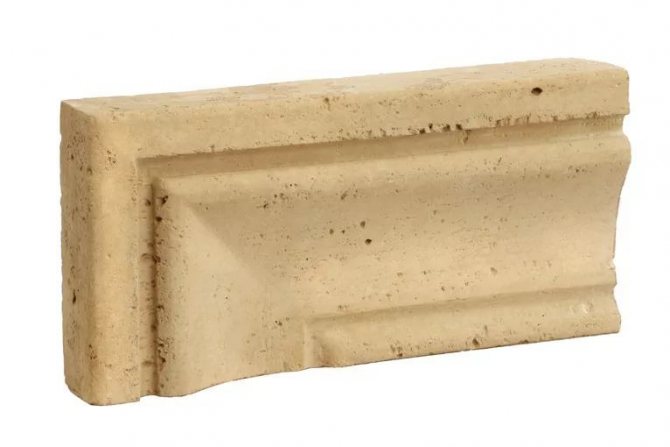
The applied decorative element resembles an ordinary polished, wooden or MDF strip in its structure. A slight difference between an independent platband and a conventional board is the presence of a centering groove on the back of the decorative overlay.
Polyurethane and MDF overlays can have a more complex shape, as shown in the diagram. This profile allows you to ensure accurate and reliable adhesion of the material to the end plane of the box.
The material is cut to the size of the frame of the interior opening with an allowance for gash in the corner sections. Structurally independent platband is very similar to the details of the wooden frame of some painting.
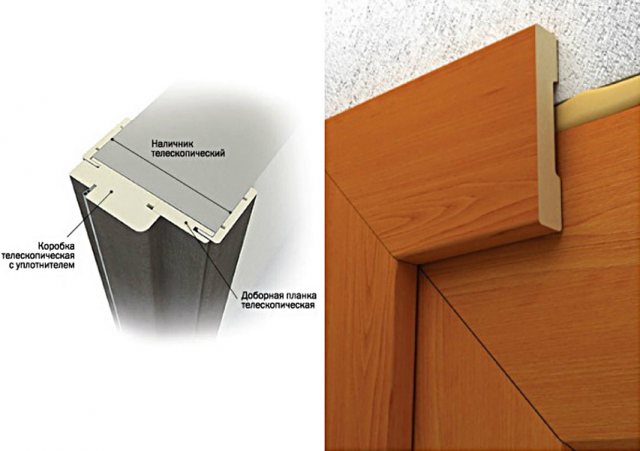
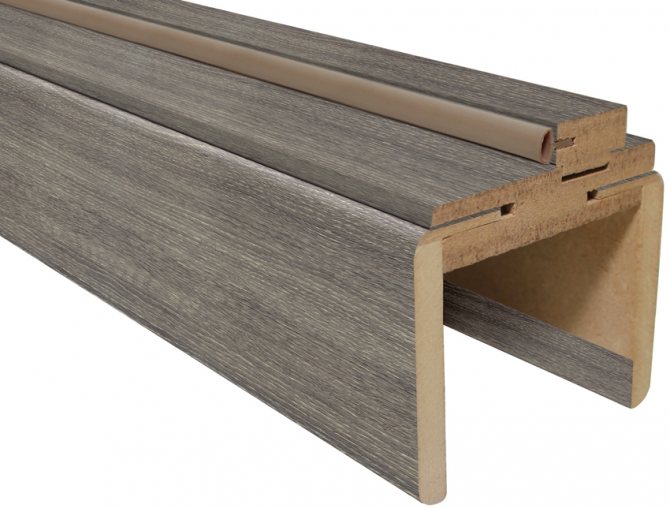
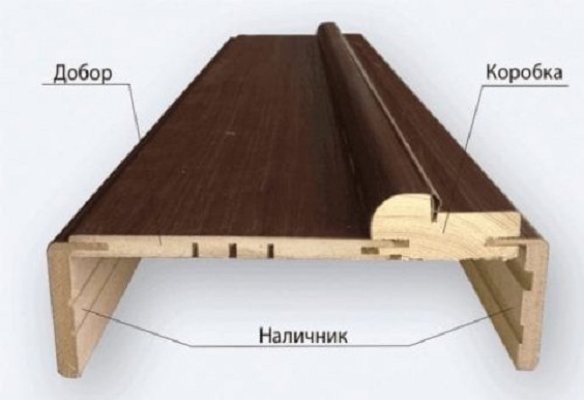
Telescopic platband for interior doors
The design of the split lining differs only in the presence of an additional side shelf. In cross-section, the telescopic casing resembles the letter "G".Telescopic platbands and extensions for interior doors are used to install and assemble a door structure when the wall thickness is significantly greater than the width of the door frame.
Installation of telescopic platbands on interior doors is carried out only after the selection of the required extension width and bringing the edge of the box into one plane with the wall surface.
Calculation of the additional bar
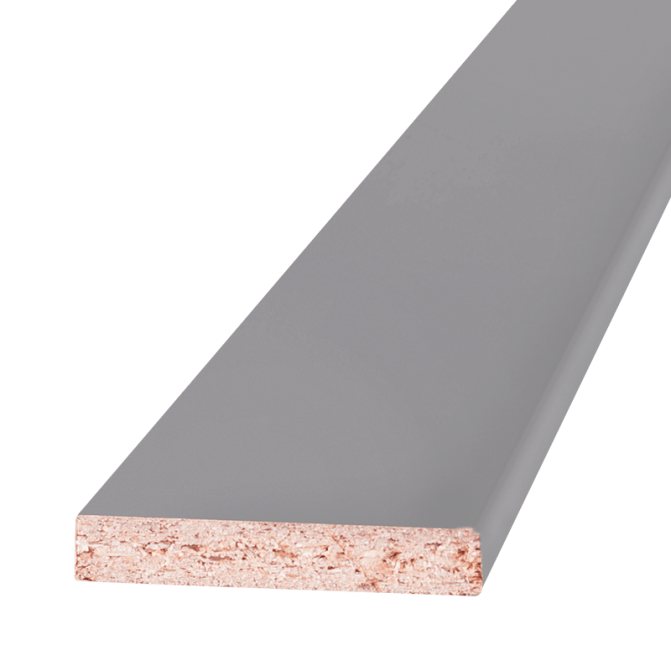
Additional plank or add-on is a decorative device. It is necessary if the wall is 70-75 mm thicker than the box. It acts as an extension if the box is narrower than the wall itself. The length of the element corresponds to the length of the platbands. At the heart - chipboard, fiberboard, plywood or other wood-based construction materials. The surface has a different texture (film, thin cut of wood).
The dimensions depend on the selected manufacturer. Width calculations using the formula:
- T st - W k (wall thickness minus box width)
You need 2.5 extras for a standard door (without a threshold): purchase 3 pieces (rounded up).
How to choose platbands for interior doors
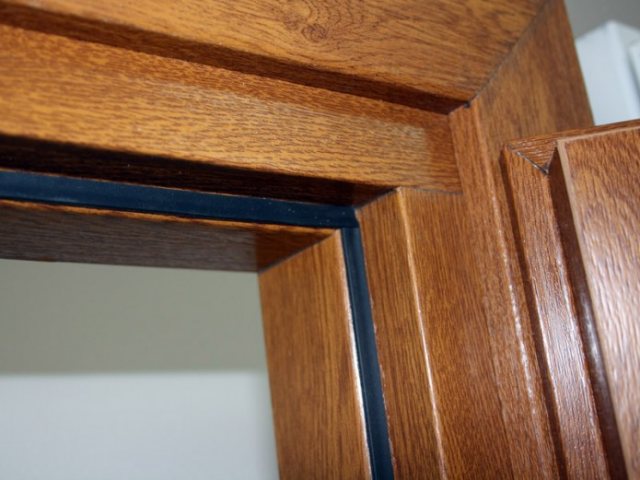
The main criterion on which it is customary to be guided when choosing is the design and way of decorating interior doors. Traditionally, frame covers are selected from the same material as the door itself.
For example, for a wooden frame and canvas, only wood trims are suitable. In this case, it is important that the texture and color on all parts of the door frame completely match.
In addition, it is important to observe the proportions between the width of the vertical racks of the tray and the transverse dimension of the platband. An increase in the size of the lining up to 100 mm is allowed only for interior openings with very thick walls.
What to look for when buying a frame
In order for the platbands to harmoniously fit into the overall interior, you need to pay attention to the following characteristics:
- Size (width and length): if the door is standard, you can simply ask the consultant to show the standard trims. If the doors were made to order, proceed from their parameters.
- Materials. Match the canvas or design details. The panels are made from various building materials: metal, wood, MDF, PVC, pressed paper and others.
- Texture. The color depends on the tone of the canvas, plinth and other interior details. It all depends on tastes.
An innovative material is popular - eco-veneer. It repeats in detail the texture of expensive tree species. The material is environmentally friendly.
- Forms. You can choose any, take into account the gaps.
- Fastening methods (liquid nails, nails, lock and others).
- Decorative details.
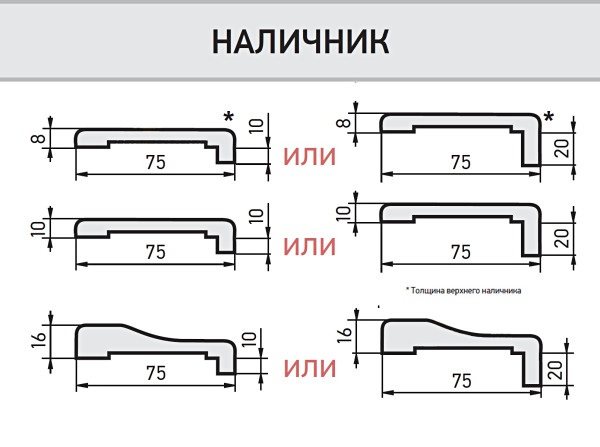
Interior door trim width
The second criterion is the conformity of the size of the decorative strip to the area of the door leaf. There are no exact ratios, but usually 40 mm material is used for narrow interior openings of a standard two-meter height. If the door is more than 2.2 m, then the width of the decor is increased to 50 mm.
For interior openings with a standard width of 70 cm, euroforms are most often used today, having a transverse size of 68 mm. For very large or tall doors, the trim can be extended up to 90 cm.
Advice! For novice designers, you can use the rule - the width of the decorative finish is taken at 1/10 of the transverse size of the interior doorway.
How to determine the required thickness
The thickness of the board must not exceed the dimensions of the groove in the box. The average value ranges from 10-16 mm.
Factory slats are produced in standard sizes, depending on the parameters of the partition:
- if the width of the wall is up to 9 cm, then the thickness of the decorative insert is 1.5 cm;
- up to 16.5 cm - 1.5 / 2.5 cm;
- up to 26.5 cm - 2.5 cm.
The maximum thickness of the finished panels is 3 cm. For non-standard openings, extensions are made to order.
For interior structures, strips of average thickness up to 1.4-1.5 cm are sufficient, and for entrance doors it is recommended to use extensions of 1.5-2.5 cm or more.
How many platbands are needed for one interior door
Regardless of the shape and size of the doorway, decorative trim is installed on both sides of the interior passageway. On each side of the carrier box, three platbands will be installed, of which two are long, 2 m each, and one cornice, the length of which is equal to the width of the opening.
Wooden and plastic blanks are sold with a length of 220 cm, in this case, five threads of material will be spent on the facing of the interior door. MDF platbands can be sold in lengths of 2.5 m and 3 m, so four blanks may be sufficient for a narrow door.
How to attach platbands to interior doors
There are at least four main ways to fix the decor on the end of the box:
- With the help of nails;
- Perform fasteners using self-tapping screws;
- Glue with a special polymer compound;
- Assemble with thorn-groove connection.
The latter option is used exclusively for boxes with additional elements and grooves for installing telescopic platbands. In this case, it is necessary to cut decorative overlays to the size of the box, cut them at an angle of 45o and install the strips into the groove on the supporting frame of the interior passage.
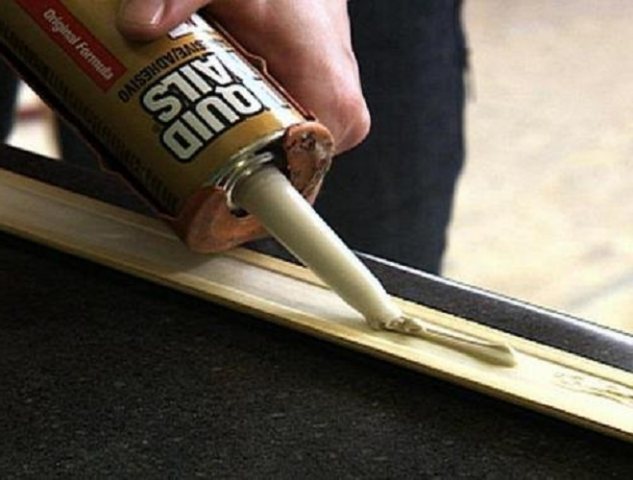
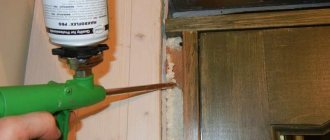
How to glue the platbands of interior doors
This is the easiest way to attach decorative strips to the box. The only problem is choosing the right glue. Often, managers of construction salons recommend "Moment" or "Liquid Nails" as the most suitable option for sticking platbands. Convenient packaging in the form of a tube, you can insert it into a hand gun and glue all the details of the interior door in 20-30 minutes. unhurried work.
In fact, both brands of glue are not quite suitable for sticking platbands on a vertical surface. Firstly, the acrylic mass dries for a long time, and during this time the strips have time to sink or move out of the attachment point. Secondly, "Liquid nails" more or less glue frames made of MDF or polyurethane, for wooden overlays it is better to use polyurethane and polystyrene adhesives. For PVC parts, you will have to use a special composition of plastic sawdust dissolved in dichloroethane.
So that the strips do not slide off the door lute, they are glued with a thermal gun or narrow strips of adhesive tape.
Advice! If the interior partition is thin enough, and every time the doors are closed, the wall with the box shakes, then it is better to use transparent or white sanitary silicone as the glue for the interior door trims.
Its price is slightly higher, but the silicone material dries for only a couple of hours, and holds even PVC cladding many times better, especially in conditions of strong shocks and vibrations.
How to nail platbands on interior doors
The quickest way to secure decorative trim is to nail it down. Of course, not simple carpentry fasteners, but specially designed for fixing the finish on a wooden base. Finishing nails for interior door trims look like ordinary nails, but without the hats.
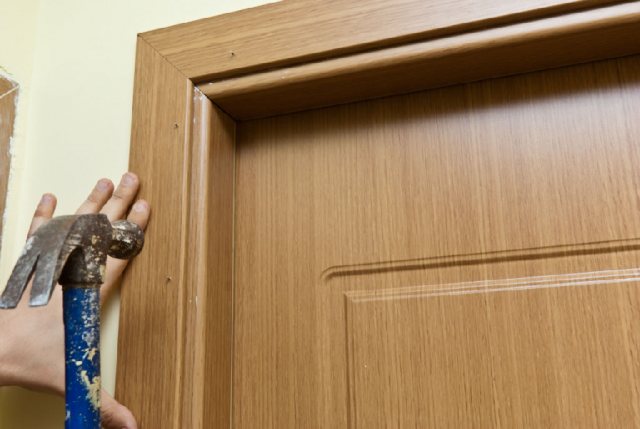
After the fasteners are hammered into the body of the decorative strip, only a small, barely noticeable dot remains on the surface. When choosing nails, it is necessary to control the length of the rod; in order to securely hold the decor, it is required that the metal enters the wood of the box by at least 10 mm.
It is clear that it is impossible to fix metal and plastic PVC strips in this way. The finishing nail will not hold on to the metal surface, and any attempt to hammer it into the PVC profile will only lead to the formation of a crack.
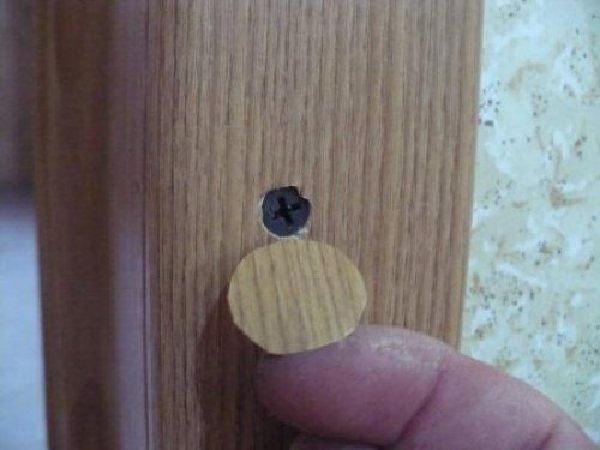
Self-tapping fasteners
Often, there is simply no way to reliably fix the platbands on the interior passage box, except how to use carpentry screws. At first glance, the idea does not look very successful - black or metal heads can seriously ruin the appearance of an interior door.But the situation is easy to fix, you just need to use cut out circles from veneer or film and glue the fastener heads with them.
The second mounting method is used for demountable models. It is enough to disassemble the profile, install its bottom part on self-tapping screws, lay the cable and simply snap the cover.
Some decor models are made with mounting grooves from the back surface of the cover plate. In this case, it is necessary, using a template, to wrap the carpentry screws at certain points on the end of the box. After that, the decorative strip is put on self-tapping screws and lowered a few millimeters down. The heads fall into the groove and hold the decor securely in position without any glue or nails.
Mounting features
There are several ways to attach platbands:
- Nails. Finishing will do, you can mask it on top (for example, with a wax pencil). This is the most reliable way.
- Liquid nails (glue). It is very difficult to hide nails on light-colored panels, so this installation method is used.
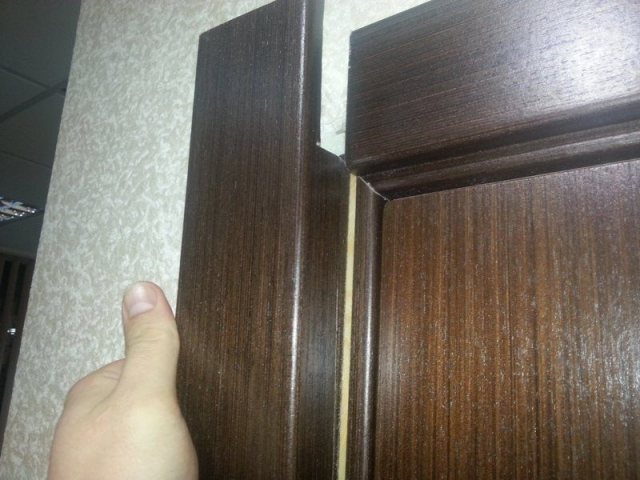
- Docking. The ends are carefully cut at an angle (45 degrees).
- 90 degree docking is popular today for its straight lines. Suitable for flat panels. There is a nuance with rounded platbands: the upper one must be narrowed so that it does not stick out.

Tips & Tricks
The most difficult stage in installing wooden planks is to correctly cut a 45 ° angle at the junction of the horizontal and vertical sections. You can file a corner using a square or template. This is usually done if you need to install telescopic platbands with extensions, or the plane of the box is ideally aligned with the surface of the partition.
In other cases, washed down is performed as follows:
- Measure with a tape measure the workpiece for the vertical platband, always with a margin for washing down the docking part. Using a square, a pencil and a hacksaw, cut the required angle line;
- The resulting workpiece is temporarily fixed on the lute of the interior passage, a horizontal bar is applied, it is leveled, the markings are transferred and the mating part of the corner joint is filed.
After installing the linings, the corner will turn out to be even, without gaps and slips. If you saw the joint according to the template, there will be a gap between the mating edges.