Window sill width in a panel house
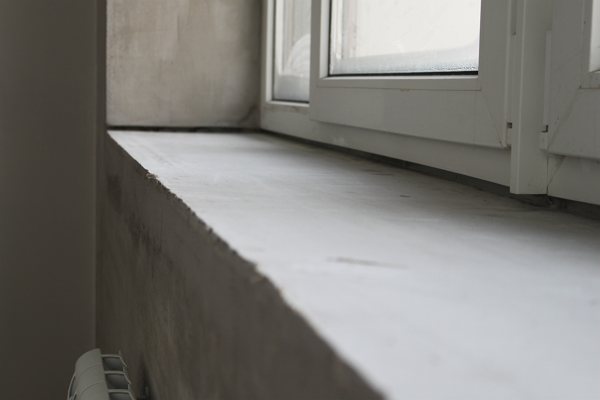
Window sill width in a panel house I had about 15 cm. If you put a three-liter jar, then 1/3 of the jar just hangs outside the window sill? sill material, maybe concrete:
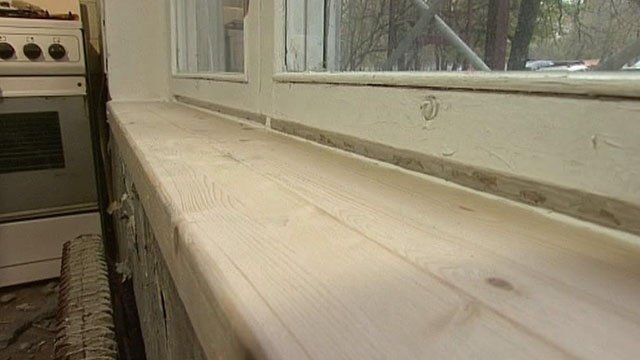
Or a tree:
Children
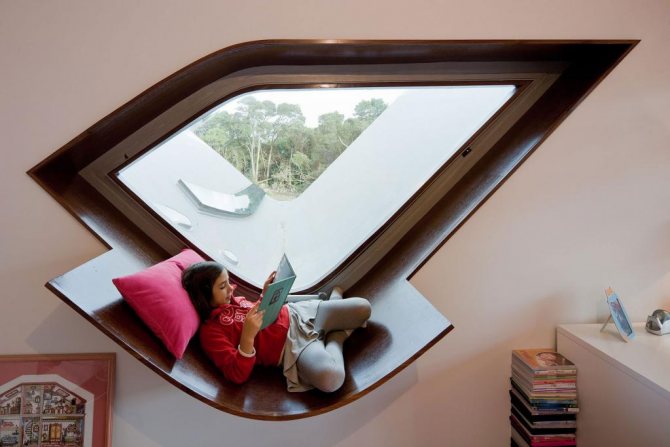
In addition to the seating area, in the children's room on the windowsill, you can equip a place for classes, using the window sill as a writing table. An excellent solution for schoolchildren would be to install a computer on this tabletop. If the room is small, then the option with a folding table top is perfect, which can be cleaned after class, freeing up space for games.
And by the way, if you make such a tabletop across the width of the entire room, then the space under it can be used to store various things by equipping there with cabinets or drawers.
What problems can you face when increasing a window sill
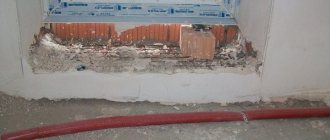
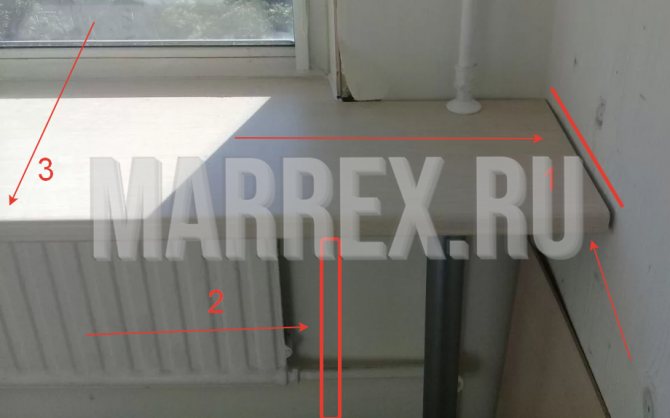
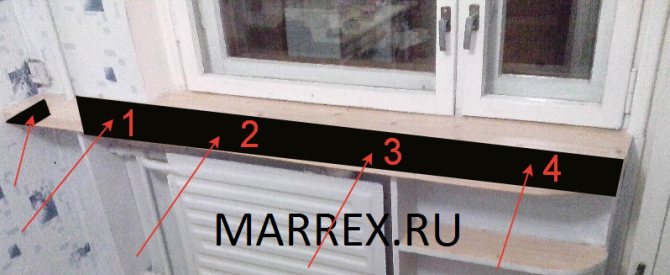
If we increase the width of the window sill in a panel house, as shown in the photo above. We are facing some problems!
The width of the concrete vertical slab to which the end of the window sill adjoins is too narrow, and if you want to extend it to the wall, then at point 1, you must secure the window sill thoroughly! Because this point will be the support for the windowsill. And if it is not fixed there, then the window sill will experience great overload! After all, we enlarge the window sill so that we can put something on it!
At the second point, which is shown schematically, approximately in the area of the slope, over the entire width of the window sill, you should also think about additional support points!
And the third point ... if you ignore the first two points, then at point 3, naturally, over time, there will be a sagging of the windowsill.
Or the severity with which you want to load the window sill, the window sill may simply break. This is certainly unlikely! But sometimes people manage to step on the windowsill! For various incentive reasons! And there is no guarantee at all that the window sill will withstand such a load!
How to make a wide window sill. Personal experience
Moving to a new apartment, we were happy to increase our living space. But there is much less space for flowers. The sills were so narrow that even a saucer could not hold onto them, let alone flower pots. The problem had to be solved urgently before we lost half of the collection. It was especially important to solve the problem of a narrow window sill in the kitchen.
Variants
The first option that comes to mind is a plastic window with a plastic sill. True, the window sills in this case increase by only 10 centimeters. Not as big a gain as we would like. In addition, if the kitchen is small, the work table (wherever it stands) makes the kitchen cramped and uncomfortable.
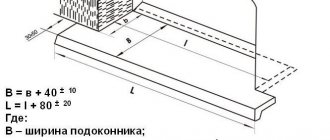
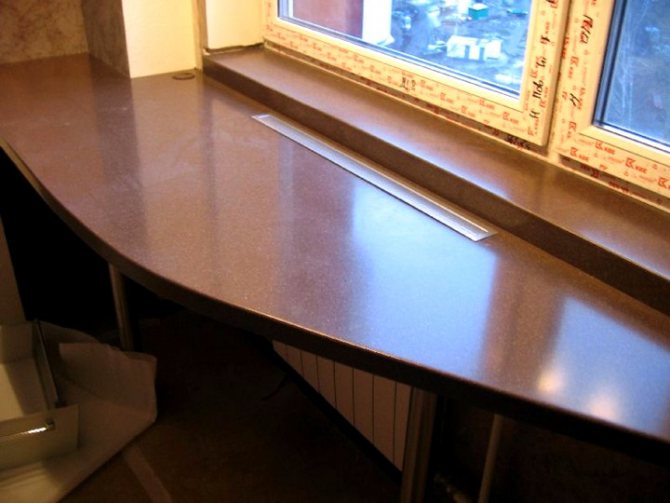
The decision came by itself. It is necessary to make a full-fledged work surface from the window sill - from wall to wall. In this case, the window sill will be 2 m long, 45 cm wide (near the wall) and 60 cm (in the window opening).

Window sill installation
For the production of a wide window sill, we used 2 simple narrow kitchen cabinets without a "top" and fronts.These side tables are easy to purchase from a home improvement store or order from a kitchen furniture company.
The bedside tables were set sideways to the outer wall, opposite each other. Thus, they have become a reliable support for the table top. Adjustable legs allowed to adjust the height of the bedside tables and the level of the window sill.
A large sheet of plywood (12 mm) was taken for the countertop. According to the plan, the tabletop is slightly wider than the side tables standing sideways, and goes into the window opening. Taking into account the uneven geometry of the walls, the base for the countertop had to be cut out according to a previously made pattern. For curly carving, a jigsaw was needed.
The next stage is facing the countertop with ceramic tiles. We used medium-sized tiles: with the small dimensions of the kitchen, large tiles visually reduce the free space, and laying very small tiles is a rather tedious task. As a result, the choice fell on the tile, which was used to decorate the wall. The total size is 20x20 cm, while each one consists of four small "tiles" (10x10 cm).
To avoid wet processes, the tiles were attached to the plywood with glue, which is popularly called "liquid nails".
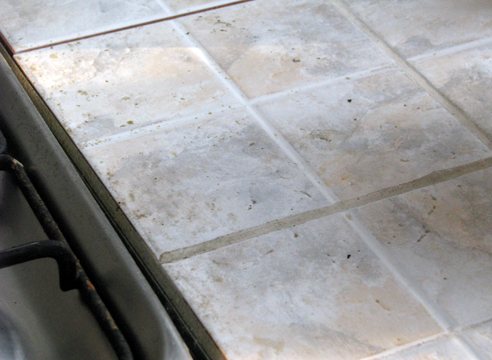
The seams were covered with white grout. The end was closed with an aluminum threshold. By the way, the window slopes were made last, when the wide window sill was already completely ready. Impressions from the operation of the window sill (after five years)
Not necessary:
Making wide seams between tiles - the designer's desire to keep the size of the cells and lines, as on the wall, played a cruel joke. The rough seams, 5 mm wide, turned out to be “dirt accumulators”. At first, they were intensively cleaned and washed. However, the grout began to crack from constant cleaning. Hence the moral: on the countertop (window sill), lay the tiles closely, with minimal gaps.
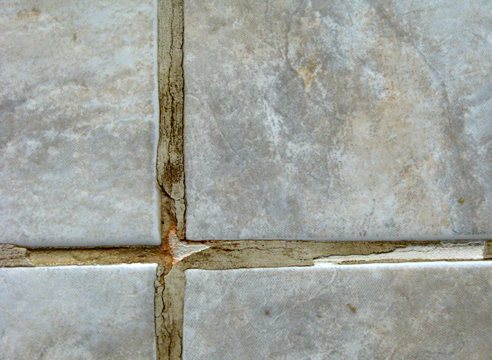
Use embossed tiles, even if one has already been used for walls. From an aesthetic point of view, it is beautiful, but from a household one ... Relief tiles have to be regularly cleaned with a brush (a cloth is enough for a smooth surface).
We recommend:
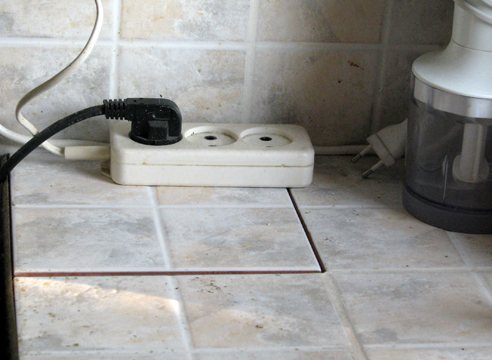
In order not to block the gas tap, a large hatch (15x15 cm) is made in the plywood; one whole tile serves as a cover for it. If necessary, the tiles can be easily removed. A furniture handle can be installed on it. True, experience shows that even without a handle, such a hatch is quite convenient to use.


What tools might you need !?
At a minimum, this is an impact drill so that the wall can be drilled for fastening and holes in the fastening material.
Without a hammer, I think it will not work either.
Knife, ax for chopiks, for example, for leveling a window sill.
Level.
The sill itself is of increased width.
And materials for additional supports.
If you do not have any of the above, then I think that the most logical thing would be to pay the master, and it will be cheaper than buying these tools.
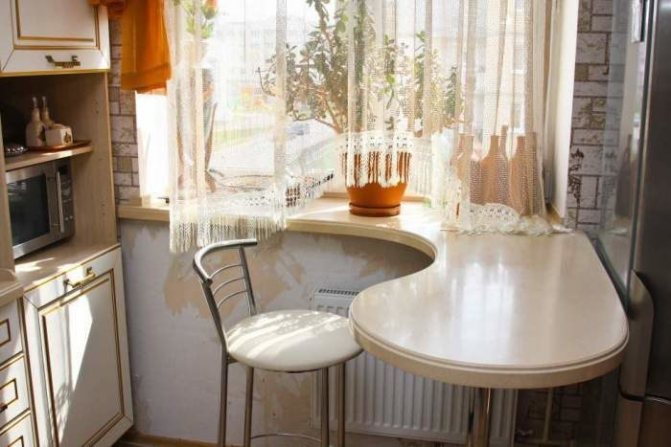
Table instead of a window sill
Everyone can cook food, talk with friends, if a table is mounted instead of a window sill. In width, it should be slightly larger than the window sill, if the radiator remains in the same place, near the window. Get a couple of chairs, nets to protect the radiator - all you need. It is not recommended to use a plastic window sill itself as a table, even if the radiator is displaced, since it is a fragile structure. It is not designed for heavy use. You need a support that will provide an even distribution of the load.
The installation of such a table is easiest to entrust to specialists. You can also do everything with your own hands. After dismantling the window sill, it is necessary to cement the wall, apply plaster, primer, sheathe with plasterboard, start creating decor and installing the countertop.
Dismantling the window sill must be done carefully, since there is a risk of damage to the window structure.As a result of careless actions, cracks may appear after a while, condensation will begin to accumulate. With proper dismantling, this will not happen, but such a modernization of the window opening will become a reason for refusing warranty service. This is important to consider. It is best to consult with the employees of the company that provided the window installation service, make a decision based on the information they provide.

You can make a table-top from the following materials:
- Plastic;
- Wood;
- A rock;
- Metal.
The easiest way, of course, is to make a plastic or wooden countertop with your own hands. It can be of any size. You should draw a sketch, drawing. After that, cut out the main working surface and supporting parts of the structure from the selected material. They should be sanded when it comes to wood, covered with a primer, varnish or paint. Then you need to assemble the structure, fix all the details, attach it to the wall. As a support, a curbstone can be used - made with your own hands or to order, in accordance with the sketch and drawing.
When the goal is to create an additional surface for slicing food, the design of the countertop instead of the window sill should be slightly different. The area is of great importance. The structure must be able to withstand heavy loads. Strong supports, good materials, attentiveness are the keys to success.
Personal experience of increasing the width of the window sill in a panel house.
Now I'll tell you how I increased the width of the window sill at home in a panel house! I also had a window sill width, it was about 15cm. And here is the result, it was done in 1998, filmed with the camera of the legendary Nokia 3250 phone
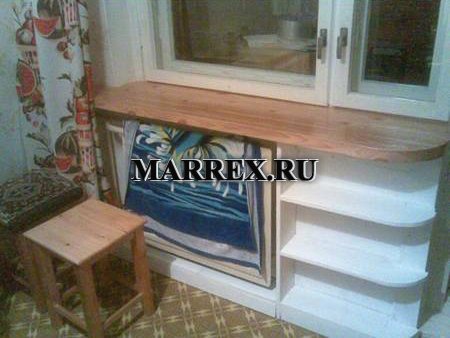
After a few years ... after about 10, the window sill was shabby and looked like this:
And during the next repair, he took off the upper part of the cladding, putty, and glued the sticky vinyl film. + painted everything.
And at the bottom of the shelf I decided not to paint either, but to glue the cladding film. In my opinion, it turned out well.
What shape should the countertop be?
There are no restrictions. The main thing is that it is comfortable, beautiful, reliable and safe. It can be a separate tabletop, or a continuation of the general one. There are a lot of options. As for the material, they usually choose between natural and artificial stone. Artificial stone is heavy, expensive, cold, and also stains if colored products are cut on it. In most cases, preference is given to artificial stone, which is lighter, cheaper, more practical, can be cut and you can make a tabletop of any shape.
You can install the window sill-tabletop separately only later, when the repairs in the kitchen are done and the furniture is purchased. Or it is initially included in the design project during the renovation. As for the battery, you can hide it, or leave it as it is. Much depends on the type of battery. For example, it has recently become fashionable to paint classic cast-iron batteries in bright colors and not to mask them. This will become a highlight of the interior, and it will look quite harmoniously with everything else.
AlinaAuthor of the article
Did you like the article?
Share with your friends:
Do-it-yourself manufacturing technology for an enlarged window sill in a panel house.
Unfortunately, at the time when I was making this window sill I did not even suspect that I would then make money on stories about repairs! Therefore, we will talk schematically!
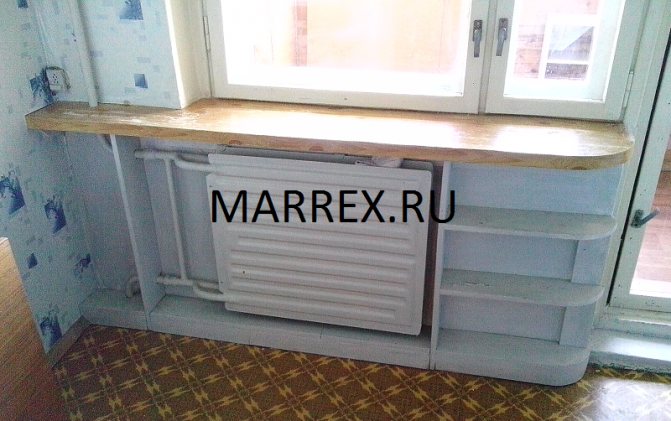
I nailed down the usual chipboard, which was lying in the pantry, about 10 cm, just before the flat battery was fastened, if you know, then there are fasteners from the very top. In order to add extra strength and sweat so that you can attach to this strip. With a 6mm perforator drill in 4 places we drill, and hammer in a standard dowel a nail 6mm x 60mm.
And in the corner I had to make a mount at an angle so that it would not be seen.I had to suffer! From the left to the end of the corner, a pipe prevented reaching
The next step is to fix the corner. 1) in the left corner, the window sill itself will hold the corner. 2 and 3) we attach the vertical posts on which our window sill will rest. At point P I put some kind of metal flat plate, fix the vertical and horizontal between them. And D1 and D2 as well, as in point 1 we nail to the wall flat.
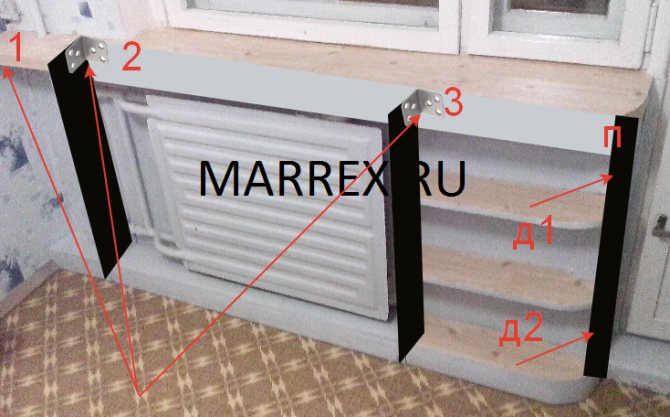
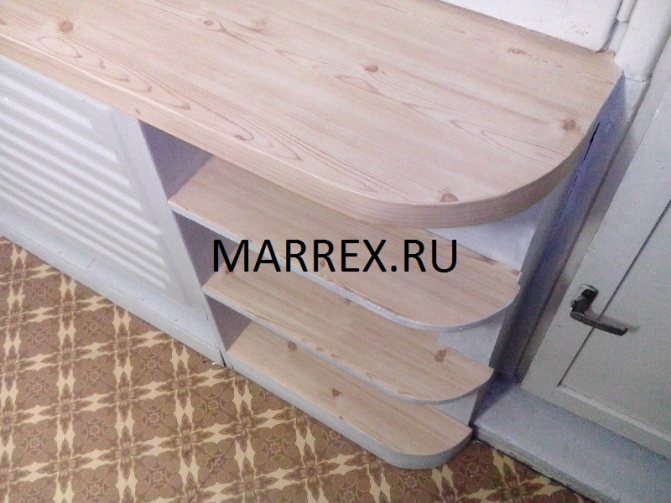
We cut out the profile of the enlarged window sill from the chipboard that we needed. Width, 3 cm more than the width of the uprights!
D1 - right through the chipboard, we drill a hole for the dowels into the body of the window sill! We first remove the chamfer so that the hat is drowned.
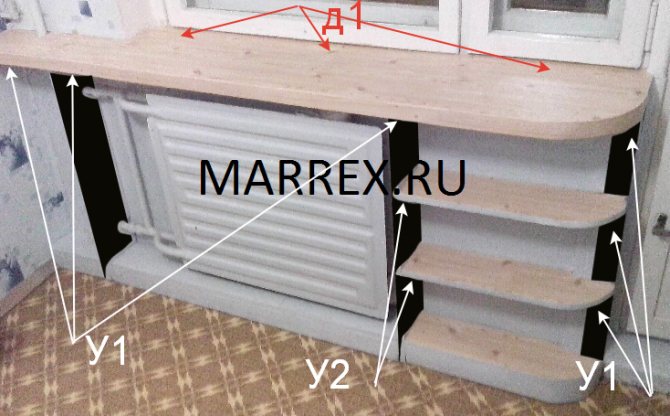
U1 - where point U1 - we put one corner, at the top, under the windowsill, for fixing the window sill. We fix horizontal shelves below the window sill.
U2 - where point U2 - put two corners.
Since I had a non-laminated window sill, I had to spat it off completely.
And put the vinyl on the windowsill on top!
Well, the rest ... in principle, is already a trifle,
Wooden window sill
The first thing you need to decide on before installing a new window sill is that the wide version will be installed on the old base, or everything will have to be replaced. Also consider the width of your walls. On too thin walls, such a structure, especially if it is provided for some heavy weights, may well not hold up.

So, how to make a wide wooden window sill? There are several ways:
- Extending the window sill with an additional board using a bar fixed from below. In this case, they take a beam about seven centimeters wide and nailed in one part to the old window sill, and on the other, protruding part, an additional board is nailed. After that, the joint of the boards is putty, painted and varnished. The disadvantage of this method is that it is very problematic to hide the bottom bar in the absence of a cabinet at the bottom.
- Extension of the window sill with an additional folding board. In this version, a wide window sill is obtained due to the fact that the additional board is attached to the base on hinges. This option is convenient in small apartments, where additional space is needed for some activities. There are practically no downsides to this method, except for the fact that when folded, the hinges will most likely be visible.
- With the help of hinges, you can also make an additional tabletop that folds outward. But in this case, it will need to be fixed with additional folding legs, according to the principle of old folding tables. The disadvantage of such a wide window sill is the same as in the previous one - the hinges will be visible, however, much less.
- Retractable window sill. A variant similar to the previous two, but the difference is that the tabletop is attached to the base with only one edge with a bolt. It must be secured so that it can rotate freely and move away from the window. The second part of the tabletop is held by one or two legs. In this version, they can not be made folding, but, on the contrary, can be selected by making them chrome-plated, and castors can be installed so that it is more convenient to move away from the window.
- Extending the window sill with wooden pins at least ten centimeters long. This option is more suitable when the wide window sill is made of chipboard or plastic, since the solid board is quite heavy. In this version, holes are drilled in the base and the stacked board along the diameter of the pins, and the boards are joined together. It is better to make holes at small distances from each other, no more than 15 centimeters. The downside is that a heavy window sill cannot hold on to such a structure. And you won't be able to put something heavy on it.
- Complete replacement of the old window sill with a wide one. In this case, the old window sill is carefully removed, and a new plate of the required size is installed in its place.


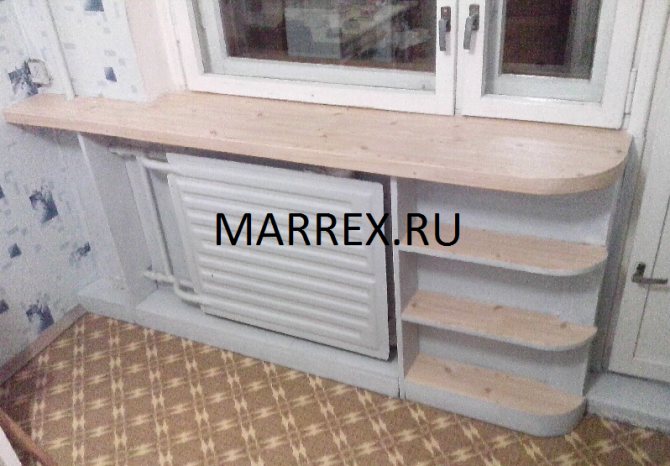
Enlarged sill result:
Unfortunately, the photo does not convey the real state of affairs! But it was done great! And it looked gorgeous!
Of course today, more than 20 years later, I would have done quite differently, and if so. that would be more modern ... but then, I did as best I could. In any case, you can't jump above your head!
Check it out in the left corner ... you can still see the plug from the wired phone ...
And if you could enter that door on the left, you would be on my balcony
And in 2008 I already did another renovation ... in the parents' apartment!

Slopes
boxes and shelves on the balcony
All repairs are here
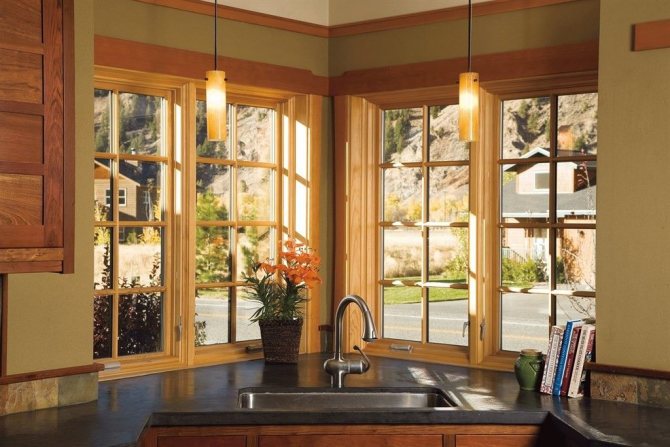
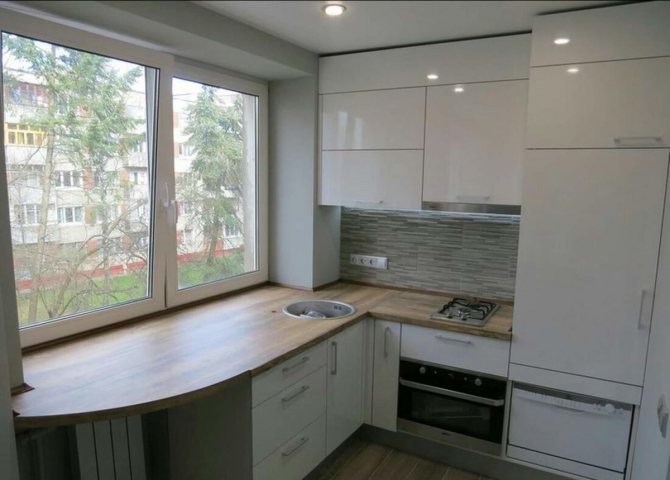
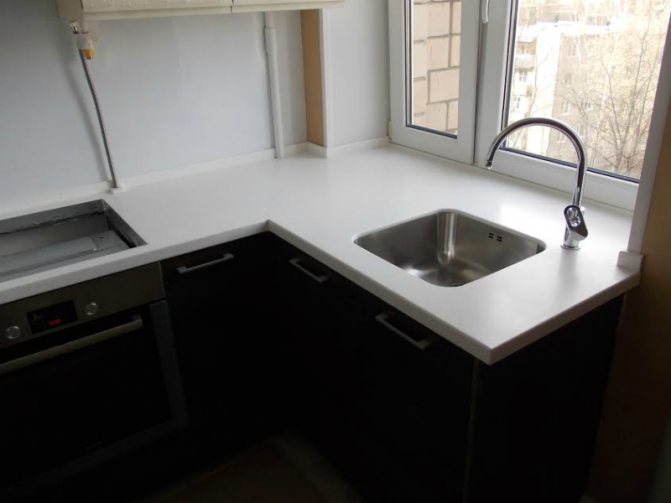
Sink instead of a window sill in the kitchen
Installing a sink in place of a window sill is a profitable design technique. The room will be transformed. Even if a guest glances into the kitchen for a short while, the design will be remembered and will make a pleasant impression.
The transfer of the sink does not require any paperwork and is associated with certain risks. Sometimes it is not possible to do a rearrangement. Otherwise, you will have to spend a rather large amount on modernization. It is necessary to change the location of the radiator, and in addition, the location of the drain and water pipes, buy and connect a pump.
It is better to entrust this work to a specialist. The plumber will be able to assess the situation objectively. It makes no sense to insist on moving the sink, to try to do the work on your own if the specialist doubts the success.
Workplace with a wide window sill
The space near the window can be rationally used if you place a full-fledged workplace there. The width of the table top should be sufficient for ease of use - at least 50 cm.The height should be within 75 cm.
It is important to consider such nuances as the presence of free legroom and lighting. Since it is dark near the window in the evening, and a shadow will fall from the central lamp, you need to take care of additional lighting. The issue can be easily resolved using table lamps or built-in LED lamps. During the day, the window should be closed from bright sunlight. The best way to do this is to use blinds.
The space under the window in such a study will become a place to store all the necessary office supplies. An organizer for them can be placed on an impromptu work table. This method of decorating a window sill is also suitable for a children's room.
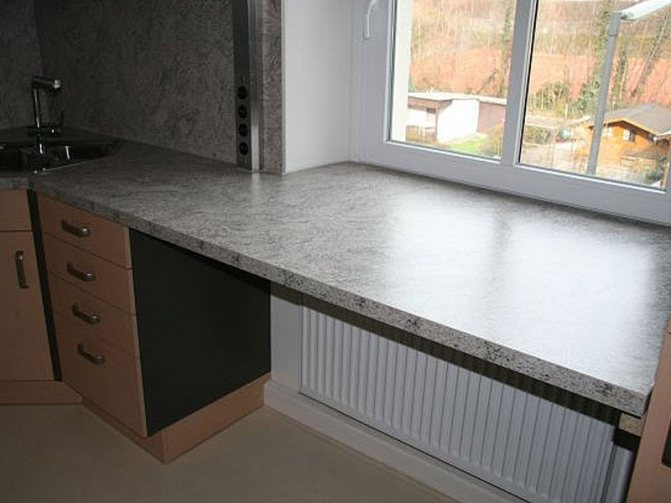
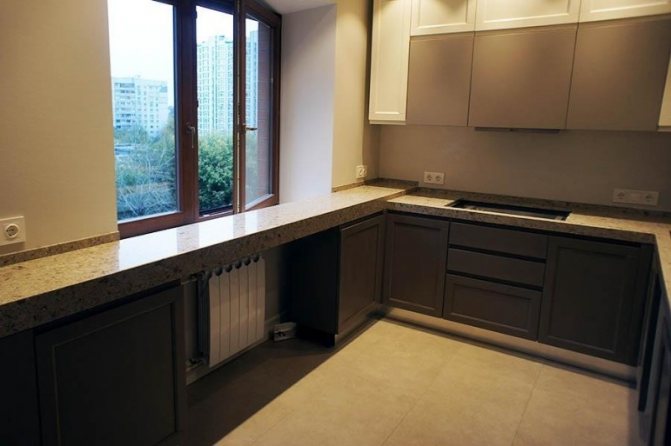
In the kitchen, the window space can also be used to expand the working area. If the height of the window sill is the same as the height of the kitchen unit, you can connect them together with one solid worktop. In a small kitchen, this will be especially true.