Home / Windows / How to remove glazing bead from a plastic window at home
Today, one of the most popular windows are PVC structures. They are durable, reliable, have effective thermal insulation properties and are inexpensive. Structures are installed in new buildings, they are replacing old wooden frames in secondary housing. But sometimes situations may arise when it is necessary to remove the glazing beads from the plastic windows. You may need this for:
- replacing the glazing beads themselves if damaged;
- replacement of a broken, damaged glass unit;
- dismantling the plastic frame.
Regardless of the goals, such work can be done by hand, which saves money on calling specialists. Below we will look at the main methods and their features.
How to remove windows on a balcony with your own hands: step by step instructions, video
If you plan to make major repairs yourself, you will be faced with an urgent question: how to remove windows on the balcony with your own hands?
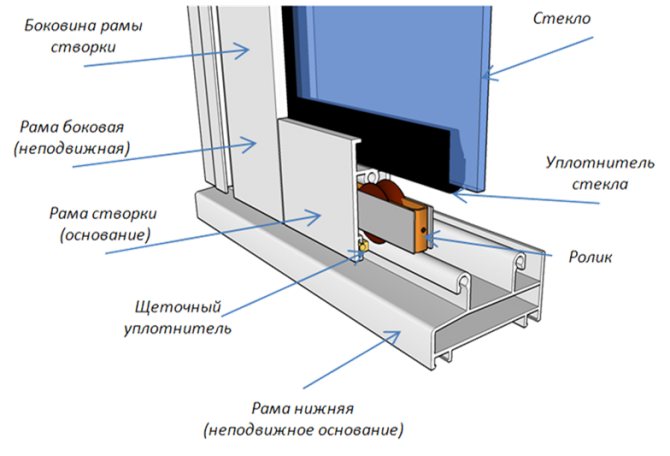
It all depends on the type of windows, or rather on their frames. They come in plastic, aluminum and wood. Also, in addition to the standard hinged window, there are also sliding windows. At this point, beginners have a question: how to remove sliding windows from the balcony, taking into account the design features. Each type has its own characteristics, and they all require a separate dismantling scheme. We will provide you with step-by-step instructions on how to remove windows on the balcony, and tell you about the nuances that usually arise during the work.
When to shoot
Usually, the bead is removed in the following cases:
- When replacing a glass unit as a result of external or internal damage.
- In case of glazing defects caused by the loss of the package tightness in the form of its internal fogging.
- When replacing the package with another type - with more or less cameras, use an energy-saving modification.
- In case of damage to glazing beads from the inside of the room, a decrease in their physical characteristics (hardening of the sealant) or a deterioration in appearance during operation (appearance of yellowness).
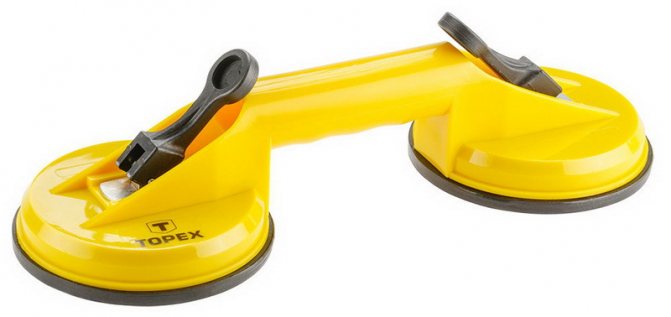
Insulating glass dismantling tool
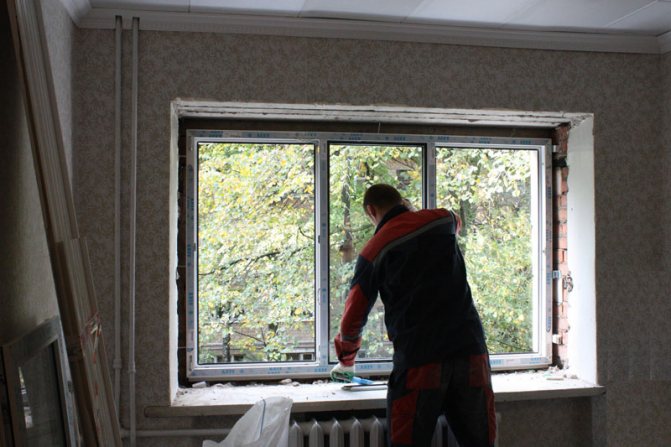
Preparation for work
The first step is to prepare the space. Often, on our balconies, everything that has not found a place in the apartment is stored. It can be conservation, household items, old trash. And no matter how important and necessary to us all these things, definitely, they all have to be removed! In the process of working on the balcony, a huge amount of construction debris and dust is generated. And in order not to wipe every jar and drawers, it is worth bringing everything into the apartment. The same goes for the adjoining room. This is necessary so that you can walk freely, take the necessary things, tools and at the same time not dirty everything around. If you only have one room in your apartment, cover the furniture with plastic wrap and move the carpets away. To protect your furniture as securely as possible, glue the edges of the film with tape. So the dust does not penetrate inside and does not settle on soft surfaces from which it is quite difficult to remove it.
In order to protect the floor, we do not recommend using a film, but self-adhesive polyethylene. It is tough enough not to tear, and at the same time it will serve as the best protection against scratches on your flooring. If you have a lot of plywood or cardboard on your farm, you can use those as well.
Remember to prepare all the necessary tools in advance.
Security measures
It is better to be engaged in dismantling windows together.So, one person will remove the window, and the other will insure it. In addition, it is better to stock up on safety elements, since the frame can simply slip out of your hands.
It will also not be superfluous to fence off the area under the balcony with a brand of tape. In this regard, it is better to play it safe, since even a small piece of concrete when falling can lead to injury and even death of a bystander.
Do not start construction work at very low or high temperatures. They can negatively affect both the quality of work and your well-being.
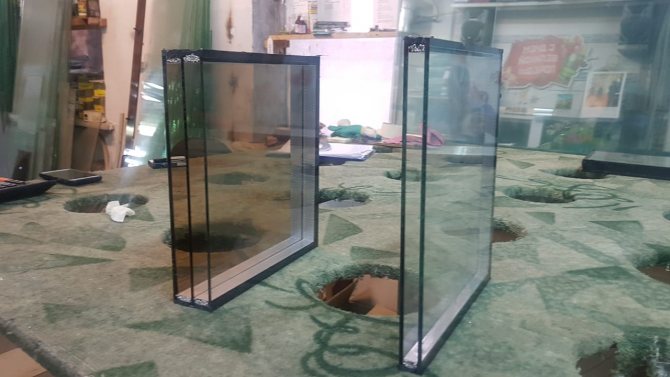
Reasons for removing a double-glazed window
Among the main reasons in connection with which it is required to pull out the glass unit are the following:
- First of all, the most common reason is the replacement of a glass unit with a better one.
- Also, the cause is damage to the glass unit.
- In case of loss of tightness of a double-glazed window, which occurs due to poor quality or improper installation.
- Also, when finishing the slopes, the double-glazed windows are removed (in case there is no access from the outside, or the windows are deaf).
Thus, there are a lot of reasons to pull the glass unit out of the frame, but as not many people know. To begin with, it should be noted that the process itself is not particularly complicated, but at the same time there is a number of knowledge that is simply necessary to carry out the work.
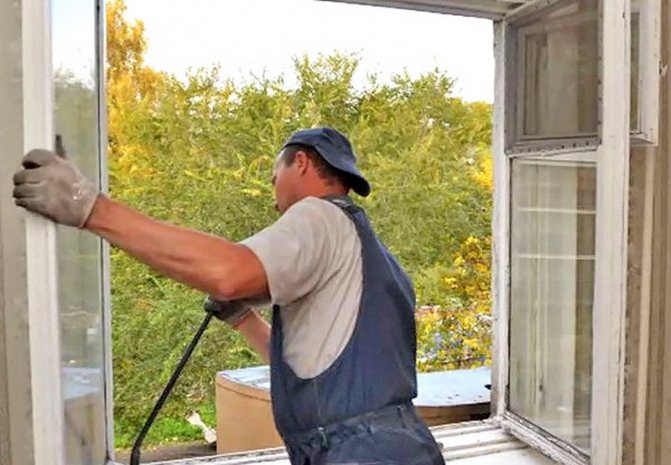
How to remove plastic windows on the balcony
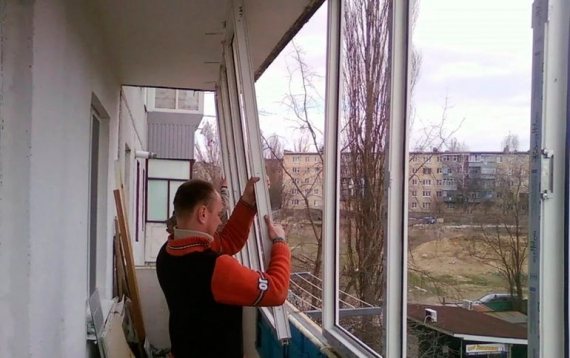
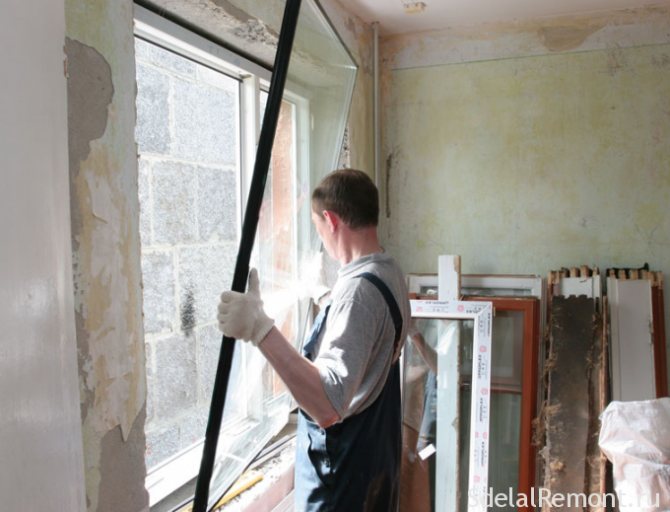
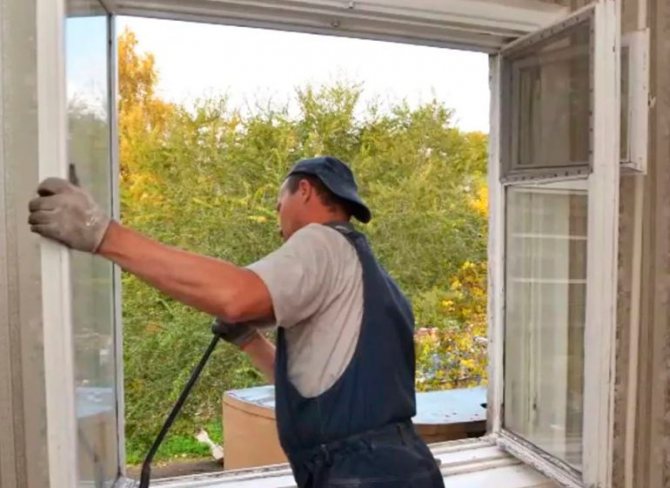
You can remove plastic windows by leaving them intact or damaged. If you plan to reinstall them in the country or sell them as used ones, you should remove them carefully. To do this, first remove the sash. If the hinges are adjustable, remove the overlays and separate the halves of the hinges. To do this, you need to remove the connecting rod - just press on it and gently pull it out. Further, holding the sash, we do the same with the lower hinge.
If the hinges are not adjustable, then the pins just need to be knocked out. After that, we remove the double-glazed windows. For this we use a spatula. With its help, we press the glazing bead into the frame. By running a spatula along the entire length, we get a large gap, after which the glazing bead can be removed by hand.
If, along with the balcony windows, you also change the windows in the apartment, another stage awaits you - dismantling the slopes. Decorative ones are easy to remove, and plastering takes effort. You can remove it with a punch, but do not forget about the safety of the frame. When you are done with the slopes, you can remove the window sill, fasteners and foam. All these elements can be present on the balcony if you have a concrete floor and a window sill made of stone or porcelain stoneware. Then carefully remove the frame. Make sure that it does not fall on you. It is best to do the dismantling with a partner. We figured out the question: how to remove plastic windows on the balcony, now let's talk about aluminum ones.
Glazing bead extraction process
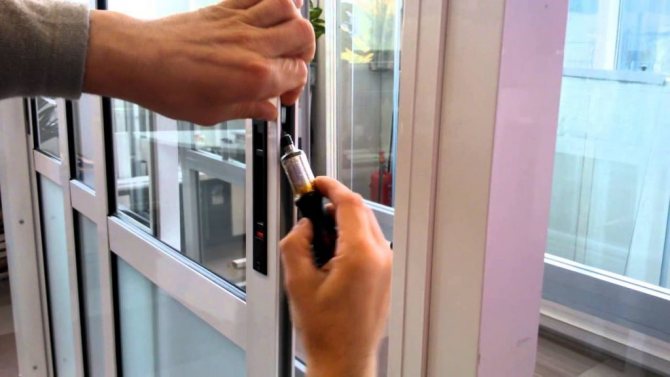
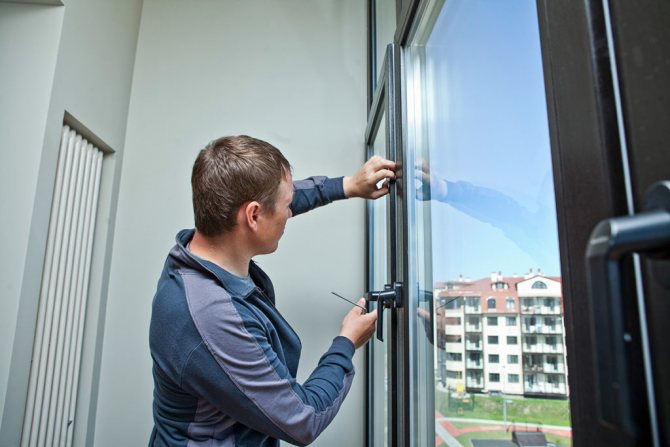
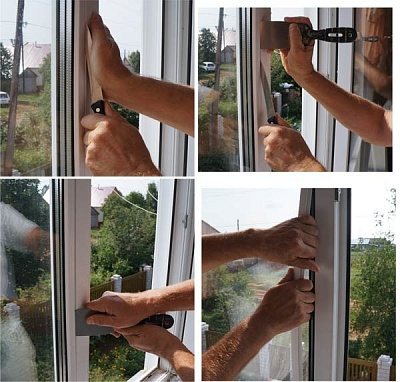
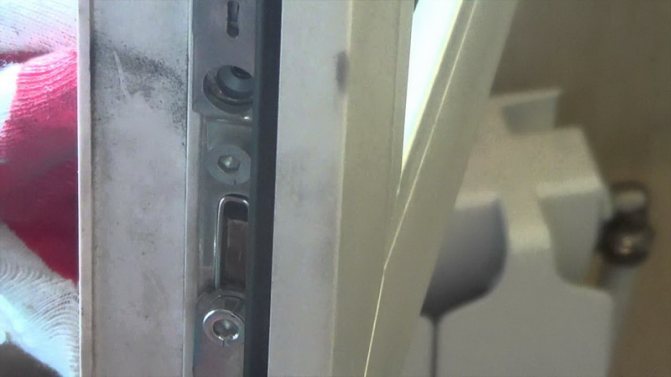
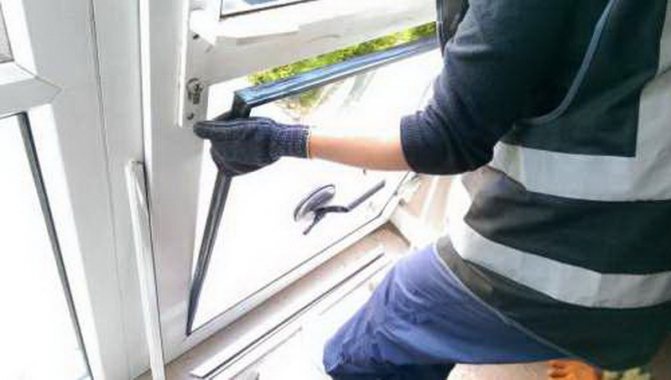
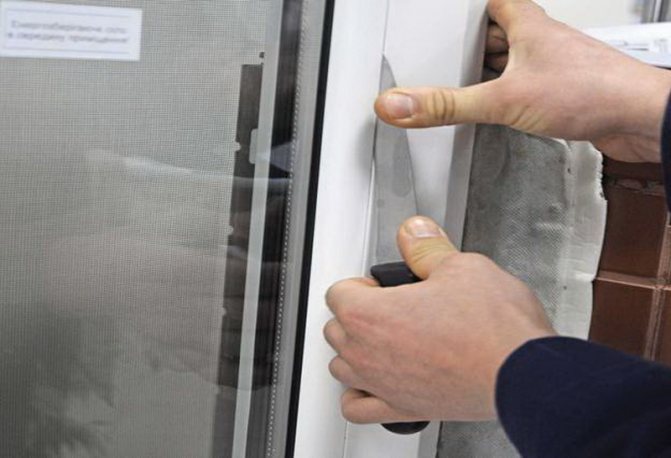
You can remove the glazing bead from the window either with the help of a specialist or on your own. In the first case, a special hammer and spatula are used. Since it is completely impractical to buy such tools for a single dismantling of a glass unit, it is quite skillful to use a plastic non-inertia hammer and a knife with a wide blade / chisel. The following is a step-by-step process for removing glazing beads:
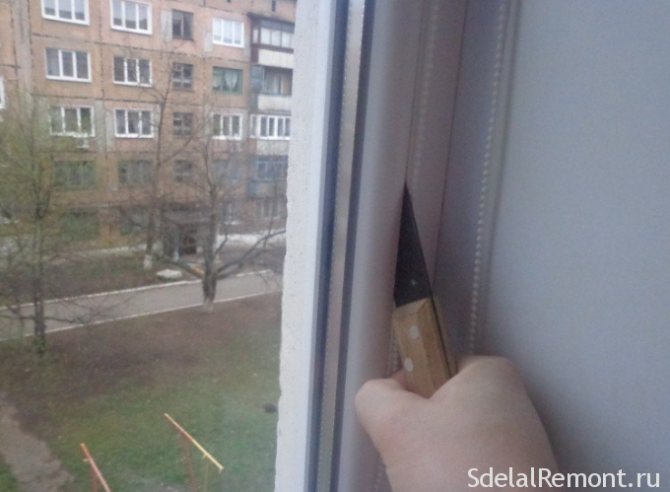
- The first step is to dismantle the vertical glazing beads.If dismantling is carried out on the sash, then it must first be closed. Carefully insert a chisel / knife between the profile and the glazing bead approximately in the middle of the window opening.
- If the trowel does not fit well, help yourself with a hammer by tapping lightly on the chisel. At that moment, when the glazing bead gives in a little, gently tilt the spatula to the side where the glazing is moving, and lightly tap the spatula with a hammer, thereby pushing the glazing even further.
- When the glazing bead begins to give in and moves away from the window profile far enough, you can continue dismantling the element manually: just grab the edge of the glazing bead with your hand and gently pull it towards you.
Today you learned how you can remove glazing beads from windows yourself using a minimum of tools quickly and accurately.
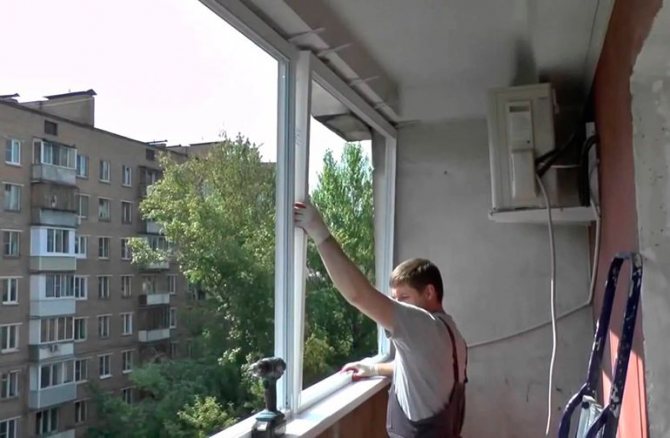
How to remove aluminum windows on a balcony
Removing aluminum windows is similar to removing plastic ones. You also need to get rid of the glazing beads and then remove the glass units. The sashes are removed first, and then everything else. If you don't need an aluminum frame, you can make cuts in it. Oddly enough, this job is best done with a regular hand saw. If you are an experienced craftsman, use a grinder, but with a circle on concrete. It is forbidden to use a grinder with a circle on a tree, as this can complicate the dismantling process, as well as be traumatic.
Remember, if initially you were only concerned with the question: how to remove aluminum windows on the balcony, then later you will come across one more thing: how to install a new window. To do this, it is best to prepare the surface at the dismantling stage: thoroughly clean the opening from concrete particles, get rid of the remnants of foam and irregularities. The smoother the surface you get, the easier it will be to install new windows on the balcony later.
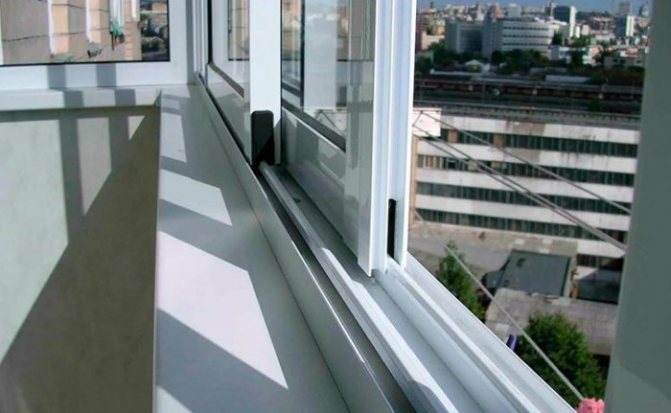
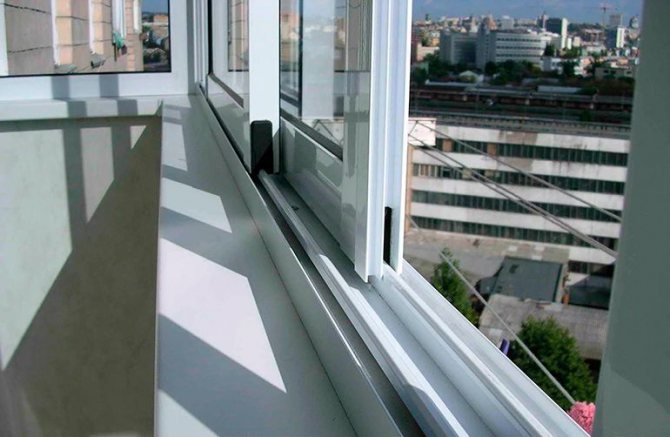
How to remove sliding windows on a balcony
If your windows have a sliding structure, you must first dismantle the sashes. This can be done manually. At the next stage, double-glazed windows are dismantled. First, you need to cut or disassemble the window frame. Next comes the dismantling of the balcony windows. If you plan to keep them, remove the windows from the fasteners using a grinder.
If you are faced with the question "how to remove windows on a p44t balcony", you just need to unscrew the plugs (they can be found at the top and bottom at the ends of the sashes), and then, just pull to the end and take the bottom inside the room. If it doesn't work out by hand, use a 4 mm imbus wrench. With its help it is necessary to loosen the screw located in the sash.
The question that initially stood before you "how to remove sliding windows on the balcony" has been resolved! At the last stage, preparation for the installation of new windows takes place. To do this, again, we clean all surfaces as thoroughly as possible.
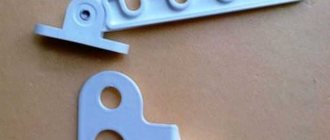
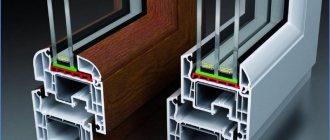
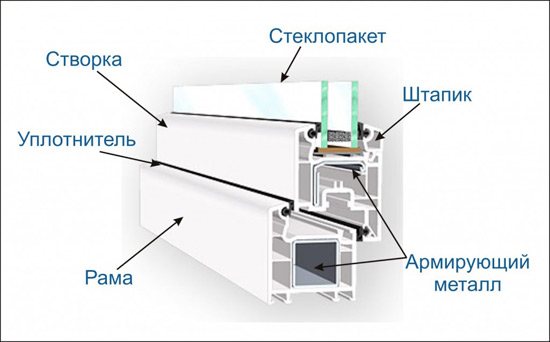
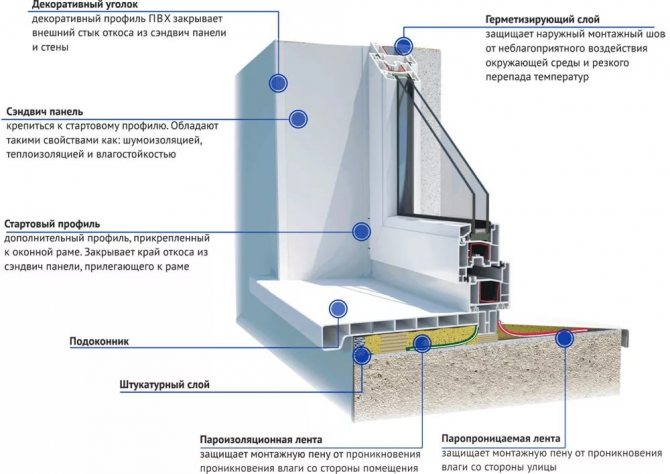
What is glazing bead and what is it for
It would seem that such an insignificant window element is a glazing bead, and how many problems it can create if you neglect the rules for installing and dismantling the window structure. As you know, difficulties arise from trifles, and it is the glazing bead that plays an important role in maintaining the integrity of the glass unit.
Glazing bead is a thin elongated strip that prevents dust, dirt, moisture and similar contaminants from entering the room. It also protects against excessive noise and drafts. Do not forget also that without glazing beads the window will not have a complete and aesthetic look.
So, as you have already learned, the glazing bead is an integral structural element of the window structure. It is a long thin strip, which coincides in length with the width of the glass unit, with a sealing rubber fixed on it.
How to remove sliding plastic windows on the balcony

Plastic sliding windows can be removed in almost the same way, with the exception of a few nuances. Use a self-adhesive protective film. It will protect you from injury in case the glass breaks. After that, you can remove the mounting strips. It is imperative to do this work with a partner, since the second person must hold the glass. After, squeeze out the glass unit.
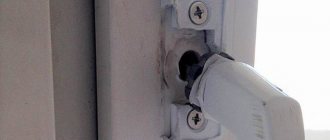
Another question: how to remove the sash of the sliding window on the balcony.
To do this, you need to find the screws that are screwed into the frame.They must be unscrewed, after which, with a sharp object, you can remove the polyurethane foam poured into the seams. An important point: be sure to secure the frame so that it does not fall down, as this can lead to an accident.
One more piece of advice will answer the question: how to remove sliding windows on the euro balcony so that later you can quickly install new ones. This is especially true for the late autumn and early spring period, when the apartment is cold enough and you want to quickly repair and insulate the balcony (in winter, such work is carried out extremely rarely and at a temperature of at least -5 degrees).
We have already mentioned more than once the need to create a flat surface for the further installation of new windows. To make the result of this process as high-quality as possible, we recommend covering the irregularities with cement. If your walls are loose enough, use a primer that will give the materials better "grip".
What it is?
Glazing bead is an integral part of a window (and not only plastic, but also glass, old-fashioned), which the window owner often does not even know about. It is impossible to see it from the outside, since it is attached from the inside to avoid unwanted penetration into the apartment through the window (by removing the glazing bead, you can easily remove the glass unit itself). But even indoors, it merges with the plastic frame and is not particularly noticeable. Thanks to this, it gives the window the appearance of completeness, integrity and aesthetics.
And yet, the main function of this inconspicuous part is to secure the glass unit in the frame. Thanks to the glazing bead, the tightness of the glass unit is achieved. With poor-quality installation of glazing beads, windows lose their sound and heat insulation qualities, fog up, lose their attractive appearance.
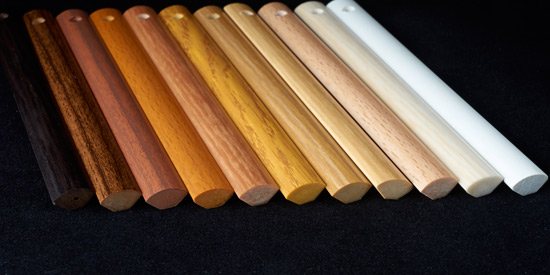
Glazing bead is an elongated wide or narrow strip made of expanded polyvinyl chloride (PVC) reinforced with a rubber gasket. More recently, glass composite beads have been used - a plastic material made of fiberglass and polyester resins as a binder. In terms of strength, such a material can be compared with steel.
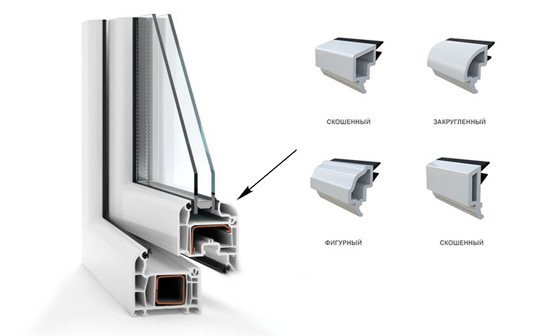
Glazing beads differ in their shape:
Curly ones have a somewhat complex shape and are more expensive than ordinary square ones. They also differ in size. There are narrow and wide glazing beads. Wide ones are installed in windows with single-chamber packages, narrow ones in windows with three-chamber ones, reinforced glazing is suitable for a four-chamber window.
How to remove wooden windows with your own hands
In rare cases, wooden windows can be found in modern houses, they are removed along with the glass, and most often scrap is used for this. However, the glazing of balconies was carried out en masse in the late 90s and early 2000s. Therefore, we are dealing with relatively new, not Soviet designs. In addition, the windows on the balcony are quite thin and single-chamber. There will be no problems with dismantling such windows. All you need to do is remove the frames from the hinges, the glass will not be removed. Further, with the help of a crowbar and a saw, you can remove the entire wooden structure, including the window sill (if provided) and the lining, since most often the balconies from the inside were sheathed entirely with either plastic or wooden lining.
We hope our recommendations fully answered your question: how to remove windows on a balcony with your own hands and will help you do it quickly and efficiently. Also, watch the video, it clearly demonstrates the whole process.
How to clean windows without leaving streaks

We have already examined in detail how to do this in the article: “How to clean windows on a balcony outside on a high floor without streaks”. We recommend that you familiarize yourself, for those who do not like to read there is a video!
In order to avoid non-aesthetic stains on the window surface, a certain sequence of the procedure must be followed:
- First of all, you need to clean the frame of accumulated dust - wipe it around the perimeter with a clean and dry soft cloth.
- Moisten a rag in a solution (any, of your choice) and again walk over the entire frame, leaving not the slightest part of it unattended.
- Wash off any remaining soap suds.
- For external washing, use a mop with foam rubber and a rubber attachment.
- Wipe clean with a paper towel or cotton cloth.
By removing the frame of the sliding structure, you can wash it better. To clean the glass, use the method described above. After the glass has dried, carefully insert it into its original place. In this case, it is important that fingerprints do not remain on the freshly washed glass.
If after the washing procedure the glasses remain dull, they must be wiped with undiluted table vinegar.
It is important to select the correct cleaning materials. Instead of a simple, smooth textile rag, a suede or velvet rag is more suitable.
To avoid the appearance of stains, you need to wash the windows in cloudy, but not rainy weather.
Diy malfunctions and repair of aluminum windows
In fact, the differences between plastic and aluminum windows are rather nominal. That is, for the end user, the difference is visible, but from the point of view of repairs, they are almost the same thing. We will now look at how aluminum windows are arranged, note their key differences from plastic ones, and then move on directly to the issue of adjustment. You will see that with a close acquaintance with the PVC profile, this class of products will also be able to do it. So, the topic of today's conversation is the repair of aluminum windows.
Construction of aluminum windows
The characteristics of aluminum are such that products made from it can be very accurate. This allows the teeth to be made so strong and small that in the case of PVC, this would simply not be possible. The first sign of this is the way the fittings are installed.
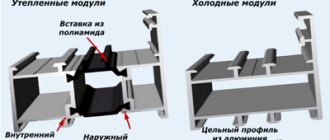
Inside, the aluminum profile is hollow, it is divided into compartments in the same way as the plastic one. But one key difference is noticeable already at the stage of considering the section. There is no reinforcement inside. And this is not surprising. A reinforcing element is not required for a metal product. Aluminum also has one drawback, it can be considered the key: the coefficient of thermal conductivity of the profile is very high. As a result, the window freezes easily.
To somehow smooth out this negative effect, a polyamide bridge is mounted inside. This is a whole compartment made of polymer around the entire perimeter of the frame. That is, in the case of plastic windows, we had reinforcement as an improvement, but here, on the contrary, a polymer insert is used. This tells us that today neither metal nor plastic, separately from each other, are suitable for the manufacture of profiles. In the first case, we would have too high a coefficient of thermal conductivity, in the second - too low strength.
The fittings, as in the plastic profile, are mounted along the sash perimeter. But if there it was superimposed into the groove, then here it is inserted from the side of the end. The gears go under the rail, as it were. Momentum is still transmitted clockwise or counterclockwise along the perimeter by moving the latch heads in the desired direction. In addition to the installation features, the fittings for aluminum windows are distinguished by an abundance of plastic elements. The gears are interconnected by toothed joints or a kind of hinge. The peculiarities of internal work are the same. That is, on an angular gear, for example, there is a flexible plate.
Due to the peculiarities of the assembly, the latter is exactly the corner transmission along the side. Whereas the linear is in the center and is removed last. Plastic windows had exactly the opposite.
As for the double-glazed window, it also stands on folded inserts, supported by elastic plates (bridges) of different thicknesses. As before, correct wedging is largely responsible for the geometry of the window. It remains to add that there are almost exactly the same sash position adjustments that plastic windows had.Only the positioning screws can be positioned slightly differently.
What to do if the handle of an aluminum window is difficult to close
The answer lies in the locking features. The heads of the latches, which move clockwise and counterclockwise in their grooves, are responsible for the firm clamping of the sash in the closed state. The strikers on the frame serve as receivers. If there are any inconsistencies in this simple system, then nothing prevents turning the knob, no! Simply due to the rotation, when the heads are already in place, the angular gears are deformed, taking a blow on themselves. This is what we feel like seizing. It is clear that the effect does not bode well, and something needs to be done.
Adjustment of Roto fittings for aluminum windows is not much different from what we saw in the section about plastic windows. For example, the clamping of the sash in the places of the locking elements is metered by the angle of rotation of the eccentric head of the latch. By the number of pivot points, you can make your changes the corresponding number of times. The closer the head is to the sash inflow, the tighter the window closes.
At the initial moment of time, the task is to understand which of the response plates causes seizure. Before you start smoking the window, it is suggested to open it, press the safety tab with your finger and turn the handle to the locked position. If these actions are performed without problems, then we will proceed to localize the place of failure. To do this, the striking plates must be removed one at a time and see if the defect has disappeared. In the end, there will be those among them that are the cause of the defect.
Install these strikers one at a time and adjust the position of the heads with a hex wrench (for Roto). Not necessarily the desired effect will be achieved with the "summer" position and minimum pressure. If the progress of work does not allow eliminating the defect, then you need to change the location of the bar. The easiest way to accomplish this task is to place a thin (about 1 mm) sole made of durable plastic under it. In some cases, changing the position of the sash helps. Let's say that it went out of range of acceptable tolerances. How can I check this?
By standards, the sash should sit perfectly symmetrically in the opening. To check the fulfillment of this condition, you need to close the window. Then, with a simple pencil, strictly along the perimeter, in eight places, strokes are applied on the frame:
- Along the lower and upper edges of the window at the handle cut.
- Along the bottom and top edges in the hinge area.
- Along the side edges in the area of the lower loop, in the area of the upper loop.
All these segments must be equal. Typical spacing is 8 mm. If there are significant distortions in any direction, then you need to correct them by adjusting the fittings. If we take Roto, then the screws responsible for the position of the sash remained in the same places. This is the lower hinge and the upper edge of the sash near the upper hinge:
- On the bottom hinge, a screw is located on top, which is responsible for the vertical position of the sash. Using it, you can raise or lower the structure.
- On the lower hinge on the side, in its lower part, there is a screw, which is responsible for the left-right displacement of the sash along this cut. It is used to align the third pair of strokes.
- On the upper edge of the sash, near the scissors and the upper hinge, there is a screw that is responsible for moving the sash to the right and left. It balances the fourth pair of labels (according to our classification).
After the sash is positioned correctly, you need to try to see if the closing problems have disappeared. Any self-respecting manufacturer puts all the mating parts according to the template, so any problems with locking the aluminum window are excluded if the geometry of the sash is in order.
There are also specific fittings for aluminum windows on sale. For example, Alutech hinges can change not only the position of the window sash, but also its clamping at the junction. Inside, the loop is held on an eccentric bushing, changing the angle of rotation of which, we set the desired parameters.In this sense, the customization and repair of aluminum windows is slightly different from what we have seen in the case of a plastic profile.
Violations of the geometry of the casement of an aluminum window
The shape of the sash, especially the large window, is supported by a double-glazed window. Inside, it is wedged on folded inserts and bridges. The correctness of installation is determined by the size of the diagonals. The one that starts from the top loop and goes under the handle should be 1 - 2 mm shorter than the other. If this condition is not met, then it is not surprising that the window is stuck. Usually the problem is that the diagonal starting from the top loop lengthens too much.
To fix the problem, remove the strips around the sash and take out the glass unit. In this case, the bridges are likely to crumble. These are such soft plastic plates that support the glass unit.
Pay attention to the folded inserts. These are the platforms that move within the profile. In the opinion of how many folded inserts should be inside, the masters disagree. These are eight (two on each side), and six, and even four. Today we will show you how to do this with five fold inserts.
One of them will be located along the bottom edge. No further than 5 cm from the edge of the buttonhole. To compensate for the skew of the glass unit, we put another insert in the upper part of the edge of the handle. We supplement the lower insert with another one, which is located on the side of the loop at the very bottom. Similarly, along the top edge, place the fourth folded insert closer to the side of the handle.
This is the initial wedging, which will provide us with the given sash geometry. Note that the bridges have not yet been installed, so the glass unit would be dangling with might and main if we decided to install it right now. Before the installation procedure, we will do something else. On the side of the hinges, in the middle part, place the fifth folded insert.
Now we put the bridge on the lower edge and put the glass unit in place. We put the next bridge along the edge of the handle. There we have only one insert, it's hard to miss. Next, we go around the side of the loops (but only the lower insert) and the upper edge. We take the bridges of such a thickness that a slight interference is created. In installation kits, they come in different widths (from 35 to 50 mm) and thicknesses from 1 to 5 mm. Therefore, for an ordinary user, there is only one problem - where to get a set of bridges.
At the final stage, a folded insert is passed along the middle part of the hinge side. This is necessary so that the sash does not shrink horizontally. We told everything we wanted about the repair of aluminum windows, we hope that the review was useful. You have seen that the working methods were not very different from those used for the plastic profile. Therefore, it will probably be useful for many to read our other reviews.
Source: remvizor.ru
How to remove the sliding frames on the loggia
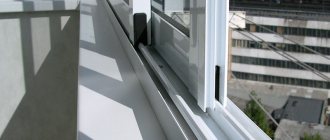
It will be possible to wash the outer glass without the use of tricky devices only if you remove them. Unfortunately, not all design options can be easily dismantled. Windows that move vertically, or require rotation before sliding, are difficult to remove unless you know how to work with them. Self-dismantling is easier to carry out on frames moving strictly parallel, in the manner of doors in cabinets.
To remove balcony sliding windows for safe washing, you need to take into account the peculiarities of their design.
Possible courses of action:
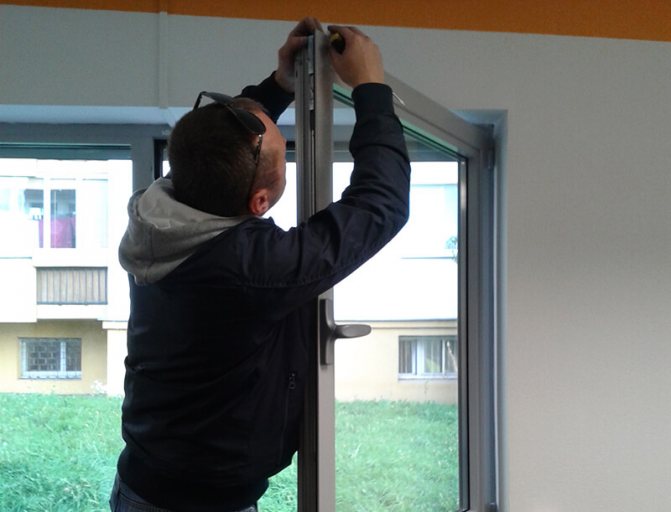
- Grasp the frame flap with both hands and lift it up so that the bottom edge comes out of the grooves of the guide. Then push the lower part inward towards you and lower it. A serviceable window should be removed without much effort.
- If the frame does not move upward by a distance that allows you to remove it from the grooves, you need to carefully examine the marks on the structure. Further actions depend on the detected elements and tags.
- Special notches are applied on the guides. The edge of the sash must be brought up to them and removed in this position.
- Instead of notches on the windows and guides, grooves are made. They need to be aligned and then the frame removed.
- The design includes locking plugs that prevent vertical movement. They are located at the ends of window frames. They must be removed by picking them up with a screwdriver. After that, the window should be free to remove.
It is difficult for one person to hold the sash removed from the frame in weight. For safety reasons, it is better to shoot together.
Before putting the washed window in place, you need to remove dirt from the guides along which the wheels move, and from the wheels themselves.
How to put back
After placing the new glass unit, the removed strips are installed in place using a glazing bead removal tool that does not damage the plastic windows. Installation of strips is carried out in the following order:
- They are cleaned of dirt, washed and, after drying, cover the rubber seal with a thin layer of special silicone grease.
- After placing the double-glazed window in the opening, holding it with your hand, put the upper horizontal glazing bead first, then the lower one. To do this, insert the bar into the groove and press on it with your fingers until a characteristic click appears, signaling the completion of the procedure. When installing, they try to accurately observe the center of placement, keeping the same distance of the extreme edges from the corners.
- They do the same with the side glazing beads, remembering to check their location by numbering; if it is necessary to apply great physical effort, use a rubber mallet.
- After installing all the glazing beads, check their placement once again for the absence of slots in the corners, signaling the shift of one of them relative to the central axis. If a gap is found, remove the incorrectly set bar and return it to its place in the correct position.
Aluminum bead - structural device and installation method
Accessories for washing exterior windows
If it was not possible to remove the sliding window with your own hands, you will have to clean the glass from the outside in other ways. You cannot do this with ordinary rags.
Appropriate tools will be needed for safe washing:
- Long handled brush with replaceable rollers... It is better to choose with a telescopic change in length. Soft roller - to remove dirt, rubber - to remove water and eliminate streaks.
- Scraper cleaner... Usually has two working surfaces - soft and hard.
- Wiper robot... The principle of operation is like a magnetic brush, but it works without human intervention. With its help it is easy on the windows. The cost of such a device in Moscow starts from 18 thousand rubles.
- Magnetic brush for external glass washing. One half is installed on the inner surface, the other on the outside. A built-in magnet presses them against the glass on both sides. The outer part repeats all the movements of the inner one. The main advantage is complete safety, since the washer is located in the room. The disadvantage is that places near the frame are poorly washed.
Choice of detergents for window panes
Washing a sliding window includes cleaning the glass on both sides, removing dirt from the attachment points, cleaning the window frame and the guides into which it is inserted.
Some products suitable for glass can damage the frame. Aluminum frames are difficult to damage when washing, but plastic materials require care.
Rules for choosing detergents and accessories:
- Do not use substances with a high alcohol content, as alcohol stains are difficult to remove from glass.
- Do not use gasoline, acetone or other solvents. They damage the rubber gaskets of the window and destroy the protective coating.
- Do not use powders or other abrasive materials to clean the frame parts. They leave micro-scratches in which dust accumulates.
- Do not use products that work in hot water. At high temperatures, the plastic may warp, and after several washes it will turn yellow.
- Use solutions with soda only for cleaning aluminum structures. Soda damages plastic.
Use only special window products: Clin, Cinderella “Clean Windows”, Cif, Help, Mr. Muscle, Ecover and others.
Flannel and suede fabrics will help you wipe the washed glass dry without streaks. Cleanliness can also be restored with the use of "old-fashioned" material - newspapers or paper napkins. But they are only suitable for cleaning removed windows, and it is difficult to clean them outside.
Varieties of glazing beads
Glazing beads come in several shapes and sizes. So, depending on the features of the geometry, the following glazing beads are distinguished:
Depending on the size, the glazing beads are narrow (used in 3-chamber PVC structures) and wide (used in reinforced 5-chamber structures). In the manufacture of this window element, polyvinyl chloride is most often used, but recently a completely new material has been used - glass composite. It is a fiberglass filler reinforced with binders. At the end of the production process, a small layer of soft rubber is fused along the edge of the rail, which will act as a seal.
Most often, glazing beads are removed when carrying out repair work: installing a new double-glazed window, external repair work, or replacing glazing beads, because this element is not eternal. Usually, after a certain period of time, the glazing bead needs to be replaced, since it ceases to fulfill its direct purpose - sealing the window and protecting it from external factors.
Attention! Some people mistakenly believe that taking off the glazing bead is a matter of 5 minutes and they get to work without really grasping the essence of the process. And thus often violate the integrity of the structure. After that, you have to either look for a new glazing bead, or call a specialist to solve the problem.
Folk recipes
You can wash a dirty window using means from improvised household substances:
- Sophisticated cleaning mixture... In 1 liter of water, 10-15 ml of vinegar, 50 ml of alcohol and 20-30 g of starch are diluted. Suitable for cleaning glasses and frames.
- A solution of water and crushed chalk... It is used only for heavily soiled glasses. They cannot wash the frames.
- A mixture of tea and vinegar... In a glass of 200 ml of strong tea, add 30-40 ml of table vinegar.
- Glycerin addition... Adding a small amount to any cleaning solution will lead to a decrease in stains on the glass.
- Table vinegar... For removing streaks and shine on washed glass.
- A mixture of baking soda and hydrogen peroxide... To remove accumulations of dirt in the grooves of the sliding windows. The dirty place is sprinkled with soda and filled with peroxide until a liquid gruel is obtained. Together with the absorbed dirt, it is removed with a napkin after 2-3 minutes.
Prevention of pollution of balcony windows
To prevent dust and dirt from getting inside the frame of sliding windows, it is important that the seals at all joints do not lose their elasticity. Twice a year they need to be cleaned and lubricated with special gels or petroleum jelly.
The drainage grooves in the bottom of the frame should be regularly cleaned to allow rainwater to drain away from the frame.
To make the glass dirt-repellent, it is useful to rub it with a mixture of water, ammonia and glycerin. Less dust settles on the resulting film.
Source: kliningovyj-raj.ru
How to disassemble a double-glazed window in a plastic window
03/31/2020 Additional insulation of the REHAU INTELIO 80 window with two triplexes! The REHAU INTELIO 80 PVC window with a 3.1.3-20-4-14-3.1.3 double-glazed window did not provide the customer with the noise reduction promised in the REHAU advertisement to 45 dB, according to measurements it turned out to be 32-33 dBA, it was necessary to order the installation of a second glazing string.
03/31/2020 Installation of an additional window for noise insulation in a ventilated facade In the house outside the Moscow Ring Road on Dmitrovskoe Highway, which was built by Morton and completed the PIK, we installed an aluminum window filled with 8mm laminated triplex (4.1.3) outside the existing VEKA Softline 4-16- 4-12-4.The house has a ventilated facade, inside the window sill is narrow, the design of the window is double-winged with a blind bottom transom.
12/25/2019 How to remove noise from the Moscow Ring Road passing through the plastic windows into the bedroom Windows of a new apartment building overlook the Moscow Ring Road, how to achieve comfortable silence without changing the windows.
- Promotions (6)
- News (24)
- Reviews (7)
- Projects (86)
- Regions (39)
- Articles (67)
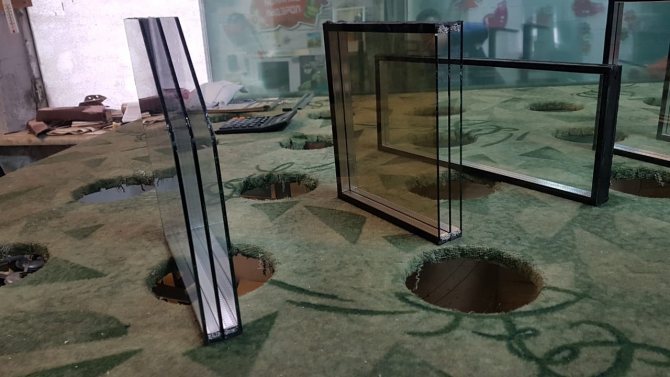
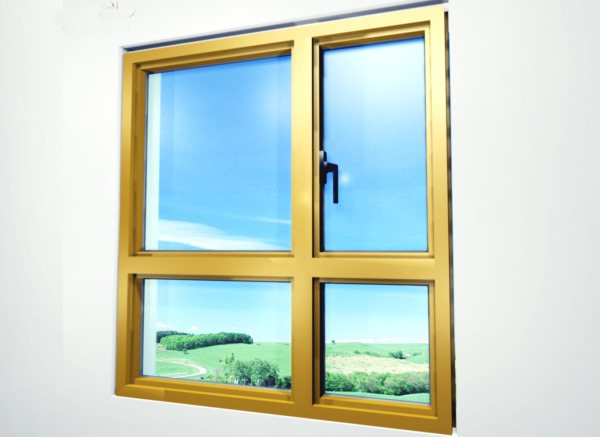
It often happens that when windows are installed, large blind sashes are made to save money, this is especially true for balcony glazing. Subsequently, there are problems with access to the air conditioning unit, which hangs on the wall from the street side. We are often asked to remove a glass unit from a plastic window for a while in order to bring in furniture from the street through it or provide access for repairing an air conditioner. Installers of air conditioners are not eager to do this work, as they are afraid that the glass unit may crack during dismantling.
Let's try to explain how to disassemble a glass unit in a plastic window so as not to damage the plastic window. First you need to provide a place where you put the removed glass unit. Place two wooden blocks or pieces of Styrofoam on the floor, then proceed to remove the glazing beads from the plastic window.
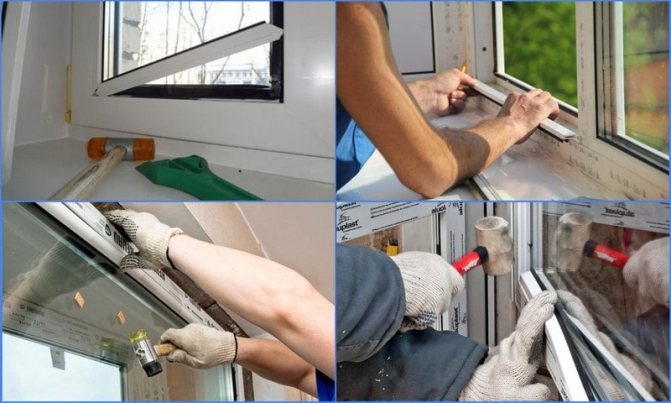
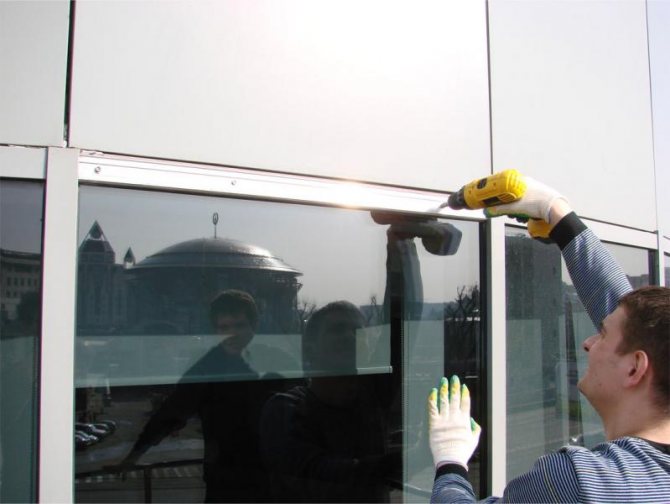
To remove the glazing beads, you must use a wide chisel or a stiff trowel. In no case should you use a screwdriver, as using it you will damage the glazing bead surface and the frame profile. A chisel or spatula must be inserted into the gap between the glazing bead and the sash profile and hitting the handle of the spatula with a hammer to widen the gap. Further, moving the spatula along the profile, bend the glazing bend and pull it out of the groove. We carry out this operation for the other three glazing beads.
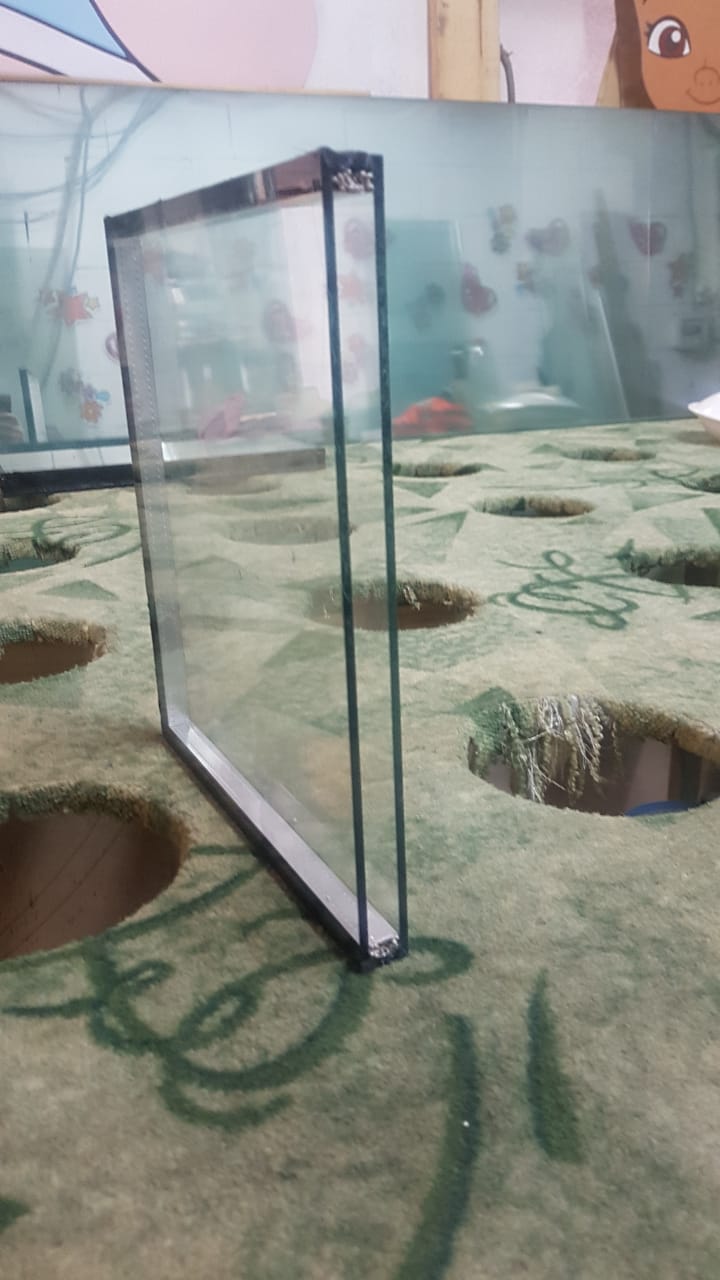
To remove a glass unit from a plastic window, wear rubberized gloves so as not to cut your hands on the sharp edges of the glass. It is difficult to remove the glass unit from the window, as the rubber bands sometimes stick to the glass surface. If it is possible to press on the glass unit from the outside, then the problem of removing the glass unit is solved quickly.
If you have a blind window, then you need to take a plastic spatula and insert it into the gap between the glass unit and the frame to tear the glass unit from the dried sealing rubber. C If there is no plastic spatula, then use a plastic straightening plate that is inserted between the frame and the glass unit. Putting the plastic plate on the glazing bead surface to the glass, move the glass unit slightly so that you can grab it with your hands. We remove the glass unit by placing it in a specially prepared place on supports, placing a cloth or a piece of foam plastic against the wall where the glass touches.
So you disassembled the glass unit and completed all the necessary work, you need to install the glass unit in place. Check if the alignment plates at the bottom of the frame are in place. The straightening plates should be the thickness of the glass unit and in no case should they fall into the inner surface of the glass, otherwise, when the glazing beads is hammered, the glass of the glass unit will rest against the plate and crack.
Having installed the glass unit back into the window frame, you need to pay attention to whether it touches the corner metal fasteners, which may be in the plastic profile or the anchor fasteners. Placing plastic straightening plates of various thicknesses under the left or right edge of the glass unit, we align the geometry of the glass unit with respect to the frame. Be sure to check once again the location of the straightening plates relative to the inner glass of the glass unit, they should be located along the edge of the glass and in no case should they fall under the glass. Then, using a rubber mallet or a wooden hammer handle, we hammer the glazing beads into the groove of the plastic frame, first short, then wide glazing beads.
I hope we have explained to you how to disassemble a double-glazed window in a plastic window with your own hands and how to install it back.
It is better not to use a knife, you can easily damage the glazing bead and cut your hand! A spatula or chisel is enough.
We changed the glass unit in the kitchen after it cracked from sudden temperature changes. It seems like nothing complicated, but I won't dare to do it myself. Believe me, it is better to call the specialists who ate the dog on this. And they will change it quickly and the glass unit will be intact. Good luck!
It seems that it is not difficult to change the double-glazed unit itself, but it takes time to order the expired glass unit, then go for the finished double-glazed unit, it takes time that is not there. Let me overpay 3000 rubles for the money, but to spend time and risk breaking the double-glazed window during installation or not, there is no desire, so let the master change the glass package.
You've got a visual aid for thieves on how to get into a house without breaking a plastic window!
Source: palikprof.ru
How is the glass unit fixed?
First, you need to understand how exactly the glass unit is fixed in the frame. And here there is nothing complicated, in plastic windows, as in any other, it is fastened with the help of special glazing beads.
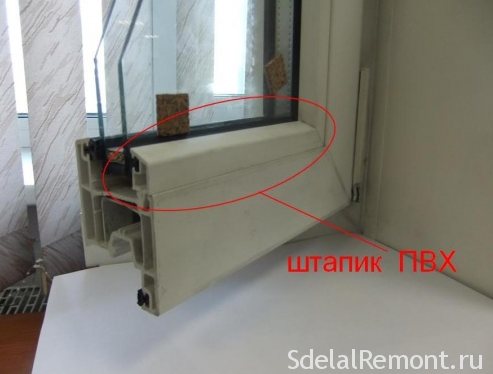
It should be noted that these are not familiar to everyone glazing beads, familiar from the time of standard wooden window systems. And therefore, in order not to damage the glass during removal, their location should be taken into account.