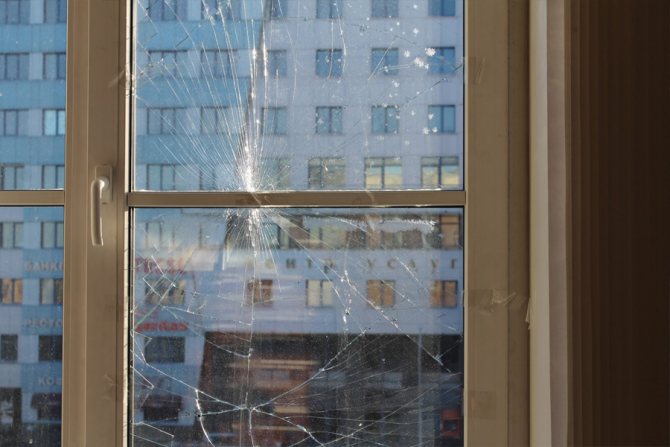
Most modern windows have double-glazed windows with 2 or 3 sheets of glass: they are fixed with an aluminum strip and special mastic. Sometimes glass, especially on the street side, can get damaged. In this case, you will need to repair the double-glazed windows with your own hands or contact a qualified master.
Design features of a double-glazed window
In terms of its structure, a double-glazed window is a bit like an aquarium, which is already "packed" from four sides, and not from three, as a home "reserve" for exotic fish.
The structure of a double-glazed window may include:
- one camera;
- two cameras;
- three cameras.
The calculation is taken for the installation of the structure in a specific region of the Russian Federation, where its own climate features are noted.
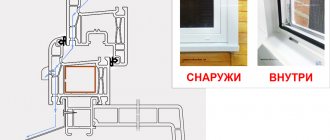
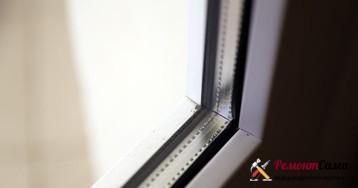
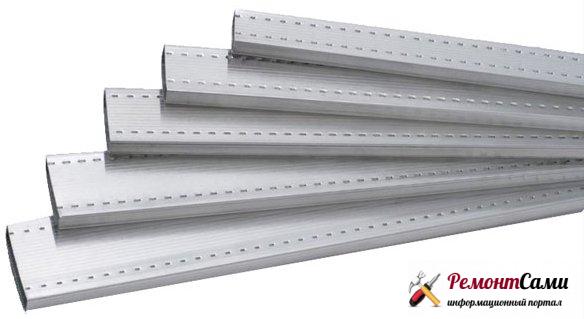
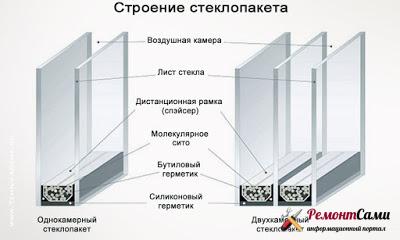
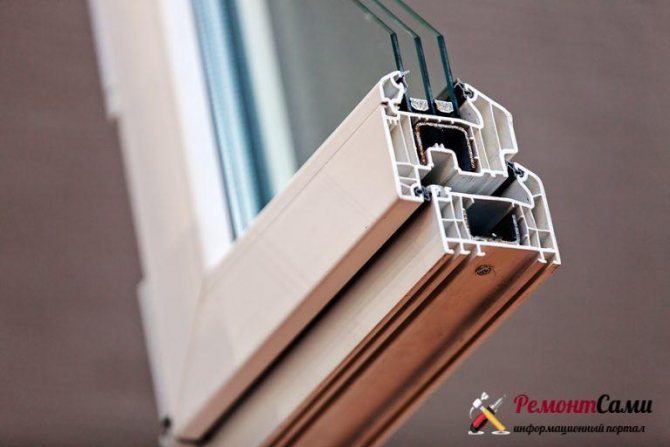
Cameras are compartments between glass panes. These glasses are separated from each other, and the designated distance gaps are determined by a metal (metal-plastic) distance rail. It is fixed on both sides using a sealant.
This spacer is punched with small holes. Their purpose is to prevent the concentration of moisture inside the chamber, because the presence of moisture can lead to fogging of the glasses.
Spacer frame in double-glazed window
There is a dehumidifier inside the spacer. It is with its help that it is possible to achieve that the glass does not fog up. And the end part of the glass unit is filled with sealant.
Spacer aluminum
The construction of the glass block, assembled by a professional method, is filled with an inert gas - argon, krypton. But it can also be filled with air - sufficiently rarefied (with less pressure than outside, for a better fit) and dried. Gas filling is more dense than air. So such windows are characterized by improved performance:
- soundproofing;
- thermal insulation.
In the production of double-glazed windows, glasses of different thicknesses are used. This nuance is certainly indicated in the product labeling.
For example, the designation 4-10-4-10-4 stands for:
- double-glazed window, two-chamber, conventional design;
- the thickness of each glass is 4 mm;
- the distance between the glasses is 10 mm.

Single and double glazing
You can find a more complex formula such as 6-10-4-16Ar-4i. Here is its transcript:
- glass unit of special design;
- external thickened glass;
- there is glass with an energy-saving effect - "i";
- energy-saving glass thickness - 4 mm.
Answers to popular questions
You can replace a single-chamber double-glazed window with a two-chamber
Yes, a single-chamber double-glazed unit can be replaced with a two-chamber one. Such a replacement is possible under two conditions:
- The thickness of the new bag is the same as that of the old one, or the new one is wider, but narrower glazing beads can be inserted.
- The profile with fittings is able to withstand a weight that will increase by 30%. At the same time, weak hinges can still be replaced with strong ones, but another reinforcing frame will not work inside the profile, it is easier to insert a new window.
You can replace a two-chamber glass unit with a three-chamber one
Yes. The conditions are the same as those needed to replace a single glazing unit with a double glazing unit. And here the difference in weight between double and triple packages is less - about 25%.
How to independently assemble a double-glazed window
A similar topic may interest a homeowner if one of the glass in a window block is broken. Indeed, it is a feasible task to assemble a double-glazed window yourself, but it cannot be called simple.
What fixtures and tools will be required
You need to stock up:
- distance slats;
- lining;
- chisel (exactly wide);
- a hammer (plastic or dense rubber);
- a special plastic spatula;
- boot knife;
- glass cutter;
- a wooden ruler with divisions from 100 cm to 150 cm;
- suction cup for glass.
Rules for dismantling a double-glazed window
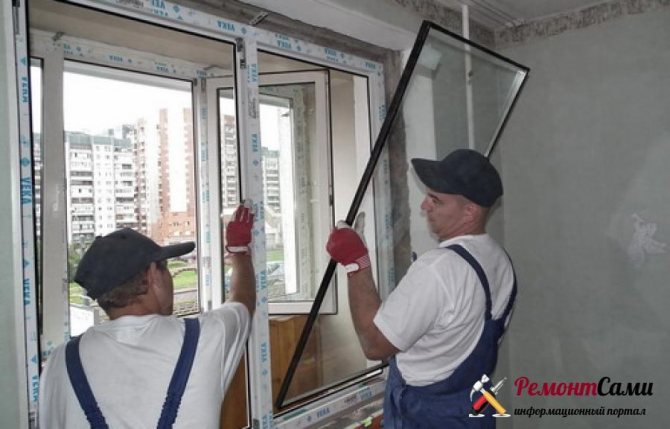
Before starting the manufacture of a new double-glazed unit, it will be necessary to dismantle the old system, which has broken glass. The glass unit is fixed with glazing beads in the middle of the frame. To pull it out, the glazing beads will need to be dismantled. But this work is not difficult if it is performed strictly according to the rules.
First stage. A suitable tool is selected - a sharp, wide chisel. This item is inserted into the gap between the frame and the glazing bead. Then they hit the chisel with a rubber mallet.
Second phase. The bead starts to move away from the frame. When it stands out at a distance of more than 5 mm, it will already be possible to detach it by hand.
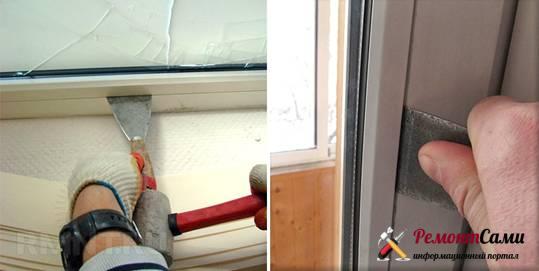
Dismantling the glazing bead of a plastic window
Stage three. The upper horizontal glazing bead is dismantled. This part usually starts to be knocked out from the corner zone.
Stage four. Then the second vertical glazing bead is removed, after that - the lower horizontal one.
Fifth stage. The owner of the house puts on tight gloves on his hands so as not to cut himself with the sharp edges of the glass (usually they are just like that).
Sixth stage. If one of the glasses is damaged, it is removed using a suction cup.
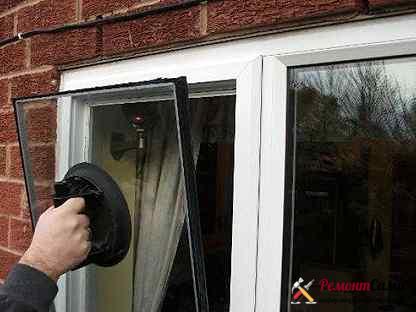
Dismantling a glass unit by means of a suction cup

Recommendations for working with a window sill
Removing old window sills is a process that can take place in different ways depending on what materials the bases are made of. The set for plastic windows usually comes with the same ebb and flow and window sills. Since PVC material is not without its advantages:
- Easy care and cleaning.
- Resistant to sunlight.
- Self-extinguishing properties. The material does not support combustion.
- Long service life, which reaches 20 years with correct operation.
- Little weight.
If the window sill is wooden, then it is filed in several places. Why take a hacksaw for wood. Then they simply take it out, using a crowbar, or use brute force.
In the case of using concrete, the structure is broken into pieces using several tools:
- Perforator.
- Bump stop set to bump stop mode.
- Manual labor. In this case, the helpers are a crowbar or chisel, a hammer.
The fastest way will be the one where it is supposed to use a grinder equipped with a special circle for processing concrete. The main thing is to remember that in this case, the formation of dust in large quantities cannot be avoided.
After each working cycle, it is necessary to sweep the debris from the surface that formed earlier. When working with grinders, do not forget about safety and the appropriate devices to ensure it:
- Respirator for respiratory protection.
- Safety goggles that have a polycarbonate glass resistant to any mechanical damage.
- Construction gloves.
It often happens that the condition of the concrete window sills is completely satisfactory to the owners. And there is no desire to engage in replacement. The change of the window sill does not always accompany the dismantling of old windows made of plastic. But we must remember that, as materials, plastic and concrete practically do not combine. And this has its own reasons:
- Compared to concrete, plastic parts have a much higher heat capacity. They are much warmer, which creates condensation.
- An old sill and a new window can lead to gaps between structures. Even a complete seal at the initial stage will not completely eliminate the formation of cracks.
Concrete windowsills are often covered with ordinary tiles to get rid of the problem. The ceramic mosaic tile will be a great decoration for those who care about appearance. The simultaneous use of several shades is permissible. A good addition is decorative glass.
How to make a double-glazed window with your own hands
Double-glazed window drawing
You will need the following materials:
- spacer (you can use a distance frame);
- glass of the required thickness (must be 4 mm or more);
- free-flowing desiccant;
- primary sealant (usually butyl is used);
- secondary sealant (polyurethane, polysulfide are more often used).
And here, when a double-glazed window is assembled, it is necessary to adhere to certain rules at each stage of the work.
First stage. A place is being prepared for assembling the structure. The table should be:
- with a flat surface;
- quite extensive;
- reliable;
- covered with felt (another soft but dense material).
Second stage. The glass is measured, all measurements are recorded. Measurements are made precisely of the inner edges of the frame horizontally and vertically (in each direction minus 1-2 mm). But you can take measurements from the previous double-glazed window.
Third stage. A perfect cut is made on the glass. For this, a good quality glass cutter is purchased, after which it will always come in handy on the farm.
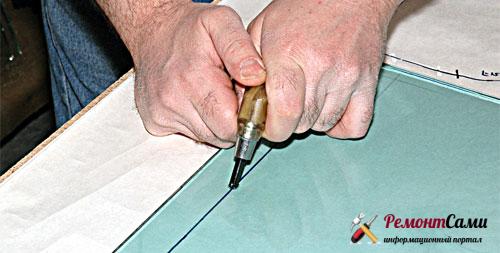
Glass cutting
Stage four. The glass is placed on the table. Measurements are transferred, a quick cut is installed. The convenience of the roller version is obvious: it is possible to make a cut, which turns out to be perfectly even.
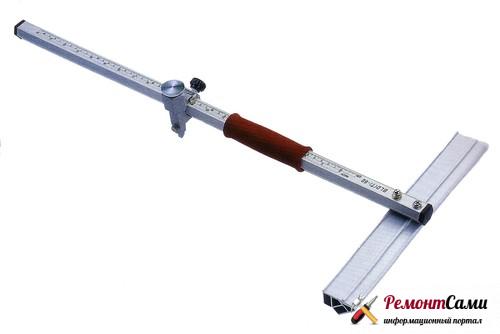
Professional "fast cutter" allows you to accurately cut large glass sheets
Fifth stage. The cut glass has very sharp edges. It is desirable to treat them with an abrasive bar ("diamond dust").
Sixth stage. After cutting the glass of the required size and processing it, this material is well washed. It will be even better if it is treated with a glass cleaner.
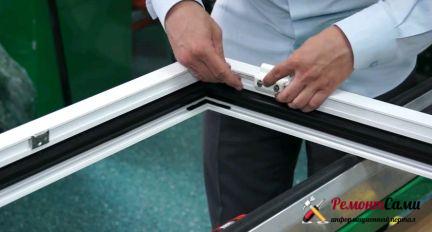
Seventh stage. Distance slats are being prepared. Sometimes slats are suitable even from an old double-glazed window. They are cut from the glass together with the sealant. However, then it will be necessary to completely free the slats from the applied mass.
A frame 4-7 mm smaller than the cut glass is used. In other words, the glass extends beyond the edges of the frame. The resulting distance is sealed with a secondary sealant.
Eighth stage. Perforated spacers have internal cavities. Their volume is 3/4 filled with a desiccant, usually granular silica gel.
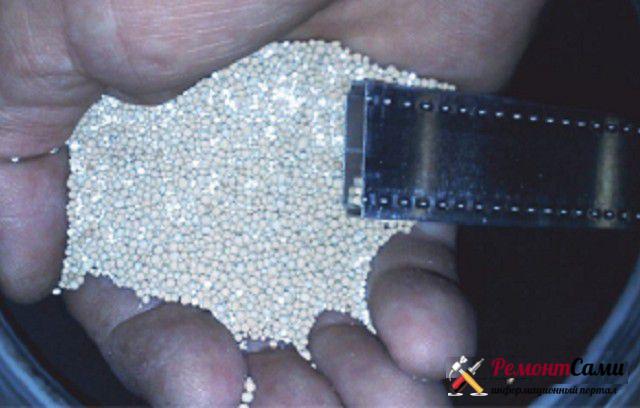
Filling aluminum spacers with silica gel for insulating glass units
Ninth stage. Material should not spill out on the other side. For this, the lath cavity is covered with a special corner.
Tenth stage. When the installation of 2 separate battens is complete, a 90 degree right angle should be formed.
Eleventh stage. A butyl tape with a protective film is used, which is glued to the ends of the frame. The tape is removed only at the stage of fixing the glass.
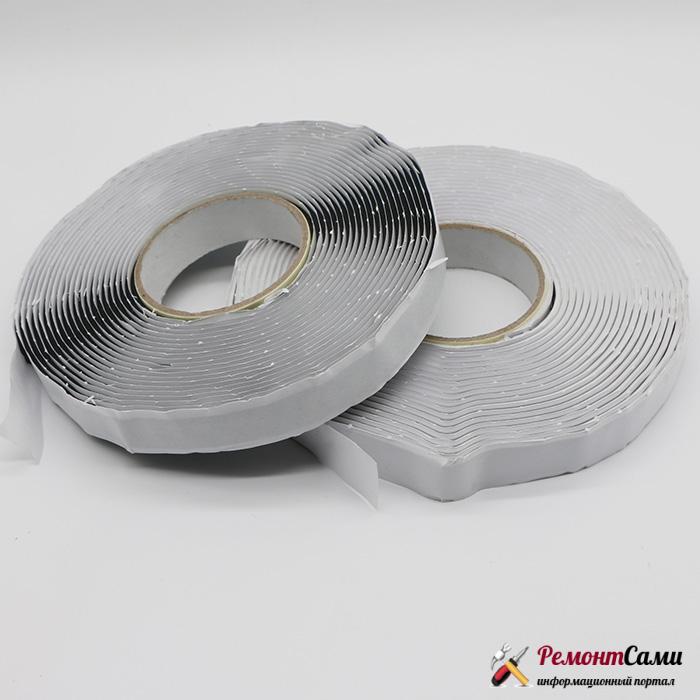
Butyl tape - self-adhesive
Twelfth stage. The glass is placed on a cleaned table. The finished frame should be glued to the glass, this must be done evenly. On the glass (on the outside), marks are made to overlay the frame, a corrector and a ruler are used. Subsequently, the marks are easily removed.
Thirteenth stage. Before placing the frame on the glass, you will need to remove the protective film (bottom) from the adhesive tape. And the frame is set clearly according to the marks.

Stacking the frame
Fourteenth stage. The top layer for protection is removed from the sealing tape. The second glass is placed on the frame exactly according to the markings.
Fifteenth stage. In the case of making a two-chamber bag, you will need to repeat the gluing process.
Sixteenth stage. All glasses are already assembled into a double-glazed unit. Then the glass is carefully crimped. This is how the adhesion to the butyl tape is formed, and it is quite reliable.
Seventeenth stage. Now the filling with thiokol, polyurethane or polysulfide is carried out along the perimeter of the glass unit of the cavity between the glasses that remains. Used by:
- staple;
- construction syringe.
The final stage. Drying of the circuit is usually completed in 8-14 hours. After the curing process is complete, the material begins to resemble rubber. All smudges are cleaned up, the owner must make sure that the solidification is complete.
Helpful hints
And now about what you need to consider before disassembling the plastic window:
- First of all, you need to draw up a consistent plan of action and make sure that you have all the necessary tools to get the job done.
- At each stage of dismantling structural elements, it is recommended to record the sequence of your own actions. After all, remembering the next morning what and how was done yesterday can sometimes be difficult.
When starting work, it is recommended to take care of safety in advance. In particular, you should put on cotton gloves on your hands, which will protect the limbs from all kinds of damage in the process of interacting with sharp objects and traumatic structures. Before deciding to engage in independent dismantling of double-glazed windows and disassembling plastic windows, you need to think about how sound insulation and sealing of joints will be carried out after returning the structure to its original place. To cope with this task, experts resort to the use of professional adhesives and sealants. Those who do not understand all the intricacies of installation technology may encounter significant difficulties in the process of reinstalling windows.
Insulating glass installation process
You need to act according to this scheme.
Firstly, the glass unit is installed in the frame. The frame has a groove on one side. A rubber seal is installed in it, and along the entire perimeter.
Sealing rubber for double-glazed windows
Secondly, rubber pads are placed on the horizontal base and vertical sides of the frame.
Thirdly, the prepared glass unit is inserted into the frame using linings. In this way, it is possible to set it in level.
Glass unit insert
Fourth, the exposed package is pressed with glazing beads. A rubber seal is installed in them in advance.
Fifth, the glazing bead is hammered into the groove. A hammer, either plastic or rubber, is used.
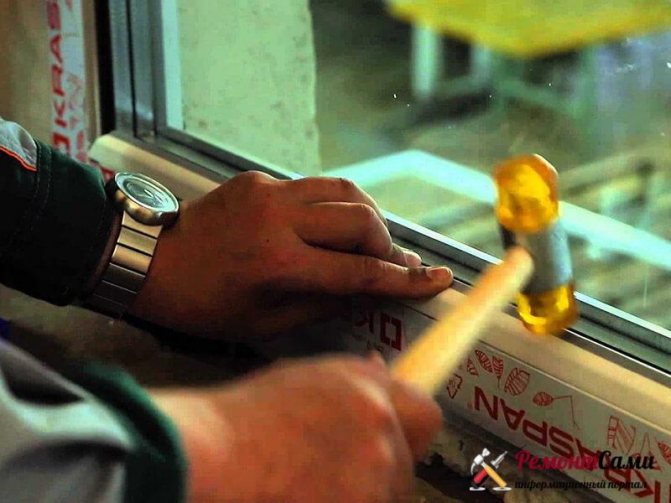
Fixing the glass unit with glazing beads
Trying to remove the fittings
- The first step is to remove the window handle. It needs to be pulled straight out of the castle.
- At the end of the frame there is a metal bar, which must also be freed from its place. For fastening in this case, self-tapping screws are used.
- In order not to unscrew the hardware itself, you need to understand where and what screws are located. They can be easily distinguished by their heads. Different manufacturers have different numbers of parts.
- If everything was unscrewed correctly, then the frame begins to move freely in the groove.
The hardware design consists of many parts. Among them there are traction. You just need to disconnect them, no need to try to do something by force. On the other hand, the actions are carried out in the same sequence as in the first.
What breakdowns of PVC windows can be considered typical, and how defects are eliminated
Most often, when the window is used for a long time, various breakdowns of the fittings are noted. Here are some of the most common failures.
- Sagging of the valves was noted.
- The breakage of the handle is fixed (replacement or repair is required).
- The sash hold-down function is impaired.
- Sealing becomes poor quality, it is required to replace the seal.
- The sash opens simultaneously in two positions.
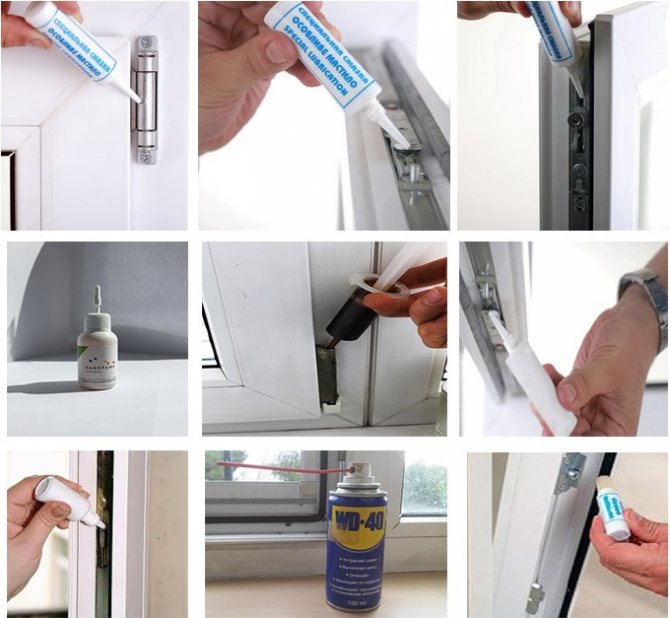
Here's a list of the tools you'll need:
- screwdriver;
- screwdriver;
- Allen key, size - 4 mm.
How to adjust the bottom corner of the sash horizontally
Horizontal adjustment of the plastic window sash
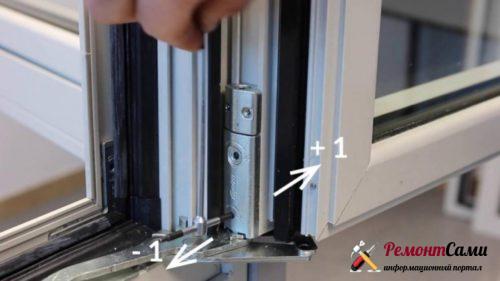
Any of the corners of the sash at the bottom of the structure can sag. To adjust the system, use the lower canopy, however, in this case, the adjustment is carried out by activating the side adjustment screw.
Turn it left or right. It depends on the need to horizontally align a particular angle.
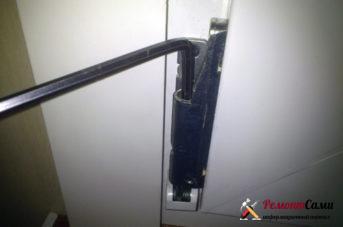
How to adjust the sash horizontally if it sags
If it is necessary to adjust the sagging sash in a horizontal position, use an adjustment groove. It is located in the upper area of the frame and must be viewed from the canopy side. Then, with a hex wrench, adjustments are made by turns, similar to the previously indicated adjustments.
How to adjust vertically
A decorative plastic strip is removed from the bottom hinge. Then, a hex key is inserted into the upper groove (adjusting), turning it:
- to the right, when it is planned to raise the sash;
- to the left when the sash needs to be lowered.
Vertical window adjustment
Important! The key must be turned very smoothly. After each new turn, it is imperative to open the sash and then close it. In this way, the result of regulation is assessed.
How to adjust the sash clamps
When blowing, there is a need to regulate the sash pressure. You also have to perform such actions when the window is switched from winter to summer mode and vice versa.
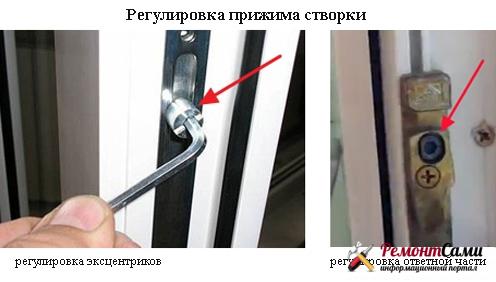
Sash pressure adjustment
The position of the eccentric stub axle needs to be changed. The designated element is located on the front side of the window structure. When adjusting, the same hexagon is used.
What to do if the handle gets stuck
When the handle of the sash, which is in the open position, jams, it is required to disable the lock. It is installed in order to avoid breakage of the window, which can be reset to different positions very quickly. If the window is installed in the tilt position, the lock is triggered, preventing the handle from turning.
How to adjust the sash (shift left, right)
The bottom of the sash can be adjusted "left-right". For this, the sash must be open. It is necessary to use the groove that is located on the inside of the canopy. The key turns to the right, which means that the sash moves to the left, and vice versa. After each turn, the system is checked for functionality.
How to replace the handle
The handle can simply break. In other situations, there is a need to update the fittings or install a better handle - with a built-in lock.
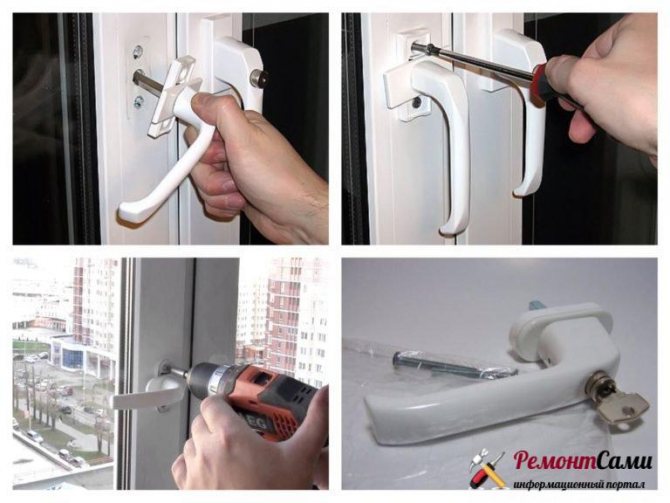
Replacing the handle on a plastic window
Replacement is effortless. The screws open to secure the handle to the frame. The screws are hidden under a decorative plate, which is installed under the handle. The plate is turned and 2 screws are opened. They are unscrewed with a curly screwdriver, after which they pull the handle towards you. It can be considered that the handle has been dismantled without much difficulty. A new one is inserted in its place, fastening with the same screws.
How to make plasterboard slopes for plastic windows, read here.
What to do when the sash is in the pivot and tilt positions at the same time
If the frame is installed with the possibility of opening in two positions (this happens often), then it will be necessary to install the sash in a vertical position, pressing the upper area of the frame against the canopy. In this case, the handle is installed horizontally, without completely closing.It should be turned in the open position of the sash.
Prices for PVC window fittings
Video: Repairing a double-glazed window at home:
(1 votes, average: 5,00 out of 5)
Types of malfunctions
Over time, the sash starts to work intermittently or sags. There is a skew of the transom under the weight of the glass unit.
Other breakdowns may occur:
- the handle turns with difficulty;
- the transom is not fixed in the folded or closed position;
- blowing from under the glazing bead;
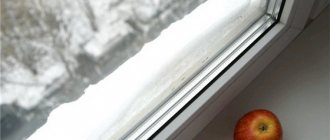
- fog up the glass inside and outside;
- mold appears on the window slope and frame, water streaks are visible.
There are instructions for repairing mechanisms, fittings contain adjusting screws and parts for coordinating work.