How to fix a hole in the plastic on the ceiling surface
Published by Anonymous on January 16, 2012 - 23:26.
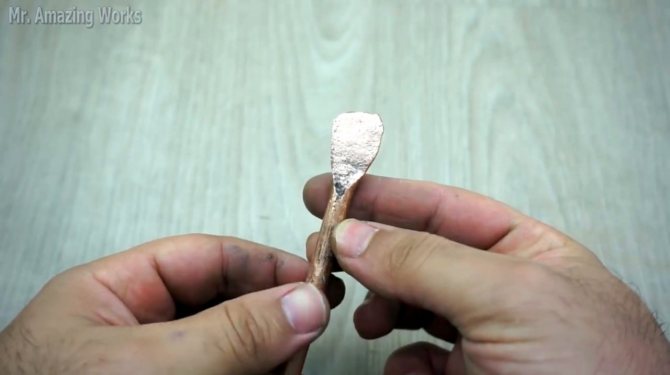
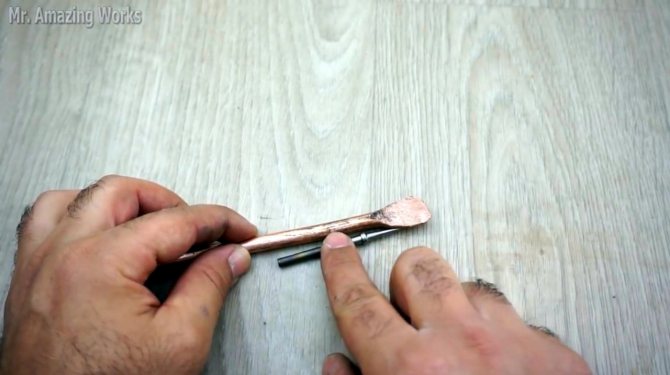
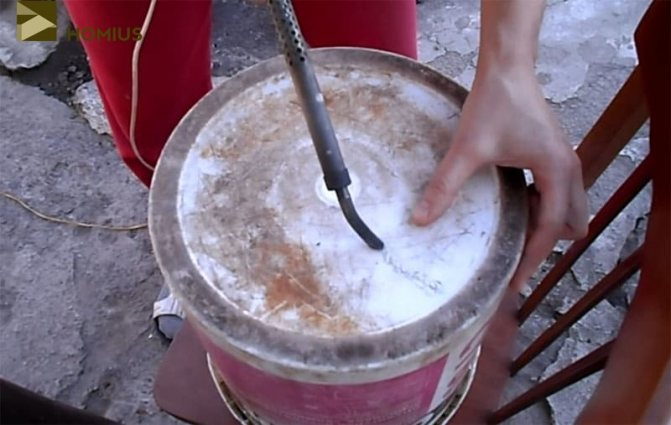
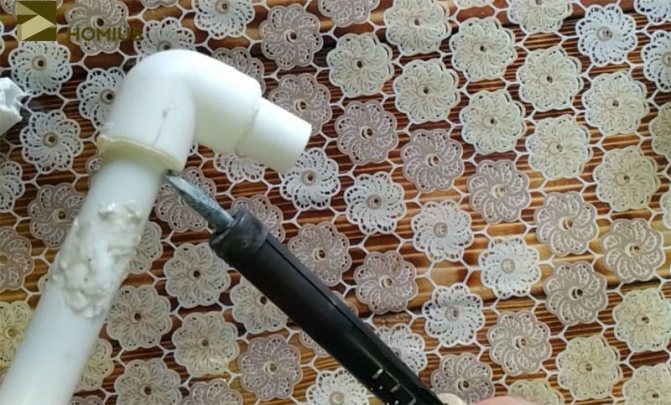
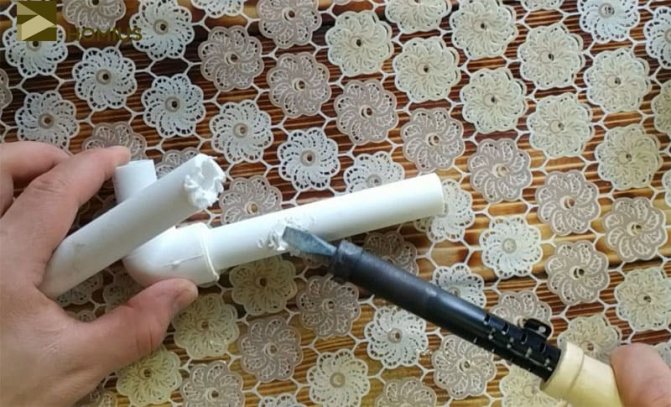
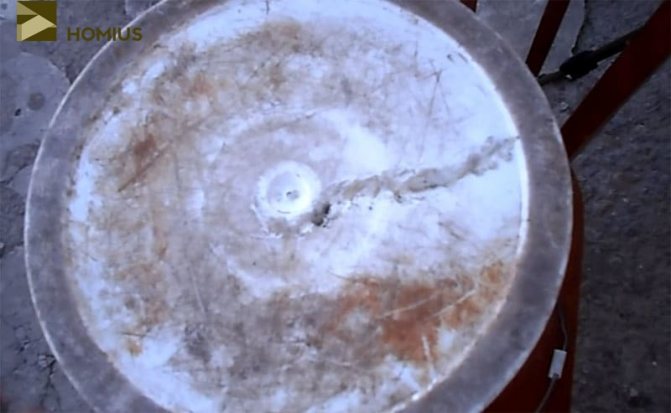
The operation is jewelry, he himself faced a similar difficulty and suffered all day. Required: a stationery knife, glue for plastic or silicone, a whole panel of similar painting and a plastic profile. Take out the fragments and elongated ribs (those that go to the length of the entire panel and connect the back and front of the panel). If they are very small, cut out the desired size from a new piece, cut the back part of the panel in the cut-out piece with a clerical knife, leaving less than half of the long edges. Next, cut short strips of plastic from a profile, any profile (side, docking, it does not matter, you are interested in the surface surface) 5x1 cm, using a stationery knife, the number depends on the size of the hole, 4 or 6 are enough for you ... Check how these strips fit on the piece of sticking plastic cut out by you, should lie between the longitudinal ribs. Lubricate one half of each strip with silicone or plastic glue. Glue the greased strips from the inside to the front plate of the panel, wait for it to dry, grease the other half of the strips and glue the cut patch to it.
there is also an option to purchase a part of a seamless ceiling (client) and stick it on. Or, using foam for installation, blow out the hole, cut off the foam that has come out and stick a patch on top of it. under any circumstances, the view will deteriorate, but it will be more beautiful than a hole.
Published by Guest at February 16, 2014 - 20:05.
There is an easier option. We take a similar plastic or find the remains from the surface of the ceiling. Cut out a circle, depending on the hole, so that it would slightly cover the hole. Cut out the back of the circle (ribs) so that the thin plastic comes out, add the thickness with sandpaper. Glue the round timber on the hole.
Can only a few plastic panels be replaced?
Good afternoon, is it possible, after the already paneled bathroom, to replace a few panels? And the thing is that our masters left us a hole in one panel and on the same wall they did not close the inoperative exhaust system and a fetid odor escapes from it into the bathroom. We would like to remove three panels, close up the exhaust system and replace the leaky panel. Is it possible?
Good day, Elena. As a rule, it is of course possible to replace several panels, and without much work. But here I will immediately warn you about such a moment.
Ideal if, after renovation work, you have a few unused panels that were bought for finishing work. However, if there is no plastic panel for replacement, then it is worth paying attention - the same collection of plastic panels from different LOTs differs in shade. The difference is small, but it will be noticeable when mounted on a wall surface.
If PVC panels were bought not so long ago - immediately run to the same store and buy the missing one. If there is no chance of finding panels from the same batch, there are several ways:
- The color of the new panels may actually be similar and will not be much different or attention-grabbing. This is the maximum.
- If the difference in shade is still noticeable, then a wonderful option would be to redo one damaged wall completely.
- Try to patch up damage on the panel.The hole must be well smeared with a sealant and some decorative component (sticker, mirror, etc.) should be fixed on top of it, if of course it is appropriate. The hole for the exhaust system can be closed with an ordinary white grill for hoods (as in this article in the first photo), which are sold in every store that sells building materials and tools.
I would also like to warn you! By closing the hole in the hood, you will disrupt the air circulation in the bathroom. This will push very high humidity and therefore mold, mildew, etc. We advise you to read the article Ventilation system in the bathroom. to understand its working principle. If a foul-smelling smell comes from the hood, you should contact your own management company, they are required to monitor the condition of all systems in the house.
We hope we helped you with advice.
Calculate the price of your repair! Is free!
Exclusively for Muscovites, Moscow Region, St. Petersburg and Leningrad Region:
Interesting article? Rate and bookmark!
Please rate the post:

Materials of modern bumpers
If you do not take into account the old models of passenger cars of the Soviet era and some models of modern SUVs, then the vast majority of bumpers are made of plastic. Each car manufacturer uses its own compounds, but they have common characteristics that determine the technology for repairing cracks and breaks - gluing or soldering.
In total, there are two large classes of plastics from which bumpers are made: thermoplastic (thermosetting) and thermosetting. Cracks and breaks in bumpers made of thermoplastic plastic are welded (sealed), from thermosetting plastic - they are sealed.
What type of plastic belongs to is determined by the marking:
- thermoplastic - these are all types of polyethylene or polypropylene. In the marking, they are necessarily designated as PE or PP (in "pure" form or in combination with other letters of the Latin alphabet). The same category includes tuning bumpers, panels and body kit made of ABC (ABS) plastic;
- thermosetting is polyurethane (PUR), polycarbonate (PC) and fiberglass (no marking).
Sometimes the first type is called "soft" plastic, and the second - "hard". By this criterion, it is easy to determine what material the bumper is made of, and accordingly select an insert for it.
"Soft" plastics are lighter than water. The density of polyethylene is not more than 0.96 kg / dm3, polypropylene is about 0.95 kg / dm3. Only ABS is slightly heavier than water - 1.02-1.06 kg / dm3. When for some reason it is not possible to determine the nature of the material by marking, then it is enough to throw a small piece of plastic into a bucket of water. Polyethylene and polypropylene will float on the surface, a piece of ABS will be in a semi-submerged state, but will not "sink" to the end.
"Hard" plastics are heavier than water. The density of monolithic polycarbonate is 1.18-1.2 kg / dm3, monolithic polyurethane is 1.2-1.25 kg / dm3, fiberglass is 1.8-2.0 kg / dm3. And if you throw a piece of hard plastic in water, it will drown.
How to fill a hole in the ceiling: recommendations and life hacks
A hole in the ceiling, intelligent when carrying out repairs, can cause a lot of inconvenience, because it makes a room unaesthetic and ugly. If a deep hole is based near the riser, then the sound insulation in such an apartment will be disturbed, which means that it is worth solving this problem immediately. First you need to find out what kind of ceiling you have in your room.
Popular types of ceilings:
- suspended cassette;
- stretch (fabric);
- plastered;
- suspended and plasterboard.
Depending on the type of ceiling, the repair of the hole in the ceiling is determined.
Repair of a seamless ceiling
Before you start filling the hole in the fabric ceiling, you need to determine how large it is considered.Small slots can be sewn up using strong nylon threads. And if a large hole forms, then you will need a piece of fabric that is suitable in size. If there is no such material in the house, this is not scary.
You can always count on the help of the company from which you purchased the ceiling. Actually here you will be able to purchase the fabric of the required color.
In order to seal the hole in the fabric ceiling, it is better to use instant glue. Do not over-press the oiled patch to the ceiling, otherwise the glue will protrude over the edges and spoil the appearance of the entire ceiling.
Damage to plasterboard ceilings
There are several options, thanks to which it is possible to seal holes on the surface of the gypsum ceiling. If there is a crack between the ceiling board and the wall, then the edge of the gypsum fiber board must be carefully trimmed so that a 45 degree angle eventually emerges. After that, the gap can be filled with a gypsum filler.
The putty area can be pasted over with paper tape and smeared with glue. If the hole in the gypsum sheet itself is removed, and the walls are next to the riser, then you first need to cut a stencil from cardboard in a square shape or rectangle. Its dimensions must completely cover the holes. After you need to attach the stencil to the hole in the ceiling, you will be able to carefully make the hole in the required shape. After that, using such a stencil, it is necessary to cut out the insert from the new gypsum fiber sheet.
In order for the insert to hold on to something, it is necessary to push a strip of thick plywood or a block of wood into the hole, which should be screwed to the ceiling using screws or dowels. After that, a patch is attached to the wood bar. Reinforcement tape and putty can be used to close very small gaps. This will give the surface a smooth and beautiful appearance. All dowels and screws should be tightened so that their heads are not visible on the ceiling surface.
conclusions
The question of how to restore and repair a car bumper with your own hands is relevant for all modern motorists without exception. If you follow the instructions and tips provided in the article, you can repair damage to the bumper with minimal money and time.
Characteristics of the repair of a plastered ceiling
In order to cover up the hole in the ceiling, you can use any good method. If the hole is not very deep, putty can be used. The cracks in the joints of materials should be covered with an elastic filler, which will help smooth out all the irregularities. The place where the plaster has fallen should first of all be cleaned, and then treated with a primer mixture that has disinfecting qualities. After that, the hole should be coated with a primer, which will improve the characteristics of the material.
The putty on the plaster ceiling should be applied in 3 layers. Each new layer is applied to a very clean and dry surface. The finishing layer should also dry out perfectly, after which it is sanded and covered with a primer mixture.
If the place to which the plaster is applied is damaged, then the damaged area can be replaced with plaster without much effort. A painting net is applied to the insert, and then the area is covered with putty.
Bumper painting
Do-it-yourself painting of a plastic bumper is a simple procedure that almost any car owner can perform. To do this, it is worth purchasing tools and materials:
- Drill with attachments, orbital sander.
- Foam rubber adapter.
- Sandpaper.
- Soldering iron.
- Solvent.
- Putty, primer.
- Paint, varnish.
- Spray gun. If desired and for additional savings, you can do it yourself.
To prepare for painting the bumper, proceed as follows:
- Bumper washing. Then the solvent is treated.
- Grinding. We clean the entire surface with a grinder. Where she has no access, we clean it manually. The used skin is P120.
- Putty. Apply a fiberglass putty to the surface. After hardening, we grind it (P120). We apply the finishing putty. Grinding P180-220.
- The next sanding with P220 abrasive: we clean it from the coarse skin. Followed by standard procedures for air blowing, degreasing and anti-silicone treatment.
- Padding. The restoration of the bumper is carried out with a two-component acrylic primer. They dry it for a day. However, when using an infrared heater, the drying time will be much shorter and will be 3 hours. The dried primer is sanded. Before sanding, it is advisable to use a developing powder to detect possible miscalculations in work. The sanding paper should be P320-400. After the next layer of primer, sanding with P400-500.
The painting procedure itself is preceded by degreasing. The paint is applied in two to three layers with drying for 10-15 minutes. Then several layers of varnish are applied, also with intermediate drying.
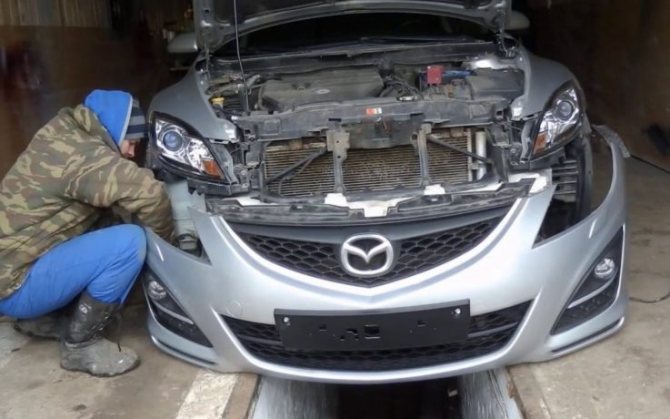
Not a single driver is insured against road accidents. And if the bumper is damaged in an accident, do not rush to a car repair shop or rush to buy a new part. Better to collect the pieces and try to repair the bumper of the car yourself.
Difficulty filling deep holes
If the holes in the ceiling are deeper, then the sealing process usually has many difficulties. Narrow and deep gaps appear between the floors. They can be filled with foam for installation, and then remove its excess with a knife.
A narrow and short lumen can be painted over with paint, and a bandage can be applied on top. After that, it is worth applying a second coat of paint.
A coarse metal mesh is applied to the dimensional cracks, which is covered with plaster on top. If the hole is deep and it is located near the riser, then its edges can be lined with a chisel and a hammer. This will help create a lot of jagging in the surface. After that, a mixture of sand and cement is laid. It is applied in portions, waiting for the previous layer to completely dry. At the end, the problematic area is covered with a water-repellent primer mixture, and then plaster is used. Especially large holes are filled with cement. And in order to better hold it, the surface is reinforced with a large wire and several electrodes.
Applying our recommendations for repairing holes in the ceiling, you will be able to solve this problem without any problems. Now damage to plaster or plaster will not scare you, and you personally will be able to cope with both insignificant and large holes on the ceiling surface. Do not forget that when filling holes, it is quite important to choose good materials that will make it possible to get rid of the problem once and for all.
General information about the subject
To understand how to fix a bumper with your own hands, you need to familiarize yourself with the damaged item. What is a modern bumper? This is a protective element of the car, in a collision it takes the main blow, so it is in this place that the car is most vulnerable.
Today, the main material for them is plastic. They use thermoplastic plastics that can be repaired by welding, which will not only get rid of small cracks, but also restore the fastening. It is not enough to know how to use welding, you need to learn how to repair a plastic bumper yourself.

Bumpers are primarily protective and the stronger the material, the better
The durable plastic material for the bumper has several advantages:
- Ease.
- Corrosion resistant.
- The cost is much lower than metal.
- Easy to clean.