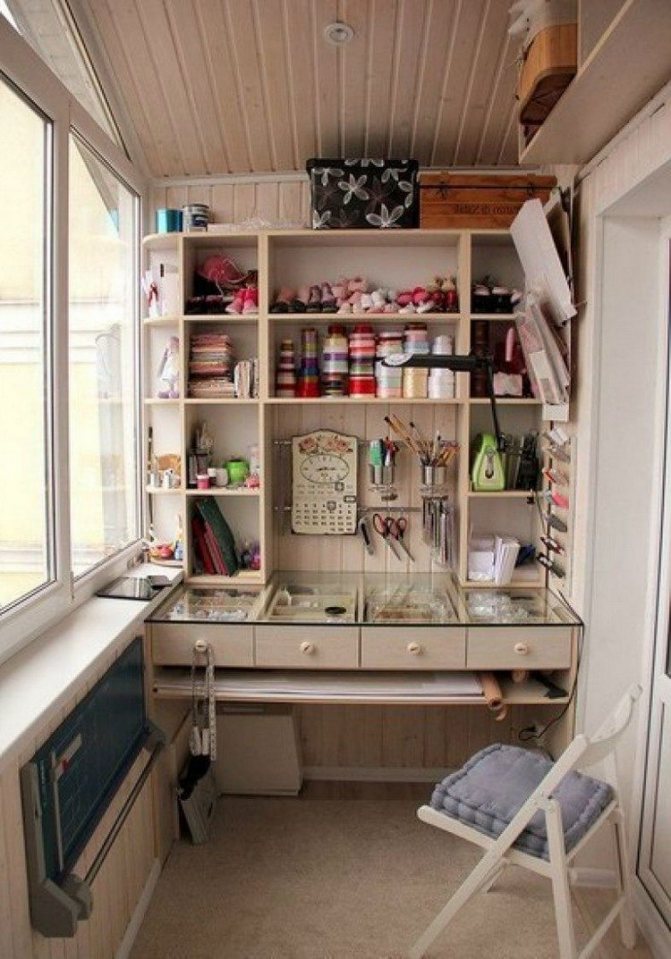
If there is a desire to do your favorite craft, and there is not enough space for this in the house, and the loggia is empty or not used for its intended purpose, then a workshop on the balcony with your own hands will be the right choice. With a competent approach with the arrangement of actions, equipping it will not be difficult, and getting the fruits of your activity will not keep you waiting even in urban conditions.
Stage 1: glazing and interior decoration of the balcony
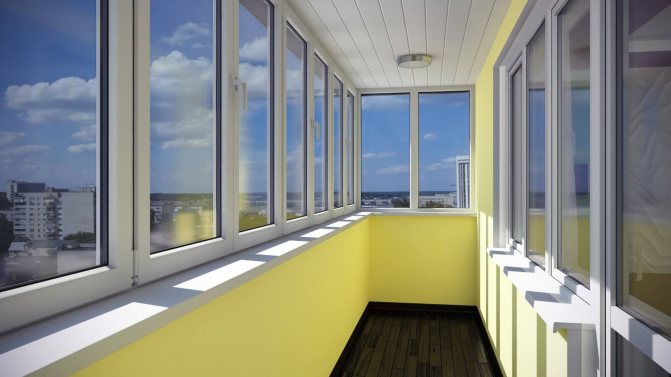
To use the balcony space, you must first of all take care of its insulation. Now the option of glazing balconies with the help of metal-plastic blocks, which are successfully mounted at any height, is popular. After glazing, it is also necessary to take care of internal or external insulation. Most often, the insulation is installed on the side walls and balcony parapet. If a loggia is converted into a workshop, the cost of insulation will be less.
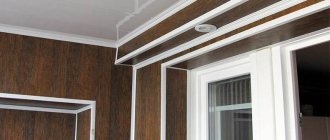
Internal insulation is carried out using mineral wool, foam or extruded polystyrene foam. The sheets are sheathed on the outside with clapboard or moisture-resistant plasterboard. When planning shelves and for hanging furniture, it is advisable to provide for a wooden crate. When decorating a room, you should definitely use moisture-resistant materials that are insensitive to ultraviolet rays and temperature extremes.
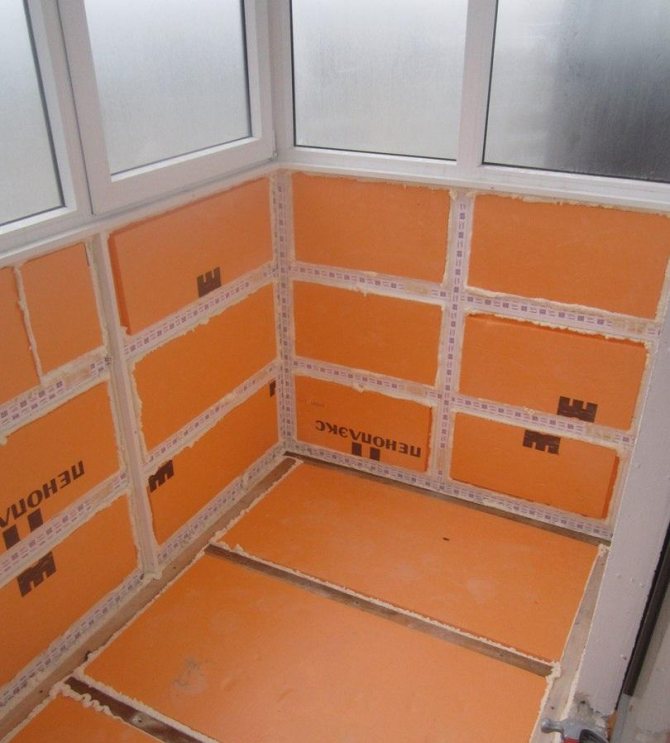
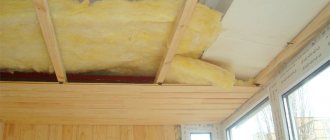
In addition to the arrangement of the walls, due attention should be paid to the insulation of the ceiling. To reduce heat loss, the surface must be insulated and sheathed with moisture-resistant material. The range of modern finishing materials will allow you to choose a suitable option from plastic or wood-based raw materials. Plastering of walls and ceilings is no longer so in demand, but when choosing this option, it is worth using universal moisture-resistant compounds of increased strength.
Basic requirements and legality of redevelopment
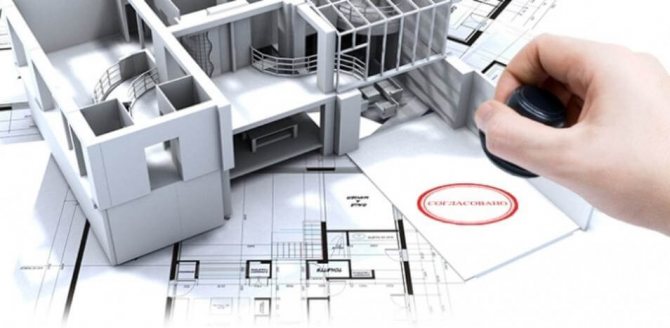
Before using the premises of the loggia for the needs of the workshop, you should make sure of the legality and safety of future repairs. Failure to comply with the redevelopment rules is a fine; you will also have to return the loggia to its original form.
Read more in the article "Combining a balcony with a room".
Therefore, before starting work, it is worth contacting the competent authorities for information if the workshop involves the presence of heavy, dangerous equipment.
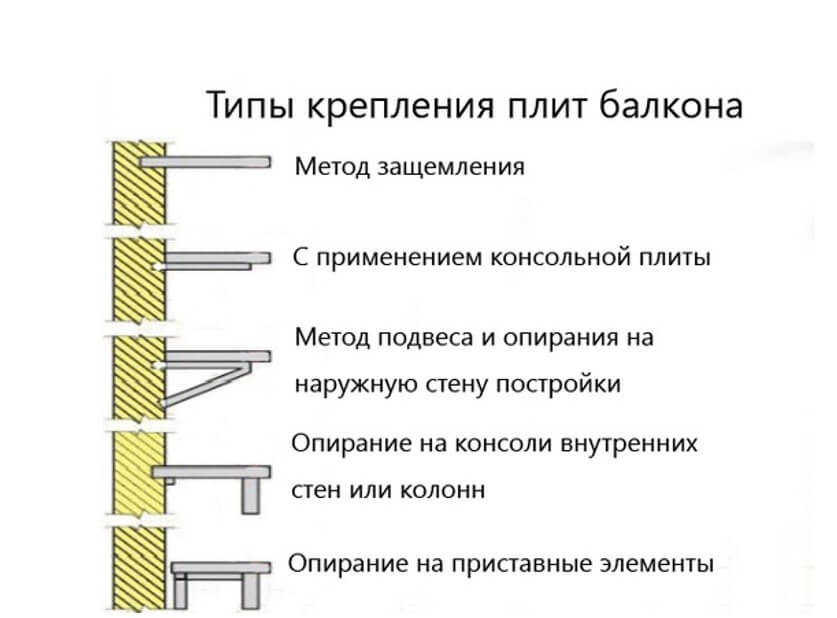
The general rules for this stage include the load on the balcony slab, no more than 200 kg per 1 m2 for a new slab. This indicator for a worn-out structure will be even lower. To assess the condition of the balcony slab and the entire structure, it is also worth contacting specialists.
It must be remembered that the balcony space of an apartment building is not only a future usable area, it is also subject to fire safety rules. If something is supposed to be tinkered with the help of open fire or other dangerous, flammable substances, then the balcony must be equipped in accordance with all safety rules, with the notification and permission of the fire service.
But this applies only to light work, it is forbidden to install a blast furnace or make a large fire on any type of loggia in an apartment building. This is an industrial activity and cannot be carried out in a residential area.
Another important point is compliance with the noise regime. The balcony is part of the apartment, therefore the same standards apply to it as to the living quarters.In the daytime, noise is allowed up to 40-55 dB, at night it is 30-40 dB.
These are the measures prescribed in the law, neighbors remain another important factor, it is worth making sure that the workshop only brings benefits, without inconveniences for third parties.
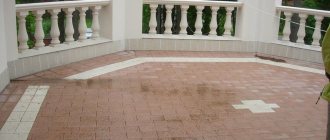
Stage 2: arrangement of flooring
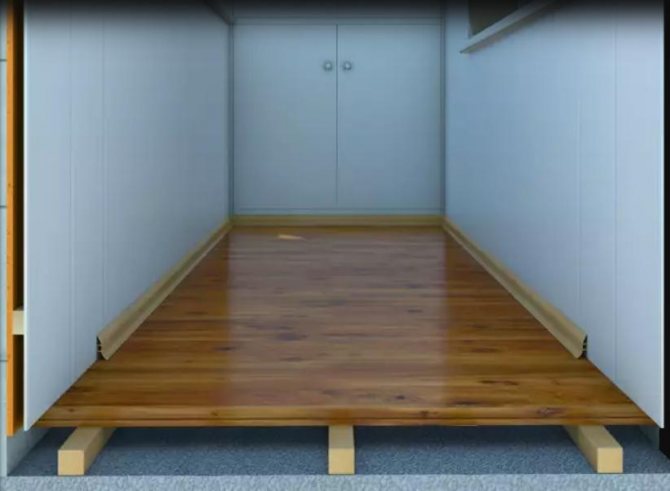
Concrete floor slabs used in the construction of balconies do not differ in thermal-saving properties, therefore, the option of floor insulation must also be thought out in advance.
All work is performed in the following sequence:
- Dismantling the old coating, cleaning the base and removing construction debris.
- Installation of waterproofing. In this capacity, building mixtures are used, as well as a cut-off waterproofing material (dense film, for example).
- Make the floor crate from wooden blocks. The cross-section of the bars must be at least 60 mm. The frequency of laying the floor log depends on the thermal insulation material used, but should not exceed 50-60 centimeters. This will provide sufficient support to support the weight of the furniture and other physical activity.
- Install heat-insulating material in the voids left. It can be polystyrene or basalt mineral wool. For optimal thermal conductivity, the thickness of the insulating material must be at least 50 mm.
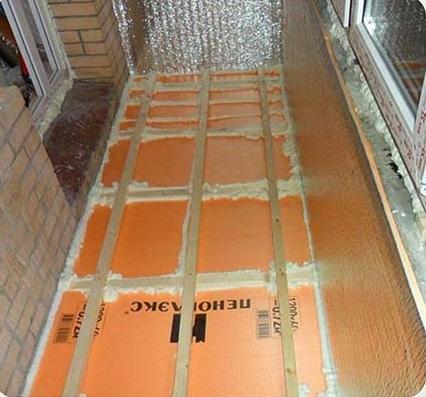
- Lay a layer of waterproofing on top of the insulation. It is advisable at this stage to use a vapor-permeable material (membrane) to ensure sufficient air circulation and moisture removal from the room.
- After that, it is advisable to use a crate of 20 mm bars. The frequency of the location of the bars should be at least 20 - 30 mm between the slats. This will provide an air gap and will also help strengthen the base.
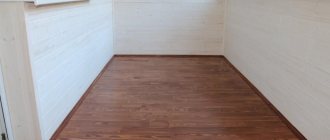
- The topcoat is usually made from suitable pieces of moisture resistant plywood. Fastening the floor sheets is carried out with screws to the base beams.
- The final stage will be the installation of linoleum. It is chosen in terms of density and thickness; it is undesirable to use several sheets that are joined together. Over time, this will damage the coated sheets.
- Along the perimeter of the balcony, linoleum is fixed with plinths. The inevitable shrinkage of the coating can lead to a curvature of the plane, therefore, the skirting boards are fixed to the wall, and not to the floor.
All work on the installation of flooring does not take much time, because the area of the room is small. When choosing a topcoat, it is advisable to choose light colors of the finish.
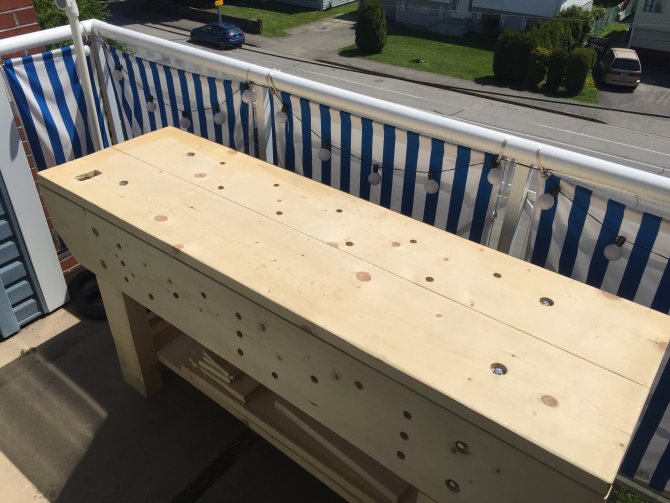
Desktop dimensions
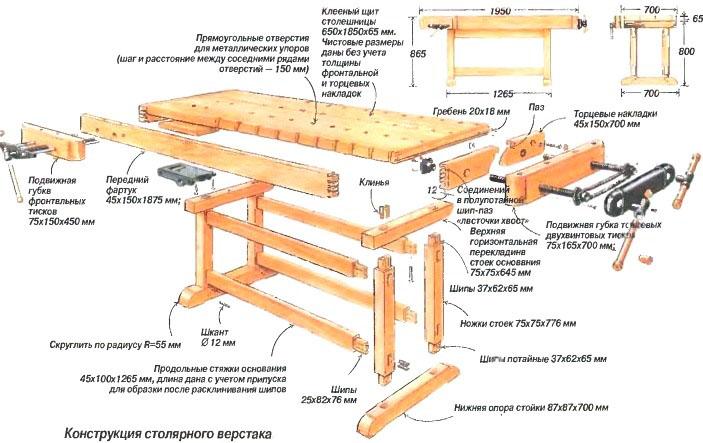
Workbench construction
To understand what size the workbench should be, they measure the balcony. Based on the data obtained, they begin to design technical furniture.
The main dimension is the width of the table. Usually a workbench is placed in one of the sides of a balcony or loggia. The distance between the front wall of the house and the frontal fence of the balcony or loggia will be the width of the table. The height of the table depends on the individual physical data of the owner. The standard height of this type of furniture is 750 mm. The depth of the countertop can be any user-friendly.
Be sure to need an opening for the legs of the employee at the table. In the absence of such, the workbench will be very inconvenient, especially when a person stays behind it for a long time.
Stage 3: supplying electricity
Ensuring the operation of the power tool must be considered in advance. For this, a separate power cable is carried out, the installation of which is often carried out on our own.
Recommendations for work:
- It is best to use NYM 3 x 2.5 mm² three-core copper cable. It can be replaced with a similar domestically produced VVG 3 × 2.5 mm².
- The connection is carried out through a residual current device or a separate differential circuit breaker. This is necessary to ensure operational safety.

- The protective function for the used connection cables is performed by a plastic corrugation. For concealed wiring, the casing is placed behind the outer wall and ceiling cladding (for plasterboard or plywood sheathing). A masking method is often used in finishing flooring.
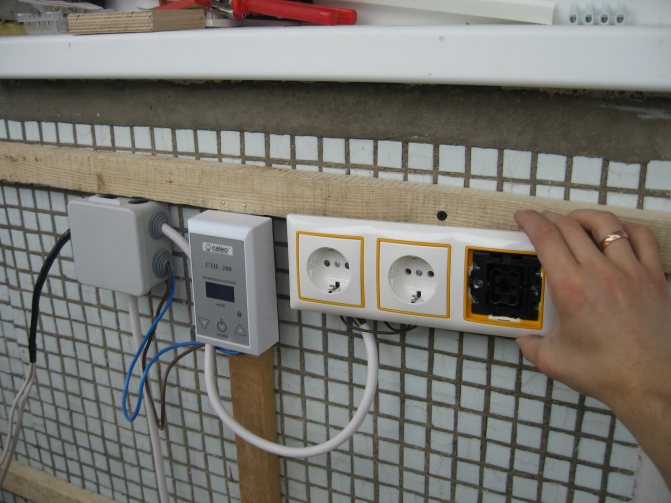
- The number of electricity consumers is calculated in advance. These are usually lighting fixtures, as well as three to four electrical outlets. Electrical equipment must have sufficient protection against dust and moisture of at least IP 65. The sockets are additionally equipped with working grounding contacts.
- For especially powerful devices, for example, a heater, the location of the outlet of the corresponding characteristics should be provided.

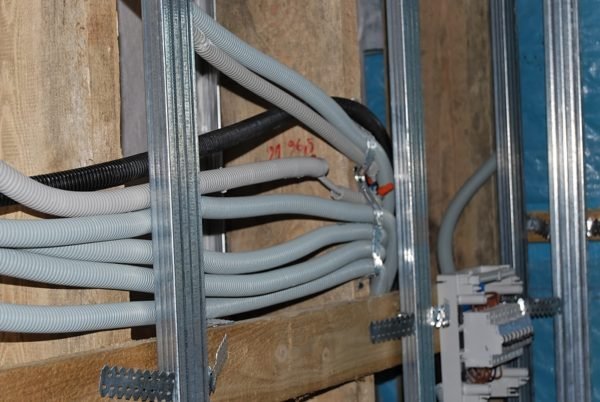
Important: work on laying hidden electrical wiring should be done before finishing finishing.
In addition to lighting on the balcony, it is necessary to provide several outlets located in the immediate vicinity of the workplace.
Stage 4: installation of the heating and ventilation system
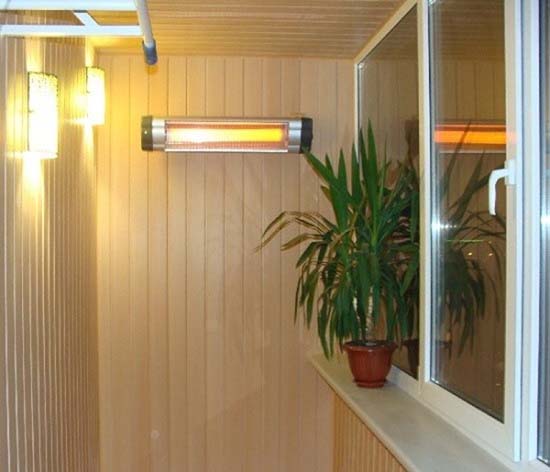
Comfortable work is impossible without suitable "climatic" conditions. The choice of suitable heaters is wide enough, so it is worth focusing on the simplest and most frequently used options.
What heating options are suitable for a balcony:
- Piping from the main system. Designed even before the repair work is done, it is a costly, but rewarding option.
- The use of stationary heating sources. These are oil heaters, convectors and heat fans. An excellent option, the only drawback of which is a large amount of power consumption. In case of infrequent use of the premises, it will be the most preferable solution.
- Infrared heaters do not dry out the air and have good performance. The disadvantages of such a purchase will be the cost, as well as the design feature that heats the items in the access field, and not the room as a whole.
- It makes sense to install air conditioning on balconies facing south. Thus, it is possible to control the air temperature in summer, as well as to heat the premises in autumn and spring. The use of an air conditioner with negative temperatures is prohibited, so for winter it is worth looking at an additional heating option.
The ventilation system is usually conventional ventilation. Of course, you can use ventilation systems or install an air conditioner with suitable climate settings. At the same time, this option is rather expensive and not advisable for small premises.
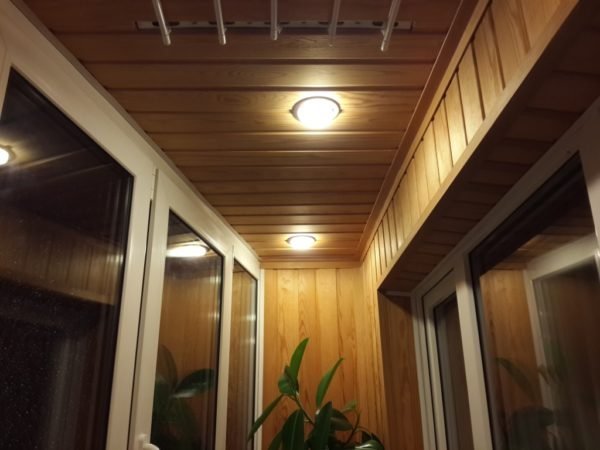
Stage 5: installation of light sources
Even a balcony with panoramic glazing and located on the sunny side needs additional lighting. This will allow you to freely carry out any work, use the workshop in the evening and at night. These parameters are easy to achieve when installing at least two artificial light sources.
Highlights:
- The main overhead lighting is calculated according to the area of the room. The standard square allows you to get by with a luminaire with a 63 W fluorescent lamp. When using LED lamps, preference should be given to luminaires of 6-10 watts.
- For small work at the table in the workshop, there should also be a movable directional lamp. You can use standard office equipment with lever joints or a clamp. These luminaires are characterized by trouble-free installation in any convenient location.

Important: on sunny days, natural light can be difficult to work with. To prevent such situations, it is better to take care of the possible shading of the balcony room in advance.Adjustment of the luminous flux is provided using conventional horizontal blinds, which also need to be equipped with a balcony.
Planning and calculations
Depending on the type of activity, before starting the reconstruction on the balcony, the workshop is personally designed according to the following parameters:
- materials. Resistance to aggressive media, chemicals, temperature and mechanical stress. Fire retardant, dielectric characteristics, according to the manufacturer's quality certificates. Suitability for cleaning and repairing;
- electrical network. The total rated load of the used devices, mini-machines, equipment, lighting, heating, ventilation. Possibility to consume maximum load values from existing networks. Number of connection points, commutation, parameters of automatic protection, cross-section of current-carrying wires;
- heating. The need for additional heat sources in the cold season, the use of only devices included in the calculation of the network;
- ventilation. The presence of sources of evaporation, smoke, gas pollution. The need for exhaust hoods over tables, a supply fan, an air conditioner. Sealing the balcony block to protect the apartment from harmful odors, as well as providing sound insulation;
- illumination. The number of artificial light sources, the regulation of natural lighting blinds, curtains;
- water and drains. If you need running water, you will have to remove the pipes. In small quantities, it is possible to envisage the location of containers for supplying and collecting liquids.

The high-quality performance of all calculations and the determination of the parameters of interest are the key to the comfort and effective functionality of the room.
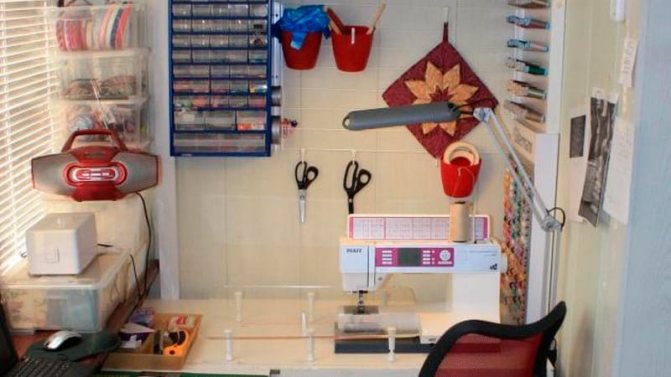
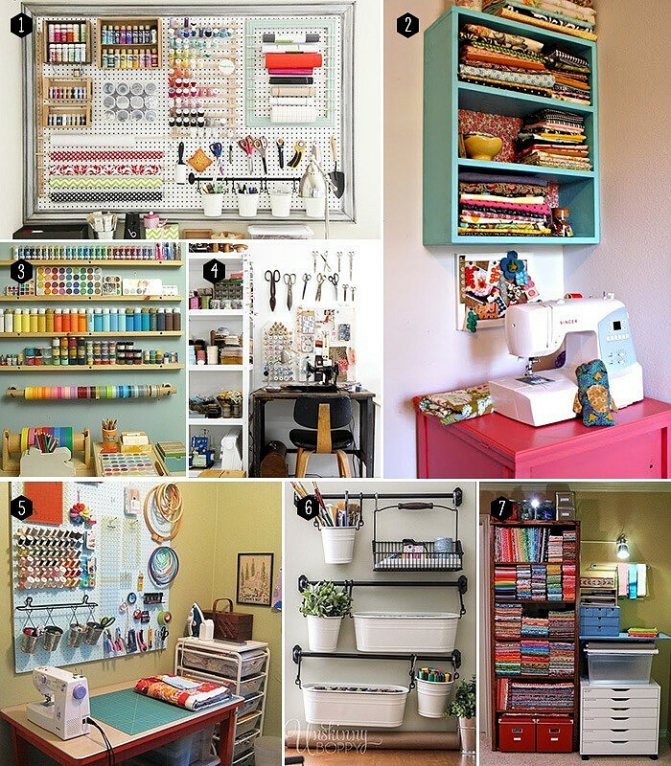
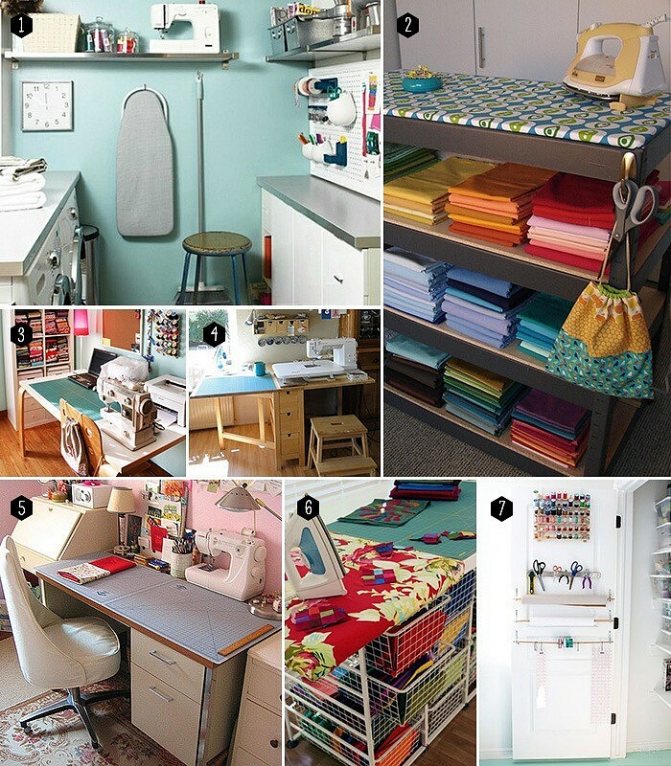
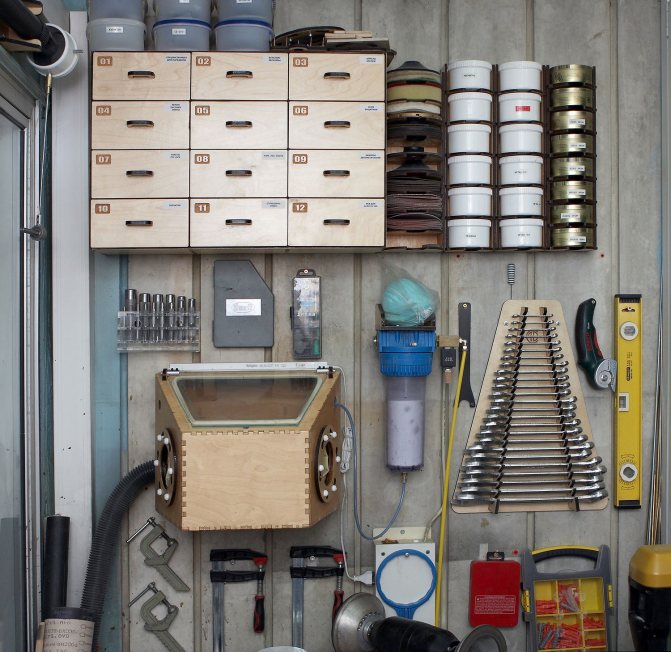
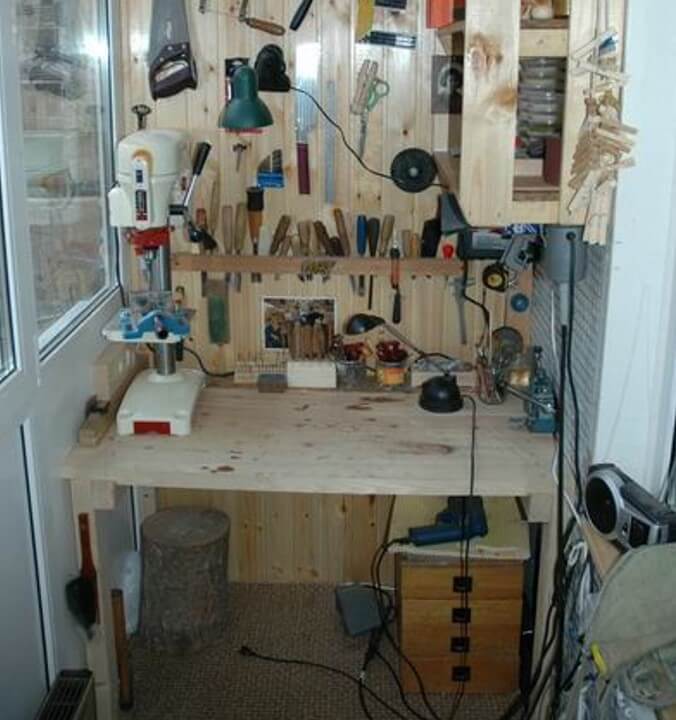
Stage 6: equipping the workplace and storage systems for tools
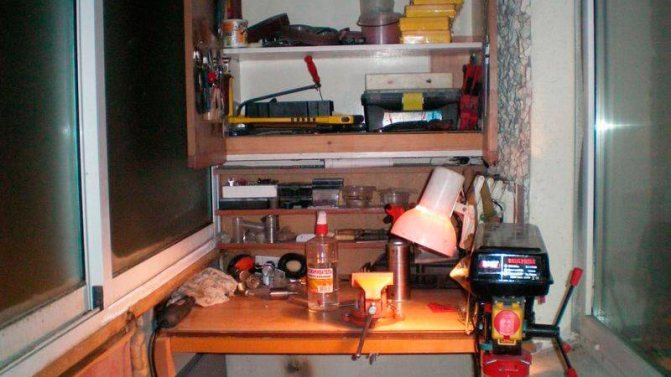
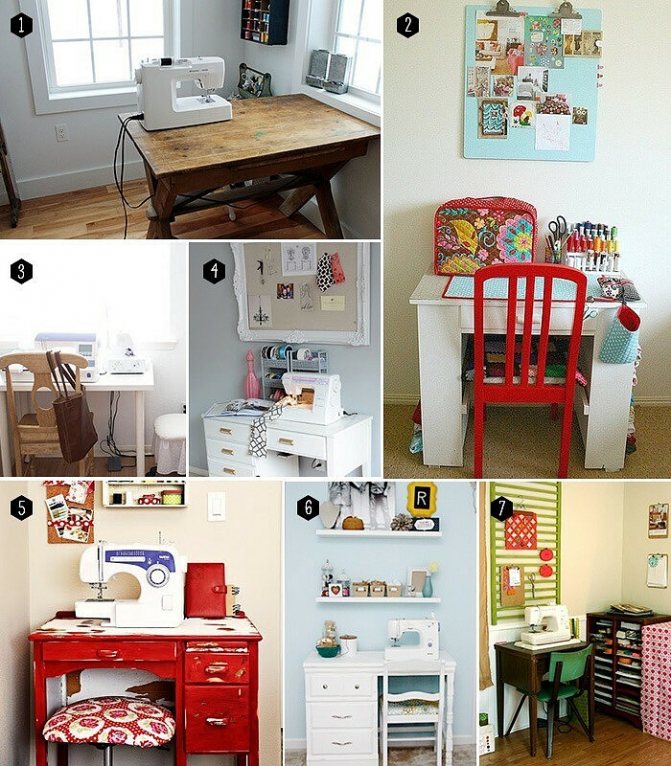
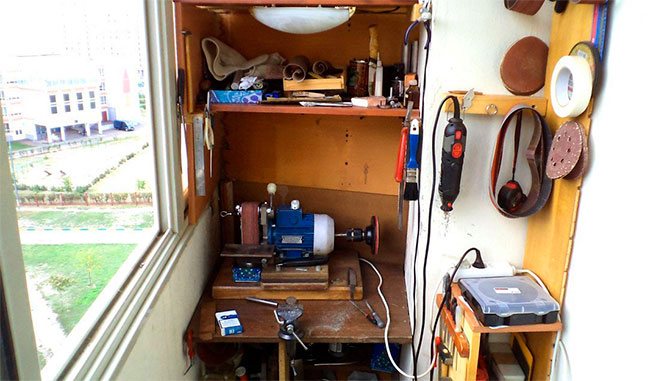
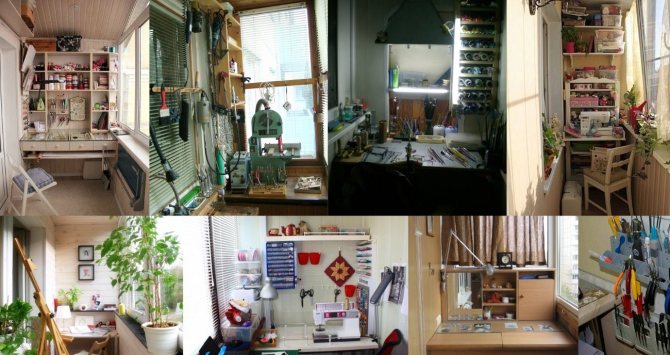
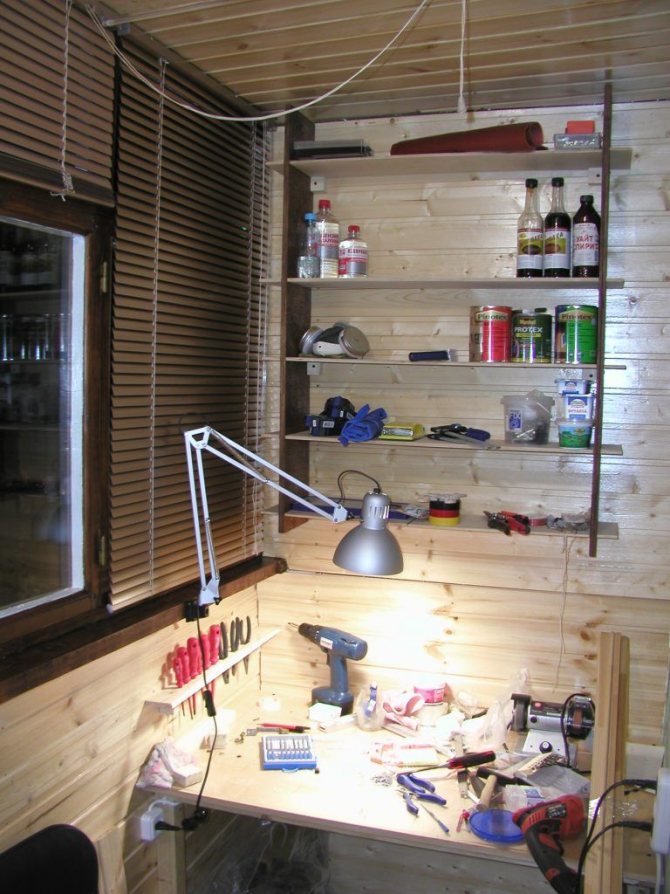
An important issue that needs to be considered partially even at the planning stage of construction work. A crate is installed under the hinged furniture and shelves. The workbench on the balcony is mounted on a pre-reinforced floor area. There are a lot of options for arranging a comfortable and practical workplace, just look at the photos of successful projects.
Some of the nuances of arranging a workshop on the balcony of a city apartment:
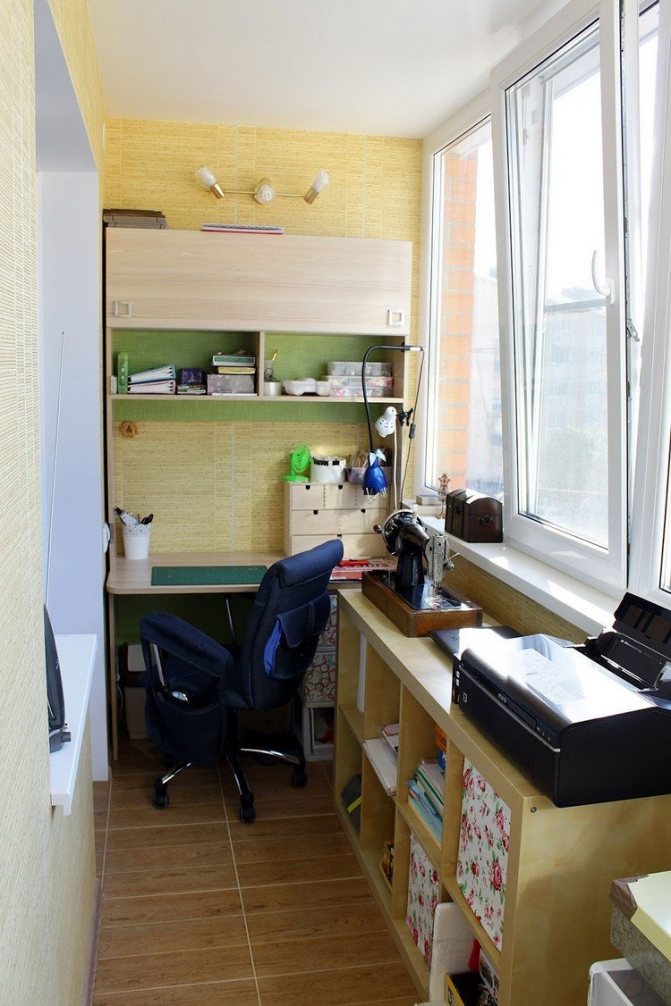
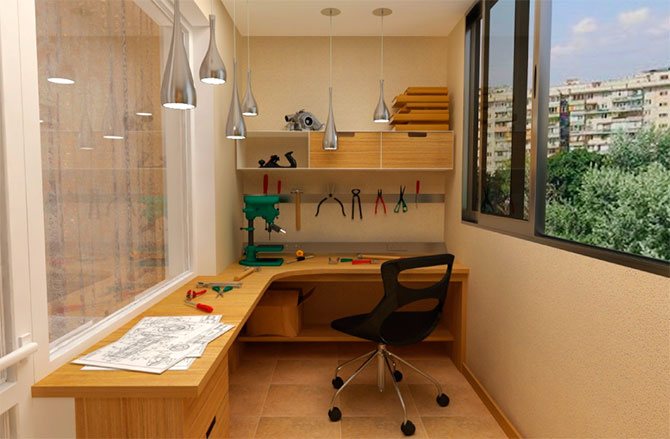
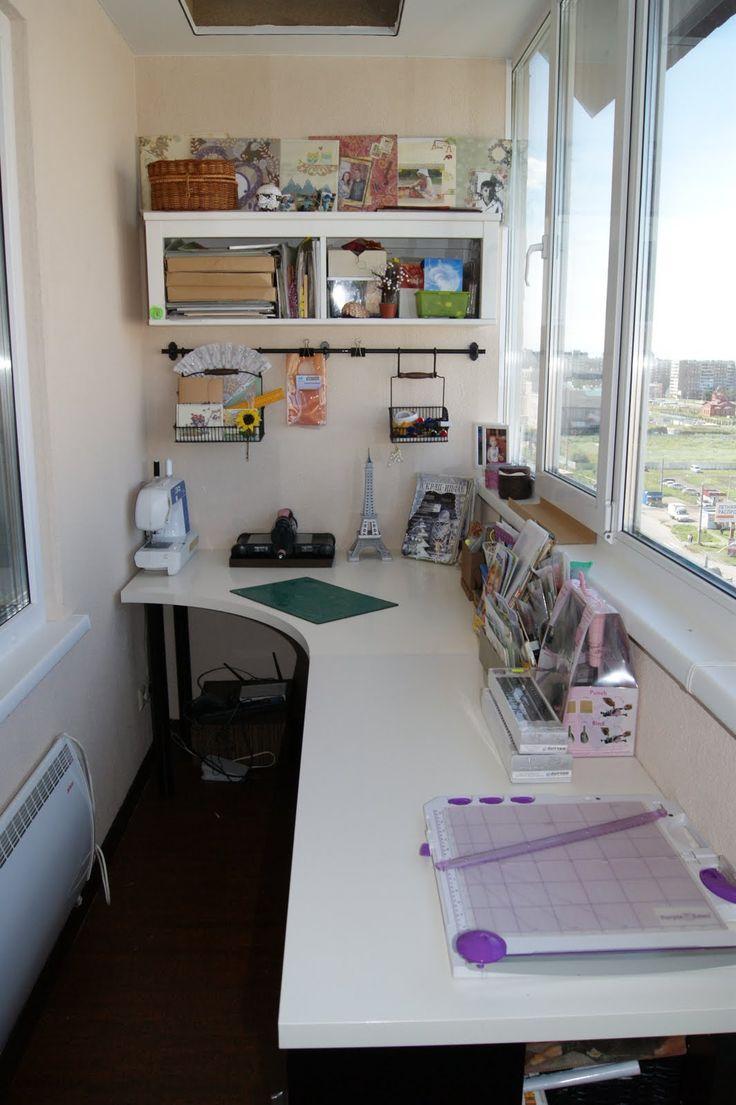
- It is most practical to place a table or workbench at the end of the far wall. The corner option will be preferable, because in this case the usable area increases.
- For balconies large enough, the table can be arranged parallel to the length of the side.
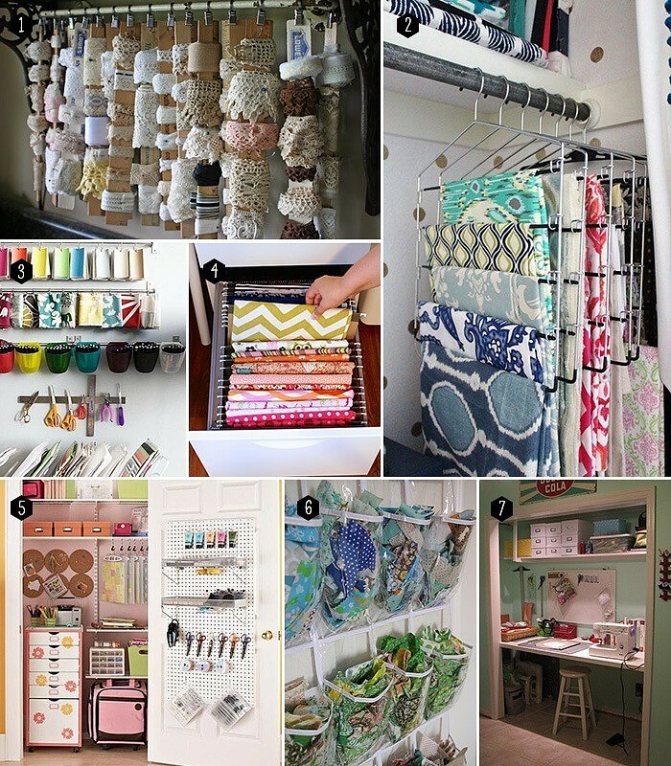
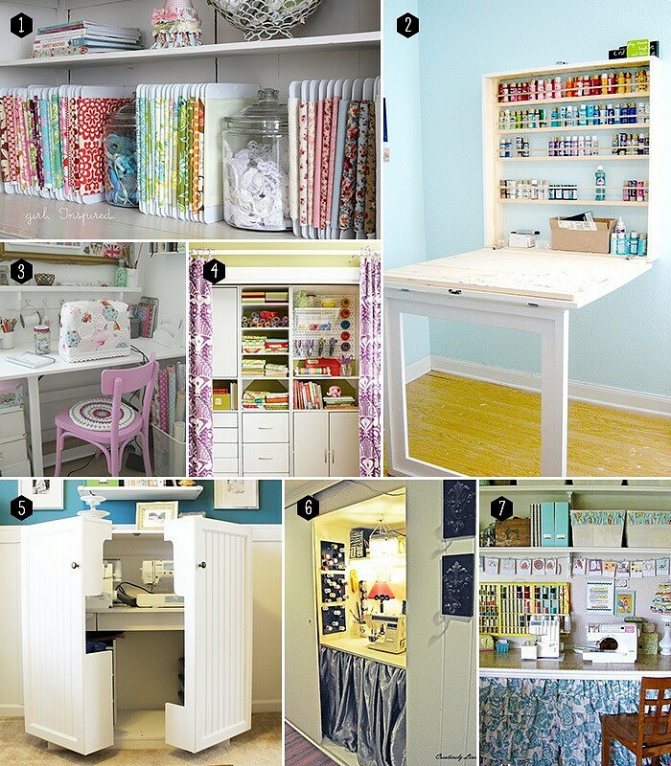
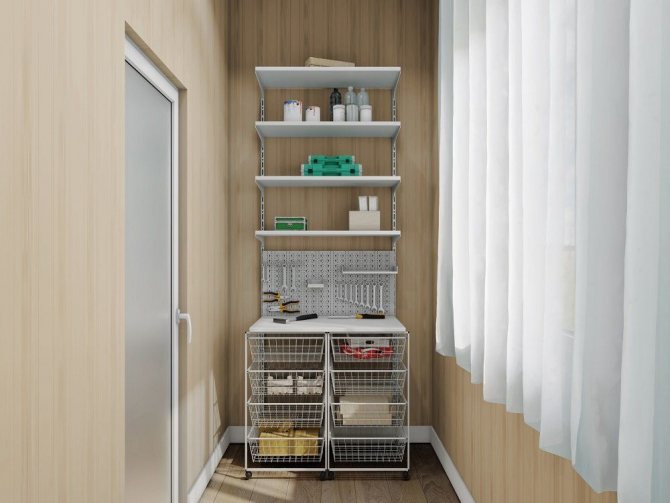
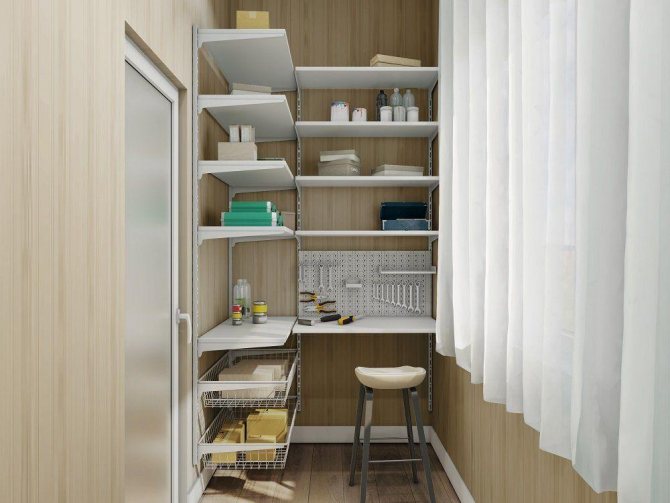
- Storage systems for tools and materials provide for the use of open shelving and cabinets with sliding doors. In this case, the usual swing doors will take up too much space.
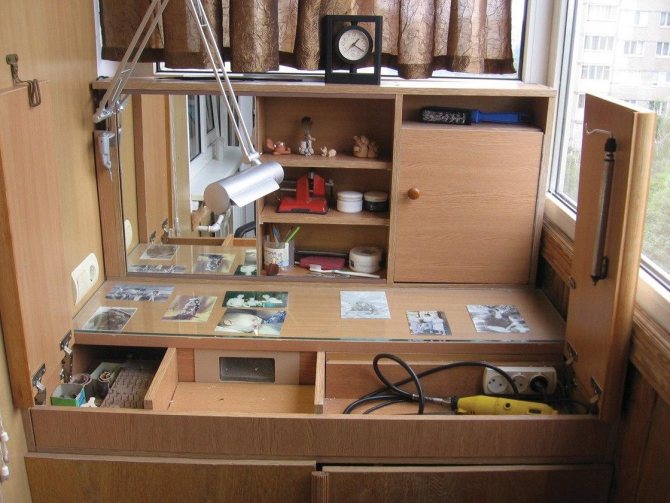
- When performing work, you can use a folding tabletop, as well as furniture - a transformer. Suitable options are available, but it is easier and more affordable to use homemade fixtures adapted to the size of your room.
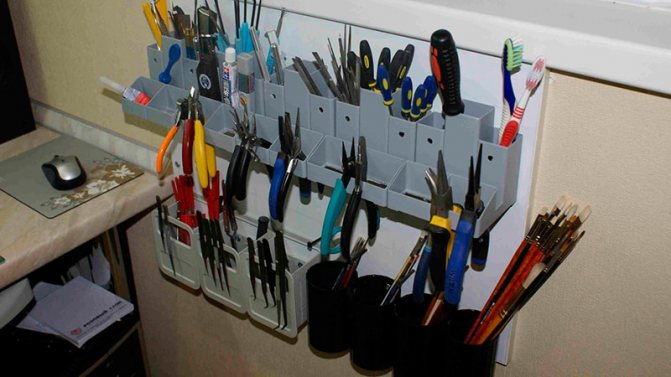
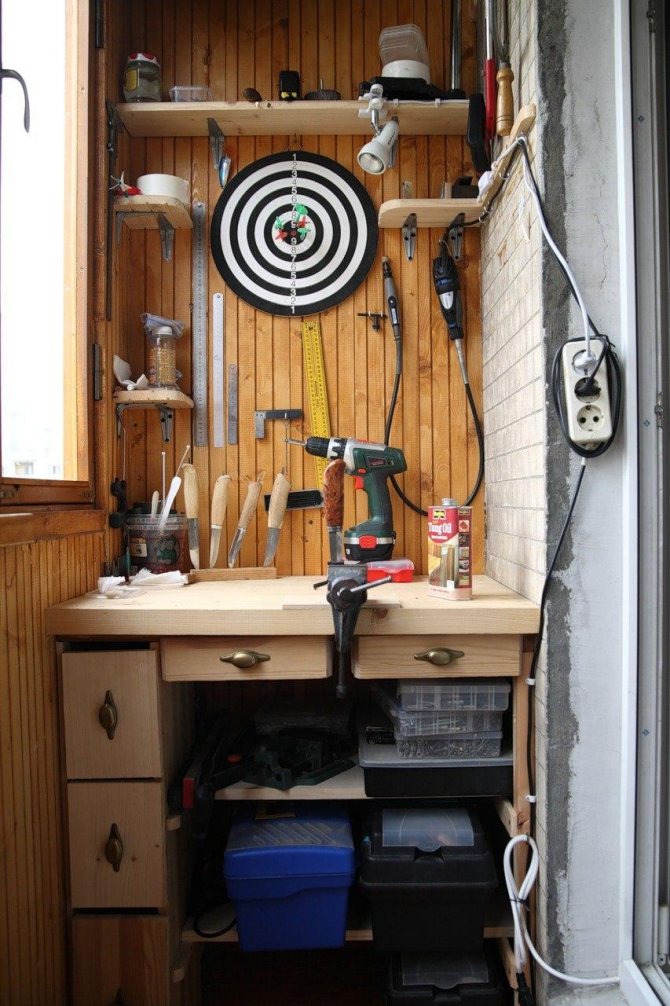
- For storage of small tools and materials, it is advisable to use compact systems. These can be hanging shelves and hooks, lockable containers and organizers. For a small room, the issue of rational use of space is very relevant, therefore all boxes and cans should be marked and laid out according to a convenient and understandable system for the master.
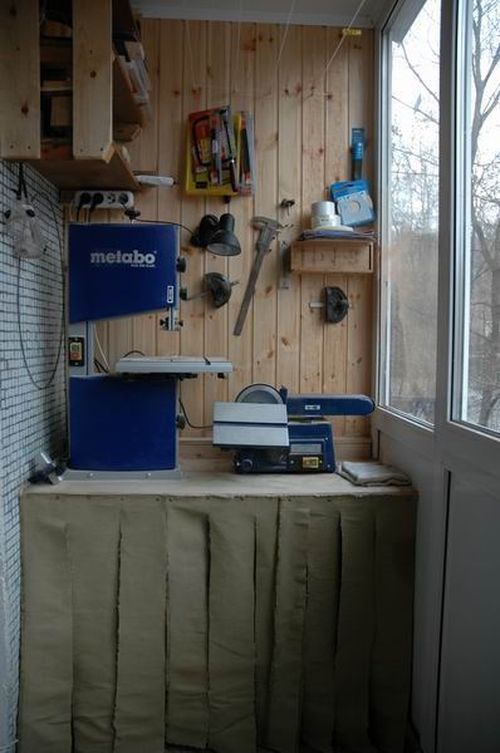
- Professional and energy-intensive equipment cannot be placed on the balcony. When performing work, noise and vibration can interfere with neighbors, so it is better not to consider this option for arranging a balcony.
How to make a workshop on the balcony with your own hands in this video:
Workshop on the balcony. How to build it and avoid mistakes
I have been thinking about an article on this topic for a long time, but I could not answer the question of whether it would not be a repetition of already existing articles.But having studied all the materials previously published at the Masters Fair, I decided that my article can still answer several unresolved questions and can help the masters who decided to organize their creative space.
I will talk about the lampwork workshop. And some technical features will only apply to lampwork. But I think that masters of other creative directions will also find something interesting for themselves.
The first few years my workshop was in the kitchen. It was just a corner with a table and a range hood. However, when “creative ideas” began to live in other parts of the kitchen and the table had to be cleared of beads and glass every day so that the family could have dinner, then the family council decided to allocate money for me and build a workshop on the balcony.
I have a large balcony, 10 sq. meters, with two entrances - from the room and from the kitchen, glazed. We decided to wall off one part of the balcony to create a separate room with an entrance from the kitchen. Replace the balcony glazing in this part with warm double-glazed windows. These three glass units were the most expensive part of the workshop. It turns out that the facade glazing of high-rise buildings is very expensive, but extremely necessary if you are going to work in a workshop in the winter, and you do not live in Sochi.
After installing the double-glazed windows, the husband took over the rest of the construction. He built a dividing wall from a metal frame and plasterboard and insulated it with mineral wool. He used moisture resistant gypsum. He also insulated the rest of the walls and ceiling with mineral wool. Since I work with an open fire, we opted for a non-combustible mineral wool. It is somewhat more expensive than usual, but compliance with safety measures obliges not to save on trifles.
The balcony floor was tiled and heated. "warm floor". But it was not possible to use this heating for the workshop, because this "warm floor" was heated all over the balcony at once, and considering that I sometimes spend 8 hours in the workshop, it was expensive to heat the workshop and the rest of the balcony for so much time. Therefore, on the floor in the workshop, the husband simply put a layer of insulation and a laminate.
Dear Lampwork Artists, do not put laminate (and linoleum) on the floor in your workshop! Hot glass blowing off burns ugly holes in these materials and can cause a fire. Tile is the most suitable floor material.
We covered the walls and ceiling with wall panels. This is a fairly cheap and simple material. It was safer, of course, to sew up with plasterboard and paint. But at that time we decided to choose panels.
A week after settling in the workshop, I inadequately threw a red-hot metal knitting needle into the wall. The spoke burned an ugly hole in the panel in a split second. It was then that I regretted the painted plasterboard, and was glad about the non-combustible mineral wool. For extinguishing the insulation smoldering under the panel is a difficult and unpleasant business. Well, at the same time I had to learn to be more restrained in my actions, even if something does not work out. 
Dear lampwork masters, make walls from plasterboard and paint them in your favorite color! In the event of an attack of rabies, the traces of your atrocities can always be easily painted over.
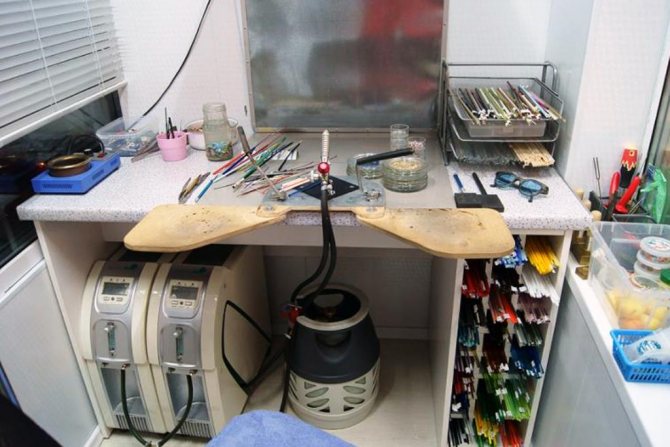
After finishing the premises, it was the turn of furniture and ventilation. I needed two tables - one for making beads. It was supposed to place a burner on it, under it a cylinder and two concentrators, as well as a glass rack. Above him is a ventilation umbrella.
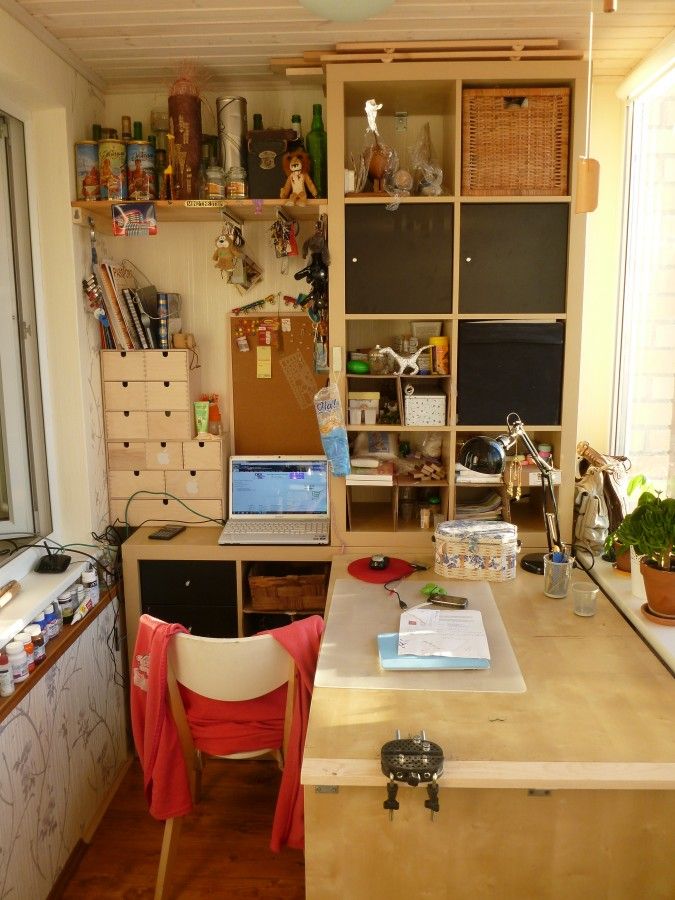
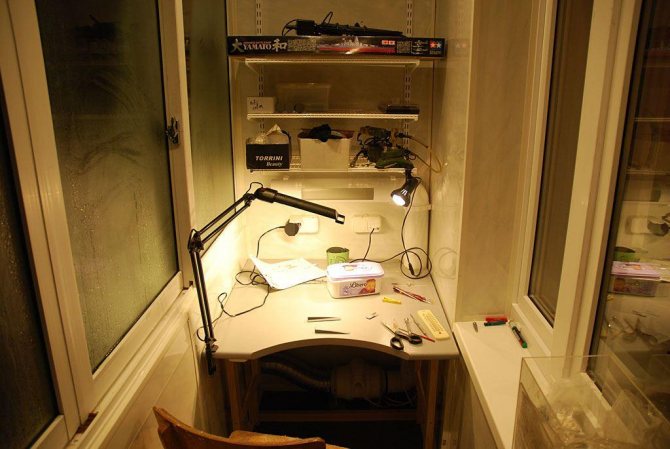
The second table was needed to assemble jewelry. Above this table are shelves for small items. An annealing oven was installed under it, on the edge.
We immediately had difficulties with this stove. My stove is rather bulky. When the tables were made, it turned out that the stove simply had nowhere to fit. Either it stands too close, now it is too far, now it is inconvenient to place beads in it ... In short, they put it under the assembly table.Later it turned out that this is quite a convenient place. Only I had to overlay it with mineral wool so that the surfaces close to it did not heat up. Subsequently, my husband bought minerite (a thin slab, such as slate, with which the stoves in baths are insulated, it does not generate dust and is much more environmentally friendly than mineral wool) and promises to replace the mineral wool with minerite, but for now this is in the project.
Dear Lampwork Masters! Use minerite for thermal insulation of the stove. Minvata is dusty and “unhealthy”.
Above the table with a burner, my husband made a huge hood. He led the flexible ventilation corrugation from the umbrella through the dividing wall to another part of the balcony.
In the same place (on the other part of the balcony) he installed an exhaust fan. At first it was a regular fan that I had before. But he was not doing well, I began to cough, and it quickly became stuffy in the small room. And my husband bought a giant industrial fan from a hardware store, which he installed instead of the old one. The difference was very significant. Here is such an "industrial still life" on the second side of the balcony. An impressive "swelling" in the middle of the pipe, and there is the same industrial fan.
This fan perfectly pulled all the poisonous carbon monoxide out of the workshop, and then oxygen. If there was still enough oxygen for breathing, then there was not enough oxygen for the operation of two concentrators, and the power of the burner flame dropped very much. There was a need for additional air supply. At first, I opened the window, but when it got chilly, my husband supplied air from the second half of the balcony, where he connected an old low-power fan that was idle, as well as an air conditioner, which he also placed on the second half of the balcony. Now the air from the second part of the balcony is supplied to my workshop by a small fan. If this air needs to be cooled or heated, I turn on the air conditioner and create a comfortable temperature in the workshop.
Dear Lampwork Masters! Be sure to provide additional air supply to the workshop. Otherwise, your concentrators will not work at full capacity and the burner power will be very low.
However, I want to clarify right away that the air conditioner does not completely solve the issue of a comfortable temperature in the "balcony" workshop. In winter, when the temperature outside the window drops below zero, the air conditioner cannot be used because of the danger of freezing of condensate in its pipes. Therefore, to warm up the workshop, I put a small electric heater, which quickly heated the room to the desired temperature.
In the summer, the air conditioner turned out to be simply an irreplaceable thing, because our balcony faces south, and the lower part of the balconies outside the house is sealed with metal sheets (such a moronic architectural project). These sheets heat up in the sun and the temperature on the balconies in our house in summer rises to 50-60 degrees. Therefore, the air conditioner allowed me to work comfortably in my workshop all summer. However, if you are not engaged in lampwork, but in other art, in which there is no need for air supply and ventilation, then in winter there will be fewer problems with the "cooling" of the workshop, because you simply will not have uncovered openings in the workshop to the street through which cold air will flow.
Now I'll tell you a little about lighting. There should be a lot of it in the workshop and it should be different. General lighting - we supplied fluorescent lamps.
Additional lighting - for each type of work. For the assembly table, we installed a long fluorescent lamp that illuminates the entire table. An old spot lamp has moved onto the table with a burner, which is convenient to direct directly onto your hands.
Here you go. I talked about the most important and global things in the construction of my workshop. Now I'll tell you about pleasant and convenient little things.Each master selects them for himself separately.
The balloon is, of course, composite. It is more modern and safer than metal. On the balcony I would not dare to use a metal cylinder, because temperature drops on the balcony are very significant, and the "Achilles heel" of metal cylinders is the temperature drops at which they are susceptible to all sorts of unpleasant surprises.
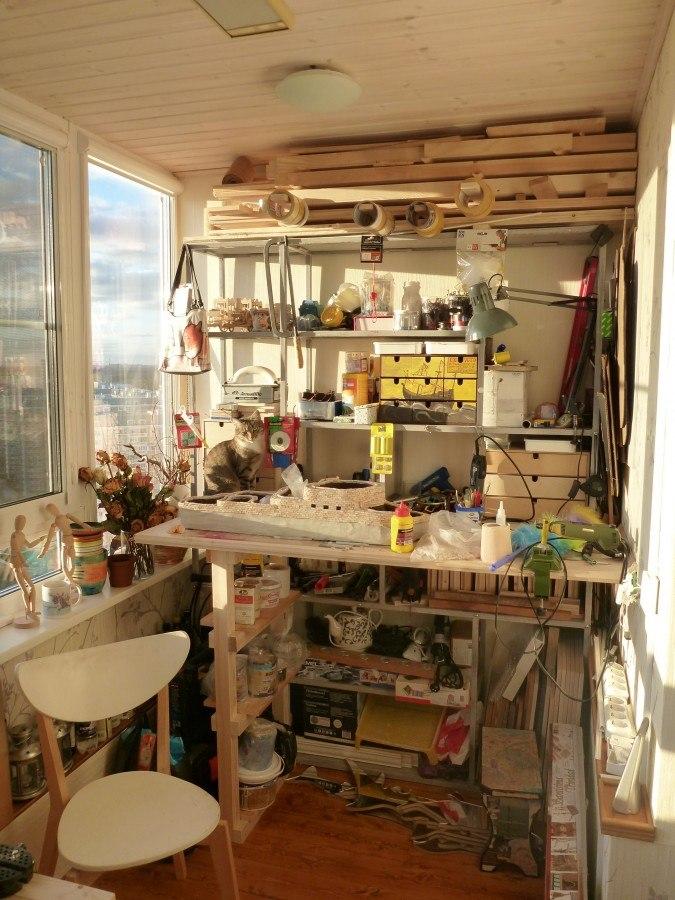
"Cashier for glass" - convenient, close at hand and all glasses are arranged by color.
The window sill is also used under the shelf.
Assembly table. There are several shelves for small items above the table. On the wall is an organizer for tools.
A simple music center with speakers. There is always the opportunity to listen to the radio or disc.
By the way, I want to immediately explain to the readers and to Greenpeace about the dried flowers in the frame. If you think that I do not water them and they bent because of this - no! These are petunia bushes that were sent from the dacha to overwinter to my workshop. This is their normal late autumn state, in winter they will completely decay, and in the spring they will begin to grow again. Nature
Carlosa the mod. This is the brownie and the mascot of my workshop. Trying on new necklaces and pendants.
Metal office grid-shelf for papers. Purchased in Ikea. It is very convenient to store the most critical and frequently used glasses.
The knitting needles smeared with release dry in a glass filled with small glass balls. These balls are used to fill the bellies of soft toys. I don’t remember how I got these balls, but it turned out to be very convenient to use them for drying the knitting needles. Much more comfortable than sand.
I store frits, murrini and enamels in small and large flat glass candlesticks, also bought in Ikea. Small ones easily fit one into another. And large flat ones have almost no sides, which is convenient for using frits.
Add to my circle. Read my blog. Write me.
Always yours, Julia Samokhina
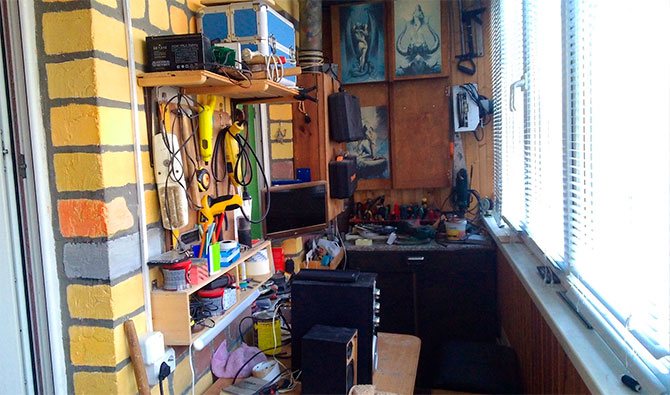
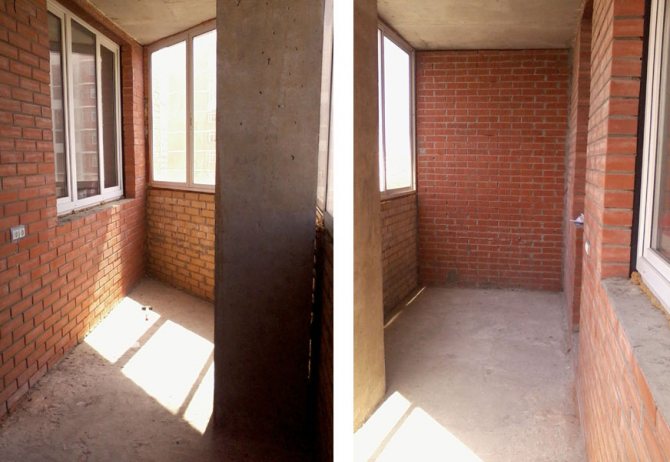
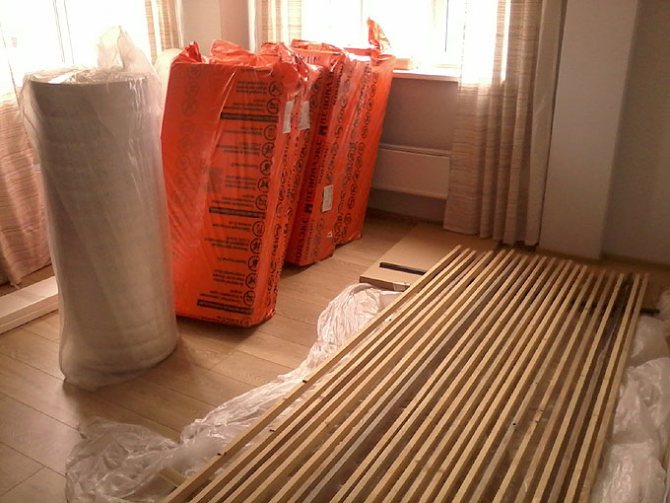

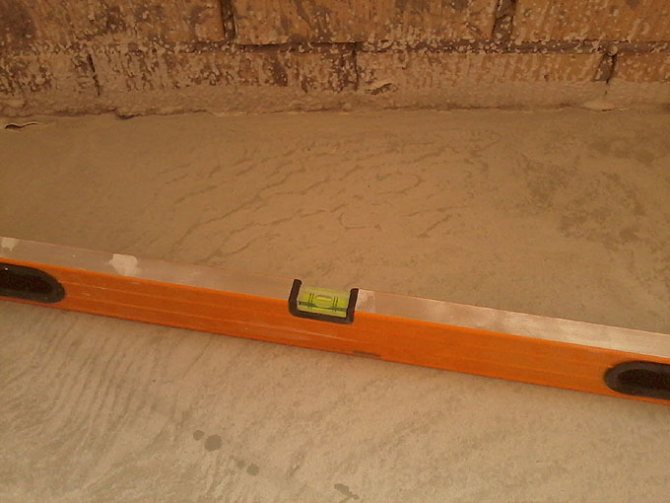
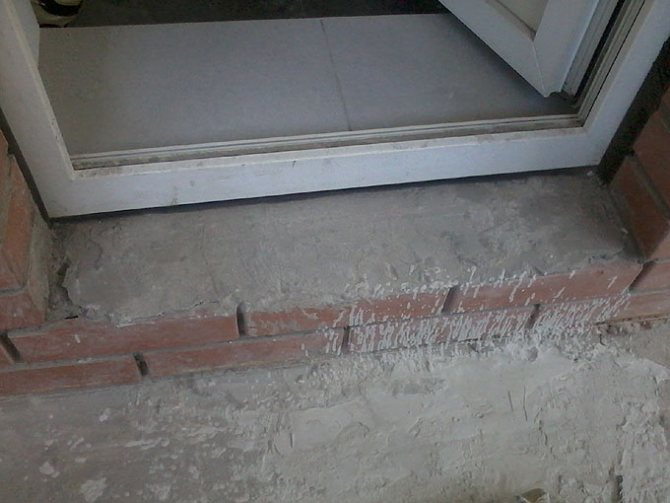
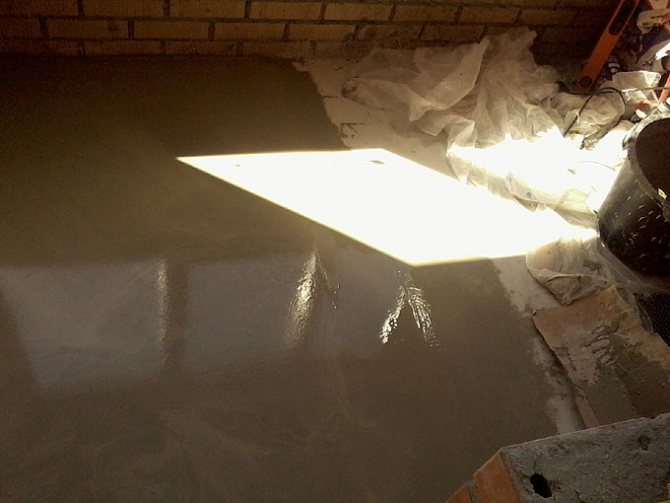
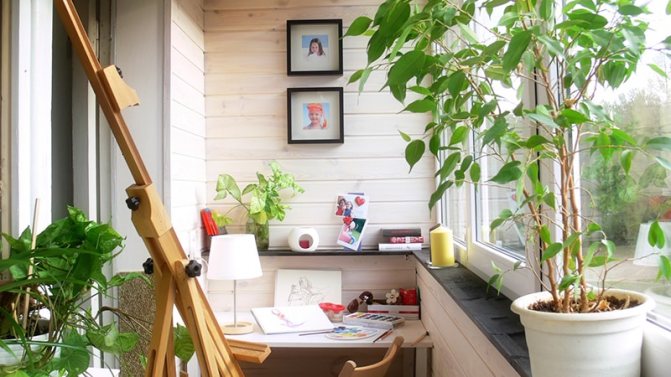
Photo ideas
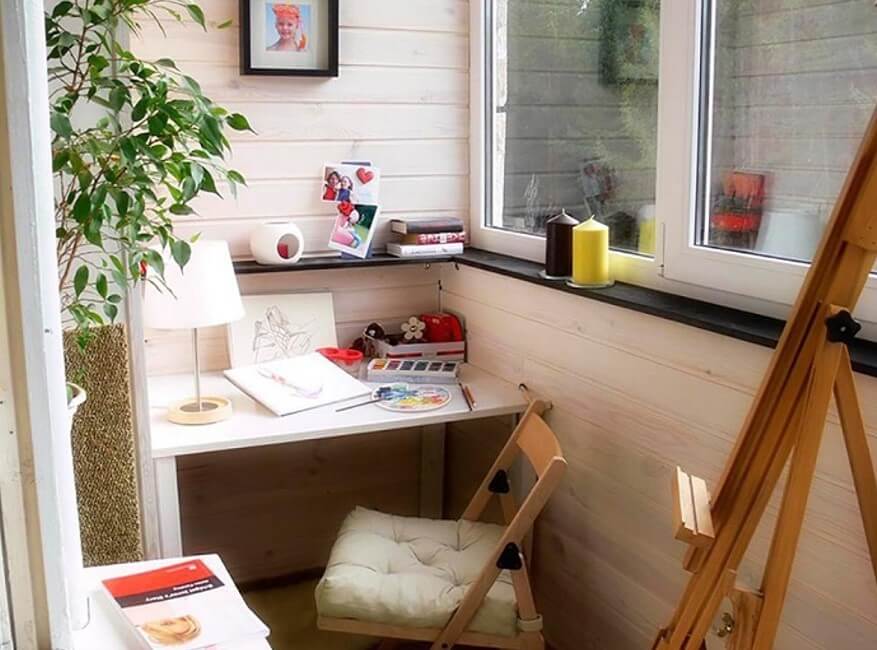
A workshop on a loggia or balcony is a great idea for the rational use of additional space. Even such a small room can be turned into a functional working corner if you think over all the main points of the arrangement in advance. The sequence of work and important nuances of placing the workshop on the balcony are highlighted in the information provided.


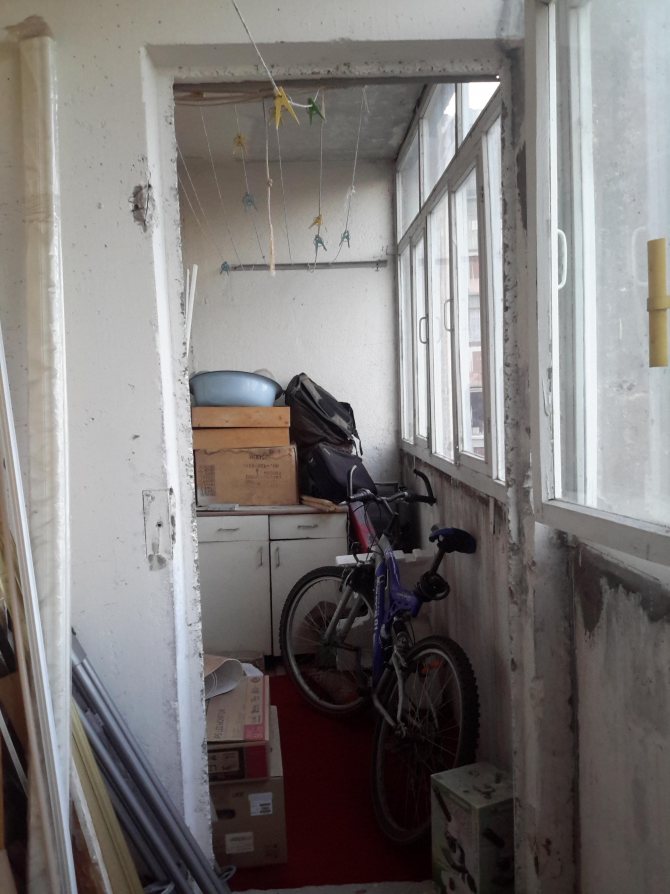
Upcoming work
To start work, you need to create a plan for the future workshop. To do this, take the trouble to free your balcony from unnecessary things and furniture. It does not take much time. If you are sorry to part with old furniture and things, then move them to your personal plot, cottage, garage, or just give them to good hands. Although, do not rush to throw away the old cabinet and table. Their parts can also be used in this construction.
Carefully measure the completely vacated area to calculate the scale of the upcoming work, as well as to correctly and accurately purchase building material. This will save you money and personal time.