How to put the mosaic on the windowsill
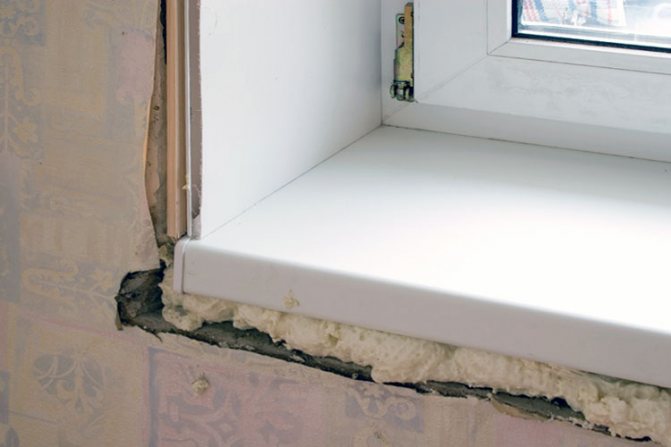
As a rule, during the repair, the replacement of old windows with modern metal-plastic ones is accompanied by the installation of plastic window sills and a similar external ebb. If plastic as a material for windows has come into use for a long time, then when installing a window sill, you can, if you wish, refuse it, replacing it with another material. In this article, we will talk about the advantages of decorating a window sill with ceramic tiles and mosaics and describe the main stages of laying tiles on a window sill.


Mirrored slopes
Visually expand the area of a small room slopes from mirror inserts will help. The practical surface, which is easy to maintain, looks unusual and attractive.
The only drawback of this method is that they are clearly visible on a reflective basis. stains and streaks... However, it is easier to wash it than to change it. yellowed plastic.
Mirror slopes are made from mosaic pieces, tiles, films and a solid mirror sheet. First, prepare the surface, making it perfectly flat, then measure the required amount and size of the material. Precision should be observed when working with mirrors, it will be difficult to file or cut them in the future.
The basis for fixing the mirror sheet is colorless sealants, liquid nails or amalgam-based glue. The choice of tiles and canvases of different sizes will allow you to create a mosaic pattern or a flat mirror surface

What to make a window sill from?
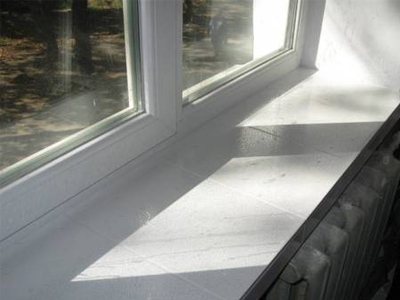
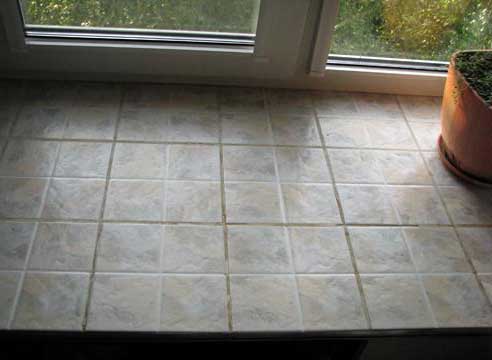
The window sill in our apartments and houses can become an active functional space, if the issue of covering it is correctly approached. This is especially true for window sills in the kitchen - apart from banal pots with flowers, you can put pots, pans, and other utensils on them. The creation of a countertop on the windowsill became a breeze of the latest fashion, which is a rather rational and convenient solution in small rooms.
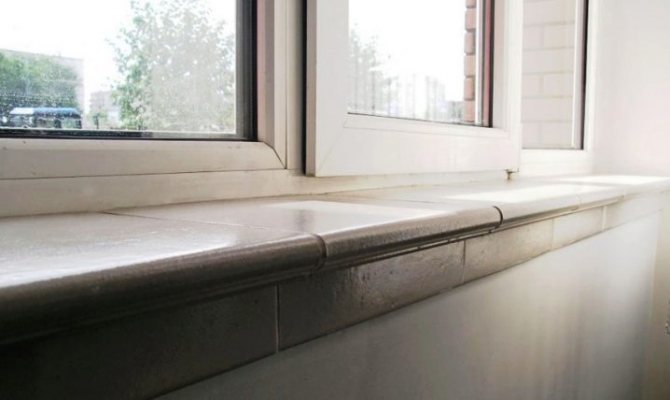
Of course, a plastic window sill does not shine with a wealth of opportunities that are inherent in this small but very important element of any house or apartment. Over time, plastic turns yellow from moisture and flower pots, spoiling the aesthetic appearance of the room. It can be damaged due to high loads or excessive heat or cold.
If so, it is best to consider available alternatives. The easiest options are to paint or polish it, but from an aesthetic and functional standpoint, a tile or mosaic sill is the best option.
Fitting
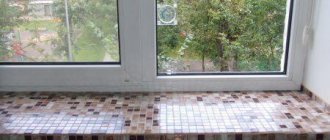
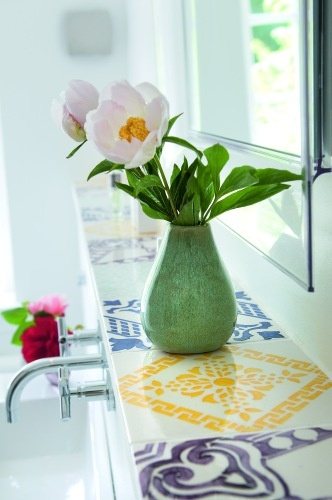
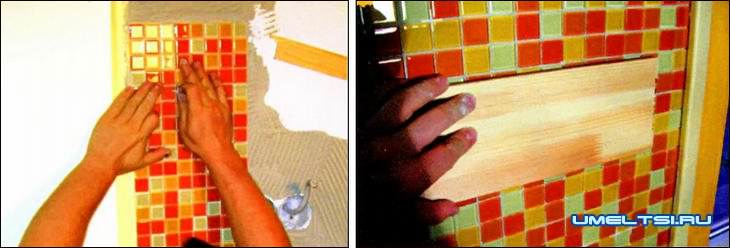
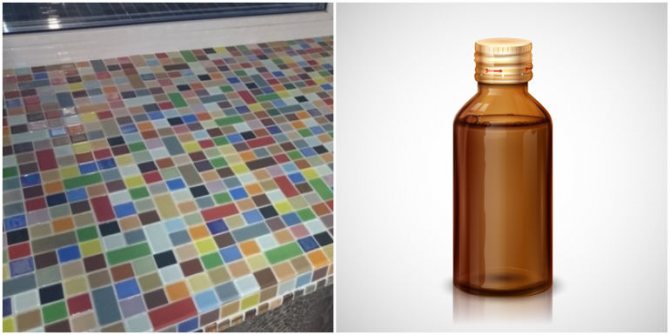
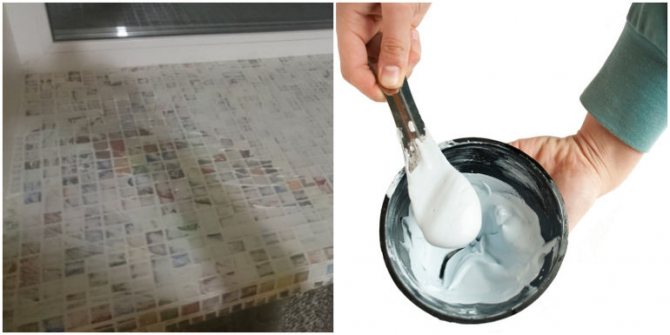
My husband and I decided to decorate the window sill with a mosaic, because this material remained after the renovation of the bathroom. Mosaic, in comparison with a new window sill, costs several times cheaper, so this decor does not require special material costs.
WHO pointed to the effectiveness of existing vaccines against mutations of coronavirus
Dancing Dolphin: British Wildlife Fund presents the best photos of 2020
The best footballers are in their club: Messi plans to become the director of Barcelona
We cut the mosaic into squares. We spread them on the windowsill. You can choose a monochromatic material, you can multi-colored to look unusual and original. We add a drawing from the squares. We attach self-adhesive tape on top. Then we put everything aside.

How to make a window sill from a tile with your own hands.
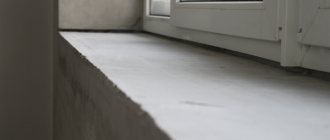
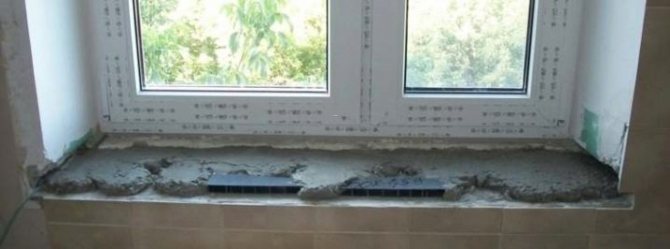
Before proceeding to the facing of the window sill, you need to take into account several important factors: - The base of the window sill must be concrete (you can also lay tiles on wooden and plastic windowsills. This is discussed further); - The base should not have significant damage (cracks and chips) and be firmly fixed in the window opening; - All work on the installation of the window and external ebb must be completed.
Preparation for facing the window sill. Tool.
In general, the set of tools and materials is no different from the standard set when laying tiles on the floor:
- ceramic tile; - primer; - glue; - tile grout; - putty knife; - glass cutter; - rubber mallet (optional); - level; - pliers and a hacksaw.
If you are decorating a window sill in the kitchen, then it is worth considering porcelain stoneware as a facing material. It is stronger than standard tiles and is just as undemanding to maintain. A porcelain stoneware window sill will serve you for a long time, perfectly withstanding hot pans and pots on itself.
At the initial stage, it is necessary to properly prepare the basic foundation for the facing work. Remove old paint and putty from the windowsill and clean the surface from dust and dirt. Next, coat the base with a deep penetration primer. With great attention you need to approach the choice of tiles. Much depends on the size of the base. If it is small, then it is better that the tiles for the windowsill are small in size - 10x10, 15x15. This will allow you to avoid unnecessary hassle with trimming and will significantly improve the aesthetic appearance of the product. If the base is quite voluminous, then you can choose ceramics and more - 30x30, 40x20, etc. Especially if the room is small and every meter of space is expensive. For example, a wide window sill in the kitchen can be turned into a comfortable worktop.
The technology of facing the windowsill with ceramic tiles.
Depending on the size of the tile, you should determine in advance how it will be located on the windowsill - along the window or perpendicularly. It is necessary to find the most optimal option in which the need for pruning will be minimal.
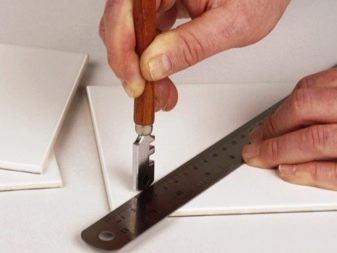
The pruning itself is carried out using a glass cutter. First, you need to decide on the place for cutting the tile and use a marker on the front side of the material to make the appropriate outline. Next, the tile is placed on a flat surface and, according to the marked marks, a cut is made with a glass cutter by pressing firmly and firmly on the tool, so that the cut is thorough.
Then, on the back side of the tile (in the place where it is supposed to be cut off), it is necessary to tap it with a rubber hammer or a spatula handle (for greater confidence, you can wrap the handle with a thin towel). We will break off the tile with sharp, light blows against an even corner. In this way, horizontal and vertical samples are made for laying on a window sill.
Trimming tiles instead of a glass cutter can be done with a grinder. For experienced craftsmen, this saves more time, but requires skill and precision.
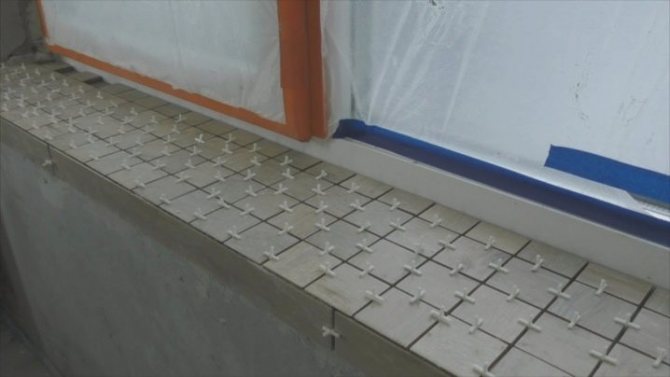
The next step is to lay the tiles on the windowsill. To do this, it is necessary to make an adhesive solution and apply with a spatula in even layers on the reverse side of the tile. When laying tiles on the surface, observe the gaps between the tiles.
Tip: it is better if you fix a slight slope from the window to the outside of the window sill with the help of a building level, so that water or condensation does not accumulate at the base of the frame.
After finishing laying the horizontal tiles on the window sill, you can proceed to the installation of the end parts. Here everything is done in a similar way.Make sure that the horizontal and vertical (end) elements match at the edges to each other.
When the entire area of the window sill is decorated with tiles, you need to clean the surface from the remains of the solution and wait for it to dry completely. Next, grout of the desired color is laid in the gaps between the tiles. Excess grout residues, while it is still in a liquid state, are carefully removed from the surface. After the grout dries, the surface of the window sill is finally washed out and the work can be considered finished. The tile sill is ready for use.
Related article: Types of window sills for plastic windows
Laying tiles on a wooden or plastic window sill.
If the base of the window sill is not concrete, but wooden, then this is not an obstacle for tiling. The work process is almost the same as described above. The correct solution would be to pre-sheathe the wooden window sill with plasterboard, and then to carry out the cladding.
If you do not want to cover the tree with drywall, then carefully treat it with an acrylic primer and glue the tiles to epoxy glue, you also need to use epoxy grout.
The option of laying tiles on a plastic window sill is even easier. Liquid nails can be used as glue. However, the degree of adhesion depends on the texture of the plastic. There is a chance that the tile will not be able to grab properly. In this case, it is better to look in hardware stores for special tile adhesives that can be used to glue ceramics to wood or plastic surfaces.
It should also be understood that ceramic tiles on a plastic window sill mainly have a decorative effect. Strongly heavy loads can damage the plastic, and therefore the tile itself. Therefore, you will have to handle it carefully.
Window sill decoration: a modern approach
The decision has been made, you have made a choice in the direction of installing a new window. The windows were ordered, installed, but what to do next? The aesthetic appearance is disturbed, how is the decoration of window sills and slopes carried out? There are several basic types and finishes.
How is the finishing of slopes and window sills
Finishing types
There are several options for finishing window sills:
- Plastic.
- Natural and artificial stone.
- A tree.
Type of material used
- has excellent thermal insulation properties;
- durable, does not rot;
- waterproofness;
- resistance to sunlight;
- aesthetic;
- affordable price;
- immunity to external effects of moisture and microbes.
The appearance of yellowness under the influence of ultraviolet rays.
Natural and artificial stone
- beautiful appearance;
- strength;
- durability;
- moisture resistance;
- resistance to mechanical stress and temperature extremes;
- easy to clean.
Prone to the formation of small cobwebs of cracks.
- environmentally friendly material;
- strength;
- beautiful, aesthetic and expensive look;
- resistant to temperature extremes and loads;
- good thermal insulation properties.
Some wood species are capricious to the effects of moisture.
Plastic
Decorating slopes and window sills with plastic is the simplest and most affordable method.
Recently, it has gained great popularity (see Finishing window slopes with sandwich panels).
Preparatory work for finishing window sills and slopes with plastic:
- We measure the window opening.
- We calculate the quantitative composition of the required material.
- Analyzing the placement of radiators and their distance from the walls.
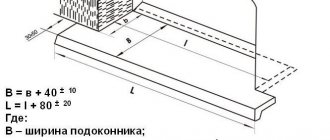
Advice. Be careful: according to regulatory documents, the required distance of the protrusion of the structure along the wall from the outside of the battery. You can buy high-quality plastic windows on the website www.okna-etalon.ru/windows/.
If you decide to save time and do the preparatory work with your own hands,
watching the video can help you.
Materials for finishing slopes and window sills:
- Soluble base sealant.
- Polyurethane-based construction adhesive with a primer.
- Installation foam (two-component).
Do not forget to look at the instructions for their use, which is reflected on the packaging.
Stages of work
Next, work is carried out on the installation and plastic finishing of the window sill.
To do this, you should prepare wooden supports on which the window sill is supposed to be applied. Installation of the window sill is made in specially designed grooves that are located at the bottom of the window.
Advice. One of the important points is the leveling of the window sill surface, due to which it will have good rigidity during operation.
This completes the installation. Remains small installation work, which is carried out in the following order:
- To avoid getting cold into the apartment, the joints of the staging profile are closed first.
- Processing of wooden poles.
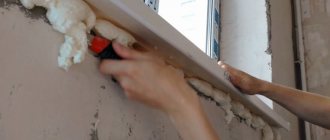
- Foaming the junction of the window sill with the wall.
- Placing a uniform load over the entire surface of the window sill.
Conducting final work with silicone sealant. The finishing of the plastic window sill is finished, the finishing of the slopes is carried out in the same way.
Window sill tiling
- Special glue.
- Deep penetration primer. Tile.
- Plastic parts for installation work on the corners of the windowsill.
- Tiled grout.
- Glass cutter.
- Level.
- Putty knife.
- Pliers.
- Hacksaw (preferably small).
The main materials have been prepared, you can proceed to the decoration of the window sill itself. You should choose a place so that the tiles lay on the windowsill in whole tiles.
Carrying out works
Installation instructions
Further, with the help of a glass cutter, the places for cutting off the tiles are determined and preparatory work for the entire tile is carried out for laying the pattern on the surface of the window sill.
- Next, a solution is evenly applied to the tile using a special spatula, and the tile is laid on the surface of the window sill.
Advice. Before this procedure, a pre-cut decorative corner is installed in the future location of the outer corner.
Thus, the remaining tiles are laid, while taking into account the observance of the necessary gaps between them.
- Remember to use a level when laying tiles to avoid uneven surfaces. To prevent condensation from accumulating on the windowsill, make an inconspicuous slope from the outer corner.
- After finishing work on laying the tiles, it takes about an hour to dry it. To give the window sill a beautiful aesthetic appearance, work is being carried out to clean the cable from excess solution.
- Then the grout of the desired color is selected and laid between the tiles with neat movements.
Finally, wipe the window sill with a damp cloth. The surface is ready and can be used successfully.
Window sill wood trim
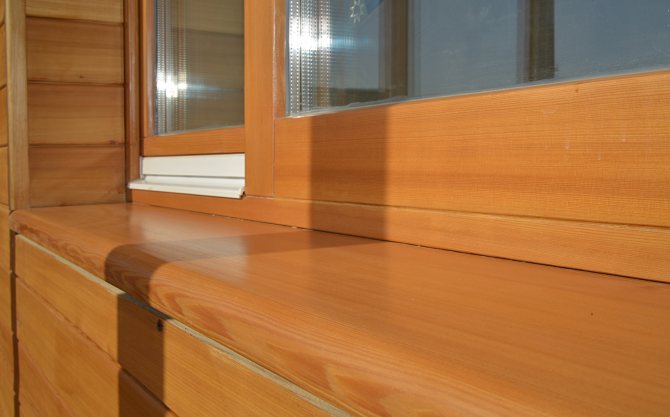
The tree in all ages gives the apartment coziness and comfort.
It is fully compatible with the overall interior. The main tree species for wood finishing of window sills are:
Preparatory work involves cleaning the place and upholstering it with shingles or felt to insulate the structure. Installation is carried out using lime-gypsum mortar, which is poured between pre-installed wooden wedges.
Photo of the design of window sills and slopes
Installation work
After pouring, the board is laid. Sorting it starts from the bottom of the window opening:
- From the edges of each board, it is necessary to add 4 cm, which will go into the slopes.
- The boards are fastened with dowels.
- If the wall is made of stone, it is necessary to accurately calculate all the grooves and fit the boards to them. To insulate the structure, cover the lower part and ends with felt.
- Using the level, control the levelness of the surface.
- After completion of work - fill all gaps and cracks with plaster material. The surface of the damaged walls, carefully plaster and decorate according to the finish.
And remember that wood always brings a feeling of warmth and comfort, it brings a certain harmony to the house.
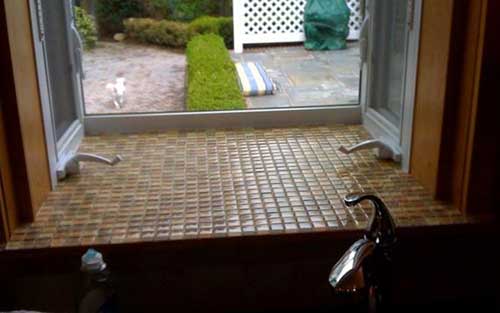
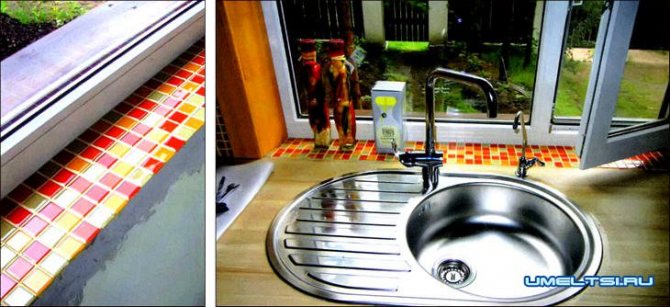
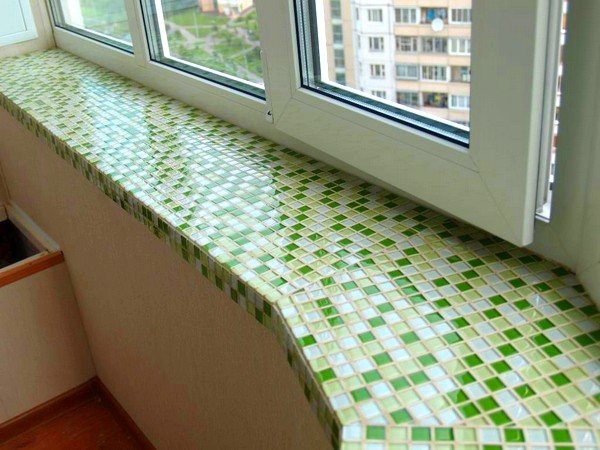
Mosaic window sill.
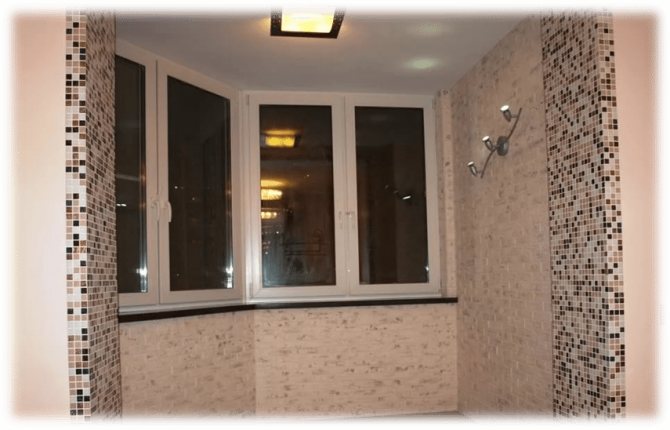
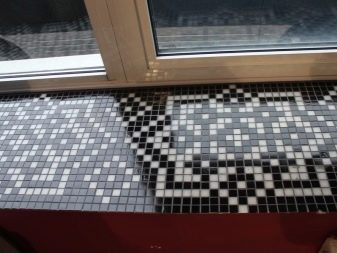
The mosaic on the windowsill looks very stylish and modern. The only caveat is that a large number of seams carries the risk of mold, and also makes cleaning somewhat difficult. Mold problems can be avoided by choosing a quality grout. And if a slightly more thorough cleaning of the surface from dust than in the case of ceramic tiles does not scare you, feel free to consider this option.
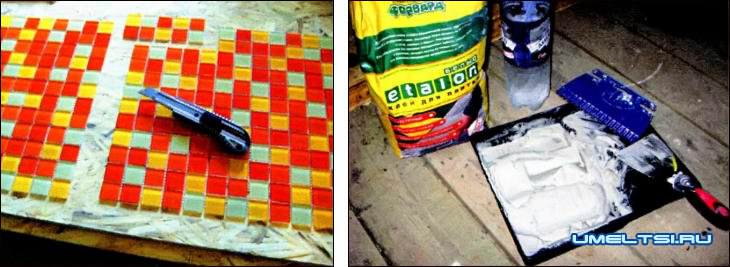
As a finishing material, you can take a standard store mosaic on a grid, or make your own unique mosaic from broken tiles. The second option is described in more detail here - Broken tiles remained after repair - we make a mosaic.
Surface preparation is carried out in the same way as described in the case of laying ceramic tiles. Next, glue is applied to the surface of the window sill and grid squares with mosaics are laid. Excess mosaic pieces are easily cut off along with the mesh. Grout is applied to the laid out mosaic. The remains of the grout are removed with a rubber spatula, and after drying, the entire treated surface is cleaned with a damp sponge.
Thermal insulation of a ceramic window sill.
Some are scared that in winter a window sill made of tiles or mosaics will give off cold. In fact, this is a problem of many concrete or even plastic window sills, and a lot depends on the quality of thermal protection of windows and walls. If you are afraid of this, then ceramic window sills can be insulated in the following ways.
1. In the process of laying, after preparation of the base, a layer of extruded polystyrene is laid. Next, reinforcement with a plastic or metal mesh is carried out and a screed layer is applied (from 50 mm.). This is followed by the standard tile bonding process. 2. Another option to insulate a ceramic tile window sill is to use infrared heating (underfloor heating system). Considering that the size of the window sill is not too large, the installation of this system will not cost you too much. For example, according to the prices at the time of this writing, a heating mat will cost you 350-370 hryvnia. per m2. Heating cable - 260-270 UAH per m2. A good solution is to use infrared film - it is very thin. Its minimum cost is from 300 UAH. per m2. Electricity costs will not exceed 4 UAH / month.
So, we tried to make out as much detail as possible the issue of facing the window sill with ceramic tiles. I would also like to advise that if you are not confident in your skills, then it is better to entrust all the work on laying tiles or mosaics to professionals. If you have any questions, we will be happy to answer them in the comments.

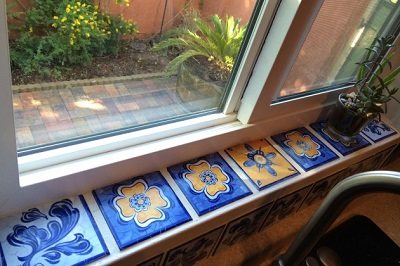
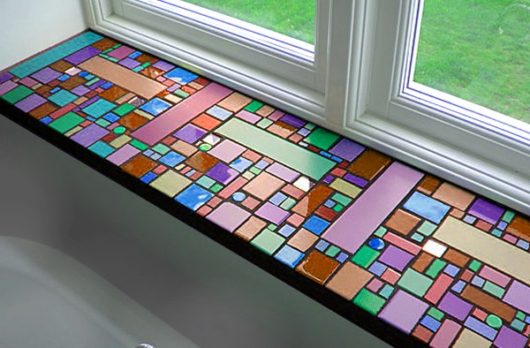
Mosaic on the windowsill: multi-colored decor
Required materials and tools:
- glass mosaic in chips on a grid of different colors
- tile adhesive
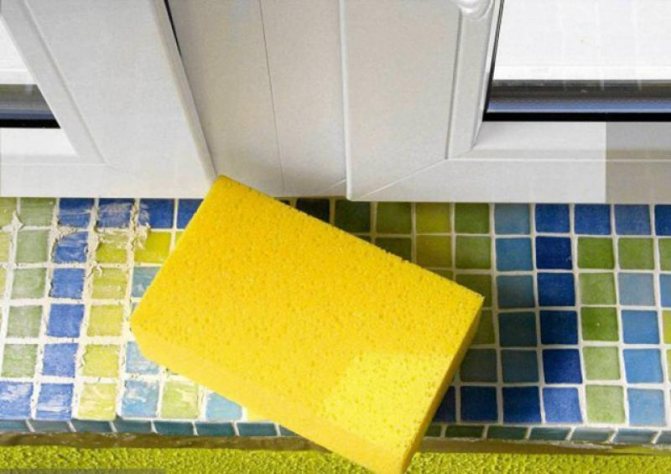
- substrate degreaser
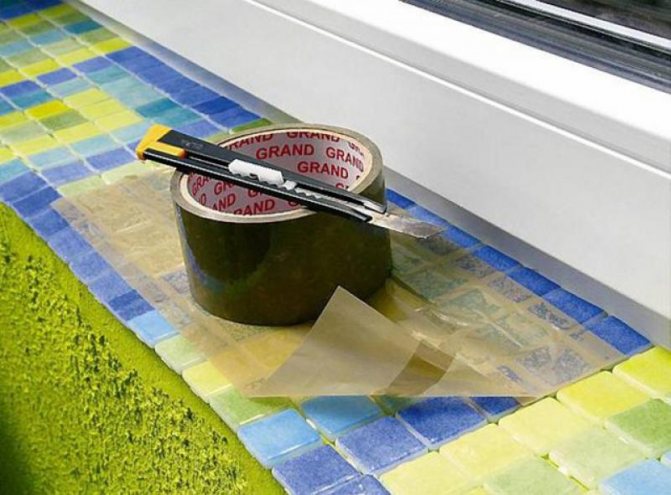
- self-adhesive tape (wide)
- notched trowel
- grout
- mosaic press
- rubber trowel for grout
- sponge
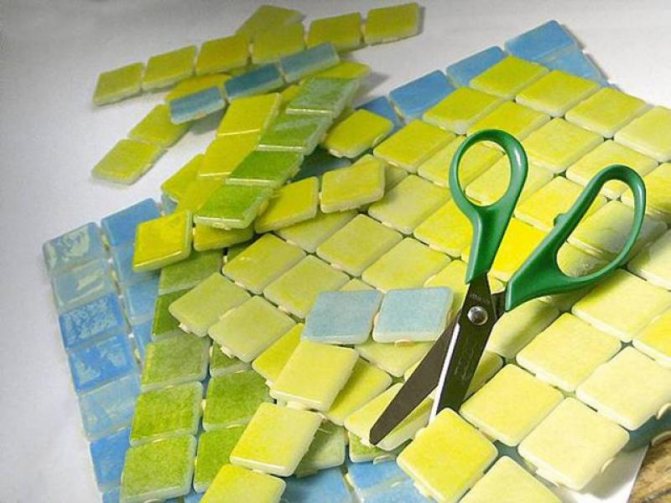
- scissors
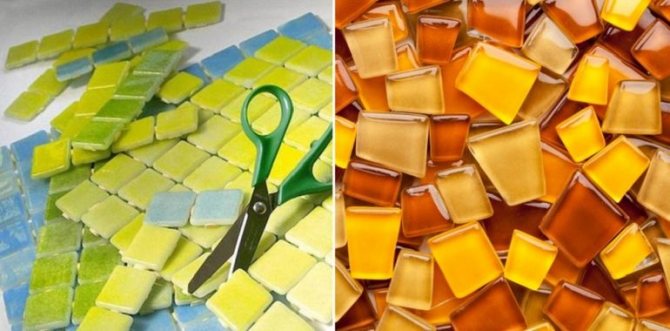
STEP 1. Cut glass mosaic into strips from factory blanks placed on a PVC mesh. Depending on the composition of the pattern, the stripes can be of different lengths.
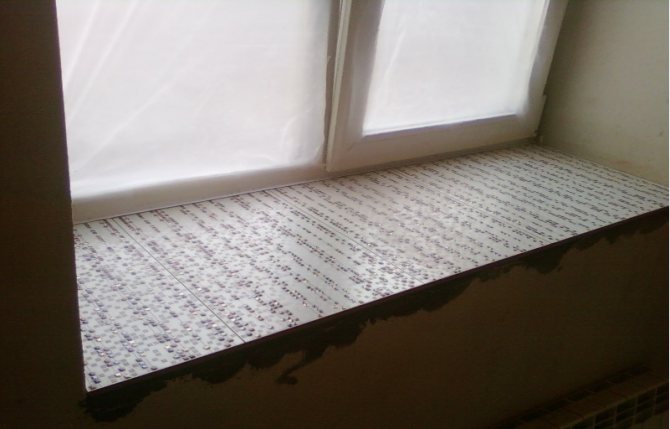
STEP 2. Place the mosaic segments on the windowsill, creating a pattern.
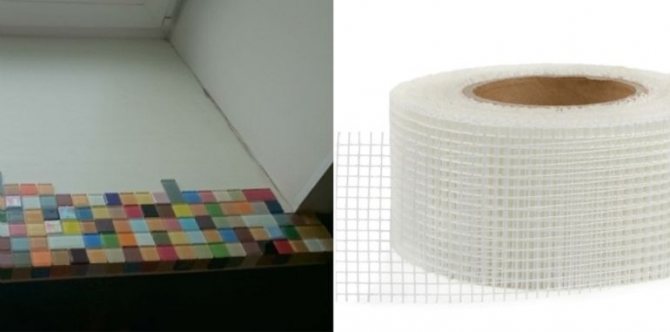
Step 3. Glue a wide self-adhesive tape on the laid pieces of the mosaic. Thus, we combine all the elements of the mosaic pattern and delete them entirely from the window sill.
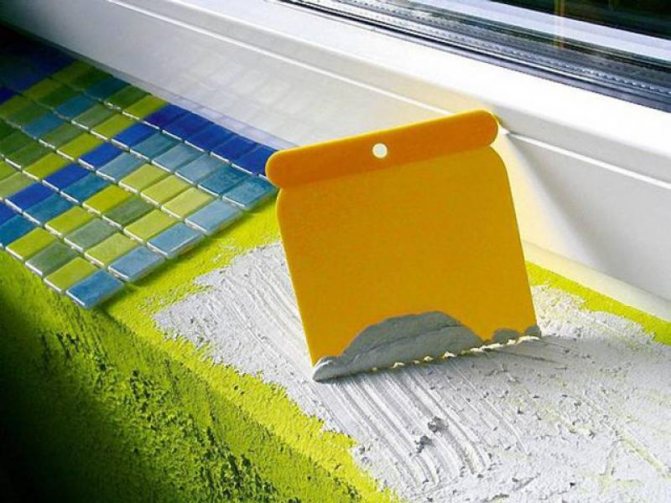
STEP 4. Next, you need to prepare the substrate: on a dust-free and degreased window sill, apply tile adhesive using a notched trowel.
STEP 5.We very carefully transfer the mosaic composition to the windowsill, lay it evenly, pressing it evenly with a special press. Carefully remove the adhesive tape.
Related article: How to clean plastic windows and sills
STEP 6. Make a border with a single mosaic strip. When the adhesive has hardened (approx. 24 hours), apply a grout in a neutral color or matching the color of the mosaic.
STEP 7. After the grout has dried, the excess is removed from the surface of the windowsill with a sponge moistened with water.
The fastest way to decorate a windowsill with mosaics
If your PVC window sill cannot be looked at without a sigh, there is an excellent solution - to decorate the window sill with mosaics.
The MEDIA WINDOWS portal offers the fastest and easiest way to make an effective and practical window sill yourself - to glue a glass mosaic on a grid onto its surface. In this case, the composition can be monochromatic or cast in all colors of a kaleidoscope. It is good to form a pattern from pieces in colors that are in harmony with the color of the walls.
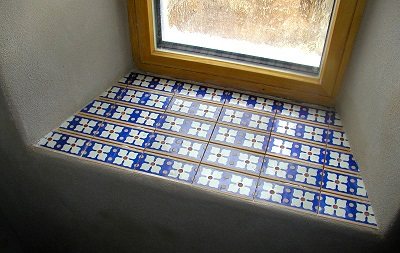
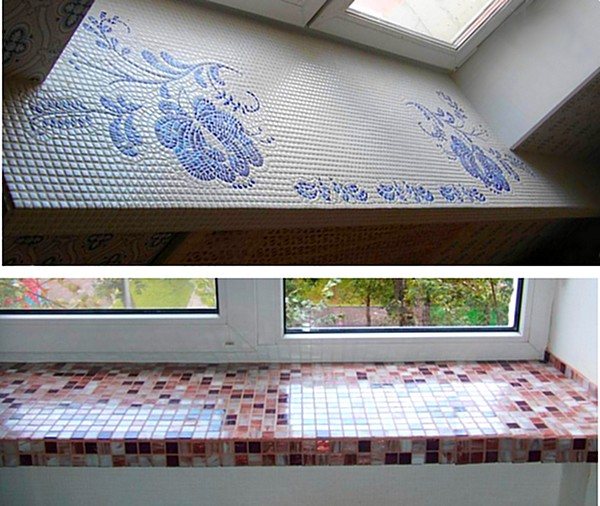
Mosaic on the windowsill: monochromatic decor
The mosaic on the windowsill can also be monochromatic. Then the process of applying it looks a little different.
For this you will need:
- single color glass mosaic in chips on a grid
- glue gun
- liquid nail glue
- rubber spatula
- grout
- White Spirit
- sponge
- wire cutters
STEP 1. Pre-apply sheets of glass mosaic to the window sill to determine the required dimensions. Cut out the corresponding fragment with pliers, taking into account the edging of the bend.
STEP 2. Degrease the surface of the PVC window sill using white spirit or other similar substance.
Step 3. Using a gun, apply a small amount of glue to each segment. Then we carefully lay out the mosaic canvas on the windowsill, pressing each square well to the substrate.
STEP 4. After the adhesive layer has completely set (about a day), proceed to grouting. The composition is applied with a rubber spatula. The excess is removed with a regular dishwashing sponge.
Ceramic and Mosaic Application Procedure
The location of the ceramic elements must be thought out in advance. When laying, the mortar on which the tiles or mosaic elements are placed must be evenly distributed over the area of the window sill and the back of the material. In this case, the observance of the gaps is ensured by standard crosses. For better fixation, the tiles should be pressed down with blows with a rubber hammer. The end parts are stacked in a similar way.
After the entire area of the window sill has been completed, it is necessary to remove the crosses and grout the gaps with a grout, the color of which matches the overall range of the finished window sill. Remove the remains of grout with a rubber spatula, rinse the window sill and leave to dry for 2-3 days.
If you do not have the skills necessary for laying tiles or mosaics on a windowsill, it is recommended to entrust the work to professionals.
The cladding should be carried out after the completion of the installation of the window structure.
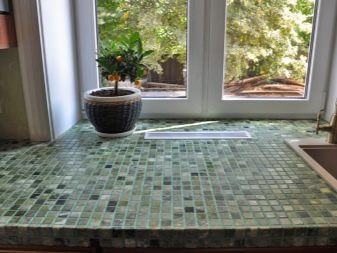
Practical and aesthetic result - mosaic on the windowsill
The glass mosaic is very smooth, so dirt will not accumulate on the surface of the window sill. Thus, besides the fact that it looks beautiful, such a decorative window sill is also easy to clean. Accordingly, it can be a harmonious addition to a kitchen or bathroom.
If you are worried that the mosaic window sill will be "cold" in winter, you can insulate it. To do this, after preparing the base, a sheet of extruded polystyrene should be laid. Then make a reinforcement with a plastic or metal mesh and apply a layer of screed from 50 millimeters. Then start the standard glass mosaic bonding process using the first or second option.
Features of the
The window sill can perform several functions at the same time. In a small kitchen, this is an additional usable space that is used for arranging indoor plants, cooking, placing dishes and other household appliances. Tiling is a practical, stylish and durable solution. Due to its special performance characteristics, this finishing material is ideal for cladding kitchens and bathrooms. The material is not afraid of water, resistant to stress and pollution.
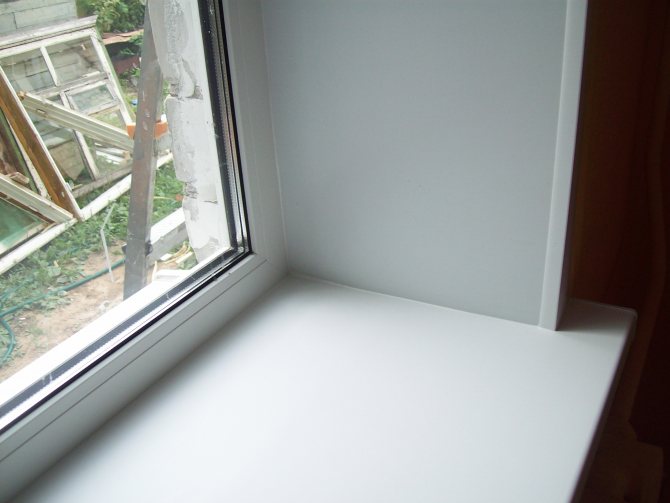
The cladding will help increase the strength of the structure. Compared to a standard plastic product, the tile does not lose its beauty throughout the entire service life (plastic turns yellow and gets dirty quickly). The tile window sill benefits from an aesthetic point of view and functionality. This option will harmoniously fit into various stylistic directions.
Finishing of window and door slopes with ceramic tiles
Korovin Sergey Dmitrievich
Master of Architecture, graduated from the Samara State University of Architecture and Civil Engineering. 11 years of experience in design and construction.
Decorating slopes with ceramic tiles is relevant for rooms with high humidity - where this material is most often used for cladding walls and floors: in bathrooms, toilets and kitchens. The tile on the slopes of the window will perform not only a decorative function, but also a practical one - its quality can be compared with natural or artificial stone.
How to do it yourself?
You can design a window sill from a tile yourself, without having much experience in a similar industry. Before starting work, it is necessary to identify certain factors.
- The ideal tile base is a concrete window sill. It is also allowed to lay tiled finishing material on a plastic or wood sill.
- Check the integrity of the surface. There should be no pits, cracks, large scratches, chips or other defects on it.
- The base must be securely fixed in the opening.
- You can start the finishing process only if the installation of the window frame and external ebb has come to an end.
Required tools and preparation
To lay tiles, you will need a specific set of tools and compositions. The list includes:
- adhesive solution;
- grout;
- primer;
- finishing material;
- glass cutter;
- building level;
- putty knife;
- rubber hammer;
- hacksaw;
- pliers.
To decorate the window sill in the kitchen, it is recommended to opt for porcelain stoneware.
This material is distinguished by its special strength, density and wear resistance. The finish is completely unpretentious for cleaning and boasts a long service life. You can put hot dishes on porcelain stoneware without fear of damaging the surface of the material and its integrity.
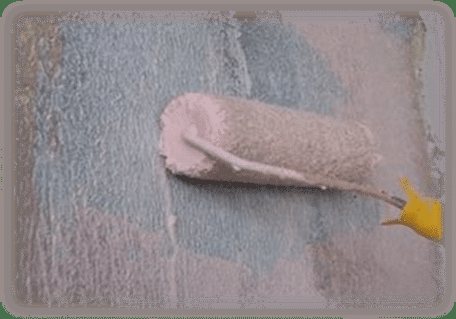
Preparation
The cladding work should begin with the preparation of the base. Old enamel, putty, etc. should be removed from the windowsill. Remember to clean the surface of dust and dirt particles. After that, the window sill should be primed. Use a deep penetration compound for this.
Particular attention is paid to the choice of tiles. It is important to consider the dimensions of the slabs. If the dimensions of the base are small, the recommended size of the finishing material is 15x15 or 10x10 centimeters. The compact finish minimizes the need for trimming and also plays an important role from an aesthetic point of view.
For more voluminous bases, it is worth choosing a larger tile. You can opt for varieties with dimensions of 30x30 or 40x20 centimeters.
Given the wide range of modern stores, finding the right size for the finishing material is not difficult. At the same time, it is important to take into account the aesthetic component.
Completion of work
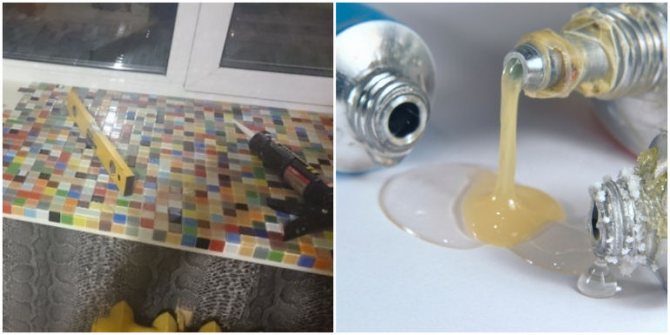
There is very little left to complete the work. The surface must be treated with a special solution.The water repellent antifungal fluid does the job well. Apply a small amount of the product to a rag and wipe the entire surface with it. This is necessary in order for the window sill to remain so attractive and beautiful for many years. After such treatment, he is not afraid of either dust or moisture.
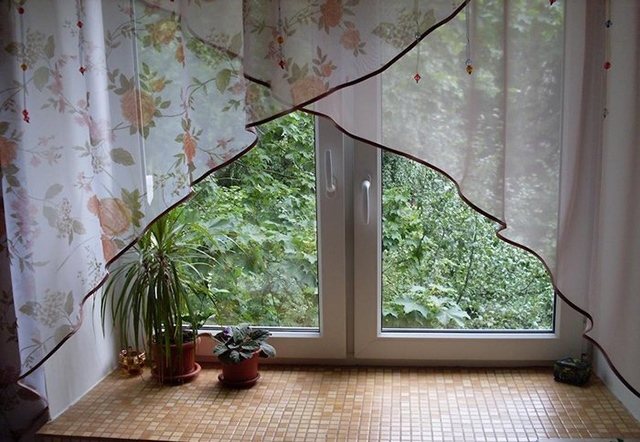
Such a window sill looks very beautiful and original. And indoor plants will complement the composition. All this will create an atmosphere of comfort and warmth. It took only three hours of working time to make such a change, and the window sill will delight you for many years.
Source: fb.ru
Technology
- After you have decided on the size of the dice, you should know exactly how the tile will be placed on the windowsill. There are two options to choose from: perpendicular or along the window. The choice is made in order to minimize material trimming as much as possible. To fit the die to a certain size, use a glass cutter.
- Pre-mark the place of the incision with a marker. The tiles are laid on an even and stable base, after which trimming is carried out at the outlined points. Press firmly and firmly as you cut.
Related article: How to put a window sill on plastic windows
- Next, you need a rubber mallet. They tap the tiles from the back at the place of the supposed cut off. If the tool is not at hand, you can use a spatula handle wrapped in a thick cloth or towel.
- It is necessary to break off with sharp movements, controlling the force. If the skills allow, you can trim the material using a grinder. Using this tool will save you a lot of time and effort. Use this technique if you have professional skills.

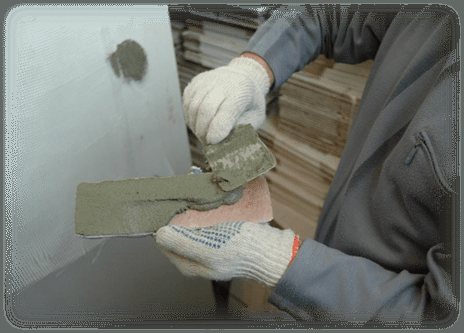
Installation
At the stage of laying the tiles, it is necessary to prepare an adhesive composition. The solution is applied to the base and back of the tile evenly and accurately with a spatula. When laying tiles, pay attention to the integrity of the pattern. Do not forget about the gaps between the tiles. To place tiles at the same distance from each other, you can use special crosses that differ in size.
For convenience, it is recommended to arrange a slight slope of the window sill from the window to the outer part of the structure. This will help prevent moisture build-up by allowing water to drain from the base of the frame to the edge. As soon as the laying of horizontal dies is completed, it is necessary to proceed with the installation of the end parts. The placement technique is similar to that described above.
In the process of work, carefully make sure that the vertical and horizontal elements correspond to each other at the joints.
After the entire window sill is tiled, putty is used. For greater practicality, experts recommend using the composition in a dark color scheme. The most common options are:
The choice of shade is selected depending on the color of the tile. As soon as the solution is completely dry, the window sill is thoroughly cleaned. The renewed window sill is now ready for use.
Slopes of ceramic tiles under a stone
Slopes from tiles imitating natural or artificial stone masonry for windows and doors can be done by hand.
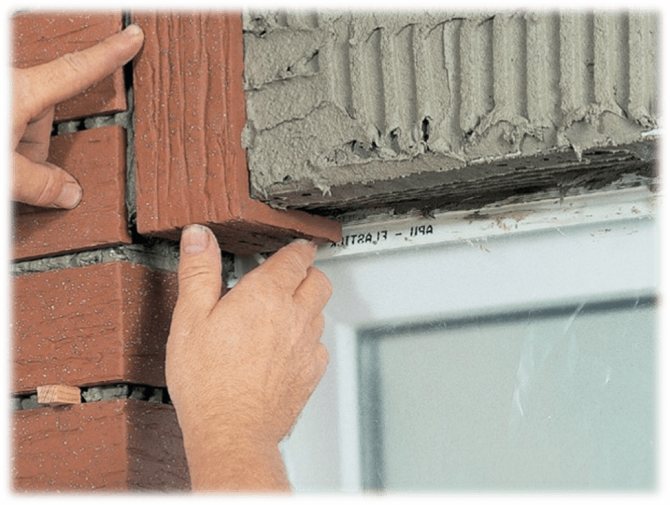
You can trim the slopes with tiles yourself
Before starting work with this material, you do not need to level the surface.... This material is convenient because, in addition to flat elements, you can purchase corner pieces to make the opening look neat.
- To achieve high-quality adhesion between the product and the surface of the slope, notches are made on the latter.
Notches on the slope improve adhesion. Slopes are primed.
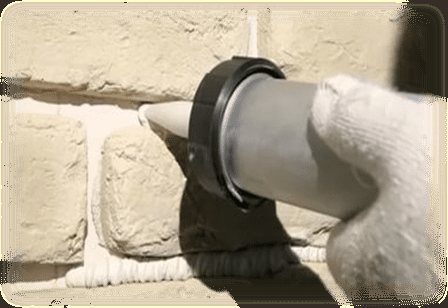
Priming the surface of the slope The adhesive solution is applied not to the wall, but directly to the product.
The solution is applied to the tiles. The tiles should be laid from the corner. When laying, the masonry elements are tightly pressed against each other, leaving no seams.If there is a desire for the seams to be, then plastic pegs are inserted between the parts.

To design the seam between the tiles, pegs are inserted. The seams are filled with a grout mixture using a construction syringe.
The seam is filled with grout
- The grout is spread over the joint with a brush.
You can use a regular hacksaw to trim some of the pieces that connect to the window frame. At the ends, the tiles can be laid out in a free form.
DIY mosaic windowsill
DIY mosaic windowsill
Each of us wants to transform our home, make it more functional, comfortable and aesthetic. Design items or minor cosmetic repairs usually help to update the environment. In this article, we will tell you how, with minimal investment, not only add bright and elegant notes to the interior, but also give vent to your creativity. It's about decorating a window sill with glass mosaics.
This design will help turn a yellowed old window sill into your pride. The composition can form a pattern, ornament or pattern. You can either use the entire wide range of the palette, or get by with just one color. The main thing is that the result obtained is in harmony with the overall design and reflects your own tastes and preferences.
Before starting work, the fate of such moments should be:
- the surface should not have noticeable damage (cracks and chips);
- the window sill must be firmly fixed in the window opening;
- the installation of a plastic window and an external ebb must be completely completed.
To install mosaics on the windowsill, you will need:
- tile adhesive;
- surface degreasing agent;
- the mosaic itself on a grid in the form of a chip;
- wide self-adhesive tape;
- two spatulas (notched and rubber);
- grout;
- press;
- sponge;
- scissors.

If everything is in place, let's get to work
- First, let's prepare the surface. We remove the old paint, putty, accumulated dirt, wipe the dust.
- We take the mosaic. We cut the blank into strips based on the preferred composition of the picture. If the standard pattern suits you, leave it as it is.
- We lay out the mosaic elements, forming an ornament.
- We glue self-adhesive tape over the components, thereby uniting them into a single whole.
- Now let's get to the background. We degrease the surface of the window sill, after which, using a notched trowel, apply tile adhesive.
- Move the composition to the windowsill. Laying must be neat. Make sure everything is smooth. Press the pieces of the mosaic with a special press, but in no case overdo it, as excessive pressure is unacceptable.
- Carefully tear off the adhesive tape and wait for the glue to dry completely (about a day).
- Armed with a rubber trowel, apply the grout. It is best to use a compound recommended by the mosaic manufacturer. Remember that choosing a quality grout will help you avoid mold problems in the future.
- When everything is dry, clean the surface with a damp sponge and remove excess grout. If you wish, you can do polishing.
- Enjoy the result. The window sill is ready for use.
Alternative styling
The work process is almost the same as described above. The difference lies in the use of glue such as liquid nails. The adhesive must be applied separately to each mosaic element using a special gun. When laying out the mosaic canvas, all the squares should be tightly pressed against the windowsill. Do not forget about the end parts.
Practical and aesthetic result
It is difficult to overestimate the advantages of the window sill updated in this way. In addition to the obvious aesthetic benefits, the practical side of the issue also has its advantages. The glass mosaic is very smooth so that dirt will not settle on its surface.In addition, washing such a window sill is a piece of art as easy as shelling pears.
If you are afraid that in winter it will give off cold from the decorative window sill, you can do insulation. To begin with, after preparing the base, it is necessary to install an extruded polystyrene gasket. Then place the plastic mesh and apply the screed. After that, start laying the mosaic according to the scheme you already know.
Laying tiles
Next, glue small tiles. We start to do this from the end. Further we move towards the window.
Each element must be glued with liquid nails. They will ensure the strength of the entire structure. And such a window sill will serve you for many years and will delight the eye. We apply it on the windowsill in small quantities and gradually lay out the mosaic pattern. Do not forget to press each piece.
After gluing all the tiles to the surface of the windowsill, we wait until the glue is completely dry. After that, we can proceed to the next stage.
The seams must be hammered in with ordinary plaster. Remember to remove excess mixture. A spatula and sponge can be useful for this.