Instructions for pasting the door with foil
Use a metal ruler and a building corner to make high-quality markings.
The surface is prepared, now we turn to the door cladding with a decorative product. The procedure is as follows:
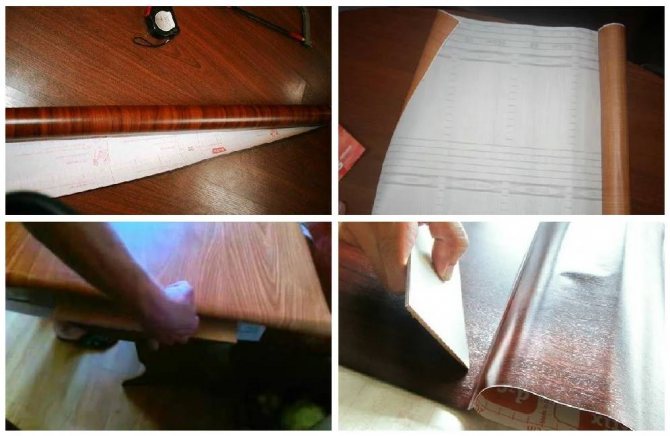
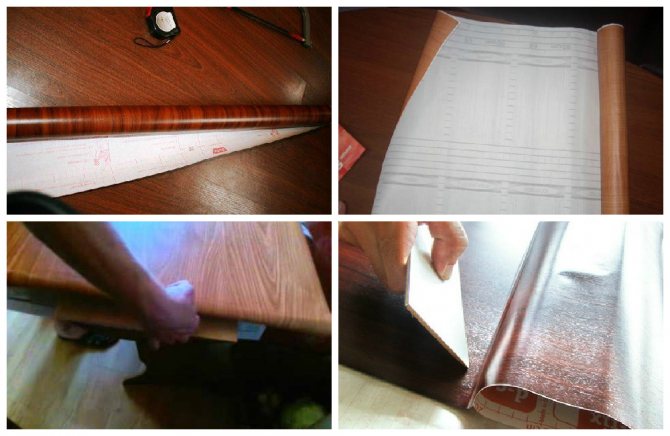
- First, we do the markup. We determine the dimensions of the door using a tape measure and put on the sticker a contour corresponding to the size (taking into account the ends). The marking is done on the back of the film, where, as a rule, there is a millimeter marking.
- At the second stage, we cut the material using a clerical knife. Cut very carefully and strictly along the lines drawn. The edges should be straight.
- Let's move on to pasting. We apply the upper edge of the cut film to the corresponding place on the door. We separate the protective paper 10 centimeters from the edge and firmly press the sticky part of the self-adhesive to the door leaf, leading it to the upper end.
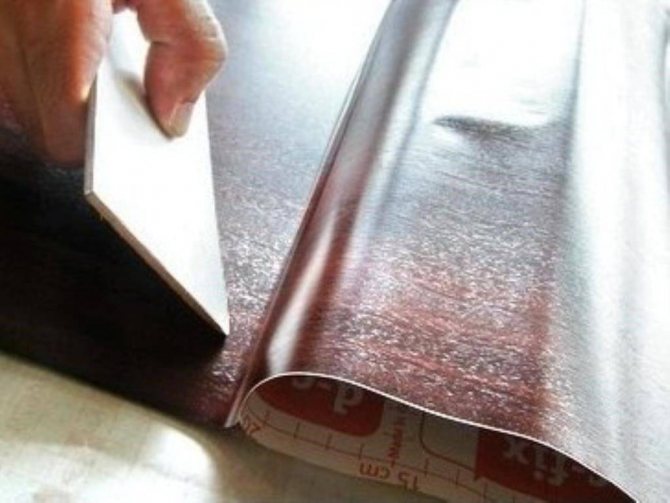
- Slowly separate the paper and gradually glue the film, moving from top to bottom. At the same time, smooth out the sticker with a rubber spatula or a soft rag, expelling air bubbles.
- We wrap the film over the rest of the ends, cutting the corners to reduce overlap layers.
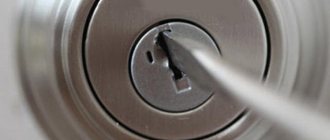
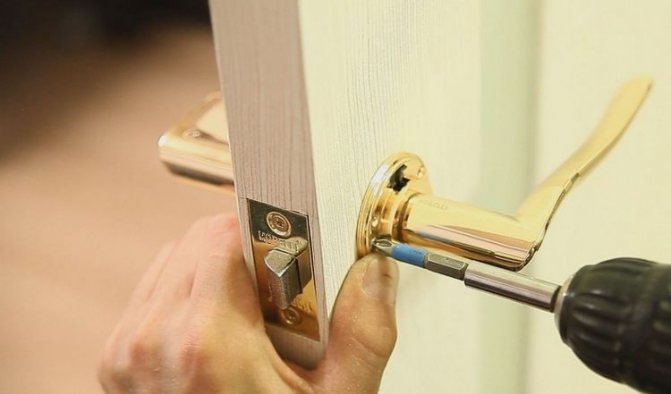
- Carefully cut off the extra centimeters around the edges and cut out a hole for the keyhole. We install the mechanism itself and the handle.
For good fixation of the film at the ends, dry the material with a hairdryer
Helpful Hint: Immediately before applying the film, apply a soapy solution to the surface using a spray bottle. This will allow you to easily move the decal until it is in the desired position. After that, drive out the water with a rubber spatula, and dry the protrusions and corners with a hairdryer so that the self-adhesive melts a little and presses well against the door.
Video: How to properly stick a self-adhesive film
Self-adhesive foil is an excellent material for improving the durability of the door and its appearance. Adhering to the tips and tricks described in this article, you can achieve the desired result in the shortest possible time.

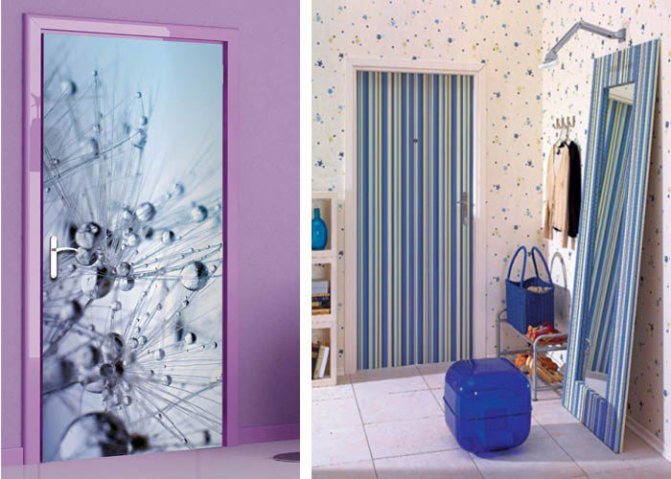

Wallpaper in the design of the opening
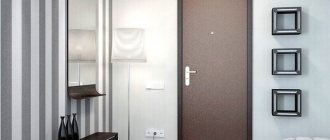
We glue the door ourselves
Very often, wallpaper is used in the design of a doorway. They can be used to highlight a passage, or vice versa in order to hide this place and make it less visible.
Paper wallpapers are suitable for facing openings, however, being resistant to moisture, they still have a short service life. Therefore, it is better to decorate surfaces with such wallpaper for temporary use. Wallpaper is prone to fading in the sun, and therefore, they will soon lose their attractive appearance. But if the pasting takes place with acrylic wallpaper, then the term of use will increase significantly, besides, the surface will "breathe". The decoration will be similar to vinyl, but unfortunately less durable.
If you want to qualitatively update wood surfaces with wallpaper, then choose vinyl materials. They are more durable, moisture resistant and have a huge number of shading solutions. You can even pick up a picture printed on vinyl trellises and thus perfectly decorate the partition between rooms.
What is self-adhesive for?
Self-adhesive is used for full repairs or for the restoration of outdated items, doors and furniture. The purpose of the application can be to impart strength to various surfaces.For example, if wooden doors are installed in a bathroom, they need to be moisture-resistant, and the film is indispensable in this case.
Attention! When choosing a material for pasting, pay attention not only to the color, but also to the fastness of the colors. Run your hand over the self-adhesive surface
If the palm is slightly stained, the paint will quickly wear off.
If you have made repairs, radically changing the color scheme of the room, and you do not want to change the door that does not match the color, then self-adhesive will also come in handy.
Using a self-adhesive film, you can increase the waterproof properties of doors
Another area of application is to protect the door from scratches and damage of any kind.
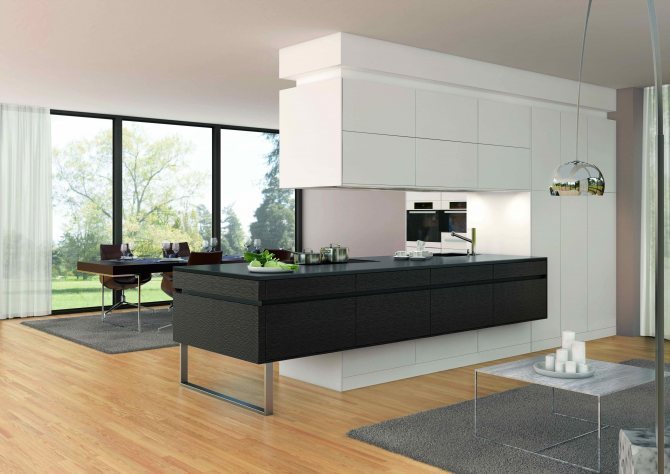
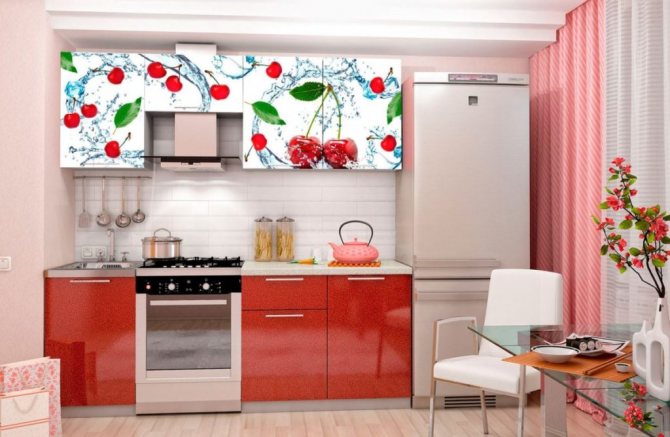
Efficiency of arranging kitchen modules to the ceiling
In order to rationally use each free cm, it is necessary to correctly position the kitchen furniture. Sometimes, to complement under the ceiling itself, they use not closed, but open versions of cabinets, which do not perform a practical function, but rather serve as decoration. It is imperative to install a hood so that gas and steam do not settle on objects that will stand near the ceiling.
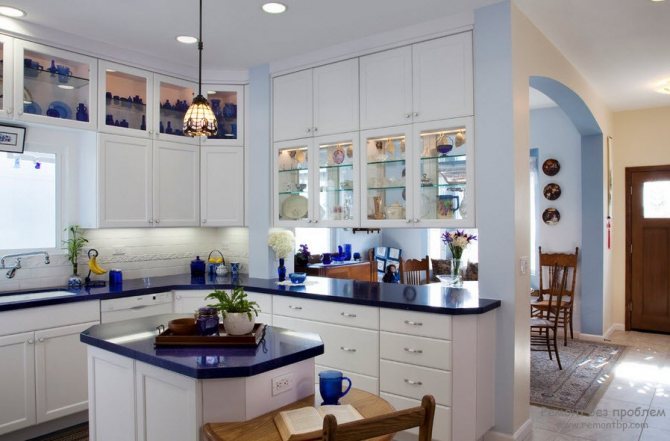
If you are not ready to completely abandon handles, use elements to match the furniture or made of a similar material.
The lockers look original, which are located directly on the ceiling itself. This option is more suitable for rooms with a large area, where you can place such "floating lockers" over the islands. Most often, these cabinets open from both sides and are very convenient when preparing food. A great option for storing everyday things.


With the help of lighting, you can hide too voluminous items of furniture.
Film instructions
Let's consider in detail how to glue the self-adhesive film on the door. First of all, you need to prepare the instrument. You will need a ruler, tape measure, and a pencil for marking. A rubber spatula will be useful. For surface preparation, sandpaper is indispensable. You will also need a primer and mastic. For correction, you will need a spray bottle with water and a hair dryer.
The algorithm of actions is as follows:
- The surface of the door leaf is cleaned from irregularities. Paint drips are removed and burrs are cut off, as well as roughness;
- Then the entire plane is primed. This will allow the adhesive to better adhere to the surface;
- After marking the polymer material, all excess is cut off. For convenience, its back is lined with squares;
- Pasting starts from the top of the canvas, moving down;
- Bending back the backing, glue the corner of the canvas. Then the material is spread out to the sides and down.
There is one trick for inexperienced and insecure DIYers. Before gluing the door, you need to spray the canvas with a spray bottle with soapy water. This will allow the self-adhesive tape to be operated. It will slide on the surface and can be shifted to the sides. After fixing in the right place with a soft cloth or spatula, water is expelled from the rubber. Then the surface is dried with a hairdryer. But it should be warned that overuse of water can spoil some material. For example, if the base is paper. To make it clearer how to stick the self-adhesive film on the door using this method, it is better to watch the video.

The DIYer also needs to know how to remove the already pasted film. This will come in handy when you want to change the interior of the room and need to change the texture on the door. There are several techniques to cope with this difficult task.
You can use a hairdryer first. It is necessary to warm up the corner of the film, pry it off with a knife and gently pull it towards you and down. If the material lags normally from the surface, then you can continue to move.In those places where a hitch occurs, it is necessary to warm up the areas with a hairdryer.
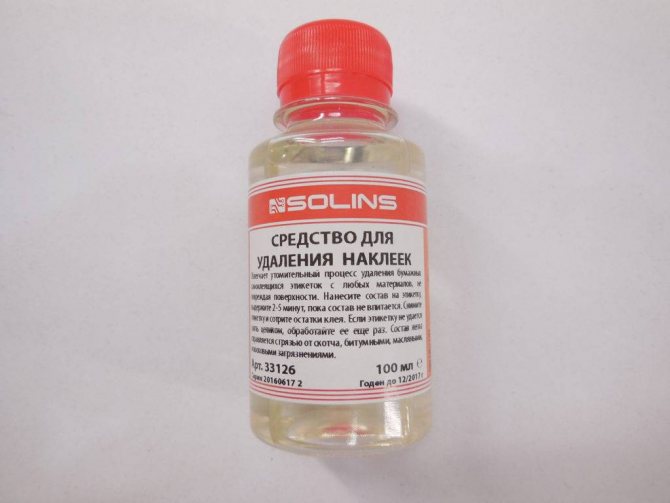
The stores sell "Label and Decal Remover". This is a special highly penetrating aerosol composition that you need to spray under the edge of the film and wait a little while it flows inside. So move, gradually adding aerosol to the surface. The famous spray can WD-40 has a similar effect.
If you want to suffer with solvents, then it is better to choose white spirit or 646. You cannot use their fatty varieties. You need skill to work. You need to try to soften the glue by applying a moistened swab to the surface and then wipe off the excess with a dry cloth. But in any case, do not rub the solvent on the door. Mixing with glue, it is capable of disrupting the structure of the material.
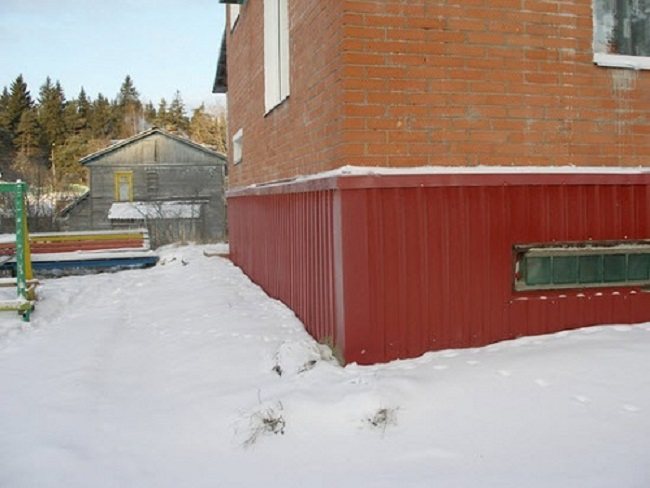
Basement siding: practical, fast, aesthetically pleasing
If the design should perform only the function of decoration without additional insulation, then siding panels are quite suitable. A variety of textures, colors of material can transform an unfinished open area of work into a neat pedestal on which the building rises. They can be brickwork, tile or ceramic tiles, decorative stone.
Siding will be the perfect solution to the problem:
- It is very simple to solve a problem like: how to close the basement of a house on stilts, using this simple and understandable material. For independent work, you will need the following tools and devices: a cord, a building meter or tape measure, a set of wooden pegs, a plumb line, a building level, boards, a shovel, roll-type waterproofing.
- Before starting work, the site between the piles and around them is freed from vegetation and debris.
- The soil is selected along the outer perimeter of the house near the walls. A trench with a depth of up to half a meter and a width of 0.3-0.4 m is being formed. At the same time, its inner border should be located, slightly going under the walls, and the excavation itself should be carried out with the formation of a slight slope in the direction from the walls: for every 2 m, 1-5 cm.
- The entire excavated pit, including the walls, is covered with a layer of roll waterproofing.
- A drainage perforated polyvinyl chloride pipe is laid on a small layer of crushed stone along the perimeter.
- In several places, drainage wells are brought to the surface - "ambulance" when silting up the system to flush it.
- The pipes are covered with a layer of 0.1 m of fine gravel. The trench is completely filled with sand along the upper border, which is well tamped, performing a slope from the walls.
- A blind area is being formed. Alternatively, it can be paving slabs, paving stones or concrete screed.
- Holders are welded onto the piles, onto which the guides will be attached through the holes.
- The frame is made of wooden (40x100 mm) or metal elements. To prevent wood from rotting, it is pre-treated with an antiseptic agent.
- Siding panels are installed using the J-profile, external and internal corners with fasteners. At the same time, a compensation gap of 3-5 cm is maintained for possible expansion when the temperature changes between the panels and the blind area.
- On top of the finished structure, an ebb is installed, along which precipitation is diverted from the base.
Views
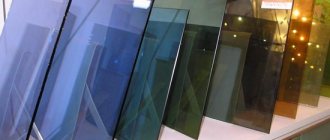
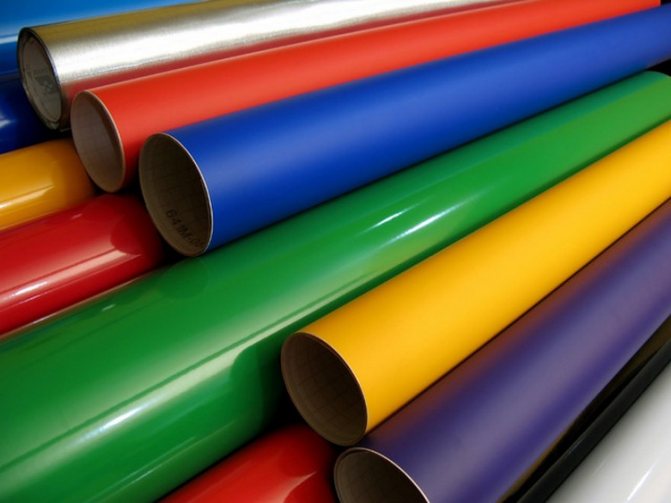
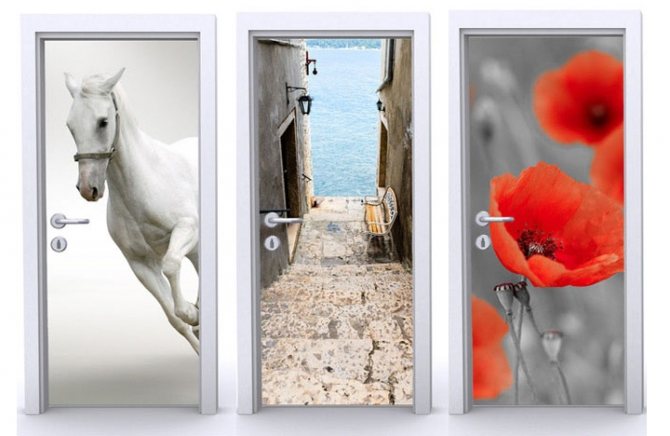
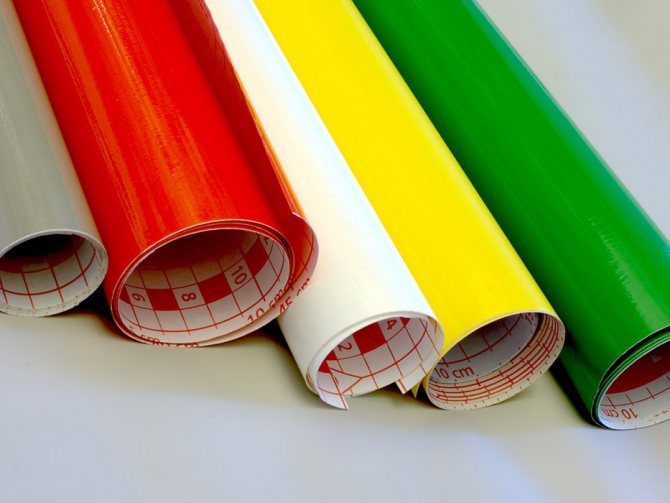
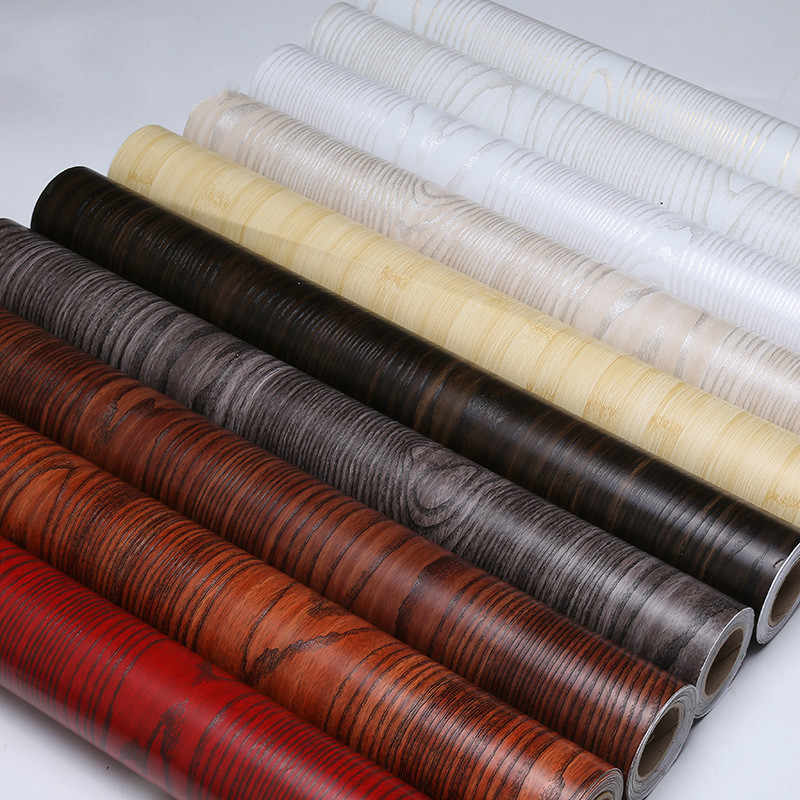
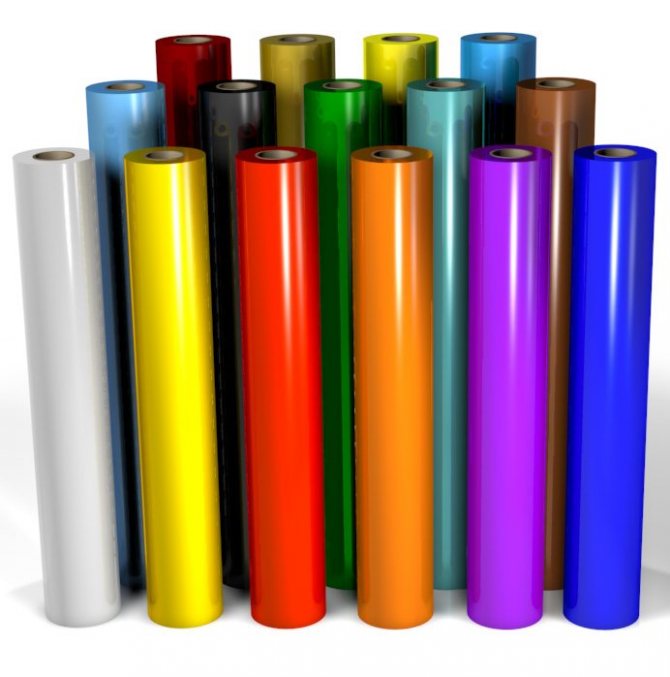
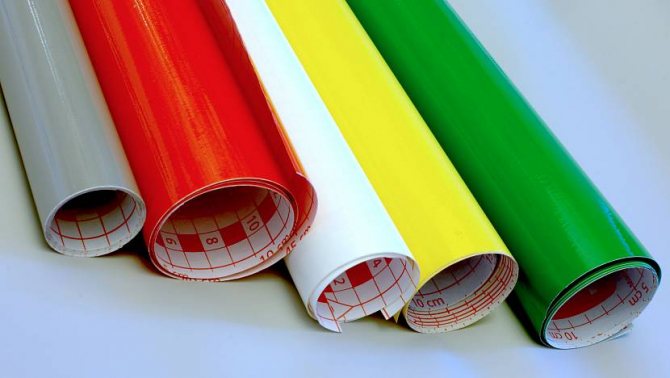
There is a wide range of door films on the market, differing in material and method of production, structure, texture of the outer surface, in color and design.
According to the material of manufacture, the following films for doors are subdivided:
- Polypropylene. Propylene films are often used for pasting glass surfaces. They can be transparent, matte, with a pattern. Frosted is often glued to the glass of an interior door or used for the design of glass doors of wardrobes.Such a film also has a protective function, as it makes the glass more durable, and in the event of its breaking, it prevents fragments from falling out.
- Paper. Doors, laminated with a film, which are based on paper, should be protected from getting wet. Therefore, you should not use it for rooms with high humidity.
- With a finish effect. The film is a material, the main component of which is paper impregnated with resins and coated with varnish, which increases its strength and durability.
- Fiberglass. Quite an expensive option with good characteristics that ensure its durability.
- Polyvinyl chloride (PVC). Such films are not afraid of temperature fluctuations, are sufficiently resistant to mechanical damage and are not afraid of high humidity.
- Two-chrome. Perfect for the bathroom, as it is not afraid of humidity and temperature fluctuations. The fabric is sufficiently resistant to UV rays and household chemicals.
Films can also be classified according to the manufacturing method. Each manufacturer strives to find its own way of manufacturing products that will make them unique compared to other brands of materials. However, we will not consider this point in detail, since the manufacturer does not indicate such information on the labels. This means that this information will not help you in choosing a film.
According to the structure, single-layer and two-layer ones are distinguished. Monolayer materials are a single fabric resulting from a mixture of various components and their special processing. Such products are flexible and elastic.
Two-layer films are products consisting of two separate layers, one of which is the base, and the other is the carrier of decorative elements. This option is considered less durable than the first.
According to the texture of the outer side, products are available with a matte, glossy, transparent, mirror or holographic surface.
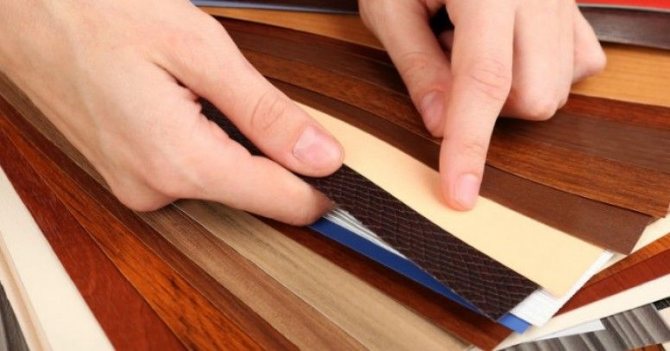
There are a variety of colors and textures of self-adhesive films on the market. Depending on your desire, you can purchase material with a wood grain pattern or even imitation leather.
Interior doors need wear-resistant material, especially if children and pets live in the house. Also, make sure that if something happens, the film can be washed.
Bathroom doors can be covered with a film that is not afraid of high humidity.
What it is
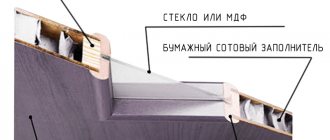
Self-adhesive film for doors is a multi-layer composite material consisting of four layers:
- paper or film base, differing in thickness;
- a layer of special evenly applied glue, resistant to drying;
- anti-adhesive coating of protective (temporary) paper;
- protective paper layer removed during application.
In other words, it is a familiar furniture renovation adhesive, sold in rolls up to one meter wide. It has a subtype called finish film, which is made using special types of resins.
How to glue a self-adhesive film on a door - a step by step diagram
Step 1: Select wallpaper
If the doors are external, it is best to choose a self-adhesive film in dark colors - dirt will be invisible on such doors. If your choice fluctuates between matte and glossy options, opt for matte - this way, multiple handprints will be less noticeable. Check the density of the material by touch, it should be well felt. A good way to find out how thick the wallpaper is is to fold a corner. If it unfolds on its own as soon as you release it, you can buy such a film. It remains only to choose the desired width of the self-adhesive, it is best to take it with a good margin.
In addition to the wallpaper itself, you will need some tools for pasting: an assembly or stationery knife (you can do with a shaving blade, but the knife is still more convenient), large paper scissors, sandpaper (take a piece with a large grain and a piece with a fine one), putty on wood and a small spatula, as well as damp and dry rags.
Step 2: preparing the door
If the door has been painted before, it is not necessary to clean off the paint layer, but if the old paint peels off and crumbles, scrape off at least such areas with a knife. Use a coarse grit sandpaper to properly sand the door to remove any unevenness or roughness. Cracks, pits and other visible defects should be repaired with putty. This needs to be done in several stages: first treat the cracks with a small layer of putty and let it dry. After that, completely cover the cracks with putty. When it's dry, sand the surface of it
If the cracks are repaired immediately, then the putty may crack and fall out, so it is important to follow the procedure.
Remove the door handle, if there are glass in the door, it is better to remove them too. There should not be a single protruding nail or an extra hole in the doorway. Run your hand over the surface of the door - if you don't feel any roughness, then you can proceed to the next step.
Step 3: We carry out the pasting
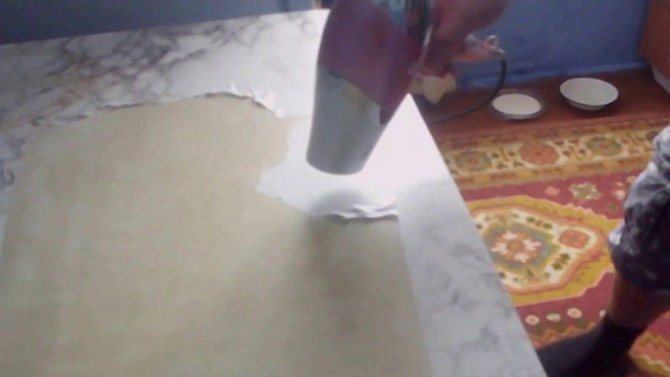
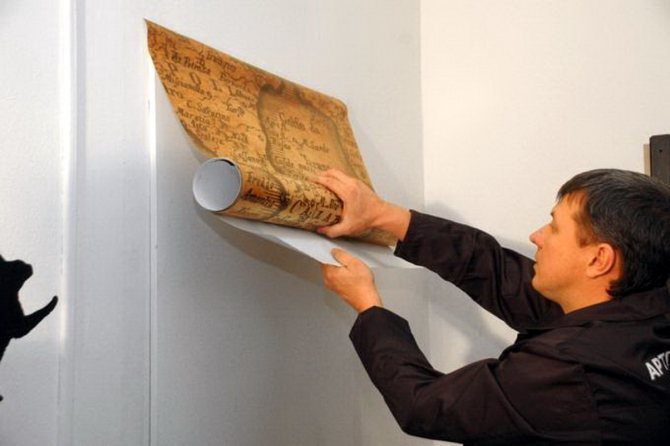
Despite the name, the door film itself will not stick - it still needs help with this. It is good if the surface of the door is even, without grooves - then the pasting process will not last longer than 10 minutes, especially if you glue with one solid sheet, starting from the top and ending with the bottom. In this case, you don't even have to measure and cut pieces of wallpaper - just grab the entire roll and pull on one edge to unwind a large piece.
Peel off the paper a little (you don't need to tear it or cut it, let it just hang), which closes the adhesive layer on the back side and carefully, by the very edge, glue the wallpaper. If you managed to do this evenly, grab the paper from the back and slowly pull it down, with your free hand while gradually stroking the film from left to right, expelling air bubbles. If you do everything right, there won't be a single bubble left under it! If you still see air bubbles on the door, you can get rid of them with a regular needle - just pierce the bubbles and squeeze out the air.
Continue this way until you reach the bottom of the doors. When this happens, take a utility knife and cut the roll around the edge of the door. If you have correctly sized the film, there will be unsticked pieces on the sides. There are two possible options - you cut them along the contour of the doors with a knife or blade, or bend them by gluing to the back side. The second option is possible if you glue both sides of the doors and if the door frame allows - do not forget that the self-adhesive has its own thickness, for which the door frame is not designed.
If the surface of the door has recesses and contours, the hassle will be a little more. First, you will have to cut off pieces of the film and glue it in stages. Fortunately, the paper is very conveniently lined on the back. Secondly, you will have to work hard with a stationery knife, cutting the wallpaper in those places where they will form "wrinkles". For convenience, completely remove the paper from the back of the film and start gluing exactly from the recess - lean against the self-adhesive and gently slide your finger in the place of the recess so that it sticks to its surface. Then locate where the "wrinkles" appear and make cuts from the beginning of the wrinkle to the very edge of the film. Layering wallpaper can help you avoid these uneven areas. Self-adhesive door films will last you so long that you yourself will be surprised at it.
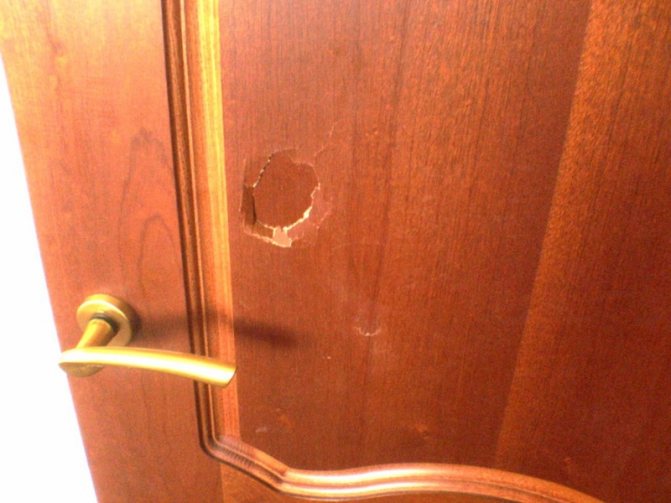
Surface preparation
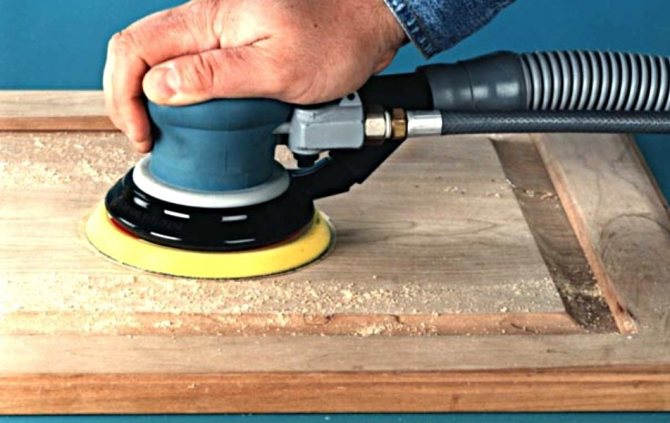
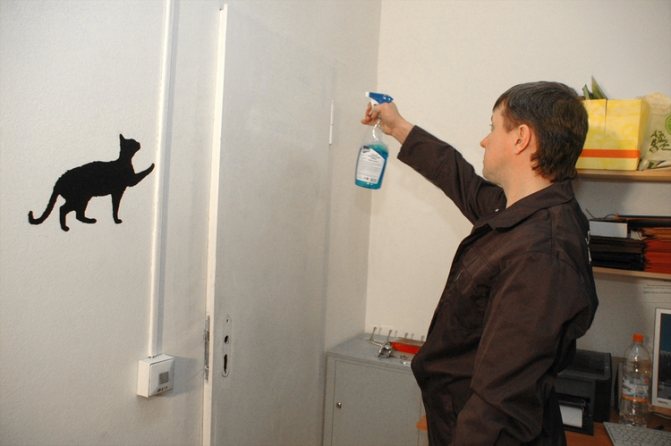
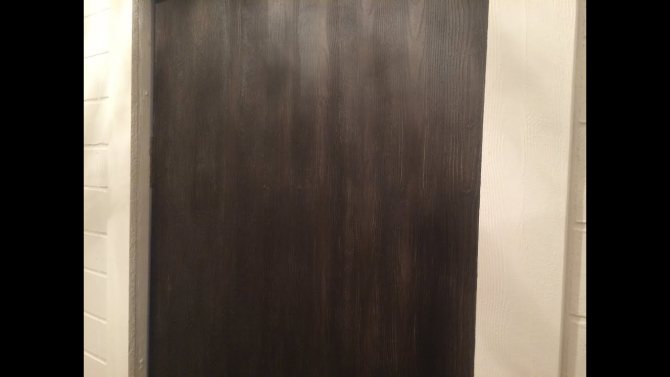
Before pasting the door with foil, carefully clean the surface
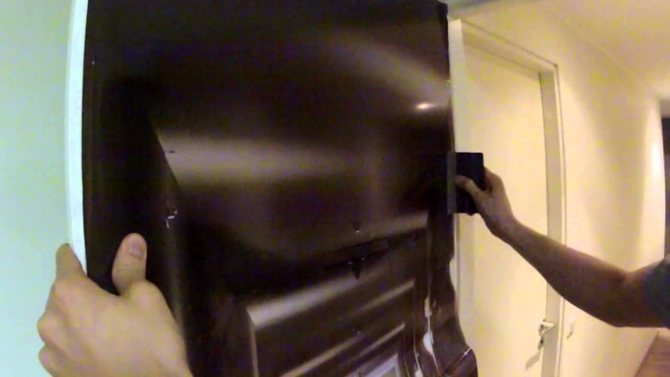
For convenience, the door can be removed from the hinges. It is also advisable to dismantle the handles and the lock, if any.
Helpful Hint: If there is glass in the door, the pasting process will take a little longer. In this case, you need to remove the glazing beads and dismantle the fragile material.
The surface of the canvas should be as smooth as possible, because the applied film will repeat any, even the smallest, unevenness. If the structure was originally painted, and its surface began to crack over time, then it is worth thoroughly removing the layer of old paint. After that, the surface must be degreased. Take a regular dishwashing detergent, dilute it with water and wipe the cloth with a cloth soaked in the solution. Then wipe the surface with a dry cloth. If there are flaws on the door, then fix them with putty. If there are bulges, carefully remove them with a plane. Next, sand the door with sandpaper until it is completely smooth and treat with acrylic primer.
Advice 2: How to glue the interior with carbon
Over time, the plastic panels in the car's interior will scratch and grow cloudy. The Carbon Fiber Kit is the perfect option to transform your car's interior.
- - details of the car interior;
- - carbon fabric;
- - epoxy resin for the base coat;
- - epoxy resin for the finishing layer;
- - hardener;
- - polish;
- - two pairs of latex gloves;
- - two cups for mixing;
- - two mixing sticks;
- - two tassels 2 cm wide;
- - sanding paper with a density of 120, 240, 400, 800, 1200;
- - instructions for using the carbon coating kit;
- - room thermometer;
- - film or unnecessary matter;
- - Screwdriver Set;
- - scales with an accuracy of one gram;
- - scissors;
- - home or building hair dryer;
- - soft non-woven cloth.
Cover the work area with plastic or unnecessary cloth. Make sure the room temperature is at least 25 degrees. Carefully unscrew and remove the plastic elements of the interior (dashboard, door panels, dashboard, etc.) from the latches.
When preparing the part for pasting, remove dust, grease and other contaminants from it. For stable adhesion and increased adhesion, sand the surface with 120-grit sandpaper. Remove abrasive dust by rinsing with water and wiping with a dry, lint-free cloth.
Combine the black resin with the hardener. Mix the ingredients thoroughly according to the instructions for the kit, measuring their amount on a scale. Apply a base coat with a brush to the entire surface of the part. Wait four hours, after which the resin dries, becoming slightly sticky.

Cut off a piece of carbon that completely covers the surface to be treated. Apply it to the center of the part and gently, with light effort, smooth it out to the sides. Make sure that the fabric is tight and does not form cavities or wrinkles, and the base layer does not seep through the fibers of the material
Carefully trim off excess carbon and tuck the edges under the detail
Mix the clear resin with the hardener in the correct proportions. Apply a thin, even layer with a brush, lightly saturating the carbon. If small air bubbles have formed, remove them by heating the surface with a hairdryer. After three hours of drying, coat the garment with another layer of clear resin and let it sit for eight hours until completely cured.
Sand the part from 120 grit to 2,000 grit in order, using all the sandpaper in the kit. To prevent the abrasive from clogging, periodically wet it with water. Once you have a perfectly smooth surface, polish it with a polish and a soft non-woven cloth to shine.
Application area
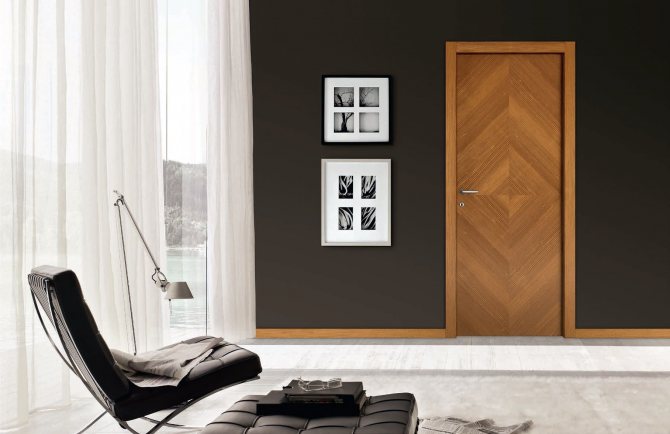
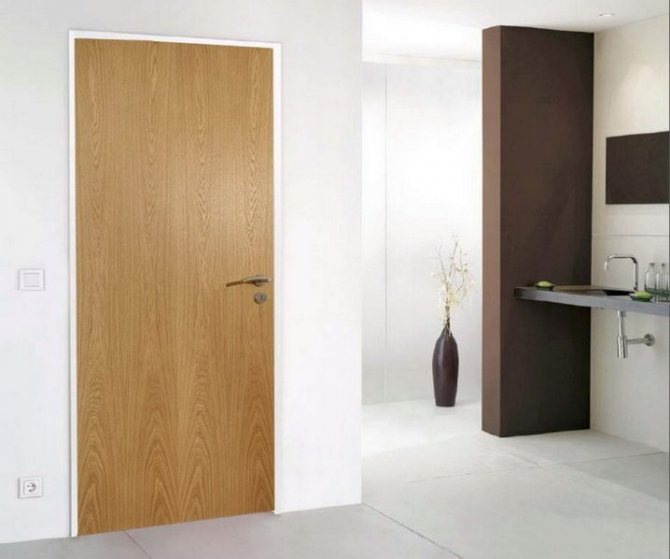
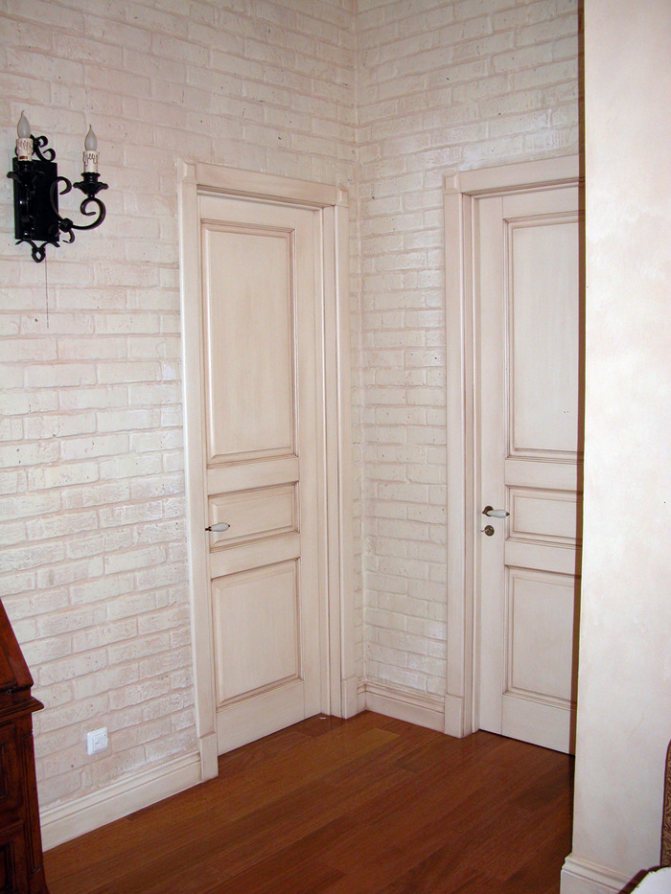
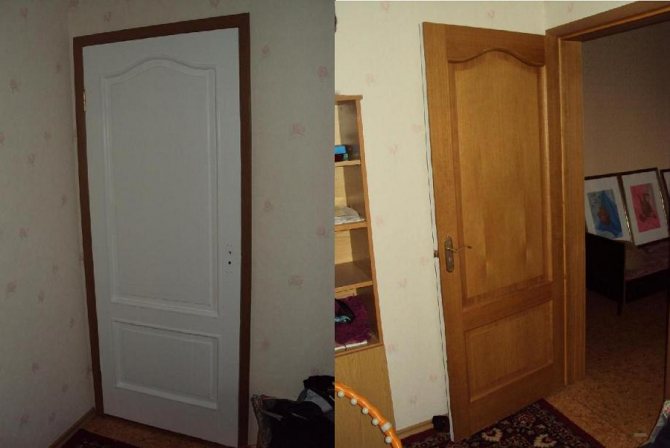
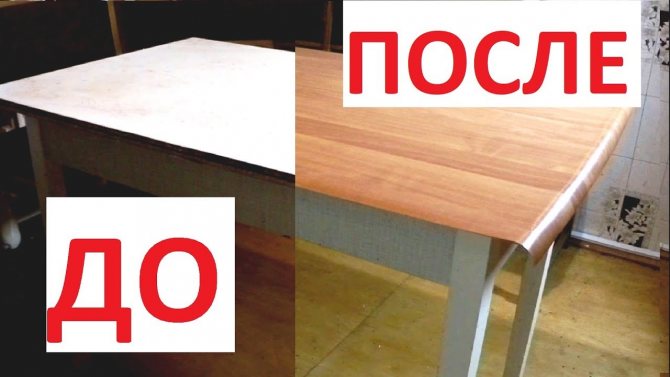
As you can see, the self-adhesive film has a lot of advantages.But the main thing is that it is universal and can be glued to almost any surface. Manufacturers recommend using the product for door cladding made of chipboard, MDV, PVC and other similar budget materials, which often have an inexpressive appearance and wear out quickly. And thanks to the self-adhesive film, you can completely transform the door leaf and make it pleasant to the eye. So, most people choose the material for pasting a natural wood. As a result, an inexpensive door acquires noble features and looks very presentable.
But it is worth noting that the film finish is used not only for budget door models, but also for metal structures. The question here is what goals are pursued by the owner of the home. For example, not everyone likes the graceful shine of iron, so people want to give doors a more traditional wood look. There are even cases when the owner wants to mislead possible intruders by concealing that the structure is actually made of metal. By the way, the film is often used to protect the surface, since even the most durable metal doors are exposed to adverse external factors. Therefore, if a large amount of precipitation falls in your region, then self-adhesive decoration of the entrance doors is more than justified - this way you will prevent metal corrosion.
Types and types of films for furniture
The variety of films is very large. They differ in the way of production, structure, surface, design, scope of application. Finished products consist of three main layers:
- External. Can be polyvinyl chloride, propylene, polyester. The most common are vinyl models. They are characterized by an affordable price and a longer service life.
- Kleeva. Serves for gluing the canvas to the surface, which can be almost any - wood, chipboard, MDF, chipboard, ceramic tiles, glass, metal, plastic.
- Protective. Presented by a film layer or paper, which are removed only immediately before starting work.
As noted earlier, calendered and injection molded versions are distinguished according to the production method. By structure: single-layer and double-layer. But the design of the material can be very diverse. It can imitate various types of wood, natural and processed stone, masonry and ceramic tiles, fabric, display various images and subjects.
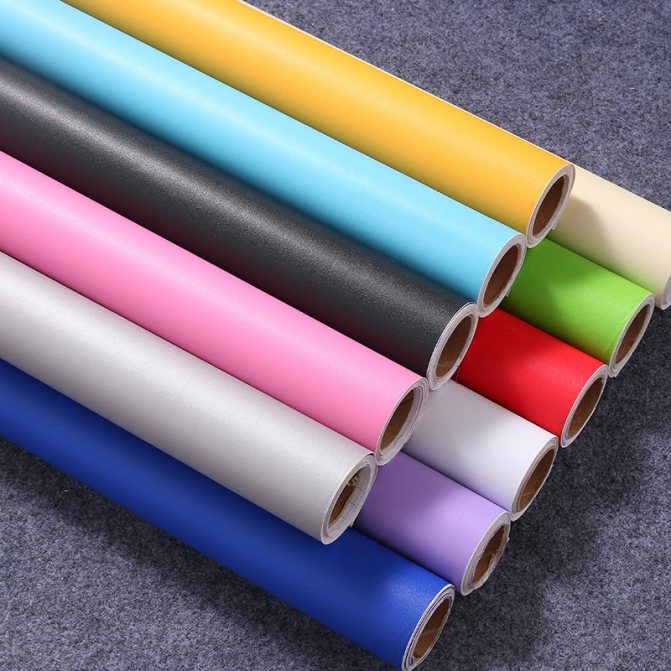
Colored films for furniture
Self-adhesive PVC foil is an excellent tool for decorating and renovating furniture. It has a wide variety of colors and textures. The material can be used to paste over old cabinets, cabinets, chairs, tables, shelves, giving them new life, partially changing the design of the room. However, before applying it, it is necessary to prepare the surface, to make it perfectly smooth.
The choice of a specific option depends primarily on the room. So, monochromatic models of various colors are suitable for decorating children's play and kitchen sets. A canvas imitating a stone can be used to decorate a decorative fireplace. To decorate the bedroom and living room, you can choose a surface that mimics natural fabrics such as velor and velvet to add extra softness to the furnishings.
Films for wardrobes, glass and mirrors
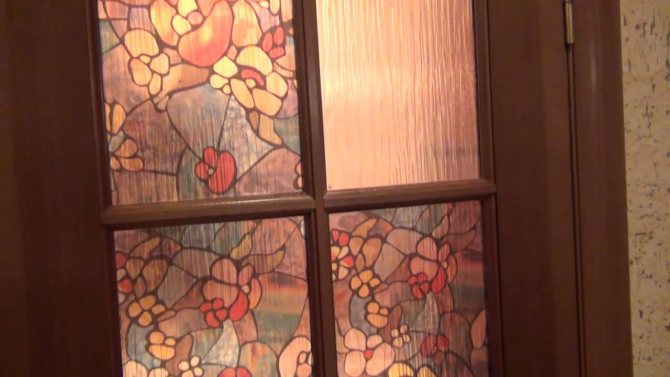
The technology of decorating glasses and mirrors with films allows you to expand design possibilities, to give the item in question individuality and uniqueness. Self-adhesive sheet acts as a surface protection against cracks and shattering of fragments, as well as an interior decor. For work, we use color, stained glass, as well as products with plot drawings and ornaments.
The color variants are used to color the transparent glass elements of the compartment.With the help of stained glass models, interesting patterns are created, while the material has a high degree of transparency. Decorative films, while maintaining good light transmission, help to partially or completely hide the contents of the cabinet, or close windows, glass inserts on the doors from prying eyes.
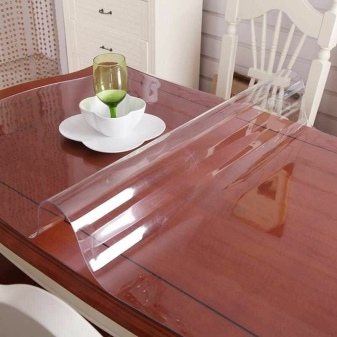
Design
The color scheme and decorative design of films for tables, regardless of the material of their manufacture, are very diverse. The most popular is the transparent protective film, which is practical and easy to use. It is versatile, well suited for tables with a pronounced texture of stone, wood or ornamentation. In this case, the beauty of the material will be preserved, and the surface is protected from damage.
Other types of decorative overlays are also popular.
- Patterned. It is a transparent film with monochrome graphic patterns. Such products have great expressiveness and visual appeal; they look good on kitchen tables with monochromatic lamination or plastic as a finish.
- Matte. They are transparent and colored, and often have a pronounced granular structure. Such materials have their advantages and disadvantages. For example, a colored silicone pad will be useful for protecting the surface when a child is working with crafts, paints, a fabric or wood burner. Lightweight PVC films of this type will hide minor surface imperfections on an old kitchen or worktop.
- With prints. Such films are considered decorative, they can contain almost any image: from romantic landscapes to cups of coffee. For school-age children, you can find overlays with formulas, examples, maps, or other useful prints.
- Transparent colored. Suitable for interior decoration and for organizing creative work. The films look bright, are lightweight, and can be easily removed for storage if necessary. You can find both glossy and grainy varieties.
How to properly stick the self-adhesive film?
You need to start gluing with the preparation of the material. The door must be dismantled from its hinges and placed on a flat surface.
If glass elements are present, carefully remove them. In advance, you should prepare the tools with which you will be able to achieve the result.
Preparatory stage
Before you glue the interior doors with self-adhesive foil, you need to prepare them. Use tools and additional tools. If the design of the web is broken, it is leveled on special equipment. Additionally, you can replace or lubricate the hinges, install a new handle.
The preparation stage requires the following tools:
- brush;
- sandpaper;
- putty, primer (if the door leaf has deformations);
- corner, ruler;
- pencil;
- degreaser;
- hairdryer;
- spray;
- plastic spatula.
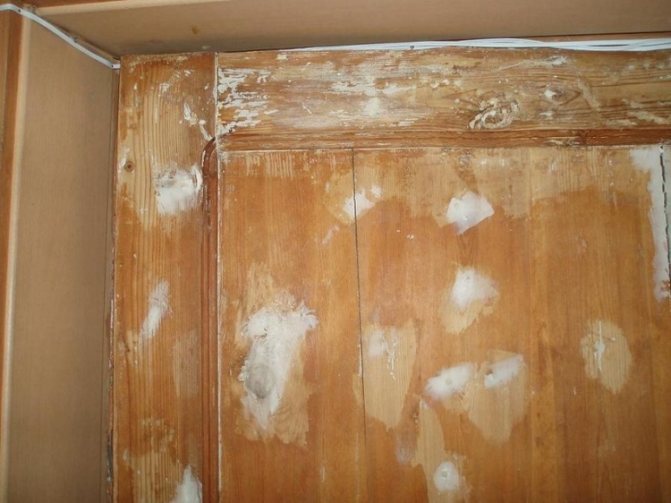
For reliable fixation of the finish, irregularities are removed from the canvas. If cracks and chips are left behind, they will be visible. The main activities include degreasing, grinding. The preparatory steps depend on the type of old finishing material. The old paint is removed completely, then the surface is treated with sandpaper.
Attention! It is not necessary to wash the lacquer protection - you can rub it with fine-grained sandpaper to get rid of minor damage. Degrease the door with soapy water, which is applied to the areas where the self-adhesive will be located. In the household department of the supermarket, you can find a degreaser designed specifically for this purpose.
To eliminate cracks, chips, unnecessary holes, the canvas is putty and then primed
In the household department of the supermarket, you can find a degreaser designed specifically for this purpose. To eliminate cracks, chips, unnecessary holes, the canvas is putty and then primed
Degrease the door with soapy water, which is applied to the areas where the self-adhesive will be located. In the household department of the supermarket, you can find a degreaser designed specifically for this purpose. To eliminate cracks, chips, unnecessary holes, the canvas is putty and then primed.
Pasting technology
The technology of application of the material is indicated on the back of the package. It may differ slightly from manufacturer to manufacturer. There are options with a high density - they reliably protect the coating and serve for a long time, but their application is complicated.
Sticking consists of the following stages:
- Measurements. You can mark the dimensions of the door on the inside, where the auxiliary lines are drawn. It is necessary to add a few centimeters to the measured width and length as a margin for the ends.
- Open it. An important stage at which, if you carelessly, you can ruin the sheet. You can cut a piece with a knife or large scissors.
- Sticking. It is necessary to separate the protective paper by 10 cm and fix the material to the upper edge of the canvas.
- Gradually peel off the rest of the paper, smoothing the canvas at the bottom and sides. A rag or a plastic spatula copes with the task ideally.
- The ends are pasted over by pressing firmly. If necessary, trim the edges with scissors.
Hazardous areas are corners and ledges, so these areas need to be warmed up with a hairdryer. Hot air softens the material, which in this form will be firmly fixed. The foil finish slightly increases the dimensions of the door, which will make the closing tight. To solve the problem, you need to remove a small amount of chips from the box. Now you know how to stick the self-adhesive film on the door.
Features of the
Table protectors have gained particular popularity since open furniture designs became fashionable. On a transparent glass module or a polished bar, smooth ceramics, even cups leave noticeable marks, not to mention scratches that easily appear on such surfaces. In order not to sacrifice aesthetics, in the countries of Asia, where such coatings are especially popular, they came up with special inconspicuous overlays to protect against damage.
They can replace the tablecloth with a decorative cover. But much more often completely transparent options are used, suitable for both a desk and glass in the dining room, living room. In most countries of the world, overlays on the tabletop are called cribs. They are glossy and matte, have different shapes and thicknesses, and fully protect the surface from possible mechanical or thermal damage.
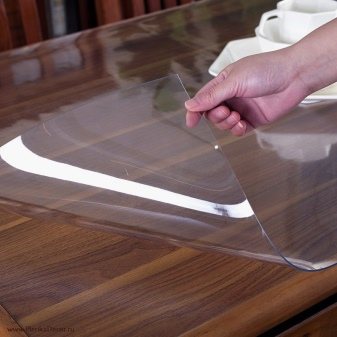
Today on sale the film on the table is most often presented under the name "liquid glass". We list all the properties of this material.
- Stealth. The overlay does not overlap the surface of the table if you want to preserve the texture and pattern of its surface.
- Protective functions. The coating prevents fading under the influence of ultraviolet radiation (the film itself does not turn yellow due to the addition of blue pigment). In addition, it protects against the penetration of active dyes, moisture and chemicals into the structure of the material.
- Heat resistance. There are no traces of hot plates, cups or other dishes on the table. You can fearlessly put a kettle, a saucepan.
- Versatility. In the kitchen, such a film can be used to protect the work surfaces, in the office - a desk. The coating is indispensable for transparent, polished, lacquered smooth materials that easily lose their appearance. When laying on a chipboard slab, it is possible to reduce the risks of moisture penetration into the seams.
- Functionality. Under the film on the desktop, you can store important notes, phone numbers on stickers.If you want to decorate the interior in an original way, you can make a collage of photos on the countertop, and then cover it with protective "liquid glass".
- Ease of cleaning. It is enough to wipe the material with a damp sponge or cloth - no need to use aggressive chemical agents for cleaning.
- The tightness of the fit. On smooth surfaces, the material always lies tightly, without shifting. But if you lay such a coating on an ordinary polished wood, other rough materials, the contact ability will be noticeably reduced.
For the production of such coatings, hypoallergenic materials (silicone, PVC) are used, which ensure complete safety during use. The film is easily rolled into a roll during storage or transportation, it is not afraid of cracks and creases.
Pasting the cabinet
The process of updating furniture with film is simple, but it requires patience and knowledge of how to glue the cabinet and what tools are needed.
Required tools and materials
To start updating cabinets, in addition to adhesive cloth, you will need a number of tools at hand:
- ruler or tape measure;
- pencil or marker;
- scissors, stationery knife;
- silicone spatula or dry rags;
- spray bottle with soapy water;
- hairdryer.
Preparation
Gluing a polished cabinet with self-adhesive tape begins with surface preparation. All removable accessories are removed from the very beginning. For convenience, you can remove the doors from the hinges.
It is necessary to carefully inspect all furniture for protruding fasteners, chips and cracks in the coating, since in the future all these defects will appear. Self-tapping screws and bolts just need to be tightened with a screwdriver or a key, and it will be more difficult to cope with irregularities. You will have to level the surface with a putty, and then sand it with sandpaper.
After leveling, they proceed to cleaning and degreasing using any detergent and ethyl alcohol.
If the cabinet is made of uncoated wood, MDF or chipboard, a thin coat of furniture primer can be applied to enhance adhesion and allowed to dry.
Wrapping the cabinet
When gluing the film, 2 methods are used - wet and dry. The positive outcome of the whole process will depend on the choice of the right one.

With dry pasting, you must first separate a small section of the substrate, freeing the adhesive base, attach the film to the fixing point and level it. Further, as it is glued, the substrate is pulled back, and the sheet is gradually fixed and aligned in parallel with a silicone spatula.
If the question arose about how to properly glue the old cabinet completely and at the same time eliminate the likelihood of creases and other defects, it would be better to use the wet method.
The process consists in sticking the film on a damp base, which will allow you to correct mistakes immediately during the work.
To moisten the adhesive layer, a spray gun is used in the "fog" mode. For this, the substrate is completely removed. For wetting, prepare a soapy solution of 10 ml of detergent and 1 liter of water. The main rule with the wet method is not to overdo it with moisture. This greatly slows down the adhesion and leads to the material slipping off.
The prepared canvas is placed on the cabinet and moisture is squeezed out from the center to the edges, while holding the surfaces together. The remaining solution will completely evaporate after 48 hours. After a day, you need to process the canvas with a roller again.
In the same sequence, we glue over all the walls and facades.
Video description
The video shows ideas for updating furniture with self-adhesive -
Stage 1 - preparation for gluing
The technology for working with self-adhesive is the same for different surfaces, i.e. renovation of doors, cabinets, glass furniture, etc. is carried out according to the same scheme.
To glue the film, you will need the following tools:
- a stationery knife for cutting material (you can use a construction one);
- a piece of soft-textured cloth to remove wrinkles;
- roller to eliminate air under the cover.
Also in the process, a primer mixture and a solvent will come in handy. For sanding the surface, you can use special paper of medium dispersion.
Tools make it easy to work with self-adhesive tape
Stage 2 - what to do with furniture
Once fully equipped with the tools listed above, you can move on to the second stage of the process. Here it is necessary to carefully work with the glued surface.
Before sticking the self-adhesive tape, you need to follow only 3 simple steps:
- step 1 - surface treatment with a primer mixture to increase tenacity and better bond the planes;
- step 2 - elimination of errors in the form of chips, cracks, etc. by filling the voids with putty and further grinding the dried material;
- Step 3 - degrease the furniture with a cloth soaked in solvent.
After processing the furniture before gluing, there will be a perfectly flat surface under the film.
Stage 3 - how to stick the film without bubbles
Air bubbles and folds that accumulate when gluing the film spoil the appearance of the product. Accurate adherence to technology will eliminate the appearance of this problem.
To understand how to apply bubble-free self-adhesive film, you need to follow the instructions in three steps:
- step 1 - accurate measurement of the renewed piece of furniture;
- step 2 - cutting the roll with a clerical knife;
- step 3 - covering the surface with a film.
There is another method of gluing using a solution of soap and water. This method is relevant when updating surfaces with a large area, most often doors.