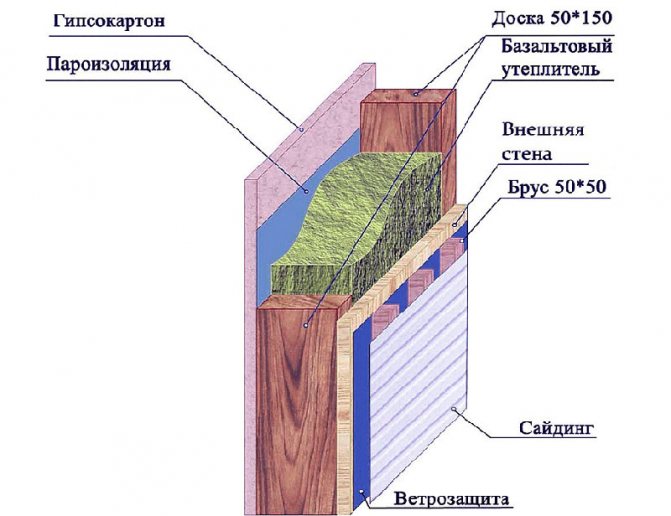
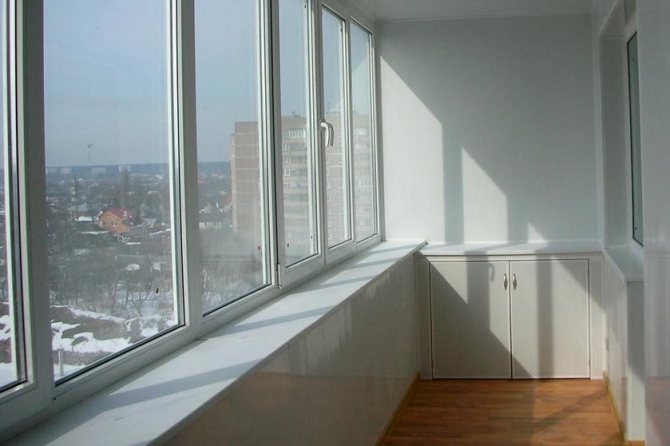
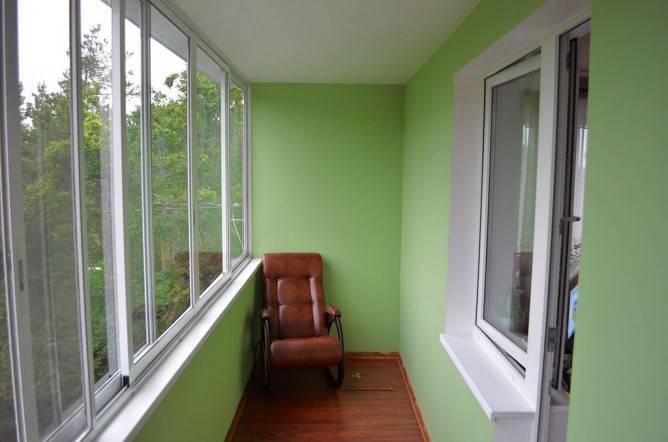
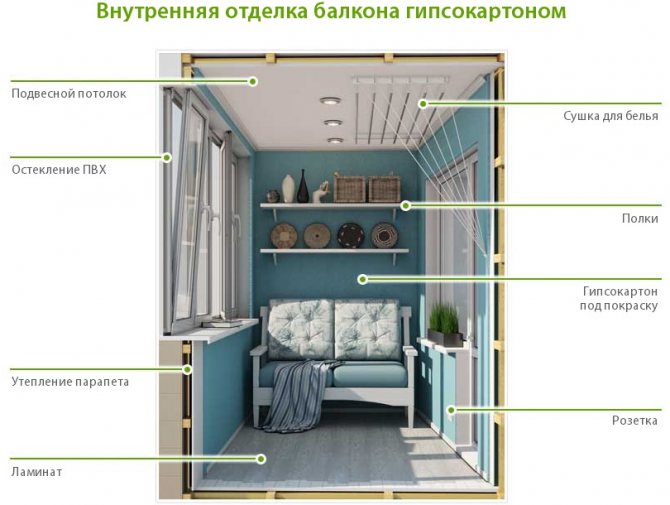
Before decorating a balcony or loggia, it is necessary to make even walls for this, drywall is perfect. This material is in demand due to its characteristics: ease of installation, flexibility, the ability to correct any curvature of the wall, environmental friendliness and availability.
In this article, we will analyze the advantages and disadvantages of this material, as well as, thanks to the step-by-step instructions, we will carry out the installation with our own hands.
Which gypsum board to choose for installation on the balcony
Determine which type of drywall sheet on the loggia or balcony is more acceptable, taking into account its main classification. Immediately, we note that its weight and strength depend on the thickness of the sheet, respectively, the scope of its application is partially determined by these parameters.
The largest manufacturers of gypsum plasterboard distinguish the following types:
- Ordinary drywall, without the addition of special additives, can be used in dry heated rooms with a natural humidity level.
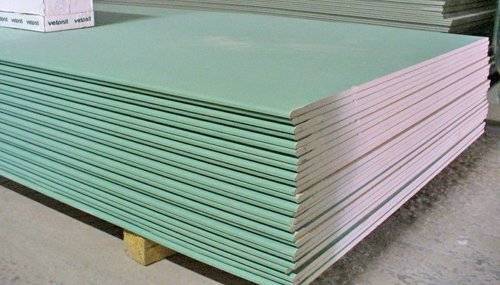
- Moisture-resistant drywall is recommended for use in rooms with high humidity, as well as where condensation can form, for example, slopes, a balcony, a bathroom, a bathroom, a kitchen.
- Refractory GCR in its coating contains additives that restrain direct fire. It can be used near fireplaces, stoves and other sources of high temperatures.
As you can see, from this classification, moisture-resistant drywall is the most acceptable for installation on a balcony or loggia. For installation on walls, it is recommended to use thicker sheets (from 8 mm), and on the ceiling, you can use a thin 6 mm gypsum board.
Pre-lathing
The process of installing drywall requires careful manufacture and installation of the lathing, which ensures the strength of the entire structure.
Lathing options for finishing The action plan is as follows:
- We clean the walls from the previous coating, remove dust, dirt, debris as much as possible.
- We get rid of cracks and irregularities, cover the work surface with an antiseptic.
- We start the layout - we draw a line in the very center of the room (on the ceiling).
- Next, we retreat 5 cm from the corner of the ceiling and draw a strip along the entire balcony or loggia.
- We make markings along the walls in such a way that there are three lines for fastening per gypsum sheet.
- We prepare wooden blocks according to previously taken measurements.
- Using a punch, we drill holes, and then fix the frame with dowels.
- Next, we prepare the insulation material, leaving a margin of 2-3 cm.
- We fix the insulation with a construction stapler.
If the room itself is warm enough, additional insulation of the walls and ceiling need not start. In this case, it is advisable to glue drywall onto the cleaned and prepared walls with special glue.
The preliminary stage is insulation
The sequence of work when sheathing the balcony with plasterboard
Installation work is not particularly difficult if carried out together with a partner. Also, it will not be superfluous to study the algorithm of actions in advance so that the final result of the repair will please with its quality.
Preparatory work
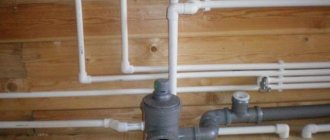
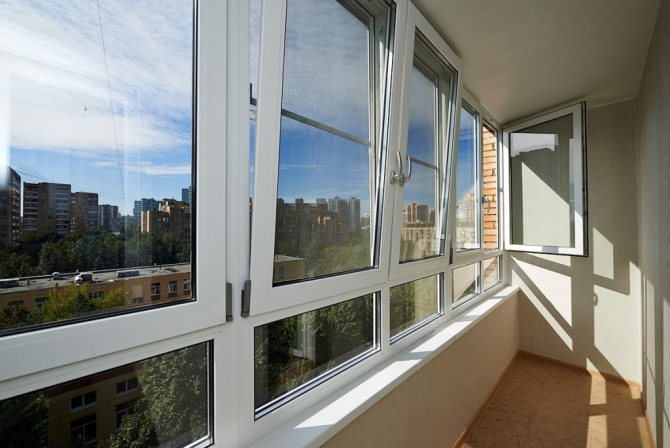
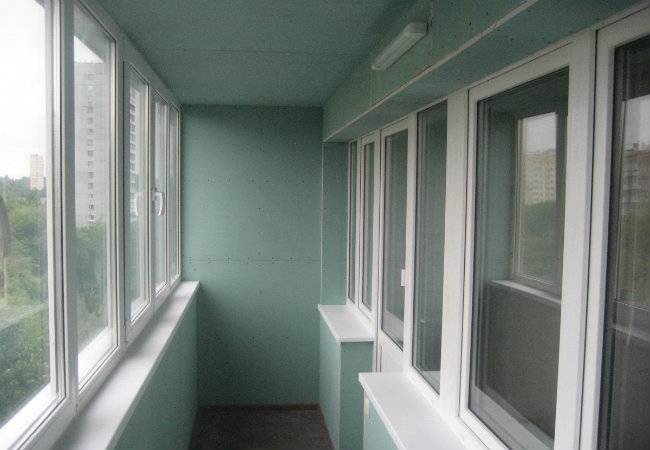
Before finishing the loggia with plasterboard begins, the installation of all the necessary communications must be completed. If possible, it is necessary to install new double-glazed windows, as well as carefully prepare the walls for finishing.
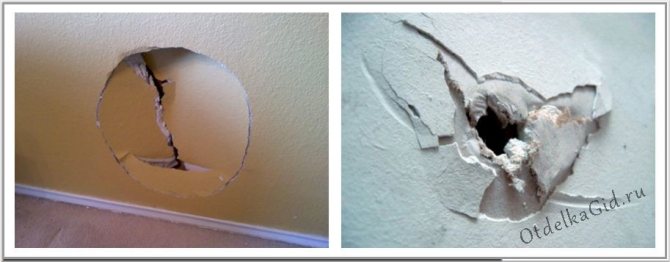
The wall surface on which the plasterboard structure will be attached should be examined for cracks and possible breeding grounds for mold or mildew. If this moment is missed, then it will be very difficult to correct such shortcomings in the future.
The cleaned walls and ceiling of the balcony must be primed. Among the variety of primers, it is better to choose the one that contains PVA glue. After its application, a very stable film is formed on the surface, which can become reliably sewn up for many years.
We select materials and tools
In order not to waste time looking for the right tool during the installation of drywall, it is better to prepare everything in advance. For the installation of drywall structures, you may need:
- water or laser level;
- waterproofing, heat-insulating and vapor barrier material;
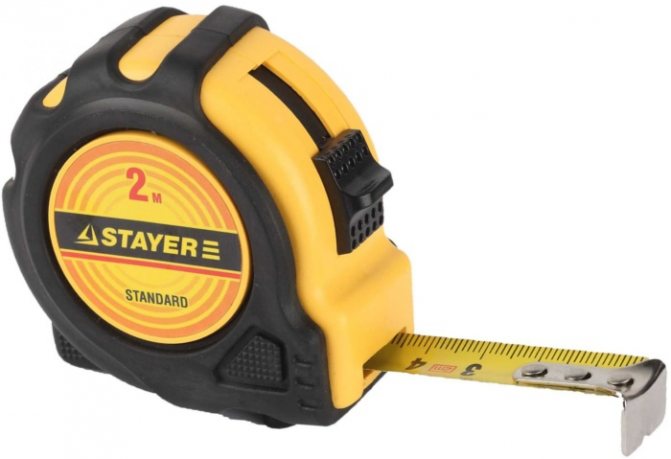
- tape measure, ruler;
- fasteners (dowel - screw or dowel - nail);
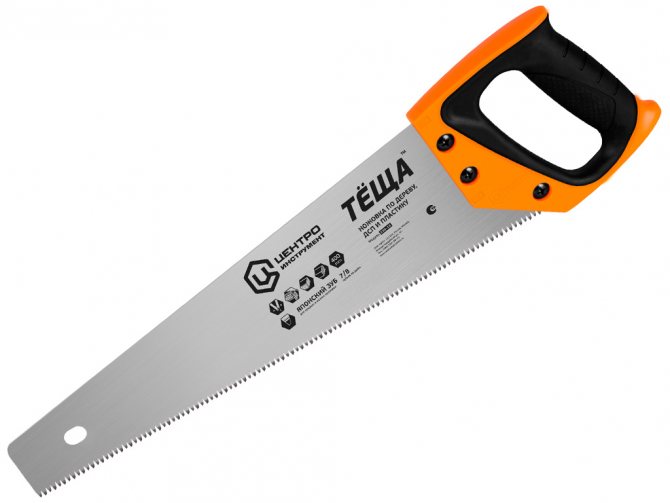
- hacksaw for metal, jigsaw;
- a hammer;
- guides and metal profile;
- puncher;
- screwdriver;
- polyurethane foam;
- putty;
- drywall.
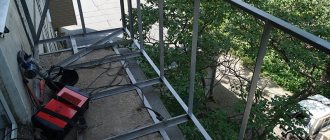
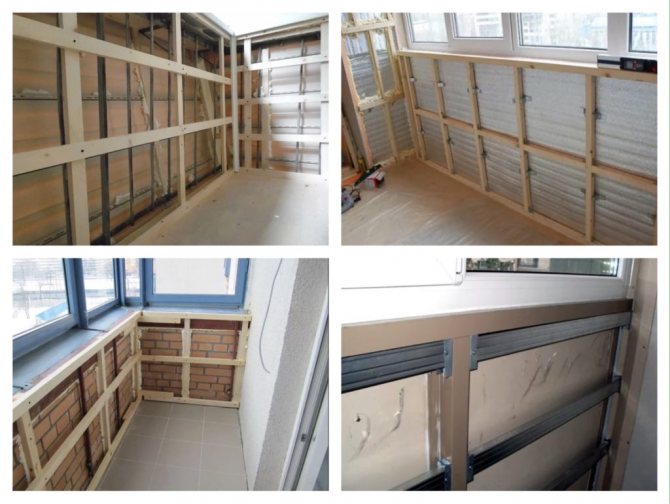
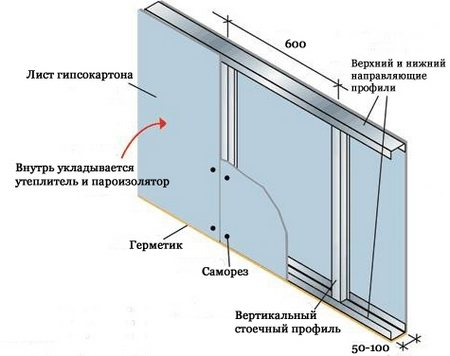
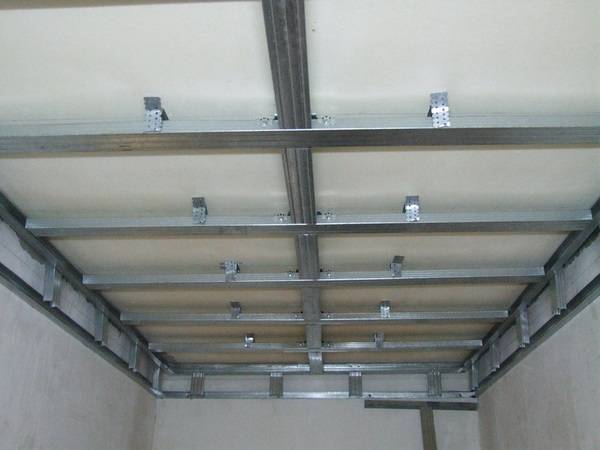
Installation of guide profiles and frame
Finishing the balcony or loggia with drywall sheets begins with the installation of the frame, on which the finishing material will be attached in the future. This process is rather complicated, laborious, requiring accuracy and attention. But the quality of the work performed depends on how the finishing will go in the future and the final result of the repair. For the frame, you can use both wooden slats and a metal profile.

After the area of the surface to be trimmed has been measured, profiles or strips of the required size are cut. The ceiling and walls are marked and the center line is marked in the center. The rest of the lines are drawn perpendicular to the axis. The frequency of the tags is every 30-40cm. Guide profiles or wooden battens are fixed to the wall surface. To do this, make holes with a puncher and use dowels to attach the profile to the wall or ceiling.
Initially, the planks are not fully fixed. Before rigidly fixing the guides, using a level, the horizontal and vertical of the frame are checked and only after that all the guides are rigidly fixed.
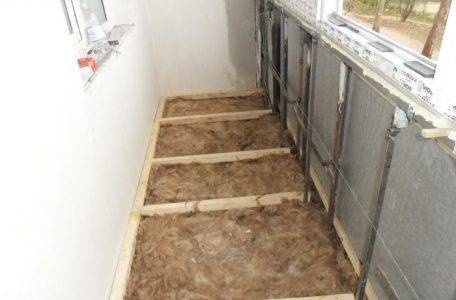
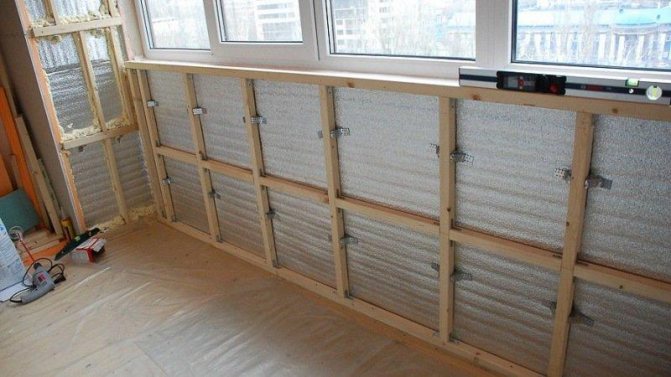
We insulate a balcony or loggia
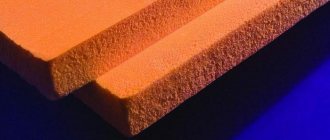
The best option for insulating a balcony is polystyrene foam. Having a small thickness, this heat-insulating material retains heat well. It is also worth noting its low cost. Styrofoam will be an alternative to expanded polystyrene. Sheets of this material can be easily cut and inserted into the crate. The insulation is fixed with special plastic dowels "umbrellas". It is necessary to position the fasteners at the corners of the sheet. A small gap should be left between the insulation and the frame guides, which is blown out with polyurethane foam.
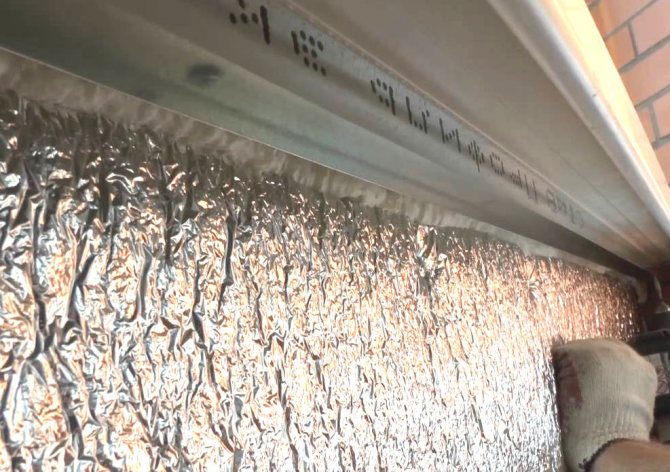
After the installation of the heat-insulating material is completed, the entire structure is covered with foil vapor barrier. It is attached to the frame with a stapler. The vapor barrier roll foil protects the walls from the effects of steam and moisture, which is very important when arranging a balcony.
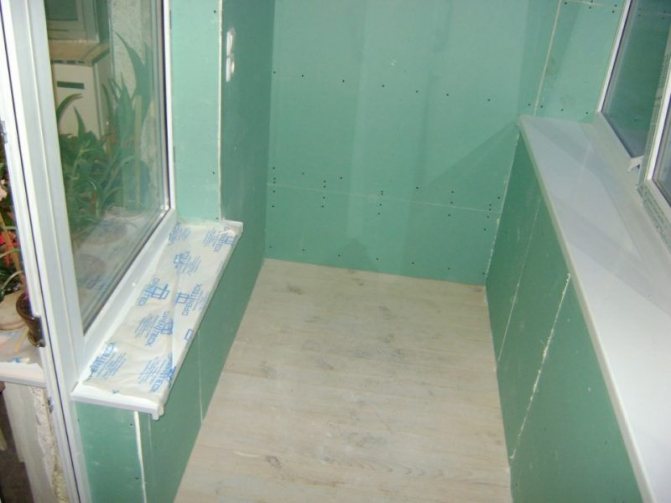
Fasten drywall sheets
We prepare the material. Cut out sheets of the required size. If necessary, we make holes in the drywall for the lamp. On a sheet of drywall, you should cut the chamfer at an angle. This will prevent further deformation of the sheets and improve the quality of the finish.
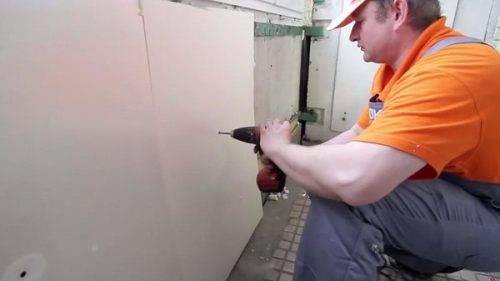
Drywall sheets are attached to the frame with self-tapping screws. Fasteners are fixed in 20 cm increments. The screw cap must be hidden in the thickness of the drywall sheet.
Finishing works
The assembled plasterboard structure is prepared for painting. For this, the surface is impregnated with a primer, the seams between the panels are putty. All plasterboard finishing is covered first with starting and then finishing putty.
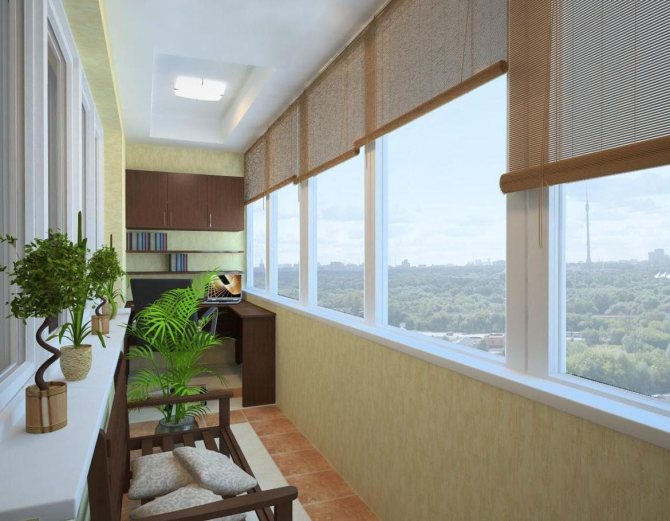
Having studied in detail the stages of finishing the balcony with plasterboard and the features of the material, you can not only save money, but also quickly create a cozy, beautiful restroom with your own hands.
What are the basic steps to follow
Let's take a look at what the step-by-step instructions for finishing the loggia with drywall look like. Obviously, it can be applied to the balcony as well.
- Surface preparation. At this stage, it is necessary to dismantle the current finish so that it does not interfere with us. Make sure that the base is solid and that old plaster does not fray.
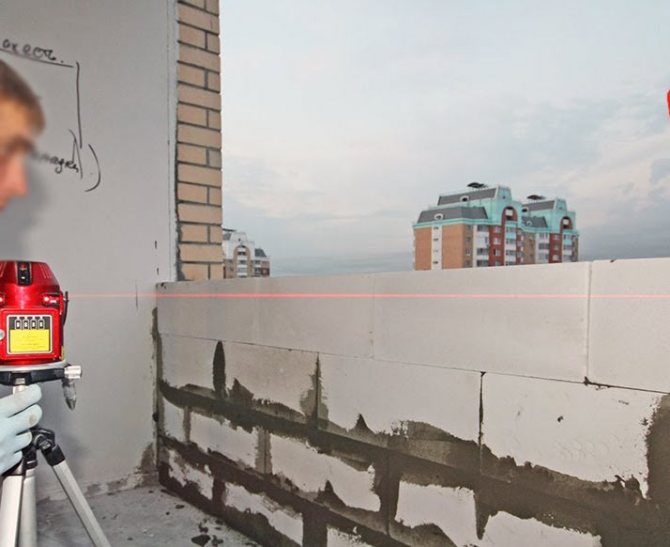
- Marking. With the help of a level, plumb line, tape measure and other auxiliary tools, markings are made for the future frame.
- Assembling the frame. With the help of correctly selected profiles, a crate is made, to which drywall will be attached.
- Heat and vapor barrier. Insulating material is inserted into the frame, and then a vapor barrier is made. Some believe that it is possible to insulate the balcony with drywall, but foam, mineral wool or other insulation will give an even greater effect. Therefore, they need to be used in conjunction, and not rely on only one GCR.
- Plasterboard installation. At this stage, it is necessary to cut the gypsum board to the desired size and attach it to the crate.
- Finishing work includes priming and puttying of the previously laid sheets.
This is how the main stages of work look like. Next, we will consider them in more detail so that there are no more questions left about the process.
Drywall selection
For cladding a loggia or balcony, you can use only moisture-resistant drywall. Anyone else will damp in a fairly short time. Moisture-resistant drywall is much more resistant to moisture and, moreover, is treated with special substances that prevent the formation of fungus.
Is it possible to sheathe a balcony with poor quality plasterboard? This finishing material, like any other, can be made in violation of the production technology, so an inexperienced craftsman is not always able to choose a high-quality material. As a rule, such a finish will need to be redone as soon as possible after the end of the work. Before you go to the store for drywall, you need to get comprehensive information on how to choose the right drywall for finishing a balcony or loggia. Which drywall is better for a loggia and a balcony is not difficult to figure out
When choosing this material, you should pay attention to the following points:
- If there is an opportunity to purchase gypsum plasterboard at a large retail outlet, then this must be done. Such trade organizations value their reputation and take goods for sale in large quantities from trusted manufacturers.
- It is advisable to inspect each sheet of drywall for abrasions, scratches and distortions. In the presence of even minor mechanical damage, the plasterboard sheet must be set aside and a perfectly flat one must be chosen.
- You should not buy drywall, the price of which is significantly lower than the average. Trying to save money, you can lose significantly more money by purchasing a low-quality product, which may not look different from a good material, but during operation, a plasterboard wall may bend or gypsum will begin to crumble between the cardboard layers. The easiest way to protect yourself from poor-quality purchases is to purchase material from well-known manufacturers. Among the drywall manufacturers, the most famous and popular are Knauf, Rigips and Lafarge. The products of these companies will cost much more, but you don't have to worry about the quality of the plasterboard material.
Pros and cons of drywall
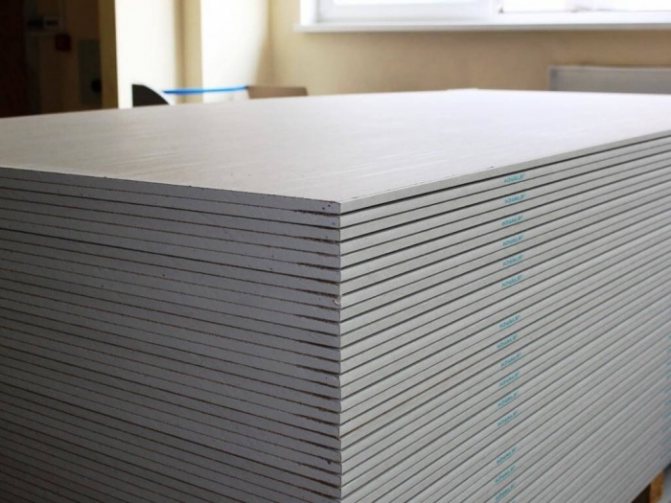
Drywall is a layer of gypsum covered with cardboard on the outside. It is used for cladding ceilings and walls in a house.The flexibility of the material allows making wall and ceiling structures of almost any complexity on its basis. Balcony cladding with plasterboard has the following advantages:
- Leveling surfaces of any degree of curvature. While with plaster (the main "competitor" of drywall), you can level a maximum of a wall with a 1.5-centimeter thick curvature;
- Cleanliness of work, because of which this material is also called "dry plaster";
- The ability to hide small pipes and electrical wiring under the interior plasterboard;
- Soundproofing;
- Simplicity and speed of work, the ability to create multi-tiered suspended ceilings;
- Possibility of placement on the balcony under the plasterboard sheathing of steam and heat insulation;
- Hygroscopicity, due to which air exchange is maintained between the wall and the balcony;
- Affordability due to low prices;
- Variety of lighting: the use of built-in lamps, ice backlighting.
Plasterboard balcony cladding has many advantages.
But, like all materials, drywall is not alien to the disadvantages. These include low resistance to mechanical stress.
Also, the sheathing is located at a certain distance from the wall, which as a result reduces the volume of an already small room. Well, ordinary drywall is not resistant to moisture. But this disadvantage is easy to fix. It is enough to choose waterproof plasterboard for covering the balcony. How is it different from the usual one? We'll find out now.
Advantages and disadvantages
Drywall is popular with professional builders and newbies. It is easy to use, suitable for a variety of surfaces and has many positive properties. The material consists of a solid panel, glued on both sides with construction paper.
Distinctive features of drywall:
- Light weight. The panels are easy to transport due to their compactness. Also, this property simplifies the assembly of parts.
- Environmental friendliness. The absence of harmful emissions makes the material safe for human health.
- Ease of processing. Drywall is easy to cut, so you can get parts of any size. This is especially important when rooms with a non-standard area are sheathed.
- Non-flammability. The material is resistant to high temperatures, almost does not burn.
- Thermal insulation. This feature allows you to create a comfortable microclimate on the balcony and maintain a comfortable temperature for a person.
- Soundproofing. The balcony, lined with plasterboard, will be quiet, it will not hear noises from the street and from the apartment.
- Affordable price. Drywall is lower than natural wood panels, at the same time it is of high quality and has a decent appearance.
Work order
For the most effective balcony decoration, follow the instructions below:
- remove the old flaking finish;
- fill all the cracks well with polyurethane foam;
- if necessary, remove all fungal infections and prime the walls;
- mark the frame. We must not forget about level control and the need to install a sufficient number of fasteners (profile or bar along the edge of the sheet under the ceiling and near the floor);
- fix the frame elements to the walls. It is recommended to make a crate with horizontal slats with a pitch of 40 - 60 cm for reliable fastening inside the thermal insulation frame;
- lay the thermal insulation in such a way that it fits snugly into the frame, without creating voids, but also not protruding outward;
- cover the frame with a layer of vapor barrier, glue the joints with tape (the foil side should be directed towards the inside of the room);
- fasten the drywall as tightly as possible at the joints with the window sill, wall, in the corners, etc., leaving about 1 mm for possible movement of the sheets due to temperature changes;
- scroll the gypsum board with self-tapping screws every 15 - 20 cm, you also need to monitor the depth of their screwing. The durability of the drywall structure largely depends on this;
- putty the joints, screws and corners of the structure;
- after applying the primer and drying it completely, you can proceed with the finishing.
Drywall on the balcony is installed on a frame made of wood or metal and lined with a sound and heat insulator.
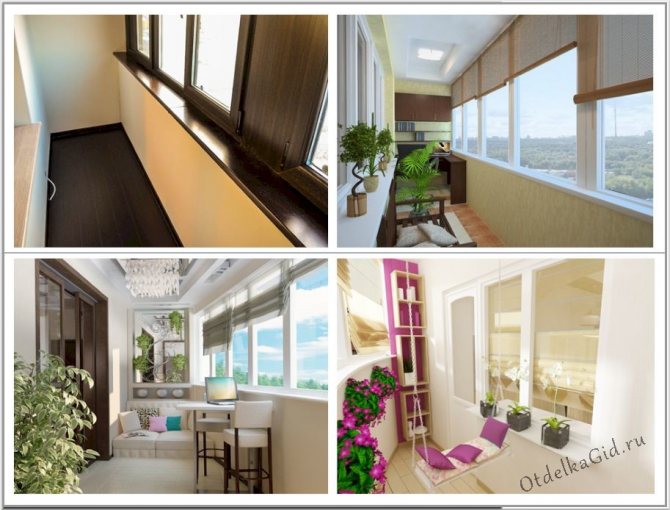
Possible finishes
There are tons of ways to transform your balcony:
- corrugated board;
- plastic lining;
- PVC;
- plaster;
- drywall.
Why are we sticking with the latter and not using something else? It's all about the price and simplicity of the work performed. Moreover, after using the gypsum board, the walls can be finished with any topcoat. The price of plasterboard sheets is lower than that of other decorative finishing materials. And not everyone is able to qualitatively install the same lining or the same PVC panels. If some kind of jamb comes out of the gypsum board, then it can always be hidden by the finish.
Which is better, plaster or drywall on the balcony? This question is already more complicated. The fact is that plaster can also be redone to perfect condition, but not everyone can do it. After this method, you will have to carry out cleaning for a long time. Moreover, curved walls with plaster cannot be leveled without special skills. And the insulation cannot be hidden under it.
For a better comparison and choice of materials, it is necessary to analyze their pros and cons.
Resistant to wet environments
Plasterboard walls also have their pros and cons when installed in wet rooms.
It is important to choose the right material here. There are at least 3 types of drywall on sale, depending on the possible operating conditions:
Moisture resistant drywall
- moisture resistant;
- refractory;
- normal.
Each of them has its own advantages, as well as designs from it. If the sheet does not burn out from the fire, then from direct exposure to water and the gypsum plasterboard it will become completely unusable. But this will only happen to a lesser extent than with conventional dry room material. Gypsum is gypsum, you can add hardeners and hydrophobic components to it, but it will not change its main property - hygroscopicity, as a result of which it swells.
This is another of the few disadvantages of drywall and its structures. Therefore, due to the possibility of flooding by neighbors from above, it is not recommended to build partitions and ceilings from ordinary drywall. This can lead to additional financial and nervous waste. It is better to use materials that are more resistant to moisture, for example, a foam block, and it is better to make the ceiling stretch or suspended without using drywall.
Drywall walls also have pros and cons in terms of versatility and practicality. By creating a structure from this material using frame technology, it is possible to perfectly hide the elements of communication in it without much difficulty. Pipes, wiring, ventilation ducts. But again, if there is a threat of flooding, it is better to use GKLV sheets. They have a distinctive feature - green cardboard.
Decorative plasterboard partitions
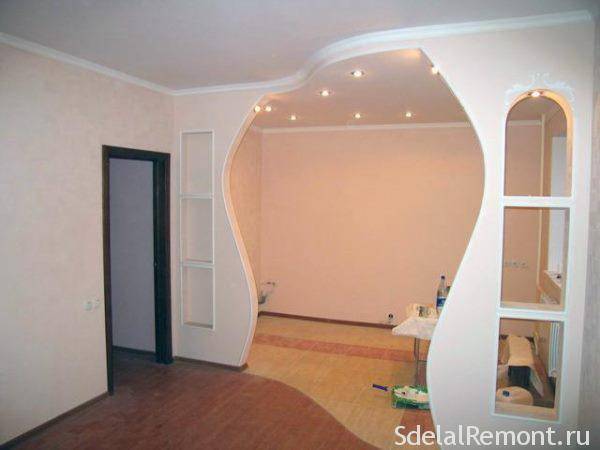
But the main advantage of drywall is that only from it you can make whole works of art and unique compositions:
- arches;
- bar counters;
- decorative designs in the art nouveau style;
- huge massive columns.
Decorating the loggia with moisture-resistant plasterboard with your own hands
Have you decided to sheathe the balcony with plasterboard yourself? Pay attention to moisture resistant drywall. The most suitable material for the balcony
There will be no mold or mildew, you will not be afraid of a fire either.
The light green sheet consists of a couple of layers of cardboard, inside there is a gypsum filler. Impregnated with a moisture-repelling compound.
Don't want to overpay money? Let's calculate the amount of drywall correctly. Measure all the walls, subtract the area above the railing, but feel free to include the window and balcony door in the calculations. But count the required amount of insulation without windows and doors.
One drywall sheet requires 70 self-tapping screws, and a dowel - nails - 5 pieces per bar.
See what you need to repair your balcony yourself. Perhaps you have something at home or you can borrow from a neighbor.
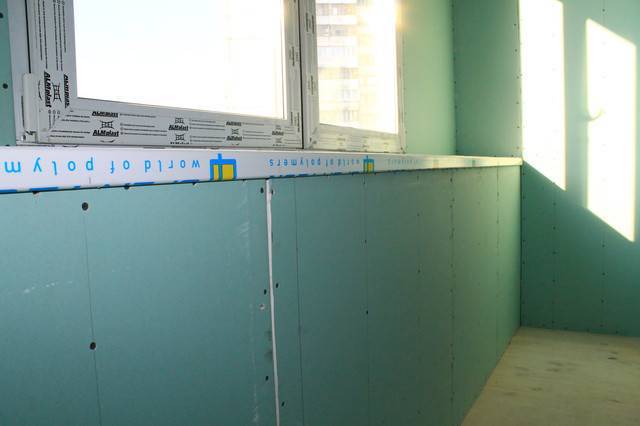
Moisture-resistant drywall has a green tint
We purchase the following materials in the store:
- Drywall;
- profile or bar for lathing;
- self-tapping screws for drywall;
- insulation;
- putty;
- primer;
- paint.
You will need the following tools:

Screwdriver
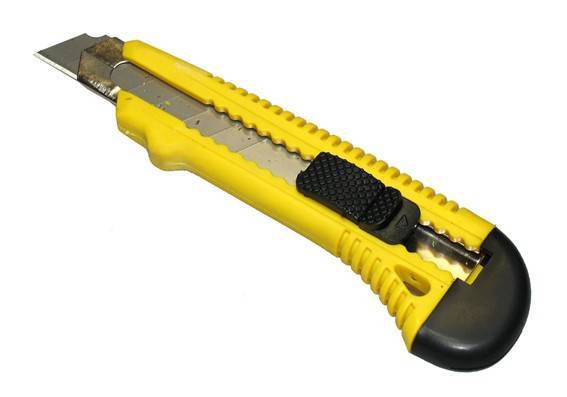
Stationery knife
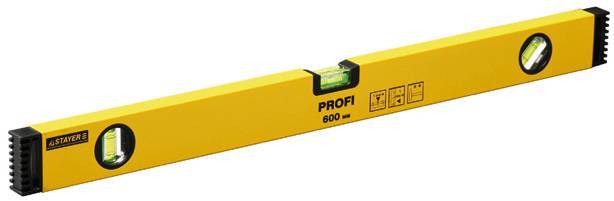
Building level

Perforator

Roulette Pencil

Hacksaw
First, get rid of the old plaster, of all cracks, apply a waterproof filler. Treat the walls of the balcony with a primer a couple of times and you will not think about mold for a very long time. The preparatory work has been left behind and you can proceed with the installation of the crate.
The metal crate will serve you for a very long time, but the wooden version is also not bad, and it is easier to work with.
Install the crate horizontally and fasten with dowels, keep the distance 60 centimeters. Use a grinder to remove the unnecessary.
The insulation has already been selected, lay it evenly and without gaps. Roll foil is laid on top of the insulation. This is necessary for vapor barrier and will not be difficult. Fix it with a mounting stapler and proceed to the most interesting part - plasterboard covering the balcony.
Useful video:
Start with the largest wall to save material and spend less time cutting. Drywall is easy to cut with a knife, just apply a hard and level object along the cutting line, such as a level.
Fasten the sheets on self-tapping screws every 20 centimeters, immerse the hats in the sheet, then it will be easier to plaster. Form the wall by adjusting the second sheet to the level.
The main work on finishing the balcony is behind, but it's too early to relax. Prime the walls well and seal the seams and joints. Now the surface needs to be putty, then start grouting. Prime again and exhale. The most pleasant thing remains - painting in the chosen color. This article will help you with this.
In a word, they prepared longer than they did. Now only you have such a cozy balcony with smooth walls and original design.


Types of drywall and frame profile
Today on the market of finishing materials there is a large assortment of various types of gypsum plasterboard and frame profiles.
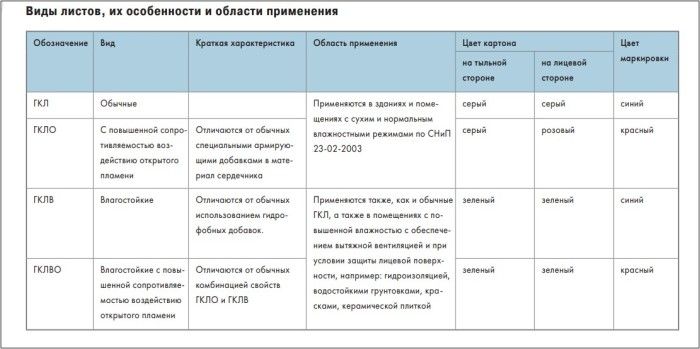
Drywall marking
Types of drywall
Certain types of gypsum boards differ in their technical characteristics and scope
Therefore, when choosing the material you need, you should pay attention to the labeling of the sheets:
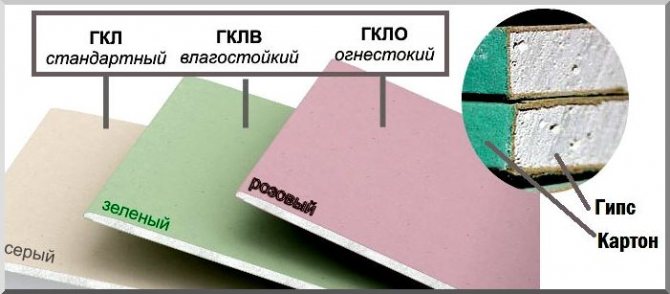
- GKL - ordinary gypsum plasterboard, consisting of a layer of gypsum, glued on both sides with layers of cardboard;
- GKLV - moisture resistant sheet. It includes hydrophobic additives that repel moisture, and is specially designed for finishing work in rooms with high humidity - bathrooms and toilets, kitchens, etc.;
- GKLO is a fire-resistant sheet. It consists of a mixture of gypsum and asbestos, for which a fiberglass mesh is used instead of cardboard;
- laminated gypsum board - differs from the usual sheet with a coating of polyvinyl chloride film. Such drywall, installed on a wall or ceiling, does not require additional finishing with putty - it is already ready for painting with any compounds, for wallpapering or applying decorative plaster;
- arched gypsum board is a thin and flexible sheet specially designed to create curved structures (arches, niches and multi-level semicircular ceilings).
In addition to the area of application, gypsum plasterboards differ in their thickness. The most massive of them, up to 50 mm thick, can be used as load-bearing wall panels, and they can also be used for finishing floors. The thinnest modifications have a thickness of only 4 mm - this is the so-called "ceiling" drywall. It is used to create structures that do not experience great physical stress during operation: for suspended ceilings and other decorative elements of the interior. The dimensions of the sheets can vary in length - from 2 to 4 m, in width - from 60 cm to 120 cm.
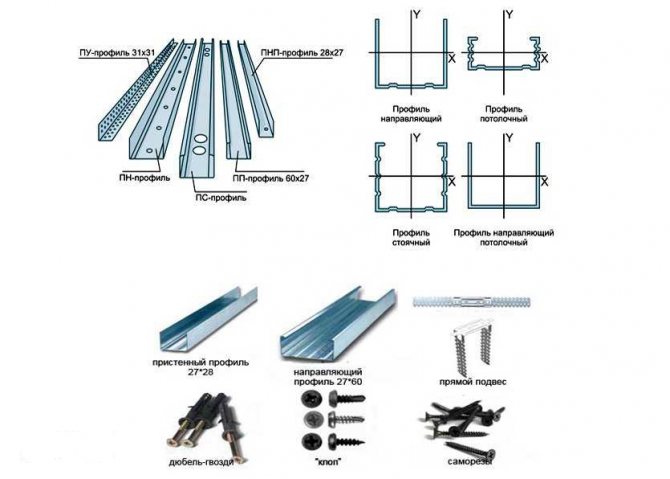
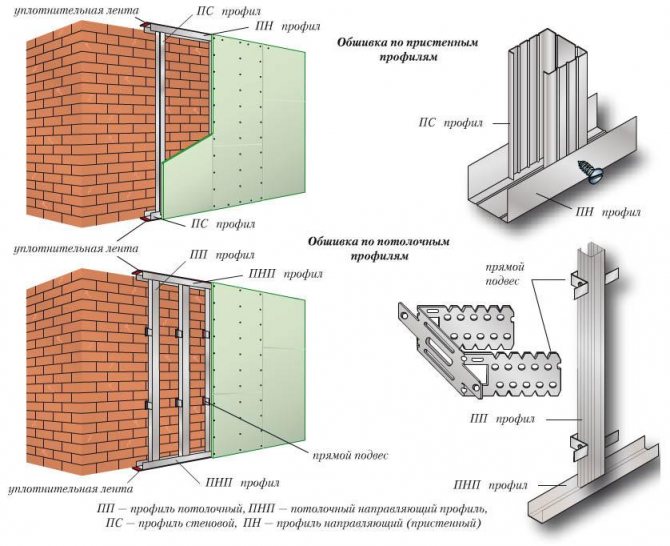
Types of frame profile
Profile types
The popularity of gypsum boards is largely due to the simplicity and speed of their installation. This is achieved by using standardized frame elements - metal profiles. Before sheathe the balcony with plasterboard, a frame is mounted from such profiles.
They are of two main types - wall and partition. Each of these types consists of guides and bearing elements:
- Wall profile. It is used for cladding load-bearing elements - walls and ceilings, to which it is attached by means of standard fastening accessories (hangers, "crabs", etc.). Wall guiding elements (UD marking) should be installed around the perimeter of the future structure. Along walls when installing suspended ceiling structures; or along the ceiling and floor, for wall cladding. The load-bearing elements of the wall profile (marking CD) are designed for direct attachment of gypsum board sheets to them. They are inserted into the guiding elements and attached to the walls using frame reinforcement.
- Partition profile. It is designed to create load-bearing frames for wall partitions. In the decoration of the loggia with plaster, such a profile is used relatively rarely, since it does not seem advisable to divide the limited balcony space with partitions. It is possible to arrange a partition here only if there are two separate entrances to the loggia, say, from the hall and the kitchen.
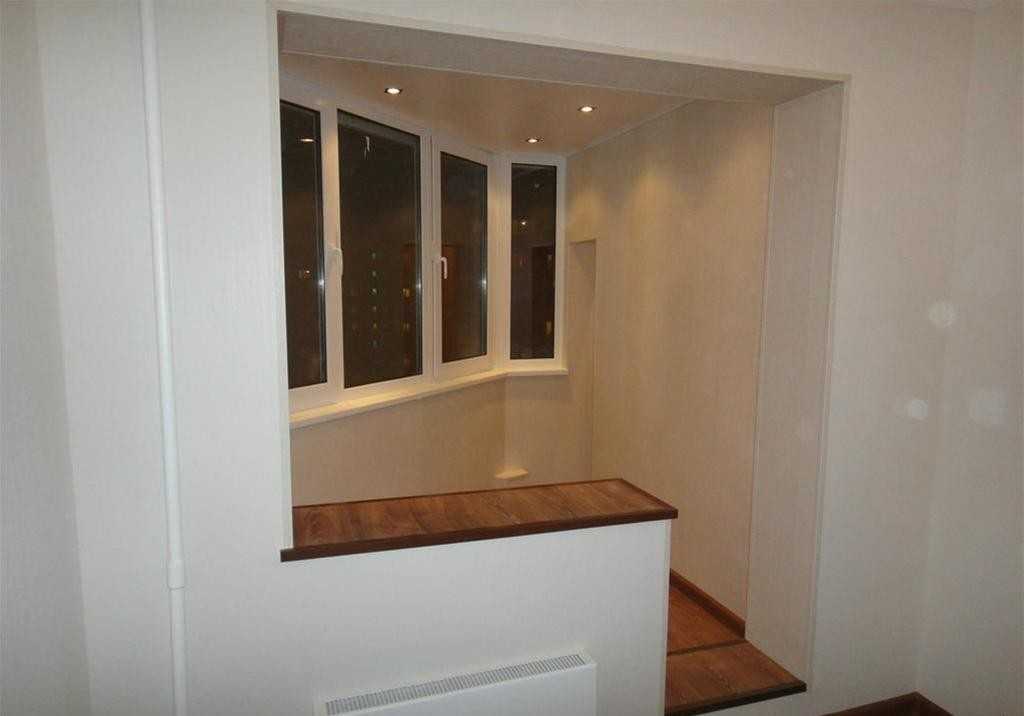
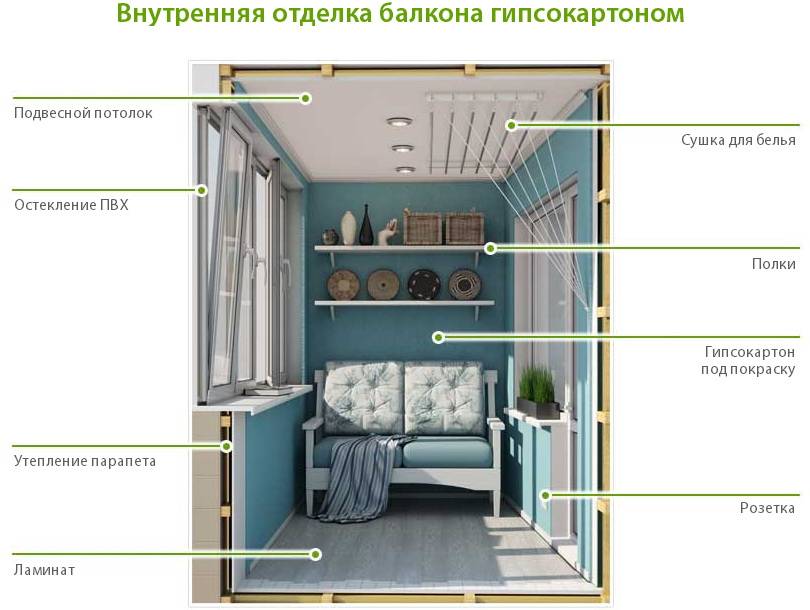
Finishing balconies and loggias with plasterboard
Balcony cladding with plasterboard is mainly used in cases where the surface is subsequently painted - the paints have very good adhesion to the GKL paper coating and is an additional protection against moisture penetration and mechanical stress. For other types of finishes, drywall is not designed: tiles, natural and artificial stone are cheaper and easier to put directly on the walls, just as it is to apply decorative plaster.
Installation of drywall sheets on any surface can be done in two ways: by gluing the sheet or screwing it to a special profile.
An ordinary balcony or loggia has small overall dimensions, therefore, in cases where insulation is not required, it is better to glue the gypsum board on the walls. In addition to saving usable space, this will reduce costs (you do not have to buy an installation profile and fastening accessories), and significantly reduce the time to complete the work.
Gluing drywall to walls or ceilings
If you need to align the balcony wall with drywall with your own hands, you can use several types of adhesives. Knauf Perlfix, polyurethane glue Polimin, Fugenfüller putty are quite famous. If the unevenness of the walls is less than 10 mm. to apply glue, you can use a notched trowel, if you come across deep holes, you can cover them with glue solution, and knock down or cut off protruding bumps.
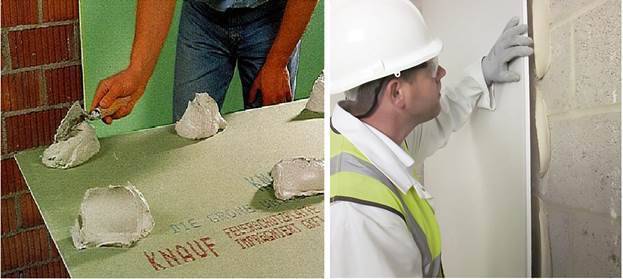
Fig. 5 Decorating balconies with plasterboard gluing
The procedure for gluing the sheets to the wall is as follows:
- Preparing the surface. We clean the wall from sagging and then prime with Ceresit CT17 using a roller.
- We dilute the glue in a container with water according to the instructions and spread it over the surface of the sheet with a toothed comb.
- We fasten the sheet by leaning it against the wall vertically (length 2500 mm.should be enough for the entire height of the ceiling) and press it with an even bar or rule.
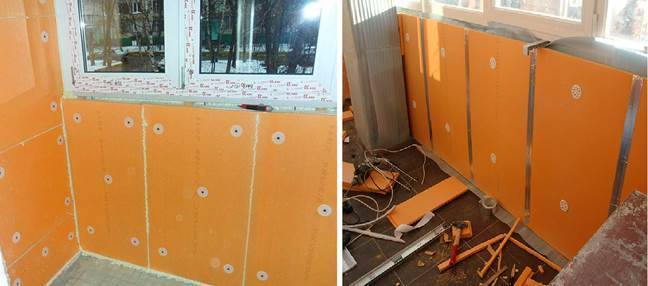
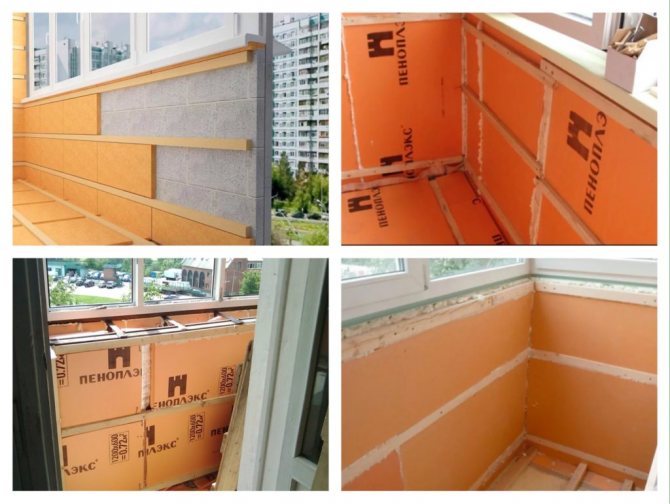
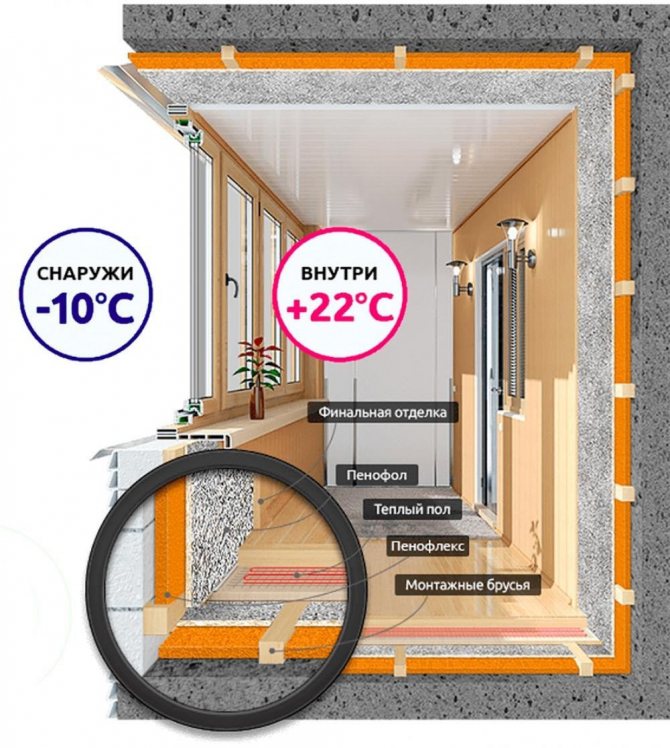
Fig. 6 Insulation of the loggia with Penolplex
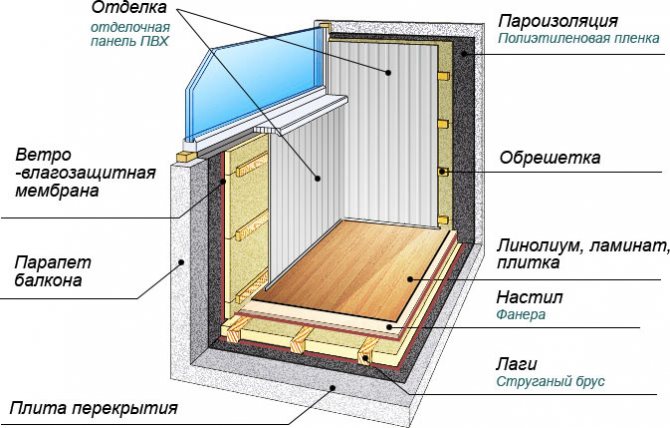
Insulation and sheathing of the balcony parapet with plasterboard
If we use rigid Penoplex or polystyrene as a heater for the walls of the parapet, then the plasterboard sheet is easiest to attach to the insulation by gluing according to the above technology.
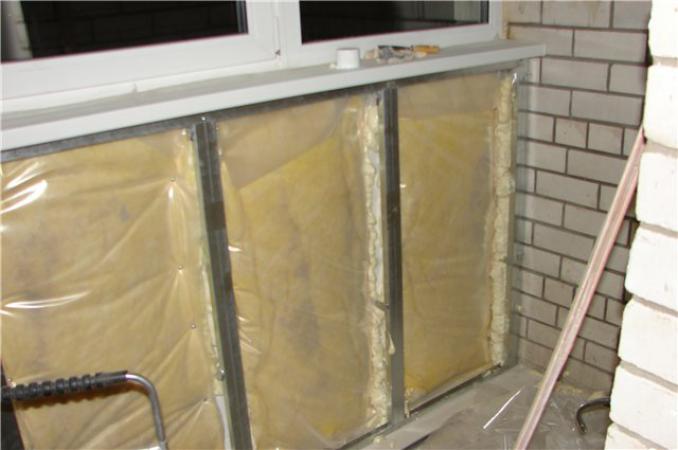
When deciding whether it is possible to insulate the loggia with safer materials, many choose environmentally friendly basalt wool as a heat insulator. In this case, plasterboard cladding is carried out as follows:
- We fix the self-adhesive Penofol on the wall for vapor barrier with the foil facing out. We fasten the PU guides to the dowels with self-tapping screws to the floor and under the windowsill.
- We cut out vertical posts from PS in the size of 5 - 10 mm. less height, we install them vertically in level with a step of up to 60 cm. without fastening to horizontal guides, mark the location of the profiles on the floor and windowsill.
- We insert insulation between the profiles and fasten the sheets cut to size with self-tapping screws along the vertical marks.
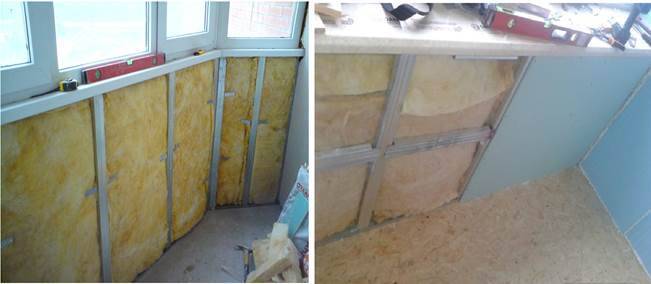
Fig. 7 Thermal insulation of the balcony with mineral wool under the gypsum board
Decorating the loggia with plasterboard is overwhelmingly used in cases where further decorative coating is painting. It is more rational to mount a gypsum plasterboard on glue on balcony walls; mineral wool and frame installation of gypsum boards on a fixed profile can be used to insulate the parapet. A more economical option for covering the loggia with plasterboard with insulation is fixing foam or Penoplex on dowels or glue, followed by sewing its surface with glued plasterboard sheets.
Surface preparation and marking
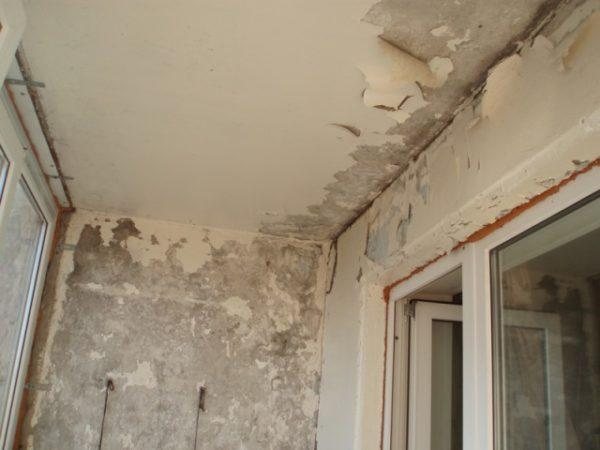
Anything that falls away must be removed
You can do this work quickly or efficiently. In the first case, nothing is cleaned, and the installation of the profiles is carried out according to the previous coating. The surface is not prepared at all, because it will be hidden by drywall, so who cares if there is old wallpaper or paint peeling.
Obviously, before starting work, all objects must be removed from the balcony. Also, skirting boards and baguettes, if any, are torn off.
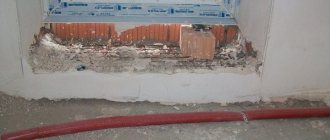
By removing the old finish, you can make sure that there are no defects on the wall. We are talking about a balcony, where there may well be cracks through which it blows from the street. Therefore, it is recommended to clean the wall down to the base. If there are gaps, they must be blown out with polyurethane foam. Small cracks are sealed with sealant.
If you do not get rid of all the defects of the wall, then the finish of the balcony with plasterboard will not be of high quality. It is on the balcony that defects such as cracks and cracks are most common. Before correcting the oversight of the builders, you need to clean the base from grease and dust particles.
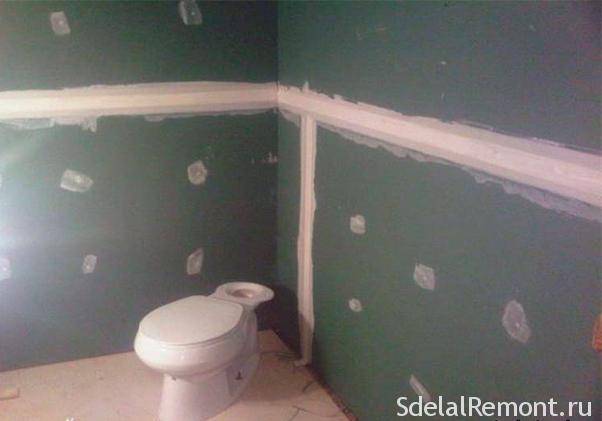
The prepared base must be marked for fixing the frame. On the floor, you need to draw lines along which the guides will be attached. These lines can be drawn with a pencil or with a paint cord. In most cases, a rectangle will be drawn along the walls of the balcony floor. Similar lines are drawn on the ceiling, where the guides will also be installed. Marking is also made on the lower part of the window sill in those places where the drywall will be attached under the window.
On the walls themselves, you do not need to make any markings for attaching the suspensions.
Material calculation
For a balcony, it is better to choose a moisture-resistant drywall. Usually it is marked with GKLV, and its back is green.
Sheathing the walls with plaster and at the same time saving money will help the correct calculation of materials. The drywall itself is calculated by the full area of the walls, it is not customary to subtract windows and doors from here. Thus, the required stock of material is formed.In the case of a balcony, it is worth subtracting the area above the railing, but not subtracting the door and window of the room.
Insulation is calculated minus all windows and doors.
The fasteners are calculated depending on the fastening pitch. Typically, 60-70 self-tapping screws are needed on a drywall sheet with a lathing step of 40 cm.
Dowel-nails are purchased with the calculation of 10 pieces per profile or 5 per bar.
Self-tapping screws for metal with a press washer, 10 pieces are required per profile.
The calculation is quite simple, but it must be treated with attention.