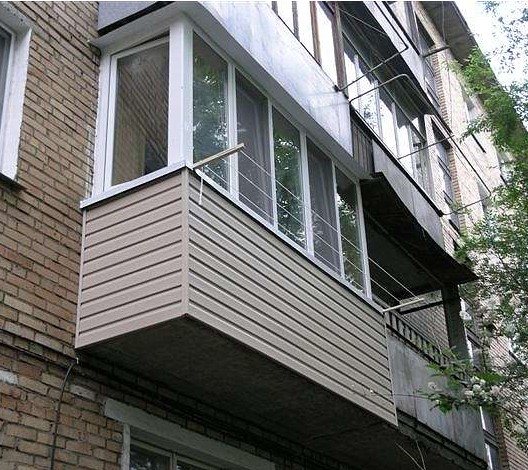
Khrushchev's apartments can hardly be called comfortable for living without redevelopment performed in them. During the renovation, the owners do not ignore the balconies, which are formally a continuation of the premises, but due to the catastrophically modest size, by default they are only suitable for storing unnecessary things. If this topic is more relevant for you than ever, then study carefully our selection of cool and modern ideas for your balconies.
Repairs
To make global changes, you need a special work permit. The corresponding paper can be obtained from the housing inspectorate at the address of the location of the object. To obtain permission, you need to submit the following package of documents to this authority:
- application for the implementation of transformations;
- a copy of the certificate that confirms the ownership of the premises - such a paper is certified by a notary;
- registration certificate for the living quarters;
- balcony reconstruction project.
You can start work only after the permission is in hand.
Preparatory work
- dismantle old window frames and coatings from all surfaces;
- construction bases are tapped with a hammer to detect and remove unstable fragments;
- metal parts are cleaned from rust and treated with an anti-corrosion agent.
If the floor reinforcement is thoroughly corroded, it is recommended to fix the new material on top. It is best to put a mesh with mesh sides of 150-170 mm, connected from class A-III reinforcement, 3 mm in diameter.
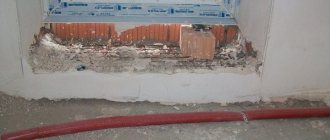
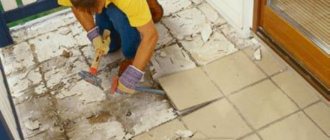
Rebuilding the slab
Do-it-yourself slab restoration can only be done if the building base has minimal damage or just needs to be leveled. If the floor is largely destroyed, it is recommended to invite professionals.
The help of specialists will be required in the following cases:
- a piece of cement collapsed, as a result of which through defects appeared or a significant part of the reinforcement opened;
- a deep crack formed at the junction of the slab with the house;
- the concrete base has collapsed or the material has peeled off.
Self-leveling of the slab is performed as follows:
- the building base is primed, the primer is put in two layers and after each treatment they take a break so that the product hardens;
- cement plaster is laid, the material is leveled over the surface using a rule;
- install the formwork using a board with a width of 15-17 cm;
- concrete is poured, the material is leveled, and the activity is stopped until the composition hardens.
Replacing the fence
At the very beginning of work, the old fence is dismantled along with the glazing and coatings. After that, a new structure is installed. For this, it is recommended to invite professionals. Specialists will perform the necessary measurements, after which they will manufacture and install the fence. Usually the structure is made of metal, but you can order the parapet from glass or other material, depending on personal preference.
The fence can also be done by hand. For this, a rectangular shaped pipe is used. Such material has the following advantages:
- strength;
- ease of use;
- external attractiveness.
For the manufacture of the fence, measurements are taken of the balcony and a diagram of the parapet and its installation is developed. After that, the material is prepared, and the parts of the pipe are welded together, according to the plan.Then the fence is installed on the concrete base using anchors.
You can also use foam blocks to make a parapet. The material is laid on a concrete base using a repair mortar. If there is no welding machine and experience in drawing up diagrams, it is best to use this particular way of arranging the parapet.
Legality
To glaze a balcony or attach it to a room, you must comply with the framework of the law, obtain permission for redevelopment and construction work. This is necessary for the safety of apartment owners and neighbors. The rights and obligations of all parties are fixed in the Housing Code.
Basic rules to be followed:
- Do not violate the integrity of the house's supporting structures.
- Do not load the slab, it has the ultimate strength.
- The removal of the structure beyond the perimeter of the slab must also be coordinated with the authorized bodies.
- All fire safety rules must be followed
In case of failure to comply with the norms of the Housing Code and in the absence of permission for repairs, a fine may be imposed on the apartment owners. And the entire illegal structure will have to be demolished or altered in accordance with the established norms.
Magnification
In the case of planning an increase in the balcony to 30 cm, permission and approval is not required if the house is not an architectural value, in other cases it is necessary to coordinate the work and obtain permits, but as elsewhere there are nuances that you need to familiarize yourself with.
Coordination and permissions can be obtained from the following authorities: Ministry of Emergency Situations, BTI, gorexpertiza, design organization and others.
In what cases is agreement necessary:
- If the expansion of the balcony is planned in a house that bears architectural value, then the final appearance must be agreed upon;
- It is also necessary to obtain permission if it is planned to expand the area of the balcony in the Khrushchev over 30 cm;
- It is necessary to agree on the repair work if the weight of the structure to be installed is large, which entails a high load on the walls of the house;
- Permission must be obtained for the installation of a concrete slab, no matter what size the increase is planned for;
- Before carrying out repair work, it is necessary to check the condition of the balcony slab and walls.
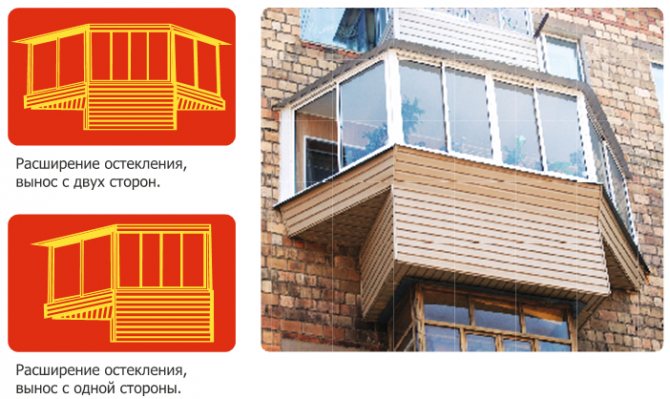
Sill extension
This option is also called external glazing. The method consists in the fact that the glazing frames are installed outside the balcony parapet using special metal brackets.
For expansion along the windowsill up to 30 cm, permission is not required, however, the quality and condition of the balcony slab will be an important factor, since when installing a metal frame and double-glazed windows, the weight on the balcony slab will be significant.
Expansion of balconies is possible both frontally and on the sides.
It is not advisable to take out on the windowsill in the case of:
- if the balcony is located on the lower floors of a multi-storey building, as precipitation and debris will fall on the expanded area from the upper floors;
- if the house is already old and its floors are in poor condition. In this case, additional costs will be required to repair and strengthen the balcony slab.
It may seem that such an expansion is insignificant and imperceptible, however, given the initial small width of the balcony, it will turn out that its dimensions will increase by about a third.
The wide window sill can be used as a planting site, a countertop, or as a bar counter.
Instructions for increasing the balcony in Khrushchev on the windowsill:
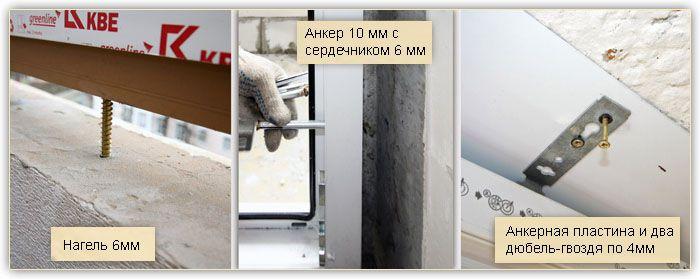
- Brackets are welded to the metal parapet with a step of 50-70 cm. If the parapet is made of concrete, then the brackets are fastened with anchors.
- A frame made of a metal corner is fixed to the brackets by welding.
- Next, the outer facing of the balcony or loggia is performed.
- The next step is to insulate the floor and walls of the new frame.For convenience, use the same material for the walls, floor and ceiling. We recommend using penoplex or mineral wool.
- Next, the glazing is installed.
- The final step is to carry out interior decoration and equip the balcony.
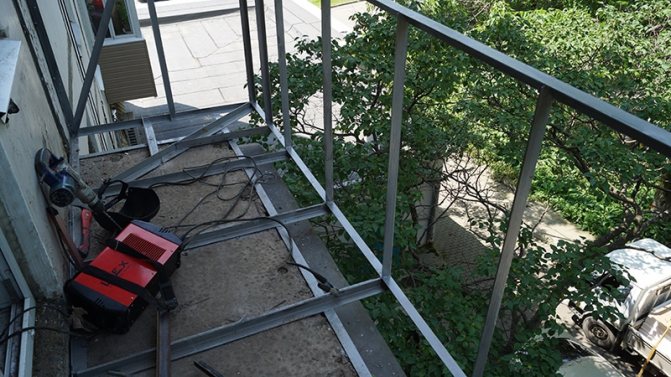
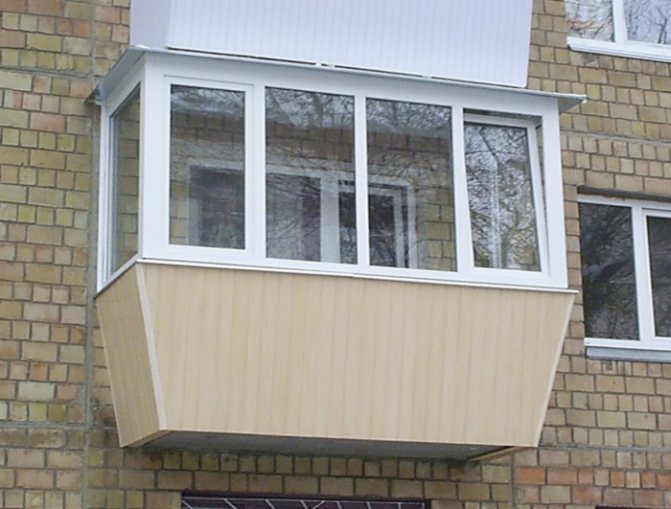
Expansion at the base of the slab
Often this method is used on loggias, since its structure is stronger than a balcony one, and it is easier to equip a loggia for living space.
Increasing the balcony over the base of the slab is more difficult and expensive. This method allows you to increase the balcony space more than in the previous version.
For this extension, a reconstruction permit will need to be obtained.
How to enlarge the balcony in Khrushchev at the base of the slab:
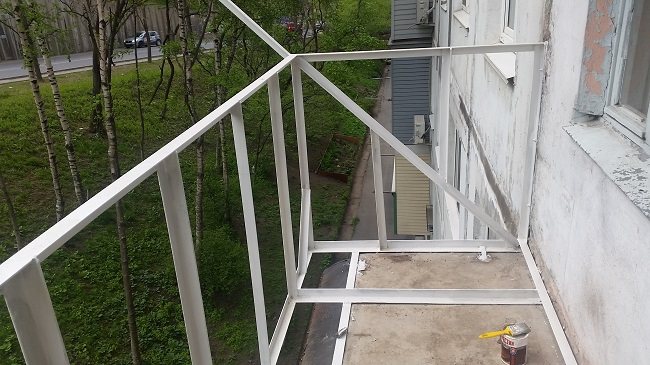
- The old railings are being dismantled.
- A metal frame is installed on the edges of the base plate. The parts are assembled together by welding. This will be the support of the outrigger structure.

- In the next step, the lower part of the frame is sheathed with metal sheets;
- Next, a new fence is installed around the entire perimeter of the outrigger structure. These works are performed strictly according to the level.
- Cladding is made from the outside.
- The next step is to lay the floor.
- Installation of glazing.
- Next, the floor and walls are insulated.
- Last but not least, they carry out interior decoration and arrangement of the premises.
It is worth noting that it is not an easy task to complete these works. It is better to seek help from specialists who will select durable and high-quality materials and perform all the work in a short time.
There is also a combined option when the removal on the windowsill and on the floor is done simultaneously, the area being increased by 70 cm.
Such a structure is heavy and carries a serious load. For such a reconstruction, it is necessary to install supporting supports (for the first and second floors) or try to minimize the weight of structures and materials as much as possible.
Butterfly
Expansion of the balcony "butterfly" is a less common option than the previous ones, but you should not bypass this option as this design has a beautiful appearance and a large area of increase.
Permission and approval is not required since this design refers to the removal of the window sill.
The expansion is carried out by installing metal brackets on the sides of the balcony, which are welded to the parapet at the level of the window sill.
One side of the structure rests on the walls of the house, and the other on the parapet.
Electrical wiring and electrical fittings
Before revetting the inner surface of the balconies, electrical wiring is pulled along the walls and ceilings, leaving ends for connecting lighting devices and electrical fittings: switches and sockets.
The socket boxes are attached to the walls and ceilings with dowels. The ends of the wires are led out through the boxes.
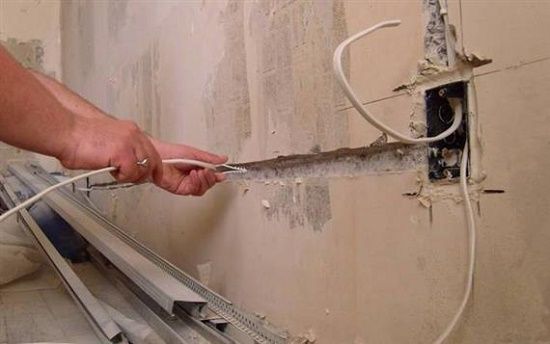
In the facing of the walls and ceilings of the balconies, circular cutouts are made in the attachment points of the junction boxes.
The electric wire is placed in a special corrugated polymer hose, which is fixed on hinges or clips with dowels to the brick and concrete surface of the room.
After installing the cladding, sockets and switches are connected through the cutouts in the boxes.
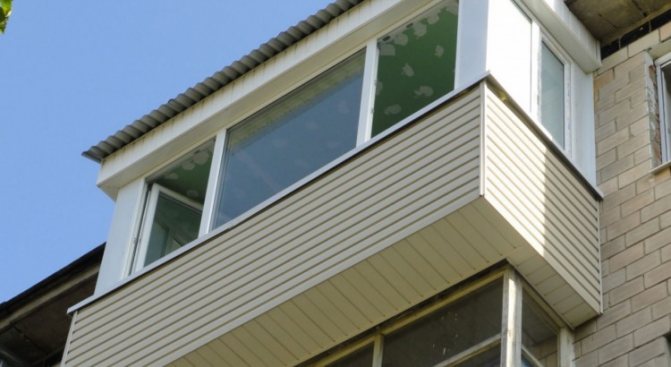
External finishing

The outside balcony cladding in Khrushchev is carried out in several stages and is conventionally divided into the cladding of the upper and lower horizontal belts, the design of the corners and the installation of siding strips. Let's consider all the presented elements in more detail.
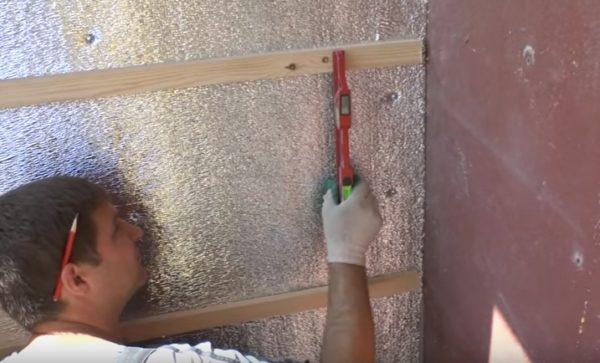
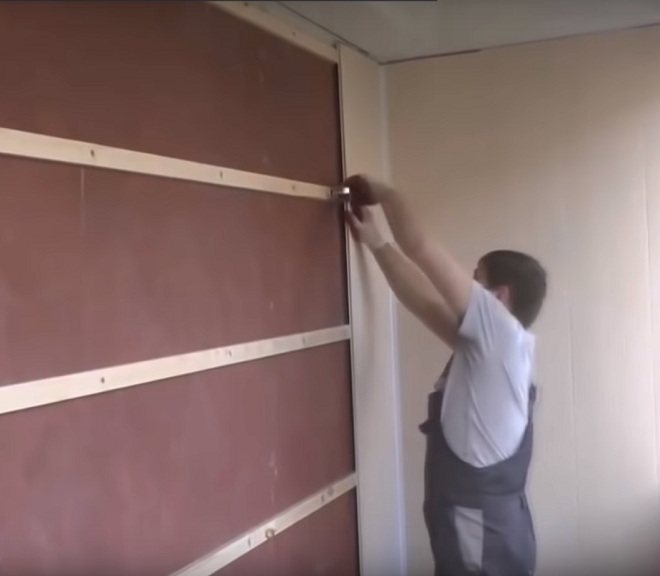
- Installation of the lathing
The presented works can be carried out on a previously prepared balcony area. They provide for the installation of horizontal and vertical beams, to which siding sheets will be attached in the future. Initially, horizontal lathing elements are mounted, and then vertical ones.
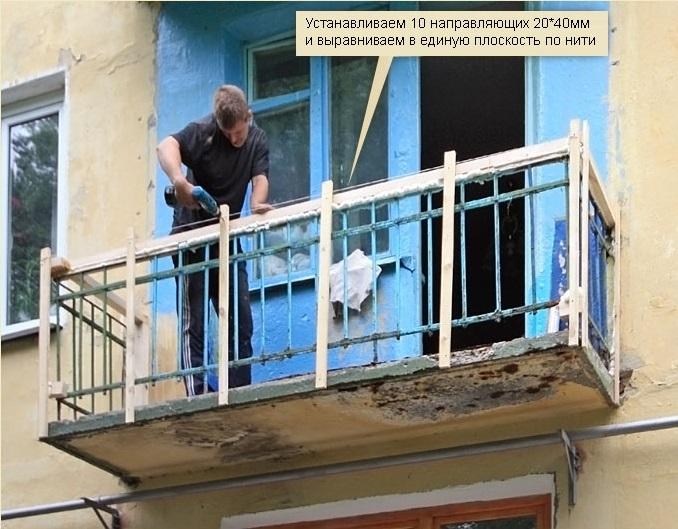
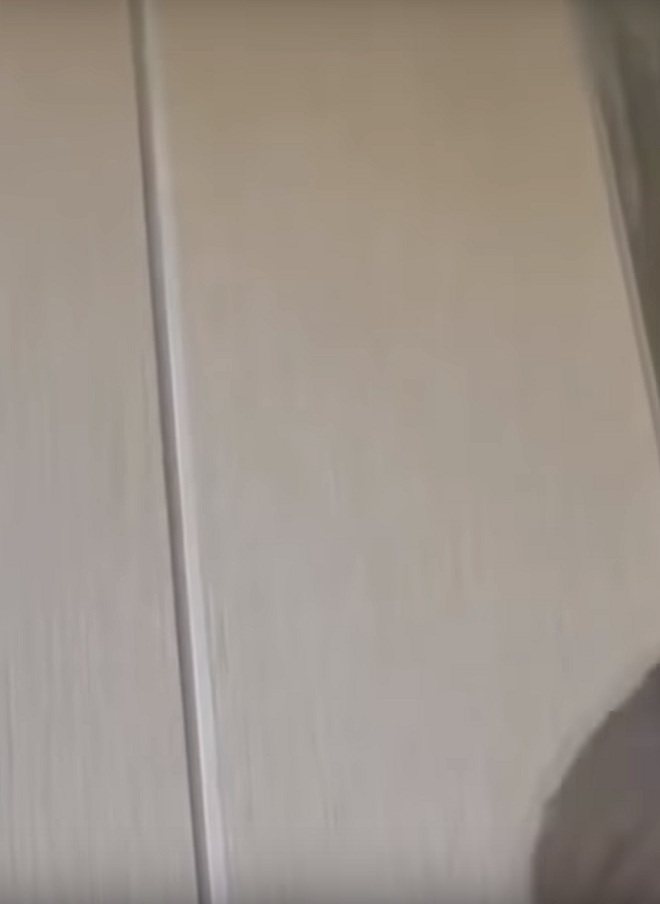
Important! At the joints of the panels, gaps of about 5 mm must be left in order to exclude deformation of the plates when the temperature changes. For the same purpose, it is better to turn the screws back a quarter of a turn, in case the material expands.
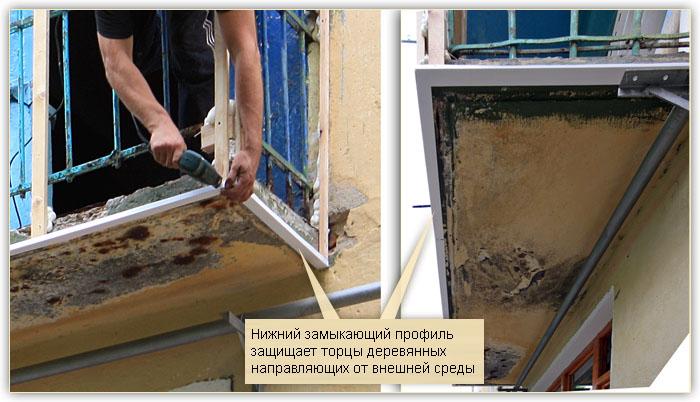
- Sheathing: installation of the lower horizontal belt
The horizontal slats of the battens are mounted to the balcony slab using metal dowel corners. The bars are additionally fastened together with self-tapping screws. In the event that the balcony grate is pressed close to the slab, you can attach the batten to the lower part of the fence.
- Sheathing: installation of the upper horizontal belt
Finishing the balcony with siding outside at this stage is carried out as follows:
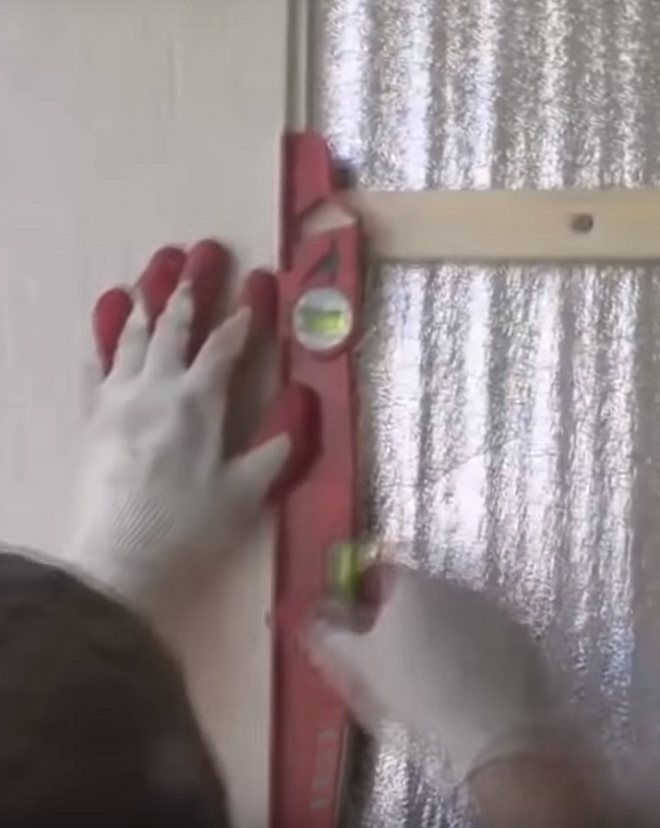
- The height of the installation of the material from the balcony slab is measured.
- With the help of a building level, a markup is created for installing a bar.
- The material of the required length is selected along the perimeter of the parapet.
- The beam is installed on the parapet using dowels, self-tapping screws.
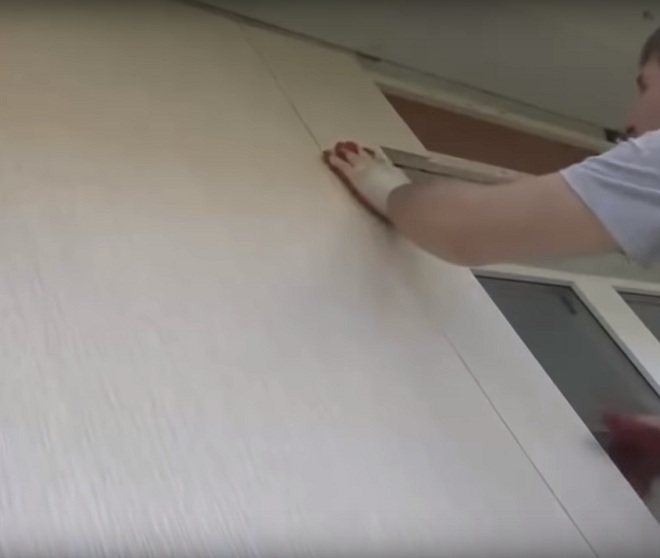
After the end of such work, the side battens of the crate are installed with a step of half a meter. Two strips are placed at the joints for reliable fixation of the material.
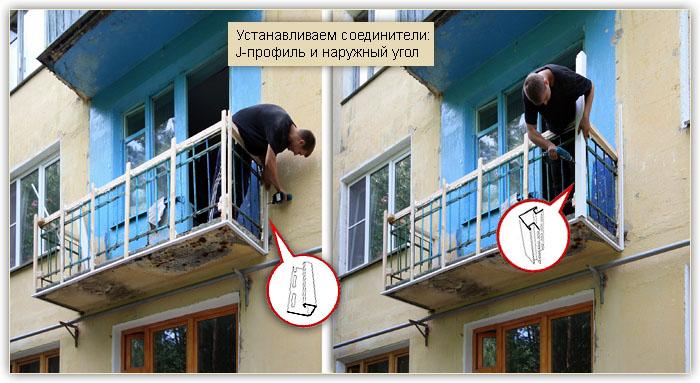
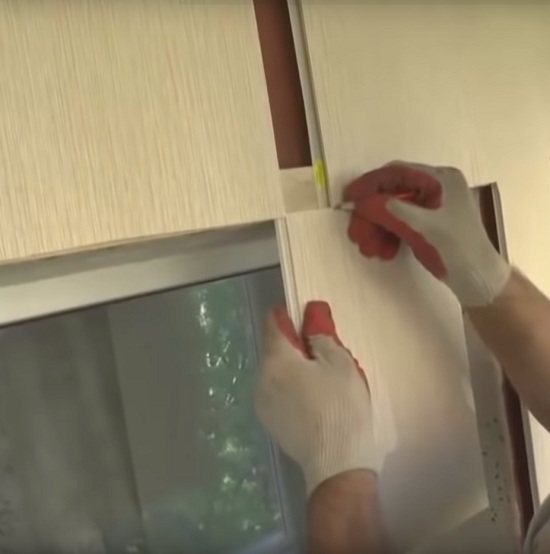
- Plating corners
The corners are formed by special L-shaped profiles. They are inserted between two corner beams of the crate and fixed with self-tapping screws. These works are started when the lathing has already been mounted.
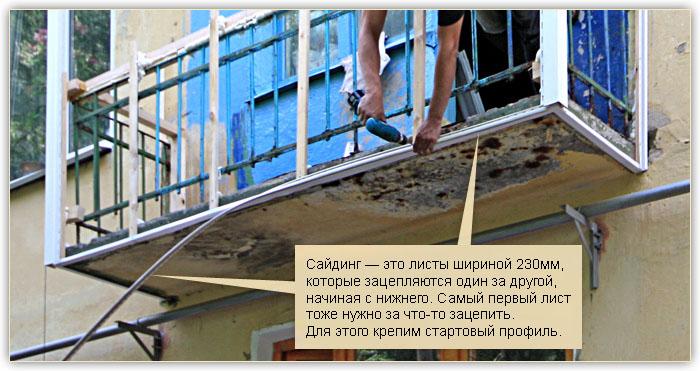
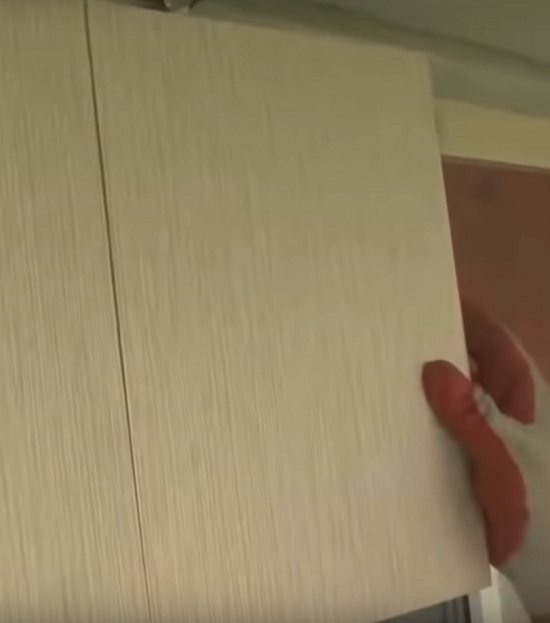
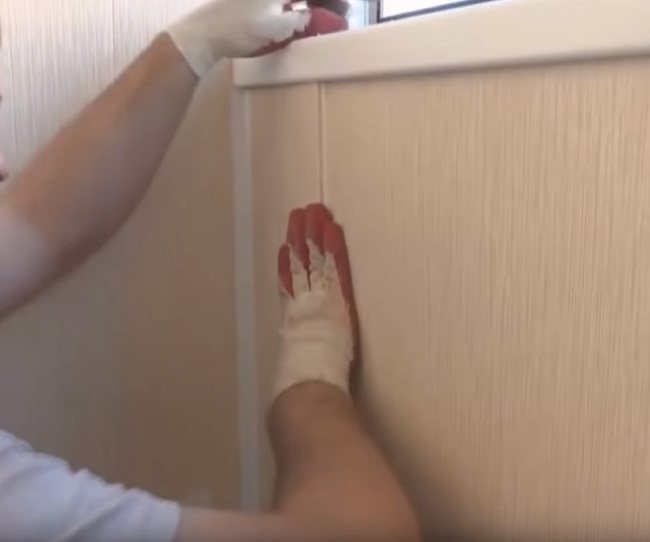
- Installation of siding strips
After finishing work on the crate, you can proceed to the installation of the siding itself. You should work like this:
- Attach the starter bar to the lower strapping with self-tapping screws.
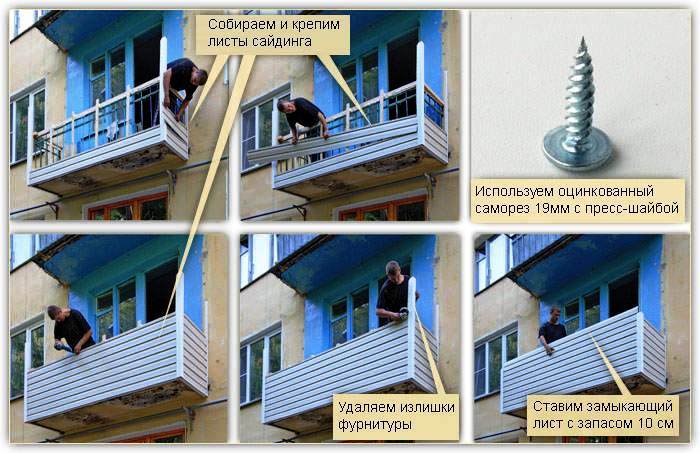
- Measure the siding panels. Trim them as needed. When performing this part of the work, it must be borne in mind that the outer skin should have a gap of 4-5 mm in relation to the corner profile. Such a margin is given for the thermal expansion of the material. If you do not make it and install the sheets end-to-end, they may bend when heated strongly.
- Start installing panels. They are wound over the crate, inserted into the corner profiles. The first panel is inserted into the starting plate and fixed with self-tapping screws. The fasteners are not clamped tightly so as not to deform the sheet. All subsequent panels are installed in a joint to the previous ones.
- Fasten the finishing profile above the panels.
At this stage, the exterior finish is considered complete.
Video instruction:
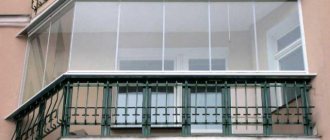
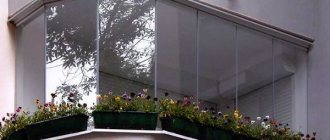
Glazing
When it comes to how to make repairs on the balcony, first of all, the question of its glazing arises. To perform this type of work, you can use the following materials:
- Metal-plastic. This is the best option for self-glazing balcony. The advantages of the material are a long operational period, an acceptable cost. Plus, it keeps you warm for a long time.
- Aluminum. Such material can be used only if insulation is not planned on the balcony.
- Wood. The main advantage of this material is environmental friendliness. The following points are distinguished from the disadvantages - high cost, short operational period, the need for regular restoration, lack of moisture resistance.
After choosing the glazing option, you can proceed directly to the installation of profiles.
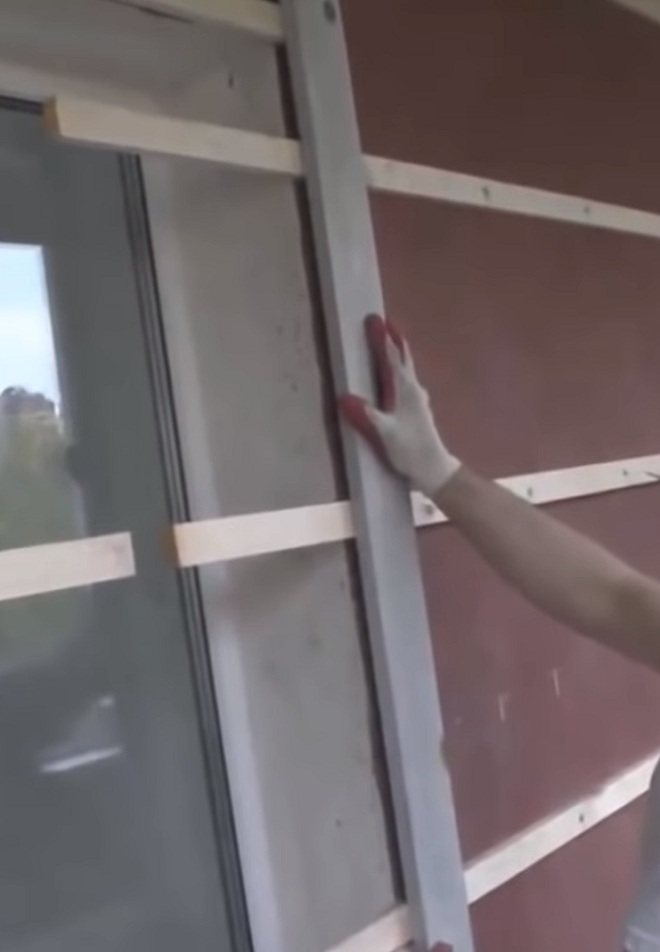
Instructions for glazing a balcony in Khrushchev:
- Windows are freed from packaging.
- Double-glazed windows are removed from the frames.
- Remove the hinged doors (you can not remove the double-glazed windows from them).
- The frame is turned over 180, the support support profile is installed in the grooves and it is knocked out with a wooden hammer.
- At a distance of 150 mm from the edges of the frame, fixing plates are mounted, hammering them into the grooves and screwing them with self-tapping screws of 30 mm length.
- The metal-plastic structure is installed in the opening, leveled and secured with self-tapping screws, clamps and anchors. If the glazing consists of two or more window units, their frames are interconnected.
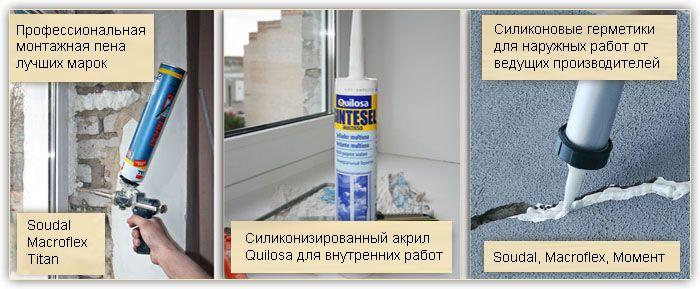
- Slots along the contour of the window are blown out with polyurethane foam.
- The time comes to return to the place of double-glazed windows and sashes.
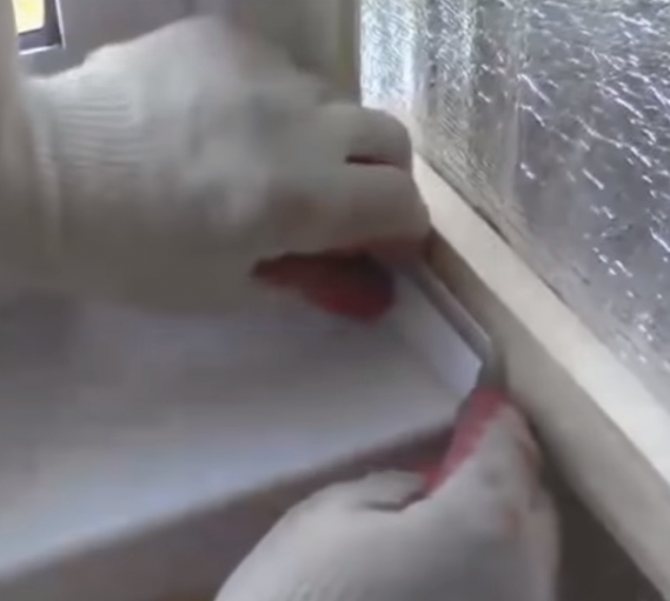
At the end of the above operations, the window sill (from the inside) and the drainage (outside) are mounted. After that, the installation of the glazed balcony is considered complete.
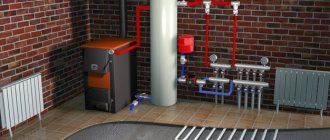
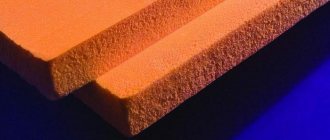
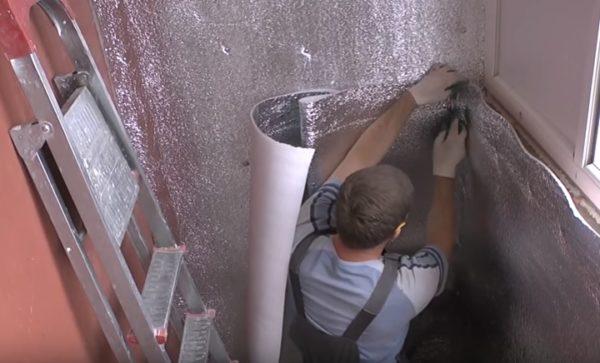
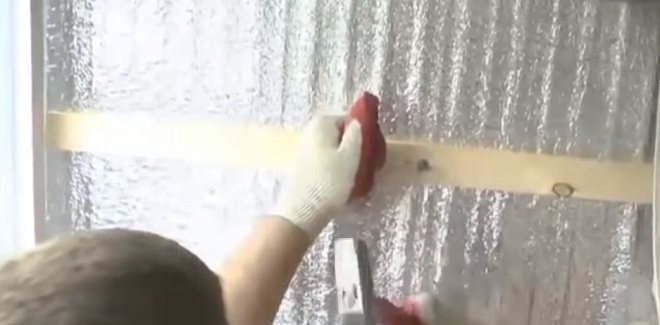
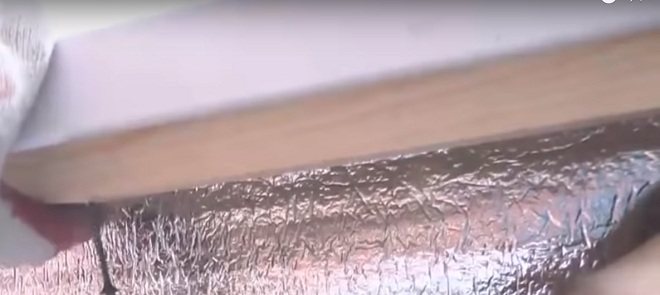
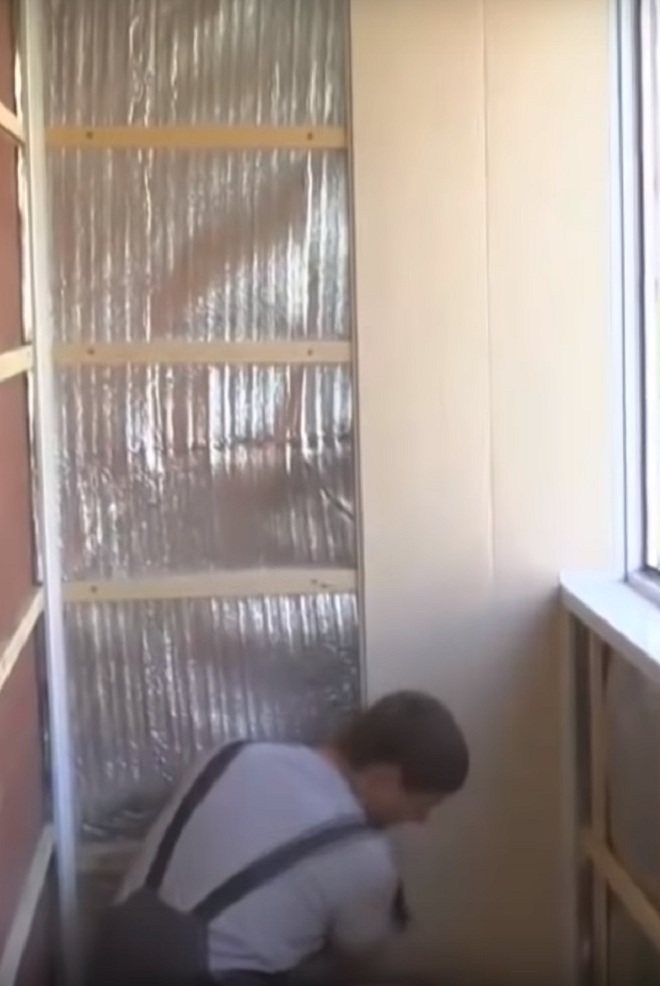
Mineral wool
- effective material for balcony insulation. The low cost and harmlessness of such insulation makes it the most common material. Insulation stages:
- Mineral wool does not accept moisture and therefore, at the first stage, it is necessary to take care of waterproofing. Any foil-based material is used for it.
- At the next stage, a wooden or metal crate is erected.
- Mineral wool is mounted inside the crate. To do this, it is cut into pieces of suitable size and put on glue.

Thermal insulation of a balcony with mineral wool
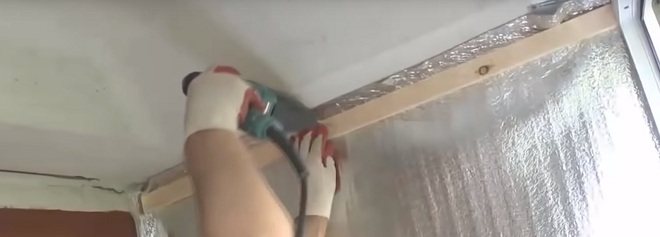
Warming
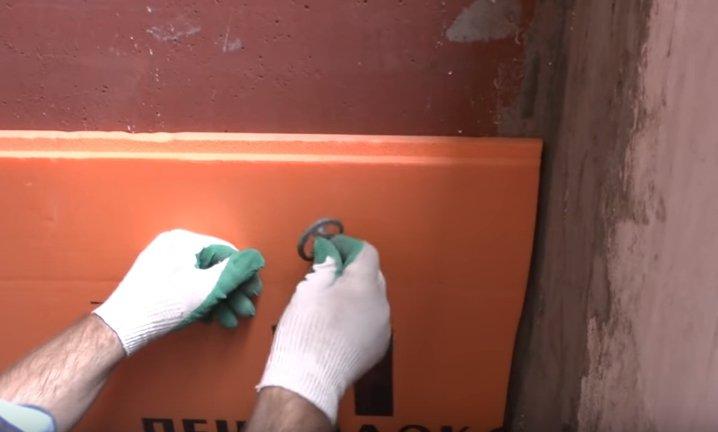
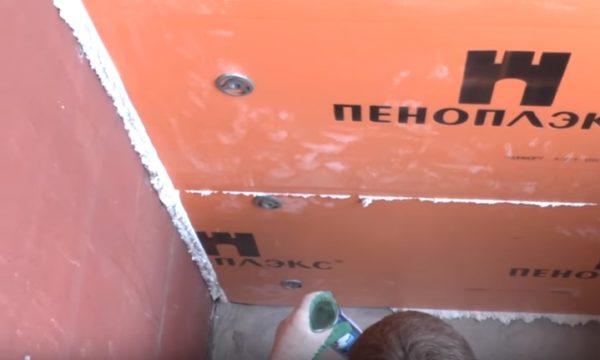
For insulation, special materials are used that are fixed on building foundations. The most commonly used mineral wool or penoplex. Below you will find step-by-step instructions for insulating a balcony with penoplex.
Instructions for insulating a balcony in Khrushchev with your own hands:
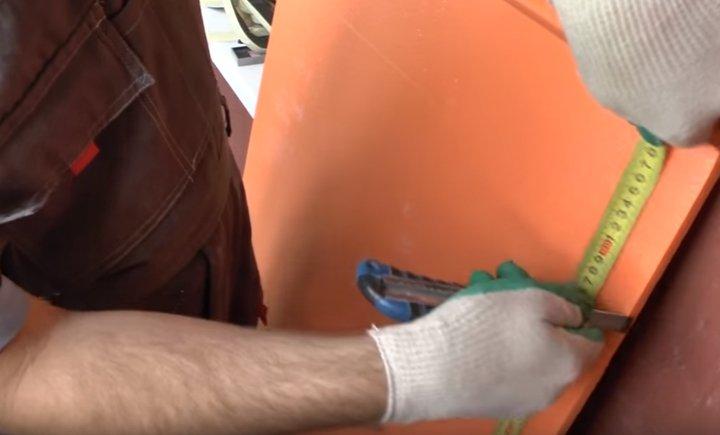
- It is necessary to measure the width of the side walls of the balcony and use a construction knife to cut the required size of the foam board.
- After cutting the required amount of insulation, proceed to installation. Let's start with the walls. It is necessary to apply the penoplex to the wall, having previously applied polyurethane foam along the edges on the reverse side. There is no need for glue; dowels will be enough for reliable fastening.
- To securely attach the foam to the wall before installing the foam and the crate, it must be fixed with dowels with caps. To do this, we drill holes with a puncher directly through the insulation plates into the wall, then insert the dowel and wrap it with a screwdriver.
- For the installation of the second and subsequent sheet, we apply polyurethane foam to the edge at the junction.
- When all the foam plates are installed, it is necessary to seal all the seams with polyurethane foam.
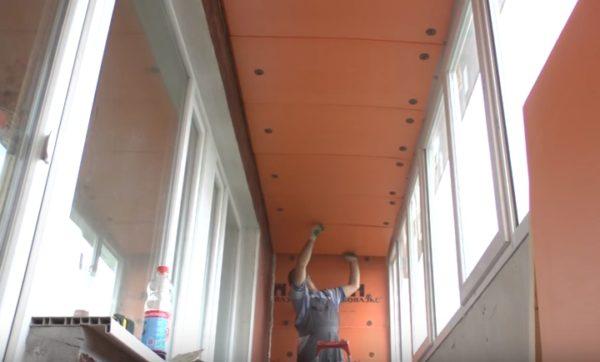
- Next, we proceed to the installation of insulation to the ceiling. Usually, it is problematic to attach foam slabs to the ceiling. It is necessary to drill holes and fix the insulation with plastic dowels.
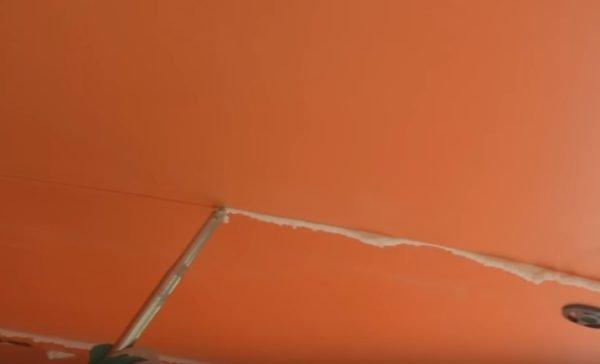
- Next, it is necessary to seal the joints between the plates with polyurethane foam. It is important to choose a polyurethane foam that does not chemically react with penoplex.
- Next, we turn to the thermal insulation of the balcony with penofol. We fix Penofol with a construction stapler. The sheets are laid with an overlap so that there are no gaps.
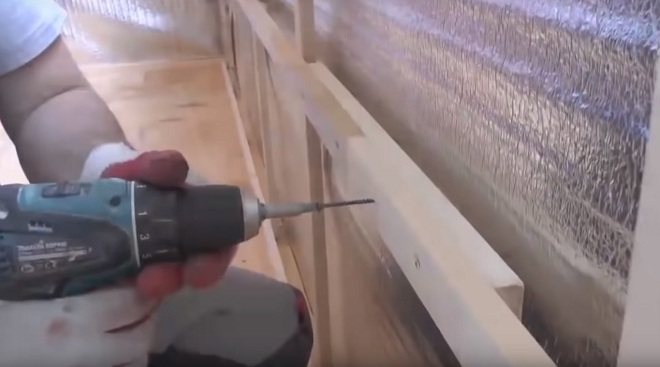
- Having finished the installation of penofol, we proceed to the installation of the lathing for further fixing the decorative material.
- For the lathing, wooden blocks with a cross section of 3 by 3 cm are needed.

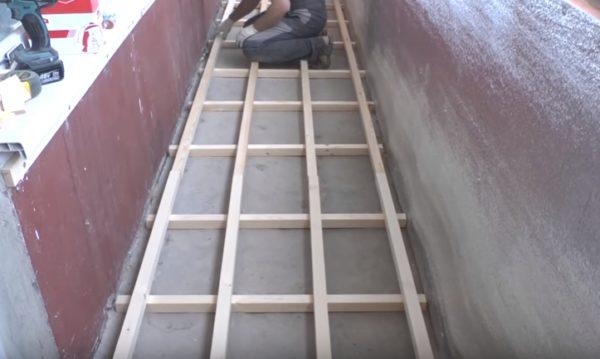
Floor insulation instructions:
- Let's start with the installation of a wooden lathing made of 5x5 cm bars. We lay the bars crosswise so that after laying under the penoplex, an air gap forms. The bars are fastened with dowel-nails, and to each other - with self-tapping screws. An important point will be the processing of wood with fire retardants and antiseptic compounds, this will increase the service life and ensure fire safety.
- Next, we cut the insulation into parts of the required size and settle them between the longitudinal details of the lathing. We lay in such a way that there are smaller seams between the insulation and the wood through which heat can escape and cold penetrate.
- We blow out the joints with polyurethane foam.
- Next, plywood sheets are laid on the crate. And already on these sheets any floor covering can be laid.
Video instruction for warming:
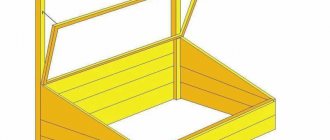
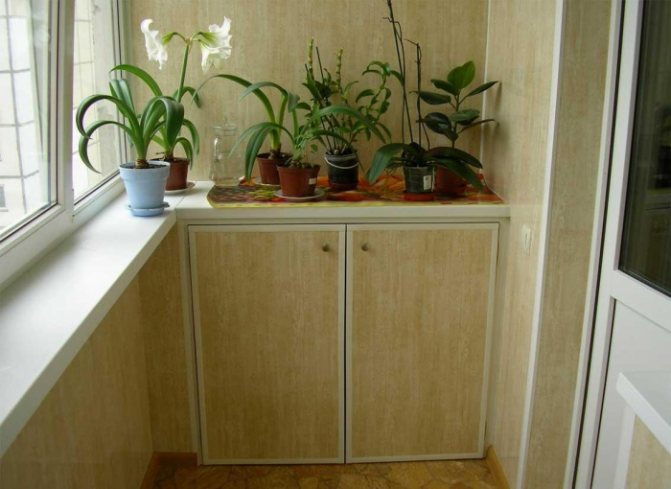
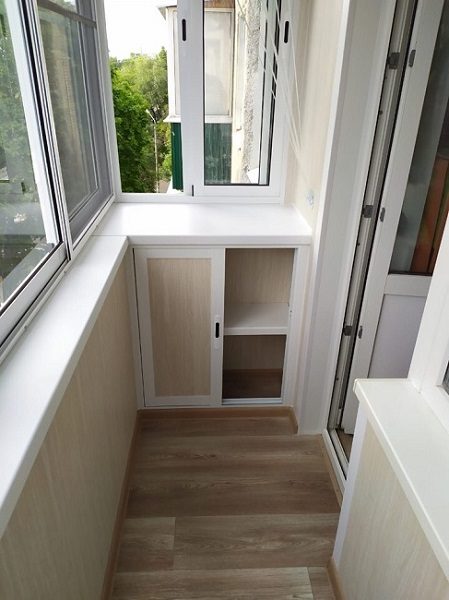
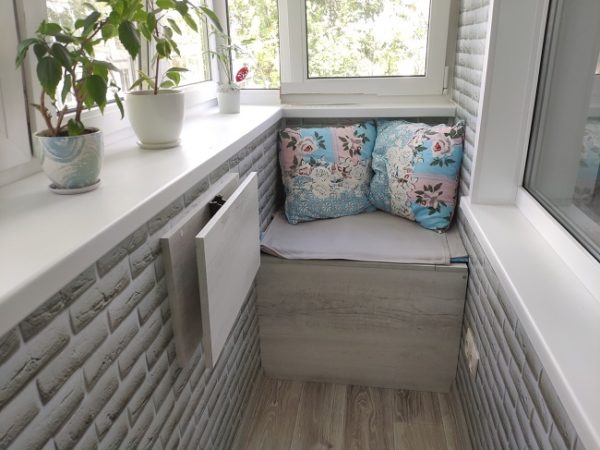
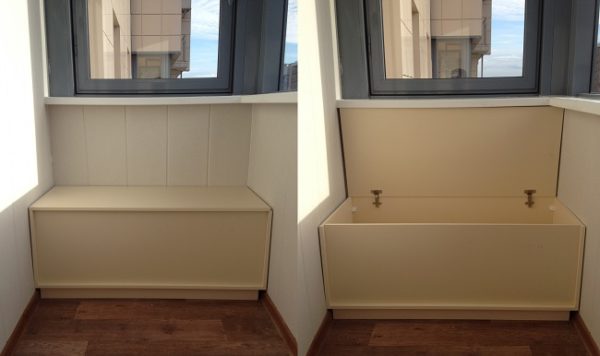
The choice of furniture for the balcony in Khrushchev
Based on the above features of the Khrushchev balconies, one can guess that the choice of furniture will have to be given no less attention than the choice of decoration and purpose of the room. Here are some helpful tips:
- it is better to choose the lightest in weight pieces of furniture (made of plastic, wood, with hollow entrails, etc.);
- massive shelves (books, with appliances or equipment) can be placed on the wall adjacent to the room, but it is better not to overload the side walls with objects and decor;
- folding furniture will help to significantly save space if the balcony is used not only for recreation and receiving guests;
- also folding chairs and a table are suitable for an open balcony - in autumn and winter they will not take up much space in the apartment, but in the summer you will have a great place to relax;
- try to combine comfort and ergonomics - closed storage boxes can be arranged under the seating;
- if the balcony is not 100% insulated, it is better to give preference to furniture made from materials that do not deteriorate from changes in temperature and humidity (various options can be found in the departments with outdoor furniture).
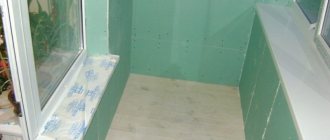
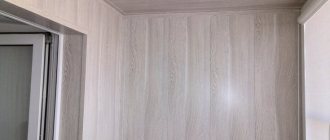
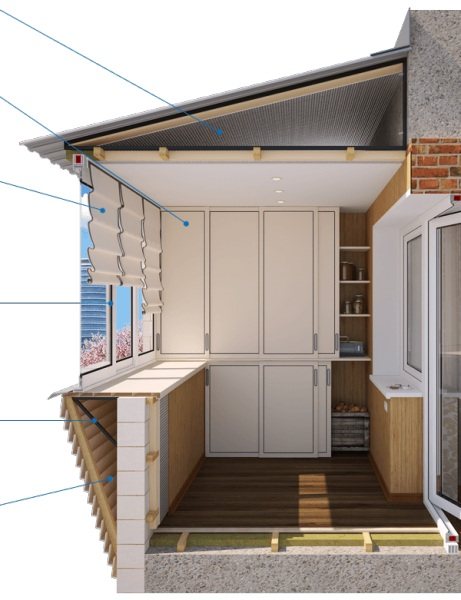
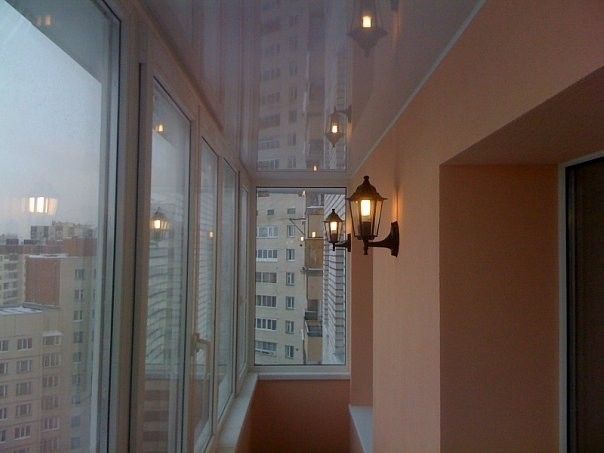
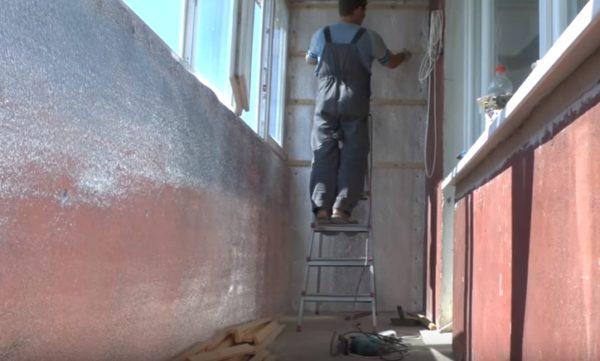
Interior decoration
The renovation of the balcony inside will be unfinished if the interior decoration is not done. Most often, the following materials are used for this:
- Lining made of wood. This is an environmentally friendly product, so its use does not have a negative impact on health.
- PVC panels. This is the most requested material. It has the following advantages - environmental friendliness, affordable cost, long operating period, ease of installation and maintenance.
- MDF panels. It is an environmentally friendly and visually attractive material. The disadvantage is the high cost.
Instructions for decorating the walls of the balcony in Khrushchev:
- Installation of the lathing. A timber of the required width is installed 5 cm from the ceiling. In this example, point lighting will be installed, so the ceiling will be suspended. If there is no need for a false ceiling, then the beam must be fixed directly to the ceiling. Fastening is carried out by dowel nails. The timber must be treated with a colorless antiseptic.
- The next bars are placed in parallel with a 50 cm pitch.
- On the opposite side, at the same level from the ceiling, a timber is installed.
- The next beams, as well as on the opposite wall, are installed in parallel with a step of 50 cm. The position of the beam is checked with a level.
- We proceed to the installation of the battens to the inner wall of the balcony. Subsequent bars are also placed in parallel with a step of 50 cm.
- The part of the timber that overlaps the window block must be cut off.
- We proceed to the installation of the lathing on the balcony parapet. The timber is attached to the window sill with self-tapping screws. It is important to calculate the size of the screw so that it does not break through the window sill.
- Parallel to the timber on the windowsill, the timber is attached to the floor.
- Bars are attached between the fixed rails at right angles. Installation step 50 cm.
- Next, we install the rail parallel to the crate frame. If you have a wide balcony, then you will need to install a second rail. It is installed with an overlap to the first one and is attached with a self-tapping screw.
- In the frontal parts of the balcony, the rail is fixed with a self-tapping screw at an angle.
- A U-bar is also placed at the window sill and is fastened with brackets.
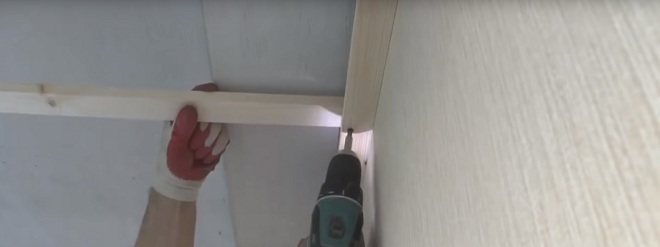
Ceiling decoration instructions:
This manual describes the finishing of the ceiling with PVC plastic panels. If you want to finish the ceiling with other material, then on our website there are already instructions for finishing the ceiling with laminate, clapboard, or make a stretch ceiling.
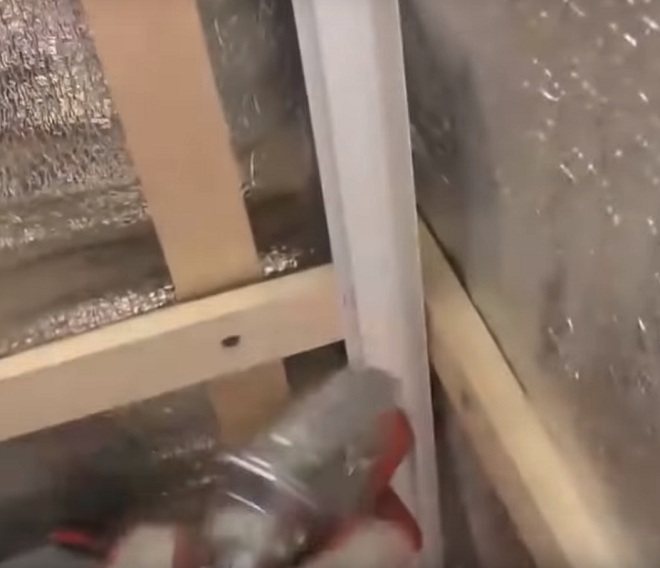
- Installation of the lathing. The first bar is placed above the frame and attached to it with self-tapping screws.
- We attach the second beam to the inner wall in the same way. It is important that these two beams are at the same distance from the ceiling.
- Next, we place the slats in parallel inside the lathing with a step of 50 cm. The beam is connected to the lathing frame with self-tapping screws.
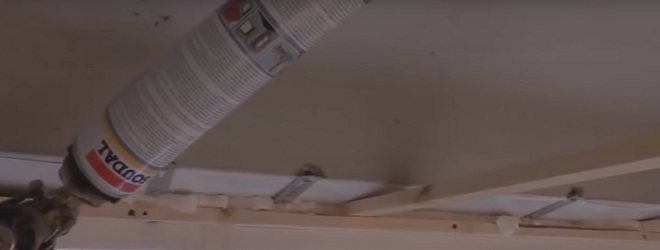
- The gap between the lathing and the slopes is blown out with a layer of polyurethane foam. It is applied in an even layer and provides additional sealing.
- Installation of the last rail according to src = "https://balkonoved.ru/wp-content/uploads/2019/08/x6.jpg" class = "aligncenter" width = "660" height = "202" [/ img]
- To fix the rail in this place, you can use a metal corner with holes for self-tapping screws.
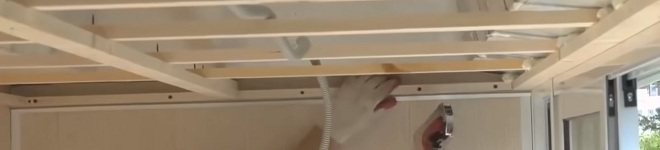
- Further, along the entire perimeter of the lathing, we fasten the U-bar using brackets. Fixing step 10-20 cm.
- We cut the panels to the required length and proceed to installation. The panel is placed inside the U-planks and moves to the side wall. The panels are interconnected by a locking mechanism, and are fastened to the crate with brackets. If spotlights are used on the balcony, then it is necessary to make holes for them using a crown. The rest of the ceiling is sheathed using a similar technology. If the last panel does not fit in width, then it must be trimmed.
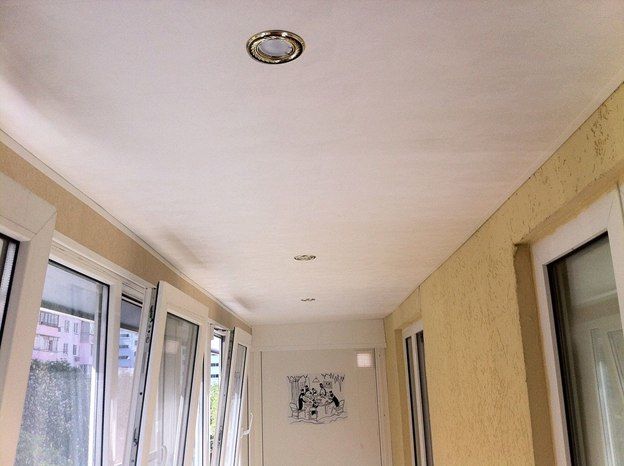
- The ceiling is ready.
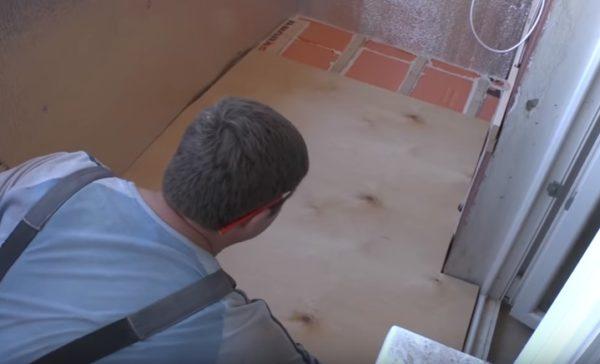
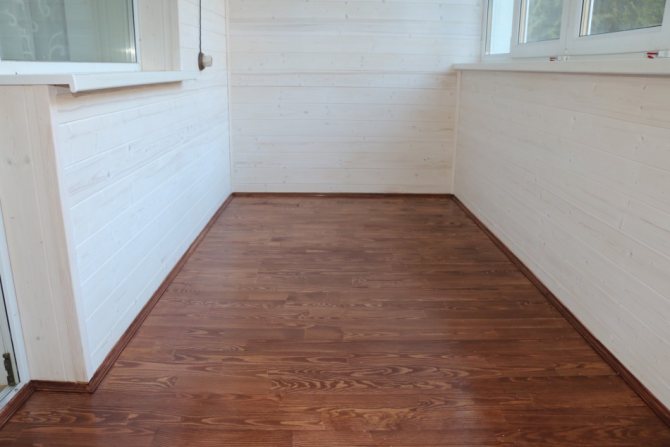
Floor finishing instructions:
In this example, we will finish the floor with laminate. If you want to finish the floor with another material, then on our website there are already instructions for finishing the floor with tiles and linoleum.
- The first step is to measure the distance between the walls of the balcony and mark the required distance on the laminate sheets. Make a small gap between the wall and the floor. This is done when the size of the laminate changes due to moisture and temperature extremes. Cut the laminate at right angles, otherwise it will not be possible to lay the lamellas evenly along the walls. In this case, an electric jigsaw is used to cut the laminate. You need to cut at a low speed in order to avoid the appearance of chipping, and when approaching the edge, the jigsaw must be led even more slowly to avoid chipping.
- The next step is to lay the substrate on the surface of chipboard or plywood. The substrate is spread on the floor, free of construction debris.
- We fix the substrate to the wooden base using staples and a construction stapler. This is necessary so that the substrate does not fidget or move during the laying of the laminate. Alternatively, you can use double-sided tape.
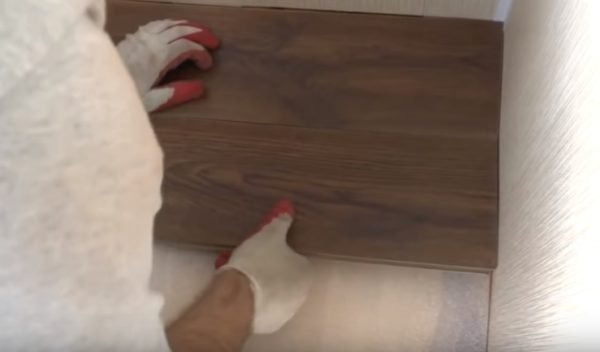
- After fixing the substrate, we install the first piece of the laminate. In this example, one piece of laminate covers the entire surface of the balcony, as a result, the seams are located perpendicular to the long walls of the balcony. There are other ways to lay laminate flooring: diagonal, longitudinal, herringbone or squares. In these cases, a larger amount of finishing material will be required and there will be more undercuts.
- Next, we move on to installing subsequent elements.The connection technology depends on the method of processing the ends of the products. In this example, there was a lock that snaps into place with a slight pressure on the lamella.
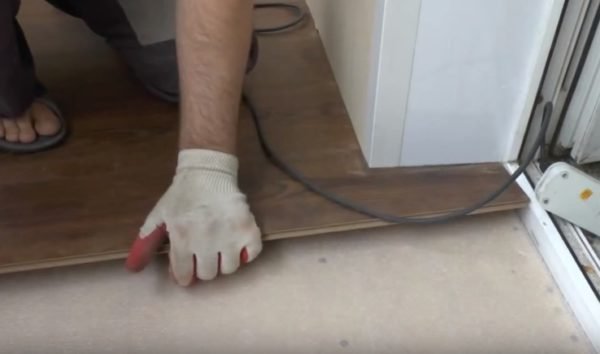
- Difficulties may arise in the area of the threshold of the balcony door. At this point, it is necessary to cut the lamella for the recess. We measure the length and width of the groove, transfer it to the lamella and cut it out.
- The last element of the laminate is laid after preliminary cutting. On the last lamella, the cut must be made lengthwise. It's okay if it turned out a little unevenly, since this area will be covered with a plinth, and small defects will not be noticeable.
- The floor is ready.

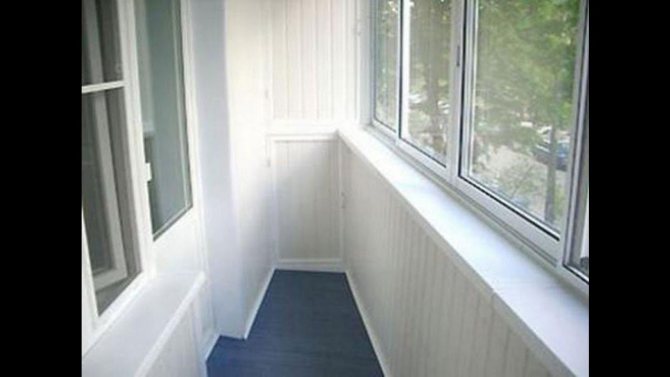
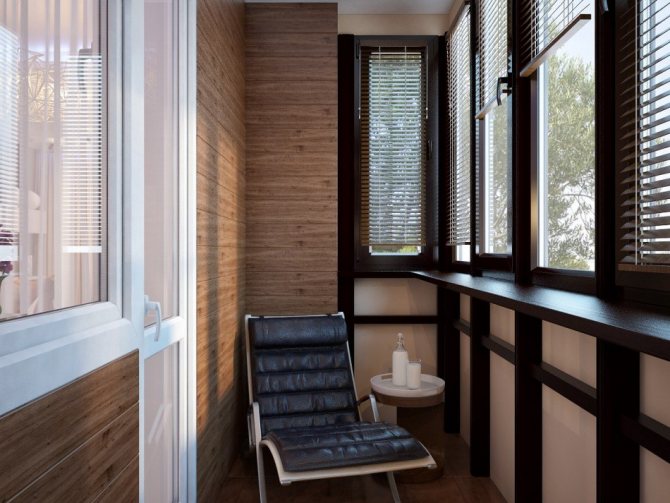
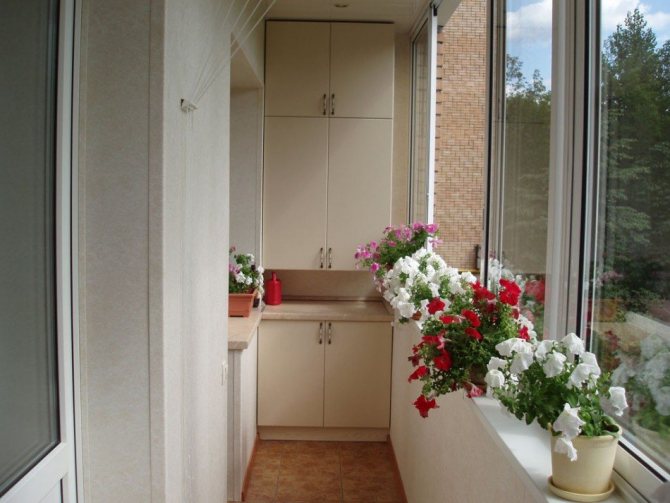
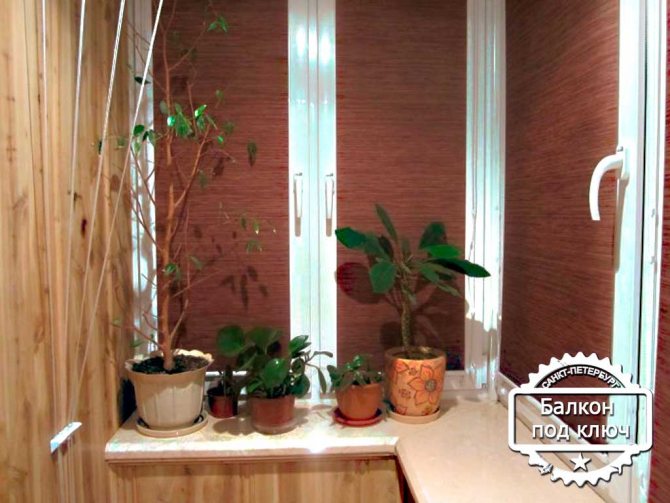
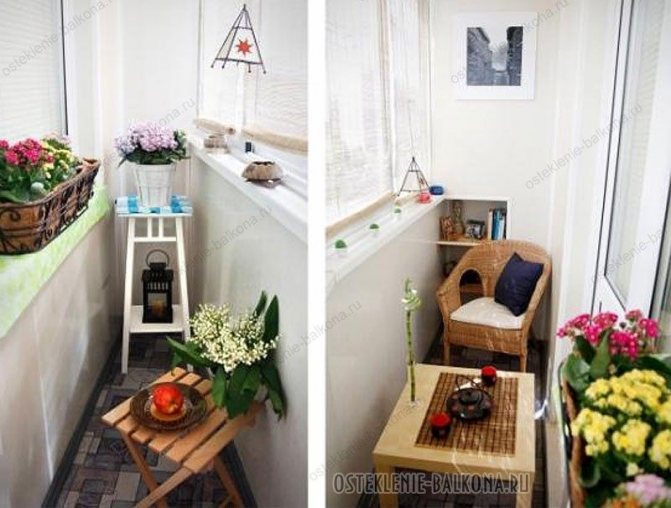
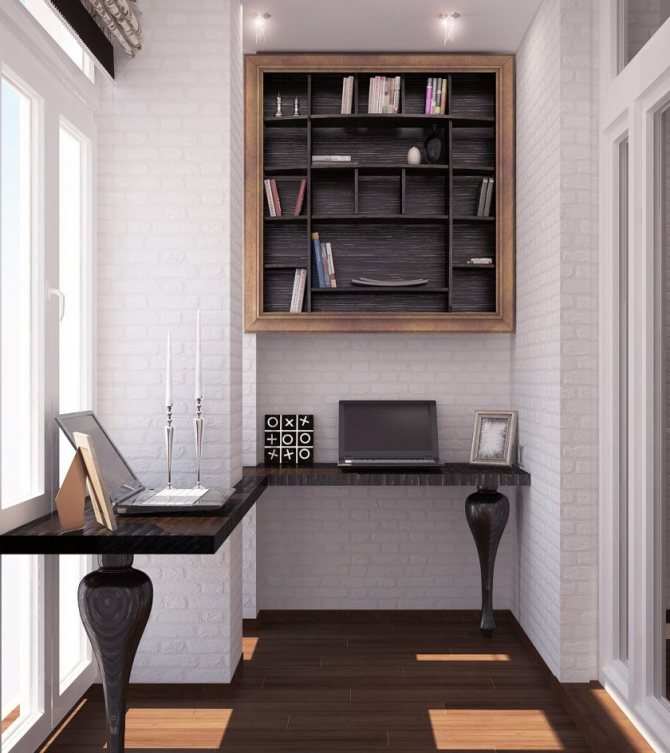
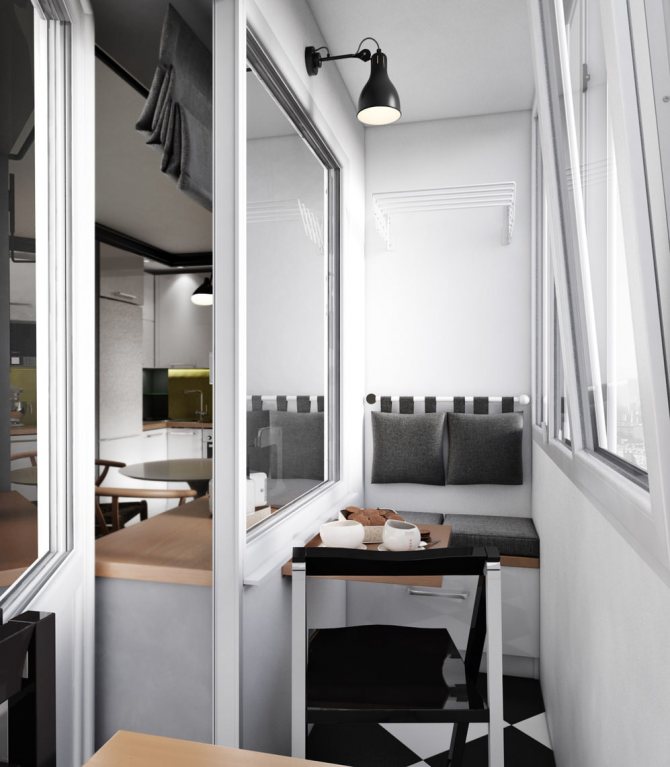
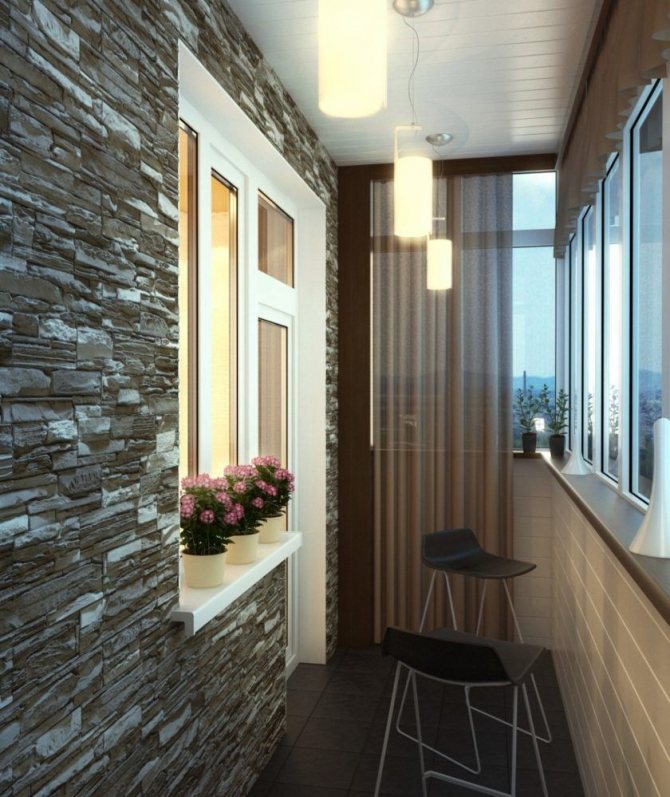
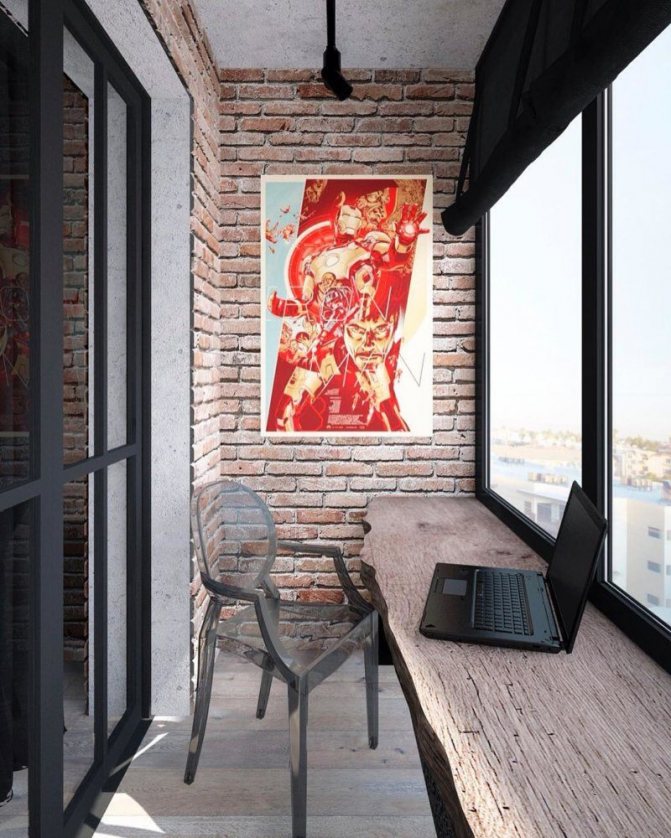
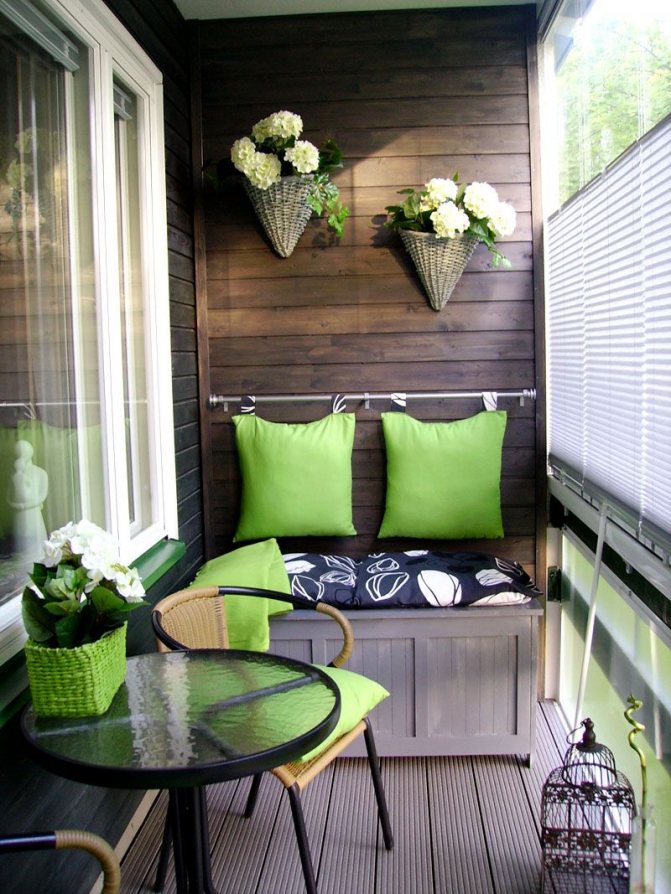
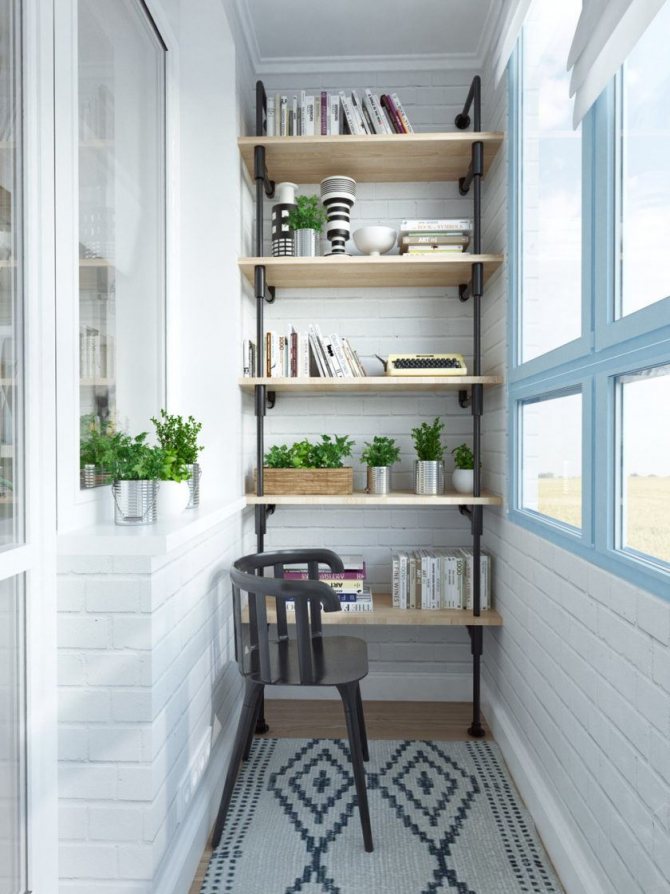
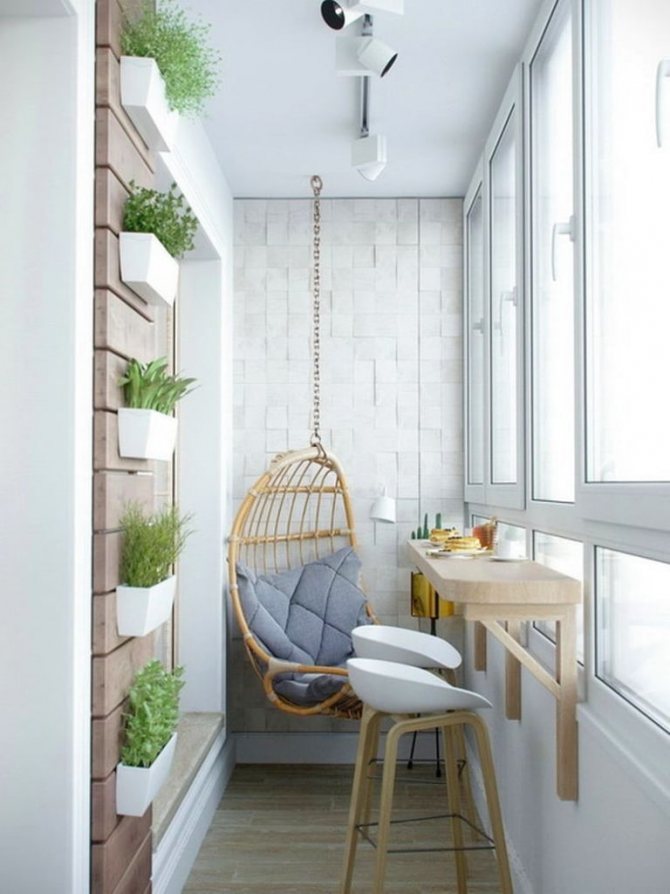
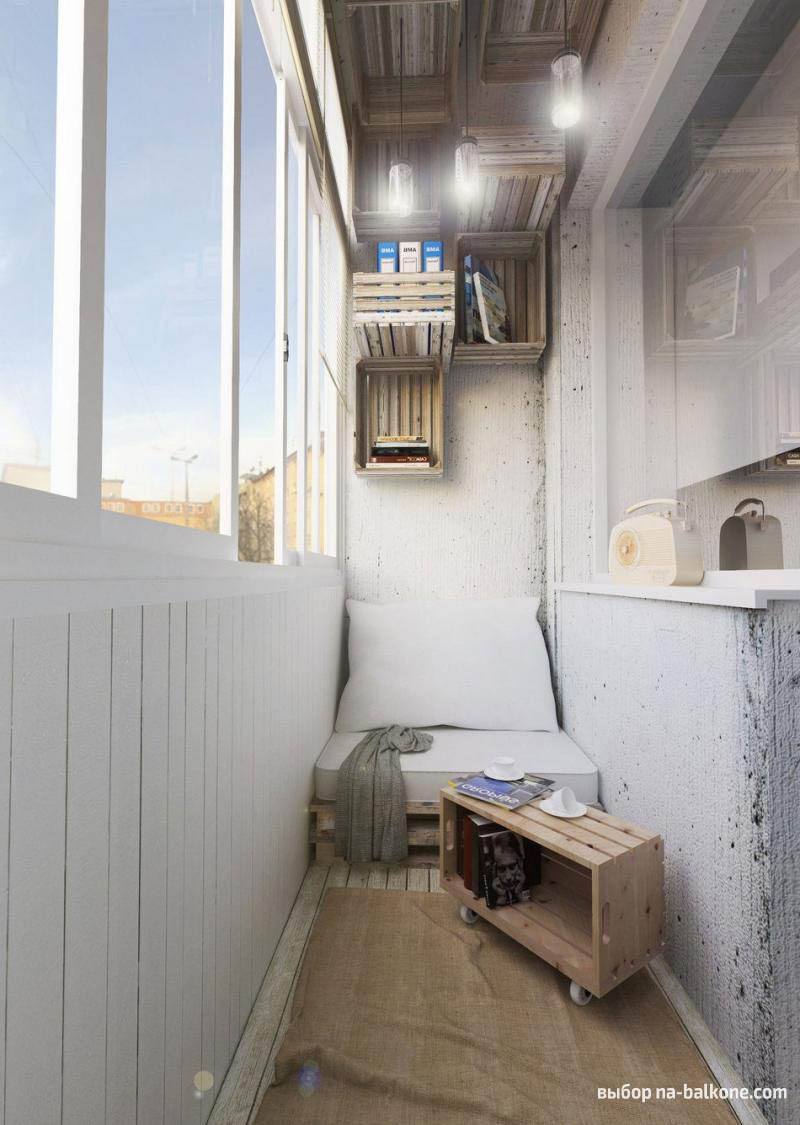
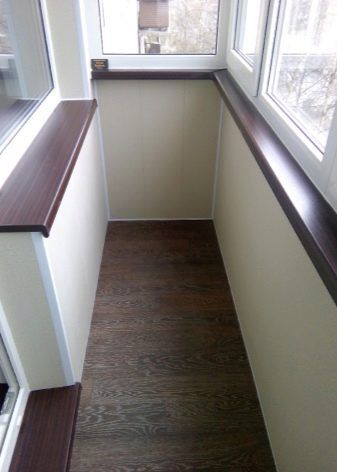
Design ideas
Below is a photo gallery of the design of the balconies. If you wish, you can choose a suitable design option for your balcony in Khrushchev.