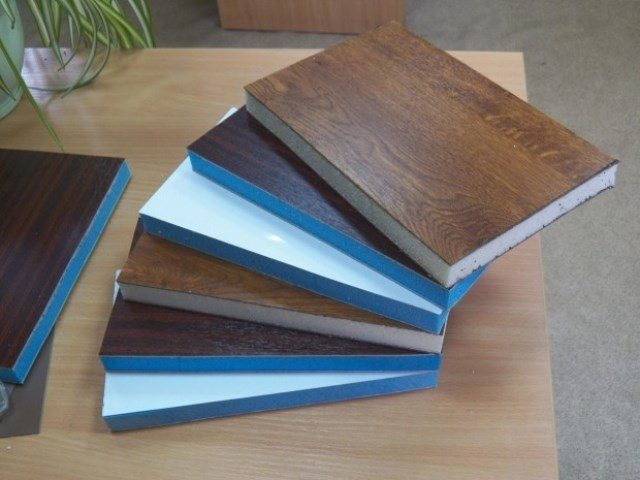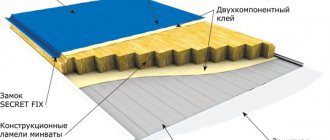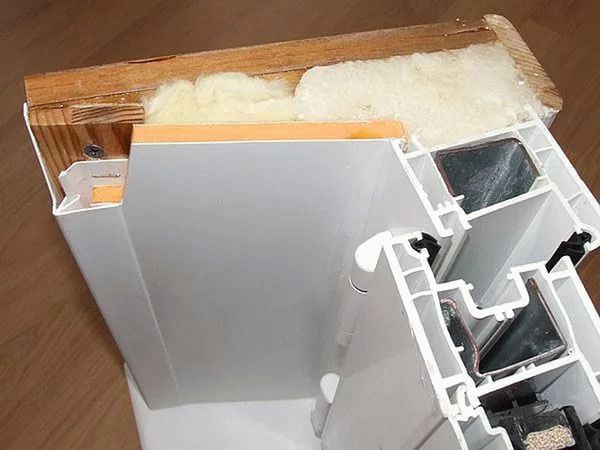
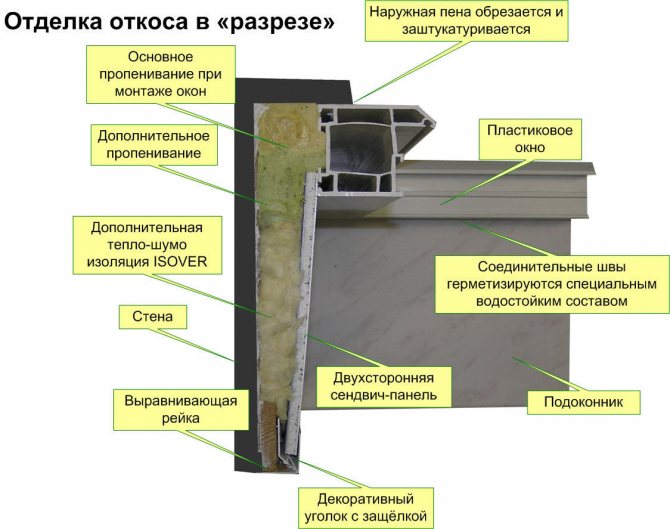
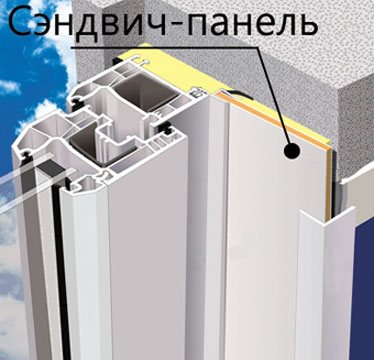
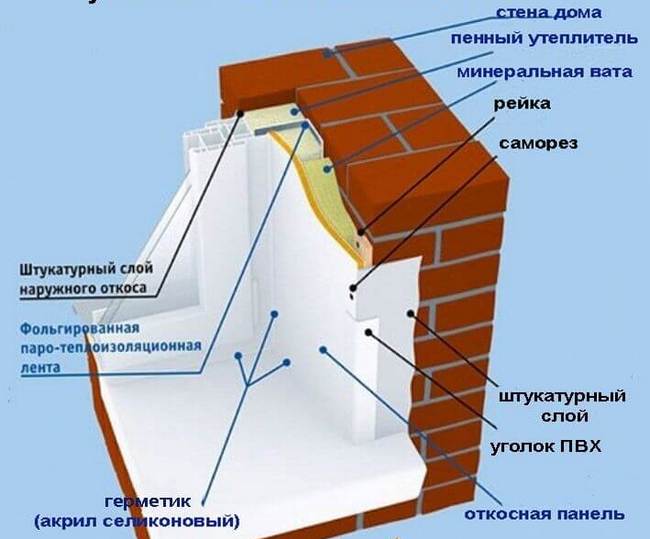
Installation of slopes from sandwich panels is one of the options for finishing window openings, which has its undeniable advantages. The fact is that this material combines several advantages at once. Firstly, the product has the shape of a sandwich, that is, there is a heater between two layers of plastic, which provides excellent technical characteristics. Secondly, the installation is carried out without much difficulty, there is no need to invite specialists and use complex tools.
Why do we need slopes
Many people think that slopes are optional, so they postpone finishing them until the very last moment. In fact, this is a very important procedure, which ensures not only the preservation of the exposed sections of the walls, but also the installed window frame.
Installation of sandwich panel slopes is important for the following reasons:
- Protection of assembly seams from destruction. Therefore, the decoration of plastic windows should be carried out outside and inside the premises.
- Prevention of moisture penetration. That is, the object itself, and in most parts - the walls are protected from moisture penetration, which leads to the appearance of mold.
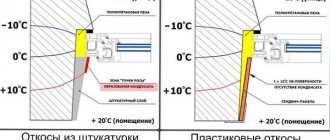
- Improving thermal insulation. Slopes on the windows are the most vulnerable place, through which cold air from the street can enter the room, as well as warm air can leave the room.
Summarizing the above, we can conclude that the slopes are an irreplaceable part of the room that needs high-quality finishing.
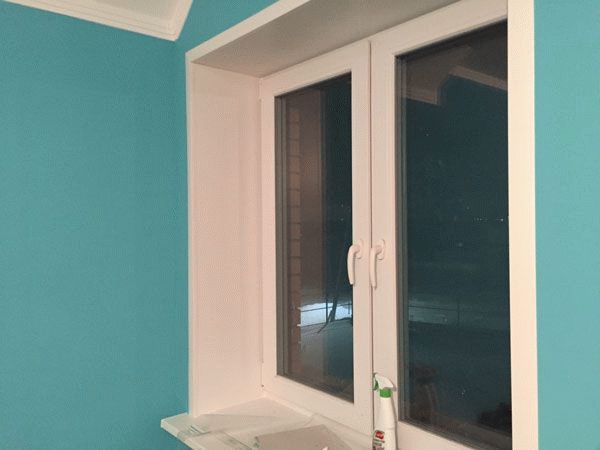
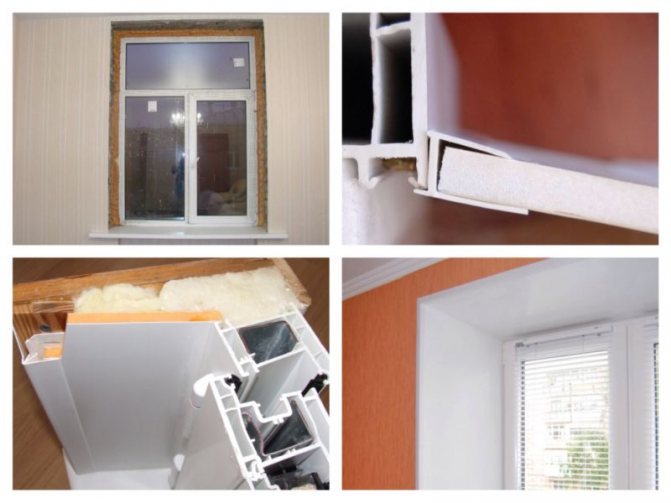
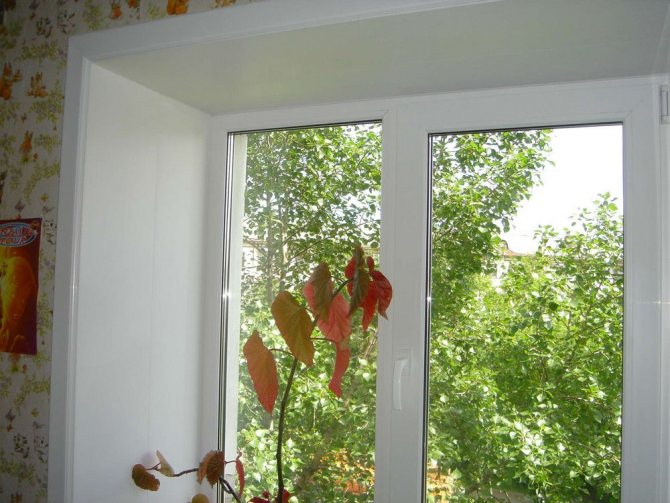
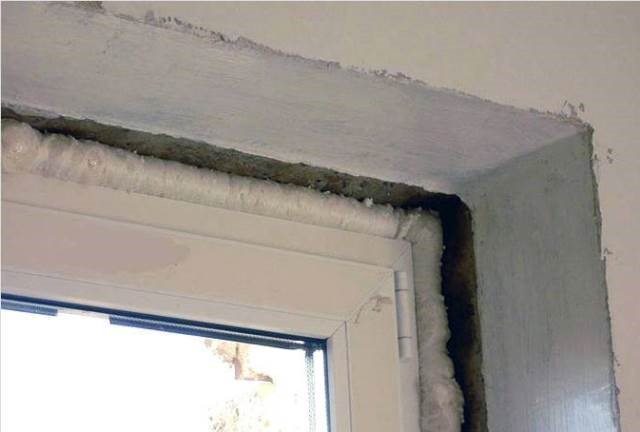
Sandwich panel slopes improve the thermal insulation of the window and prevent the appearance of moisture

Material features
Unlike wooden window frames, modern plastic frames have ventilation equipment. It is for this that the upper part of the sash folds back, resulting in a narrow opening through which the inflow of air masses is carried out. As a result, air turbulence with sharp temperature changes is formed. To increase the operating period of the window system, you need to take a responsible approach to finishing the window slopes.
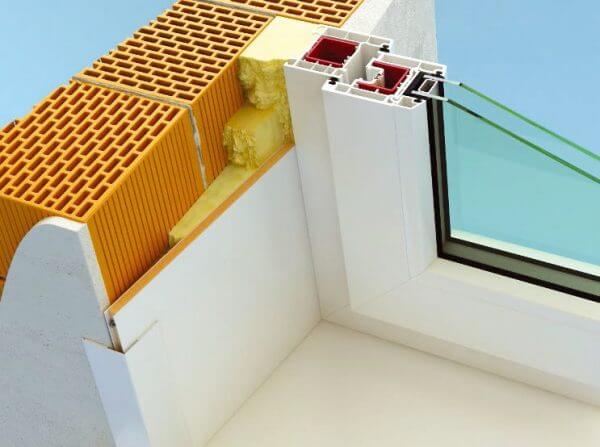
For these purposes, drywall is often used, but in winter this material can freeze. In addition, it needs to be looked after carefully. If the building is made of reinforced concrete blocks or bricks, a sandwich should be used for maximum thermal insulation of the sloping panels. The main advantages of the material:
- does not need special care, any contamination can be removed with a soap solution;
- low weight of structures;
- resistance to sunlight;
- resistance to the appearance of fungus;
- the material does not need additional decoration, the outer surface resembles window plastic;
- high rates of heat and sound insulation, building foam can be used to improve the thermal insulation and adhesion of the panel with a slope;
- good vapor permeability, panels do not get wet and do not deform under the influence of moisture;
- resistance to mechanical damage;
- stylish design;
- acceptable price;
- the material is environmentally friendly, no substances harmful to humans are released during operation.
Despite a number of obvious advantages, a sandwich, like any other building material, has a number of disadvantages. Some of them:
- improper installation of panels can cause gaps and cracks;
- under the influence of high temperatures, structures turn yellow and deform;
- installation of products must not be carried out if there is a small distance between the hinge and the wall (otherwise the panels will "walk" around the entire perimeter).


Advantages of finishing with sandwich panels over other types
Decorating slopes with sandwich panels is an excellent solution that has many more advantages than using other types of finishing materials.
- Window decoration with gypsum plasterboards. This option is considered to be quite laborious. It is convenient to work with drywall sheets when wall cladding and frame construction are planned. Otherwise, you have to purchase much more material than is required for the slopes of the windows.
- Using plaster. This method is loved by many due to the fact that it does not require special financial costs. But it must be borne in mind that finishing areas with solutions is a very laborious process. If you do not have certain skills, then it is almost impossible to bring out a flat surface. Also, we must not forget that the work is accompanied by dust, dirt.
- MDF products. Of course, they perfectly imitate natural materials, for example, a cut of wood, but using them for facing plastic windows is not quite the right decision. After all, it must be borne in mind that the products must be combined with each other.
Indeed, a sandwich panel for the construction of window slopes is an option that deserves a special talk. Although many have not yet appreciated the benefits of this material.
How to choose slopes: the best finishing option
There are several options for finishing slopes. For this, materials such as plaster, drywall, gypsum fiber, plastic panels and sandwich panels can be used. The price for window slopes of the latter type of material is the highest compared to other options.
The traditional way of finishing the slopes is to plaster the side and upper niches of the window frame. The technology consists in leveling the surface by applying several layers of plaster, followed by priming and painting the surface. This method has a number of distinctive advantages. First of all, it is versatile. You can plaster the slope in a room with any humidity and temperature conditions. The mixture itself is an inexpensive material.
Plaster slopes are characterized by resistance to mechanical stress, ultraviolet radiation and moisture. This finish does not contain seams or joints. The surface is perfectly flat and smooth. In case of a decrease in aesthetics, such slopes can be easily updated or repaired.
For slopes, drywall, plastic and sandwich panels, as well as gypsum fiber are used.
Despite its many advantages, this method of finishing slopes has its drawbacks. Plastering side niches is a time-consuming and laborious process that requires breaks in work to dry each new layer. In addition, to get a good result, you need to have the appropriate skills. Plaster slopes are characterized by low thermal insulation properties. They are prone to freezing and condensation.
Note! To perform plastering work, you will need to trim the foam inward by 1-2 cm, which will weaken the heat-insulating seam.
The plaster and plastic frame do not interact well enough with each other, which will soon lead to the formation of cracks. You can fill them with a sealant. However, there is no universal compound that adheres equally well to plaster and PVC window block.
Features and material selection
Plastic sandwich panels are a versatile material for window decoration.He successfully pushed other options in this field that do not have so many advantages. It should be noted that this product can be used even when working with wooden structures.
Of course, it is necessary to take into account the peculiarities of the material. They depend on the variety that will be used for installation work. So, there are several product options that differ in their technical characteristics.
Sandwich panels are a versatile material for finishing slopes with many advantages
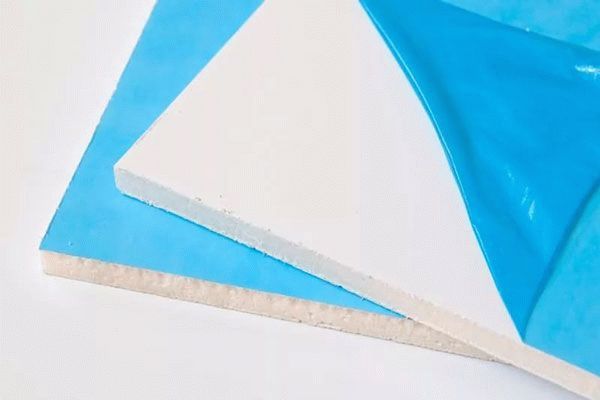
Allocate sandwich panels for slopes:
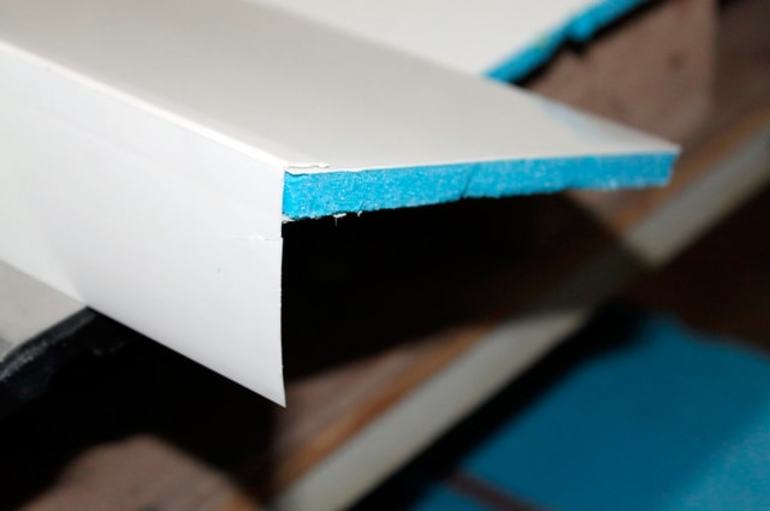
- Consisting of two layers. They consist of foam (or other rigid insulation) and a protective plastic layer.
- Having three layers. Such a product is distinguished by the fact that it has another protective layer. That is, the insulation is located in a space that is closed on both sides.
The first type is considered the most acceptable. After all, the presence of another layer of plastic that will contact the surface being trimmed is not the best option. It requires a better approach to sealing and an additional layer of insulation.
Installation of window slopes in a sandwich panel: technology and requirements
How to correctly and quickly install windows in a sandwich panel and can you do it yourself? Usually, such questions arise when replacing old window blocks with new ones, plastic or wooden. The requirements for the design of the window opening are as follows:
- Reliable thermal insulation.
- Long-term preservation.
- Undemanding care.
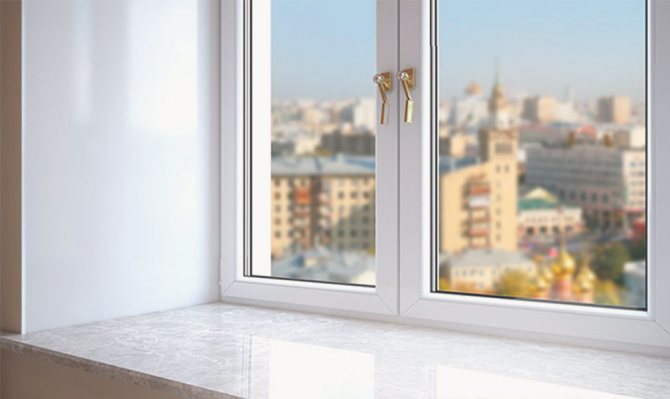
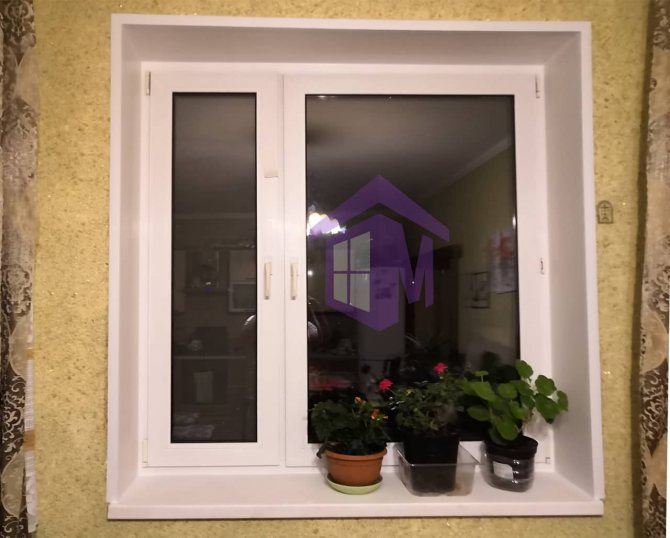
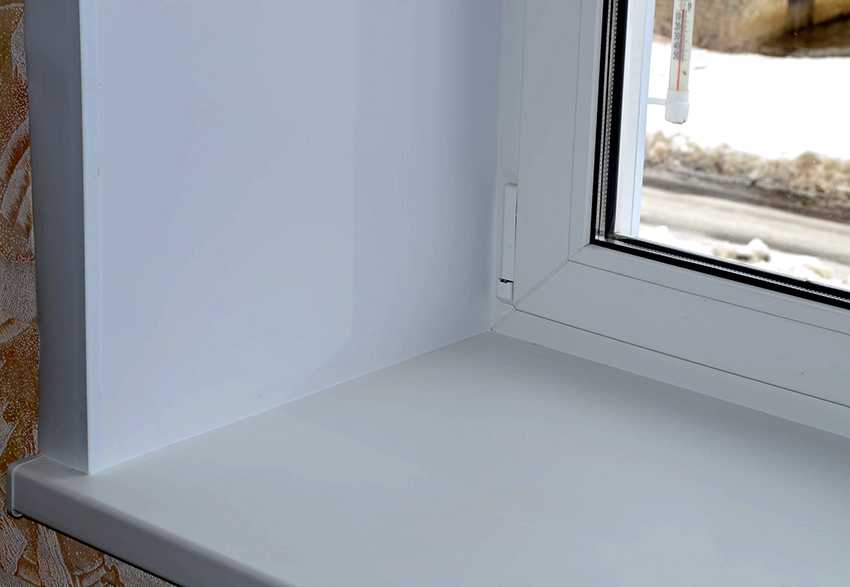
- Attractive appearance - straight lines, smooth surface, neutral colors.
The installation of window sandwich panels can be carried out on your own, having some knowledge, skills in construction business and a minimum set of construction tools. Thermal insulation by this method is especially important in buildings made of bricks, concrete panels or blocks, due to the peculiarities of the building material of the walls.
Advantages and disadvantages of the product
Currently, sandwich panels for windows are produced, which have excellent properties. The following can be distinguished:
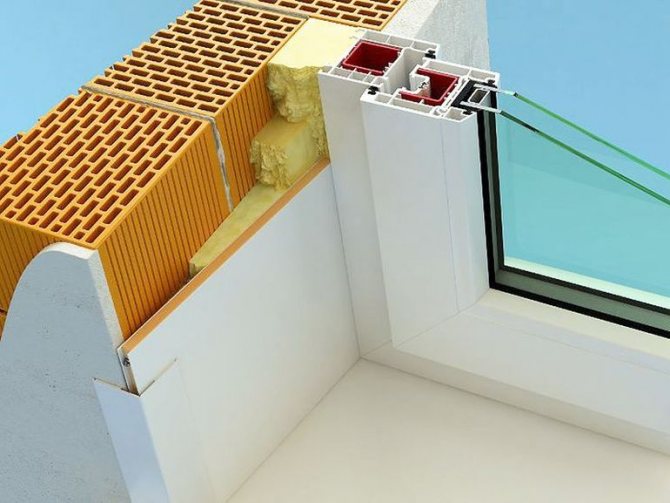
- The presence of a foam layer is a great way to keep the room warm. This material does not transfer cold from the walls, which creates a special microclimate in the room, and the windows are not covered with condensation.
- The sandwich panel has an energy saving effect - it reflects heat, limiting its loss as much as possible.
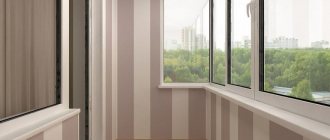
- Large selection of colors and textures. Naturally, the most popular is the white shade, but if you wish, you can choose any color scheme.
- Window slopes made of sandwich panels can be of different sizes. The material is selected directly on the basis of the size of the treated areas.
- There are ready-made options that simplify the installation process.
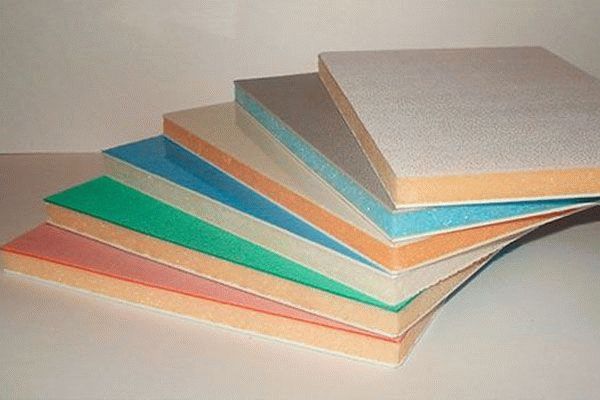
Plastic sandwich panels are available in a wide variety of colors
Of course, there are some disadvantages as well. They should be considered:
- The material must be cut very carefully, because it can be very easily damaged, which will lead to damage to the entire part.
- For work, you need to prepare surfaces. Although this procedure will not cause any particular problems.
- This option is not suitable if the distance between the wall and the hinge installed on the frame is small. That is, the material hides some space that is necessary for its installation.
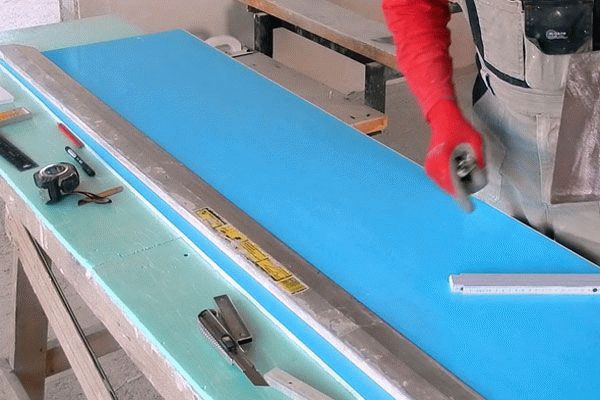
It is necessary to work with the material very carefully, otherwise it can be damaged
Comparison of sandwich panels and insulating glass: which is better
The design of a balcony or loggia is often accompanied by the joint installation of metal-plastic glazing and plastic sandwich panels. The latter are often used for sheathing blind sections, which can be located at the bottom of the balcony door frame, reaching the floor, or for finishing the side sections. This is done to limit light transmission at specific locations.In addition, due to their good strength properties, sandwich panels are considered the best option in comparison with a glass unit in terms of safety.
Installation of sandwich panels instead of a double-glazed window allows you to make the side sections of a balcony or loggia blind, which is necessary for installing cabinets or other items that should not be visible from the outside. Such a structure can subsequently be used as a ventilation outlet, since a number of holes can be made in it.
Sandwich panels, unlike double-glazed windows, are resistant to moisture, ultraviolet radiation and mechanical stress.
However, the use of panels instead of a glass unit has other advantages. The material is resistant to various negative influences. It is immune to ultraviolet radiation, moisture, chemicals, mechanical and shock loads. The panels are durable, reliable and durable. They do not need much maintenance, which is not the case with traditional glazing. You can also choose a different color design of the material, which is clearly shown in the photo of the sandwich panels.
Note! The "Salamander" window profile is very popular today, and it is possible to order sandwich panels with a protective film, which not only improves the decorative qualities of the material, but also increases its strength characteristics.
Since the plastic sandwich panel is represented by a multilayer material, inside which there is a layer of insulation, such a sheathing is characterized by good thermal insulation and sound-absorbing properties.
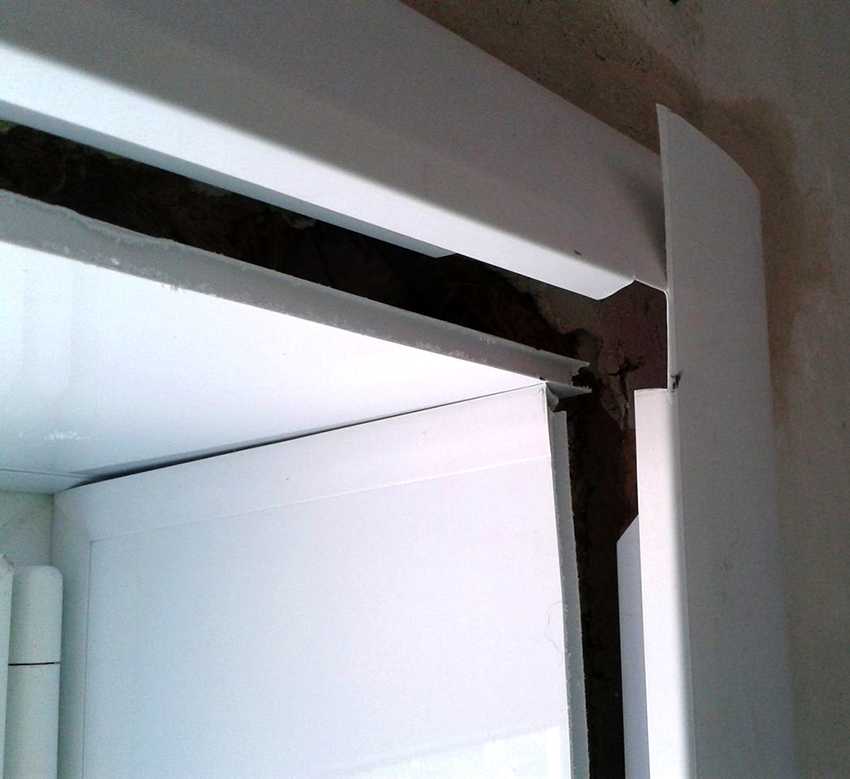
Preparatory work
Before thinking about how to make slopes from sandwich panels, it is advisable to prepare the tool necessary for work. For this event you will need:
- Miter box - for cutting material at the required angle. Such a device significantly reduces the operating time, and also allows you to create a more beautiful coating.
- A set of spatulas. Although only a medium and small version is needed directly for the process.
- A hacksaw for metal or an electric jigsaw.
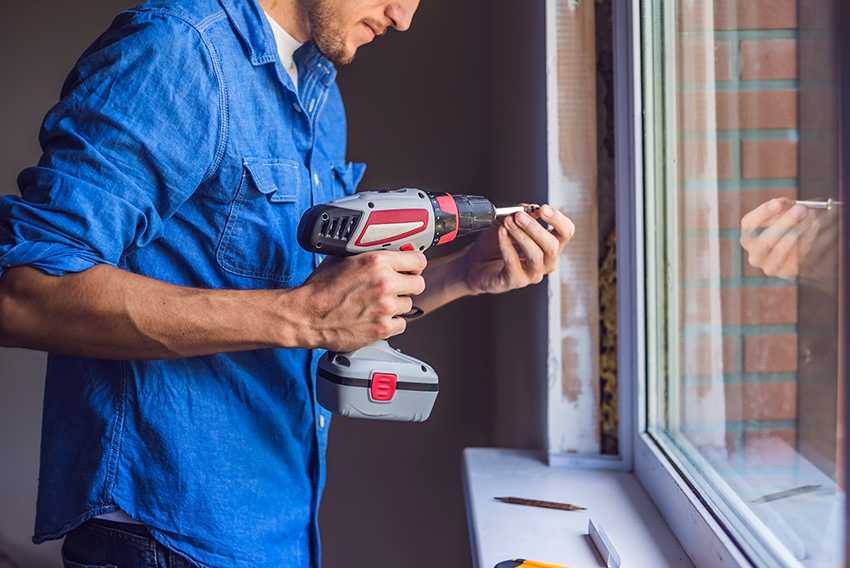
- Screwdriver or screwdriver set.
- Level and tape measure.
- A special construction gun used to apply liquid nails.
- Stapler. A more professional version is needed, which belongs to the middle price category. Such a tool will come in handy in the household, so the cost of purchasing it will be justified.

Tools required for the installation of sandwich panel slopes
For the device of slopes from sandwich panels, a number of preparatory measures are required:
- All areas that will not participate in the installation are covered with plastic wrap and cardboard. This will prevent damage to the window sill and the window itself.
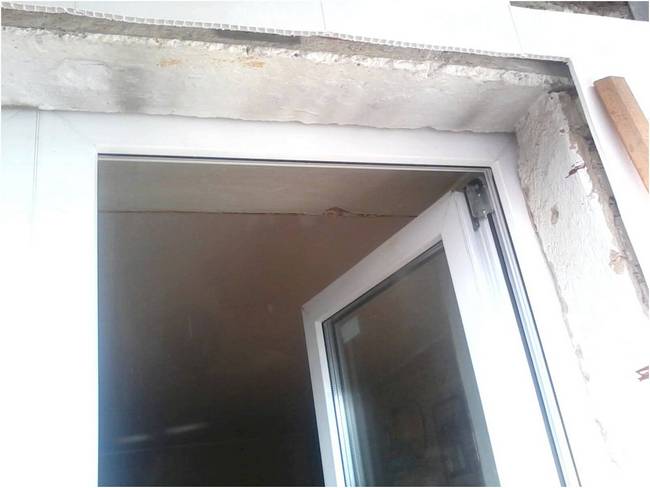
- The slopes are well inspected. Make sure the surface is completely dry and free from mold.
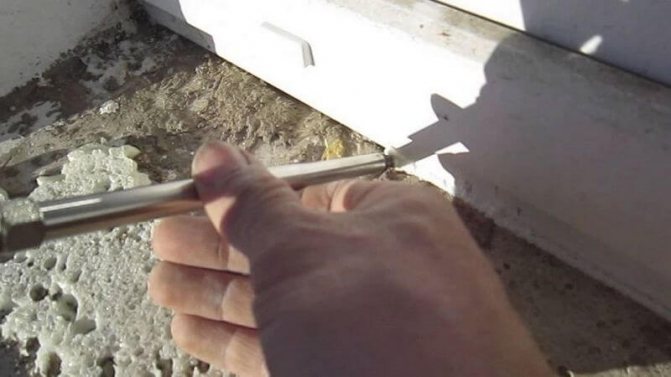
- Excess polyurethane foam is cut off. A simple stationery knife is great for this.
- The state of the base is checked immediately. If necessary, a layer of putty is applied. The presence of crumbling places indicates that the site needs to be completely replaced.
- To prevent the appearance of fungus, a primer with an antiseptic is used.
- The assembly seams are additionally sealed.
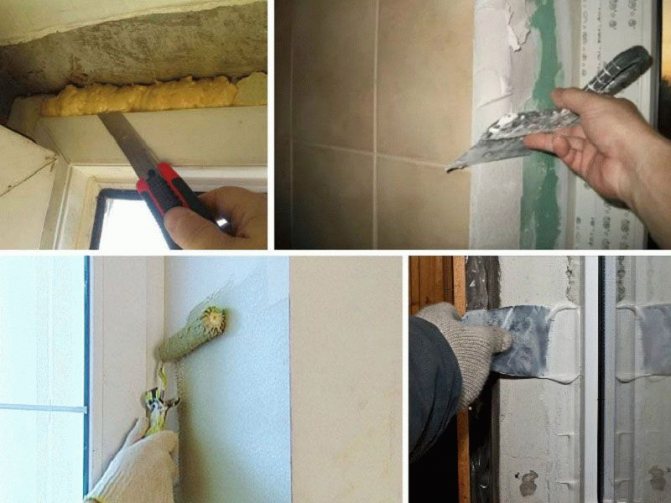
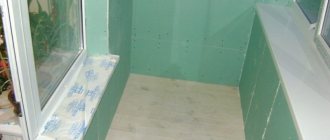
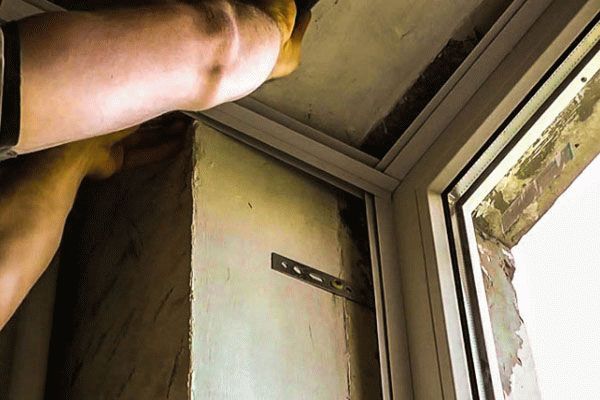
Preparatory work before installing slopes
Thus, a clean surface should be obtained, without the presence of defects. It must be borne in mind that after applying the primer, the work area must dry well.
How to insert a window into a sandwich panel
The location of window openings is laid down at the stage of development of the building project. When erecting walls, a fastening frame is installed in parallel.
Before cutting out an additional window opening in an already finished building, it is necessary to study in detail:
- Dimensions of the finished window block.
- The side to which the window opens.
- Ventilation properties.
A hasty decision is unacceptable. After the completion of the work, the owner of the building can expect an unpleasant surprise. For example, window sashes will not open completely or drafts will walk around the room, even when opened for ventilation.
Installation of a window block, in a pre-prepared frame:
- The window unit fits into a slot bounded by the frame rails.
- Aligns with wedges and a level to the correct position.
- Fastened to the frame with self-tapping screws or analogs.
- Seams and gaps between the block and the wall are filled with sealed material.
The execution of work does not require high qualifications, the main conditions for the successful completion of work are adherence to technology, attentiveness and accuracy.
Mounting methods for sandwich panels
Do-it-yourself installation of slopes from sandwich panels is possible in three ways:
- Facing using polyurethane foam.
- Application of "liquid nails".
- Mounting with wooden slats.
Each of these options has advantages and disadvantages. It is advisable to take this into account, giving preference to one of them.
Foam mounting
Many people think this method is the easiest. For this installation option, it is necessary to purchase a sandwich that will have two stiffeners. The procedure itself is divided into several stages:
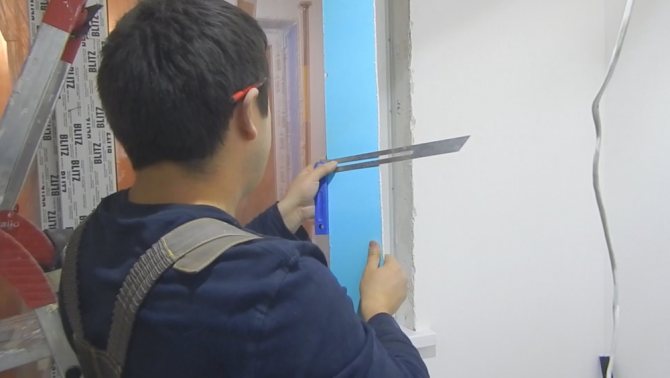
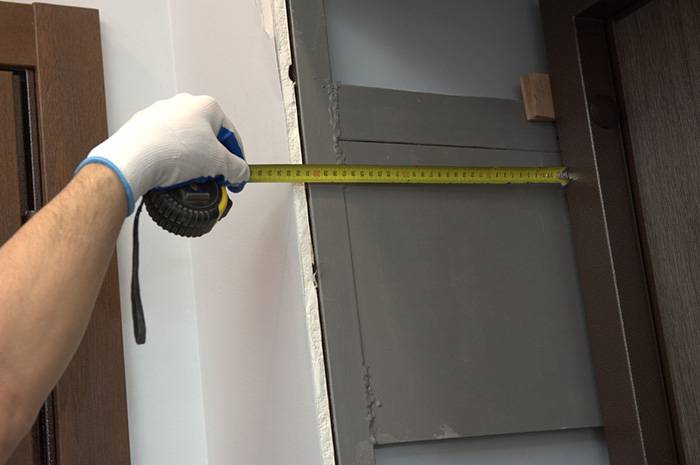
- Measurements are being carried out. You need to get accurate data, otherwise there is a high probability of making mistakes when trimming.
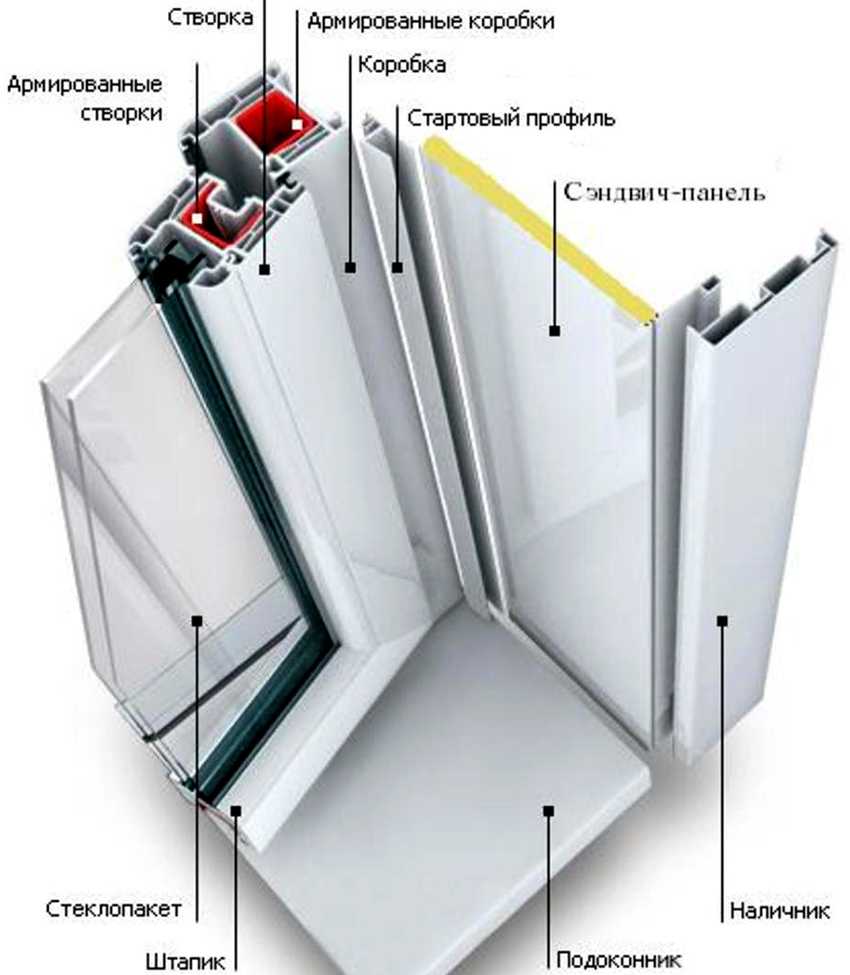
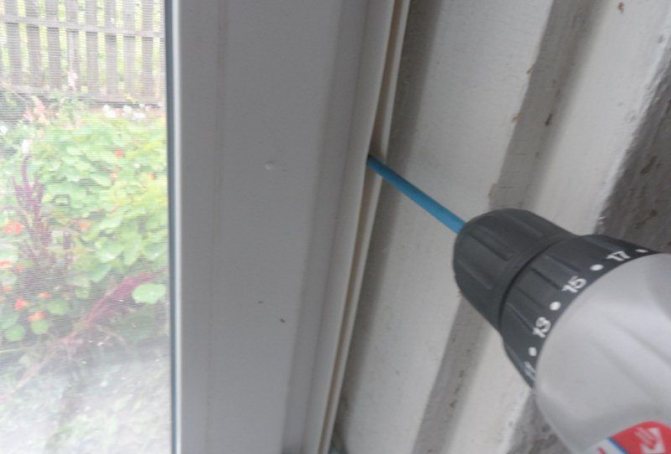
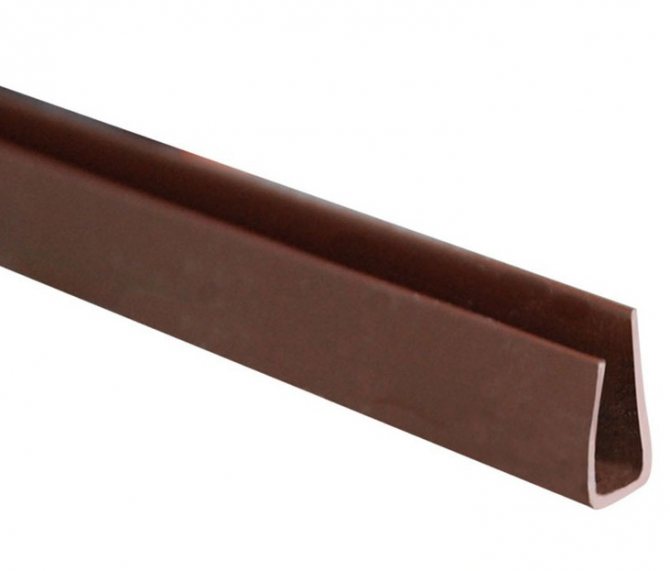
- The start profile is installed. It is a plastic element that has a groove used to fix the material. Please note that the profile is attached directly to the edge of the plastic frame.

Installation of the starter profile - The measurements are transferred to the facing material.
- Trimming is performed with the help of a handy tool.
On a note! Sometimes there are tips that pruning can be done with a construction knife. This is the wrong decision. This tool is only suitable for plastic panels that are used for wall cladding.
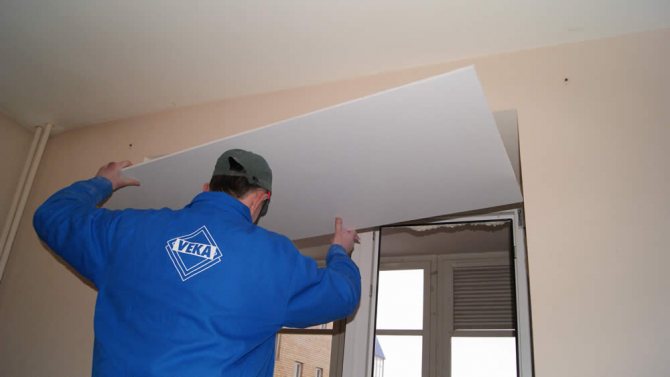
- Install the top bar first. It is inserted directly into the groove of the guide profile. Make sure that the part is completely seated.
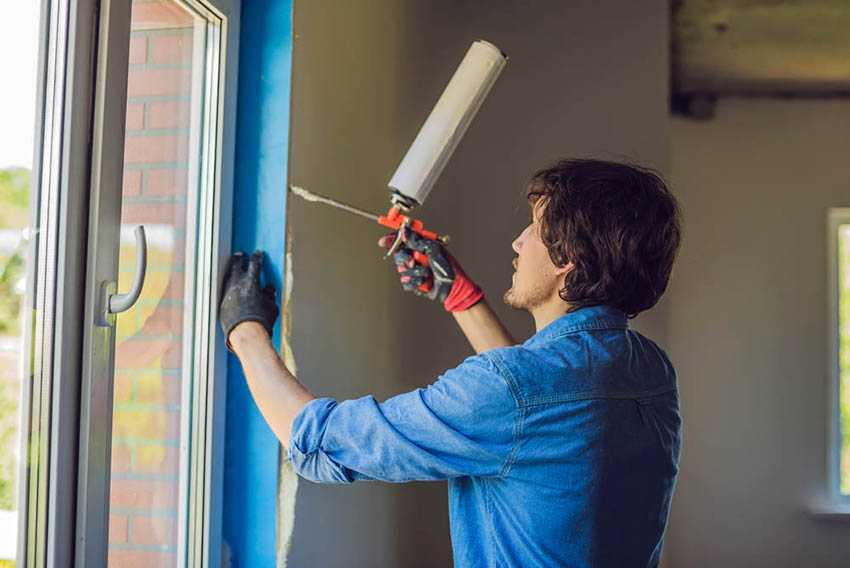
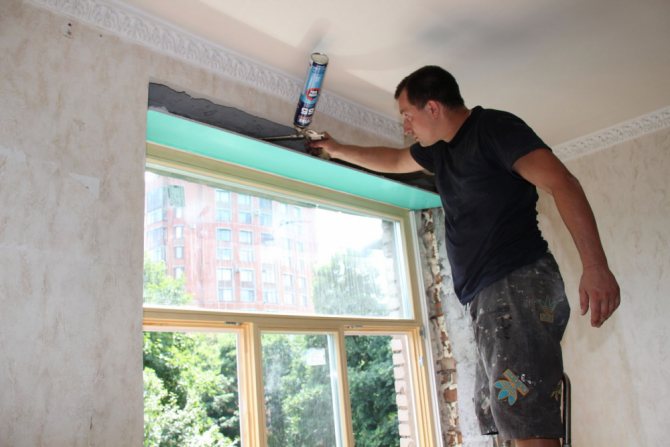
- The gap between the wall and the panel is foamed. This should be done in such a way as to minimize foam expansion. Therefore, a professional version is chosen, which is applied with a small layer.
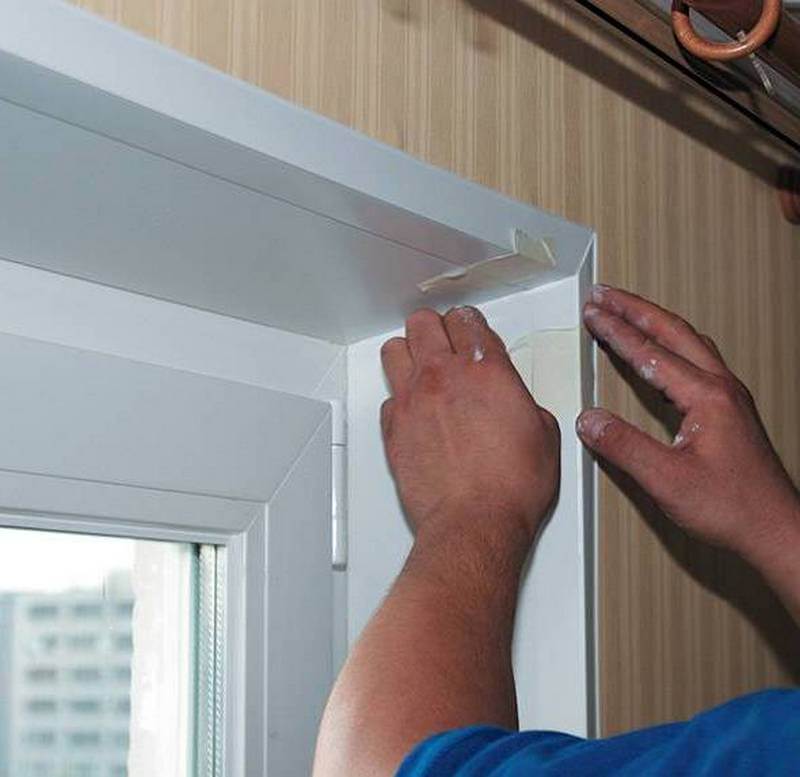
Filling the gap with foam - The plastic element is immediately fixed. This is done with masking tape.
- Then vertical sections are sheathed with sandwich panels. The process is completely identical.
- Allow time for the foam to dry well. Its surplus is cut off, the sections are closed with overhead corners.
Fastening the sandwich panels to the slopes in this way allows you to create an additional layer of thermal insulation. In addition, the assembly composition perfectly withstands any impact, does not undergo destruction from moisture.
For a better understanding of the technology, we suggest watching this video:
You should know! Foam mounting can be done without the use of guides. The slopes are attached directly to the windows. The technology is as follows: a sufficient amount of foam is applied to the panel. The part is pressed to the surface and torn off for a while. Next, fix it tightly by installing a spacer. This method is inconvenient in that it can lead to a distortion of the structure.
A similar technique is used when liquid nails are used. They are more convenient in that they do not expand as much as foam. But this method requires a better prepared surface.
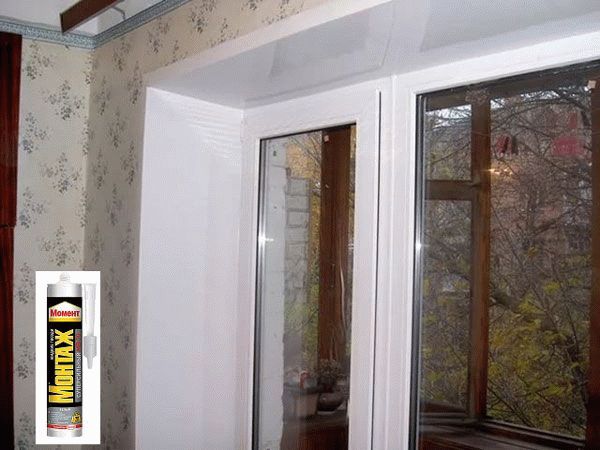
The use of "liquid nails" avoids the expansion that polyurethane foam gives
Mounting on wooden slats
Do-it-yourself sandwich panel slopes can be installed using wooden slats. They are most conveniently used in conjunction with a guide profile. The procedure is as follows:
- The dimensions are removed and transferred to the panel. Details are trimmed.
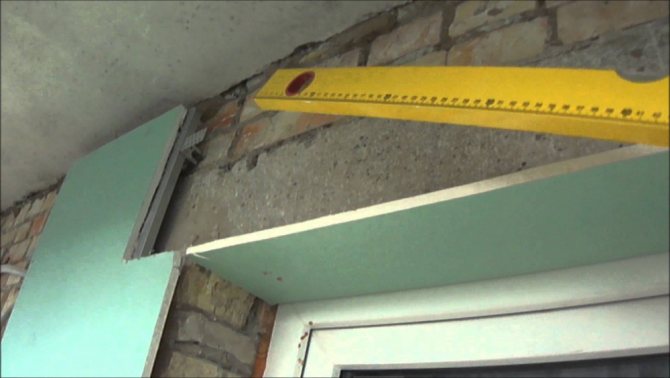
- On the edge of the window opening, which is located from the outside, wooden slats are installed. They should form a complete outline. Correctness is controlled using a level.
- A profile is screwed to the plastic frame.
- A small area is formed, which will represent a void. It is filled with mineral wool or filled with polyurethane foam.
- The panels are installed in the profile, but not glued, but nailed with a stapler. The staple is punched through the back layer of PVC. Therefore, this option is suitable for three-layer products.
On a note! If you do not use a profile, then the elements must be glued. Then the inner corner is treated with sealants to hide possible defects.
Thus, window cladding with sandwich panels using wooden battens is an excellent solution, which makes it possible to carry out installation quickly and efficiently.


Installation execution
Finishing work on window blocks should be started no earlier than 36 hours after replacing the old window. During this time, the polyurethane foam should completely solidify. The excess protruding foam is cut off. Before that, it is important to make sure that the foam has completely hardened, does not reach for the knife.
Then the P-profile is installed. It must be cut so that in section it resembles the letter P. To minimize costs, preparing a part of the desired size, measure the parameters of all slopes with a tape measure. Block parameters are taken in terms of width and length.
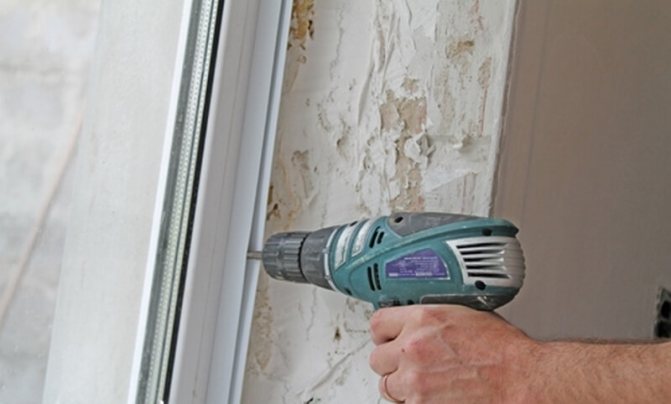
The finished starting profile is fixed with self-tapping screws. Fastening should be carried out strictly along the edge of the profile. About 15 cm is left between the self-tapping screws. First, they are attached to the top of the window block, in order to then install the side parts according to its level. They are mounted joint to joint so that there are no gaps.
For reference!
Starter profiles don't always look aesthetically pleasing. Installation of a panel for a metal-plastic window can be carried out without using a U-profile. Installation along this path consists in bringing the panels tightly behind the window profile by approximately 1 cm. In this case, the resulting niches should be filled step by step with foam. The process of finishing slopes without a starter profile takes longer, but the result is more aesthetic.
The next step is to install the panel itself. The installation sequence of the panels is the same as for the profiles. Then it is necessary to measure four more parts of the P-profile along the length corresponding to the width of the slope. These parts will be installed in the side U-profile. Thus, 2 elements are needed for each side part.
For reference!
The stage with the installation of additional profile strips is sometimes omitted. In this case, the sandwich panel simply adheres to the top layer and the surface of the window sill. The gaps resulting from this installation are filled with liquid plastic. This composition will acquire the drying properties of plastic. But if you decide to use this installation method, then only liquid plastic should be used as a filler, as the sealant will darken over time.
At the last stage of installation, strips of sandwich panels are installed in the finished structure from U-profiles. Installation is completed by installing panels around the perimeter of the window. The final step is to complete the look of the window block.
To complete the finishing work on the slopes, an F-profile is cut.
The length of the profile is calculated as the sum of the length of the slope, the width of the profile for the side and the length of the slope + the width of the upper slope multiplied by 2.
For reference!
In order not to be mistaken, it is better to cut off a couple of centimeters more than calculated. Excessive length can be cut, but if the length is insufficient, you will have to redo it.
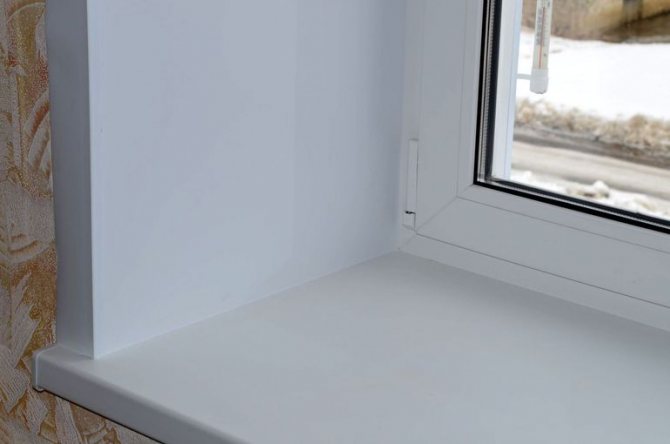
The slope cover or top panel is then snapped into place at the edges of the sandwich panel. At the corners of the window block, the profile will overlap. To trim the corners, you need to mark the cutting area with a pencil and cut the corner from the end of the profile. As a result, neat corners are formed.
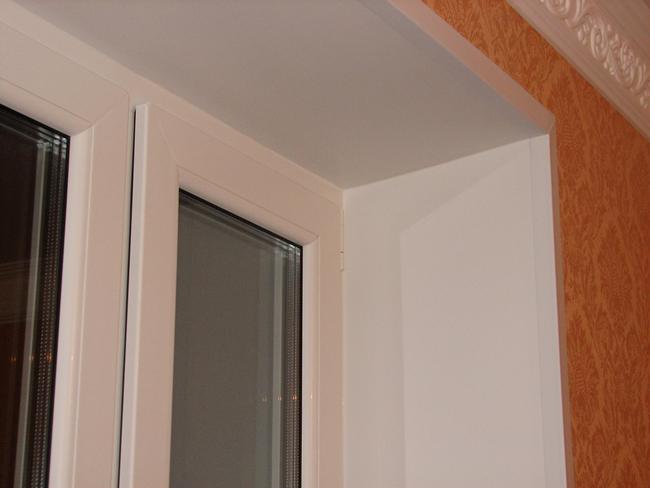
Installation of sandwich panels is simple enough to do it yourself, without resorting to the services of specialists. Such finishing of the slopes will maximize the sound and thermal insulation, it will look neat and clean. The materials used for facing the slope have high technical characteristics, which allows them to serve for decades without losing their properties and accuracy.
DIY sandwich panels
Few people know that sandwich panels can be made by themselves. This technology is used in cases where it is necessary to obtain material of non-standard width.

If you have the right materials, sandwich panels can be made by yourself
The general principle is as follows:
- A foam layer is prepared. Its thickness is selected individually.
- Plastic or other material is bought.
- The protective layer is smeared with glue, insulation is laid on it. Close the top with another panel.
- To fix the structure, a clamp or other press is used.
It turns out excellent material that will allow you to perform the necessary work. Of course, this option should be used as a last resort, because factory products are of a higher quality.
Sandwich panels for windows price and quality
When choosing sandwich panels, pay attention to their quality and finish. The cost varies depending on the type, color, structure and thickness of the facing board
The modern market for mounting materials offers a variety of structures: both embossed and flat. In addition, a wide range of colors allows you to choose a sandwich panel that is individually suitable for the interior of the room. Using denser materials will raise the price bar significantly. Also, when buying an imported sandwich panel, you will have to pay even more. However, the quality of the produced domestic coating is in no way inferior to the foreign product. Therefore, think twice about buying an imported sandwich panel.
Installation
The device of slopes from sandwich panels with your own hands on plastic windows is carried out in three ways: using foam, liquid nails or slats.
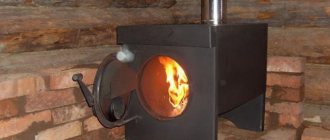
Installation of a slope using construction foam is the easiest
Whoever made the installation on foam knows that this method is the simplest. The slope for a window made of sandwich panels is assembled in several stages:
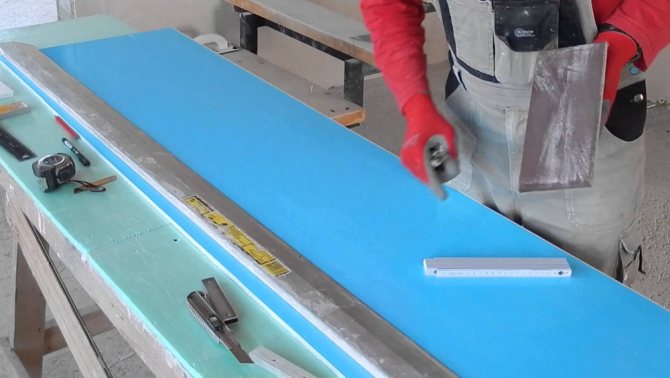
- In order to cut out a part of the required size from the sheet, it is important to correctly remove all the parameters;
- Then the start profile is installed.
After taking measurements, the starting profile is set - Then it is necessary to transfer the dimensions to the sheet of facing material and cut out the necessary elements;
According to the measurements, the cladding sheets are cut - First, the upper element is installed in the groove of the starting profile;
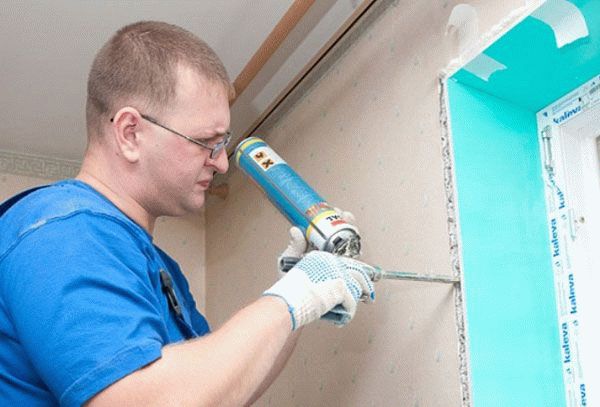
- A small layer of polyurethane foam with a minimum coefficient of expansion is applied to the seam between the wall and the panel, fixing it with molar tape;
The gap between the wall and the panel is filled with a thin layer of foam - In the same way, the side elements are attached and fixed;
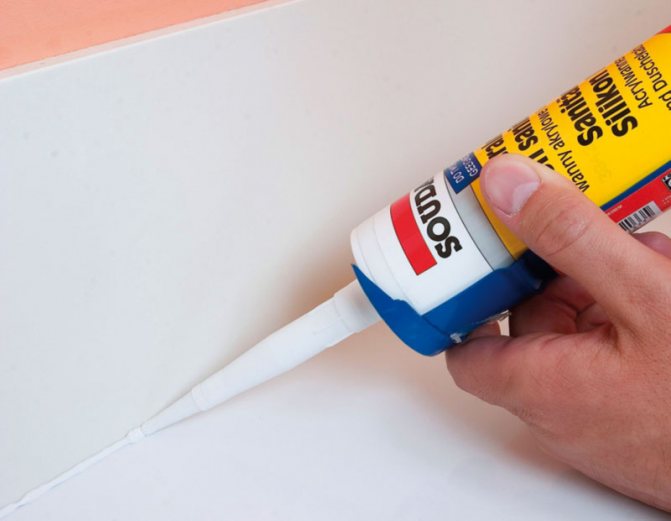
- After the foam has hardened, cut it off and close the seam with a decorative plastic corner. The joints are treated with a sealant.
Joint processing is performed using a sealant
It is important to know that the finishing of the slopes should not be postponed indefinitely, but carried out immediately after the drying of the polyurethane foam.
Installation of slopes from sandwich panels is one of the options for finishing window openings, which has its undeniable advantages. The fact is that this material combines several advantages at once. Firstly, the product has the shape of a sandwich, that is, there is a heater between two layers of plastic, which provides excellent technical characteristics. Secondly, the installation is carried out without much difficulty, there is no need to invite specialists and use complex tools.
Preparation for work
To install the slopes from the sandwich panels with your own hands, you will need the following tools and fixtures:
- Several spatulas of various sizes and a miter box so that the slab can be cut at the required angle;
- Jigsaw or hacksaw for working with metal;
- Screwdrivers or screwdriver;
- Measuring instruments in the form of a level and tape measure;
- "Liquid nails" and a gun for them;
- Furniture stapler.

Before installing warm slopes, you need to prepare a number of tools
Before installing a sandwich panel for slopes, it is necessary to prepare:
- Window sills and plastic windows should be covered with polyethylene or cardboard;
- The wall surface is inspected for mold or dampness;
- Cut off excess polyurethane foam with a clerical knife;
- At this stage, it is important to assess the strength of the base, if it is partially destroyed, then it must be restored;
Before installing the panels, it is necessary to clean the window opening. - Before finishing the slopes with sheets, they must be treated with an antiseptic primer. This is done to prevent the spread of mold;
- Installation of slopes from sandwich panels involves sealing all joints that will be hidden under them with a sealant.
The installation of the slopes from the sandwich panels will be carried out efficiently with the correct measurement of the opening.
Positive traits
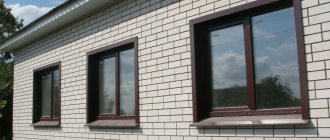
The sandwich is used in the manufacture of blind elements for balcony and street doors, as well as balcony enclosing structures. The doors, with sandwich panels at the bottom, prevent heat from escaping. This is due to the fact that the panels for the slopes of windows and doors have the following positive qualities:
- The sandwich is lightweight with sufficient strength.
- Thanks to the expanded polystyrene filler, heat loss is eliminated, the energy efficiency of the room is increased and optimal microclimatic conditions are created. No wonder expanded polystyrene has established itself as a reliable insulation.
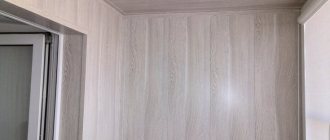
- The ability to laminate the surface to create a single composite integrity with the window system makes it a modern, versatile finishing material.
With the help of laminated panels, you can finish the window for any interior - The choice of the size of the material is possible depending on the parameters of the window opening.
- Plastic slopes are resistant to moisture, temperature extremes and biological substances.
- Warm slopes for plastic windows are not subject to rotting and the spread of mold.
- Finishing the slopes of plastic windows with this material allows you to increase the noise insulation properties of the window system.
- Ease of installation and maintenance of window slopes.