Home »Service» Door finishing services »Finishing balcony door slopes
Services for finishing entrance metal and wooden doors in Moscow and the Moscow region. Any complexity. Urgent call of the master to an apartment or office - around the clock. Extensive work experience. Call: 8 (495) 641-96-97... We will help you! 8 (925) 624-90-06
| Find out the cost of the service | |
| Find out the cost |
| LOCKS |
| Replacement of locks :: Opening locks :: Installing locks :: Insert of locks :: Replacing the cylinder :: Recode locks :: Repair of locks |
| DOORS |
| Opening doors :: Door repair :: Door upholstery :: Soundproofing doors :: Insulating doors :: Installing a door closer :: Replacing hinges :: Replacing handles |
| SAFES |
| Opening of safes :: Repair of safes |
| CARS |
| Autopsy of cars |
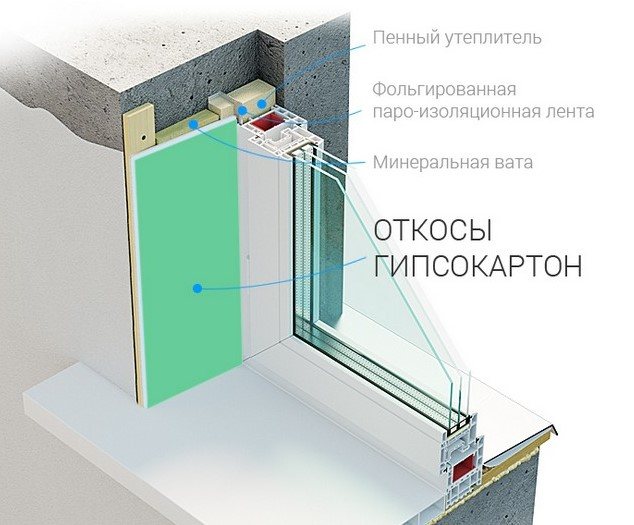
What is the finishing of slopes for?
The main purpose of the slopes is to protect window blocks from the onslaught of wind, rain, sun rays, temperature changes:
- The streams of the scorching sun will gradually reduce the insulating properties of the sealant and fasteners.
- Water, as it gets into the seams of the structure, will reduce the thermal insulation properties of the polyurethane foam.
- Low temperatures in winter can cause mechanical damage to plastic windows as the foam expands or shrinks.
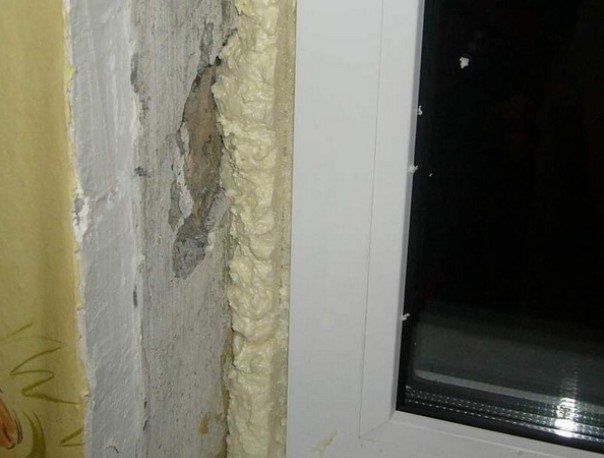
Polyurethane foam must be protected from external influences
Slope finishing:
- will allow you to hide ugly seams with protruding foam;
- will not allow the accumulation of condensate;
- prevent an increase in potholes and cracks in size under the influence of unfavorable climatic conditions;
- will preserve the integrity of doors and windows for a long time, increase their service life.
Reference! It is enough for the level of humidity inside the balcony to rise by only 5-6%, so that the heat-saving qualities of the polyurethane foam are reduced by 2 times. When installing windows, defects often remain, cracks and chips form on the walls of the opening. Without finishing the slopes, defects can only intensify, provoke heat loss or distortions of the window frame.
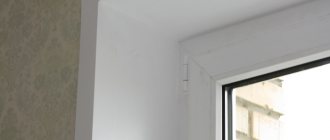
Sheathing of slopes inside with plastic panels
PVC is lightweight, easy to install, inexpensive. Its benefits include:
- good compatibility with the window profile - expands with the same coefficient;
- preservation of consumer properties up to 20 years;
- resistance to temperature extremes;
- the presence of a non-combustible protective layer;
- ease of maintenance, undemanding care.
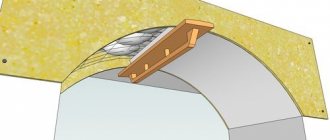
How to make slopes on plastic windows? Follow the simple instructions. \:
- Secure a block of wood to the slope to keep the profile space open.
- Attach the starter strip to the block using a stapler.
- Cut the plastic strips to the desired dimensions. They fit into the fasteners of the first rail. Place the PVC panel on the first strip.
- Move the rail away from the wall, fill the gap with polyurethane foam.
- Secure the plastic with mounting tape to the wall.
- When the foam dries, cover the end parts of the panels with window slope corners.
Finishing of external slopes with plaster followed by painting
How to close the foam on the balcony outside? Plaster is the easiest option for leveling, refining slopes. The work uses a dry gypsum mixture by dilution with water and thorough mixing using a construction mixer. First, a layer of primer is applied to the seams, namely the base at an angle of 45 degrees.
Then - the prepared solution is applied to the outer slopes along the entire opening with a small spatula. It remains to wait until it dries.
After:
- eliminate irregularities, wipe the seams with sandpaper;
- apply a small layer of topcoat.
Attention! For the finish, leveling the top layer, eliminating any remaining cracks and irregularities, you can take the same plaster solution, only in a more liquid state. Last but not least, the slopes are neatly painted with water-based paint (read more in the article “how to paint a balcony”), preventing particles from falling on glass and windows. It is impossible that the solution, when plastering, falls on the internal slopes as a finishing material. Otherwise, it will simply deteriorate quickly. It is better to temporarily cover the windows with masking tape (film) when working.
The standard thickness of the plaster layer is 2.5 cm, but it is applied twice. First, a layer of a mixture of sand and cement (2x1). Then after drying and applying a primer - the second layer. After it dries, you can prime it, apply the finishing putty with a spatula, evenly distributing it to correct irregularities. Ideally, you should get a flat surface with a 3-5 cm groove between the frame and the slope, filled with silicone plastic sealant. It will protect the plaster from damage, will withstand the expansion of the plastic.
In the final step, you can paint the installed slopes with acrylic paints or solvent-based enamel. The main thing is to do all the work carefully so that the result is pleasing to the eye.
Chipboard
When working with chipboard, the price of the work is not high. The material itself is obtained by pressing fine chips under pressure. The technology does not use glue, it is replaced with resins.
The disadvantage is the lack of water resistance, therefore, at high humidity, it is subject to deformation. Because of this, it is used for decorative finishing of non-residential premises, in which there is no high humidity. Heaters and sound insulators can be used together with it.
Plus - the choice of color depending on the interior. The work does not take much time.
The use of drywall for finishing window slopes

Drywall as a sheet material has many advantages in the design of openings:
- cheapness;
- ease of installation;
- undemanding for additional leveling of the coating;
- suitability for creating relief structures;
- pliability in many types of finishes;
- possessing a low level of flammability;
- ecological cleanliness;
- durability;
- providing energy saving and decorative functions;
- the possibility of painting the top layer, finishing with colored stone.
When choosing, it is worth considering the degree of resistance of drywall to moisture, temperature changes. Although, the material is not suitable if the balcony is open or not insulated. When finished, its performance will quickly decrease. Exposure to the rays of the sun can cause swelling and deformation. If the air humidity exceeds 75%, the strength characteristics will be reduced.
Correct installation of plasterboard slopes (video)
Using drywall, you can quickly, effortlessly level the surface. The material will maintain a comfortable microclimate in the room, and will, if desired, equip complex and voluminous structures.
Stages of work:
- Rough the base. Remove old plaster.
- Apply a coat of primer and allow to dry.
- Draw a line along the contour of the balcony window with a level or plumb line.
- Screw the U-shaped plastic strip closer to the edge of the outlined line with a screwdriver.
- Measure the width and distance from the bottom to the top corner of the window with a ruler.
- Cut blanks out of drywall.
- Treat the surface with a layer of primer or glue (acrylic, silicone sealant).
- Set the desired angle using a square, lightly pressing the line to the base to indicate the exact size.
- Mark the points for the fasteners at the top of the slope.
- Screw the profile to the window block so that the upper part of the plaster goes slightly into the frame.
- Cover all protruding parts with drywall.
Reference! Finishing is irreplaceable when cold bridges appear.This happens immediately after the installation of aluminum, plastic window blocks.
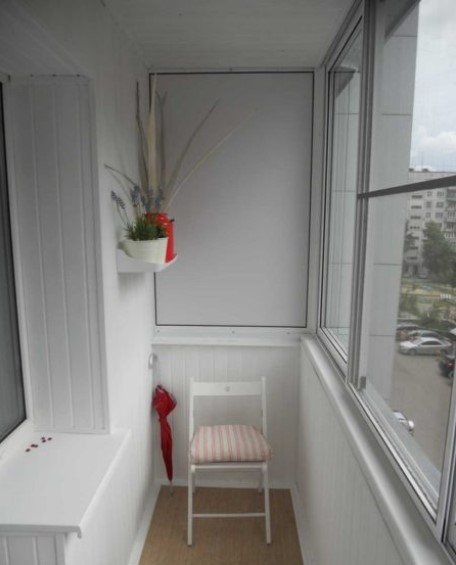
Slopes on the balcony made of plastic panels
Unpretentious PVC panels are suitable for both inside and outside installation of slope walls. With them, a holistic respectable view of the balcony block is obtained. Due to the multitude of textures, types, colors, the finishing will surely begin to be combined with the design of the main interior of the loggia.
Panels:
- outwardly aesthetic, well-groomed;
- will serve as a continuation of the frame structure;
- resistant to moisture, ultraviolet light, high temperatures;
- can be used in different colors for the most accurate selection to the interior;
- do not need additional finishing with other materials when creating a finishing coating;
- suitable for installation with cold glazing of balconies and loggias;
- durable;
- easy to care for.
Basic installation steps:
- remove the old layer of plaster from the working surface according to the dimensions of the plastic parts;
- to beat the balcony window with wooden slats around the perimeter;
- screw on the latch profile for which the panels will be refueled;
- make a frame from a metal profile, which will become a connecting link between the elements of wall decoration;
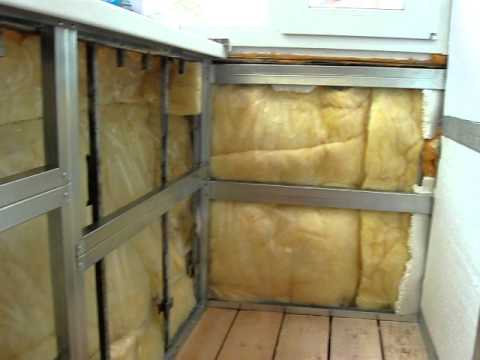
- lay a layer of foam with mineral wool, arranging it like a "thermos" before attaching the plastic to the frame;
- insert the plastic panel using the F shape at the corners of the profile;
- sheathe the frame with panels, leaving a small gap at the corners with the joints in order to avoid thermal expansion;
- cover the joints with special corners.
Attention! For additional insulation, you can pre-lay a layer of mineral wool between the panel and the wall. It is not necessary to use a lot of cotton wool, otherwise the plastic may swell. If the joints come out ugly, sloppy, then to correct the situation they are smeared with white silicone.
MDF
If you use MDF, then things will be different. Possesses good qualities. It is made of compressed fine fractions of softwood wood fiber under pressure. Then the plate is sanded until it reaches the required thickness. Unlike the previous material - MDF boards are covered with a layer, which is a protective film. It makes the finishing material resistant to external influences and increases the cost of finishing.
This material can be used to decorate the door from the inside. A variety of colors will fit into the interior.
The interior decoration of the entrance door with wood represents the old way. The finishing element is made of expensive wood or cheap wood. Then the cladding will be of high quality. Wood is a versatile material suitable for people regardless of their financial situation.
Advantages of cladding slopes with sandwich panels
Sandwich panels are rigid structures of 3 layers with already installed insulation. The downside is the high cost. If the windows are poorly sealed, the material will quickly begin to exfoliate. The advantage is that there is no need for insulation due to the manufacture of products from 2 pieces of plastic with a padded insulation between the layers.

The best way when arranging external slopes is with gypsum metal panels, but with plastic trim. Composite models with wood elements are also on sale, although they are expensive.
Sandwich panel slopes: installation stages
For the arrangement you will need:
- wooden lath;
- plastic F-shaped profile (7 mm thick);
- polyurethane foam;
- insulation min. cotton wool;
- a U-shaped starting strip made of plastic;
- drill for self-tapping screws;
- roulette;
- putty knife;
- silicone sealant;
- cement mortar;
- level;
- long and short self-tapping screws (95 and 4.5mm);
- construction stapler.
Installation steps:
- Remove particles of old plaster or wallpaper.
- Treat areas with an antifungal compound.
- Seal the holes on the street side with cement mortar, left after the installation of the reinforced-plastic window.
- Install wooden slats along the sections of window openings at the top and sides.
- Attach with screws without screwing in completely. Insert them into the pre-drilled holes.
- Fix the slats around the perimeter of the balcony opening. Check their equal position with a level.
- Tighten with screws. Attach a U-shaped strip parallel to the outside edge of the window on the self-tapping bugs.
- Cut off protrusions if left at the joints. To help - a painting knife.
- Mount the F-shaped profile (it will serve as a decorative element), placing the groove opposite the groove of the U-shaped strip. In this case, part of the F-shaped profile will be located just above the window. A little overlap.
- Trim off excess protruding F-strips with metal scissors as soon as they fit exactly.
- Attach the end of the F-profile to the rails that are closer to them.
- Seal the joints with sealant, if unsightly seams or defects remain after installation.
Reference! Cosmofen (liquid plastic) can be used for filling, sealing joints.
Installation of sandwich panels is allowed using a slightly different technology. For example, sandwich panel sections are immediately attached after mounting the starting profile. Their opposite edges are attached diagonally to the slats. Then the F-profiles are fixed, the joints are sealed with a sealant. The main thing to get smooth, beautiful slopes is to start with the top element. Leave the plastic structure alone for 16 hours without removing the protective film from the window.
If the panels, when inserted between 2 starting profiles, do not coincide with the size of the slope in width, then they can be trimmed with a clerical or construction knife. Fix the joints of the side strips and the upper lintel with a special plastic corner. You can camouflage wooden slats with narrow platbands of identical material.
Paneling on a metal frame
When the preparatory stage is completed, facing work begins. They usually start with the design of the ceiling, since this process is somewhat more complicated.
Ceiling sheathing
The center of the surface is found with the help of a paint strip, then a longitudinal line is drawn through this point. From the ceiling on each wall they step down 50 mm and put marks. A profile is applied along them along the perimeter, holes are made, the depth of which is 50 mm, the step is 250-300 mm.
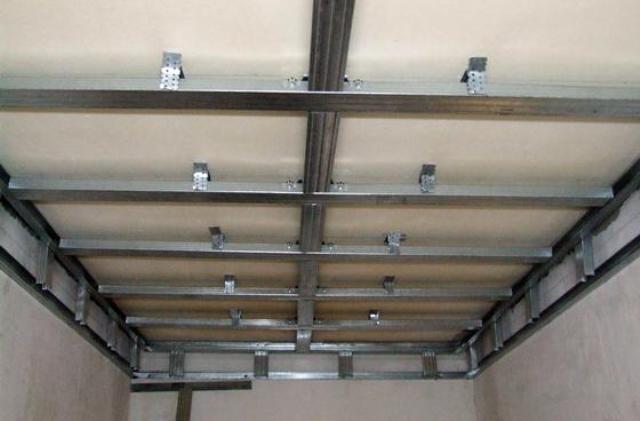
The guides are fixed with dowel screws, then, depending on the footage, 1 or 2 longitudinal profiles are added. They are mounted on suspensions. At the same stage, wiring is done if the plans include the installation of lamps. Starting strips are attached to the central profile.
The first panel is inserted into them, which is fixed with self-tapping screws to the profile and edging. The following are fixed in the same way. The last part is cut to size so that it goes beyond the penultimate part by 5 mm. Then they are interchanged, the last panel is pushed in so that the gap between it and the profile is not visible.
Wall covering
First, 100 or 150 mm are measured from the floor and ceiling. Horizontal profiles are installed on these marks, making sure to check the correctness of the lines. With a step of 500 mm, vertical sheathing elements are attached to them.
First, the starting profile is attached, in the corners of the room, internal (external) corner profiles are installed. The fastening of the first panel starts from the corner, each element is tested with a level. The strips are inserted until they click, then they are fastened with self-tapping screws. The last panel is cut, inserted into the groove of the previous strip.
Space under the window
This is the penultimate stage of working with walls, but some begin with cladding vertical surfaces. In this case, when installing the frame, they are guided by the location of the guides on adjacent walls. First, the metal profile is attached to the bottom of the window sill. Then the guide is fixed to the wall near the floor.
In the middle, under the window sill, several suspensions are installed with a step of 500 mm.The voids between them and the wall are filled with insulation, the cracks are sealed with polyurethane foam. A guide is fixed on the suspensions. PVC panels are fixed with self-tapping screws or dowel-nails. The final touch is the elimination of gaps between the panels, floor and ceiling. In both cases, skirting boards are used - ordinary plastic from below, from above - special ceiling.
After installing the last camouflage product, it can be considered that the paneling of the balcony is finished. The work will not cause any difficulties, but in order to understand this, it is better to “arm” yourself with other people's prompts in advance. And a detailed video will help here. For example, this:
How to make neat slopes with your own hands
You can decorate it yourself with different materials, using several technologies.
The most affordable to make the facade beautiful:
- drywall;
- putty;
- vinyl or wooden lining (read more in the article "clapboard balcony cladding");
- clinker tiles.
The material must have improved thermal insulation properties, resistant to natural disasters. It is also important to add decorative effect to the cultivated facade.
In general, the methods of external and internal cladding are similar. They differ only in the degree of weather resistance of the materials used, the type of work. When considering the option of plastering from the outside, you should first prepare inventory, purchase materials, and carry out sequential facing. It is important that the solution, after being applied to the wall, does not begin to peel off and crack quickly.
The usual composition for plaster is cement + sand (3x1). To increase the thermal insulation properties, it is recommended to add facade plaster or bulk insulation (perlite, plasticizer, fiber, vermiculite) to the composition.
Attention! It should be borne in mind that the facing of the slopes does not need a supply of a large amount of material due to the small area. This means that you can buy a multifunctional ready-made composition for plastering or prepare yourself a balancing homogeneous composition of a finely dispersed consistency with perfect adhesion to the working areas.
First of all, you need to clean the work surface. Otherwise, the new finishing material will quickly crack or crumble. If the base is concrete, it is possible to apply incisions to increase the adhesion. Above - the slopes, cleaned of dust.
Next steps:
- Install the ebb under the window frame, fix it to the bottom with self-tapping screws. So drops of water, as they flow down under the windowsill, will immediately fall on the inclined plane.
- Cover the window with a balcony sash with polyethylene.
- Prime all cleaned areas with a wide brush. Impregnate surfaces in order to increase the adhesion of the materials used and to prevent subsequent shedding of the plaster composition.
- Attach a perforated metal corner to the edge of the window opening from the street (you can take plastic). Place on a quick-drying plaster mix.
- Wait for the solution to dry.
- Attach a wooden batten to the outer corner of the opening, joining the window block to the wall to determine the thickness of the plaster layer used.
- Make a "bevel" for aligning the walls at the required angle. So the layer of plaster in certain places will be the optimal size. Or take a piece of flat plywood (150 mm wide, 50 mm long). Make a cutout on the end side, so that no shifts occur after applying the plaster, the best thickness was set along the line of the joint with the window.
- Make a small amount of plaster. Beat with a construction mixer.
- Apply with a layer of 10-12 mm on a part of the slope horizontally. Spread evenly with a trowel or spatula. Align the solution with a bevel.
- Wait for complete setting.
- Apply the solution to the wall from the bottom, starting from the ebb. You can sketch, then align with a small one. So apply the solution to the very top. Align.
- Form the joints of the vertical, horizontal surfaces of the slopes with a mortar using an angled spatula.
- Wait for the plaster layer to dry. Smooth the surface with a putty compound.
- Apply a layer of decorative plaster with a shallow relief as a finishing to hide the slightest imperfections.
- Apply a primer after leveling the base layer of plaster. Allow to dry.
- Paint the surface.
Instead of putty or plaster, you can use a polymer imitation or artificial stone.
Why is the finishing of the slopes so important for plastic windows?
The finishing of external slopes should not be delayed for long, as this can be detrimental to new windows. If indoors they are needed rather for beauty, then outside their role is much more important. Consider the main functions that slopes perform.
- The windows are installed using polyurethane foam. This sealant gradually deteriorates due to exposure to sunlight and moisture. Water trapped in the seam deprives the foam of its thermal insulation qualities. And in winter, it expands from frost at night and decreases in size during the day, which causes mechanical damage. The trim of the slopes protects the foam from damage and contributes to the durability of plastic windows.
- During the installation process, window openings can be damaged, potholes and cracks appear on them. If not covered with slopes, damage can be increased by precipitation and climate.
- The decoration of the slopes also has an aesthetic function. The window becomes neat and beautiful compared to the bare seams filled with construction foam.
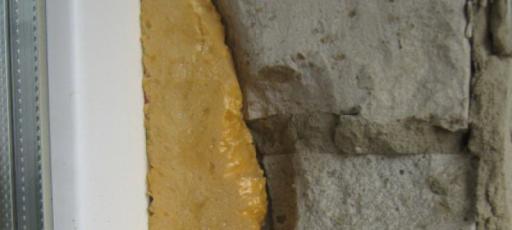
Unprotected polyurethane foam on external slopes
That is why it is necessary to approach this work with full responsibility. The decoration of the slopes should be done so that they serve for a long time and, even under the influence of precipitation, retain their decorative appearance. The insulating properties of the slopes will help to avoid condensation. You can insulate the slopes and protect them from moisture in different ways. We will look at three of the most popular and convenient ones to do it yourself. This is the decoration of windows with plaster, plasterboard and PVC panels.
How to calculate the right number of plastic panels
First of all, it is important to calculate the perimeter of the base for the cladding. Then minus the perimeter of windows and doors from the received number. Next, divide the difference by the perimeter of one element.
Example: it is necessary to finish the external walls of PVC. Height - 2.5 m. The building is equipped with a door and 4 windows. The dimensions of the material for the window will be 1.8x1.2 m, for the doors - 2.2x0.9 m.If plastic panels of 250x30 cm are used in the work, then we will start by calculating the total area of the walls (6 + 6 + 8 + 8) * 2.5 = 70 m2. Let's designate the area of doors and windows - 1.8 * 1.2 * 4 + 2.2 * 0.9 = 8.64 + 1.98 = 10.62 m2. Next - find out the area that needs cladding, i.e. subtract S walls from S doors, windows - 70-10.62 = 59.38 m2.
The area of one panel will be 0.75 m2. A total of 80 panels are needed. It is better to purchase facing material with a margin of 10% more of the total. Waste will surely appear after cutting or damage to the material. If, according to estimates, 80 PVC panels come out, then it is worth purchasing 88-90 pieces.
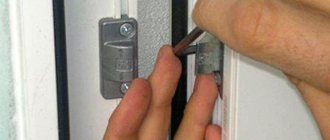
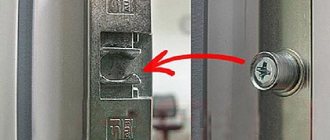
How to call the master
- The most convenient and easiest way to call our customer service: 8 (495) 641-96-97
- Send us a photo of the lock, handles, larva, door via WhatsApp and our master will contact you within 5-10 minutes.
At a convenient time for you, the master will come to you with an assortment of locks and accessories necessary for your door.
Depending on the complexity of the work required, within 10 minutes - 2 hours, your order will be completed.
SHOW MORE
A common service performed by the "Spets-Zamkov" service department is interior and exterior door decoration.
For decorative finishing of metal doors use:
- MDF;
- Chipboard;
- wood;
- laminate;
- artificial leather.
Each has advantages and disadvantages.
How and what to wipe the foam from a plastic window
The foam adheres firmly to the plastic profile of the window frame and the glass unit. Of course, it is better to clean it before it is frozen. For example, moisten a cloth with paint thinner (acetone). You can use special solutions, which are used to rinse the assembly guns. To help - Cosmofen, Macroflex.
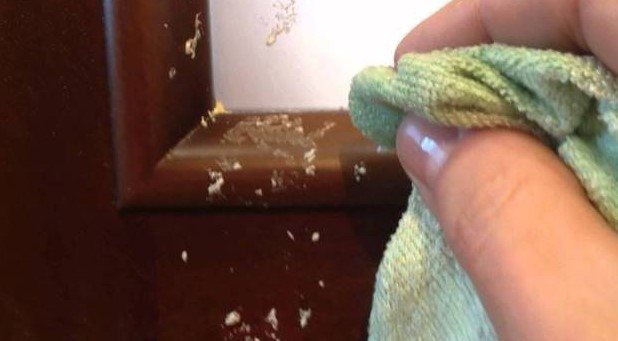
Experts recommend that you first check the funds by wiping a small area of the window frame, waiting for a few minutes. Will the plastic be damaged? If the foam has already hardened, then you should use a solvent to soften the material. Or try scrubbing with a piece of plastic without damaging the base. You can rub with vegetable oil, Dimexide (joint preparation).