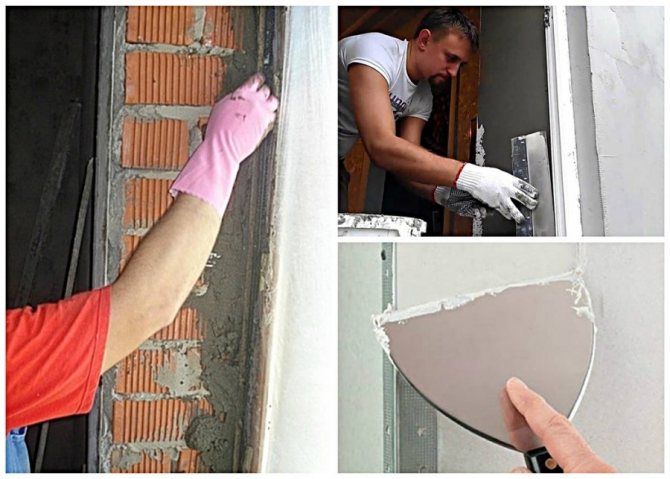
Pros and cons of plaster
To build up a slope by plastering is the most elementary way to design a window opening. No need to buy tools, modern materials. Previously, people only plastered walls on their own and did an excellent job with this task.
Cons of this method:
- the surface may end up being uneven;
- it is advisable to insulate such slopes additionally;
- it will take quite a lot of time to work, because you will need to apply the building mixture in several layers, let everyone dry.
If you try, new slopes will still turn out smooth and beautiful. As they say, the eyes are afraid, but the hands do. You should buy the necessary materials, start restoring the natural design that is usual for apartments and houses.
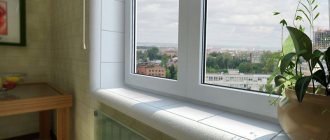
The harmony of the design of the window opening is understood differently by different people. This applies not only to curtains, the choice of plants, the colors of the window sill, the color of the windows, but also the slopes.
Self-assembly
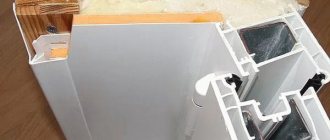
- Actually the planks themselves or ready-made grooved boards.
- Insulation under them. You can use thin polyurethane foam, cotton wool boards are thick and not too environmentally friendly: after installation, fibers will float in the air.
- Sealant. For internal use acrylic, for external - silicone.
- Fasteners - self-tapping screws, liquid nails.
- Hacksaw, jigsaw.
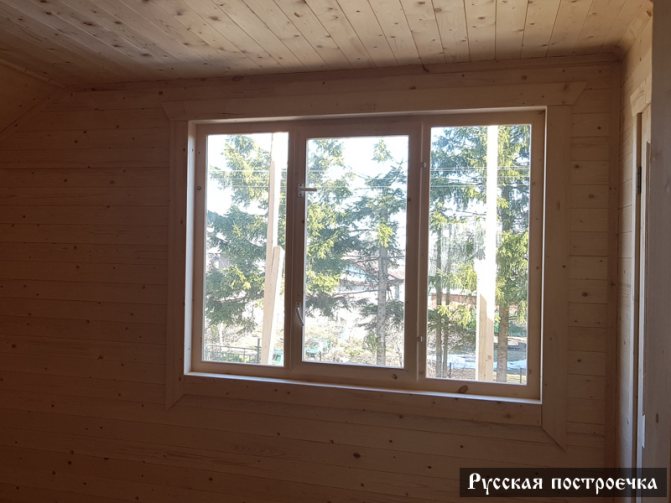
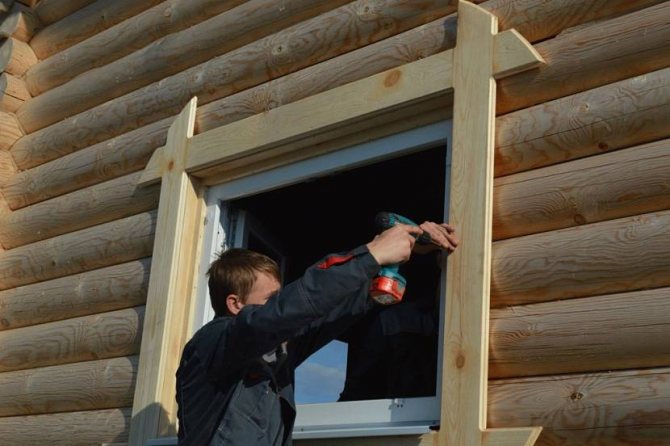
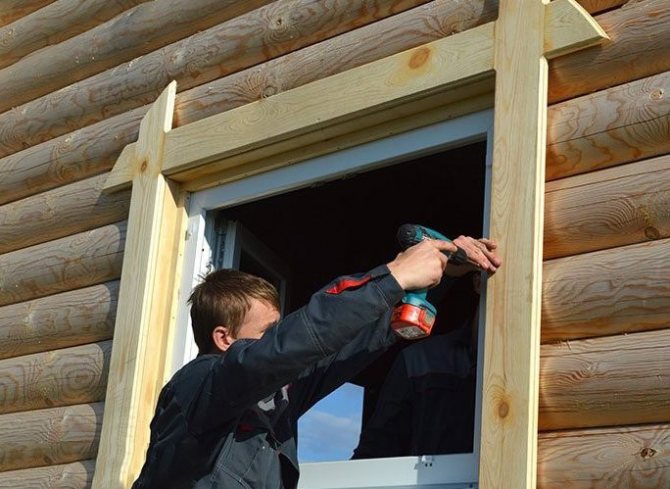
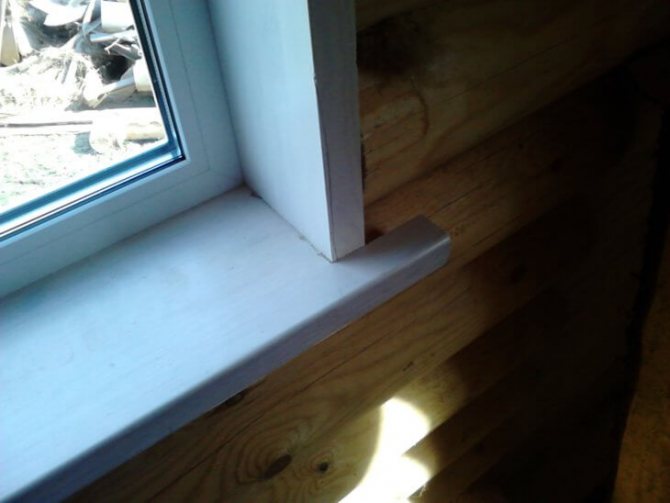
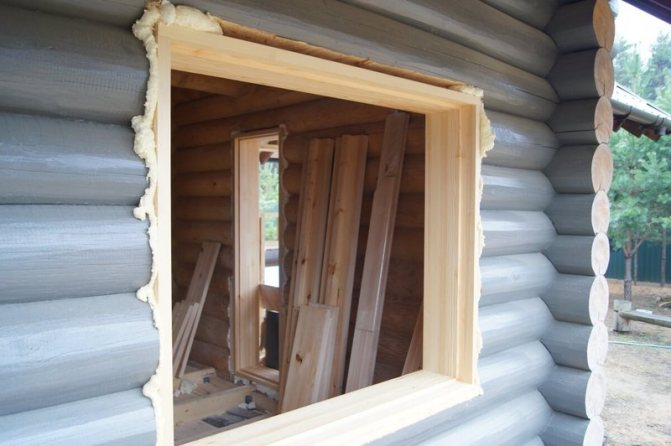
Installation and finishing of window slopes in a wooden house begins only after the installation of the window sill. Therefore, if it is not yet ready, then they mount it first. This is necessary so that the strips of the structure stand up exactly and adjoin the window.
Next, you need to choose the slope option - straight or oblique. If the second, then part of the ends of the log house is cut off with a circular saw or jigsaw. The resulting surface is carefully grinded and impregnated with protective compounds. It is necessary to make sure that it is in full compliance with the level, constantly applying the meter to the place of the future structure. Otherwise, the bar will not fit properly. Then put a new caulk in a bar or log
This is important as windows can receive cold air currents through micro-gaps. Condensation is inevitable in this case. For caulking, you can use the same polyurethane foam cut into thin strips.
It is put into the slots in a twisted state, where, straightening, it takes the form of a log. It's the turn of the insulation. The insulation is cut into wide strips according to the size of the prepared area. It is necessary to prepare it immediately according to the parameters, so that later you do not have to build up or cut it. A layer of polyurethane foam is grabbed in several places with liquid nails. It is undesirable to act simple so as not to get into the ends, where the temperature difference will cause the formation of corrosion and damage. Now, when the surface along the perimeter of the opening is ready to accept structures made of plastic or wood, they work with them. They are cut according to a pattern made of drywall, which is not thrown away, but applied to a layer of insulation on the same liquid nails. It is best to purchase a moisture-resistant type of drywall: in such places, the manifestation of moisture is common, so you should not give the material a chance for crumbling. It will be easy to lay ready-made planks on it, and the surface will remain flat. Mount slopes on self-tapping screws or fasten to liquid nails, if there is a desire to make an ideal surface without extraneous inclusions. It remains to decorate the joints with acrylic sealant.This procedure is performed for plastic options. Wood types are laid with glazing beads and skirting boards.
That's the whole installation. Then the finished structures are put in order according to the material from which they are made. Plastic is simply wiped, wooden is painted or varnished, emphasizing the structure of the tree.
Valentina Kirillovykh
Author of publications on 1Drevo.ru with topics: Tables and benches | Guest house-bath | Log house order | Solar collector | Glued laminated timber | Home decoration with clapboard | Cylinder caulking machine | Log houses | Shield House | Log cabin | Glued laminated timber, etc.
Installation
The reliability and tightness of the entire window block will depend on the correct installation of the slopes. Slopes provide not only appearance, but also tightness, additional protection from drafts and moisture. With certain skills in the construction business, slopes can be made with your own hands, the main thing is to follow the technology and basic installation rules. For PVC panels, the installation process will look like this:
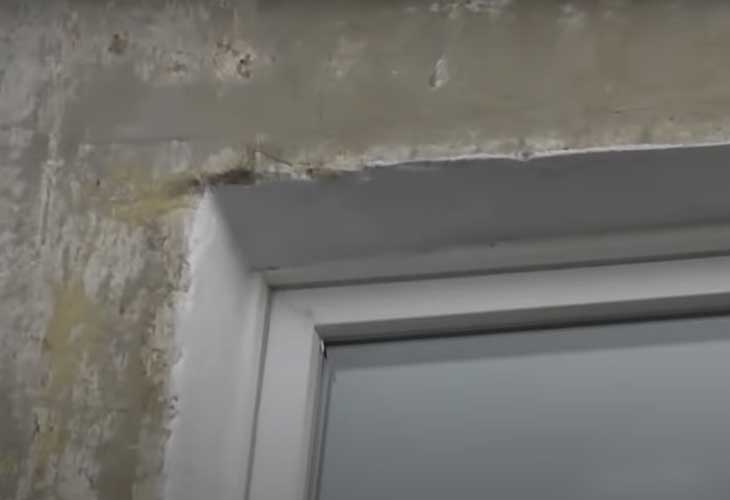
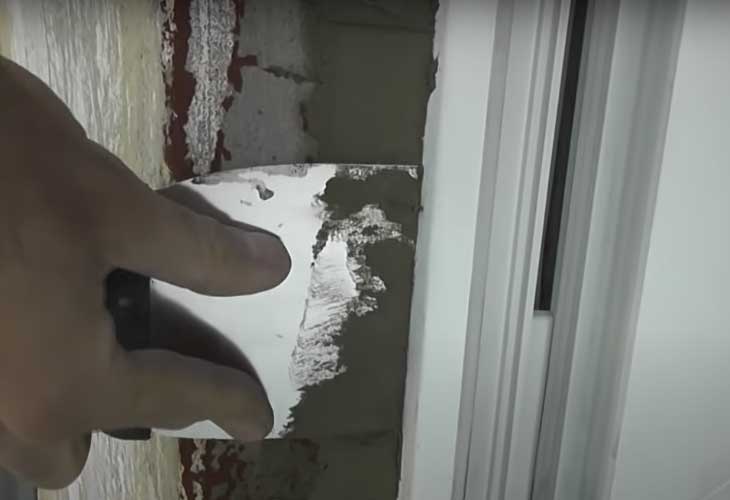
- first, you should clean the surface, remove the excess of hardened polyurethane foam with a construction knife. The cleaned area is leveled with putty, cracks and crevices are covered;
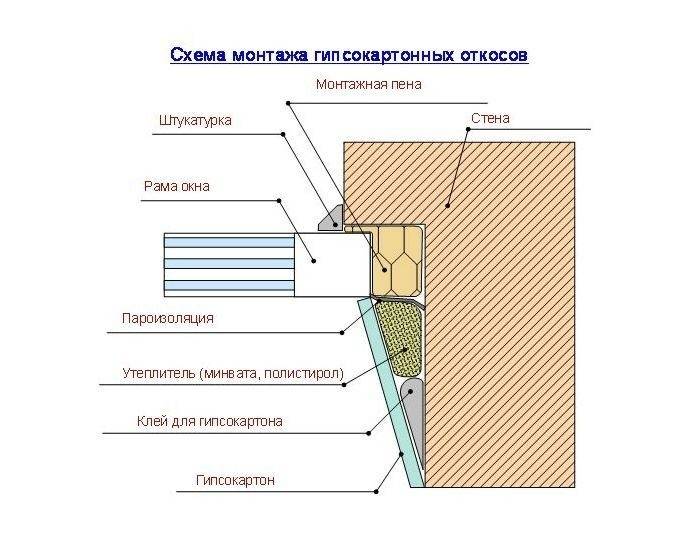
- when the surface is ready, wooden slats are exposed, which will serve as a frame for fastening the panels. A profile is fixed to the frame, and the space of the slope itself is insulated with foam, mineral wool or polyurethane foam;
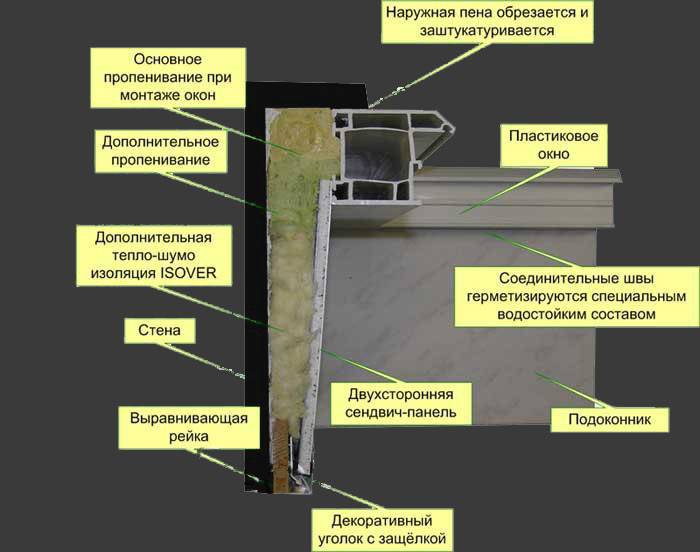
- lining or sandwich panels are inserted into the profile, which are fixed in several places. The joints are treated with silicone.
When installing plasterboard slopes using the frame method, you need to correctly set the holding base so that the dimensions on each side of the window are the same. The process is carried out in the following way:
- the distance from the window to the wall is measured, the lines indicate the installation boundary. The guide profile is fixed with the outside on the line;
- after the frame is ready, you need to insulate the slope inside in the same way as when installing PVC panels;
- drywall is cut to the size of the frame, parts of the drywall are fastened with self-tapping screws to the established places. The joints can be covered with a non-woven mixture.
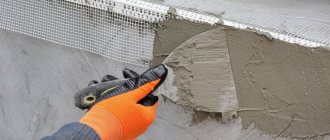
The stages of installation of slopes with plaster have their own specifics. Before starting work, the window sill and window should be sealed with a protective film if it has already been torn off during the installation of the window structure. Further, the process takes place in full accordance with the rules for applying decorative plaster to any surface. For slopes, it is best to choose a mixture with small granules of the same size. The larger the granules, the more difficult it will be to apply the mixture in an even layer. This job requires some skill. The composition of the mixture with small particles, as a rule, has a more liquid consistency and a lime base, therefore it is quite simple to apply.
The first step is to apply a layer of acrylic primer to the prepared surface. Then the plaster mixture is prepared, the specifics of the texture and shade are checked in a small area. Plastering is carried out in different ways depending on the desired result, namely:
- using a steel float or trowel;
- using a roller or sponge;
- by spraying with a brush, broom or brush.
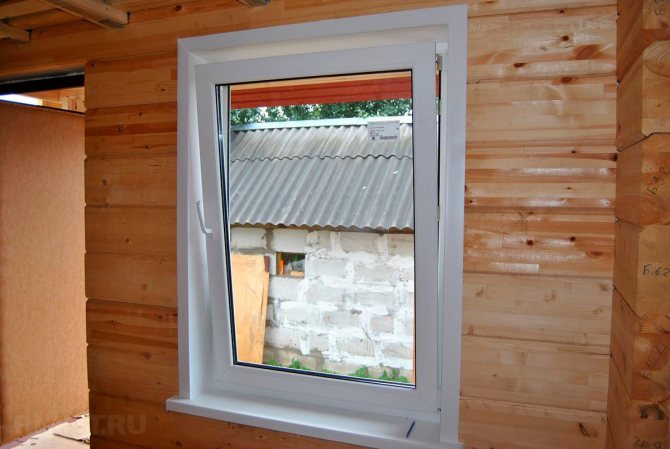
DIY wooden slopes on plastic windows
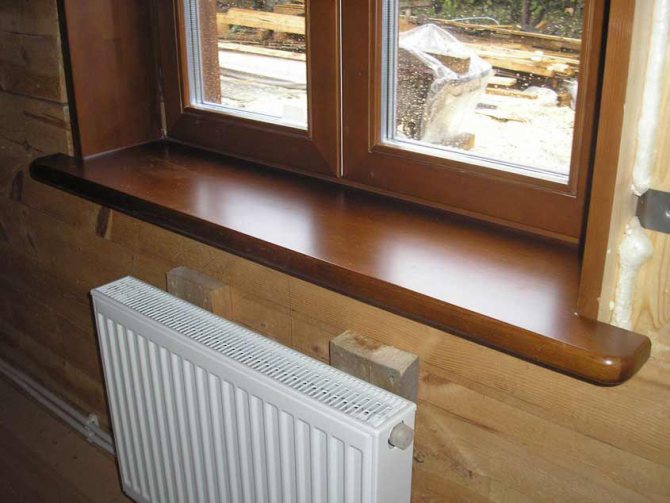
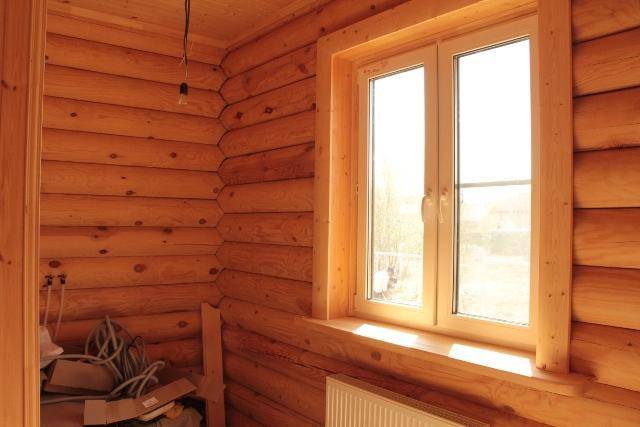
If plastic windows are installed in a wooden house, slopes can also be made of wood. For this purpose, a board with a thickness of 18 - 20 mm is used, which is cut to size and varnished on all sides.
Installation is carried out in the following sequence:
1. Along the perimeter of the upper part of the window opening, mounting foam is applied;
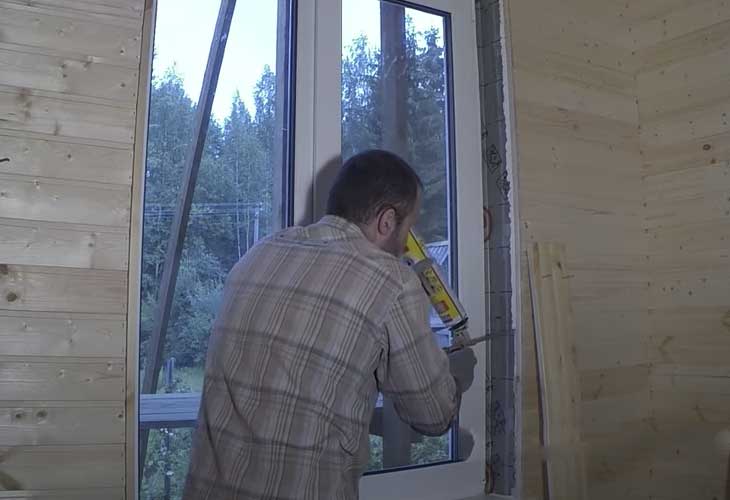
2. The wood element is put in place and leveled. Self-tapping screws are used to fix it. The side panels are installed in the same way;
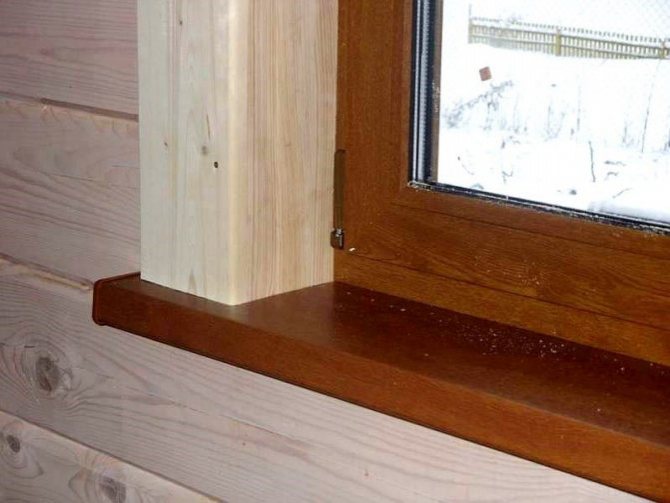
3.A sealant is applied along the perimeter of the window block at the points of contact with the slopes;

4. A wooden corner is installed along the perimeter of the installed slopes.
Source https://www.youtube.com/watch?v=sJ98rCVr5M0
Functions and need for slopes
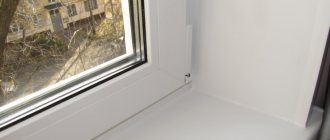
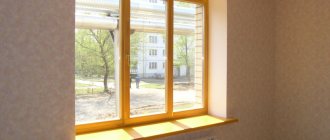
A wooden slope on a plastic window is placed in order to compensate for thermal expansion
The side finishing of the opening hides unsightly installation details and layering of polyurethane foam, the uneven surface of the casing and other defects.
In a wooden structure with plastic windows, finishing performs other functions:
- protects against drafts and external cold;
- prevents the appearance of mold, the development of harmful bacteria, fungi, microorganisms;
- protects against loud sounds, noise;
- prevents the formation of drops of condensation and dampness;
- increases the service time of the window cover.
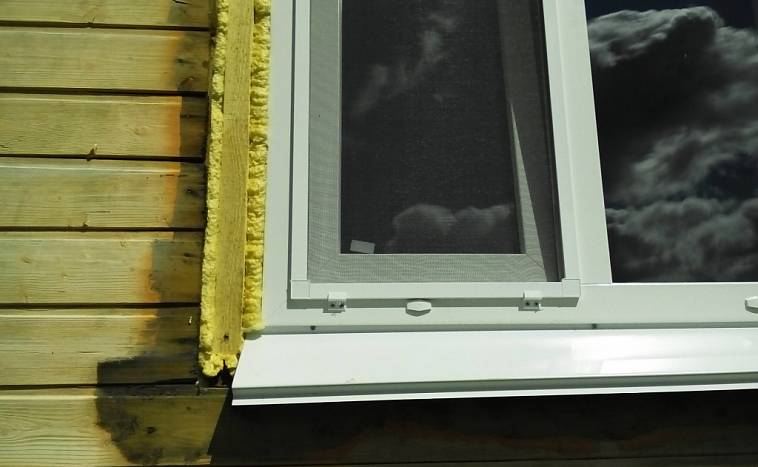
The box is placed so that there is a distance between the casing and the frame, which equalizes the skew of the frame when a wooden house shrinks. The gap after fastening the window is sealed with foam, and after hardening, the protruding parts are cut off with a construction knife. External and internal finishing of the slopes protects the foam from destruction under the influence of atmospheric factors.
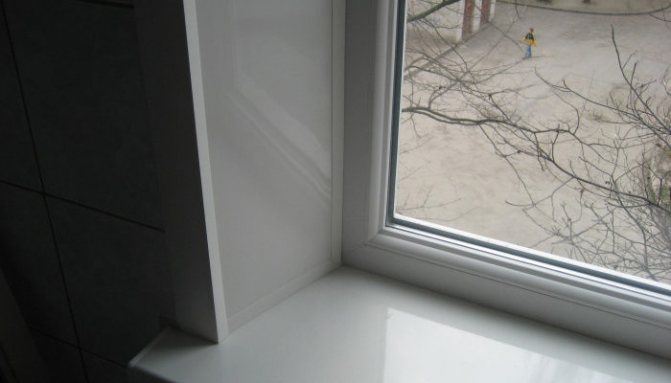
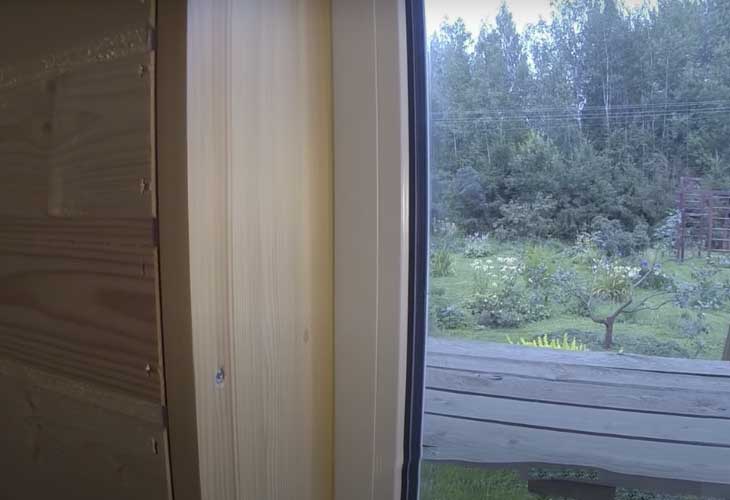
Finishing plastic windows inside a wooden house
A window sill is often a window opening. If the wooden base has not rotted, the PVC structure has not been deformed, it is mounted on top of it. We measure the required distance (angle of turn, length of the slope), apply markings on the plastic, carefully cut along the outlined lines, try on the existing base.
If the dimensions are suitable, we put the PVC window sill on the silicone. Next, a weight of 7-9 kg is placed on top of the part (a three-liter can is suitable for this).
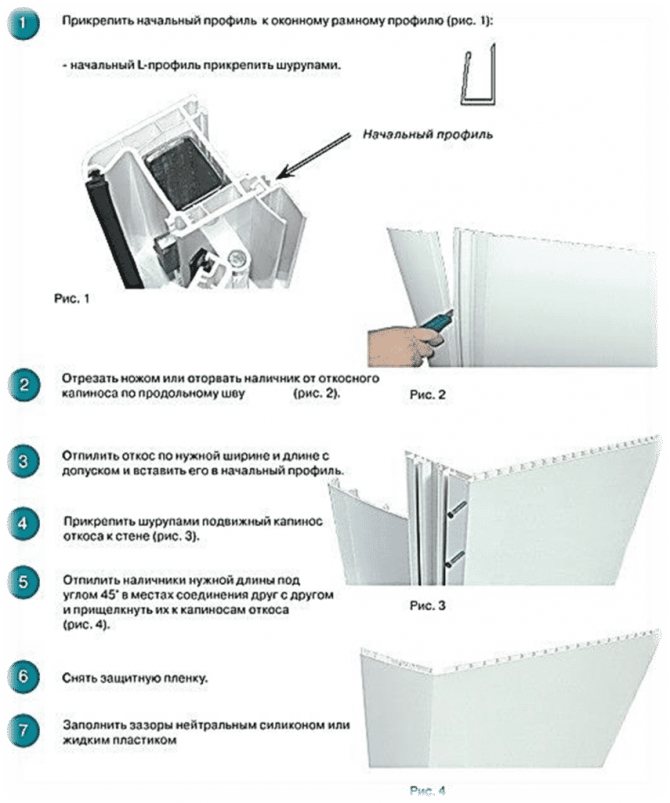
Proceeds to finishing the "jambs" with plastic strips (24 hours after the installation of the window sill). PVC is matched to the shade of the window. Slopes are installed on polyurethane foam. The installation process is quite simple:
- screw the starting metal profile into the window frame using self-tapping screws;
- remove excess foam with a construction knife;
- cut off the necessary part of the frame with a jigsaw;
- apply silicone to a wooden slope;
- plant a PVC panel;
- fix the panels with tape;
- an inner corner or starting metal profile is used at the joints;
- after the silicone has dried, we glue a finishing or plastic profile along the perimeter of the PVC slopes.
The final step is to remove the film so as not to damage the new window structure. Interior finishing works are completed.

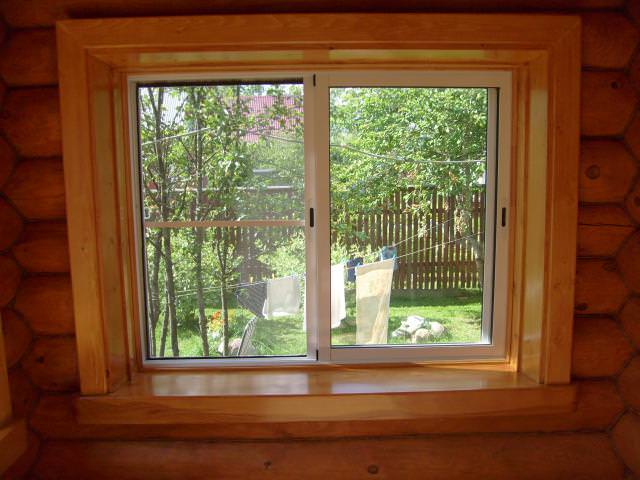
We install slopes in a wooden house
To make high-quality exterior slopes for windows, the material must be very resistant to moisture. For interior furnishings, the requirements can be omitted and any material desired can be selected. Window frames can be finished with plastic, wood or clapboard. Slopes from the lining are considered universal of the listed materials, since the material is perfect for decorating a house both from the inside and outside.
For outdoor decoration use a moisture-resistant material.
To install window slopes you will need:
- wood panels;
- corners;
- a set of self-tapping screws;
- polyurethane foam;
- screwdriver.
Front of work:
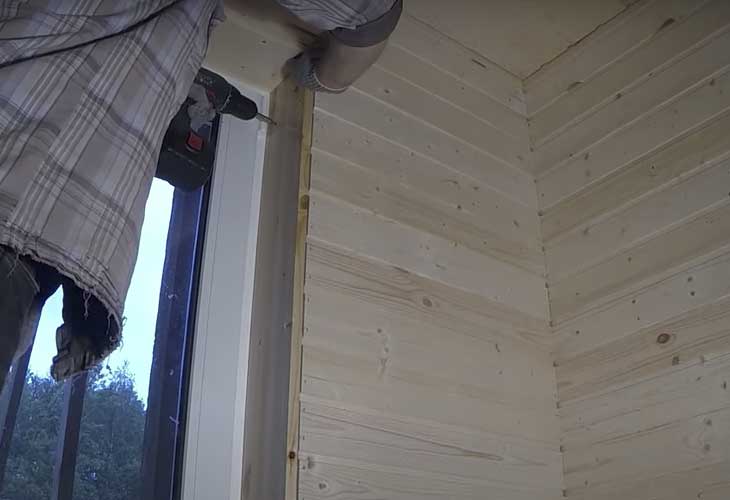
- If the walls in the house do not differ in evenness, it is necessary to install a crate, the slats for which must be selected in proportion to the thickness of the panel for finishing. When preparing the bars, consider not only the dimensions of the slopes, but also the installation technique. The lathing should be attached with self-tapping screws around the perimeter of the window frame using a screwdriver or drill. Thoroughly fill the vacated space with a material with a thermal insulation function. If the walls in the house are even and beautiful, you can safely skip the first step along the crate and immediately go to the slopes of the window frame.
For interior finishing works, lining is most often used. - Next, we fasten the lining with a screwdriver to the screws.When installing vertically, the slopes on the windows from the outside or from the inside are fixed according to the area of the frame, where the grooves should lie. Using the fasteners, fix the panel to the body. When installing horizontally, start work from the bottom side, having previously mounted the starter strip on the frame. We fix the slopes of the windows first in the openings of the strip, then with each other.
When the lining is installed horizontally, the installation starts from the bottom side - We supply the installed slopes with corners that will help hide minor errors and defects, as well as contribute to high tightness.
How to insulate window systems in a cottage
Decorating the windows inside, outside with wooden slats, makes the room warmer. But the effect can be enhanced with the following materials:
- Styrofoam. It is not expensive, it has good thermal insulation. Wooden planks are mounted on the frame. You can use glue.
- Penoplex. An expensive option, it has high energy-saving characteristics. It is denser, does not accumulate moisture. Installation of slopes on windows in a wooden house is carried out in the same way as when using foam.
- Minvata. Used in frame structures, laid out between the rail. When purchasing this insulation, it is better to purchase mineral wool that does not absorb moisture.
Decorating windows outside in a wooden house with your own hands can be done with various materials. Insulation will allow you to keep warm in a spacious room, make it more comfortable. The cladding can be done by a specialized company or the owner of the building with their own hands.


Materials used
In general, decorative side panels for windows can be made from any building material, including plaster. But in a wooden house, two types of materials are most often used: wood and plastic.
In turn, wooden slopes can be of two types:
- monolithic;
- typesetting.
To make the slopes on solid wood windows, you need a wide enough board with an ideal degree of dryness. Therefore, today for these purposes it is convenient to use a glued composition, which is not only significantly cheaper, but also less susceptible to moisture deformation.
Typesetting panels are assembled from many small elements, which are installed on a special frame mounted on a log house. As a rule, according to this scheme, slopes are collected from the lining.
Assembling such panels with your own hands is a rather time-consuming task, but it should be noted that the installation of the lining can be done both in the transverse direction and along.
In terms of price, the most affordable material for slopes is plastic, often supplied with windows. But when calculating the purchase, it should be borne in mind that, as a rule, white slopes are supplied with metal-plastic windows, which does not always harmonize with the design of houses built from timber or logs.
As an independent material, plastic for slopes is available in any colors and shades, but in this case one should not forget about the need to purchase special accessories for mounting sloped slopes.
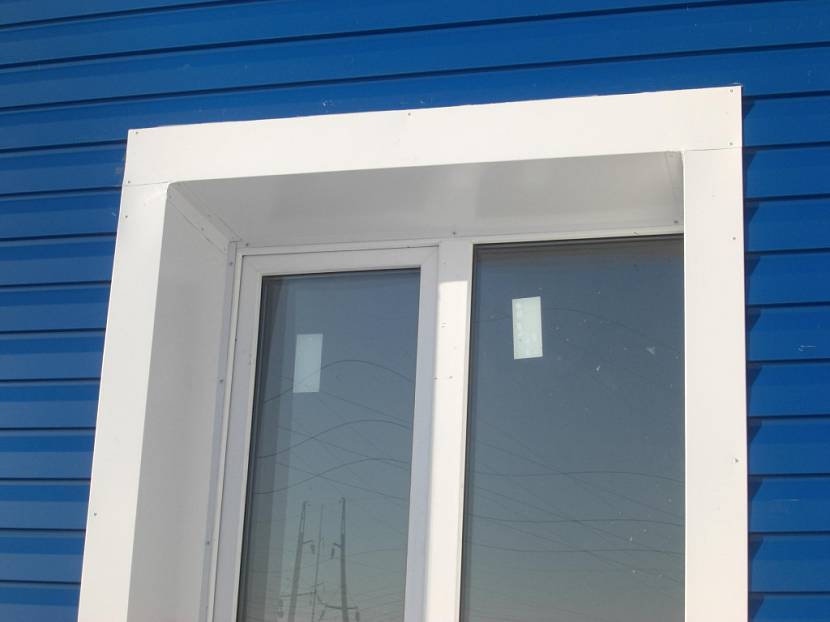
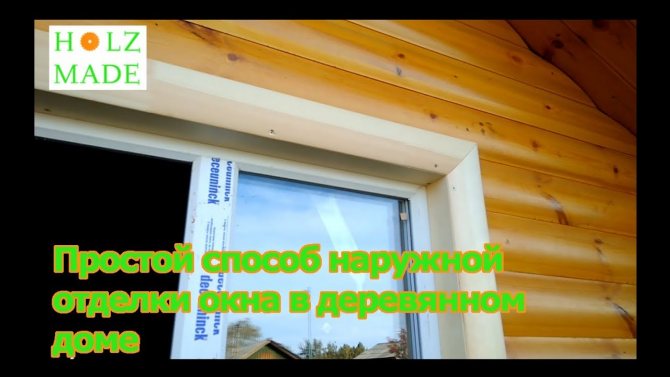
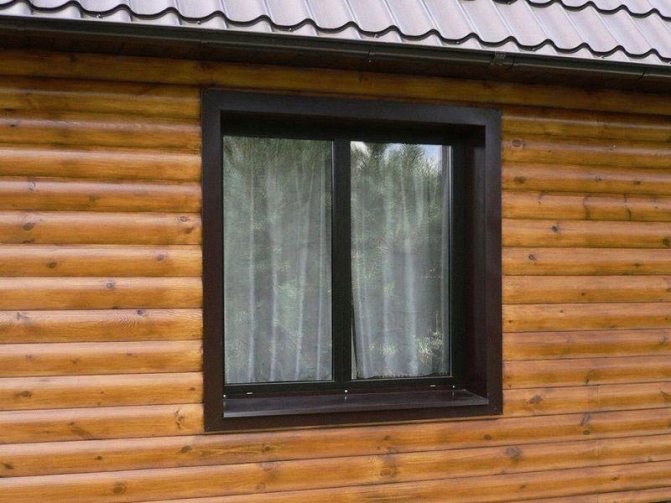
How to make external slopes on windows with your own hands
The window should look beautiful not only from the inside, but also from the outside. To achieve this, external slopes are installed.
The works are performed in the following sequence:
1. The outer surface of the wall is cleaned of dirt and dust. Moistened with water using a spray bottle;
2. A layer of polyurethane foam is poured around the entire perimeter of the window block to ensure sufficient tightness of the mounted system. After the polyurethane foam hardens, all protruding elements are cut off with a construction knife;

3. The lower surface is covered with an adhesive to completely cover the polyurethane foam and prevent its destruction during operation;
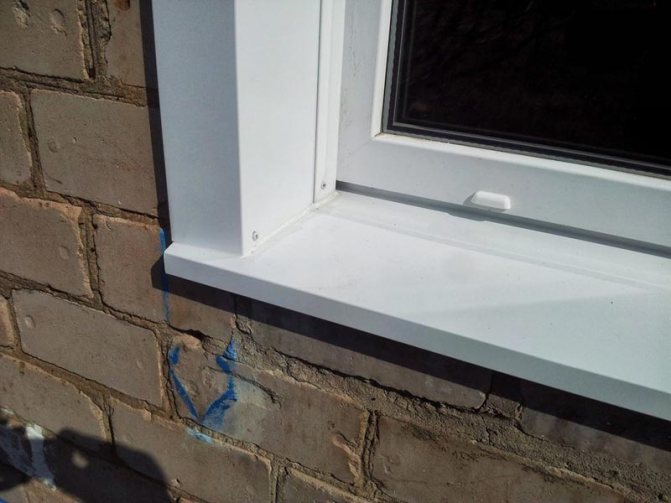
4. The ebb is installed. Attached to the wall with screws.The surface of the slopes is putty. Complete closure of the polyurethane foam is ensured;
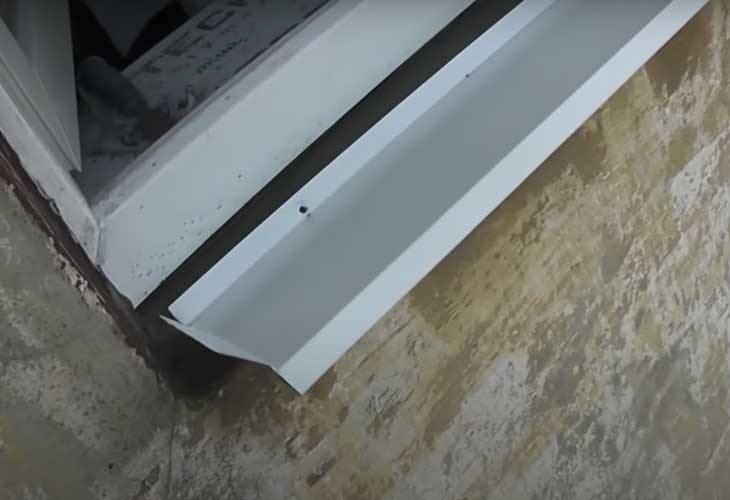
5. After the solution has completely solidified, the slopes are leveled and then painted in the selected color with water-based paint.
Source https://www.youtube.com/watch?v=zWlbiIEJS20
Detailed instructions for installing wooden slopes
Installation of wooden slopes in a building is divided into the following stages:
- markup;
- installation of the frame;
- fine finishing;
- facing of joints with platbands and decorative strips.
Markup
Using a pencil or marker, mark the location of the mounting bar. The distance between the bars should not be more than 50 centimeters. This approach will keep the structure strong and prevent further deformation during operation.
Installing the frame
We fix the mounting bar according to the markings, not forgetting to drill the holes for the dowels before that. If necessary, spacers are installed under the bars, with the help of which the working plane is leveled. It is important not to allow deviations in the working planes and to check the correct angles around the entire perimeter of the window.
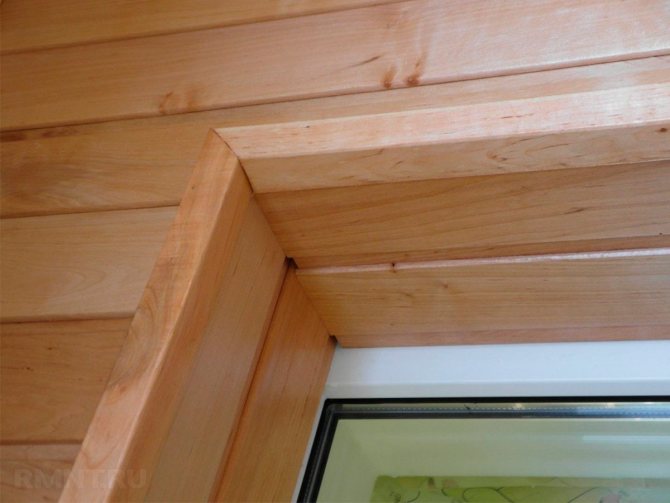
Fine finishing
Installation starts from the window frame. Do not fit the slope closely. Leave a gap of at least 5 millimeters. First, the ceiling part is fixed, after which the side trim is installed. Leave gaps of 3-4 millimeters at the corner joints. They will be covered with decorative elements, and the cladding will not deform over time.
Platbands and decorative strips
The gaps left by builders for seasonal deformation are closed with decorative strips. The gaps left between the window opening and the outside slope are closed with platbands. Fasten decorative elements with glue.
Slope classification
Additional casing for a plastic window
Wooden walls are made of a material that, after installation, reduces the percentage of moisture, unlike concrete and brick walls. Shrinkage depends on the climate in the region, the season, the purpose of the building and the internal microclimate.
In wooden houses, window frames are installed using cages - an additional rigid box that levels the position of the window in case of subsidence of the structure. This should be taken into account when choosing the structure of the slope and the material for its manufacture. Such an element must be installed in houses made of timber, profiled or glued lumber, logs, and is used in frame-type buildings.
The thickness of the walls in a wooden house can be different, for example, the sizes of summer houses and capital log cabins differ. The facing of the slopes is attached to the wooden surface with self-tapping screws or screws. If a frame is mounted from a galvanized profile, self-tapping screws for metal with fine threads are used to connect metal parts.
By size
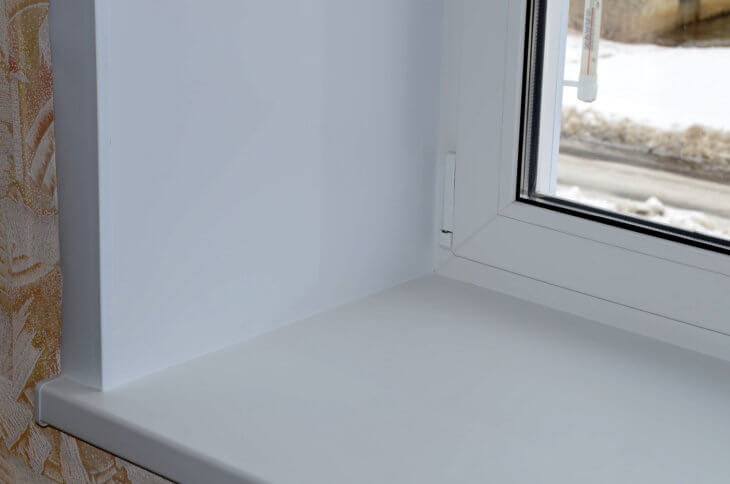
Narrow slopes on a plastic window
Slopes are made in size, which is due to the thickness of the vertical fence and the placement of the cover relative to the central axis of the wall in the plan.
The types are distinguished by size:
- wide - from 200 mm and above;
- narrow - 50 - 200 mm.
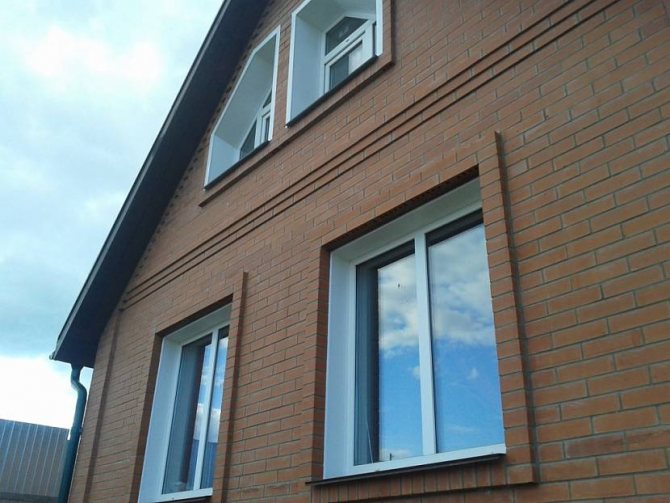
The window is often placed so that from the outside it is embedded shallowly into the wall, and inside there is more room for wide slopes and a window sill. Sometimes the box is placed flush with the facade, then the finishing is performed in the form of an overhead casing around the binding, metal, vinyl, acrylic or wood siding is used.
The finish looks good with wet wallpaper, cork, decorative plaster. The design provides for insulation, for which they put foam plastic, glass wool, extruded polystyrene foam panels. The waterproofing membrane is usually installed on the walls, and also comes with a vapor barrier film. These layers are placed inside the room and outside the building.
By location
Outside, for the slopes, choose metal siding in the color of wood or plastic
By location, planes are distinguished inside the building and from the side of the street. Each type works in different conditions, therefore, requires an individual choice of technology and material.
Internal surfaces are in gentle conditions of a certain microclimate, while the purpose of the room plays a role. In the kitchen, bathroom, the area is exposed to high humidity, active atmospheric impurities in the form of fat and acids. The finishing material is chosen taking into account aggressive factors. Surfaces in living quarters do not undergo such influences, they do not impose increased requirements on materials.
Outside slopes are exposed to temperature extremes, suffer from frost, and are heated by the sun's rays. The layer should not change color over time, become brittle and degrade. Opt for steel siding, plastic, high quality lining. The surface must withstand impacts and have high strength.
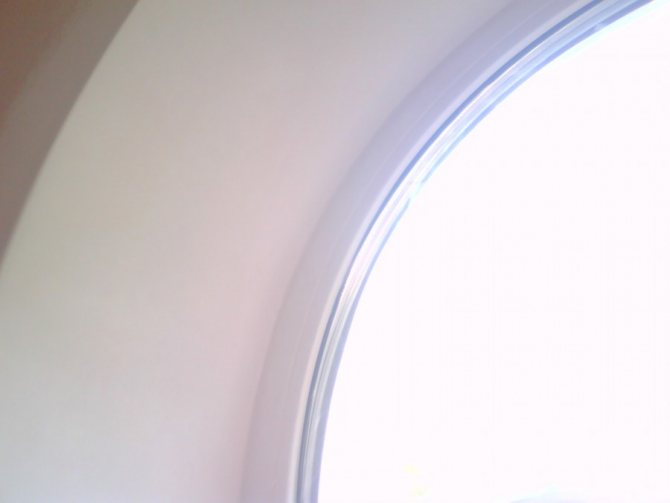
By form
From the inside, arched slopes are finished with bending panels or putty
The vertical surface of the slope is made so that an angle of more than 90 ° is obtained between the end of the wall and the edge of the window sash, which the builders call dawn. The condition is fulfilled so that more light enters the room, while an angle of up to 45 ° is considered correct. Vertical planes should be performed with the same dawn, and the upper slope often differs in the angle of inclination, therefore, the identity by degrees is not observed for it.
Slopes at an angle of 90 ° without dawn can be made if it is not possible to turn the vertical plane. This happens if the dimensions of the window fit exactly the opening without the slightest gap, and the width of the box is minimal. These slope options create a depressing mood in the room.
What materials are most often used for mounting slopes?
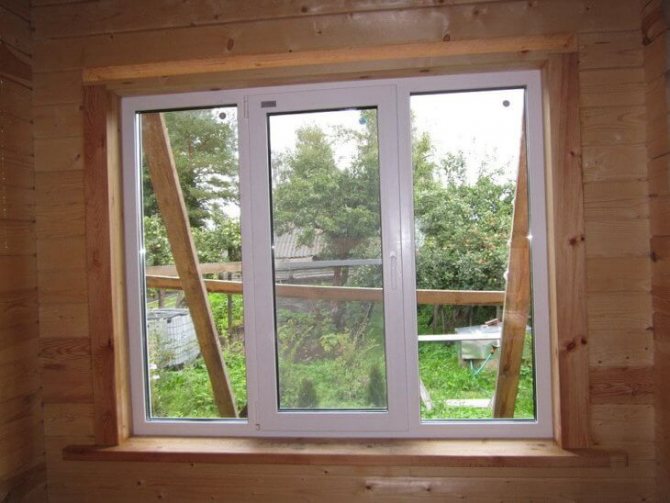
Slopes on windows are not simply installed to hide all traces of installation, they are also used to isolate extraneous noise from the street, as well as to insulate and eliminate fogging of windows. The basic rule is correct installation, otherwise about 40% of the heat will go through the window. Slopes are not just a beautiful attribute of the interior, but also the protection of polyurethane foam, which is used in the installation of windows. Without a slope, the foam will crack, absorb moisture and collapse, due to this, the insulation will deteriorate every year.
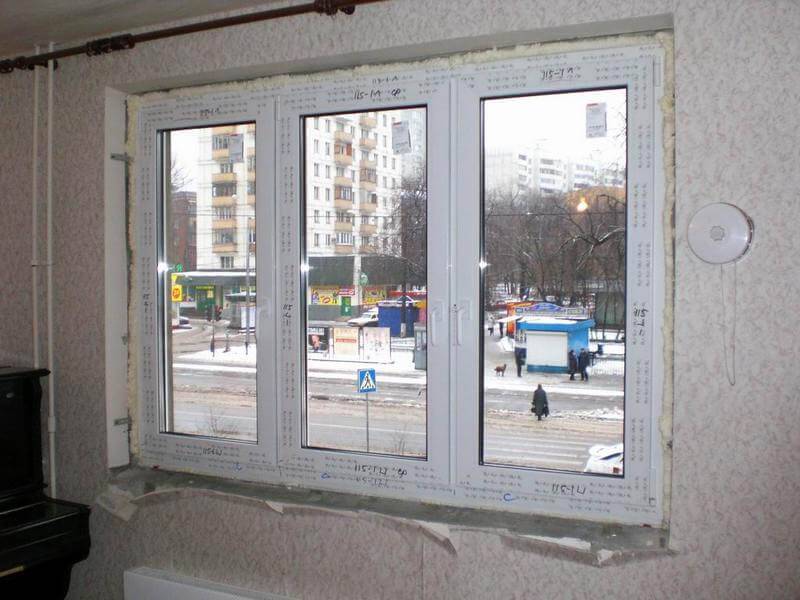
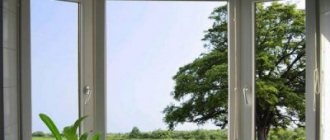
Plastic window without slopes
The variety of materials for window cladding is large, but the main ones are distinguished:
- Plastic.
- Drywall.
- Plaster.
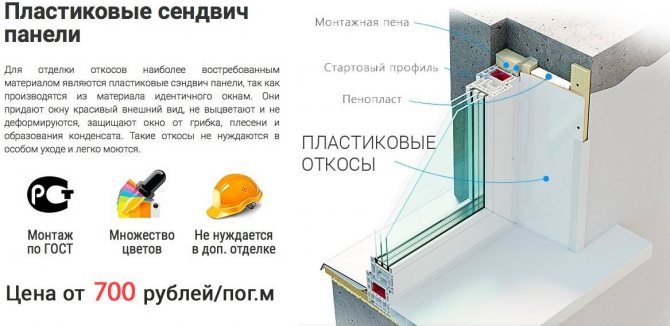
- Sandwich panels.
Increasingly, during the repair, plastic is used on the slopes, for plastic windows, working with your own hands. It is not only easy to clean and care for, plastic has other features, but all this can only be seen in a comparison of materials. Below are the advantages of the materials:
| Plaster: | Plastic: | Drywall: |
| Easy to close up windows. | Installation is carried out very quickly. | Durability when using GVL. |
| The design is very cheap. | It is easy to wash the surface of the plastic slope. | It is possible to insulate the window opening with cotton wool or foam, thereby increasing the thermal insulation properties. |
| You can change the color of the window opening with paint. | The material does not fade in the sun. | |
| They can serve for about 20 years or more. | ||
| With the right color selection, it will be possible to achieve harmony with the window itself. | ||
| Good insulating qualities. |
As for the plaster, it has more disadvantages. Over time, such material will lose its color due to sunlight. After a few years, restoration will be required, because plastering is not durable, cracks appear, and sometimes the plaster simply leaves the walls in pieces. The thickness of the plaster will be large, since several layers are applied to the window opening, and the technology is long-lasting, because each layer dries out. After plastering, primer and paint are applied.This material does not imply the use of a heat insulator, due to which the windows will fog up.
Plasterboard slopes on windows
The disadvantage of drywall is that not all types of gypsum boards can be installed in wet rooms, and during work it is necessary to use paint and a primer. You can also trim the window using the following materials:
- Tiles.
- Metal or metal profile.
- Siding.
Some people create a wooden slope, but it is better to use the material inside the house and process it with additional means to prevent mold and mildew. In general, there are a lot of materials for finishing windows, some are used as external facing material, and some as external.
Dismantling an old wooden window creates large holes in the opening, even after installing a new PVC window. In this case, it will blow from the windows and you will need to fill the holes. In addition, additional sound insulation and thermal insulation will allow you to get insulation if the frame method of decorating the slope is used. In this case, a heater is placed in the frame and closed with trim.
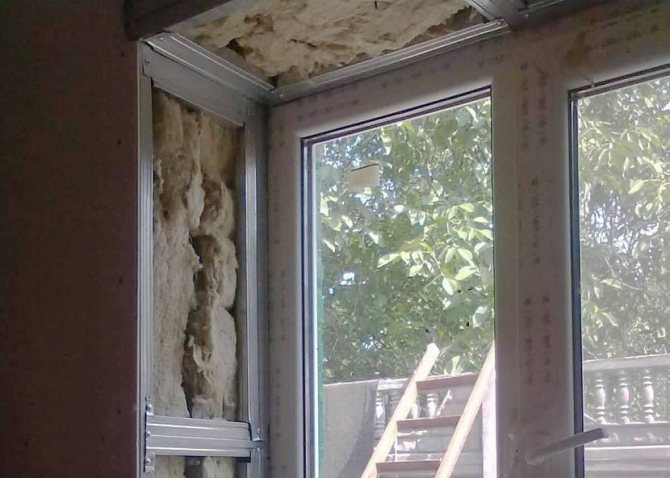
Among the available and modern heaters and methods, there are:
- Filling voids with mineral wool when installing window sills and slopes on plastic windows.
- Smear the junction of the window and the wall with foam in order to exclude freezing.
- Put on the trim on the slope, and also install the ebb if the installation is carried out from the street.
In addition to cotton wool, you can use other materials:
- Penoplex.
- Expanded polystyrene.
- Sandwich panel.
- Izover.
The choice of insulation depends on the width of the gaps and the features of the window opening, as well as the junction of the walls with the PVC frame. If the gap is up to 50 mm, and the surface is smooth, then expanded polystyrene or isover up to 3 cm are used. For unevenness, mineral wool is suitable, it will also do if the defects are very strong after the old window has been removed. Having familiarized yourself with the materials used for windows, as well as insulation, you need to understand the method of installing slopes on plastic windows with your own hands.
Features of the classification of slopes
Cladding is needed to complete the interior of the room.
The facing of the slopes is needed to make the interior of the room complete. Window decoration is different in material of manufacture, size and shape. They also classify it by location.
By size
Depending on the dimensions, the slopes are narrow and wide. The second option is suitable for structures that are built from logs. What matters is the actual size of the window block. If it's small, narrow trim doesn't look good on it. Several finishing strips are fixed on a wide area, but the joints between them should not be noticeable.
By location
Slopes in the house are divided into internal and external. The first type is not exposed to the aggressive influence of precipitation. It must ensure the decorative effect of the window opening, eliminate the risk of drafts. In this case, use any finishing materials, even softwood. Antiseptic treatment of the base and facing is mandatory. For work, drywall is suitable, which after installation of the structure is covered with acrylic paint.
Outside slopes must be made of durable material that is resistant to mechanical stress, the influence of wind, precipitation, and sunlight. It is better to use durable plastic or wooden lining, which is covered with a protective varnish. Cement plaster is suitable for finishing. After hardening, it is painted.
By form
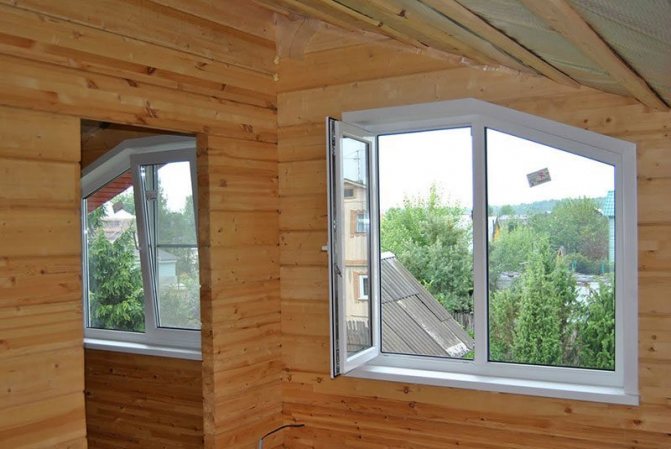
Window slopes are not always straight. There are also oblique options. They are installed if it is necessary to ensure an increase in the flow of sunlight into the room.At the same time, the glass is protected from freezing and condensation. Oblique slopes are used for roof windows. Direct finishing is used with standard insulating glass units.
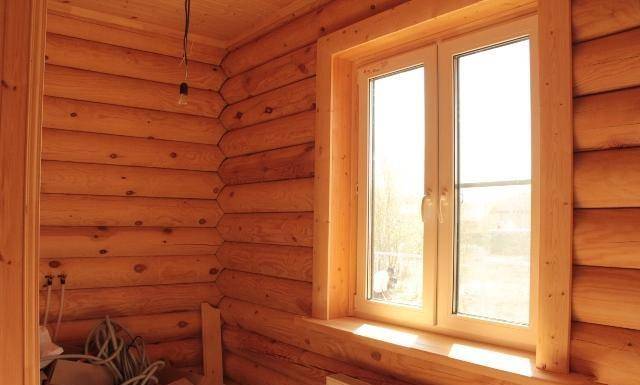
Benefits of wooden window slopes
Wood is a practical, attractive and sustainable material. It is often used for decorative purposes. Wooden slopes are hygienic, safe, reliable and practical structures. They are able to make the window opening much more attractive. They do not require special care. Wooden slopes have a long service life. The advantages of wooden slopes are as follows:
- wood is an environmentally friendly material;
- natural wood is not susceptible to the development of fungus;
- the material has an aesthetically pleasing appearance and is able to advantageously complement any design;
- wood "breathes", promoting air circulation in the room;
- the tree does not accumulate moisture;
- wooden slopes prevent condensation from forming.
The advantages of wooden slopes make them practical. The tree is not exposed to temperatures. Has increased hardness. Can be coated with a protective varnish to prolong the life.
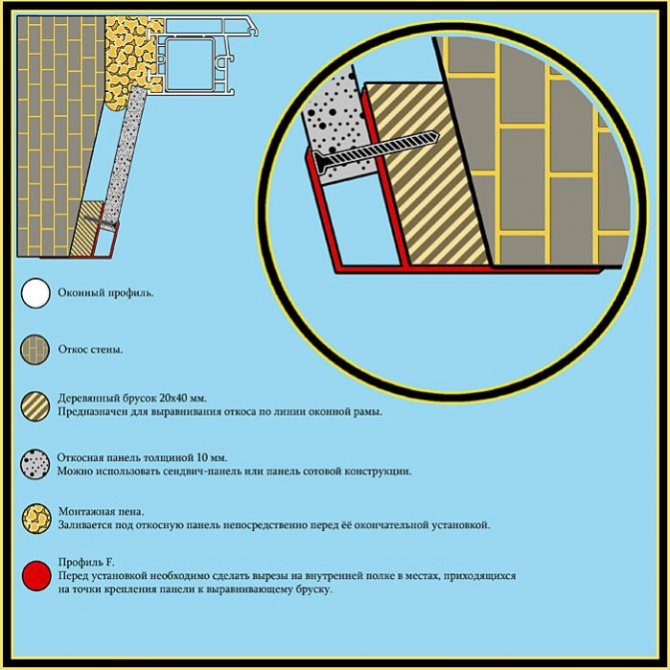
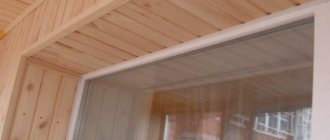
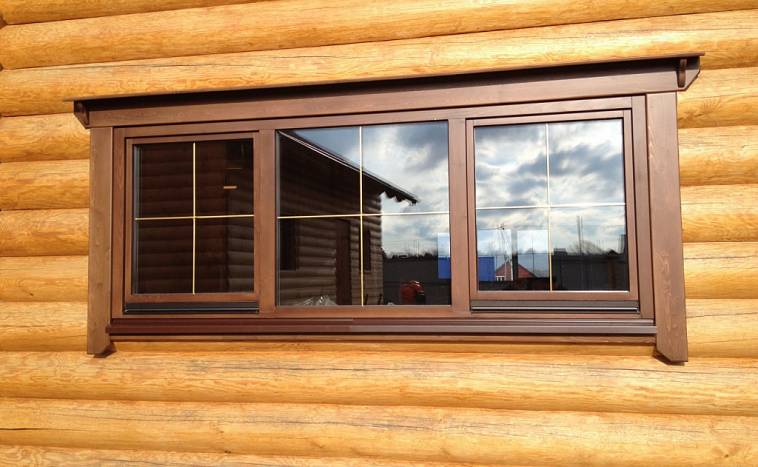
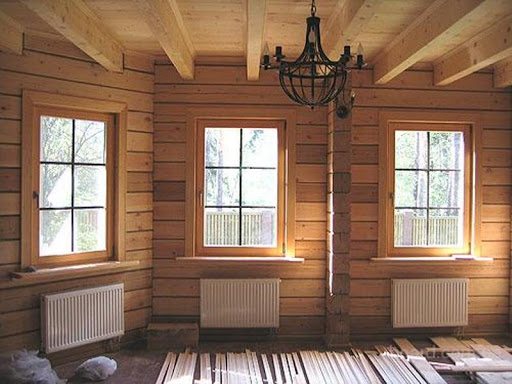
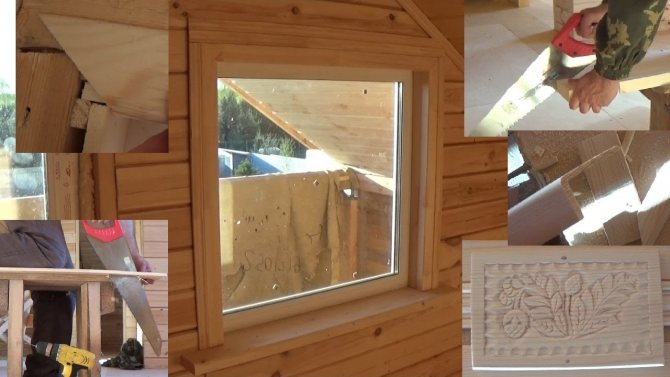
Fig. 4. Do-it-yourself slopes
Sustainability of wooden slopes
Undoubtedly, wood is an environmentally friendly material. Wooden slopes are made from natural wood. No formaldehyde used. The material does not have a negative effect on the indoor microclimate. The window is the only source of air. The use of environmentally friendly materials is a must.
The environmental friendliness of wooden slopes allows you to install them in any room, even a nursery. A wooden structure is much safer than a plastic one. Wood paints dry quickly. There is odorless varnish, for example:
- Tikkurila - from 680 rubles;
- Kompozit - from 470 rubles;
- Alpina - from 530 p.
Hygiene of wooden slopes
Wooden slopes are hygienic. The material is not susceptible to the development of fungus or decay. To achieve the hygiene of wood slopes, antiseptics are used. They prevent the growth of bacteria, mold and mildew. The tree does not require any special care. It is enough to regularly wipe the slopes from dust. The coating of wooden slopes makes them resistant to moisture, ultraviolet radiation and dirt. To maintain hygiene, the tree should be covered with an antiseptic "Senezh", "NPO NORT", "Olvia".
Practicality of wooden slopes
Wooden slopes are able to withstand almost any impact. They resist sun, rain, snow, frost, stress, etc. This material can last up to 25 years. The tree possesses:
- high heat and noise insulation,
- maintains a comfortable indoor climate,
- provides an optimal level of humidity,
- prevents the formation of condensation;
- prevents the appearance of drafts.
The practicality of wooden slopes makes them the best solution for installation in residential buildings.
Accessibility of wooden slopes
Any installation technology will do. You can use available tools and materials. Wooden slopes are cheap. They look attractive and comfortable.
Features of PVC and wood material
Decorating plastic windows in a wooden house with PVC slopes is a fairly popular option. This practical material will serve you for a long period of time, the plastic has an attractive appearance and resistance to moisture.
Finishing slopes in a wooden house from the outside from the side of the facade will last for more than one year without losing its functions. The main advantages of plastic include the following:
- reliable protection of the tree;
- resistance to temperature changes;
- a variety of shades: from natural to bright;
- ease of maintenance: without additional chemicals for washing, you can quickly remove dust and various types of contamination.
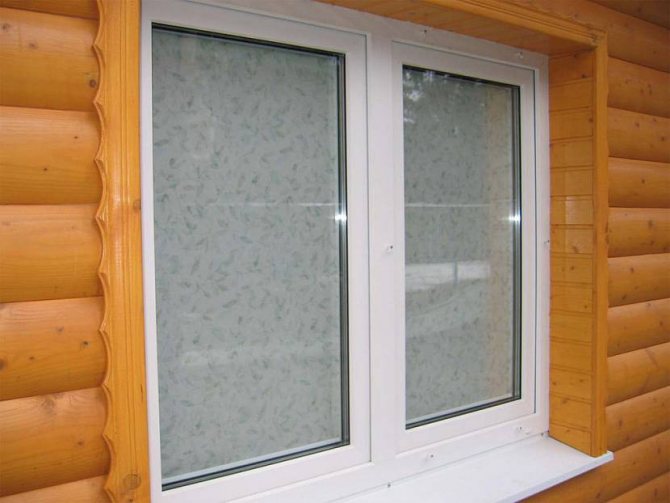
Plastic slopes reliably protect wood from moisture
Wooden materials have their own advantages:
- attractive appearance;
- natural material that does not cause allergic reactions;
- durable, has a long service life provided that it is properly installed and maintained;
- the ability to paint the slope in any color based on the color of the interior or facade of the building.
Platbands
Platbands or casing for internal slopes for pvc windows can be made of different materials, but its functional purpose is the same - protecting the assembly seam from destruction and giving the window opening an aesthetic appearance.
Types of platbands
Platbands differ in appearance and functionality:
| Flat platbands. This is the easiest and most inexpensive type of cashing. |
| Profiled platbands have a convex surface of a different profile, aimed at enhancing the decorative function of cashing. |
| Shaped platbands can have a complex relief and imitate natural wood. |
| Carved platband is the most expensive type of cashing, made to order according to individual sizes. |
Materials for making
The most common material for making cashing is plastic sheet. It is used for the manufacture of budget flat platbands, which can be used for finishing windows indoors and outdoors.
This material is not afraid of temperature extremes, exposure to moisture or sunlight. Its surface can be laminated and acquire any color or imitate various types of natural wood. Therefore, it will not be difficult to choose a cashing to match the color of the window facade.
Plastic casing can be made for any facade
For plastic platbands, deformation from temperature changes and exposure to moisture is unusual.
Profiled platbands made of PVC profiles have the same properties, but can have a shaped surface. They are also used for interior and exterior window decoration.
Platbands made of MDF can also be flat or profiled, but they are used exclusively indoors, since the properties of MDF do not allow them to be used outdoors under the influence of surrounding natural phenomena.
For outdoor use, dense foam casing can be used. This material is easy to process and install. The most intricate and complex shapes can be cut from foam. It can be decorated with any finishing materials. It has negligible weight, therefore it does not exert a load on the wall.
For the exterior decoration of the window, foam platbands can be used.
The most expensive window decoration option is a carved wooden casing. Threads can be made manually or mechanically. Handcrafting is very expensive due to its individuality and exclusivity.
Profiled and shaped platbands made of natural wood, made on a machine, will be cheaper.
Careful care is required for wooden platbands, since wood, when used under the influence of the external environment, has some disadvantages:
- wood may deform when it absorbs moisture or crack as a result of shrinkage;
- such cashing looks harmoniously on wooden windows or on timber facades. On modern facades, such cashing will look ridiculous.
Fastening
Most often, when installing platbands on a plastic window, they use mounting elements that are fixed to a frame or wall.
Platband installation scheme
The use of removable platbands, which are attached to special latches, allows for quick and high-quality installation.
Finishing methods
Narrow wooden slopes in folk style
Inside the house, the material is chosen depending on the style of the room and the interior decoration.In the bathroom and in the kitchen, plastic cladding or a surface lined with ceramics looks appropriate. These types are in harmony with the material of the walls made of tiles, the ceiling made of PVC, so they look organic and firmly resist the damp microclimate. The areas are easy to clean and free of fat (kitchen) hardness salts (bath).
For the slopes of living rooms, plaster is used, decorative putty is made. The surfaces are pasted over with wallpaper to match the room, but snow-white slopes that are suitable for any style always look better. Wooden slopes are suitable for country style and natural materials.
The planes around the windows from the street side are often performed with various types of siding, plastic, modern clapboard. The materials meet the requirements of work in difficult weather conditions and retain their performance characteristics for a long time.
Plastic
Plastic slopes to match the windows
The material is placed outside and inside on the slopes when decorating windows in a wooden house. Practical PVC panels are distinguished by a long service life and an affordable cost. The surface has a glossy or matte shade, the user has the right to choose the plastic by color. Panels are produced with imitation of natural materials, for example, stone, different types of wood. On the surface, a pattern of ceramics, brickwork, fabric braiding is applied.
Plastic has high quality properties:
- the simplicity of the technology of installation and processing allows you to sheathe the planes with your own hands;
- easily cleaned with ordinary detergents;
- does not support the development of microorganisms;
- under normal conditions, it does not emit components harmful to health.
PVC plates are lightweight, so they do not increase the load on the walls. Plastic withstands temperature fluctuations and heating by the sun, due to its moisture resistance, it does not collapse in the cold. Due to the honeycomb structure, they additionally isolate the room from noise.
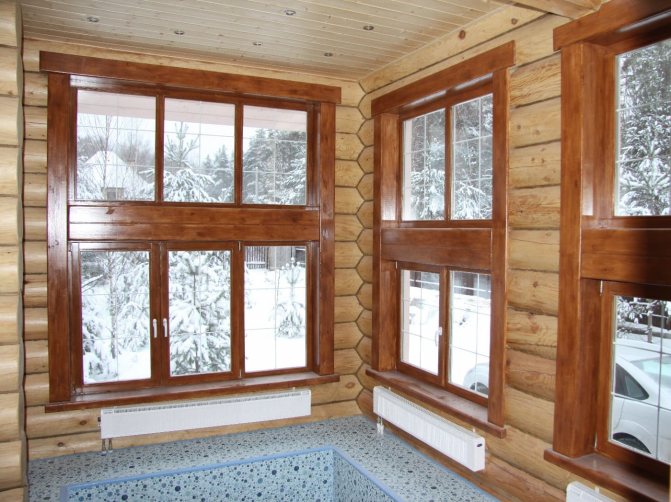
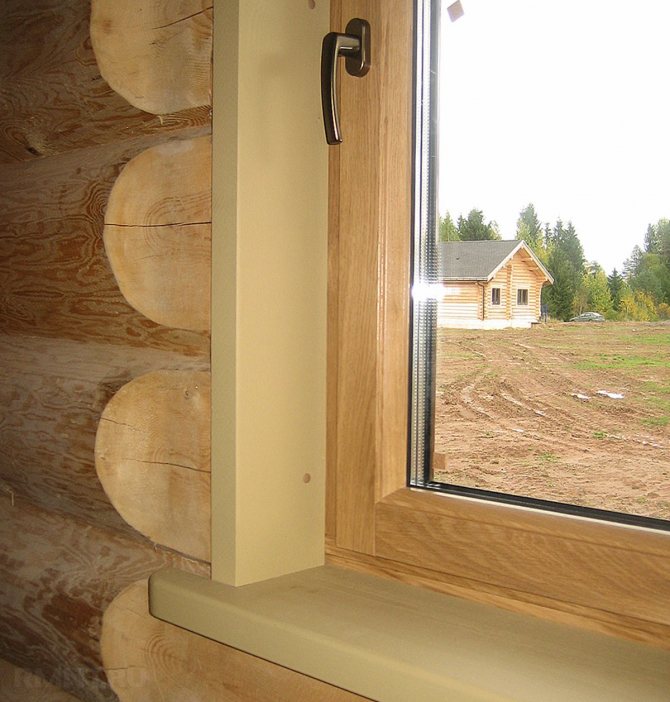
Wooden
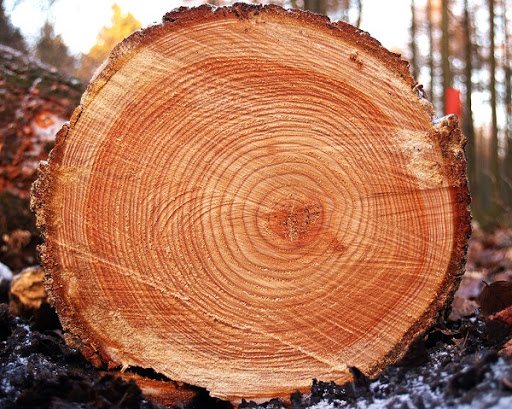
Siberian larch contains a lot of resin, so the wood does not absorb moisture
They use various species, for expensive interiors they put elite boards of oak, beech, cedar wood. As an inexpensive option, take coniferous species of pine and spruce. The average cost material is Siberian larch, which contains resin in the composition, which protects the material from moisture.
Positive qualities of wood in the decoration of slopes:
- environmentally friendly look, does not contain and does not emit harmful substances when heated from the sun;
- does not fade over time;
- creates an atmosphere of warmth and comfort;
- can be combined with many building materials.
Wood of any quality requires treatment with antiseptics, fire retardants, stimulants, so that bugs do not spoil it, and the risk of ignition of the finishing layer decreases. The material is rarely painted; impregnations and varnishes are often used to emphasize the original texture. Wooden slopes can last 2 - 3 decades without losing their original properties when properly installed and maintained.
Plastering
Standard plaster contains cement and sand in a 1: 3 ratio. It is an economical type of window decoration that behaves well outside and inside the home. Thin layers sometimes freeze.
Plaster does not adhere well to the wooden ends of the walls, therefore, be sure to stuff a metal mesh before throwing on the solution, and add gypsum or alabaster to the mixture in a volume of 1/10 of the mass. Liquid glass is mixed into the composition to increase moisture resistance. Finished surfaces are putty and covered with acrylic based water-based paints.
The modern market offers ready-made plaster mixes with increased adhesion to wood. Such formulations are sold ready-to-use, packaged in buckets or released as dry mixtures in bags of 25-30 kg. They contain polymer additives, fibrous admixtures, which increase adhesion to wood and provide elasticity of the coating.With the use of dry mixes, the cost of the layer increases.
Lining
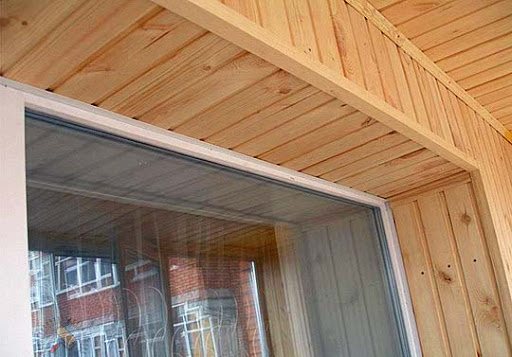
The lining is used for slopes outside and inside
Glued material is made from wood fibers that are pressed under pressure under high temperature conditions. Modifiers and artificial types of resins are added to the mixture during production to improve performance. The material looks like natural wood after varnishing or impregnation.
For outdoor use, a lining of a complex composition is produced, which includes wood waste and polymer composites (polypropylene components). As a result, the elements receive fire-fighting characteristics and do not ignite up to a certain heating limit.
Modern lining serves up to 15 years, the material is easy to install, and does not require complex maintenance during operation. In normal household conditions, the panels do not emit harmful substances into the surrounding space. For the slopes of plastic windows in a wooden structure, the lining is a suitable cladding, since it is combined with the natural material of the walls.
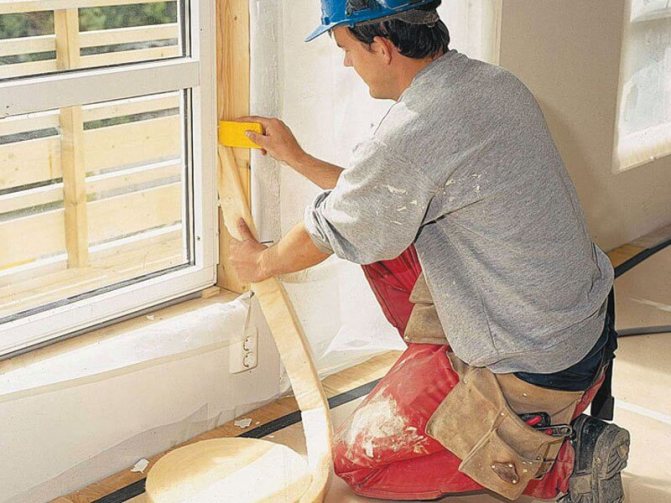
Getting ready for finishing
Before starting the installation of window slopes, you need to check the correct installation of the window blocks. If deviations occur horizontally or vertically, as well as a curvature of the profile, the errors should be minimized as much as possible so that the subsequent finishing of windows does not emphasize the shortcomings. To do this, you can use plumb lines, placing them in the next order above the vertical profile of the window frame. Then you need to measure the sides with a tape measure and, if the indicators coincide with each other, you can move on.
Check that the profiles are not scratched or chipped. The window block should have a flat surface that is free of bubbles and cracks. Slopes are installed after complete dismantling of the previous parts. It is necessary:
- remove old slopes;
- remove excess foam;
- remove the protective film;
- seal the through holes.
What are the slopes for?
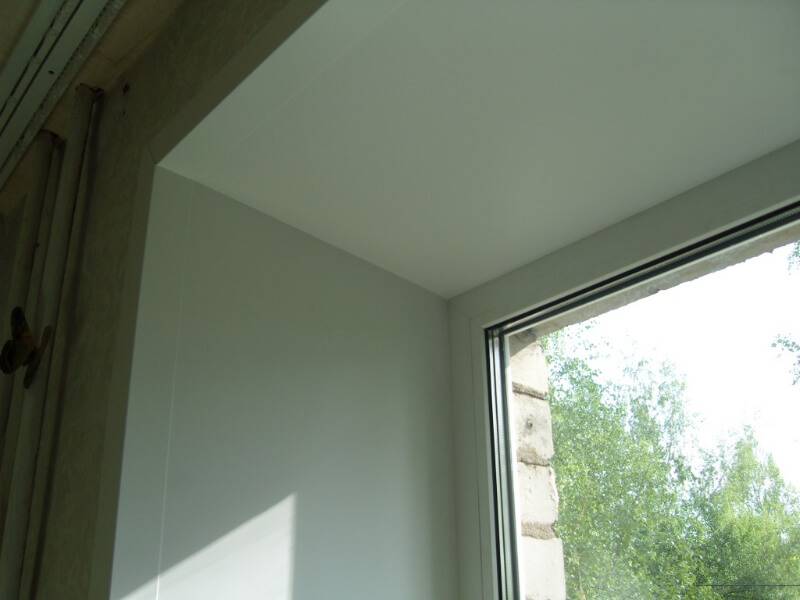
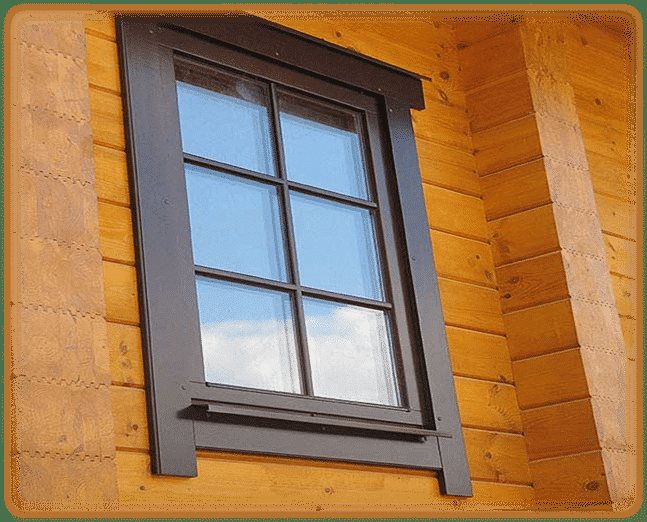
Of course, the slopes are an excellent decorative element of the window. With their help, you can hide such traces of window installation as seams, chips and foam. Moreover, correctly selected and well-made slopes will be a great framing for new wooden windows.
Is it only for beauty that slopes should be performed? Of course not. Slopes serve a number of critical functions. One of the primary tasks of slopes is insulation of a window opening
... Wooden windows with double-glazed windows themselves are very airtight and have high noise and heat insulation characteristics. However, poor-quality insulation between the frame and the opening can nullify all these advantages. It is precisely to provide insulation and improve these characteristics that slopes serve.
Thus, high-quality slopes serve as an additional heat insulator, ensuring the preservation of heat in the room.It should be noted that in winter, when the walls are severely frozen, the slopes help prevent the formation of condensation, due to which fungus and mold can appear on wooden windows.
In addition, the slopes protect the window openings from drafts. Polyurethane foam used in the installation of wooden windows tends to deteriorate quickly under the influence of sun and water. For this reason, cold air will penetrate through the resulting cracks. It is the slopes that serve to prevent the destruction of the foam and repel the penetration of cold into the room.
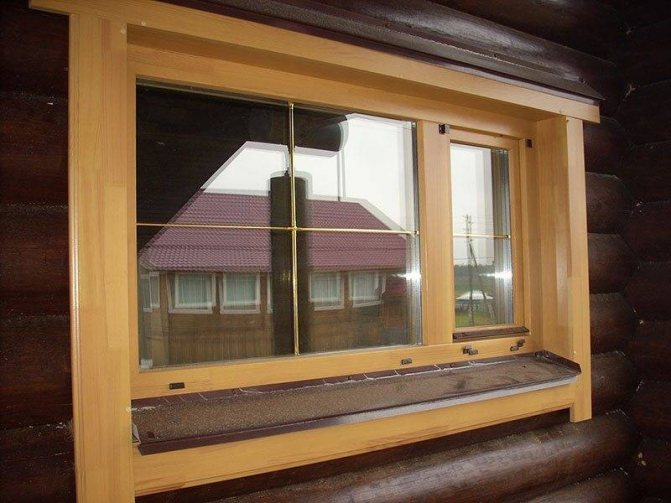
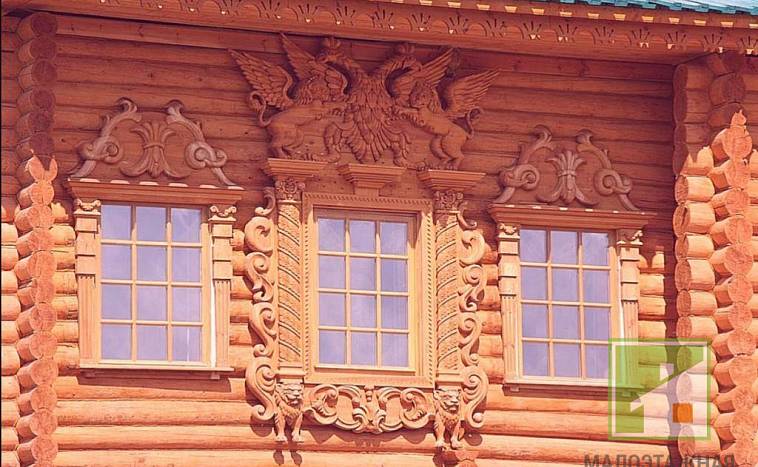
Types of wooden slopes and their properties
A slope is a part of the window opening both inside and outside the window structure. They are made from different types of wood, as well as from cork oak bark, and their function is mainly to disguise traces of installation of window frames, such as foam and unsightly joints.Qualitative and correctly selected, they can become a worthy interior decoration and a beautiful frame for windows.
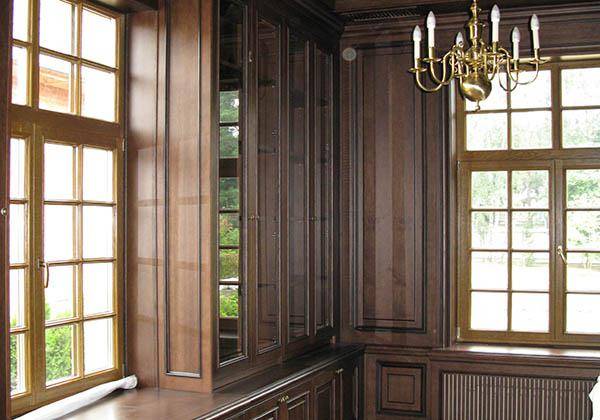
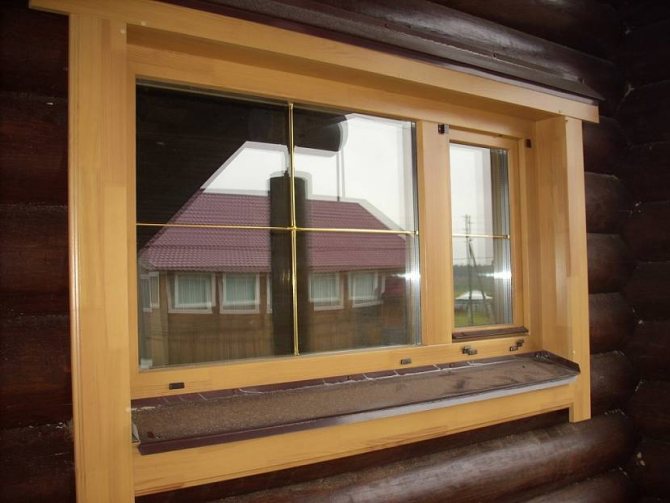
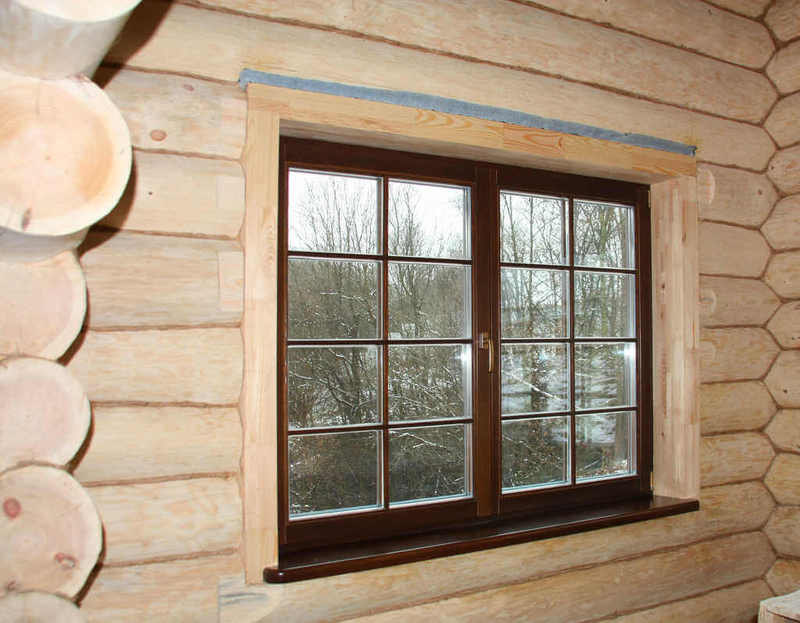
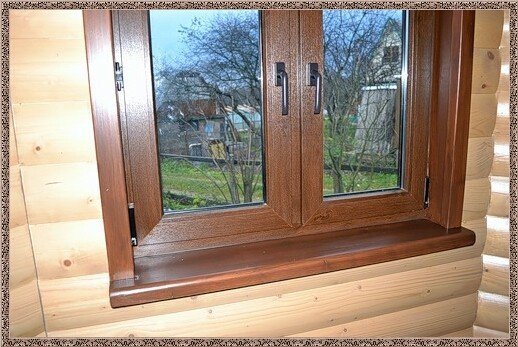
Wooden slopes give the window nobility.
In addition to the decorative function, the slopes for window openings function as a kind of window insulation, since they overlap the joints and cracks. So, let's consider the main functions that wooden window slopes carry:
- Provide protection against freezing. Wooden slopes are saved with poorly made thermal insulation when installing windows, since they close the gap that forms between the frame and the window opening. At the same time, the slopes significantly improve the thermal insulation of the room. Also, wooden slopes prevent condensation from forming on the window frame, because it is condensation that contributes to mold and rot.
- Protect from wind and drafts. The polyurethane foam used for sealing joints when installing windows loses its properties when exposed to ultraviolet radiation and water, which is why it quickly collapses. By installing the slopes, you can prevent the destruction of the foam, which, in turn, eliminates the appearance of drafts.
- They have high decorative properties. In addition to masking polyurethane foam, chips and joints, wooden slopes look very impressive in the interior and add completeness to the window frame.
During the manufacture of slopes from wood, special glued shields are used, which are treated with special compounds to prevent exposure to the environment. For the manufacture of the slopes, it is recommended to use the same species of wood that was used for the manufacture of window frames - in this case, both the color and texture of the window block will completely match, and wooden windows with slopes will look solid.
Different types of wood, such as, for example, larch and pine, differ in the texture of the wood pattern, and even if the same varnish is used to decorate the window and slopes, the original color will still differ.
As a rule, wooden slopes are not mounted on the same day as windows in a wooden house, this is done so that the foam for installation has time to dry out and become durable. At least 11-12 hours should elapse between the installation of windows and wooden slopes. But it is not recommended to hesitate with the installation of slopes, because the influence of the environment gradually destroys the polyurethane foam.
What kind of wood to choose for the slopes on the windows?
For the installation of wooden slopes, the same material is used as for the window frame. That is, if the entire window structure is made of oak, then oak should also be used for the slopes. This is necessary in order for the color and shade of the opening to match everywhere. For slopes, hard tree species are usually used, more often conifers. They have increased strength. They are distinguished by resistance to external influences. They have a long service life.
A good solution for slopes is to use:
- pine trees,
- larch,
- oak,
- lindens, etc.
If the frame and slopes are made of oak, then the same wood should be used for the window sill. In fact, you can make slopes from any type of wood. But then you will have to treat it well with a protective varnish to protect it from the sun and rain.
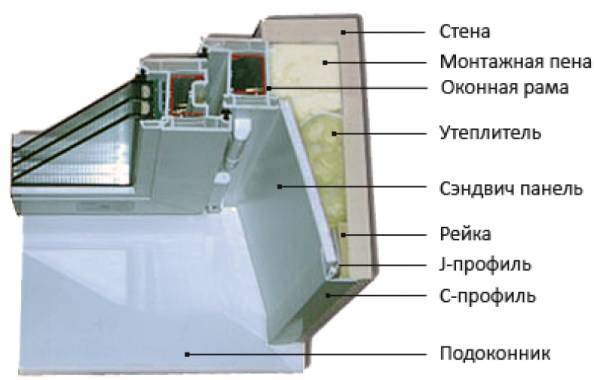
You can use natural wood to decorate the slopes or sandwich panels. FSF is often used - plywood with increased moisture-resistant properties. The top layer is covered with natural wood veneer. The surface is treated with varnish to emphasize the type and pattern of the wood. Sandwich panels are used:
- one-sided - from 1200 rubles;
- bilateral - from 1450 p.
Wooden slopes from manufacturers are practical designs. They are grooved for easy installation. Convenient connection of the slope elements allows you to install the structure yourself without unnecessary problems.
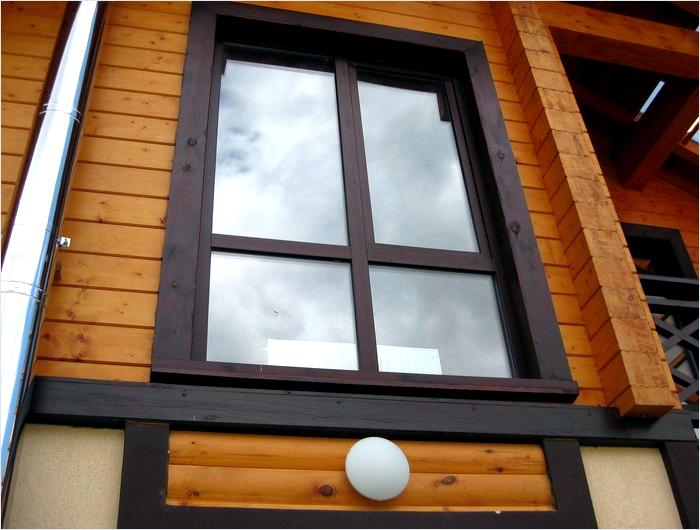
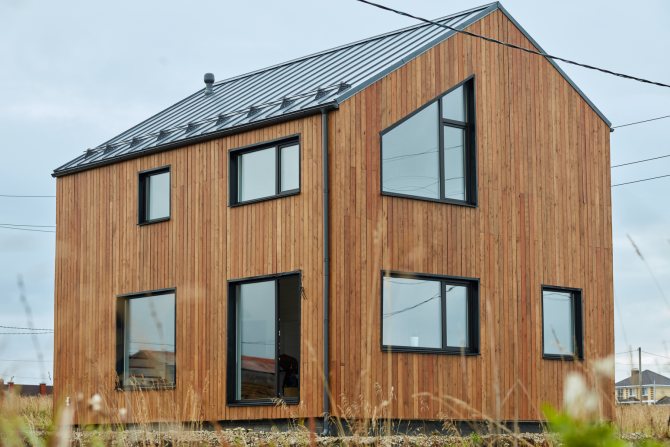
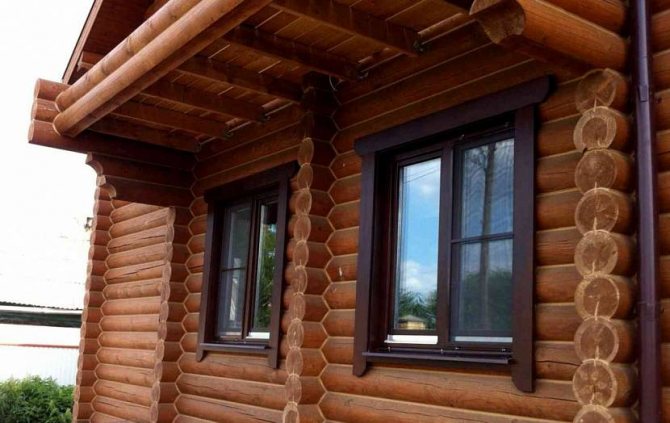
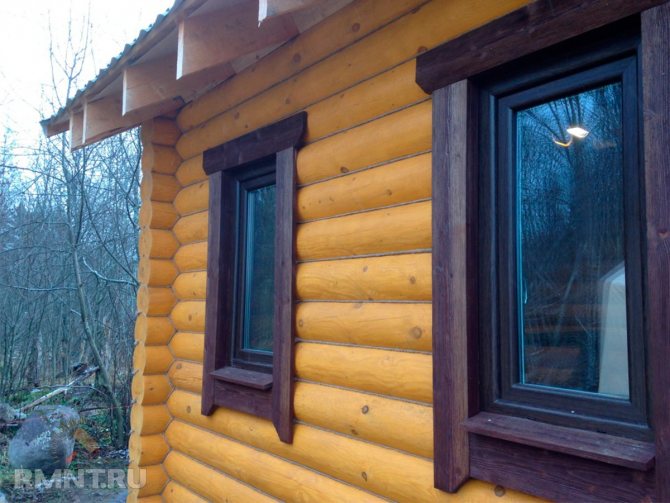
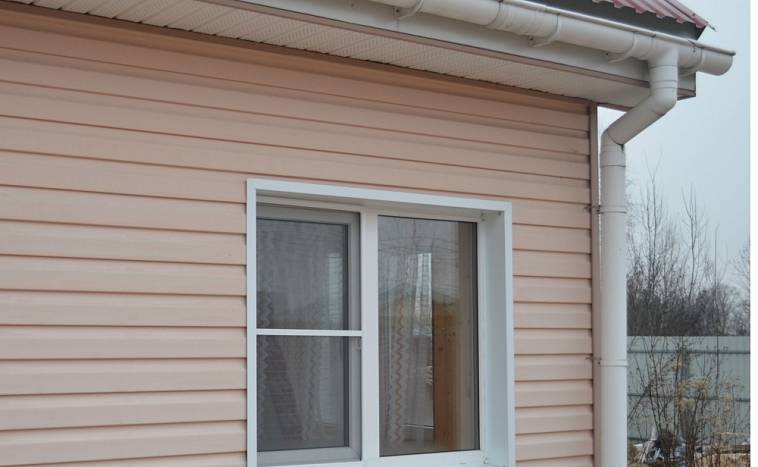
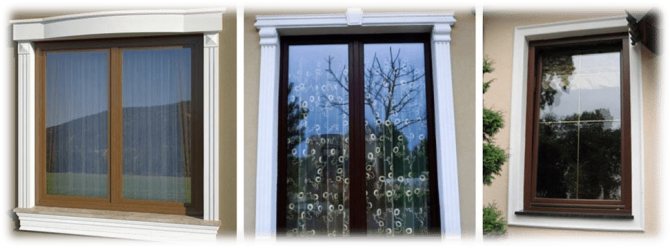
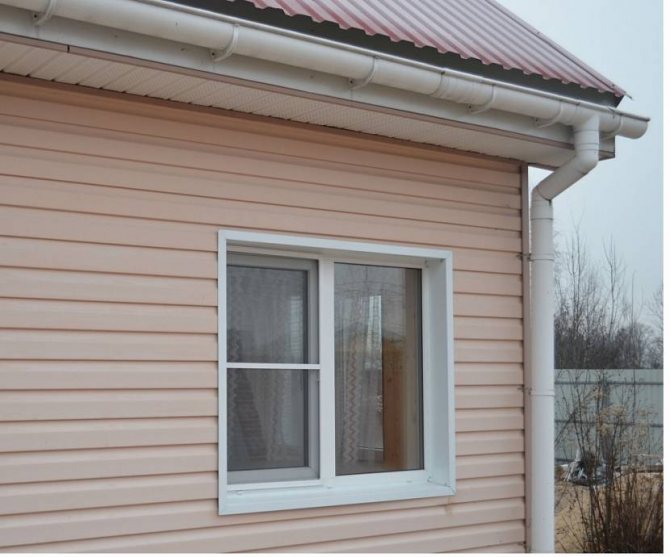
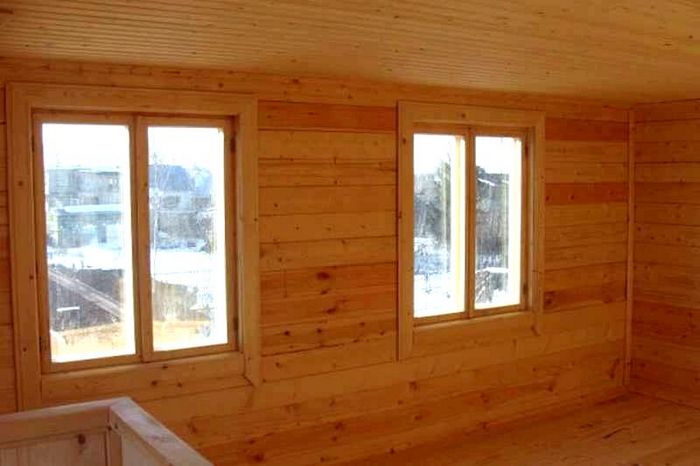
Options for finishing windows outside in a wood house
In fact, any family has a dacha or a country house, some of which are certainly built of wood. Windows in a wood house can be made of wood or plastic.
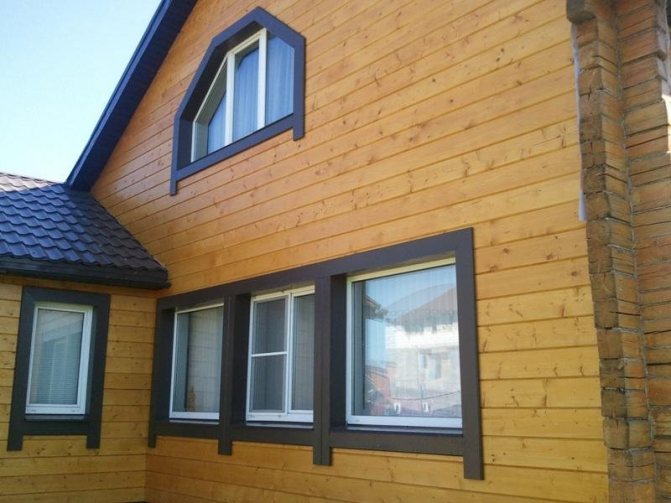
In order for them to look great on the facade of housing, they are often trimmed with different materials. In most cases, wooden frames are designed with wood species, and plastic structures - with plastic. This combination will look more harmonious.
About the main advantages of each material, as well as how to decorate windows outside with your own hands, and we will talk further.
The advantages of plastic
Plastic has been used for both indoor and outdoor use for a long time. It's not overwhelming, because the material:
easy to clean, which allows you not to use chemical detergents;
has a very wide palette of colors and textures, including wood imitation (see photo);
sealed, does not allow water and air to pass through;
easy to repair, after all, it is enough just to change the broken panel and do without replacing the entire structure;
resistant to huge temperature changes, etc.
At the same time, the fact that plastic does not allow air to pass through may somewhat disrupt the local climate in housing. In addition, it is necessary to keep in mind that such a window finish is not resistant to mechanical damage, therefore, when working with it and during operation, you must be careful.
Features of plastic cladding
In order to finish the windows outside in a wood house, it is necessary to prepare the following materials and tools:
Wall surface preparation
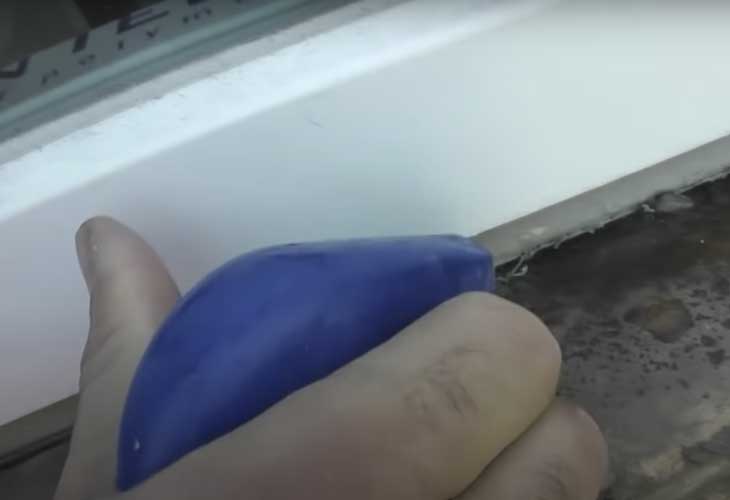
And so finishing the slopes of windows with plastic or sandwich panels begins with cleaning the surface. From the plane of the slopes, it is necessary to remove the remnants of construction debris and old finishes, dirt, dust. Cut off the protruding polyurethane foam.
Advice: To prevent the formation of colonies of mold and fungi under the plastic panels, the surface of the slopes must be treated with special impregnations of the deepest penetration. We carry out the treatment of walls and wood laths with impregnation using a roller or a paint brush.
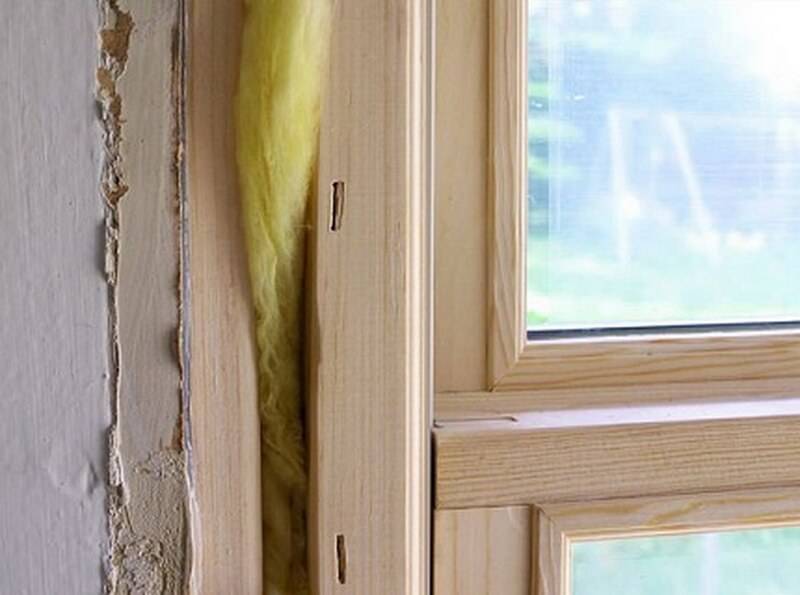
Installing an insulating gasket
When finishing the slopes of windows with plastic or sandwich panels, you need to learn one rule. We should not have blow-outs and drafts.
Advice: To prevent drafts from possible cracks between the wall and the window or door block, it is recommended to lay a narrow layer of any kind of insulating material under the PVC panels, for example, mineral wool, isolon, expanded polystyrene. It will additionally significantly increase the thermal and sound insulation of the window or door unit.
Advice: In place of the insulating material, you can use polyurethane foam. It is enough to lay the insulating material with a width of up to 5-10 mm. It should not be thicker than the prepared wood planks.
You can attach it to the wall with any kind of glue. But it is recommended to use bituminous mastic for this. It will additionally prevent the accumulation of water under the panels.
Installing the fixing loop for panels
Along the outer perimeter of the opening, we mount the wood strip using dowels and screws. To create a beautiful contour, you need to set the horizontal and vertical plane of the slopes using a building level and lining made of wood or plastic.
Install a starting profile along the outer edge of the slats, the inner shelf of which is fixed to the wood plank. We attach the starting profile along the outer edge of the block. It is installed with a gap from the surface of the slope equal to the layer of insulating material.
Installation of PVC panels or sandwich panels
The finishing step of finishing the slopes of the windows with your own hands is the installation of the plastic panels themselves. Panels are inserted between 2 start profiles.
If their width does not match the size of the slope, then it must be cut with a construction or clerical knife. The joints of the side strips and the top headroom are fixed with an internal special plastic corner.
Additionally, they can be carefully filled with watery plastic. Narrow plastic trims are used for perfect camouflage of the wood lath along the contour. Ultimately, the plastic slopes came out of a nice look.
A large assortment of color and texture solutions for plastic makes it easy to arrange them for different interiors.
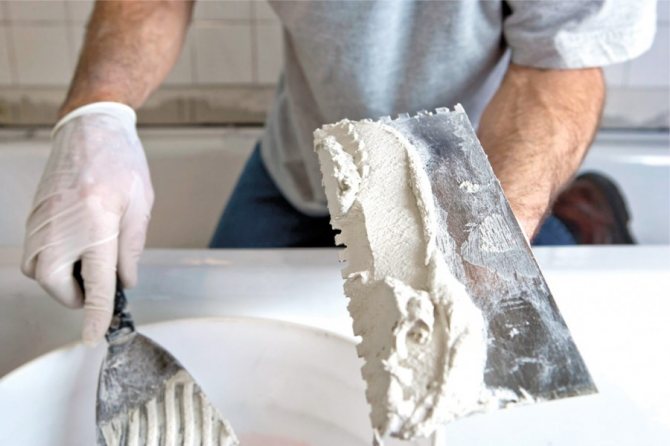
How to plaster correctly
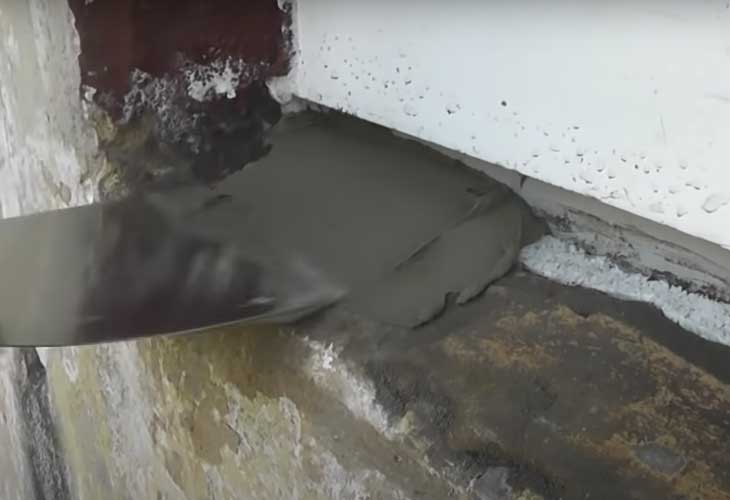
We plaster windows under slopes:
- we treat the working surface with a primer, with the help of which reliable adhesion of the plaster to the wall is ensured;
- we apply a liquid putty solution to the wall, which increases the quality of adhesion;
- we mount beacons on the solution, which will serve as guiding elements during installation;
- we put the ready-made solution on the slopes and bring it out in one plane, smoothing out the drops and unevenness;
- wait until the solution dries up a little, after which we rub it with sandpaper;
- remove the beacons, and then close up the holes left in their place;
- rub the surface again.
What kind of wood to choose for the slopes on the windows?
For the installation of wooden slopes, the same material is used as for the window frame. That is, if the entire window structure is made of oak, then oak should also be used for the slopes. This is necessary in order for the color and shade of the opening to match everywhere. For slopes, hard tree species are usually used, more often conifers. They have increased strength. They are distinguished by resistance to external influences. They have a long service life.
A good solution for slopes is to use:
- pine trees,
- larch,
- oak,
- lindens, etc.
If the frame and slopes are made of oak, then the same wood should be used for the window sill. In fact, you can make slopes from any type of wood. But then you will have to treat it well with a protective varnish to protect it from the sun and rain.
You can use natural wood to decorate the slopes or sandwich panels. FSF is often used - plywood with increased moisture-resistant properties. The top layer is covered with natural wood veneer. The surface is treated with varnish to emphasize the type and pattern of the wood. Sandwich panels are used:
- one-sided - from 1200 rubles;
- bilateral - from 1450 p.
Wooden slopes from manufacturers are practical designs. They are grooved for easy installation. Convenient connection of the slope elements allows you to install the structure yourself without unnecessary problems.
The advantage of plastic windows
Why, then, plastic double-glazed windows so rapidly captured the owners of dwellings in multi-apartment high-rises and gradually, but confidently, move into the private sector?
Yes, since they have countless advantages over their wood counterparts:
- Higher functionality.
- A wide range of configurations and colors.
- Ease of installation.
- Short production times.
- Possibility of producing windows of various sizes.
- A huge abundance of accessories and mechanics.
- Quite low cost in comparison with a timber structure with the same parameters.
Modern plastic products also allow you to create them from the outside similar to wood.
Fundamentally! The biggest plus of plastic windows is that they do not need additional processing and maintenance. No more putties, paints and varnishes.
With proper care and proper installation, plastic double-glazed windows will serve you for long and long years without changing their original appearance.
Installation technology
To clearly illustrate how to install slopes, we will consider two basic installation techniques: for straight and inclined slopes.
Installing a straight panel
As already mentioned, the installation of straight panels is carried out in cases where a classic wooden window is mounted in a log cabin in a rough casing (in a foundation beam or in a T-shaped one without finishing).
In this case, it is enough to measure the distance from the window frame to the edge of the log house (or casing) and trim the board. It is advisable to fasten the panels without using self-tapping screws, for which it is convenient to use liquid nails or polyurethane foam. The outer edge of the slope is trimmed with platbands or a special decorative corner.
Installing an inclined panel
If the window is mounted with an installation gap - and this is how all metal-plastic windows and their counterparts with wooden frames are made - then an inclined slope must be installed.
To avoid the need for corner cutting of sawn timber, we recommend installing a slope using special fittings.
We emphasize right away that before determining the size of the side panels, you must first install a closing bracket on which the outer corners are attached.
Please note that these corners are needed not only to close the ends of the slope, but also to fix it.
Slope design
The next step is to determine the width of the panel, one edge of which goes beyond the window frame, and the other is installed in the center of the closing bracket.
If the dimensions are determined correctly, then after cutting the blanks, the assembly of the slopes can be performed within a few minutes. So that the entire window structure retains its rigidity, polyurethane foam is placed between the slope panel and the frame. As a rule, the foam is applied immediately before installing the panel, but it should be borne in mind that when solidified, its volume increases by 2-3 times.
If you have a circular saw, the listed operations can be performed independently, but the best way to avoid problems when installing slopes is to entrust this task to professionals.
accepts orders for finishing log cabins, installing casings and any other finishing operations performed during the construction of a wooden house. To clarify the details of cooperation and order a visit of a specialist to calculate the cost of work, go to the "Contacts" section.
Calculate the cost of painting and insulating your home right now
Do you have accurate measurements at home?
Measured by myself There is a project of the house The measurers came I want to call the measurer
By clicking on the button, you consent to the processing of personal data
How to properly treat a wooden house with an antiseptic
How the cost of installing an electric and water underfloor heating is formed
Oil impregnation Rustins for the protection and beauty of a wooden house
Is it possible to get qualified legal assistance in one consultation?