After installing a double-glazed window with a door to the balcony, it is necessary to carry out the final work on installing the sill. This unit performs an important function - it prevents the penetration of cold into the room. But one should not forget about the aesthetic component - this is a prerequisite for proper repair. At a minimum, the threshold to the balcony must be neatly decorated, otherwise the whole effect of the fresh interior will be ruined. If desired and possible, it can be made the highlight of the room.
Threshold finishing work can be carried out independently, even with a little experience in construction and finishing work.
Preparatory work
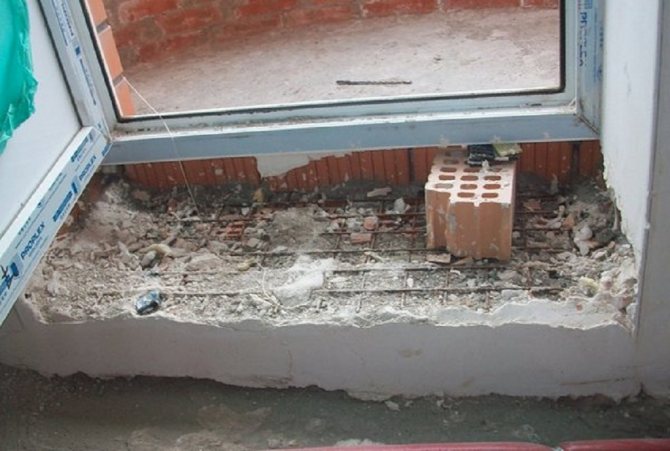
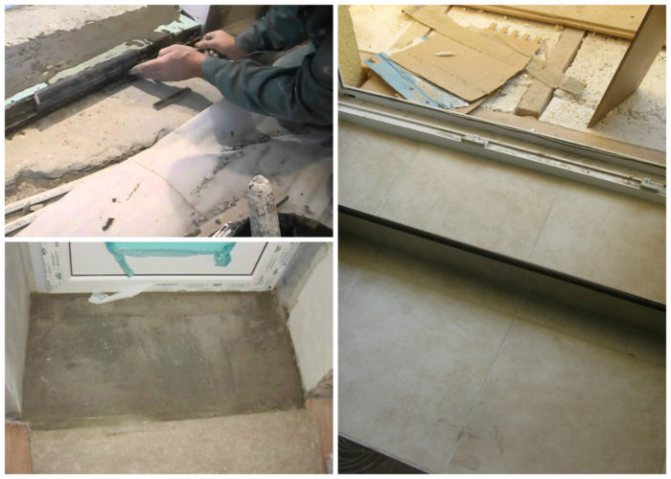
The first step is to make the foundation. There are two options for creating a base for the sill: brick or cement-sand mortar. If there is already a flat base suitable in height, then this step can be skipped and immediately proceed with the finishing.
Note!
The height of the base of the threshold is made taking into account the fact that a layer of finishing material will be laid on top. The bottom line is that, in the end, the finished balcony threshold does not interfere with the opening and closing of the balcony door.
Instructions for creating a brick base:
A brick base is made with a large difference between the balcony frame and the floor (not less than the brick height).
- Leveling and cleaning the base. The smoother the base, the easier it will be to lay the brick.
- Prepare the cement-sand mortar following the instructions on the bag.
- Distribution of mortar to the base and laying of the first brick. Next, you need to apply the mortar to the end of the brick so that all the joints are filled. Then the next bricks are laid. Usually one row is sufficient for the nut.

- After all the bricks are laid, it is necessary to apply a layer of mortar to the entire surface of the brick row and level it.
- After the mixture has dried, moisten the surface with a little water and process with a grater.
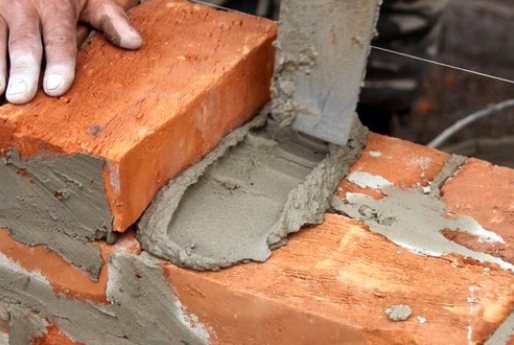
After all these actions, the nut will be even and you can proceed to the finishing.
Instructions for creating a base from a cement-sand mortar:
This method is suitable if the height of the base of the future threshold is less than the height of the brick.
- Cleaning the surface under the base from debris, excess polyurethane foam and priming.
- Next, a formwork is constructed from a board. The width and height of the formwork should be slightly larger than the size of the future base for the sill to the balcony. To fix it, we press the board to the wall and prop it up with any heavy objects.
- A filler is placed in the cavity of the future stage. The filler can be gravel, crushed stone or broken brick.
- Pouring the mortar into the formwork to fill the entire volume and leveling the surface with a spatula. If excess solution appears, then they need to be removed.
- One day after complete drying, you need to remove the formwork, moisten the surface with a small amount of water and rub it with a float.

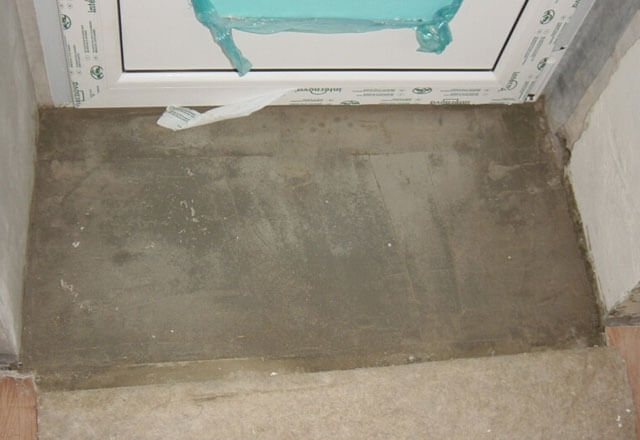
The base is ready. Now you can start cladding with any material you like.
Construction site
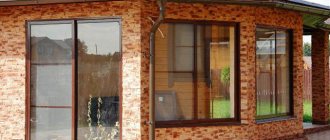
Plastic balcony doors are subject to intense stress, especially if there is a winter garden or workplace on the balcony. A balcony door can experience deforming loads due to the formation of condensation or temperature differences. Then it ceases to function normally and the question arises: how to repair the plastic door leading to the balcony with your own hands?
In this article, we will answer these questions, briefly describing the malfunctions and ways to fix them that you can do yourself.
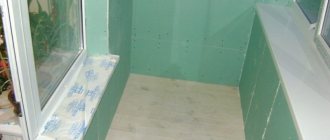
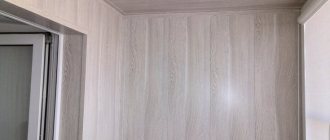
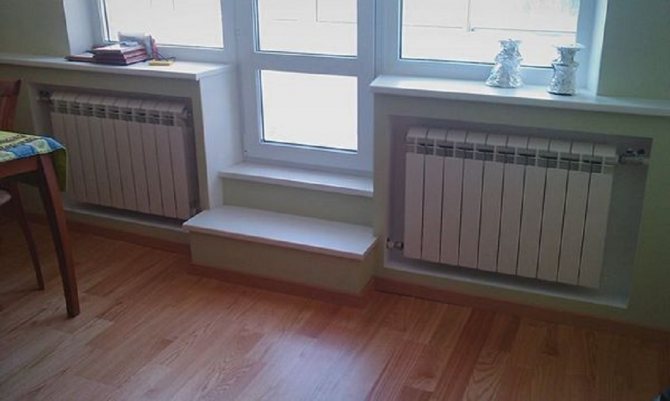
Threshold from a plastic window sill
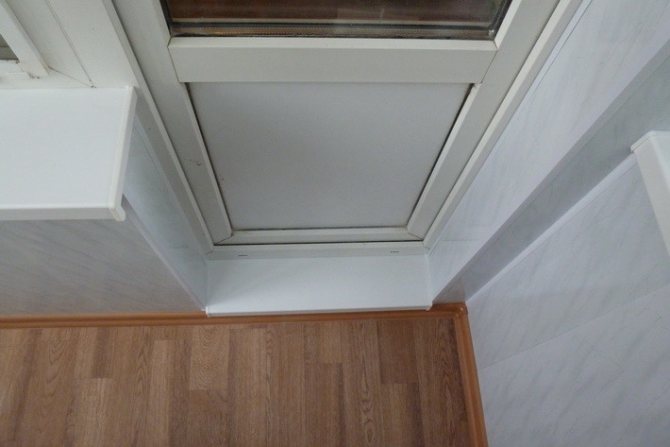
A plastic threshold on the balcony is considered the most practical, inexpensive and versatile option. It looks most aesthetically pleasing if the entire balcony block is made of plastic.
Installation instructions for a plastic threshold from a window sill:
- The surface under the threshold is cleaned of dust, debris and primed. If there is an old nut, then it must be dismantled.
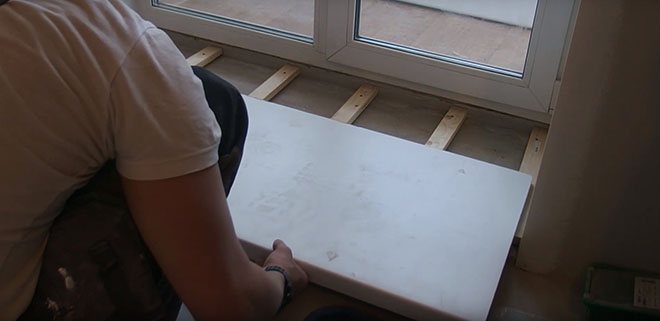
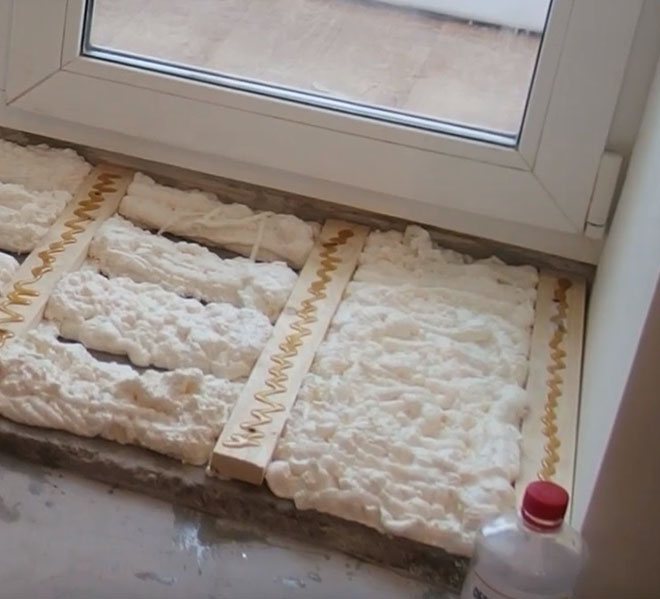
- Next, you need to expand the bars on the base of the threshold. We do not recommend installing the sill only on polyurethane foam - this is unreliable. The threshold will fit on the bars. The size of the bars must be selected in such a way that, in the end, the finished sill does not interfere with the opening and closing of the balcony door.
- The next step is to cut the plastic sill to the size of the threshold.
- Next, we put a threshold and check if everything fits and check the evenness of the surface with a level. Cut the threshold if necessary. If the threshold is suitable, but the surface is not level, it is necessary to install under the substrate bars. Any materials at hand (for example: pieces of drywall or plastic) can serve as substrates.
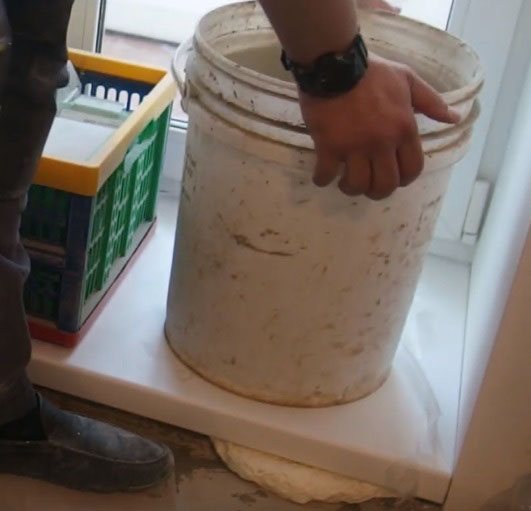
- After the threshold is adjusted to the level, proceed to applying the polyurethane foam. Carefully remove the threshold and apply an even layer of polyurethane foam between the bars, and liquid nails can be applied to the bars themselves.
- Next, carefully glue the threshold. It should be noted that the foam tends to expand, therefore, after installing the threshold, it is necessary to put a load on its surface.
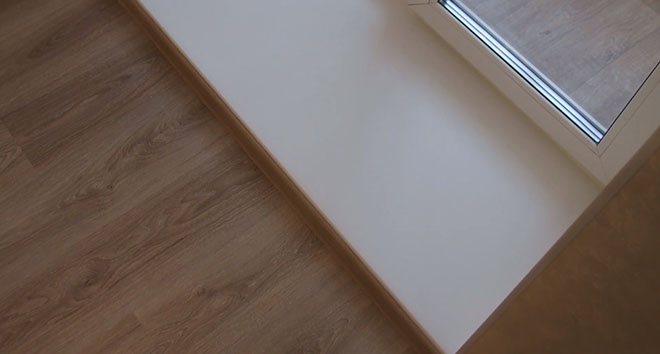
- The threshold from the plastic window sill is ready.

In addition to the textual instructions, we recommend that you read the instructions in video format, which shows the installation in a more detailed form, considering all the nuances.
Do you need a threshold? types, finishes and what material can be made
Some people think that it is not necessary to install a threshold on the balcony, especially if the balcony has glazing. However, this construction is necessary in any case, since it performs several functions:
- Improving the general appearance of the room, the ability to arrange a smooth transition from the living room to the loggia or balcony, which is especially important with large differences in height.
- Protection against heat loss, drafts, dust accumulating under the door.
- The ability to hide the joints, especially if they are not neatly executed, or a layer of polyurethane foam under the door frame.
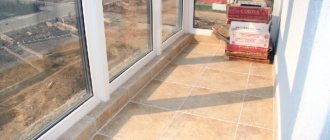
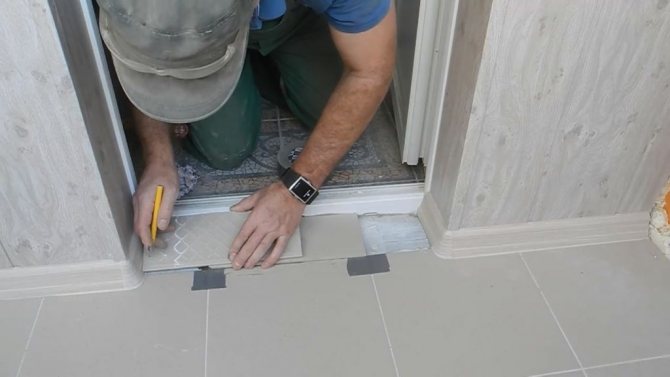
Tile threshold
Tile is a durable, beautiful and practical option. A variety of sizes of textures, colors and patterns makes it possible to choose tiles for any design and interior.
Instructions for finishing the threshold of the balcony door:
Important!
You should not choose tiles with a glossy surface as they are slippery.
- The first step is to take measurements, calculate the number of tiles and draw a masonry scheme. It is important that there is a solid tile in the center of the threshold, and trimming on the sides - this is done for symmetry.
- After taking measurements, it is necessary to cut the tiles using a tile cutter or grinder.
- Next, we move on to styling. We apply glue to the tile and lay it on the base according to the scheme. If you are not using a scheme, then place solid tiles in the center, and along the edges of the trim, as in the picture below. To make the surface even, use a level.
- After drying, remove excess glue and cover the seams with grout.
In addition to the text version of the instructions, we recommend that you read the instructions in the video format, which shows the installation in a more detailed form with an explanation of the nuances.
Causes of PVC doors and windows malfunction
The PVC profile, which is used in the manufacture of balcony doors and windows, must initially cope with such loads. But time, careless handling or increased stress on the fasteners can lead to door breakage or loose fit to the door frame. These defects not only create inconvenience in use, but also tend to further aggravate the situation, up to the failure of fasteners or door locking.
To prevent this from happening, it is sometimes necessary to carry out preventive work. In case of obvious breakdown, repair it.
It should be noted - not every repair of balcony doors and windows can be done by hand. Large surface defects, destruction of the frame, violation of the integrity of the glass unit, deformation of the door frame due to exposure to high temperatures cannot be repaired. In these cases, it is necessary to contact the company that installed the doors or to the specialists working in this profile.
Small repairs of plastic doors and windows, which can be done by hand, may consist in the following operations:
- handle repair;
- sealant;
- small surface defects;
- clamps;
- replacement of a double-glazed window;
- door position adjustment.
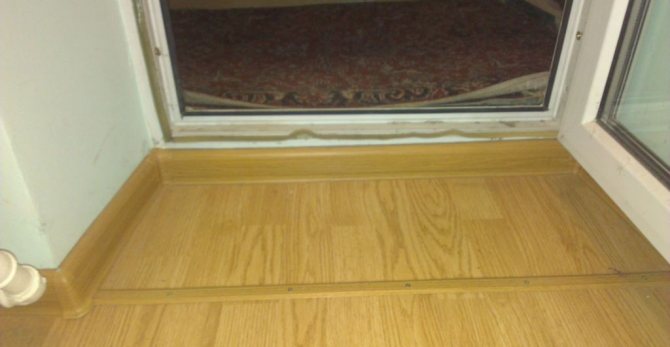
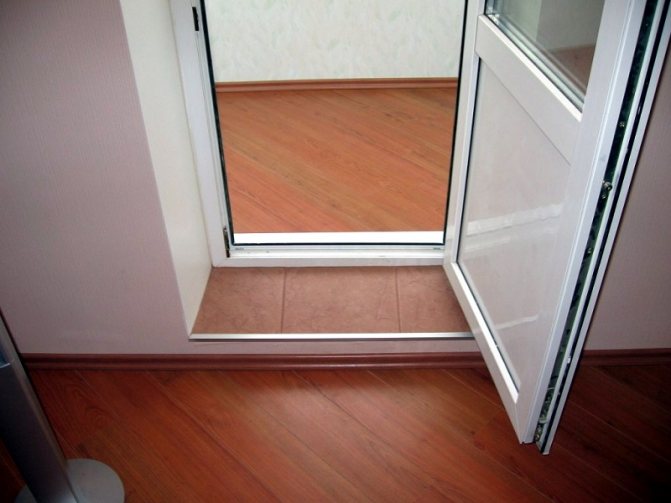
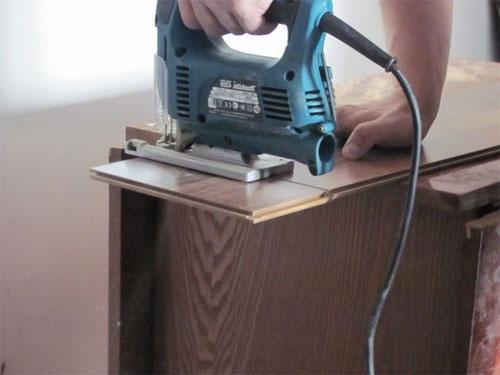
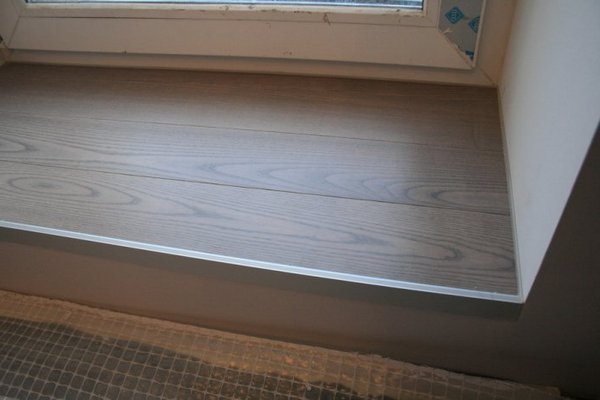
Laminate threshold
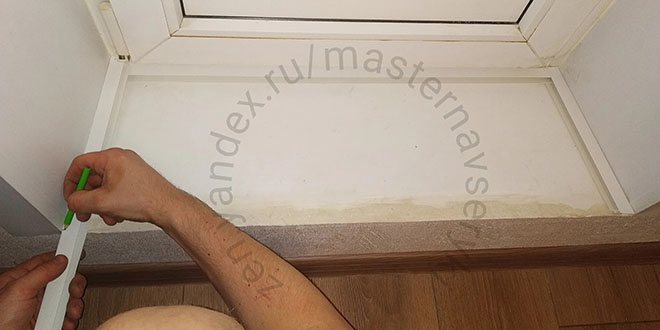
How to make a sill on a balcony from a laminate with your own hands - instructions:
- The first step is to putty the threshold.
- Measurements are made and the necessary elements of the laminate are cut out. In most cases, one plank may be enough, since the laminate can be of different widths and it is possible to choose the optimal solution. When cutting material, a hacksaw for wood with fine teeth, a hacksaw for metal or a jigsaw is used.
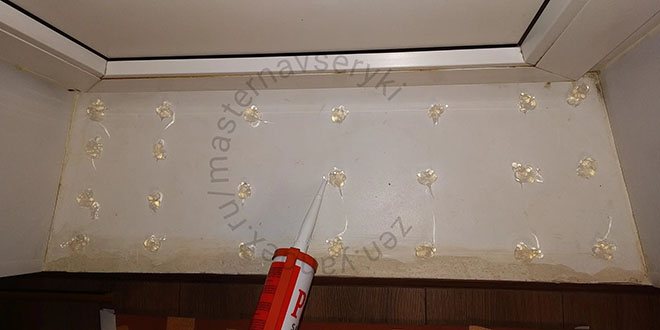
- For a beautiful design of the joints between the wall and the laminate, starting guides are used. We cut them to size and fix them around the perimeter.
- We apply silicone sealant or liquid nails to the base of the threshold and glue the laminate.
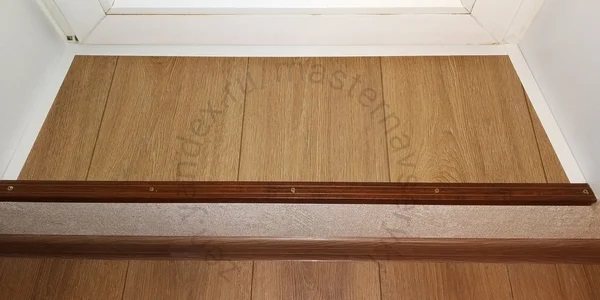
- The final stage is cut to size and a decorative corner is installed.
Do-it-yourself installation, decoration and replacement of the threshold on the balcony - step-by-step instructions with photo and description
The threshold on the balcony is an integral element of the interior of the room adjacent to the balcony. If the appearance of this element leaves much to be desired, then no matter how beautiful the room adjacent to the balcony or loggia is, the old or poorly finished threshold will be striking and spoil the integrity of the picture. And if it also blows from it, then installation or replacement is simply necessary.
In this article, we will consider how to gradually make, replace and finish the sill on the balcony without the involvement of specialists, since this type of work does not require over-skill at the same time there is an opportunity to save.
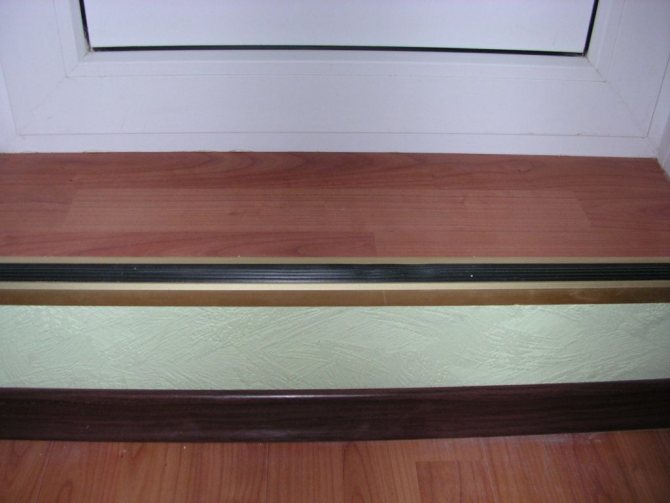
Linoleum threshold
- A piece of linoleum is applied to the surface and the cutting points are marked. It is necessary to cut carefully so that the joint with the wall is as even as possible.
- Apply liquid nails to the surface of the windowsill, level the material over the entire surface and press the canvas. Particular attention should be paid to the joints.
- The final step will be the installation of the plinth and the installation of a decorative metal corner. In addition to decorative purposes, these elements are designed to close the joints of the material.
Tools for repair
Before proceeding with the repair of a PVC profile door, it is necessary to prepare a tool that may be needed in the process.
No specialized equipment is required for minor repairs to balcony doors and windows.
In most cases, it is available in every home.
- screwdriver with replaceable bits (screwdriver set);
- screwdriver drill (cordless);
- set of drills for metal ∅1-10 mm;
- building level;
- construction plumb line;
- a set of hex keys;
- pliers;
- saw for metal;
- mallet with white rubber striker;
- white rubber spatula;
- plastic or wooden paddles for cashing.
Consumables that may be required when repairing PVC profile products include:
- glue for PVC Cosmofen Plus-S white;
- adhesive sealant Cosmofen 345;
- putty COSMOFEN RM for the restoration of hard PVC products;
- rubber seals - if damaged and need to be replaced;
- door handles and latches - in case of breakage;
- plastic gaskets.
New seals, handles and gaskets must be of the same manufacturer that are installed on your doors!
In the case of sealing dents, cracks and chips on the surface of the balcony door, you may need sanding paper for grinding surfaces with a grain size of P-1000 or P-1200 according to ISO or M20 according to GOST (designations of different manufacturing countries may have their own designation of grain size).
How to do it yourself
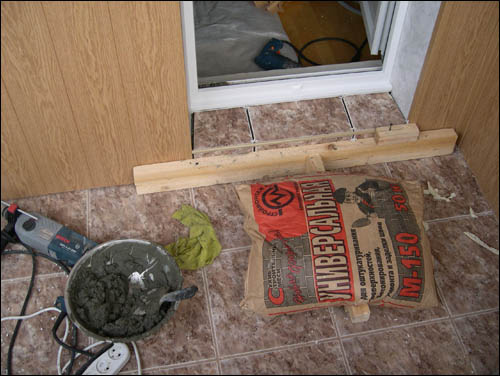
Before starting work, it is necessary to prepare the necessary materials and tools. Thus, to organize from a concrete solution, you will need:
- Beam for formwork.
- Cement.
- Sand.
- Gypsum.
- Container for mixing the solution.
- Water.
- Spatula and trowel.
- Putty.
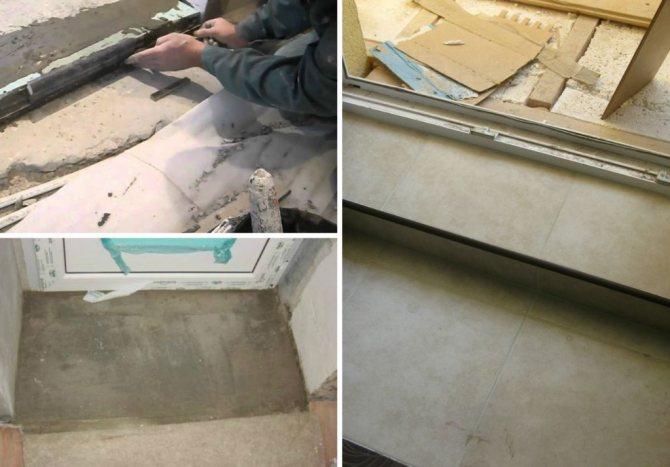
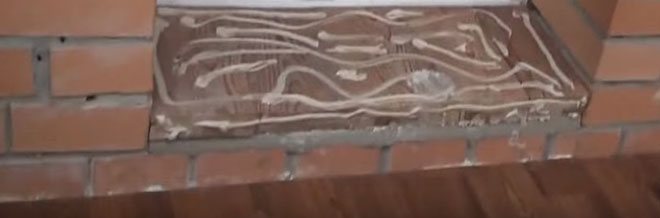
Tiling the sill on the balcony
Installation is done in several stages:
- The first step is to dismantle the old one, if any. Or to clear the territory of the future from dirt and dust.
- Then you need to putty the perimeter. It is better to choose a rough putty. This will create additional adhesion to the mortar.
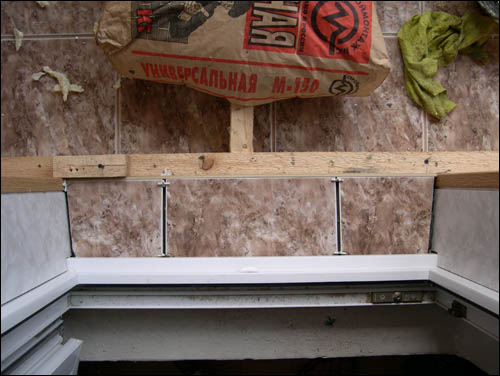
- The next step is to make the formwork from three boards so that the open side fits snugly against the side of the balcony. Formwork parameters fully correspond to the dimensions of the future structure. It is recommended to do the height just above the expected threshold.
- Then you need to mix 1 part of cement with 3 parts of sand. Also add about 10-15% gypsum so that the solution sets faster. Stir the mixture well so that there are no lumps.
- If it is high, then it is better to fill up the broken brick at the bottom. This will make the structure stronger. If it is low, then this need not be done.
- Carefully pour the mortar into the formwork and level the surface.
- It will take a day for the cement to set, but it is better to wait 1.5 days. While the solution dries, it is necessary to level the surface several more times.
- After complete drying, the formwork must be disassembled and removed. Sand the seams.
- After that, you can finish the finished structure with tiles or laminate as you wish.
Any floor covering can be used for decoration. It is also recommended to choose the color of the finish to match the floor in the room.
A variant of how you can make a sill on the balcony
The threshold to the balcony performs not only an aesthetic function, but also prevents the penetration of cold into the room. You can do it yourself from almost any material in a short time.
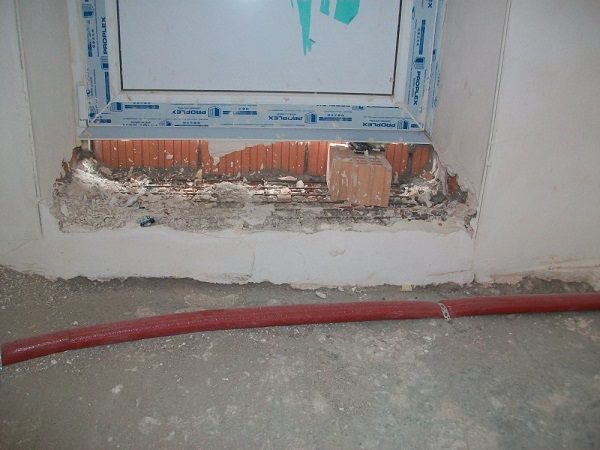
Dismantling
It is easier to remove the threshold to the balcony than to build a new one, however, there are some peculiarities here too. It is quite easy to disassemble wooden products. The situation is different with the threshold made of brick. In this case, you need to work with a hammer and chisel and do everything very carefully. If you can't do anything with these tools, then you need to take a puncher.
To work near a wall, it is better to use a grinder with a stone attachment. It happens that it is impossible to get to some places with the help of a disk. Then the remnants of the old threshold are removed with a hammer and chisel. It is better to work in a respirator and special glasses, since a lot of dust can form when dismantling a brick threshold.
Adjusting doors and windows
The most common problem is the loose closing of doors and windows due to sagging under its own weight or loosening of the hinge fasteners.
To eliminate the skewing with your own hands, first determine the verticality of the door leaf relative to the door frame using a plumb line. A plastic (water-soluble) marker is used to mark the places where the door catches on the box.
After that, the decorative plug is removed from the upper door hinge and the door position is adjusted using hex keys.
It should be remembered that the top screw at the end regulates the movement of the door in the vertical plane, and the screw located on the side in the horizontal one.
If by adjusting the upper hinge it is not possible to achieve the skew of the door leaf, the same operation is performed with the lower hinge.
After the end of the adjustment, the decorative overlays on the hinges are installed in place.
Installation
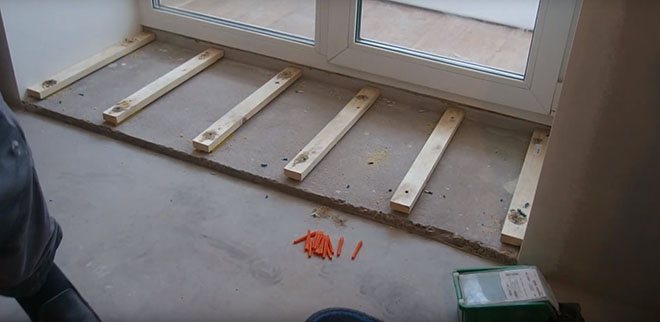
Before starting work, clean the area that you plan to take under the sill. Remove everything extraneous, outline the contours, take measurements of length, width, height. Next - start preparing the tile - it needs to be cut into the required sizes.
Ceramic threshold
Note. It is better to cut with a special machine - the work will be faster, safer, better quality.
The next step is formwork. For her, use a couple of wooden beams, they need to be fixed in the designated places. Carefully place the pieces of the board for the sides of the sill parallel to the bars, so that they become part of the formwork.
After that, make a mortar of sand and cement (3 to 1, respectively), fill it with the formwork, cover it with a slab on top. The cement hardens for a day, at this time it is forbidden to walk on the thresholds, it is better not to touch them at all. After a day, remove the dividing crosses, rub the seams.
Replacing the door handle
The most common and at the same time easily removable cause.
To remove the broken handle, set the broken handle in a horizontal position - parallel to the floor, squeeze and rotate the decorative plug at the base of the handle by 90 °. Unscrew the opened bolts and remove the broken handle. Pull out the square bar on which the handle was attached. Install a new handle with a square bar and secure with the bolts removed when removing the old handle. Turn the decorative plug at the base of the handle to its original position by closing the screw heads.