

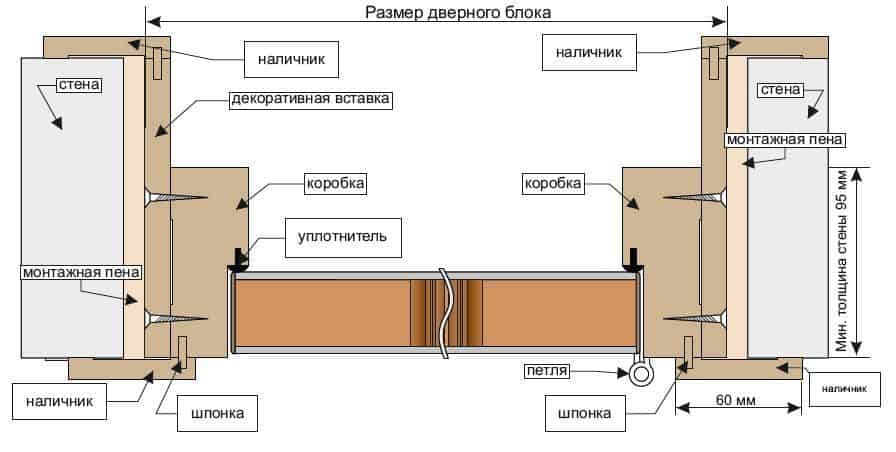
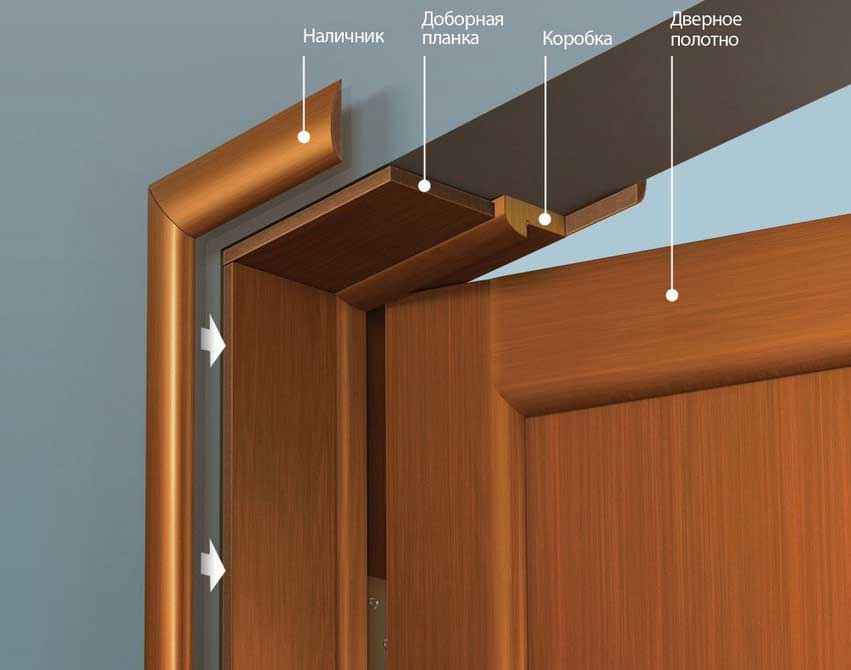
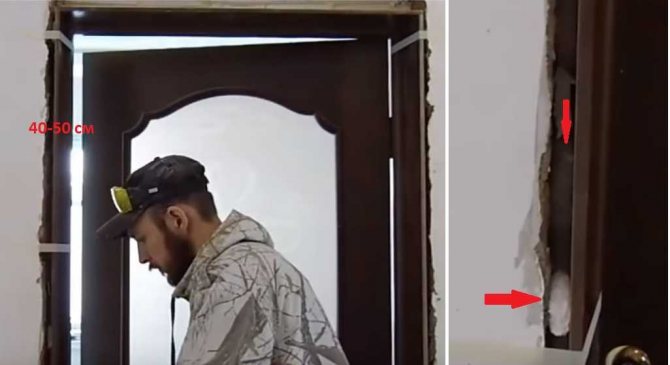
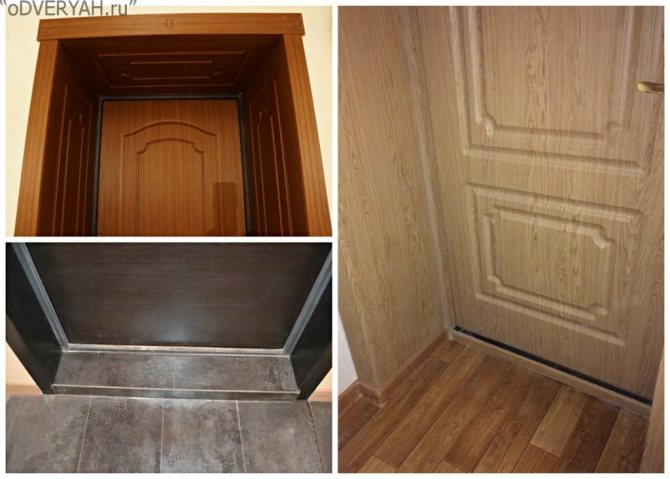
One of the problems encountered when installing an entrance group is that the width of the box is less than the opening. In this case, add-ons for metal doors are used. The thickness of the load-bearing wall, in the overwhelming majority of cases, is larger than the door frame, the difference can be up to 40-50 cm, depending on what the load-bearing wall is built from. An additional board or overlays are practically the only way out to restore the aesthetic appeal of the doorway and unite the entrance group into a single ensemble. Sometimes, with a difference in height between the level of the porch and the floor of the hallway, it is necessary to additionally make a threshold.
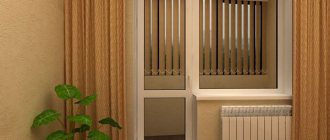
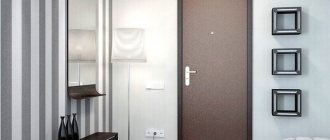
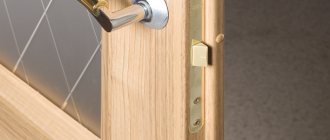
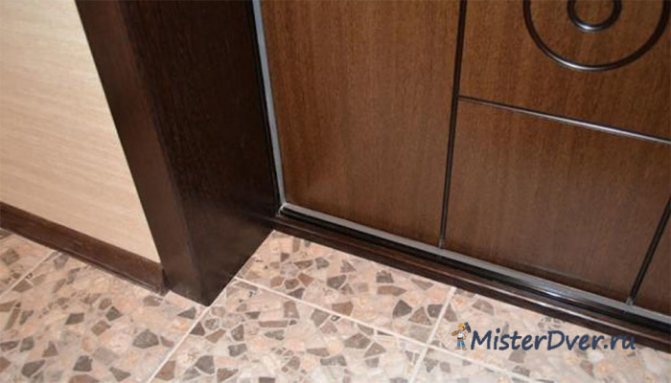
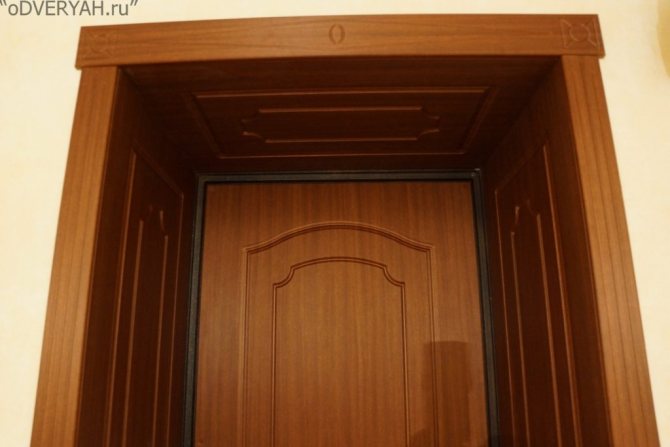
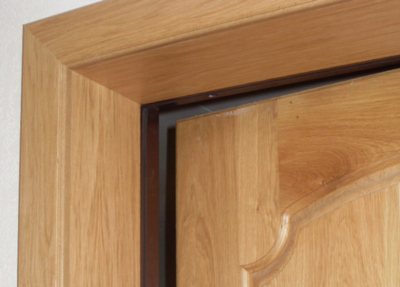
An example of installed extensions on front doors
It is better to make it to match the color or from the same material as the additions for the entrance metal doors. All these elements should be in harmony with the frame of the box, the color of the door.
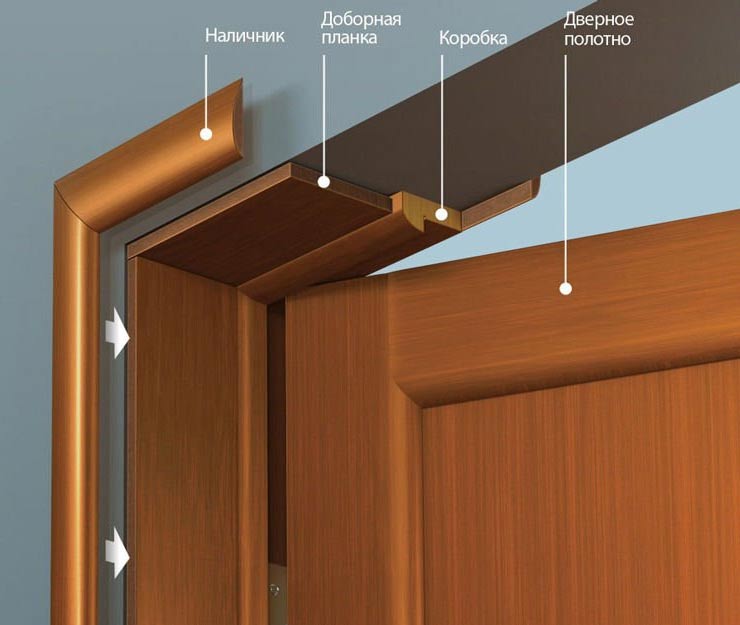
What are dobras?
The product is designed to decorate the opening that was formed after the door was installed. They are completely decorated with door slopes.
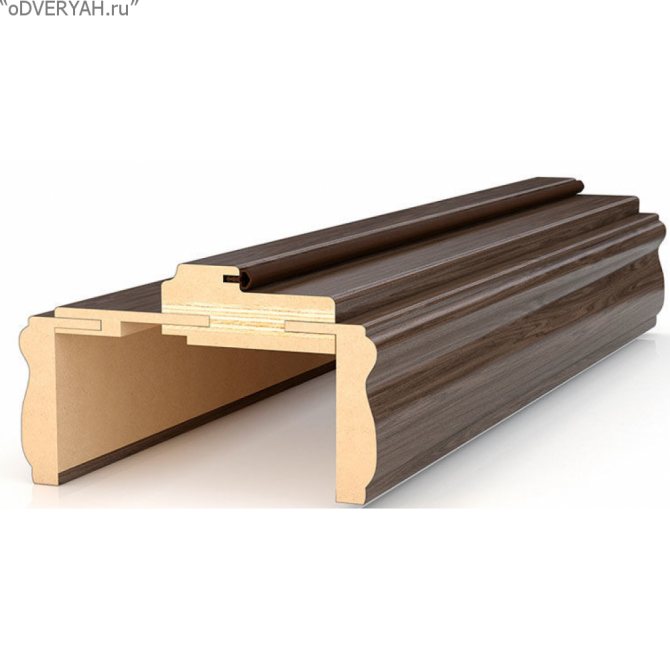
Dobors on the front door are wooden slats that increase the width of the box if it is smaller than the doorway.
There are several types of planks. It is worth knowing about their characteristics in advance in order to correctly select and carry out the facing of the entrance opening. The installation technology is not complicated. Anyone can master it.
Are they really needed?
The question of how much needed accessories for doors is largely individual, but often the strips help to correct the unevenness of the walls, the discrepancy between the parameters of the opening and the frame. The cladding makes it possible to harmoniously combine the entrance door frame with the platbands.
The building element is intended for the design of deep slopes. Thanks to them, the design looks complete. It harmoniously fits into the overall interior and complements the design in the apartment.
Doors for entrance doors are made in one color, if possible, from the same material as the furniture in the corridor. This nuance plays an important role in the design of a hallway or terrace.
Pros and cons of using
The main advantage of using cladding is that door extensions help to increase the door frame in the coverage area. In addition, the elements are used for the design of entrance openings and doors. With their help, possible uneven slopes are masked. A big plus is that you can make and install an element of the entrance door group yourself.
Among the disadvantages of the design, one can single out the fact that if the add-on is made of low-quality and inexpensive raw materials, then the terms of its operation will be short.
The most common budget cladding option is MDF slats. Since the decoration is carried out on the entrance doors, where there are temperature changes and the appearance of dampness depending on the change of weather, the material loses its strength and deforms over time.

Advantages of using addons, materials
Additional strips are a universal way to solve the problem if the opening and the door frame do not match.
Advantage of addons:
- any width of the extension can be made;
- a variety of options, have a different shape, texture;
- door accessories can be made by hand;
- with its help, you can correct the irregularities of the door jamb;
- ease of installation;
- resistant to moisture, temperature fluctuations;
- look aesthetically attractive.
The additional strip can become not only a connecting element, but also an item of interior decor.
For these purposes, the following materials are used:
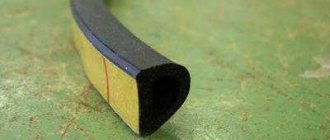
- Wood is perhaps the most beautiful and comfortable material. Besides, it is a good heat insulator.

Scheme for the installation of wooden extrusion - MDF panel. In fact, this is also a tree, as it is made from finely dispersed wood shavings by vacuum pressing. The top of the plate is covered with a film that can be matched to match the doors.
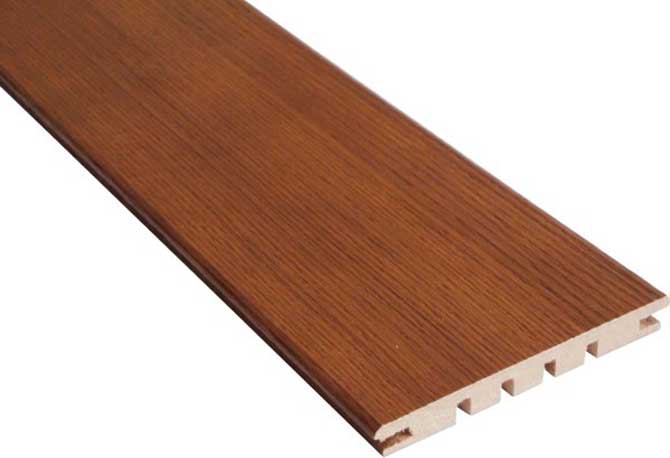
- Laminated board with bevelling.
- Plastic, in the form of panels, lining. This is a fairly practical material that is resistant to dirt and mechanical abrasion.
- Drywall. A versatile material, it can be decorated not only in the color of the door, but also the walls of the hallway.
As a finishing of the jambs for leveling, you can use the plaster of the opening, but this method is rarely resorted to. If the sides of the canvas on both sides of the doors are different in color, then the tone of the finish is selected at the discretion. More often the color matches the inner surface.
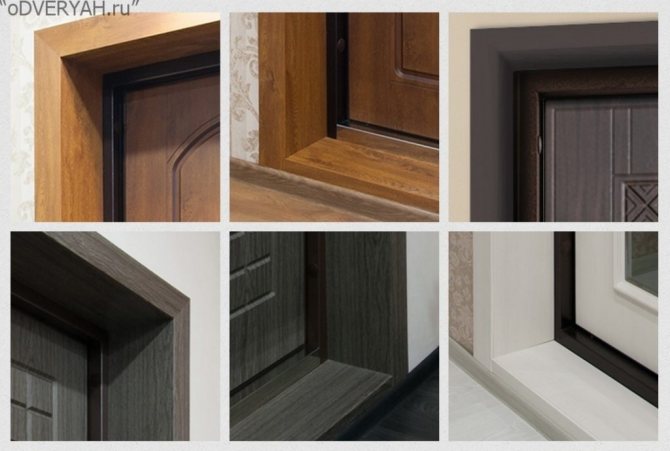
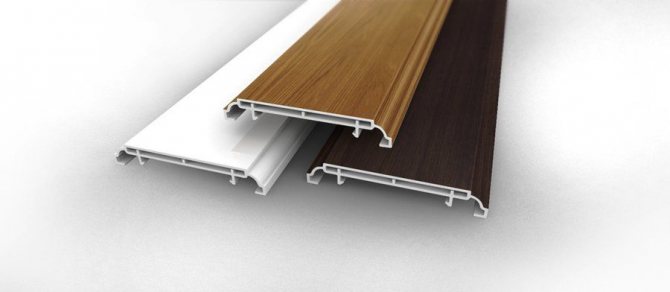
Views
The main difference between the slats is in the raw materials from which they are made, and the width of the slats themselves.
Platbands for entrance doors have different designs and, accordingly, characteristics. They are divided into 4 types.
Standard without edge
A standard entrance cladding is also called a simple addition. Such a board has raw edges, so the joints must be covered with platbands. During installation, the strips are connected to each other by means of additional fasteners.
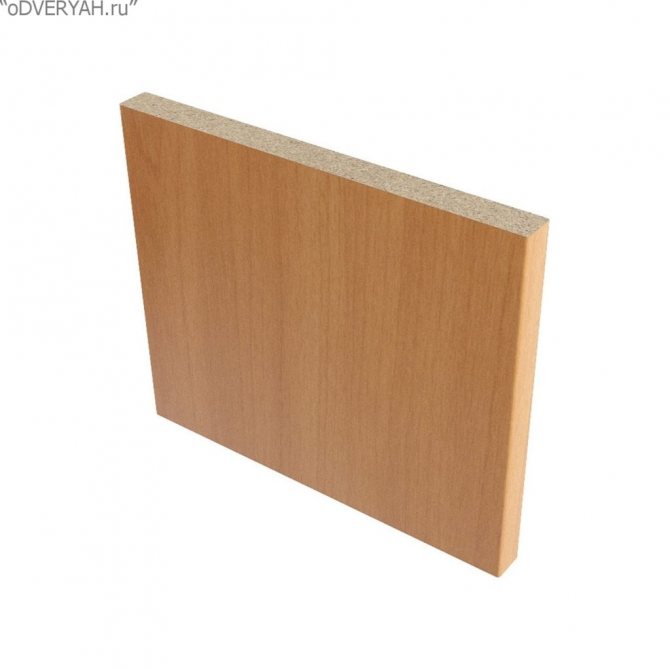
Simple additions and platbands on the front door are considered short-lived, since water vapor can penetrate them.
Standard with edge
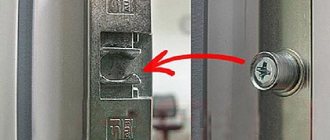
This type of front door extension board has machined edges, which also improves its quality. Moisture penetrates into such a structure less, due to which its operational life increases.
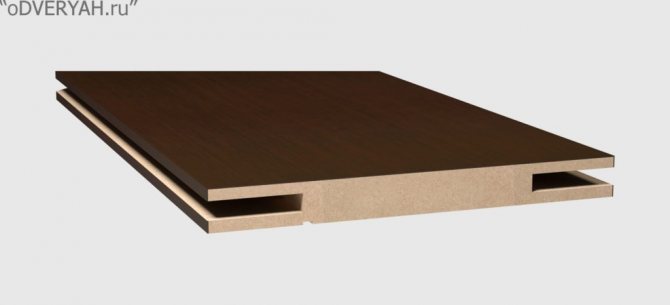
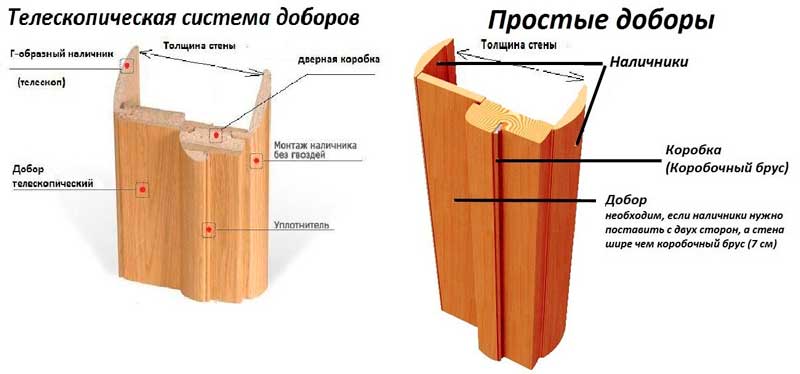
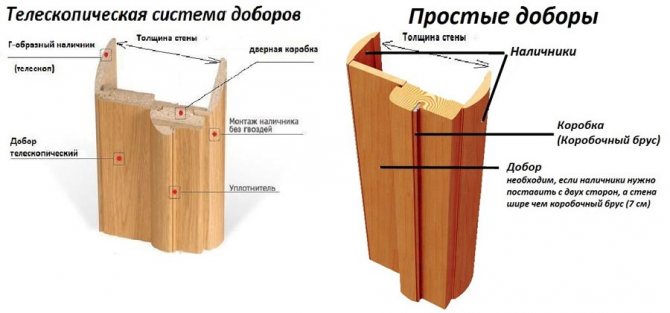
Telescopic
The telescopic door trim has an unusual design. It allows installation without additional fasteners.
The panels are easily and reliably joined together by means of connecting grooves and a ridge, these are the easiest elements to install.
Combined
This front door trim is the most practical and easy to install. Combined addons are called, which include platbands in their design. They do not require major fasteners, it is enough to correctly adjust the strips along the length and fix their grooves.

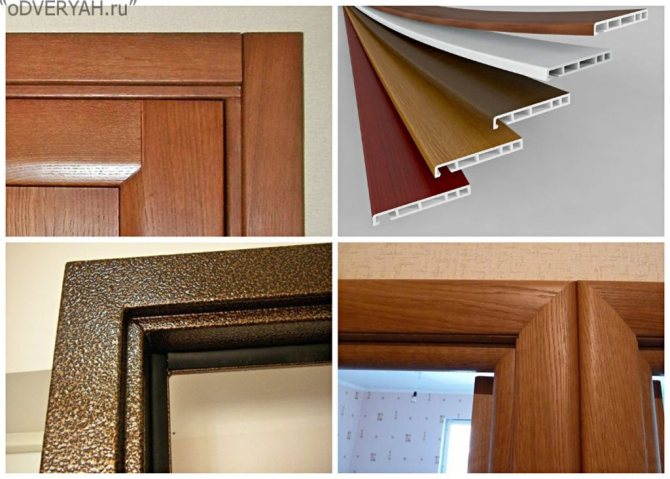
Materials and preparatory work
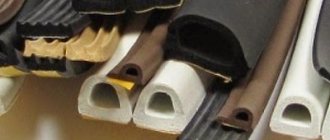
Elements are made from various materials:
- wooden;
- MDF panels;
- PVC plastic panels;
- metal, installation of which is carried out according to the instructions included in the delivery set.
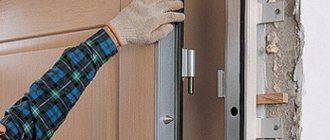
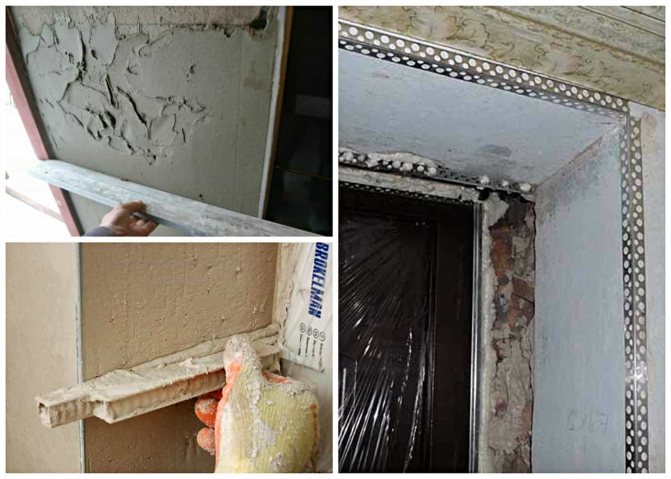
Before proceeding with the installation, preparatory work is performed. They consist in cleaning the doorway from construction debris, paint and dust. If necessary, the ends of the walls are leveled with plaster. The work does not require high quality performance, since all voids will be filled with polyurethane foam.
This operation is performed after installation before attaching the platbands. To avoid heat loss and ensure sound insulation, it is recommended to additionally insulate the openings with insulating materials. It is necessary to align the walls of the opening so as not to do this when installing the platbands.
Manufacturing material
The facing element of the entrance door group is made of the following materials:
- MDF;
- wood;
- metal;
- PVC.
The most common are the addons and platbands made of MDF. Further in popularity are wooden and metal products. The cost of facing materials may vary.The most expensive are special planks made of natural wood.
Advantages of additional panels
To make it clear: add-ons are special expanders that are matched to the color of the door. Installing accessories on the door will help to quickly finish the repair.
Dobors are necessary in order to mask the gaps between the doorframe and the walls. They are made, as a rule, of durable MDF material, which guarantees the strength and reliability of the purchased structure.
Advantages of additional panels:
- resist blows;
- easy to install;
- have an attractive appearance;
- do not absorb moisture;
- you can choose the right color;
- provide noise and sound insulation;
- eliminate jambs finishing;
- resist door settling;
- protect the door from warping over time.
How to install an extension on the front door?
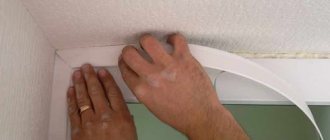
Before installing the panels, it is necessary to carry out preparatory work. First, the walls are cleaned from the remnants of building material. Their surface is leveled with plaster.
Experts recommend using polyurethane foam for minor wall defects. For insulation of the entrance opening, polystyrene foam and mineral wool are used. The material fits under the box, platbands and extensions. Thus, not only heat, but also sound insulation is provided. Installation of platbands can be carried out after finishing the walls with wallpaper or paint.
Required tools
To install the front door cladding, you will need the following tools:
- electric jigsaw or hacksaw;
- level;
- carpenter's pencil;
- carpentry hammer made of wood or rubber.

If do-it-yourself doors are installed on the front doors, then nails, screws and mounting foam are needed to fix them.
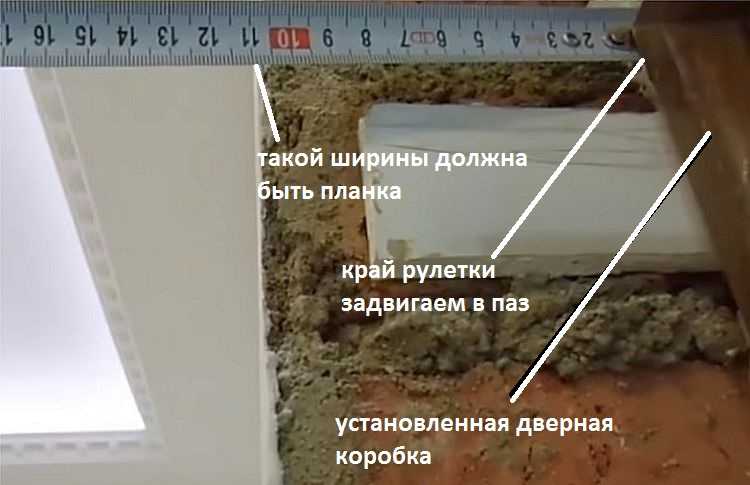
Type selection and measurement
First, the slats are adjusted in height. To do this, measure the slopes in the doorway. The greatest difficulty in installing entrance panels is caused by doorways with expansion. Here it is important to calculate everything correctly and saw off in accordance with the dimensions of the rail.
The type of entrance casing is selected individually. Combined and telescopic extensions are considered the easiest to install. Such planks are best protected against moisture penetration and air currents.
If simple type strips are installed, they must be connected to the middle and edge of the wall with foam and additional fasteners. Between the slope and the rail itself, neat spacers are installed and foam is blown into the hollow space.
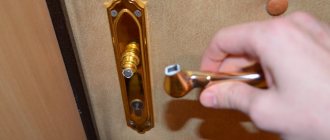
It is much easier to mount telescopic extensions. It is enough to bring them to the door frame and fix the grooves. It is not necessary to use an additional mount. The jamb of the wall can be hidden by beams with a special design or entrance platbands.
Installation: step by step instructions
To work, you will need the following tools:
- a hammer;
- self-tapping screws;
- pencil;
- roulette;
- assembly glue or silicone;
- hacksaw;
- level;
- liquid nails, dowels.
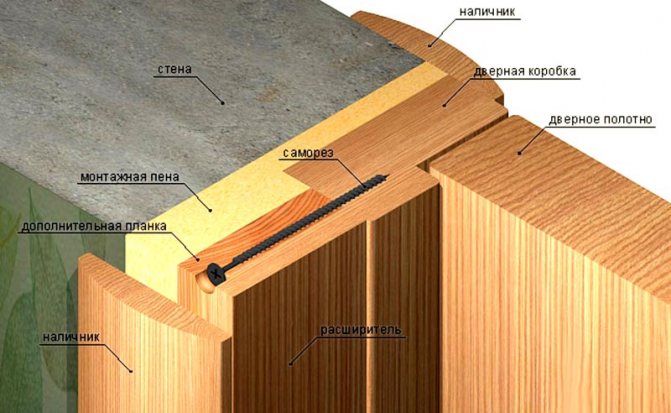
So, an additional board is needed in order to add volume between the walls and the door jamb. We will talk about the sequence of actions further.
- If finishing is carried out after installing the door, the platbands are removed first. Further, the installation of additional elements is carried out. After the installation is completed, the platbands are returned to their place.
- Measurements are taken in several places. This is necessary in order to determine the parameters of the gaps between the wall and the door jamb. According to the data obtained, door accessories are selected.
- Measurements are taken on the widest area of the wall. Joining can be performed in the form of a wedge, at an angle.
- The panel is fixed to the door frame, along the edge.
- Liquid nails, dowels, nails or screws are selected as fasteners.
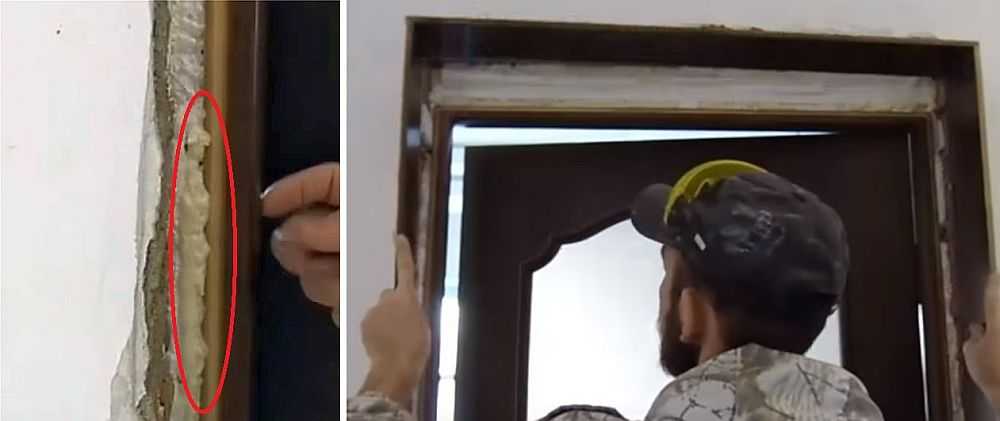
- If there are gaps, then they are sealed with silicone or polyurethane foam.
Important: Do not apply too much product, otherwise it may ruin the box.
- It is not necessary to install doors in a crooked opening. This will ruin the whole structure, and the additions here are unlikely to fix anything.
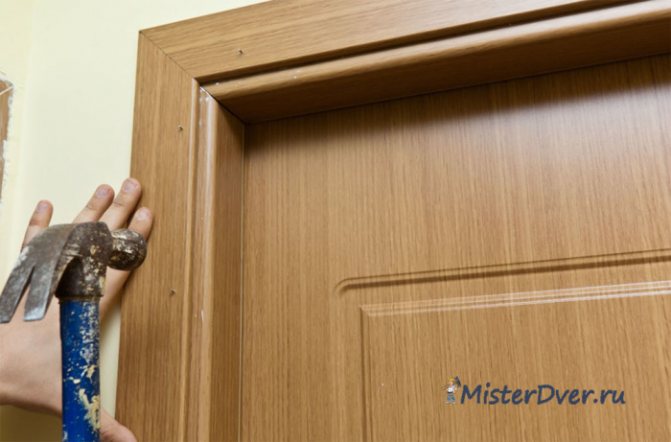
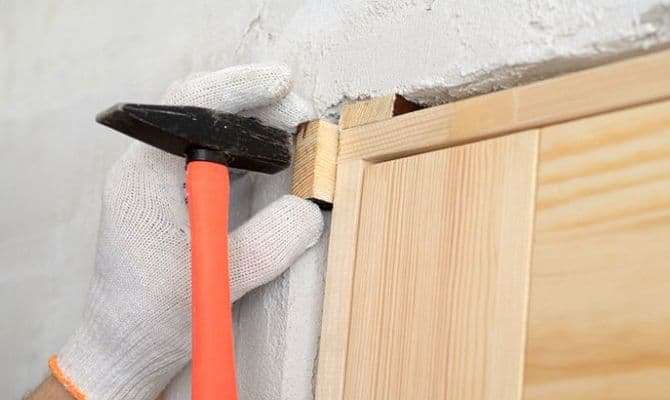
Fastening panels with nails
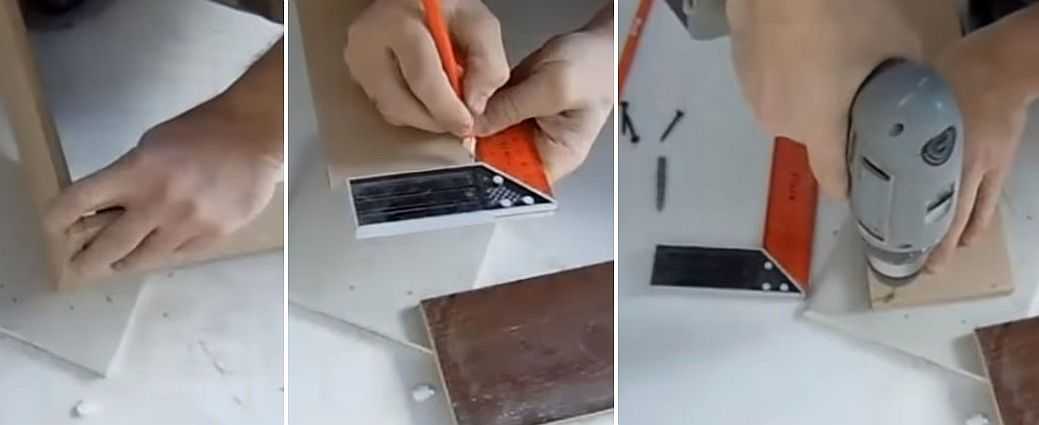
Stage 2. Postponement and marking of the required sizes of extensions
Photo 4. Preliminary marking
After we have measured the required dimensions of the extensions, we put them on the blanks of the additional elements. We make preliminary markup directly on the panel.
Photo 5. Gluing with masking tape the places of the future cut
Using masking tape, mark the future cutting lines.
On one blank for additional elements, two parts can be set aside - the threshold and the upper part of the expansion.
In the same way, we postpone the dimensions of the second part, make preliminary markings on the workpiece and glue it with masking tape.
Photo 6. Re-mark
We re-mark the length of the addition directly on the masking tape.
If you do not glue the edge of the additional element with masking tape, chips may appear on it during sawing.
Photo 7. Checking dimensions
Once again, we check the correctness of the markup.
Photo 8. Postponing the cutting angle
Use a corner to mark the cutting line perpendicular to the edge of the panel.
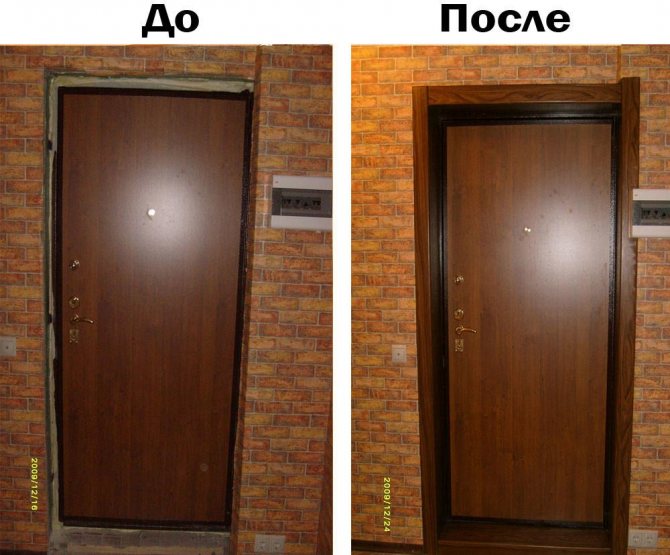
Photos of our work
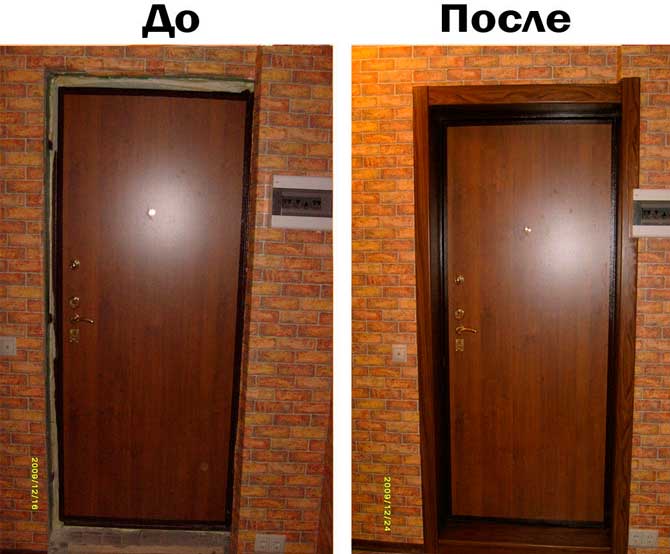
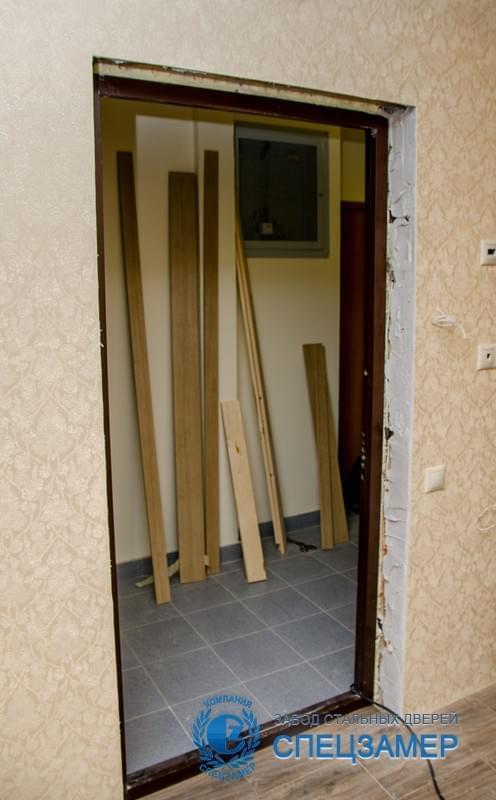
Opening before installation |
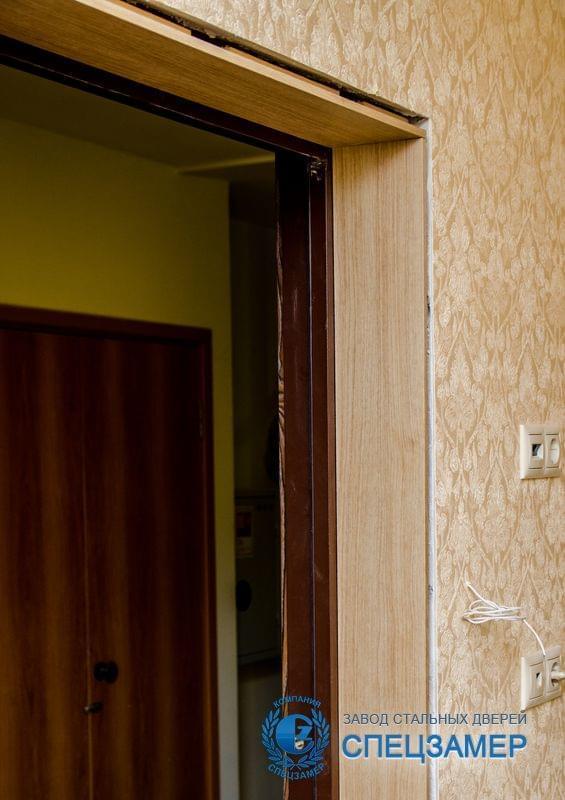
Installation of decorative accessories |
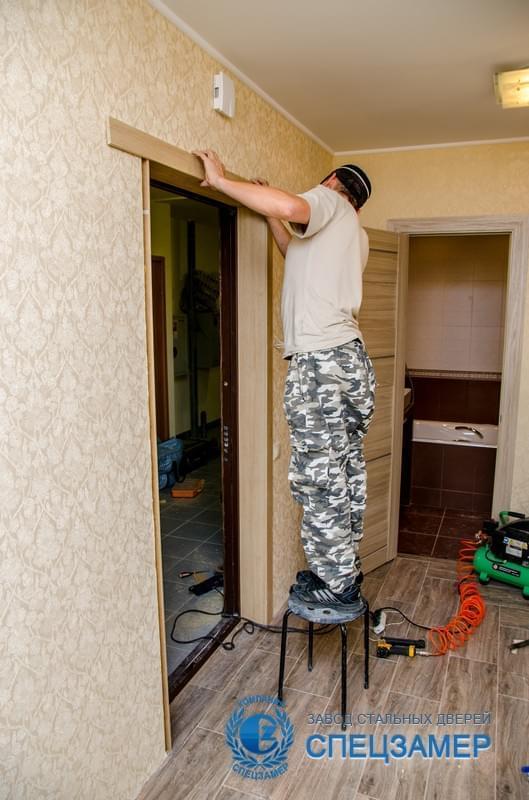
Installation of platbands |
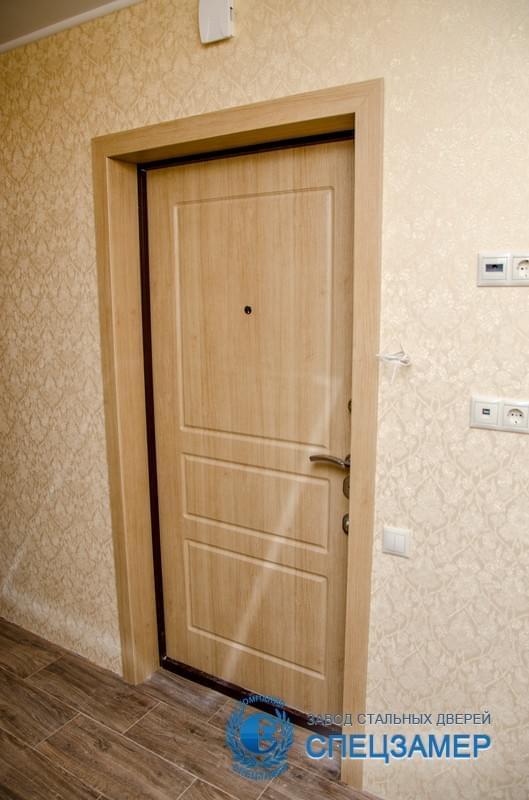
Installation Result |
What is this element and why is it needed?
Decorations are called decorative slats, which compensate for the insufficient width of the box. Due to the variety of materials and colors, addons can not only fulfill a practical function, but also serve as an interior decoration. Most often, the installation of this element is resorted to in such cases:
- discrepancy between the width of the box and the wall, the need to hide slopes and irregularities;
- alignment of the door leaf in the presence of a skew;
- decorating the doorway.
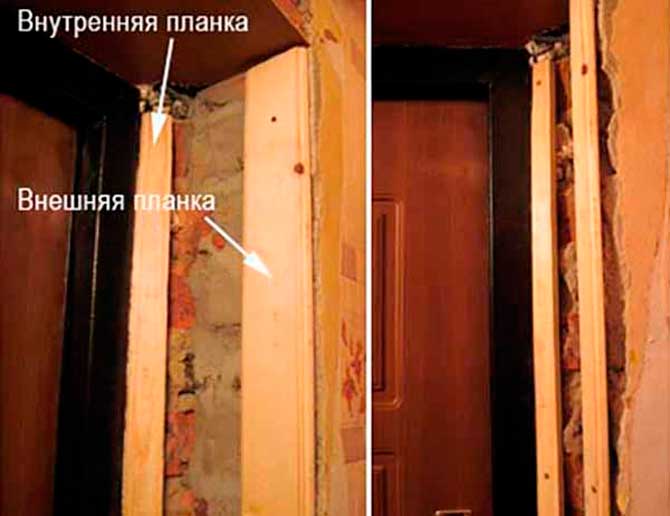
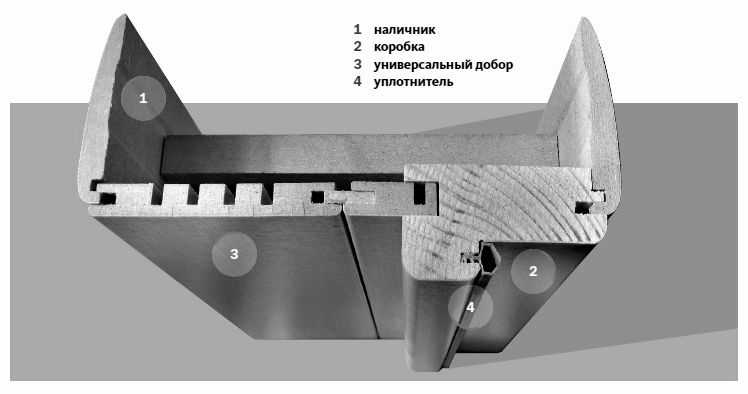
The built-in structure of two vertical and one horizontal bar is in the shape of the letter P. Dobors can be used both on one and on both sides of the canvas. Additional boards are an independent structure, so they can be used even for arranging an open interior opening.
The material and color of the slats must completely match the characteristics of the door, and the width must be sufficient to fill the space between the frame and the casing. If these conditions are met, you can create a single composition that will complement any interior.
Tools used when installing platbands and accessories
For fastening, different tools are used, depending on the type of panels used:
- Grinder for trimming or removing metal parts.
- Perforator for opening widening.
- Screwdriver, electric jigsaw.
- Hammer, metal corner, level.
- Construction knife, a set of chisels.
- Electric drill with a set of drills.
- Circular saw. It should be able to make cuts under 45˚.
- Self-tapping screws, polyurethane foam, liquid nails, silicone, dowels.
To install additional elements, pre-align the opening and mount the front door. Usually, panels are purchased complete with a door. But now in hardware stores there is a wide range of products that can be selected both by the type of material and by color.
Panels made of wood, MDF, chipboard are available in standard sizes. Thickness ranges from 5 to 20 mm and widths from 50 to 400 mm. The trade network receives panels up to 250-300 mm wide. If a larger size is required, then they are ordered. The height is the same for all 2100 mm.
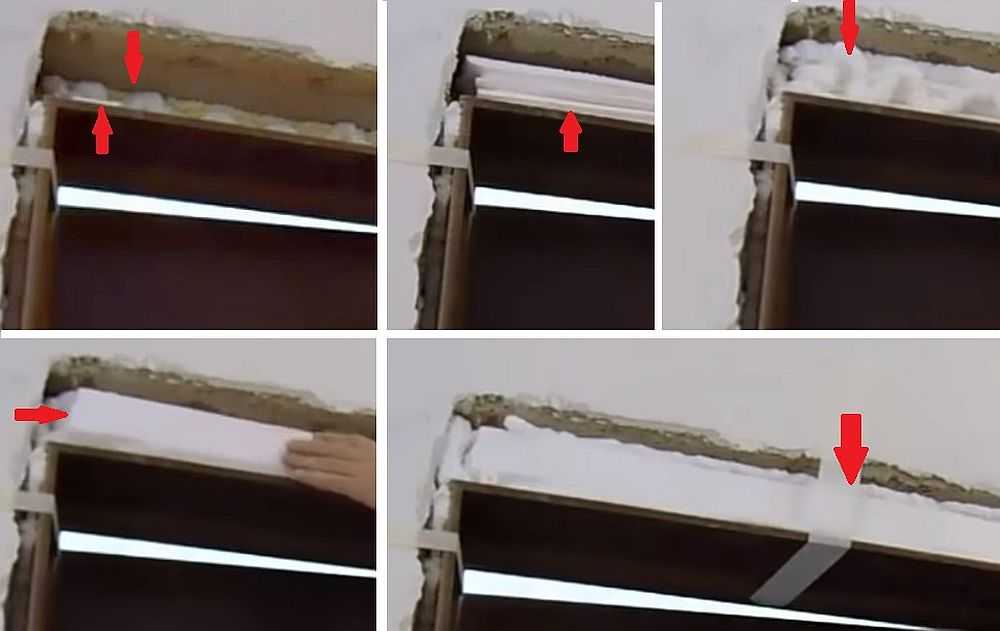
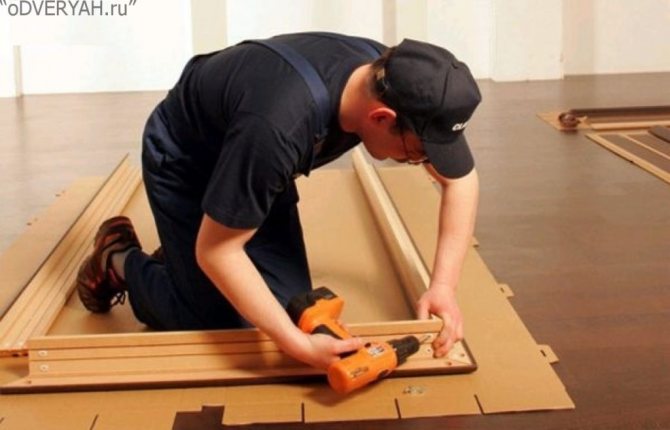
Stage 5. Installation of the box of add-ons
Photo 13. Installation of extensions
We install the box of extras in the opening. We set it relative to the door so that the gaps between the door and the box of accessories on all sides are the same.
Photo 14. Preparation of spacers
Spacers are needed in order to fix the box of extras in the opening.We cut them out of a wooden block. The thickness of the spacer is matched to the size of the gap.
Photo 15. Preparation of spacers
A total of 10-12 spacers are required. 3-4 pieces for each vertical extension. Top and bottom - 2 pieces.
Photo 16. Plugging of spacers
Since in the future we will need to install the platbands and close the gap, it is important that the spacer does not protrude beyond the extrusion and the wall.
Photo 17. Installation of spacers
We hammer in all the spacers in the same way.