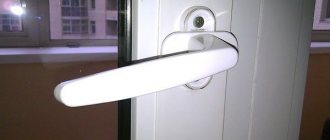
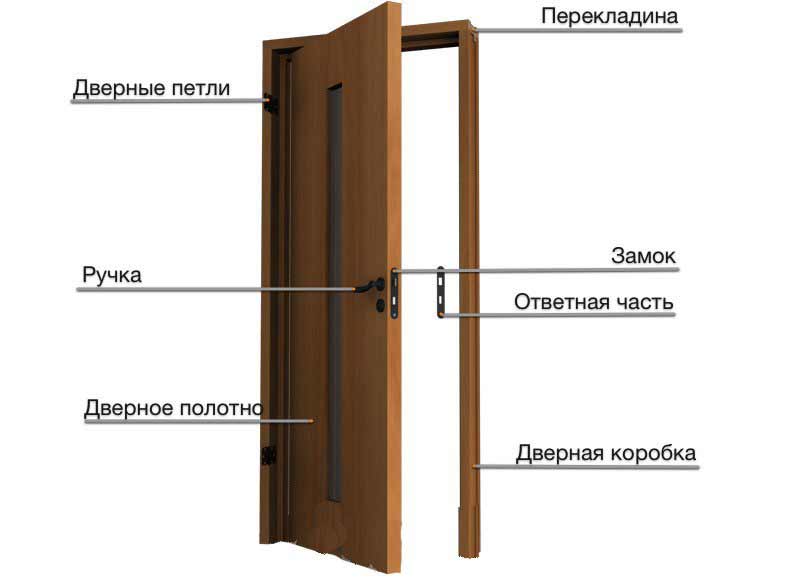

If you decide to purchase new beautiful doors, pay attention to whether the kit, which includes the door leaf, frame, handle and lock, door hinges. If the design is sold without hinges, you have to choose and install them on the door yourself. This process must be treated responsibly, since unsuitable fittings can spoil the appearance of the door, and improper installation can lead to a skewed door leaf and problems during operation.
Today there are many types of door hinges, which differ in appearance, method of attachment and functionality.
Types of loops
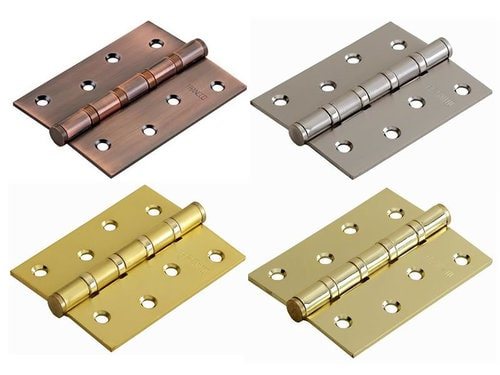
If you look at how the master's loops are cut in, it seems that this is a difficult matter. In reality, the work is simple, you just need to choose the right fittings. By constructions the following types of products are most often used:
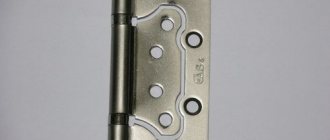
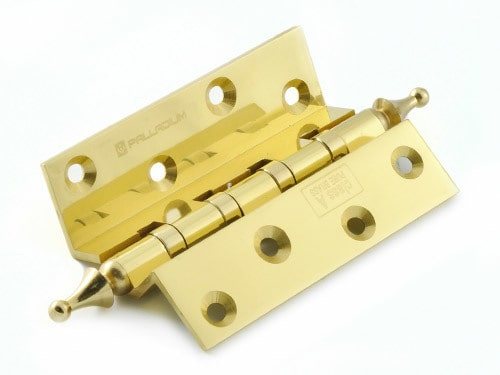
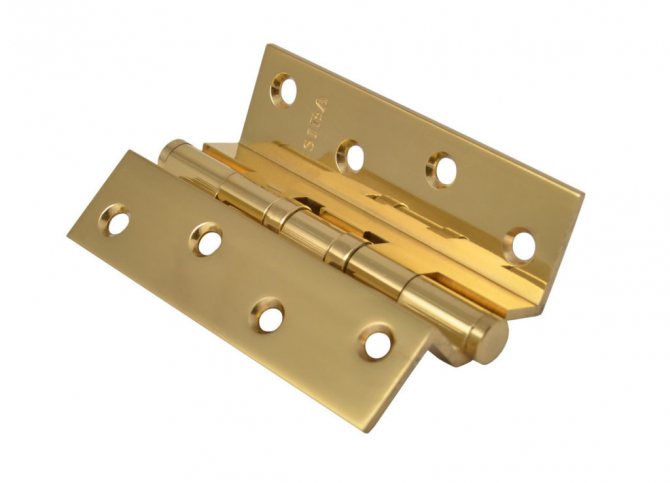
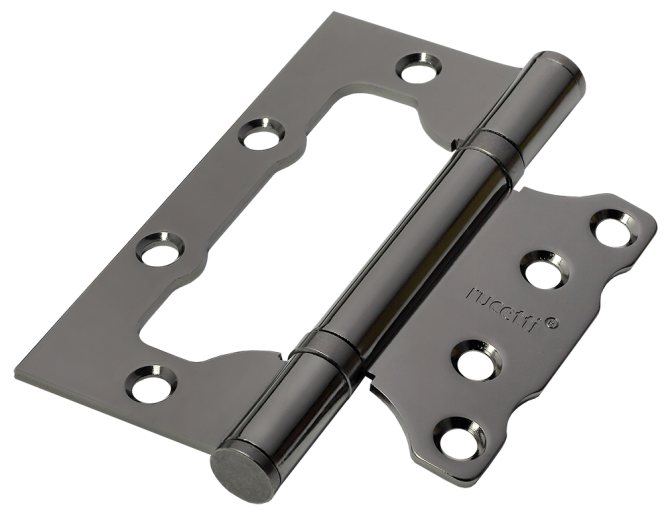
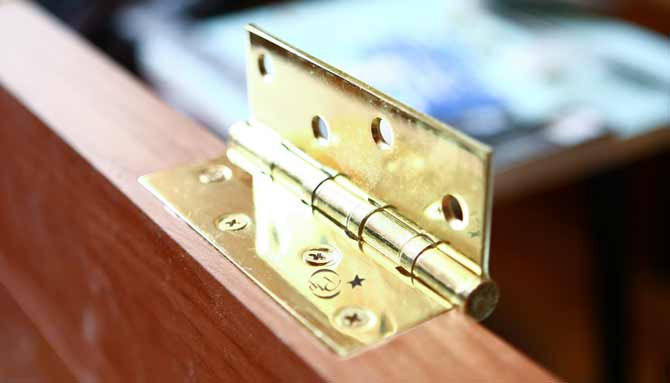
- Straight. The most common, consisting of a hinge with side mounting plates. Canopies are called cards or butterflies.
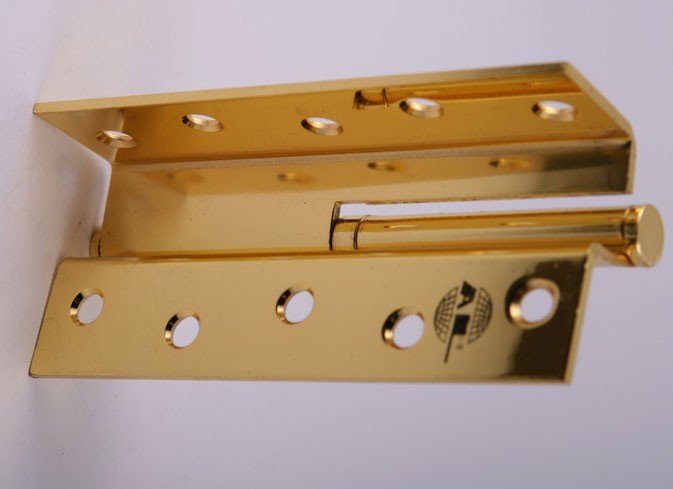
- Corner. The fittings are intended for interior doors with a "euro-quarter" (a ledge that hides the gap between the sash and the door frame). Similar to the previous ones, only the side plates are made of corners.
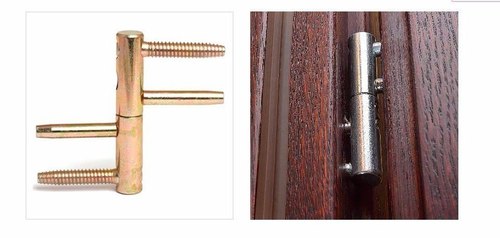
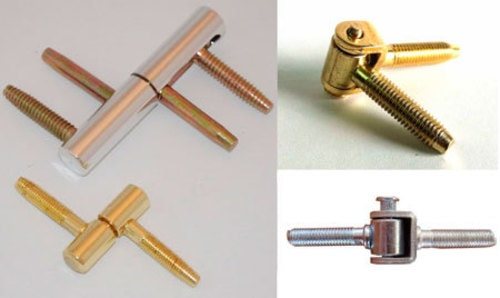
- Screw-in. The design of the hinges is a pivot axle with studs welded on the side instead of fixing plates. Designed for lightweight canvases.
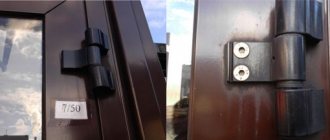
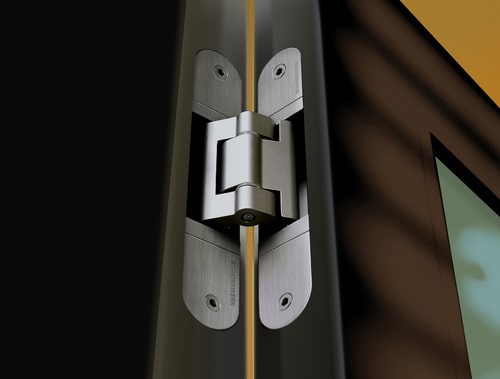
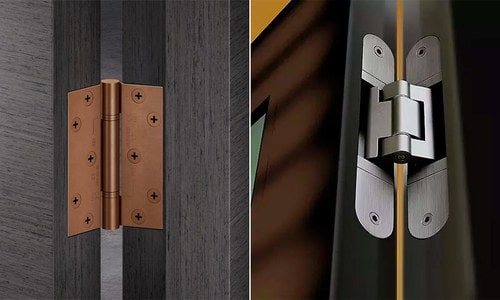
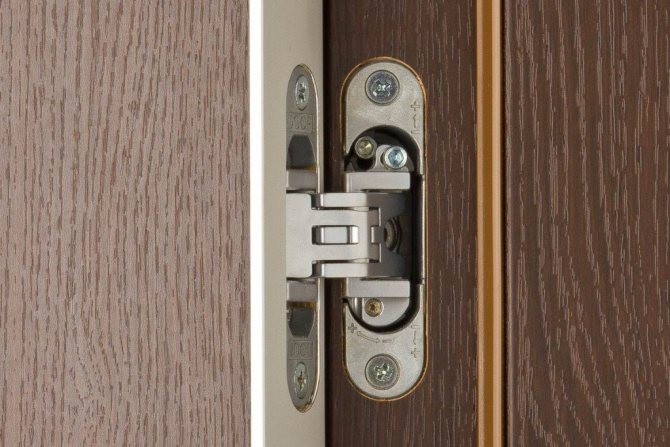
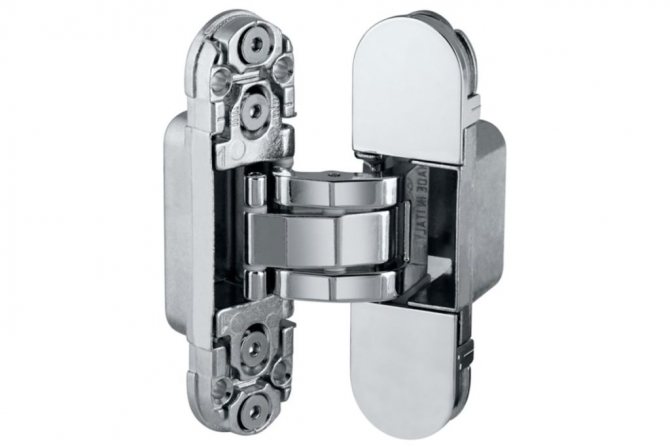
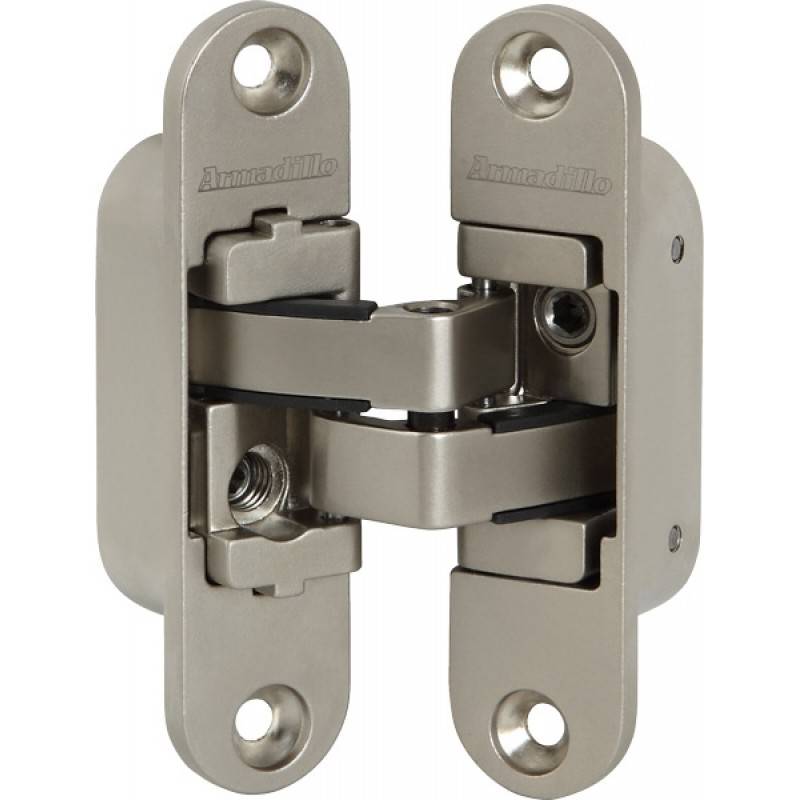
- Hidden. The fittings are installed on expensive entrance doors. The concealed hinge design is a hinge recessed when installed in the body of the door block.
- Italian. The hardware differs from hidden hinges in the design of the hinge. The mechanism is installed on expensive imported doors.
By installation method there are three types of loops:
- Overhead. The fittings are simply fixed with self-tapping screws to the surface of the door and frame without a preliminary cut of the recess.
- Mortise. Recesses are chosen for fittings. The fixing plates are flush with the door and frame surfaces.
- Screw-in. The fittings have pins instead of fastening plates. During installation, these pins are screwed into the body of the door block.
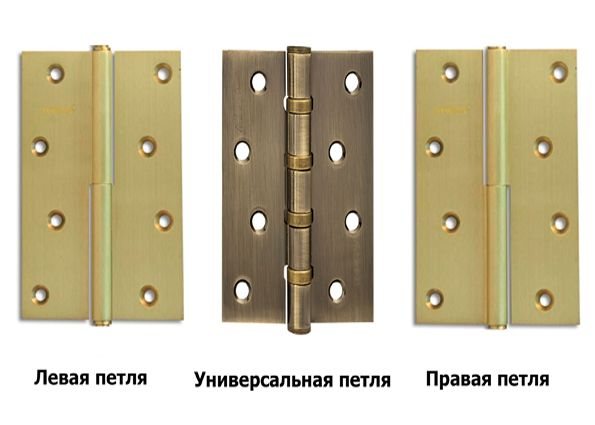
By door opening direction loops are:
- Left-handed. The sash can only be opened to the left.
- Right-sided. The sash can only be opened to the right.
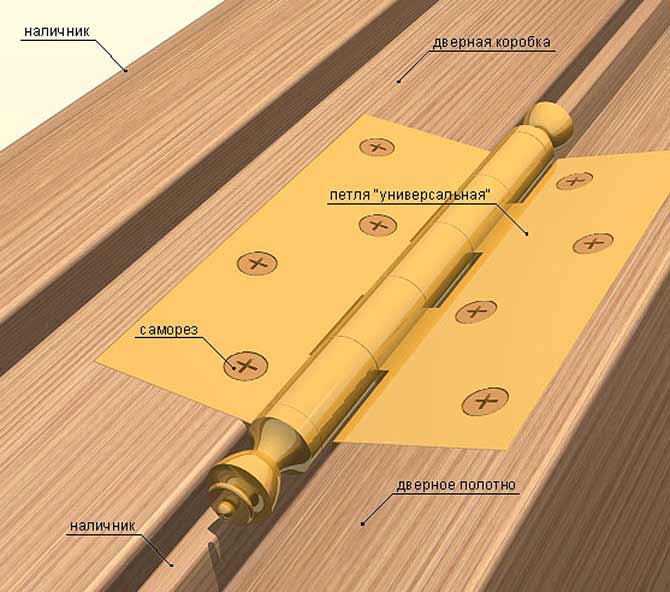
- Universal. The sash can be opened to the right and to the left.

The universal hinges can be attached to the right or left side of the door, which creates a mounting advantage. The disadvantage is the difficulty of quickly removing the sash.
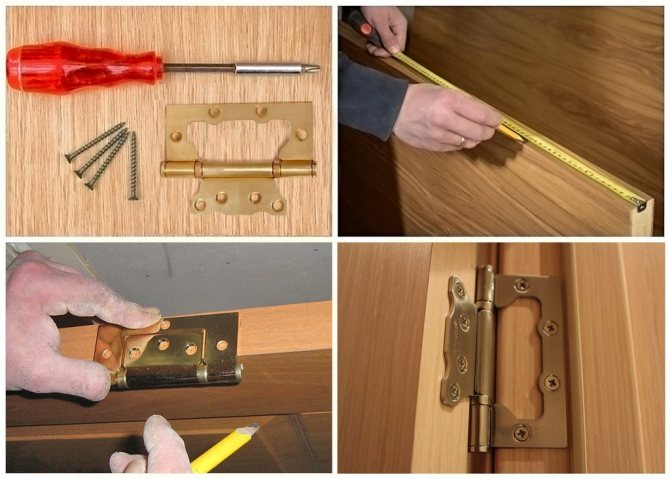
Required tools
The installation of loops begins with the preparation of tools. It is enough to have the simplest set:
- hammer with a chisel;
- straight and curly screwdriver;
- screwdriver;
- electric drill;
- pencil;
- bubble level.

If a large number of cuts are expected, it is convenient to use a hand-held router. Of the materials, wedges are needed for spacers of the canvas in the box and self-tapping screws.
Markup
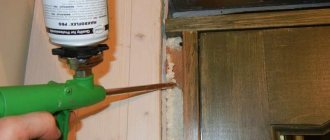
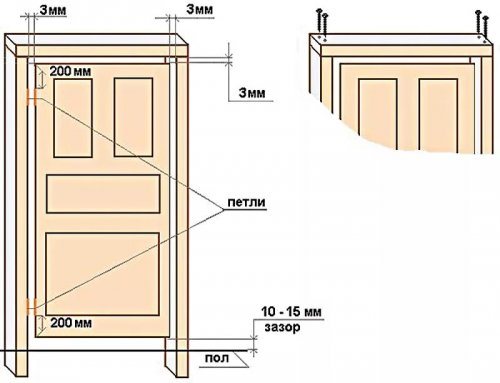
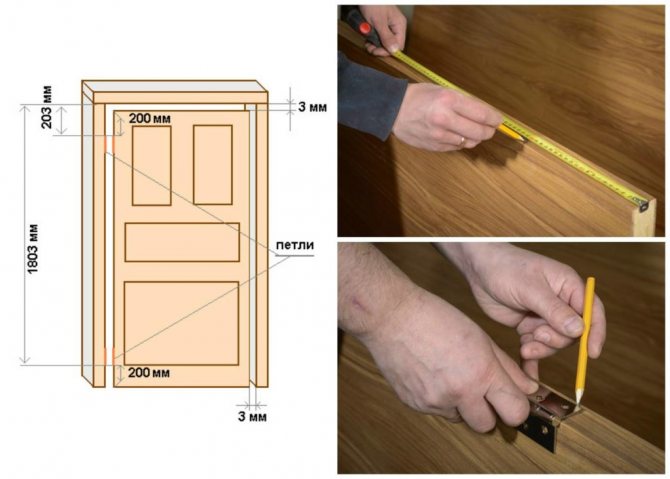
Begin the installation of door hinges with a marking. Depending on the design of the fittings, the installation process has its own characteristics. The general point is that hinges at interior doors are installed at a distance of 20-25 cm from the upper and lower edges. There should be no knots, chips or other damage at the attachment point. If there is a defect in the web, the loops are displaced.
The process of marking when installing hinges on a door involves delineating the outline of the mounting plates or pins. Further steps depend on the type of fittings. Overhead models are simply fixed with self-tapping screws. For mortise fasteners, choose a recess with a chisel or a milling cutter. For screw-in models, holes are drilled.
You need to mark up so that the sample made does not turn out to be too deep. This will cause the door to bend. When such a nuisance occurs, the depth of the sample is reduced with cardboard pads.
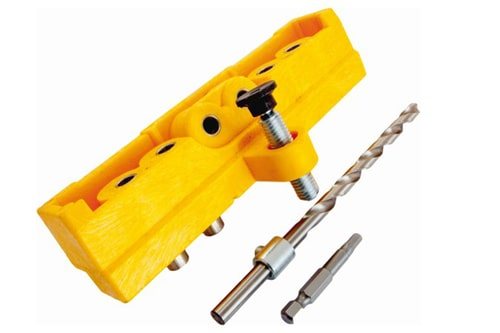
If a lot of work is supposed to be done, a special device will help to simplify it - a jig for cutting in loops. The template can be purchased or made from plywood. The jig is fixed with clamps on the marked section of the door leaf and a recess is selected in its inner part with a milling cutter.
After marking, the door is placed in a box, wedging it with wedges so that the same gap of about 3 mm is obtained around the perimeter. The next steps are to determine the place of attachment of the counterpart of the hinge on the frame. The position of the sash is checked with a level to avoid distortions. When the canvas is evenly exposed, the place of attachment of the second part of the loop is marked on the box.

Professional method and application features
Many people prefer the professional method, the advantage of which is speed and ease of implementation. Most often, professional workers use this method to ensure quick installation.
This kind of work requires the right tools. First, you need a hand-held milling machine. It is used to arrange a clean cut. Also, arm yourself in advance with the tools that will allow you to complete the inset itself. This tool assumes a kind of overlay, the task of which is to exclude damage to the door leaf.
You will need tools that will allow you to withstand the dimensions under the awnings. This will simplify the installation process. Equipment that helps to create a groove both on the box and on the canvas. This allows two parts of the door frame to be connected together. The result is that there is no need to use a groove alignment.
If such tools are not available, as they belong to the professional type of equipment, do not be discouraged. It will be possible to complete the work with the help of a milling machine. No specialized skills are required for this. you can learn to work with the device in the process of use. The disadvantage in this case is the need for a lot of time.
Treat the mechanism itself carefully. This will eliminate the appearance of scratches on the canvas. The appearance of the door structure will remain unchanged. Coating the milling machine with a special protective material will help in this. You can give preference to felt.
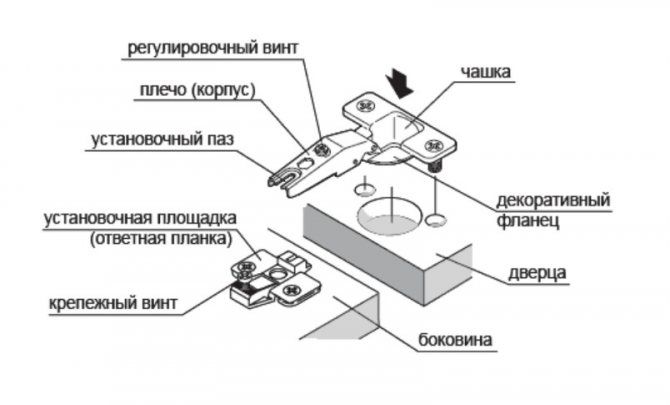
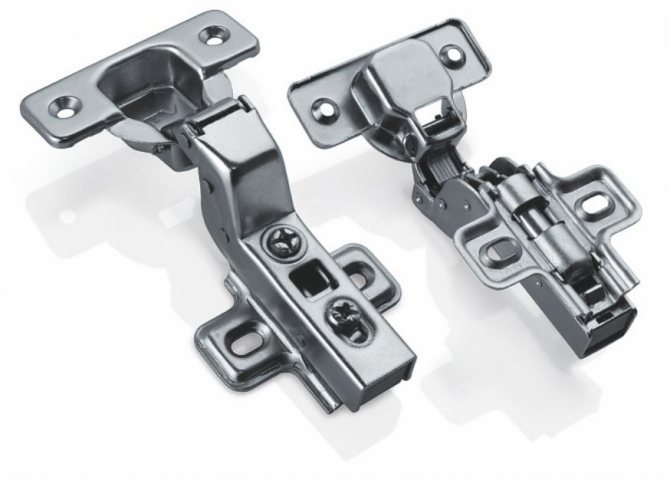
Various hinge options
How to install door hinges?
At the end of the marking, they begin to install the door hinges, but first determine the presence of additional nuances. The main problem can be the heavy weight of the web. Interior doors are usually hollow and lightweight. If the sash is made of solid oak or other heavy wood, two hinges will not support it. The way out is to insert the third element in the center of the canvas. Then the upper and lower loop can be moved closer to the edge.

When installing hinges on interior doors with your own hands, it is worthwhile to foresee in advance in which direction they will open. So that the sash does not damage the furniture or the wall, stoppers are mounted in the direction of movement.
Installation methods
It is mounted in different ways, depending on the type of fittings. Installation of universal hinges requires a separate analysis, mainly they are attached to interior doors. Three options for carrying out work:
- Overlay method. Fastening is carried out from above, without cutting into the structure. The element is fixed with hardware;
- Sidebar. Before fixing the part, the wood is removed from the box and the doorway is drilled. Plates are installed on the same level;
- Screw-in method. For this, holes are drilled, and the fastener itself has pins that connect the box and the canvas. Half of the eyelet goes into the door body.
Depending on which way the door will open, there are hinges for the left, right side and a universal option. The last type is the most optimal. It is he who is bought by all the masters who come to calls for the installation of doors. The only drawback of this product is that it is difficult to remove the canvas if you need to re-hang the structure or adjust it.
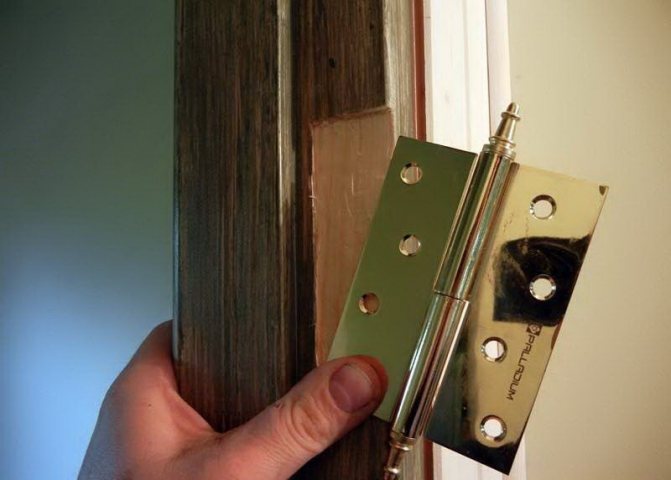
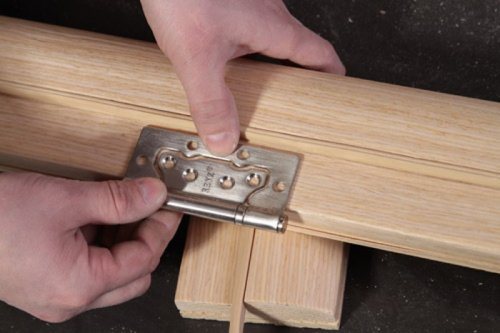
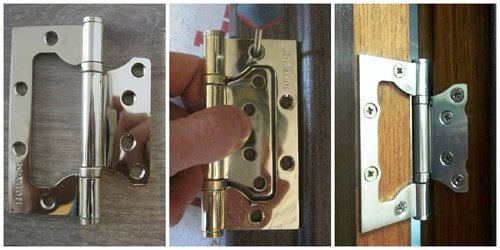
How to install butterfly hinges on an interior door?
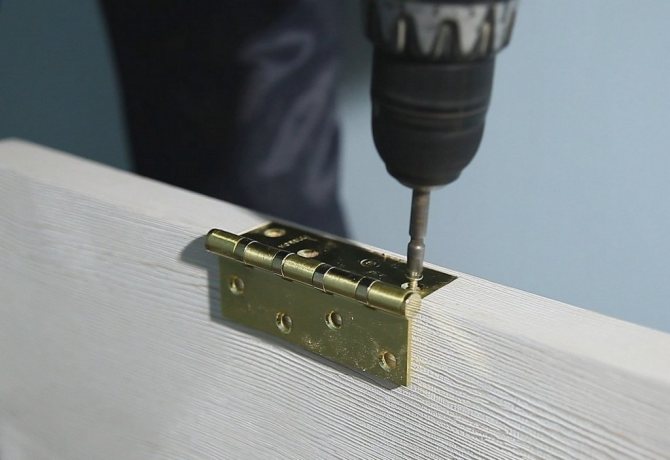
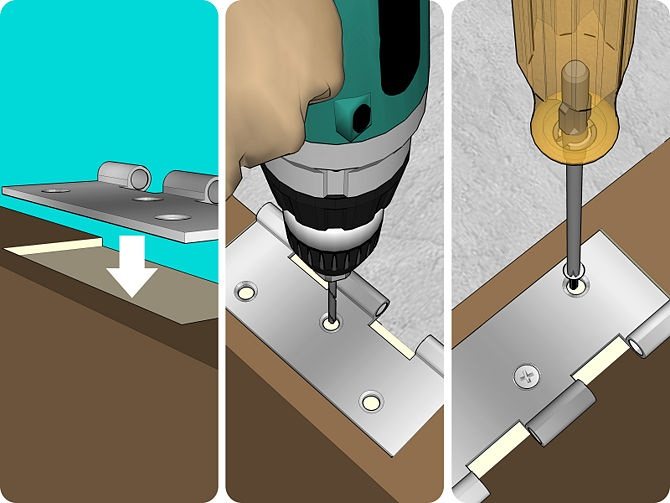
It is possible to install overhead butterflies hinges even after mounting the box. The fastening plates are not fixed to the end of the canvas, but to the front surface. Similar actions are performed on the frame. The door is firmly wedged in the frame, observing the gaps around the perimeter. Check horizontality, verticality with a level. A butterfly is applied, the points of the location of the screws are marked, holes are drilled. Recesses for the mounting plates are not selected. The hinges are simply screwed to the body of the door unit.
Installation of cut-in hinges
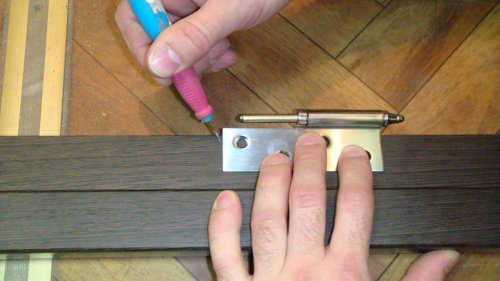
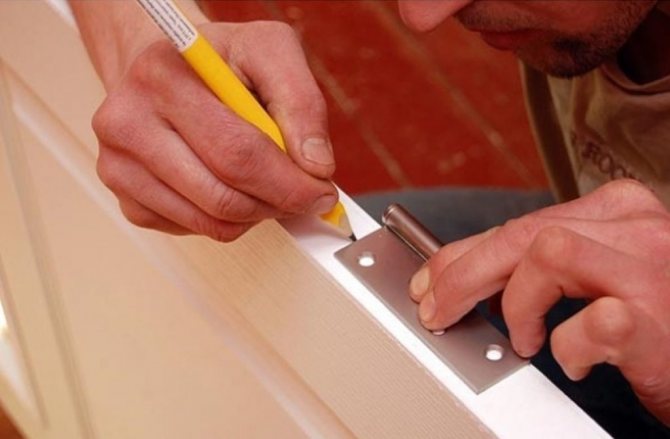
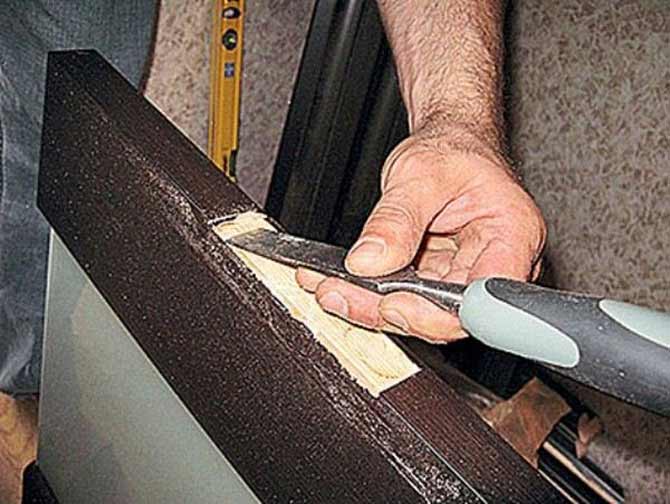
It is easier to do the installation of hinges on interior doors with your own hands when the box is not yet fixed in the opening. This rule applies to the installation of standard fittings that require a tie-in. First, one part of the hinge is applied to the end of the sash. With a pencil, outline the contour of the mounting plate, mark the place of the holes for the screws. By marking, choose a recess with a chisel or a milling cutter. A hole is drilled under the screws. When all the preparatory work is completed, the fittings are fixed to the end of the sash.
It is advisable to cut in the loops with a router, since the tool can accurately select the recess. Chips or extra sampling are obtained from the chisel. Depth is reduced with cardboard pads, but they deteriorate over time. The door starts to wobble and sag.
To continue inserting the hinges into the interior doors, the box is placed horizontally. A canvas is laid inside the frame. A similar marking, as well as the cutting of grooves, is made on the rack of the box under the counter-fastening part of the butterfly. When the fittings are securely fixed with self-tapping screws, the door block is placed vertically and they try to open the sash. If everything is fine, the canvas is removed and the installation of the pipe in the opening is started.
Insert of screw-in hinges
The insertion of hidden and screw fittings is more difficult to carry out. You will definitely need a power tool. To install hidden hinges, you need a hand router. Do the following:
- At the end of the canvas and the rack of the box, the location of the awnings is marked.
- The grooves are selected with a milling cutter. If additional cutting is required, a chisel is used to give the groove the desired shape.
- The hidden awning is in two parts. The fittings are disassembled before installation. To correctly insert the hidden hinges, you need to pay attention to the size of the details. Part of the canopy with large dimensions is always mounted on the box. A smaller part is attached to the sash.
- Both parts of the canopy are fixed in the recesses with self-tapping screws. The door is placed in a box, fittings are connected, tightened with a fixing screw.
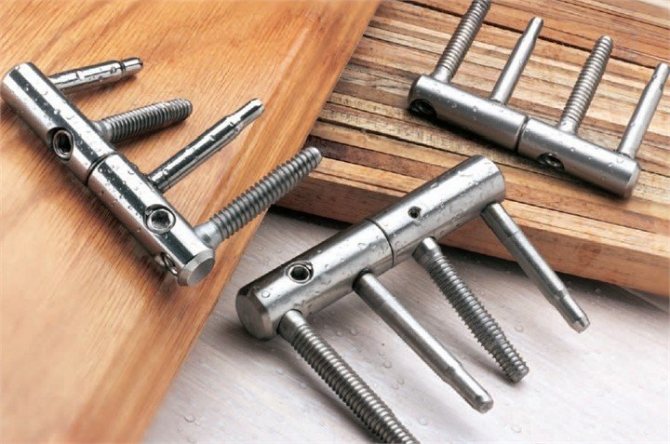
To install screw hinges, it is enough to have an electric drill. Fittings are usually sold with a mounting template.
The entry point of the fastening pins is marked on the canvas and box. Holes are drilled according to the marking. Screw-in canopies are divided into halves, which greatly simplifies their installation. Each element is fixed to the box and sash.When hanging the door, simply connect the two halves of the screw canopy.
Choosing the hinges
Before purchasing a product, count their number, decide on the direction of the parts. And if in the situation with a two-leaf door everything is clear: one part of the structure is attached to the right hinges, and for the second it is necessary to use the left canopy, then for a single-leaf system everything is much more complicated. Therefore, determine the direction of the products. Do it as follows. Stand on the side where the structure opens. Then inspect the hinges. If the canopy is on the right, then it is right-handed, on the left is left-handed.

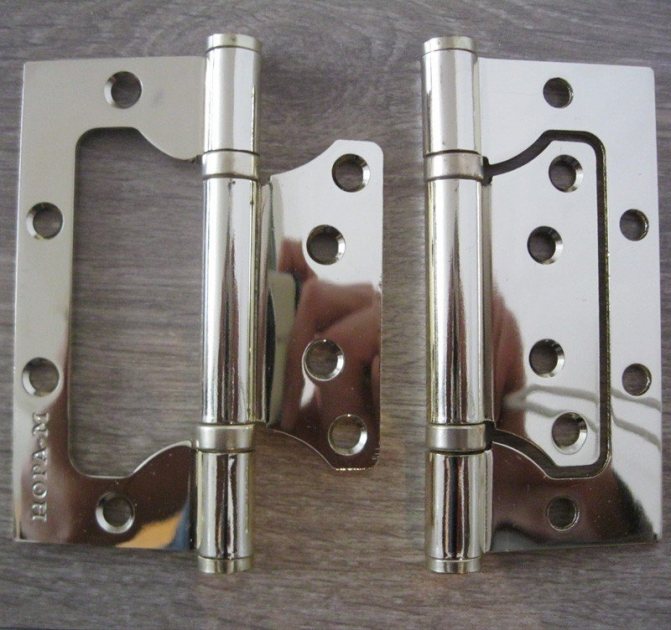
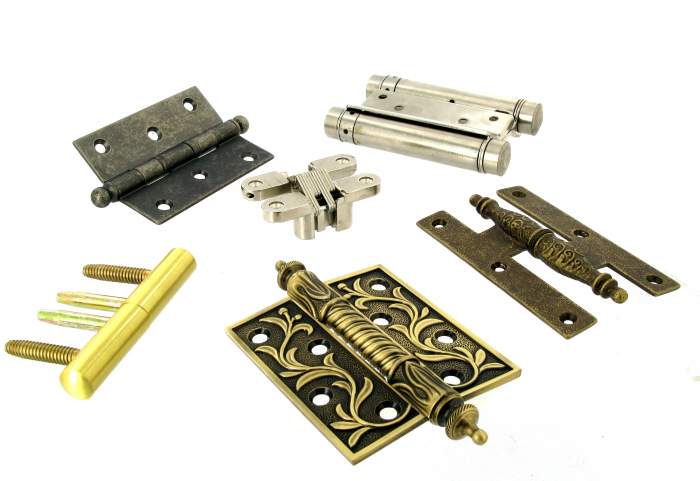
Examples of door hinges on the hardware market
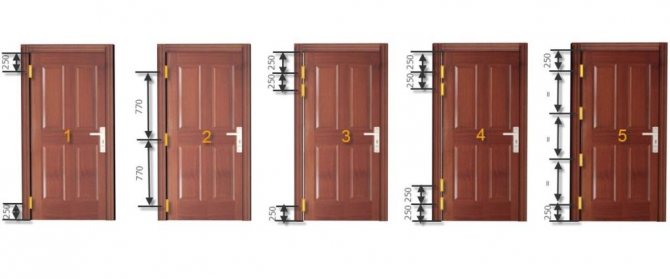
Determine the number of elements correctly. This is done taking into account the total weight of the interior structure. As a rule, the choice of fittings for ordinary interior doors involves the purchase of two products.
So, for a double-leaf door, use 2 elements. But for a single-leaf design, which is heavier, you need 3 hinges. Entrance systems can be fixed at all on 4 canopies.
It's important to know! When purchasing hinges, it will be correct to test them for opening-closing. This approach will allow you to identify defects, curvature of the rod. As practice says, this is a common breakdown.
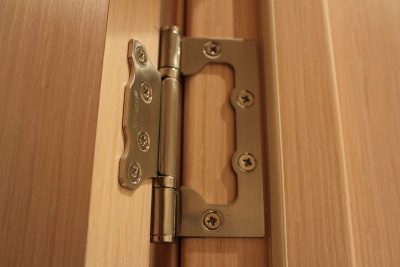
Well-installed design
Make sure that the products match the color of other types of door hardware. The same rule should be taken into account when buying screws and self-tapping screws. Then such details will be less noticeable, will fit into the overall design style. It is also worth understanding that the purchase of self-tapping screws will exclude working with a drill, which will reduce the risk of harming the door leaf and frame.
Installation of bar hinges
The cut-in of bar-type door hinges is carried out differently due to the design. The product consists of two spring sheds. The sash can open in any direction with a subsequent return to its original place.
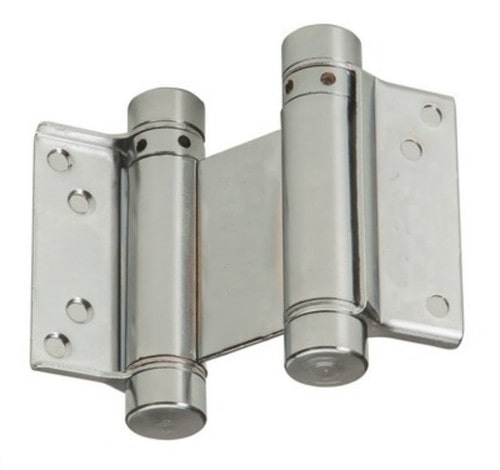
To embed bar hinges, the installation instructions include the following:
- A key is included with the bar awnings. If it is not there, you can take a hexagon of a suitable size and loosen the tension on the springs.
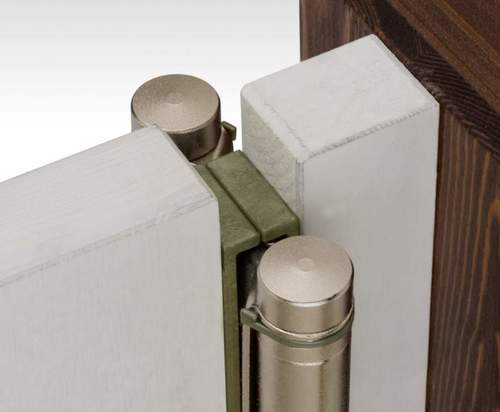
- Marking is applied under the fastening plates at the end of the sash and the door frame.
- Installation implies a mandatory selection of recesses. Without them, the gap between the canvas and the frame will be about 12 mm.
- The elements of the fittings are fixed with self-tapping screws.
Further steps are aimed at adjusting the springs. They can break, so you need to pull them on, but do not overdo it. The tightening is carried out with a screw in a clockwise direction. During the adjustment, check the smoothness of the door opening. When the spring is tightly tightened, the sash will be pulled back tightly to the side. If the tension is loosened, the abrupt closing of the door leaf will end with a hit against the box due to the failure of the mechanism to trigger. The compression of the springs is checked periodically during operation. Over time, they weaken, requiring additional adjustment.
Anyone will be able to insert canopies of any type. Specific hardware such as bar hinges are commonly used on doors in bars, shops and other public places. At home, such awnings are not in demand.
Interior sash weight
This is one of the basic characteristics, taking into account which fittings are selected. It is clear that overhead models made of aluminum alloy will not cope with a heavy glass sheet, so they cannot be fixed, and powerful hidden ones will make opening and closing a light plastic sash rather difficult.
The most common materials for interior doors are as follows.
- Plastic is an option for the office. Budgetary, lightweight, but not too durable. It will require the simplest lightweight fittings.
- Panel sash - is a wooden frame lined with MDF sheets. The weight is minimal, the strength is low, the appearance is much more presentable. You can hang the invoice, and mortise fittings.
- Chipboard - a canvas made of a whole sheet has quite decent strength. So you can install any fittings that are suitable for weight.
- MDF - an interior sash made of MDF sheet weighs much more, is stronger, more durable, is not afraid of water, has a very aesthetic appearance. The fittings can be fastened of any kind - forged overhead models, hidden, mortise and so on. It may be necessary to install more than 2 elements for larger sizes.
- Solid wood canvas is the most elegant and expensive option. The most difficult one - here you will probably need not 2, but more elements.