SHARE ON SOCIAL MEDIA
FacebookTwitterOkGoogle + PinterestVk
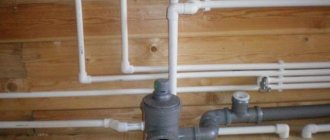
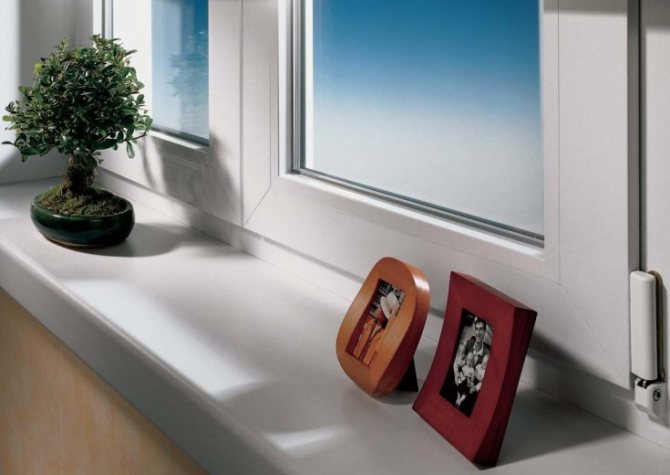
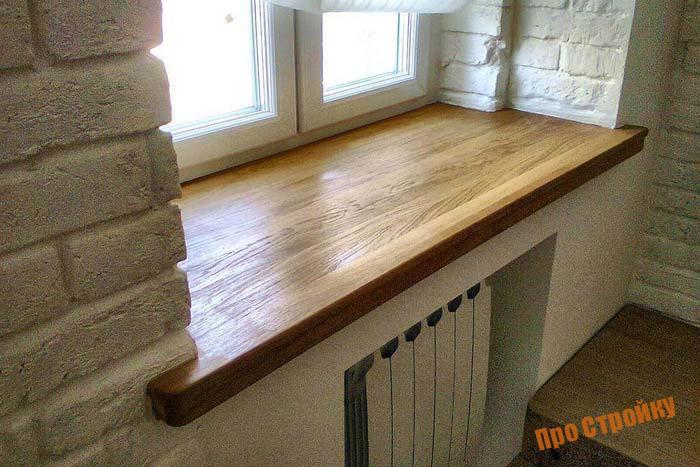
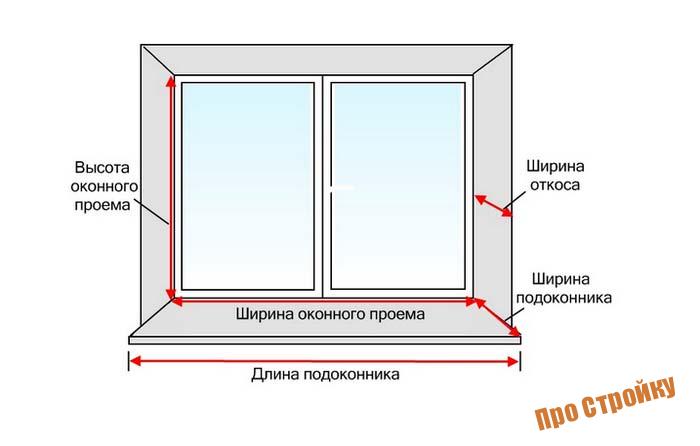
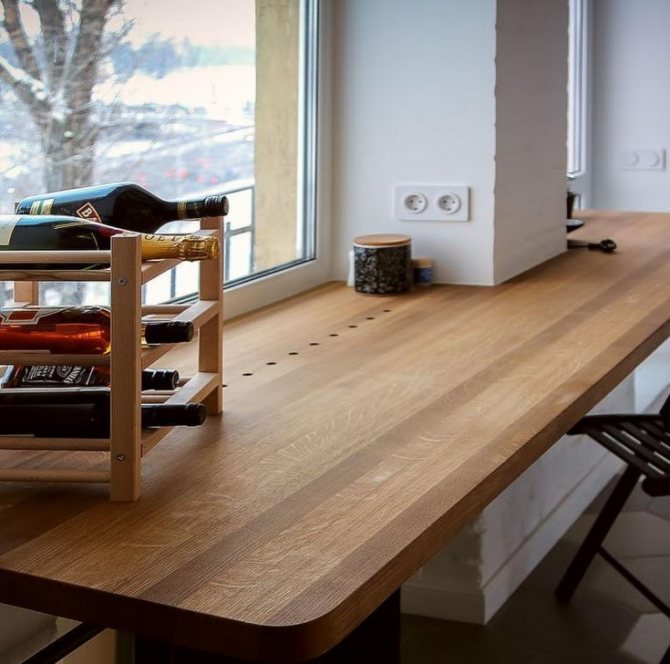
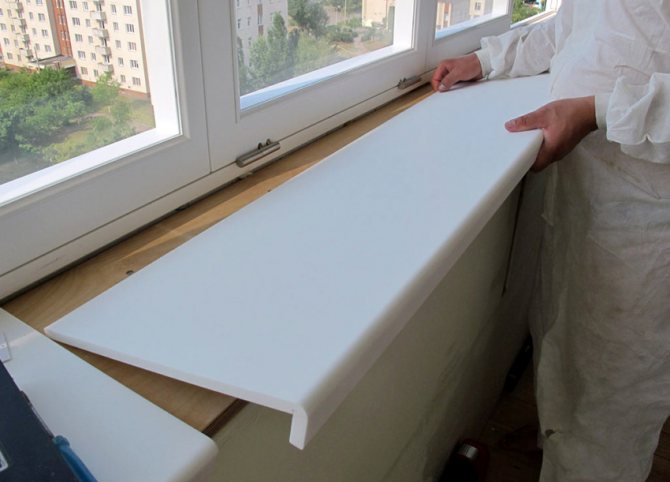
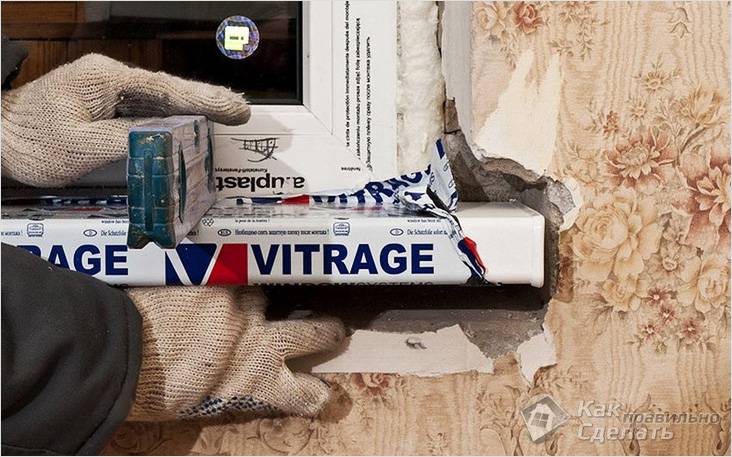
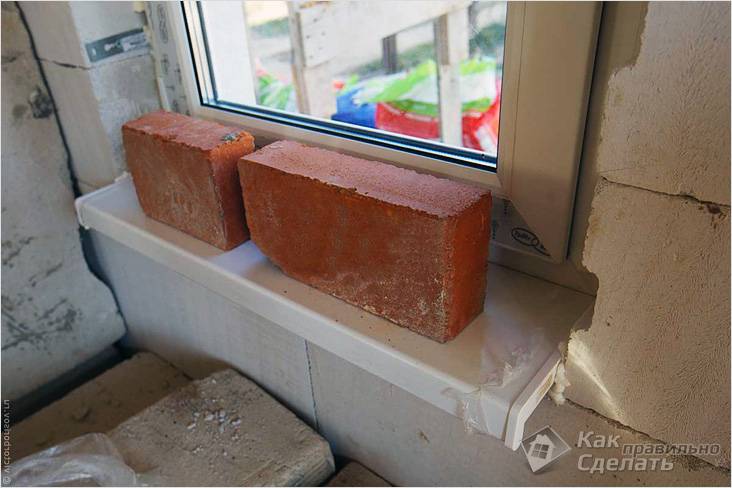
One of the important elements of the window opening, which ennobles its appearance, closing the assembly joints, is the window sill. It can be made from different materials. However, the most popular is plastic, which is associated with the widespread use of metal-plastic windows. Installation of a plastic window sill consists of several successive stages, the implementation of which will ensure the achievement of optimal performance.
The window sill is an important element of the window opening.
Distinctive features of plastic window sills
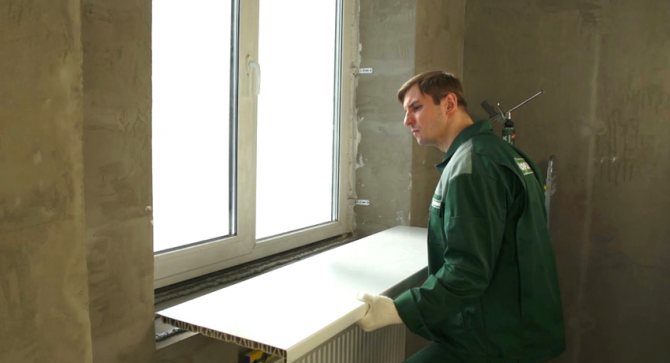
Reinforced-plastic windows have won prestige long ago. They are very popular with consumers due to the fact that they are characterized by high performance characteristics, are easy to install and have a long period of operation. After replacing the window, the installation of the slopes and the window sill is immediately carried out.
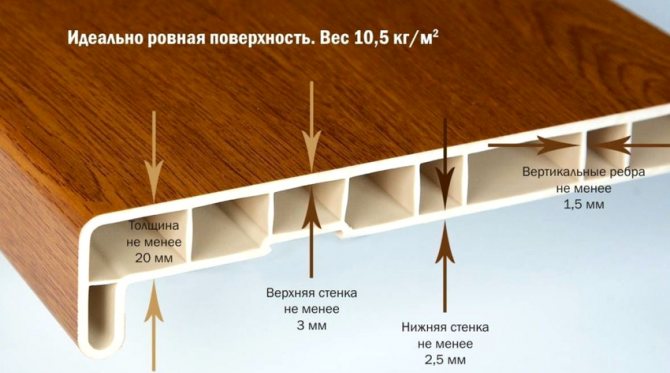
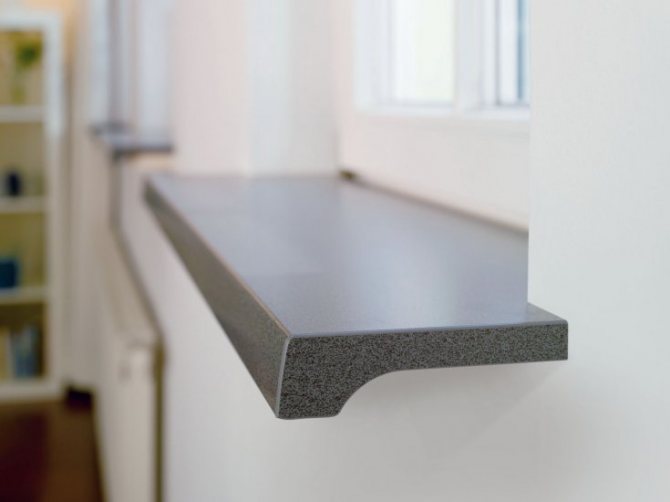
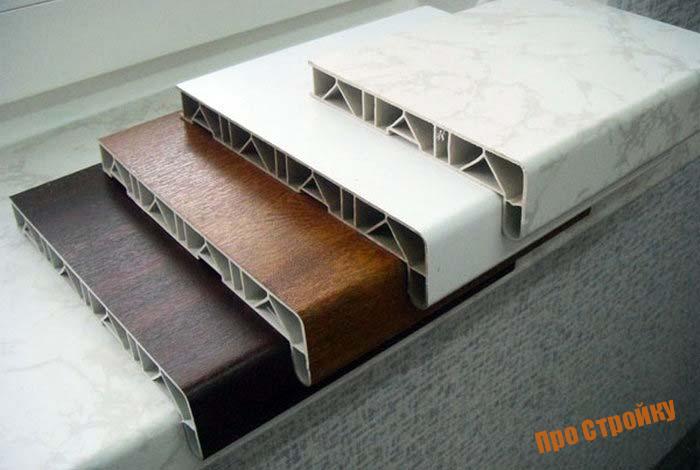
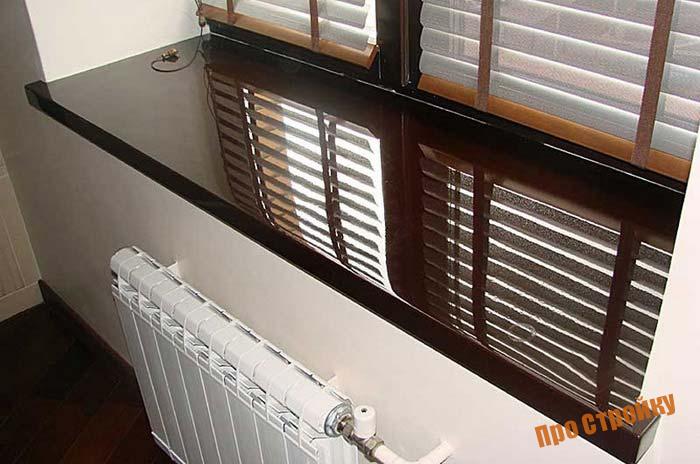
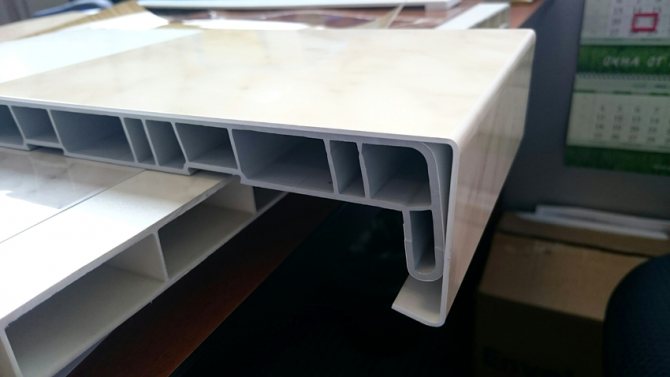
Due to the presence of stiffening ribs, the surface of the window sill is very durable
A metal-plastic window is a versatile product that can be matched with different options for a window sill, which is selected in accordance with the stylistic task. The most common option is plastic products. This design is best combined with the material of a modern window, creating a single composition with it.
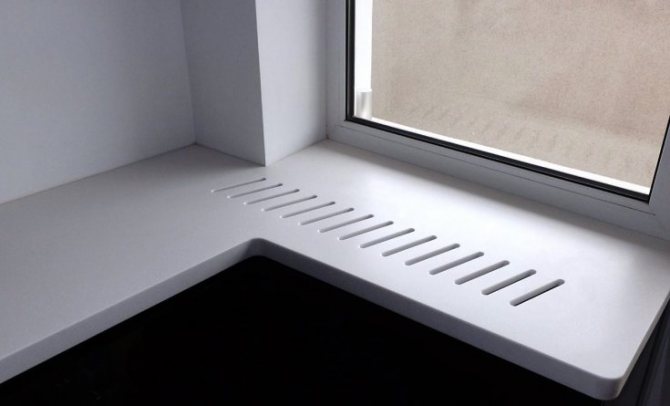
The plastic window sill has distinctive advantages. The product is resistant to moisture, sunlight and temperature extremes, not prone to rot, mold or corrosion. At the same time, the surface does not deform, does not change its original shape and appearance. The material is completely safe for human health, is durable (due to the presence of stiffening ribs), reliability, resistance to chemical influences. It has high thermal insulation properties due to the presence of air chambers in the construction of the window sill.
The product is lightweight, which ensures easy installation of the PVC window sill, while it does not shrink during further operation. The surface does not need painting and other treatment options to prevent possible rotting or corrosion. It is easy to look after her. A plastic window sill is characterized by a low cost in comparison with other materials.
Despite the advantages, the plastic window sill has its drawbacks. With careless use, dents or holes may appear on the surface of the product, which is a consequence of the fragility of the product. If a glossy finish is present, scratches may form on it, which will cause an unsightly appearance.
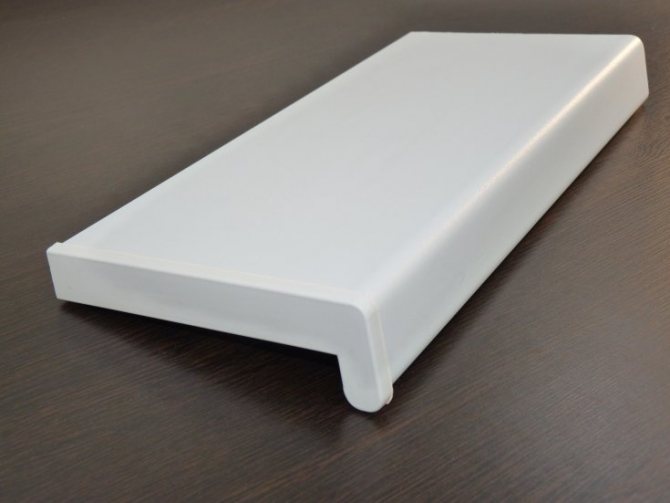
Plastic window sills are resistant to moisture, sunlight and temperature extremes
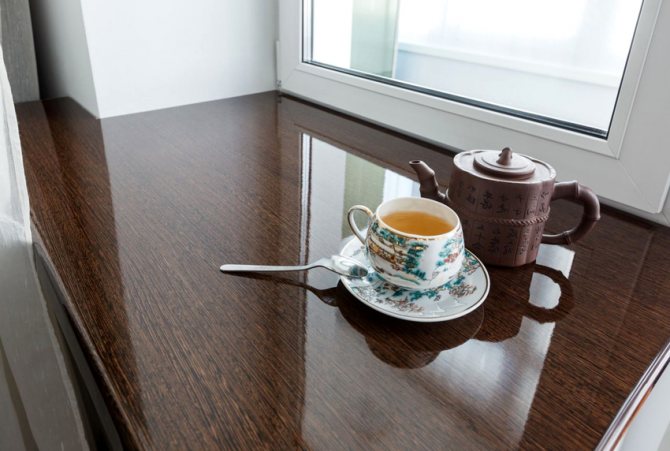
Important! A plastic window sill can deform when exposed to high temperatures, so a hot kettle or pot should not be placed on the surface.
PVC window sills
Plastic window sills are a modern solution that should be discussed separately. Window sills made of specialized plastic have many advantages over other options:
- In stock and on order, anyone can choose a design variation according to their own preferences. The decorative film that covers PVC window sills allows you to do this with ease.
- Plastic structures are moisture resistant and resist mold and mildew.
- Modern PVC window sills have special design features that help to withstand absolutely any weight.
- They can be washed and very easy.
- Window sills are not exposed to temperatures and do not fade in the sun.
In addition to all this, it should be noted the ease and accessibility of installing PVC window sills with your own hands.
Which plastic window sill to choose: product varieties
Before installing a window sill on a plastic window, you must select the type and size of the product. The most budgetary option is a surface covered with PVC film. However, such a window sill does not tolerate temperature extremes, quickly absorbs dust and dirt, which leads to the loss of its original attractive appearance.
The CPL laminate product is made by pressing paper sheets impregnated with melamine resins. Such a window sill with a multilayer base is characterized by resistance to temperature extremes and chemical influences.
Most often, do-it-yourself installation of a PVC window sill with EPL coating, which is distinguished by high strength and performance characteristics, is carried out. Products are made by extruding plastic material through extrusion holes to acquire the desired shape.

The CPL laminate sill is resistant even to chemical attack
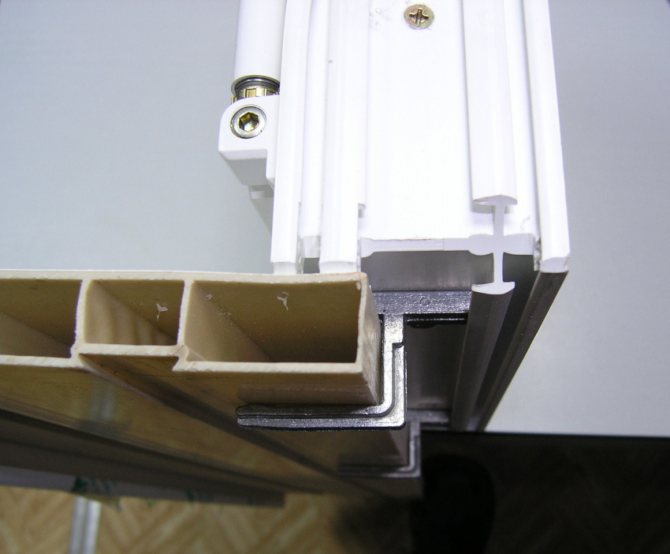
The internal space is divided into several chambers with vertical and diagonal stiffeners, which provides strength, rigidity and reliability of the structure, which does not bend or break. This also increases the thermal conductivity of the product.
The surface, thanks to the anti-static coating, does not absorb dust and dirt. Such a window sill is presented in a wide range of colors, which allows you to choose a product that matches a certain interior of the room.
Texture, color and design of a plastic window sill
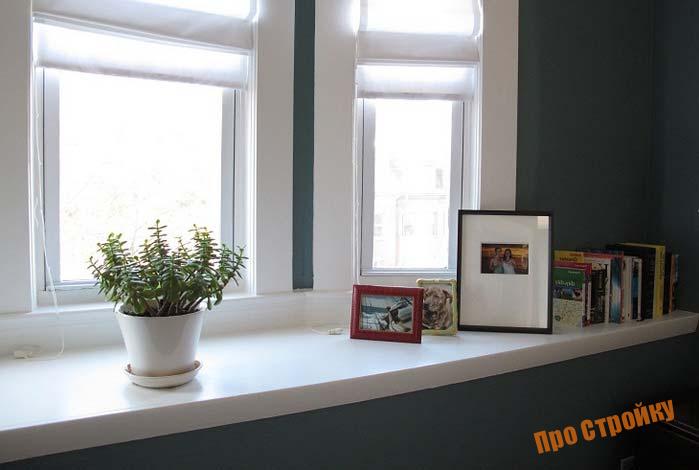
According to the type of coating, a plastic window sill can be matte, glossy or laminated. The first type of product is able to fit into any interior. The surface can be painted in a variety of colors. A frosted window sill brings a sense of coziness and warmth to the environment, but such a surface is prone to absorbing dust and dirt.
Important! In case of accidental damage to the matte surface, it can be restored using a special tool.
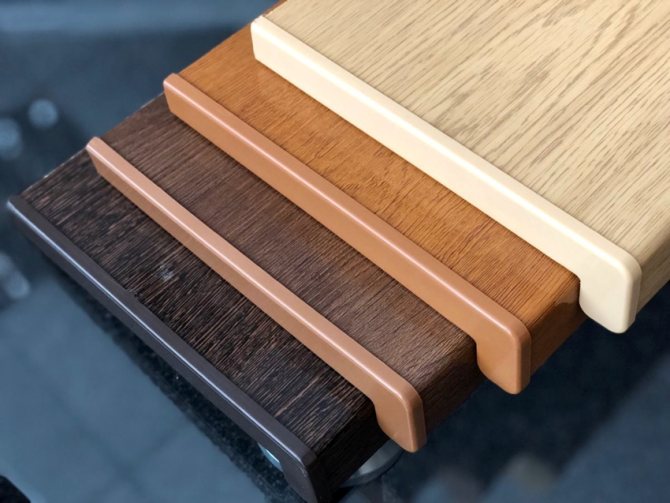
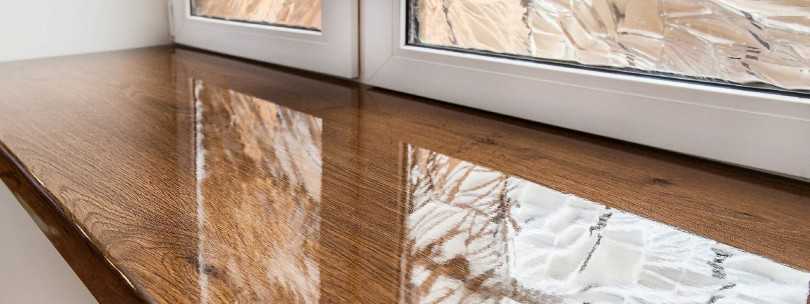
Plastic window sill can be matte, laminated and glossy
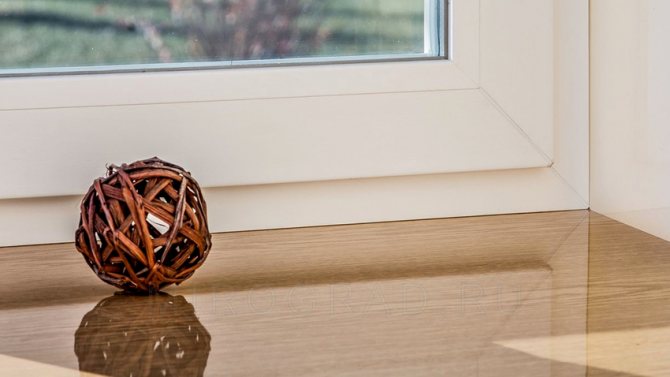
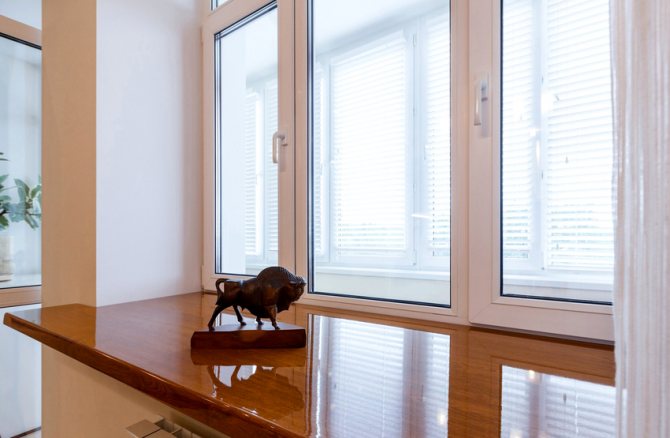
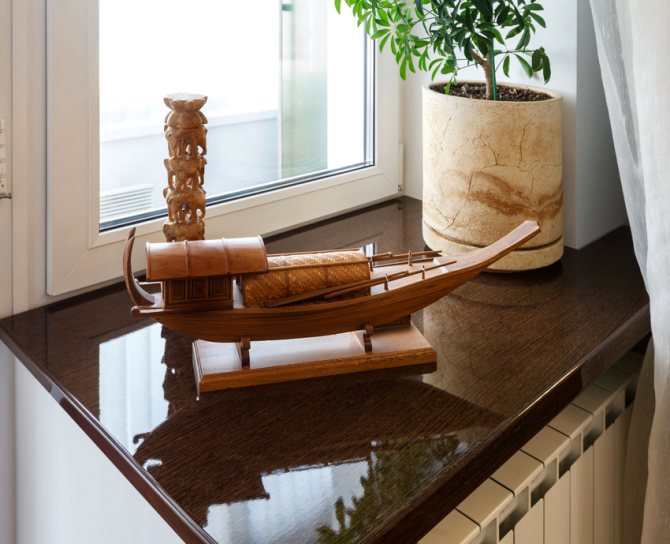
A glossy product has a more attractive appearance. The surface has anti-static properties, so that dirt and dust do not accumulate on it. The product is easier to care for. However, the surface is susceptible to mechanical stress, small visible scratches quickly form on it, which degrade its appearance. In addition, the glossy window sill does not lend itself to restoration.
Laminated window sills are covered with a special film, which gives the products texture, increased strength and durability. To obtain a white product, one layer of film is applied. The colored window sill has a two-layer coating that contains dye. The price of installing a plastic window sill of this type is the highest and starts from 1100 rubles. per r. m.
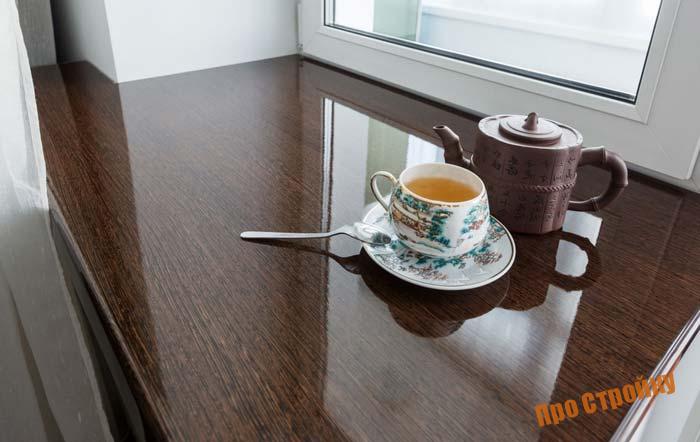
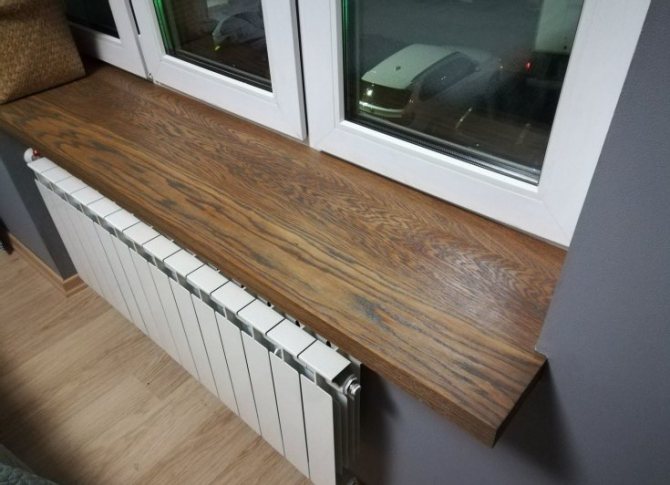
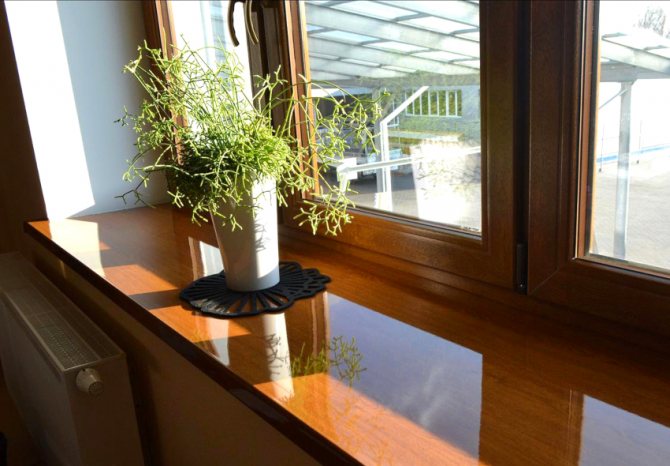
There is a separate type of product in the form of a wenge window sill, made from a mixture of PVC and wood flour. The unique production technology makes it possible to obtain a durable, scratch-resistant and UV-resistant, durable product. The price of installing a window sill of this type starts from 1300 rubles. per r. m.
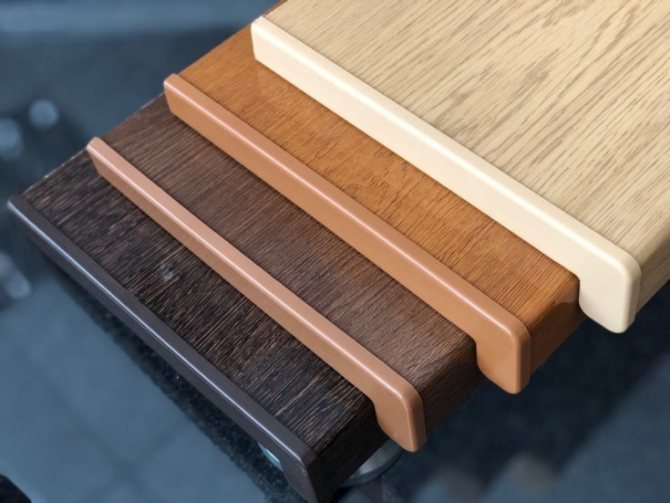
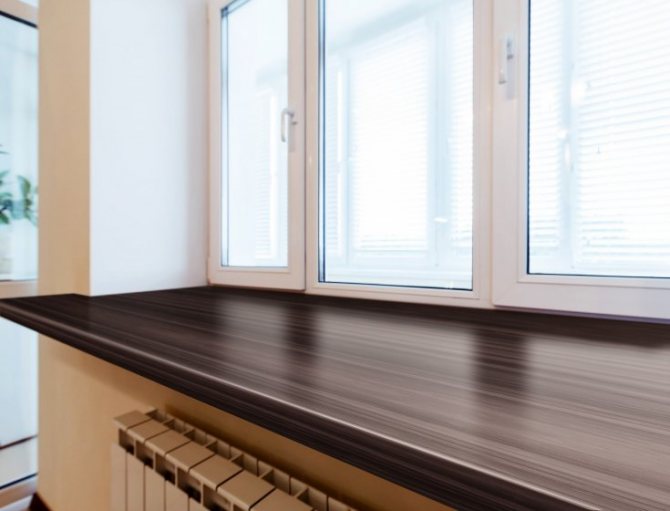
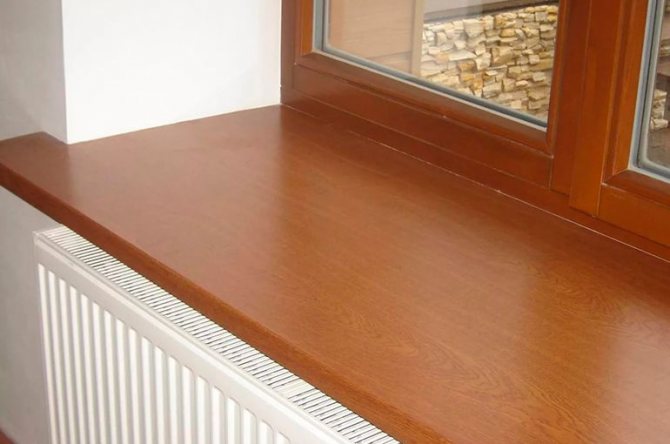
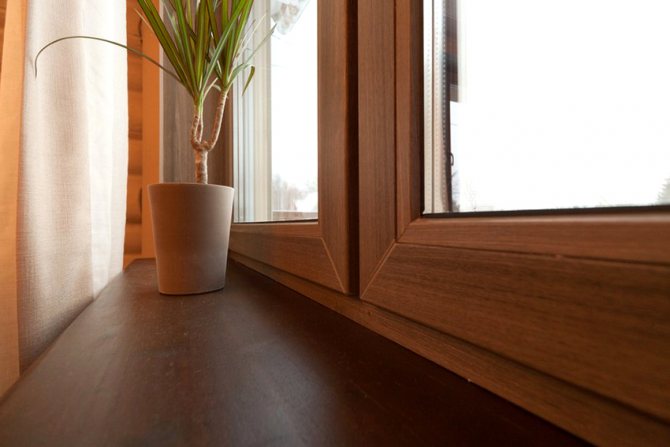
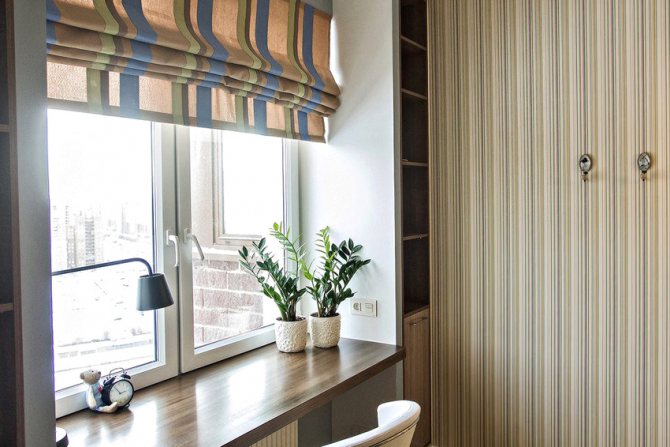
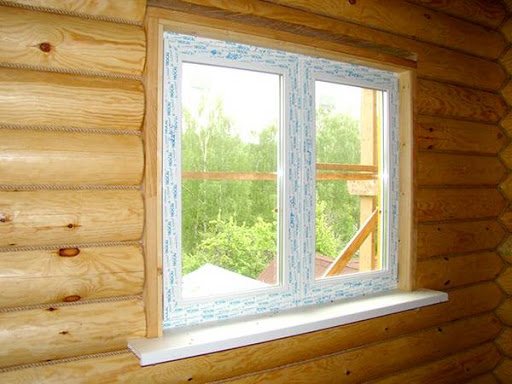
The plastic window sill can be made in white, color and wood grain. The latter option finds its application in wooden houses. It can also be used in tandem with wooden windows. However, such a structure, in contrast to a wooden window sill, is characterized by resistance to moisture, lack of processing for further operation, and a long service life. The imitation wood effect is achieved by using a suitable laminated film.

The colored plastic window sill has a two-layer coating containing dye
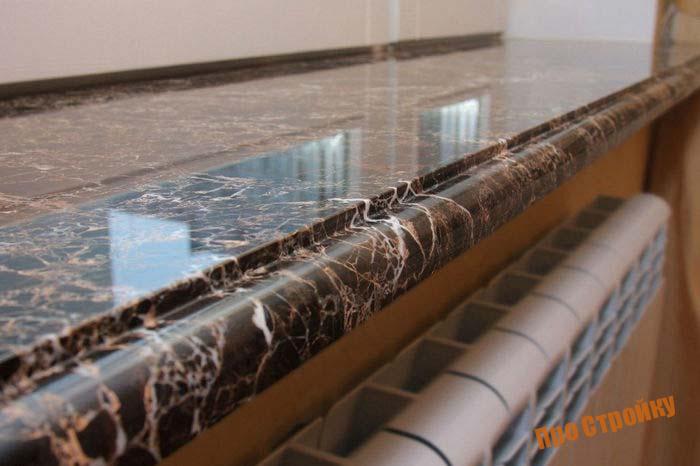
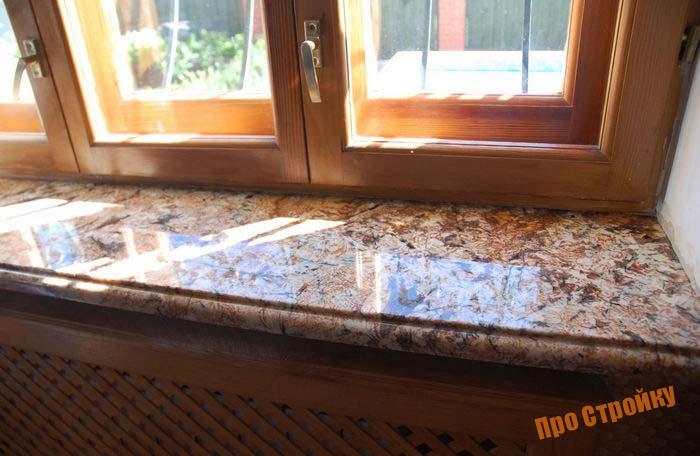
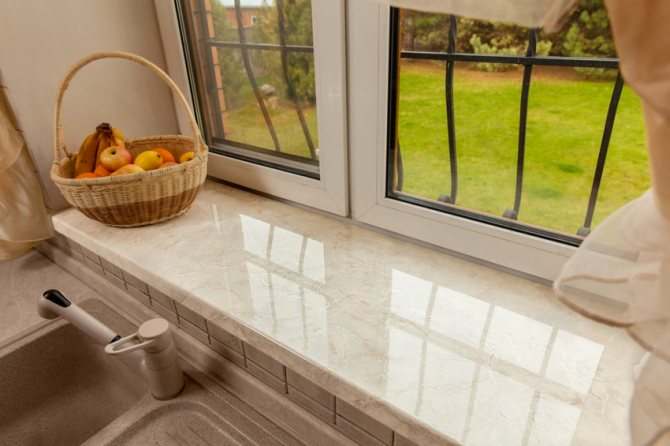
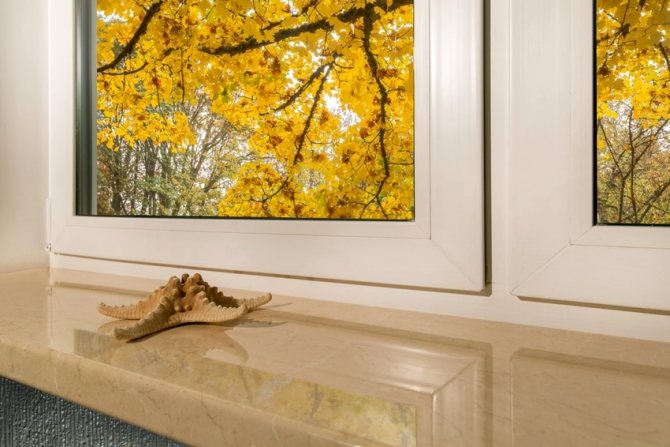
Important! The use of such a coating in the technology of manufacturing a window sill allows you to obtain a product that imitates a natural stone in the form of marble or granite.
Plastic window sills are available in lengths up to 6000 mm, width 100-600 mm with a pitch of 50 mm and 600-1000 mm with a pitch of 100 mm, which directly affects the price of installing a window sill on a plastic window. The height of the product reaches 18-22 mm.
Do-it-yourself accessories for installing the window sill and slopes
To carry out the installation of a window sill and slopes on a plastic window, it is not necessary to have certain skills and abilities. Even a novice master can handle this. To achieve a good result, an important step is the selection of the necessary components.
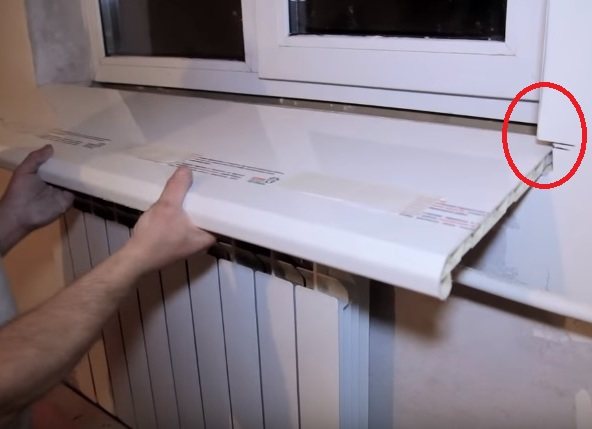
When installing a PVC window sill, you will need to purchase not only the plate of a certain type itself, but also connecting elements, as well as a double-sided end cap. The last element is represented by a strip with two spouts, used for decorative framing of the end sides of the window sill. The plug is divided in the middle, fixing one part to the right and the other to the left of the plate. Connectors are used to join the window sill at an angle and join it along its entire length into one integral structure.
To carry out the installation of the window sill and slopes, you will need to purchase connecting and fastening elements
Slopes are used to frame the side elements of the window opening. They cover the assembly seams of the frame with the opening and give the window a complete, aesthetic appearance. The most common option is plastic slopes, which are characterized by strength, reliability, good thermal insulation properties, undemanding maintenance and quick installation. The video "Installation of slopes and window sills" will allow you to familiarize yourself in detail with the choice of elements and installation conditions.
To protect the window frame from the negative impact of the environment, it is necessary to install an ebb from its outer side. The structure can be made of aluminum, plastic or metal. The second option is the most widespread. Metal ebb tides are the most budgetary and short-lived, because they have a low level of resistance to the negative effects of atmospheric conditions.
Aluminum drip tides are more durable, have reliable protection against mechanical damage, thanks to a special spraying on the surface, they absorb the noise of rain drops.
What is the window sill made of?
Modern window sills can be made from a wide variety of materials. Depending on this, the installation method also changes.
Made of plastic
PVC products are becoming more and more popular in construction from year to year. The situation is similar with plastic window sills, which stand out with a whole list of advantages:
- Easy to install by hand;
- Manufacturers place on top of a special laminating film, which can be decorated with various images and colors, which makes it possible to choose the model that best suits the style of the room;
- They keep heat well inside the room;
- Plastic tolerates moisture well and is not afraid of mold and fungi, which is especially important for indoor plant lovers;
- The surface is easy to clean;
- Thanks to the stiffening ribs, modern plastic window sills withstand mechanical stress;
- Temperature drops are not terrible;
- The characteristics of the plastic window sill do not deteriorate under prolonged exposure to sunlight.
However, despite the many advantages, PVC window sills also have a number of disadvantages:
- High temperatures on the surface, for example, the lid of a hot pot, can damage the product, causing deformations;
- Laminating decorative film is easily scratched, in addition, it can peel off over time;
- Artificial origin of the material.
And although PVC products have some drawbacks, however, most often the owners of apartments and houses choose it, performing their own installation of the window sill.
Stone board
Connoisseurs of the natural often give preference to stone windowsill boards. In most cases, this is used marble and granite... Of course, stone models are distinguished by their unique natural image on the surface and beauty in general, but this pleasure cannot be called cheap!
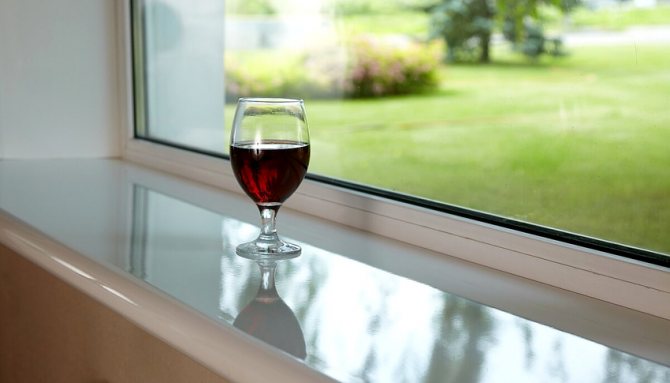
Along with this, you can easily put an ugly scratch on a carefully polished surface of a natural stone, their thermal insulation leaves much to be desired, and many dirt, be it tea, wine or coffee stains, are easily absorbed by the material. In addition, the large mass and cost of the material does not leave any chances for independent installation, forcing to hire professionals for this.
Window sill is considered a worthy alternative to natural material. made of artificial stone... It is made of acrylic and is not inferior to its natural counterpart in beauty, heat resistance and strength. An additional advantage of a stone acrylic window sill is that the surface is not scratched, and the product itself is much cheaper.
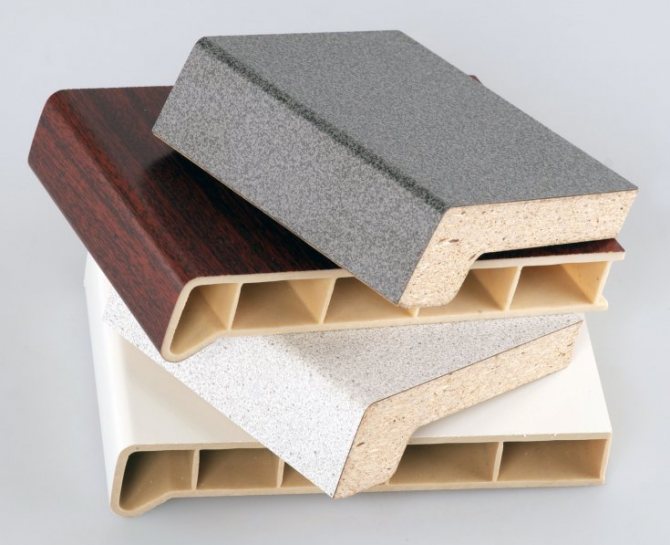
MDF and chipboard
Window sills made of chipboard and MDF panels remain a more budget option in comparison with wooden products. Many manufacturers make sill boards from fibreboard and chipboard. From above, such models are covered with a special film.
Chipboard is a less moisture resistant and durable material than MDF - if the protective film is damaged and moisture gets on the board from the shavings, the latter can begin to swell, which will lead to noticeable deformations of the window sill. MDF boards are more stable, but their price is higher.
Sill boards made of wood fiber and shavings are easy to clean, the main thing do not use abrasive products for this!
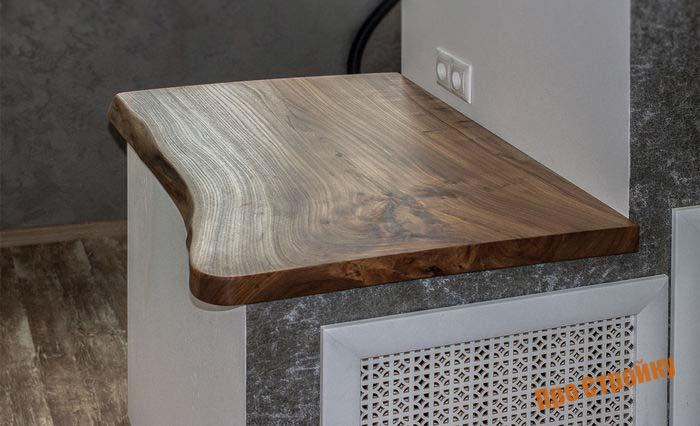
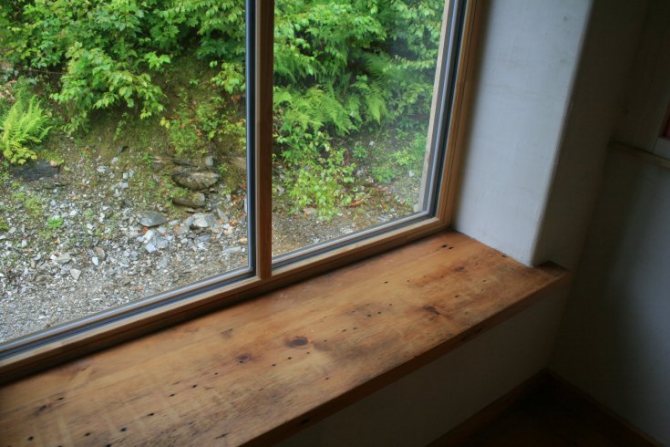
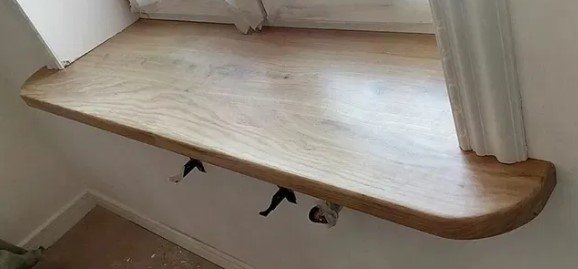
Made of wood
Such types of wood as pine, cherry and oak have long been the usual material for the production of windowsill boards. Wooden window sills remain very popular today.
Do-it-yourself installation of a wooden window sill begins with thorough drying and processing of the material varnish and antiseptic composition.
The main advantage of a wooden window sill is its noble appearance and natural origin. However, the wood mass is susceptible to deformation, and the material itself is not cheap. It will be possible to increase the performance characteristics of a wooden window sill if you avoid contact with aggressive chemicals, water and abrasives. In addition, it is worth updating the coverage from time to time!
Subject to compliance with all technological standards and requirements, window boards made of laminated veneer lumber are more resistant to negative external factors and a lower price tag.
Methods for installing a window sill on plastic windows
Before installing the plastic window sill, you should study the possible ways of installing the product.
All installation options are very reliable, they differ only in the way of fixing the window sill under the window frame
The oldest option for installing a window sill on a plastic window is to fix the product with a special compound. Today, this method is used extremely rarely due to the more convenient and reliable methods that have appeared.
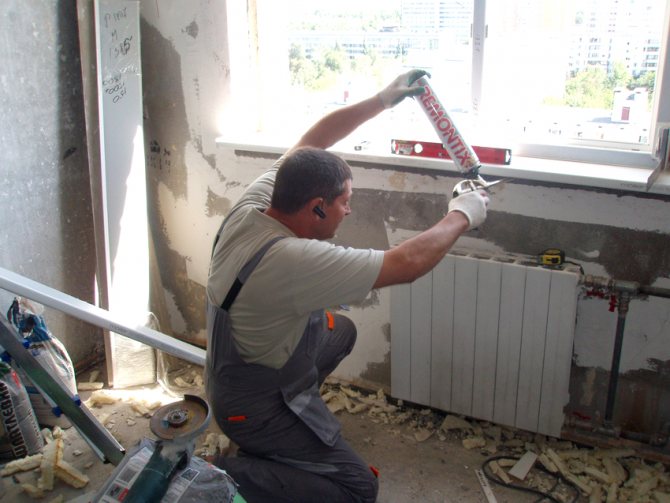
The easiest way is to install a PVC window sill with your own hands by using self-tapping screws. Previously, holes are made in the window frame where hardware must be screwed in. For greater tightness, the joints should be treated with an acrylic-based compound. To achieve maximum rigidity and reliability of the structure, during installation, special gaskets are placed under it, and the resulting gaps are filled with polyurethane foam.
Installation of the window sill can be carried out using spring metal brackets. These fasteners are fixed to the support profile by means of self-tapping screws. Then the PVC board is installed in the groove that has formed between the bracket and the window frame.
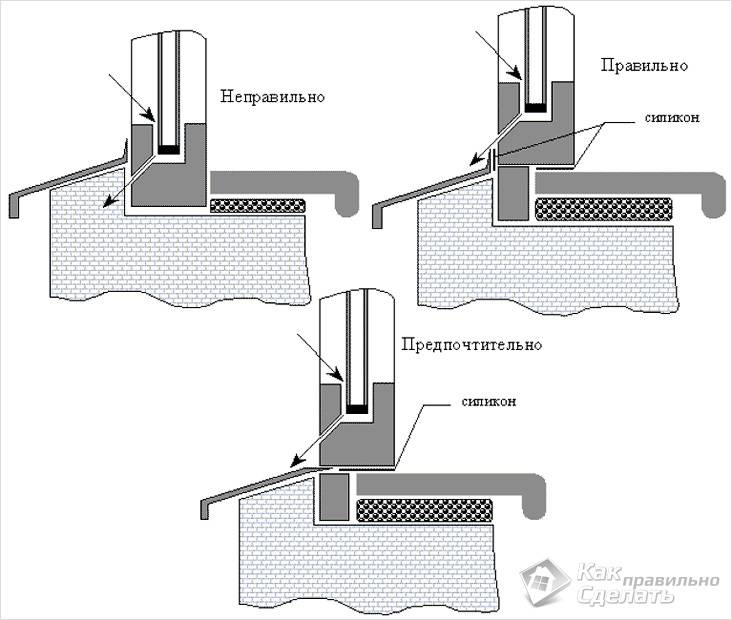
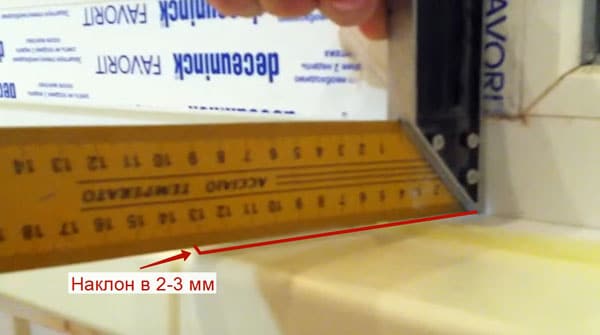
There is an option for installing a plastic window sill with your own hands, which does not involve the use of fasteners in the form of brackets and self-tapping screws. The plate is installed in the seat. Wooden wedges are driven under it until its surface is pressed as tightly as possible against the window frame. In this case, it is necessary to constantly check the level of the structure. The sill should have a slight slope towards the room in order to exclude the possibility of condensation entering the frame.
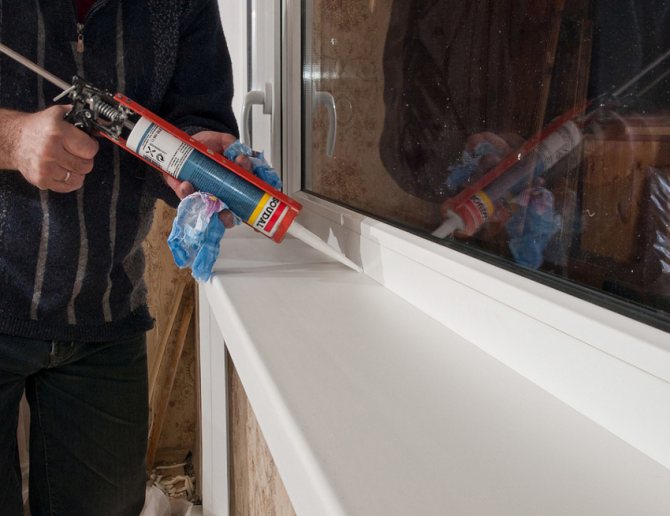
After installing the window sill, the gaps must be sealed with silicone
All the free space that has formed is filled with polyurethane foam. This type of installation is the longest, but it can be considered the most reliable.
Important! After blowing out the space under the window sill with polyurethane foam, it is necessary to install a weighting on the plate in order to create the necessary resistance at the moment of solidification of the material.
All window sill installation options have their pros and cons. They differ only in the method of fixing the product under the window frame, and all other stages are identical for them.


Workplace preparation
Whether you have completed the previous step or skipped it, in any case, it is necessary to carry out preparatory work at the workplace. And only after that you can learn further how to install a window sill on a plastic window. The essence of the preparation is to clean the surface of various debris. Serious indentations also need to be repaired.
Some experts may recommend screed construction. There is not much sense in this, the window sill will become perfect without it. If there is a great desire, you can level the surface with a screed.
How to install a wooden window sill on plastic windows and plastic structures are different processes. Naturally, we will have to consider these two options.
How to install a window sill: the preparatory stage
How to install the window sill correctly? First of all, it is required to prepare the tools necessary to ensure maximum efficiency of the work, and the component materials, thanks to which the installation process will be simple and convenient.
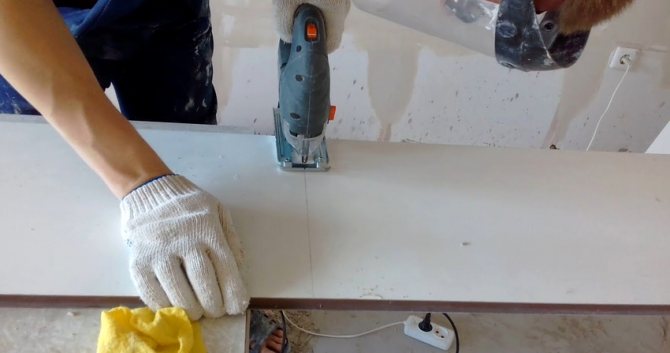
You can cut a plastic window sill with a jigsaw or a grinder
To install the window sill, you will need the PVC product itself, a corner, a building level, a marker with a tape measure, a sealant for joints and seams, polyurethane foam to fill the gaps between the plate and the wall, a jigsaw, a perforator, a screwdriver, screws, self-tapping screws.
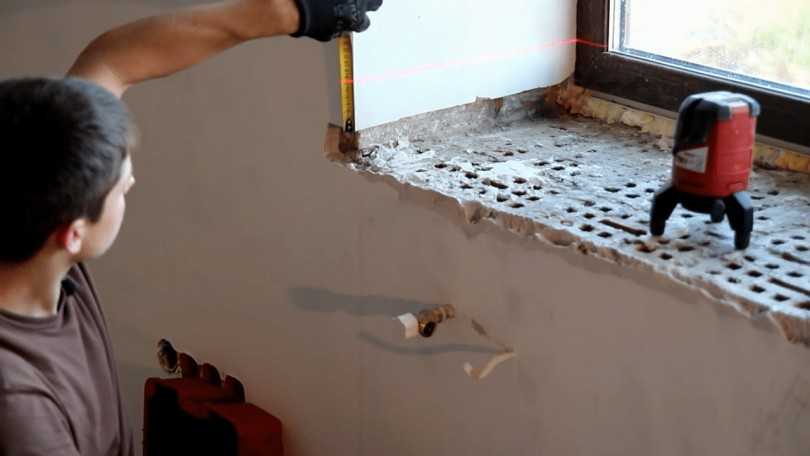
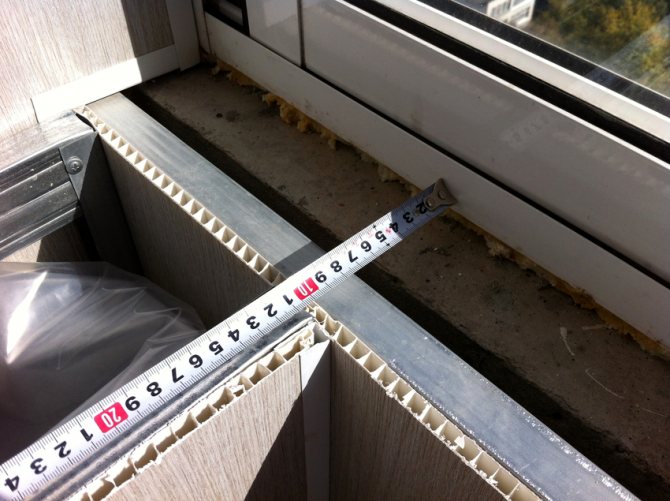
Many are interested in the question of how to install a window sill if the window is already standing. First of all, the necessary measurements are carried out. Carrying out this stage is extremely important, since the strength and appearance of the future structure will depend on the correctness of its implementation.
Related article:
Sizes of plastic window sills: how to choose the right option
What parameters are considered standard.Pros and cons of using PVC material. What to look for when buying, how to take measurements.
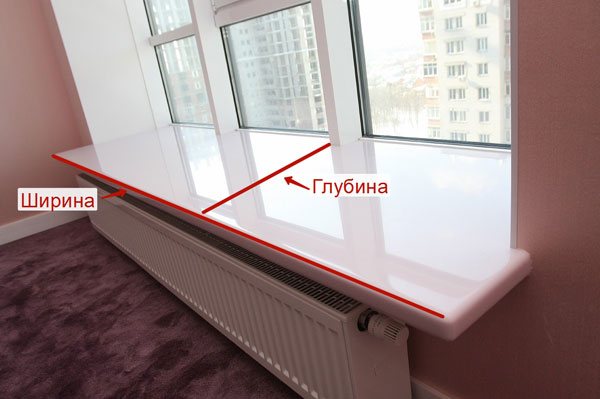
The length of the sill should be several centimeters longer than the distance between the side slopes. This is due to the fact that the product is wound 2-3 cm into the grooves made in the wall. The width of the product is selected taking into account its protrusion above the radiator, which is installed at the bottom. This value should not exceed 8 cm. Otherwise, hot air will not rise to the window from the radiator, which will cause condensation.
The distance between the window sill and the stove should also not be less than 10 cm. Otherwise, a closer location will cause a violation of air circulation, which will worsen the microclimate in the room.

The width of the window sill is selected taking into account the protrusion above the radiator
How to install a plastic window sill: taking measurements and preparing a window opening
Before placing the plastic window sill, the product is prepared according to the measurements. The required length and width are plotted on the slab using a marker. Then, using a jigsaw, the PVC structure is cut. Work must be carried out in goggles and work gloves, since plastic is a very fragile material, so small particles can fly out during intensive cutting.
The sawing process can also be carried out using a special hacksaw or grinder. In the first case, the process will be lengthy. Using a grinder, you can achieve perfectly smooth edges of the product.
Important! When cutting, do not put excessive pressure on the board, as this can lead to cracks and chips on the product.
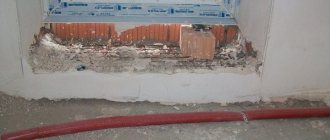
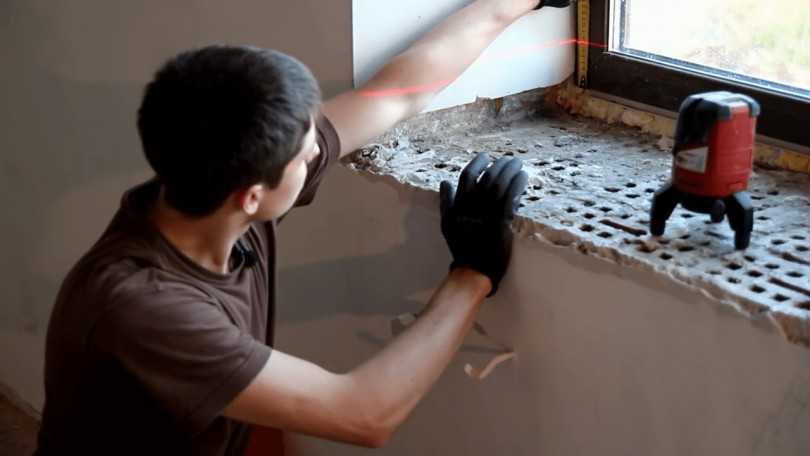
Before you properly install the plastic window sill, you need to prepare a seat for it. Since the structure is mounted with some entry into the side niches of the opening, it is necessary to make corresponding grooves for it on both sides in the wall. The process is carried out using a chisel and a hammer. The resulting openings are thoroughly cleaned of debris and primed.
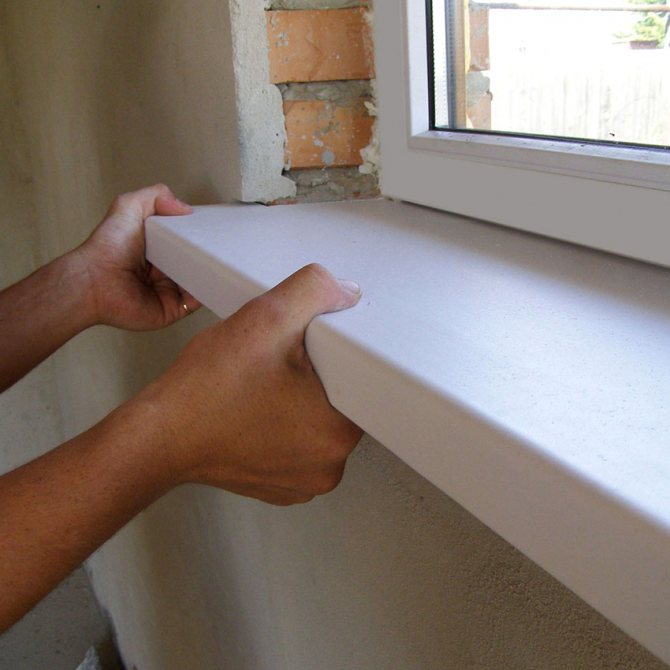
Before installing the plastic window sill, you need to saw it according to the measurements.
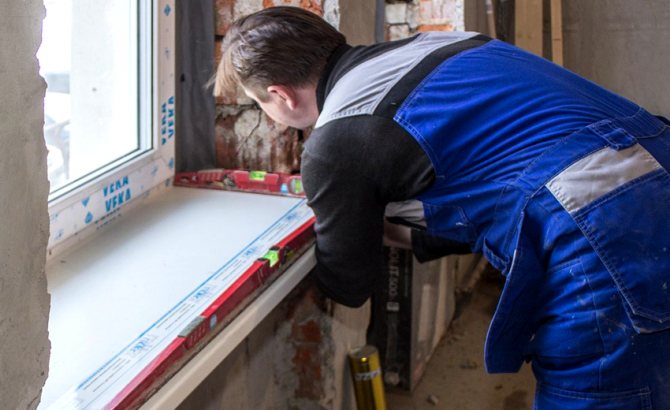
After that, special spacers or wedges must be attached to the window frame, which are fixed for reliability with gypsum mortar. The installation elements must be positioned in such a way that the required inclination is ensured. Then do-it-yourself installation of the window sill on the seat is carried out and it is checked how smooth and tight it becomes. If necessary, the edges of the structure are trimmed.
Important! The window sill should have a slope towards the room of 1-2 °.
The process of installing a window sill on a plastic window with your own hands
As mentioned earlier, there are several ways to fix the product when installing a plastic window sill. At this stage, the most popular and reliable option is being considered, involving the use of wooden spacers and polyurethane foam.
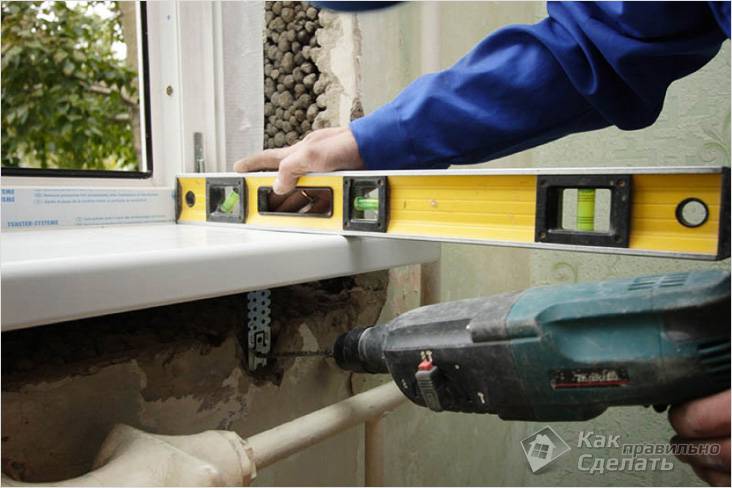
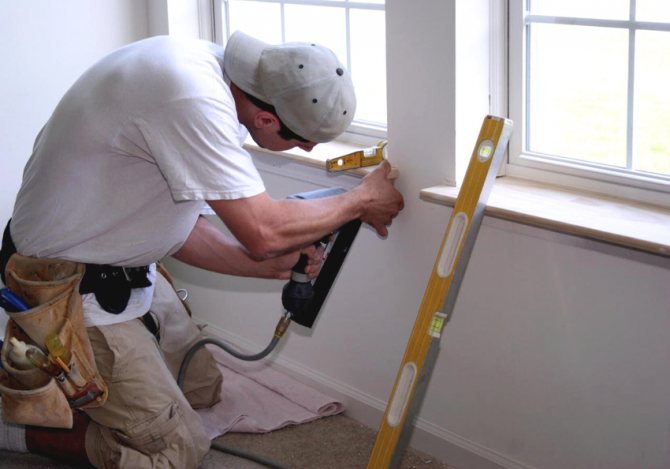
How to install a window sill without a support profile? The product is mounted on a prepared seat. Wooden beacons with a pitch of 80 cm are installed under the structure. They ensure the horizontal structure of the structure, which is controlled by the building level.
If you mount a window sill without a support profile, you will need to install wooden beacons
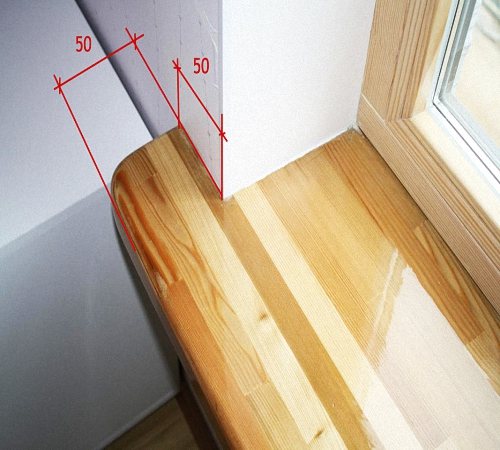
Wooden blocks are located under the slab at the front end, the distance between which should be about 50 cm. It is necessary to ensure that the supporting elements do not go beyond the plane of the wall. The distance between the wooden blocks and the side walls should not exceed 10 cm. Before placing the window sill, the horizontal position of the window sill is checked again.If the value does not correspond to the previously obtained result, the pads are adjusted in thickness.
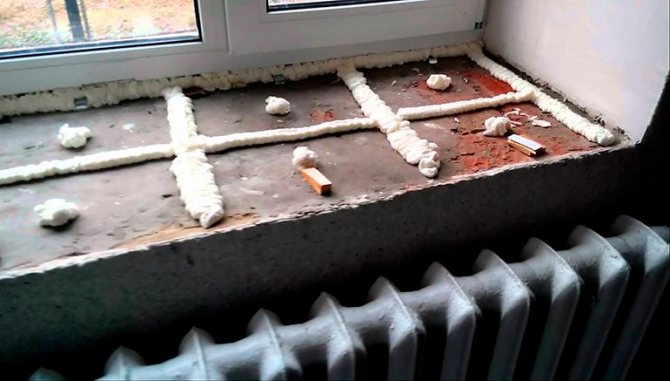
To pre-fix the window sill, the cavity between the slab and the concrete surface must be filled with polyurethane foam, a can of which is placed in warm water a few minutes before starting work. To prevent the binder from lifting the window sill at the time of expansion, a load is placed on the slab. Further, all the free space is thoroughly filled with foam.
Important! Do not overload the structure so that the window sill does not deform.
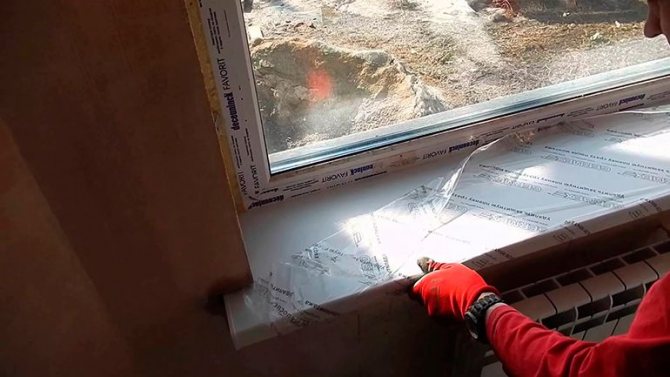
In this position, the window sill must be left alone for 2-3 days. Excess polyurethane foam should be removed with a clerical knife. If possible gaps are found, they are filled with acrylic sealant. At the end of the installation process, to give the structure a complete look, special plugs are mounted on the glue at its ends. After installing the window sill, you can start installing the slopes.
The window sill should have a slight slope towards the room
Fixing the window sill
If the plate is not fixed on the frame, then polyurethane foam is used. The surface to which the foam will be applied must be moistened with water for better adhesion. The window sill is installed in its place, and foam is blown out under it. Here you need to feel the measure. Excess foam will still find a way out.
An object weighing up to 20 kg should be placed on the windowsill. In this case, the foam will not be able to swell and squeeze out the plate in the middle. The stove will be in the pressed down position for at least 10 hours.
It remains to bring beauty (cut off the foam and put putty on the slopes) and be proud of yourself. We described how a window sill is installed on plastic windows, also made of plastic. A wooden structure was left without attention, the installation of which needs to be carried out a little differently.
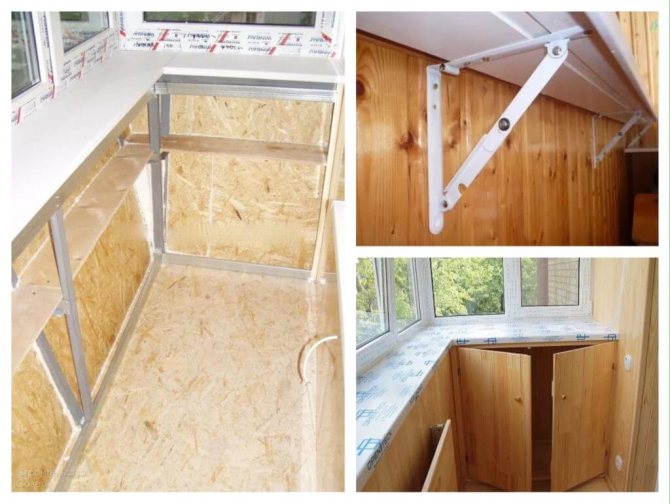
Installing a plastic window sill on the balcony
Modern balconies and loggias are actively glazed through the use of metal-plastic double-glazed windows. This process is accompanied by the installation of a PVC window sill. Installation of a window sill on a balcony is mainly performed at the time of glazing. However, this can be done later with your own hands. How to install a plastic window sill with your own hands so as not to regret the work done?
How to install a window sill on the balcony if the window is already standing? To do this, you need to prepare metal brackets. They are needed in the absence of the possibility of establishing a structure under the existing window. The metal brackets should be fixed to the parapet with anchors. These elements will help to strengthen the sill, which will lead to an increase in payloads.
The distance between the metal brackets should be no more than 1 m. Using a building level, check the horizontal position of the fasteners. Before fixing the holders, to simplify the installation process, the thread is pulled strictly horizontally.
After the brackets are fully fixed, the window sill is installed on the loggia or balcony. It is fixed at the bottom of the slab with self-tapping screws. After the completion of the installation process, the structure is treated with a sealant. The procedure is performed in order to get rid of cracks that form as a result of the presence of irregularities around the edges. You can familiarize yourself with the installation process in detail by watching the video "Installing a plastic window sill".
Polyurethane foam for filling voids after installing the window sill on the balcony is not used
Important! When installing a window sill on a balcony, unlike installation in a window opening, mounting foam is not used to fill the voids.
Installation work
The first step is cleaning. It is better to produce it with a construction vacuum cleaner, since brushes and brushes are not able to remove all dust.
Moisture is required for good adhesion of foam to other materials.Therefore, it is recommended to moisten the surface with water. But you can go further and kill two birds with one stone. You do not need to use water, but a primer. In this way it will be possible to remove the remaining dust, as well as provide the necessary moisture. It can be applied with a brush, but it is more convenient to do it with a hand spray. If you use the latter, then cover the windows with something or wipe them down immediately. If you let the impregnation dry, then then it will have to be removed with consequences.

Better to use a primer
The marking of the window sill is being carried out. Its total width will be the width of the opening plus 10 cm (this overlap is necessary to provide 5 cm for each "ear"). The depth will be equal to the distance from the window stand to the middle of the heater, if it is under the window. Better not to cover it completely. If you do this, then the warm air will not flow to the glass, and they will fog up, which will lead to the accumulation of condensation and the growth of mold and mildew. If there is no battery and radiator, then the overhang can be carried out by 5 cm. In some cases, at the request of the customer, an even larger protrusion is made. Perhaps the space will be used as an extension of the desktop or something else. In this case, it is necessary to install metal corners as props. Their base is embedded in the plaster. The length of the window sill is adjusted taking into account the fact that the edges will be recessed by 1 cm into the wall.
Features of installing PVC window sill
Using a hacksaw for metal or an electric jigsaw, trimming is carried out.
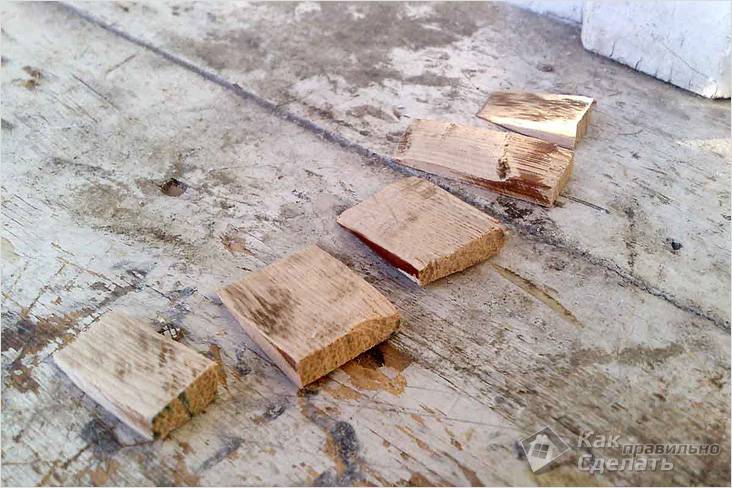
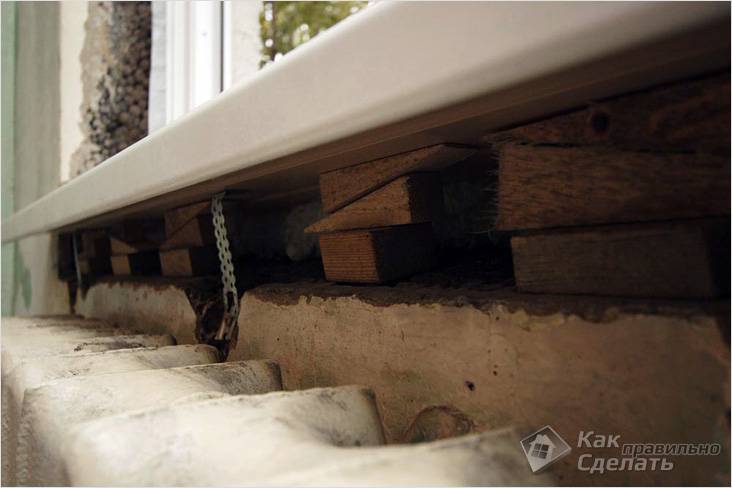
Wooden wedges for plastic windows
Next, you need to prepare the props on which the plane will lie. Special plastic plates are often used, but they may not provide the required rigidity. Instead, you can use parts of a trimmed window sill. It is worth placing them every 40‒50 cm. They are exposed using a building level or using a level (when using the latter, a line is projected and measurements are taken from it at two ends to the supports, the distance should be the same). Their height should be such that the window sill butt goes under the lower part of the frame and rests against the mounting bar. In order not to move them in the process, you can fix them with self-tapping screws. If the platform is made of aerated block, then you can simply screw it through with self-tapping screws, in the case of a brick, you will have to use dowel perforators.
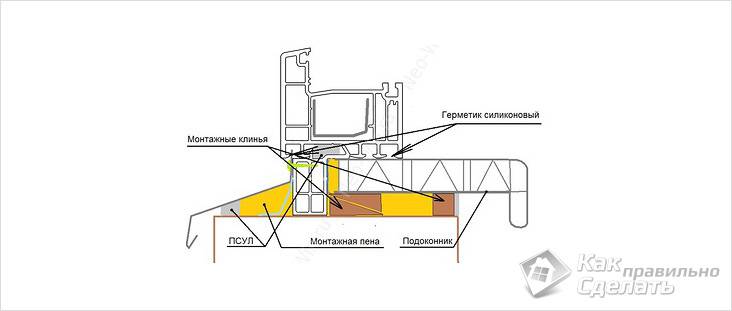
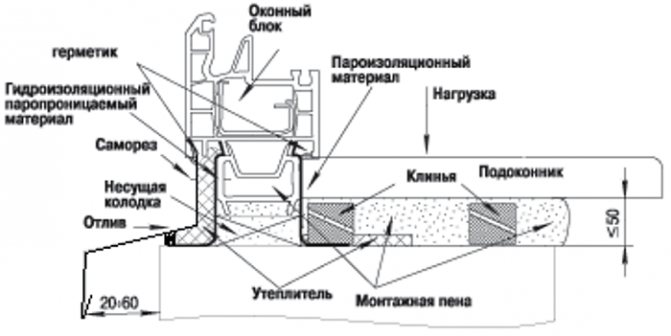
PVC window sill installation scheme
You can go the other way and install the props not across, but along the windowsill. They can be made from plaster beacons. In this case, there will be a greater emphasis, which will definitely exclude deflections and creases.
Sill alignment
With the help of a gun and polyurethane foam, the cracks, which may be under the window, are sealed. You need to be especially careful about the corners. There are times that everything is installed beautifully, and a draft blows from below, which is an indicator of carelessness.
Fixing
Plugs are mounted on the window sill, and it is tried on in its place. If there are no gaps between it and the window, then you can continue the installation. In the case when the gap is large enough, it is necessary to raise the props; at its minimum values, it can be expected that the foam will compensate for the gap. Until the repair is completely completed, you do not need to remove the film, it will be enough to lift it in those places that will hide in the wall and under the window.
Window sill bottom view
If the props were installed lengthwise, then the main layer of foam must be applied before the window sill is installed in its place. If across, then blowing can be done in several stages. Before installation - the part that is closer to the window. Then walk along the middle line, and then along the edge.
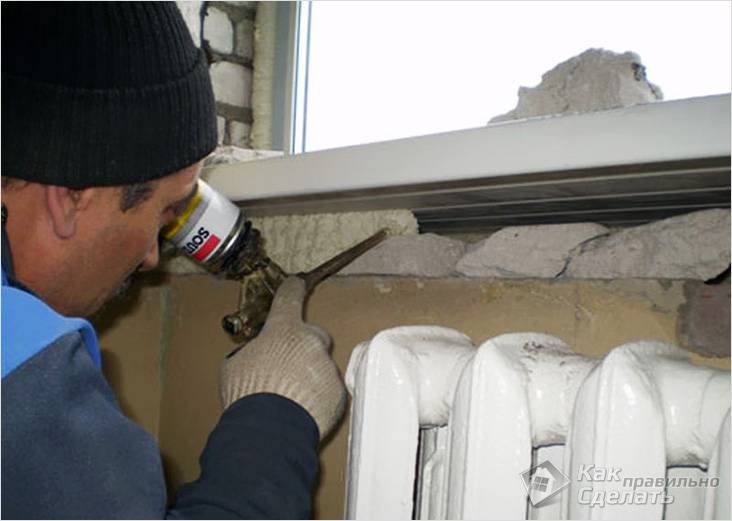
Fill the gap with polyurethane foam
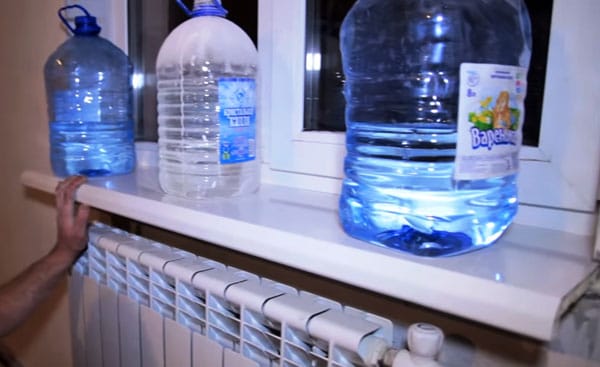
For a day, the plane must be pressed down with a load.To do this, you can use books, water bottles, dumbbells (but it is advisable to make a lining of durable material under them), etc.
Fixing a plastic window sill
After polymerization and drying of the foam, its excess is cut off. Moreover, under the windowsill, it must be cut flush by about 1 cm, so that you can safely putty this space and the applied material has a sufficient layer.
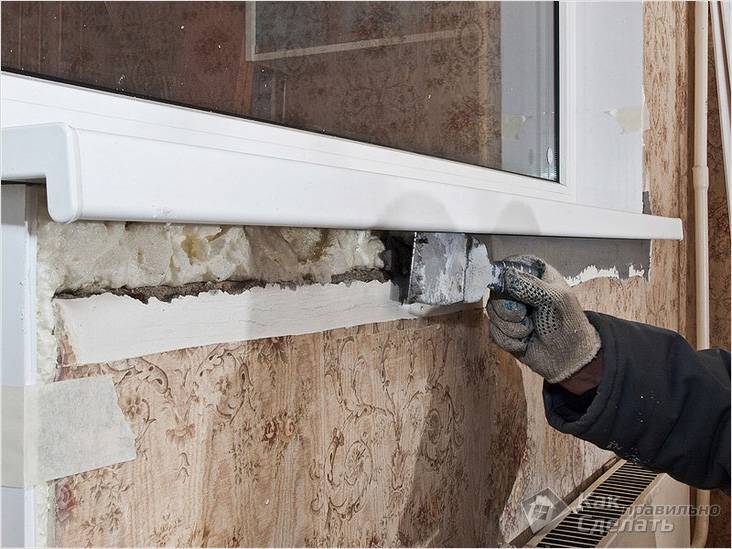
We close up the seam under the windowsill with cement putty
The procedure for replacing a plastic window sill
Over time, a PVC window sill can be damaged or lose its original appearance as a result of abrasions and ingrained dirt. In this case, it is important to know how to change the window sill.
Before removing the plastic window sill, preparatory measures are performed, which are determined by the type of slopes. They can be monolithic, that is, installed using plaster, or panel (made of PVC plates or sandwich panels). The window sill is mounted under the slopes, therefore, before removing it, they are partially or completely dismantled.
When using plastic slopes, the profile used to frame the corner is removed. Then the finishing panel is carefully opened, for which the sealant seam is pre-stitched. Further, the mounting foam is removed from the plane of the support rails, the junction of the edge of the structure is cleaned. This is necessary for easy removal of the window sill.
Before removing the plastic window sill, the slopes are partially dismantled
If the slopes are finished with plaster, to replace the plastic window sill, draw two horizontal lines along the edges of the opening with an offset of 25 mm from the top of the window sill. According to this marking, trimming is performed using a angle grinder with a diamond wheel. The process is carried out with the utmost care to avoid the possibility of damage to the frame. Using angle grinders, an undercut is carried out along the plane of the wall, the depth of which is equal to the width of the protrusion of the structure behind the slope.
Helpful advice! The installation depth of the window sill usually reaches 30-40 mm, therefore, to dismantle the slopes, you will need a circle of 180 mm.
Since the slab with the modern method of installation is not attached to the window frame or support profile, but is fixed with foam, it will be quite problematic to simply tear off the product. Before removing the window sill, the structure must be cut into fragments using a jigsaw. If the slab is planted on a cement mortar, an angle grinder should be used to separate the structure. Next, each element is removed from the footprint.
If the window sill has been fixed to the delivery profile, then the sill is removed from the outside of the window. Several screws must be unscrewed from the profile.
If the window sill was fixed with polyurethane foam during installation, it will be quite problematic to tear it off.
Installation process of wooden window sills
Some stages will coincide with those that have already been described, so we will not describe them in detail. The work is divided into the following stages.
- We mark the slab and arrange grooves in the wall. There are no differences in these processes.
- It is better to fix wooden window sills on the window frame, which can be replaced by the base profile under it. It is carried out similarly to the above description.
- From the side of the end, a damper tape is glued to the window sill. Thus, the difference between the indicators of plastic and wood (thermal and moisture expansion) will be compensated.
- The leveling of the slab is carried out again using wedges.
- Any wooden window sill has an impressive weight, so foam is not suitable for its installation. Better to use plaster mortar or cement with sand, which is applied to the wedges.
- We lay the plate on top, press it until it stops in the wedges.
- We remove the remnants of the solution, put putty on the slopes.
We told you how to properly install a window sill on plastic windows if it is made of wood. This method can be slightly modified to hedge yourself. The essence of the revision is to drive a long nail into the wedges. The nail should go through and peep out from above by a centimeter. Anchors are used to fix the wedges. In this case, the sill rests on the nails that stick out of the wedges. This method is more reliable, but requires utmost attention and careful verification of all parameters.
You know how the window sill is installed on plastic windows and nothing stands in the way of putting your knowledge into practice. Moreover, you even know how to repair the voids after installing the window under the windowsill. In addition to foam, insulation can be laid.
Methods of restoration and repair of a plastic window sill
With prolonged use, the slab loses its original appearance. The surface is heavily soiled, scratches and cracks can form on it, traces of hot objects, flower pots, stains from chemicals and sunlight can appear.
First of all, the question arises of how to wash the plastic windowsill from stains. Conventional detergents and cleaning agents can be used for this, but they do not always give the desired result. In this case, it is not necessary to change the design for a new product. There are several ways you can learn how to update a plastic window sill.
The PVC product is covered with a protective film that turns yellow or flakes over time. To correct this defect, you can use a special laminate wax or solvent-based plastic cleaner. The surface is covered with the selected composition, after which it is wiped with a dry soft cloth.
A great way to update a plastic window sill is restoration with a PVC lining.
To restore a window sill, on which small cracks and scratches have appeared, you can use specialized mixtures with a plastic effect. They are sold in powder form. After drying, the material acquires the same properties as plastic. A thick putty mixture is prepared from the powder and water, with which all visible defects are sealed.
Helpful advice! To achieve the maximum effect for the preparation of the finished composition, it is recommended to use a primer instead of water.
The ready-made solution is applied to visible damage. After that, you should wait 10-15 minutes and grind the sealed areas with sandpaper, and the surface can also be polished with a special agent for plastic.
To repair deep scratches, it is better to use liquid plastic, which penetrates the pores of the material and sets quickly. In order for the restored surface to have a uniform texture, it can be additionally pasted over with a self-adhesive decorative film.

To eliminate minor defects, you can use a special wax for the laminate.
How to make a window sill from an old slab and give it an aesthetic look
A simple and affordable way to restore a plastic window sill is to cover the surface with a laminated film. The material is presented in a wide range of colors, in a monochromatic design, and it can also imitate a variety of textures.
The surface is pre-leveled with a putty mixture. A film of the required size is cut with a margin of 3 cm at the edges. The self-adhesive product, after removing the inner layer, is evenly distributed over the entire surface, excluding the formation of bulges or waves.
Another option for solving the issue of how to update a plastic window sill is to restore it with a PVC lining, which can be used for slabs no more than 6 cm thick.This is a simple and economical way to quickly solve the problem with a swollen or cracked window sill.The cover is made of pure polyvinyl chloride, which is durable, moisture-resistant, UV-resistant.


The restoration begins with filling large cracks with glue, after which it is necessary to degrease the surface and spread it with an adhesive composition. An overlay of the required size is applied to the window sill and pressed down with a load. The surface should dry for 6 hours. The end edge is heated with a building hair dryer and bent over the shape of the window sill.
Important! In the case of using a glossy or laminated lining, heat treatment is not used, since the product will lose its attractive appearance.
Installing a window sill under a plastic window is a simple undertaking. However, in order to achieve a good result, it is important not only to choose the right product, but also to follow a certain algorithm for the implementation of installation work, which will be the key to a high-quality, durable and aesthetic window design.
Preparatory stage of work
Before proceeding directly to the installation, it is necessary to prepare the workplace. To do this, you will need the following materials and tools:
- level;
- jigsaw;
- roulette;
- hacksaw;
- pencil;
- polyurethane foam;
- foam gun;
- puncher;
- drills for a hammer drill;
- a hammer;
- chisel;
- wooden bars;
- bit.
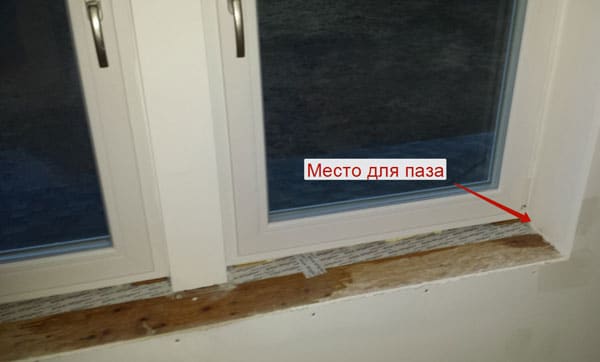
The window sill is installed so that it fits into the side wall, so it will be necessary to cut out connectors about two centimeters deep in the slopes.
To carry out this procedure, you need to attach a plastic window sill to the wall and make the appropriate marks on it with a marker, then carefully knock out the grooves. Such an operation requires maximum concentration and accuracy, otherwise it will take a long time to restore the slopes.
Important! In order to minimize damage on slopes, they should be handled with great care during the entire installation.
Next, we move on to making grooves. Consider two options:
- The slopes are made of gypsum plaster. In this case, the procedure can be carried out with a hammer or chisel.
- Concrete slopes. Then you can make recesses for a plastic window sill using a punch.
What window sills are most often used in wooden houses
In modern houses, window sills are installed of different types and they differ from each other in the way of installation and shape. The most common window sills are:
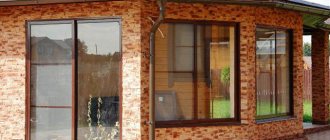
- With a wide canvas. The design can be up to half a meter in size. Install such window sills, combining them with the table top. A wide canvas is used in houses with thick walls. They are most often found in brick buildings. Since the walls of the timber are of medium thickness, the countertop window sill is rarely mounted in a wooden house.
- With a narrow canvas. This option is classic and is used in houses built from timber or solid logs. Most of all, it suits the windows in the attic.
- Formal windowsill. In this case, the element is completely replaced with a slope, which is plastered along with the walls and painted in the same color as the window frame. The owner can make a formal version with his own hands. The downside is that it cannot be used for any purpose. Such elements are made in brick and panel houses, but this option is also appropriate in wooden houses.
- With launch on the wall. In this case, the sill board is made wider than the window opening by several centimeters. This option was more often used in old wooden houses, but even now it has not lost its relevance.
- Without launching into the wall. Such designs are installed, wishing to save on material. But they look attractive on the window.
- Straight and curly types of canvas. A straight board as a window sill has been used for a long time. Therefore, this option is recognized as a classic, and is still used today.Curly options are performed as a decorative decoration of a window in a room.
The type of window sill depends on the material from which it will be made. Plastic and wood remain in demand. In addition to these materials, you can see the construction of:
- MDF;
- natural rocks;
- artificial stone;
- drywall;
- made of plaster;
- covered with ceramic tiles.
The consumer chooses the material for the window sill based on his budget. The cheapest are PVC and plastic. The advantages of PVC construction are the availability of the material at a low price. The product is easy and practical to install. But PVC window sills have a fragile structure, which is easily damaged by mechanical stress on the surface.
The plastic for the windowsills is covered with a layer of acrylic, which makes it resistant to high humidity in the room. The product is lightweight and easy to operate. Plastic has a low price, which increases its demand in the building materials market. It can be installed both in a brick and a wooden house.
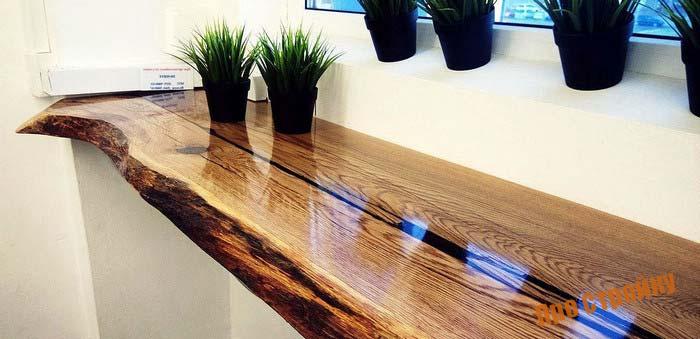
Wood is a popular material that has high strength and reliability in use. Its price is slightly higher than PVC and plastic. In addition, wood is an environmentally friendly material. Windows with wooden sills look original and emphasize the cozy atmosphere in the room.
Important! Wooden window sills go well with walls built from beams or logs.
To protect the product from moisture or damage by pests, its surface must be treated with substances that keep the wood from moisture, and covered with varnish or paint. Thus, the window sill will last much longer.
What tree is the best to make a window sill
Any type of wood can be used to make a canvas for a window sill, but at the same time, the intended purpose of the structure is taken into account, as well as in which room it will be installed. Hardwood is suitable for rooms where frequent changes in temperature and humidity are permissible. Such a product will last a long time. The only drawback is the high price of the material. An oak board will be a reliable stand for indoor flower pots.
Important! Coniferous wood is a cheaper material. Their main advantage is that the products do not need to be treated with antiseptics.
Larch is a cheap material, but it has a number of advantages:
- the tree of this species has a pleasant shade corresponding to the hard varieties;
- has all the properties obtained from conifers and does not need to be treated with antiseptic substances.
Due to all these qualities, larch material is in high demand in the building materials market.
A board for a window sill in a wooden house is selected according to the following indicators:
- The integrity of the material. When viewed from all sides of the board, there should be no wood chips, cracks and knots. In addition, there should be no signs of pest damage.
- Choose tree species that have a strong wood structure. The best material would be a board made from oak, beech or hornbeam. The second place in hardness is deservedly taken by larch, pine, chestnut, cedar. Boards made of these types of wood have an original pattern.
- The texture and color of the wood. Each wood species has an individual structure and color. Only the buyer decides which option to choose.
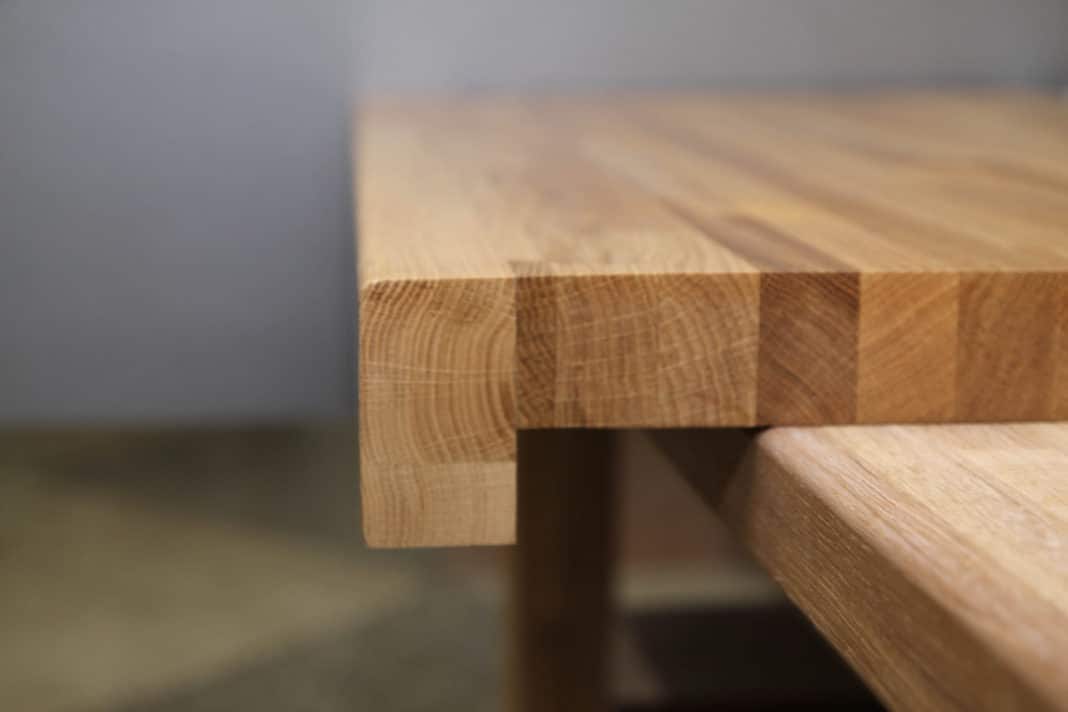
Oak plank sill
Oak material for the windowsill is made from a solid board. Oak sawdust is used for the manufacture of glued timber, laminated chipboard and MDF. Despite the fact that glued material is much cheaper than solid material, it has an important advantage, which is resistance to deformation under the influence of moisture. Chipboard and MDF have the same qualities, but are even cheaper.
For the manufacture of budget versions of the product, wood is crushed, pressed and covered with laminate.By creating such a material, the manufacturer increases the number of textures and colors. Thanks to this, the window sill can be imitated in marble, stone. The surface will be both matte and glossy.
When choosing a material for a structure, you need to determine the purpose for which it will be used. In addition, the canvas must fit into the overall design of the room.
Installation of slopes
For proper installation of slopes, they also need to be measured using a construction tape. The material for these window elements can be one of the following:
- Plastering. These slopes are budget-friendly, since they require regular maintenance and painting. Another disadvantage is the possible formation of cold bridges. However, many are attracted by the speed of work and the low price of all costs;
- Plasterboard. The installation of these slopes can also be attributed to dusty work, since after them a major cleaning of the apartment will be required. Window elements are installed on an adhesive binder. In this case, the slope and the outer edge of the opening should be smeared with a continuous layer;
- Plastic. They are the most in demand, since their operation is extremely simple. They are also warmer than the first option, since they ensure the tightness of the structure. All necessary elements are sold in one kit with detailed instructions for self-installation.
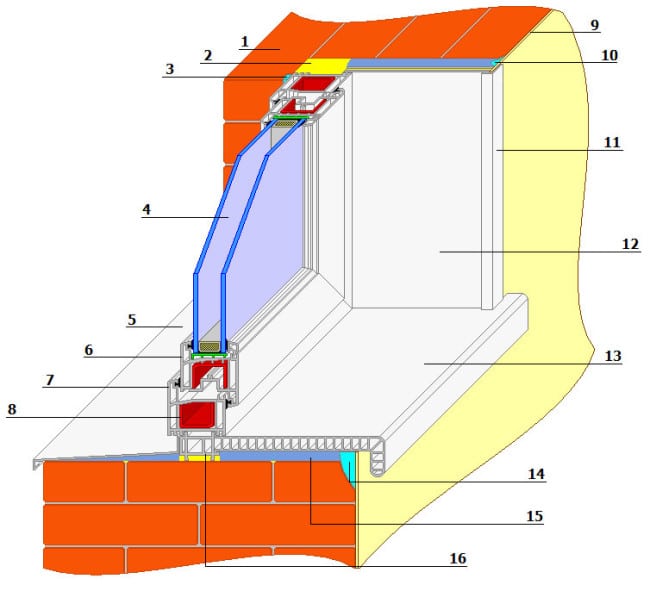
Window slope in vertical section: on the example of installation according to one of the technologies
After determining the material, you should select the type of slope - with or without slope. In particular, in wooden buildings, it is necessary to cut off the end part in order to establish oblique slopes. Then the surface is sanded and covered with a layer of polyurethane foam. The latter is fixed with liquid nails. Then the slope is decorated with a sealant.
It is quite possible to carry out the installation of the window sill and slopes with your own hands if you know the sequence of all stages. Before installing these window elements in the opening of a wooden or frame structure, it is necessary to decide on the material and take all measurements. The window sill is installed first, and then the slopes.
Fastening a window sill to a plastic window
DIY PVC window sill installation: tips and tricks
A window sill is an indispensable element of any window opening, performing both decorative and, in many cases, practical function... After all, this is one of those places where flower pots or other small household items are often located.
In the past, openings were most often decorated with wooden products, and with the advent of plastic windows, window sills began to occupy places in the interior. from similar material.
Advantages and disadvantages of PVC products
To the benefits products include the following properties:
- the material is not afraid of moisture and temperature changes;
- It does not require special care;
- the design is lightweight;
- does not require periodic touch-up, and is also not subject to shrinkage and warping, unlike wooden products;
- the window sill can be installed in any length, width and shape.
- plastic is inferior in strength to the same wooden products;
- when using a glossy decorative film as a coating, the window sill is easily scratched and its appearance deteriorates;
- Hot objects placed inadvertently (for example, a saucepan or frying pan removed from the fire) can significantly damage the surface.
Installation methods
Do-it-yourself installation of a plastic window sill can be done in one of several ways:
- Using a special solution. This method was often used in the past, now, thanks to the emergence of new technologies. it is practically not used.
- Using spring brackets... which are screwed to the substitute profile with self-tapping screws, and the window sill itself is installed in the groove between the window and the bracket.
- With self-tapping screws. This is the fastest way in which the window sill is attached to the window frame with self-tapping screws.
- Another option is to install a window sill without any fasteners (staples, screws). This is the most time-consuming method, but at the same time the most reliable. The window sill is fixed with wedges, which are driven under it, thereby tightly pressing the edges of the slab to the frame.
- sill and end caps to connect the panels;
- a cylinder of polyurethane foam and a gun for working with it;
- puncher;
- silicone sealant ;
- level, tape measure, pencil or marker;
- jigsaw or grinder;
- stationery knife;
- cement mortar.
Required tools and materials
In order to change the window sill, you need to prepare a small set of tools and materials:
This process is not complicated and is carried out as follows. Along the ends of the slab and along the entire length of the slope a niche is hollowed out using a puncher.
After that you need pry the stove with a pry bar or knock it down with a hammer. The sill freed in this way is carefully removed from the niche.
For details on dismantling, see the video:
Preparation of the base
At this stage of preparation, the first thing you need to do is clean the bottom of the window opening from the debris left after dismantling the old window sill. After that, you need to adjust the dimensions of the niche to the new slab.
If its thickness is less than that of the old product, a cement screed should be laid along the horizontal base of the niche, if it is more, part of the surface should be cut off with a perforator and after that level it with cement mortar.
There should be a gap of about 2 cm between the window sill and the base for fixing the product with polyurethane foam.
The grooves in the side slopes are also fitted. if necessary.
A layer of silicone sealant is applied along the width of the window at the place of the future fit of the window sill to the frame. This is done for the purpose prevent cavities... through which cold can seep into the room.
And also read everything about finishing window slopes in our article.
Installation work
After the base is ready, you need to measure the niche and in accordance with the received dimensions cut out the window sill from a pre-purchased plastic blank using a jigsaw or grinder.
Next, the plate is installed in its place and wedge with wooden wedges... After that, it is necessary to check the horizontalness of the window sill with a building level.
If necessary, the thickness of the wedges is increased or decreased. The installation of the window sill must be carried out taking into account the fact that the slab should have a slight slope towards the room (1-2 degrees). This will allow condensation and water from watering plants to drain to the floor, thereby liquid will not collect under the stove.
After fixing the window sill, the space between it and the base is blown out with polyurethane foam. For better fixation, the plate can be evenly press down with a weight .
As cargo, you can put 3-4 liters of water bottles. In this position the structure is left for 2-3 days... so that the foam solidifies well, and then remove its excess with a clerical knife.
It is advisable not to overload the window sill, as in this case its surface may deform.
How to seal up the foam under the windowsill?
This can be done in one of two ways:
Learn how to properly seal the foam with a solution from the video:
Useful Tips
A few points to consider when installing a window sill.
Working with a hammer drill is desirable use personal protective equipment (glasses, mittens).
The window sill should not protrude beyond the slope line more than 6 cm... otherwise, air circulation may be impaired, leading to fogging of the windows.
Polyurethane foam will stick much better... if the surface with which it will contact, pre-moisten.
Having familiarized yourself with how to replace the PVC window sill, we can conclude that this the procedure does not require professional skills and a special tool.
The main thing in this matter is to be attentive and do not make a mistake with the dimensions when trimming plates. Therefore, the rule "measure seven times, cut once" is more than appropriate in this case.
How to repair a window sill - all the secrets of installation, see the video:
How to install a window sill with your own hands - installation instructions and nuances
Window installation companies often don't follow through. And the customer has a bare window opening that needs finishing. But it also happens that in order to save money, a person himself takes on the installation of a window sill board. Then the question arises - how to install the window sill so that it holds firmly and does not freeze through. It also depends on the correct installation whether there will be condensation on the windows, and therefore mold. Read the manual below carefully before starting work!
Content
PVC panels for window sills are the leader in terms of sales. And for good reason! After all, their technical characteristics give a large number of advantages during installation.
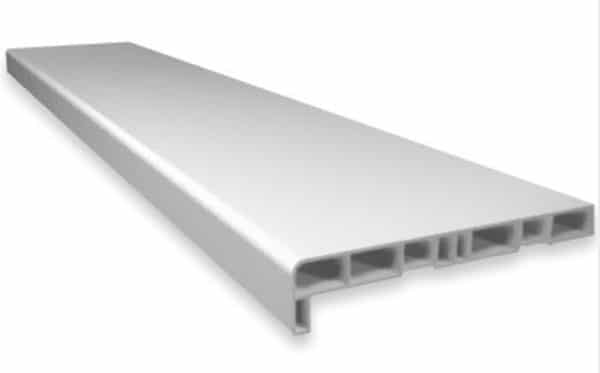
The panel has stiffening ribs
Do-it-yourself installation of a plastic window sill has the following advantages:
Video: How to install a window sill with your own hands
Before you buy and install a PVC window sill, carefully study its certificate. What you should pay attention to:
- for the PVC content (it should be at least 50%, better - 60%);
- on the percentage of chalk content (permissible no more than 5%);
- the thickness of the stiffeners must be at least 1.2 cm and not more than 3.5 cm;
- the thickness of the panel itself is from 2 cm.

PVC panel "wood grain"
The most durable panels are produced by Germany. The second place is shared by Russia.
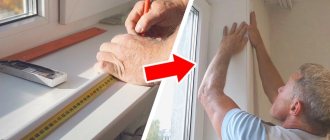
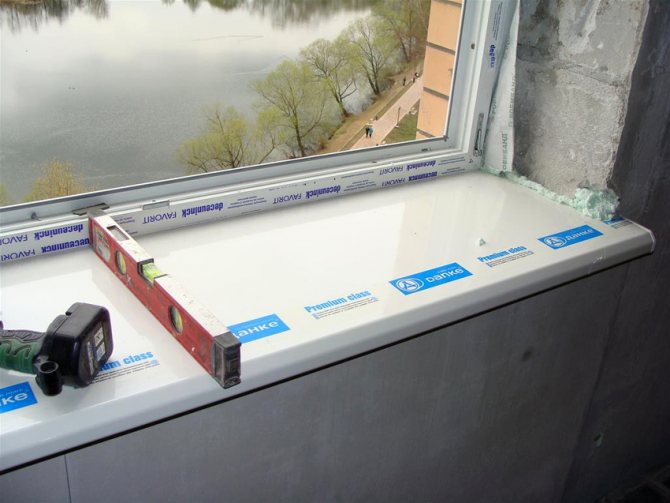
Do-it-yourself installation of a plastic window sill should begin with careful measurement. How to choose the optimal parameters? Focusing on the following conditions:
Measurements should be taken from the concrete base.
Advice! When measuring the depth, add 15 mm for the overhang and 50 mm for the overhang. These are the optimal sizes of the window sill.
- install at least 10 cm from the radiator (battery);
- the panel overhang should not overlap the heating source by more than ⅔;
- the window sill should not be at an angle of 90 ° to the window - an inclination inside the room of at least 1 ° is required.
The correct sequence of work and adherence to technical nuances is a guarantee of the quality of the window sill. The process of attaching to a plastic window is not complicated and does not take much time.
At what stage of the repair is the installation of a plastic window sill most appropriate? The correct answer is immediately after installing the windows, before finishing the interior slopes.
If you install it later, the slopes will have to be partially or completely redone. Indeed, for installation, you will need to select grooves in the slopes. It is not recommended to remove the protective film from the plastic board before the end of all repair work.
Advice! When installing the window sill, the protective coating must not be completely removed. But only in those places where the panel fits into the grooves (near the frame and on the sides). If this is not done right away, it will be difficult to remove the film completely.
Slope for installation in slopes
How to properly install a window sill on plastic windows:
Advice! If, during priming, part of the liquid gets on the glass, wipe it off immediately. Since, when solidified, the composition forms a film that is difficult to remove.
Base profile - 16
How to put a window sill to a plastic window:
How to prevent foam squeezing
How to install window sills on plastic windows - skill secrets:
Attention! The most vulnerable is the back of the window sill. It is she who has the entire load during window cleaning. Therefore, a tight hold-down is necessary to increase the strength of the structure.

Directional blowing of glass
The classic way to install a plastic window sill on a loggia is based on the following rule. The window sill should be installed last. As a result, in order to do this efficiently, a lot of measurements and adjustments are required. This leads to a colossal loss of time and energy.
The Spanish method reduces the installation time by 4 times! And make the structural strength 2 times higher. What is its essence? The fact that the window sill should be installed at the very beginning. And already from it, fasten the guides. This significantly reduces the number of measurements.
The step-by-step installation process looks like this.
Screw 51 mm self-tapping screws into the plastic frame at a distance of 3 mm from the bottom edge of the special support profile.

Screwing in the clamping screws
Install a window sill between the screws and the frame. How to attach a window sill to a plastic window? Fix it to the frame with 71 mm self-tapping screws at an angle in several places. The depth of entry of self-tapping screws is 1–2 mm. This is necessary to prevent the structure from falling out.
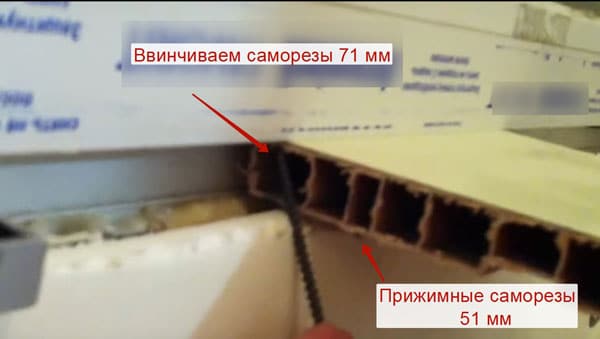
Fastening the window sill to the frame
On the lower part of the plastic board, attach the upper rail from a bar 40 mm wide. Fix it with 51 mm self-tapping screws. The distance from the "spout" of the window sill to the upper rail is 8 mm. This distance is necessary for the installation of the cladding panels.
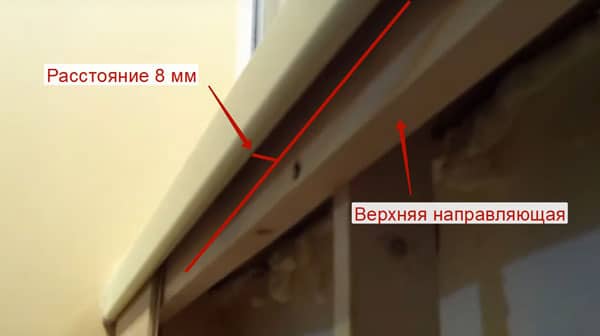
Installing the top rail
Install the lower guide using a plumb line. Grab it with self-tapping screws to the floor along the edges. Align the bottom rail with a level and fix it with self-tapping screws to the floor in 50 cm increments.
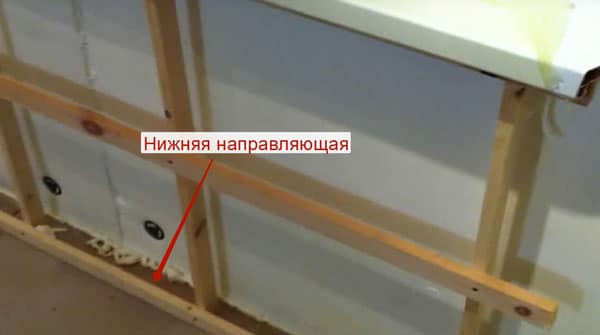
Installing the bottom rail
Attach the vertical guides (planks) to the top and bottom rails.
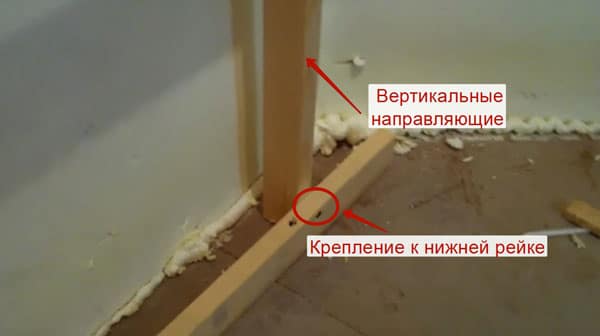
Fixation of vertical battens
Align the board with a square (at 90 ° or tilted inward 2–3 mm from the level). Screw in the screws 71 mm to the end.
Aligning the window sill with a square
Attach the middle rail to the vertical planks.
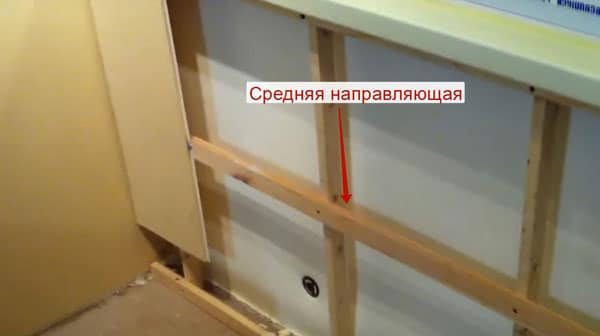
Fixing the middle frame
It is quite possible to save on the purchase of a plastic panel! To do this, you can go in the following ways:
Advice! For growing flowers on a wooden structure, it is better to use special overlays. They can be glued to wood.
Making a window with your own hands is both simple and difficult at the same time. On the one hand, this does not require serious skills and a special tool. On the other hand, it will be quite difficult to correct the mistakes made. Therefore, it is better to entrust the installation of the window sill board to professionals!
Did you like the article? share it on social media. networks
How to correctly install a plastic window sill?
- Tools Required for Installation
- Basic installation technologies
- The main stages of installation
- Basic installation rules
In recent years, plastic has firmly entered our lives. It is used in various fields.
The installation and replacement technology is absolutely simple, however, if you decide to do it yourself, you need to clarify how to install a plastic window sill.
A plastic window sill is an integral part when installing a plastic window.
Today, more than ever, windows made of metal-plastic have become popular, and with them accompanying elements such as a window sill.
The final stage of installing a plastic window is the installation of the window sill.
The window sill, as a rule, is installed together with the window, and this installation is often carried out by those specialists who were engaged in the installation of the entire window.
Tools Required for Installation
To the list of basic tools that you will need to install a plastic window sill with your own hands. include the following:
- circular saw or jigsaw;
- polyurethane foam;
- level;
- pencil;
- roulette.
Back to the table of contents
Basic installation technologies
There are several basic methods by which you can carry out the installation of a window sill with your own hands.
Window sill mounting tools.
The first and one of the most traditional is fixing the product with a special solution. However, this method is practically not used by modern craftsmen due to the fact that there are newer and simpler methods.
One of these most common methods is fixing on self-tapping screws. Using this method, holes are made in the frame into which all the parts are screwed.
The connection point must be treated with silicone sealant. The edge of the window sill is wound under the frame and is also fixed with self-tapping screws.
The second most popular method of installing a plastic window sill is its installation using metal spring brackets. They must be screwed to the profile using self-tapping screws. The product is installed in the groove formed between the bracket and the frame.
The third and no less popular method of mounting this type of window sill is installation on special linings. This method is characterized by the absence of screws or staples.
Back to the table of contents
The main stages of installation
When you have decided on the installation method, figured out how to properly install the plastic window sill, and have prepared all the necessary materials and tools, you can proceed with the installation.
Window sill measurement scheme.
At the preparatory stage, you need to make all the necessary measurements. This issue should be approached with all responsibility, since the strength of the structure completely depends on the correctness of the measurements. Often, with incorrect measurements, you have to completely redo all the work.
When making measurements, it should be remembered that the length of the window sill must necessarily be greater than the length of the window itself, but the width can be any. The average width of a window sill is considered to be a width that does not go beyond 8 cm.
Consider the distance to the battery, which is located under the windowsill.Leaving a very small space between them, you can disrupt the movement of air, which will negatively affect the heating of the room.
When all measurements are completed, you can proceed to the second stage - trimming the window sill.
This stage is relevant if the dimensions of the finished product do not correspond to the required ones, but in some cases trimming may not be necessary.
If you need to remove the excess in width, it should be done on the side that will be attached to the wall. In order not to disrupt the construction of the window sill, it is necessary to outline a straight line along which you should cut.
Sill installation diagrams when using a stand profile.
This line should go behind the stiffeners at a distance of approximately 1 cm. Then the window sill will rigidly dock with the frame and will not bend inward at the junction, which will surely happen if the stiffeners are broken.
Pruning is done with a jigsaw or saw.
The lining will be laid on the bars pre-installed under the windowsill, which will take on the main load from the windowsill. In order for it to be securely and firmly installed, this entire structure must fit snugly against the frame.
At the same stage, it is necessary to cut out the lower part of the slopes, and the wedges for mounting the window sill must be fixed.
The fourth step is the direct installation of the product.
At this stage, keep in mind that the distance between the slopes should be less than the length of the window sill. It should enter the slopes with a distance of a couple of centimeters. The protrusion of the sill should not exceed 5 cm, then the air from the battery can rise to the window, which will ensure the absence of condensation.
Installation of PVC window sill.
After inserting the window sill into the slopes, it is necessary to clean and expose it. The window sill is exposed with the help of beacons with a step of 60-80 cm. When it is correctly exposed, you can fix it with polyurethane foam.
The product must be left for a couple of days so that it can dry out, after which the excess foam is cut off with a sharpened knife.
When, after treatment with foam, there are still gaps, it is necessary to additionally process them with silicone sealant.
After installing the product, plastic plugs are put on it, which are attached to special glue.
Back to the table of contents
Basic installation rules
Firstly, if the removal of the product inside the room relative to the wall exceeds 10 cm, then the entire structure must be reinforced with metal corners. This will help give the edges of the product the necessary rigidity. However, it is not worth overloading the edge of the window sill. This can easily deform it.
Secondly, a spring bracket, fixed with self-tapping screws and placed in 20 cm increments, will help to achieve complete adhesion of the window sill to the wall.
Thirdly, when installing a window sill on the balcony, it must be remembered that its exit from the door frame should not exceed 1.5 cm and in no case should it overlap the corner.
Fourthly, it is imperative to install support blocks if the distance between the profile and the wall is more than 15 cm. This will help to avoid deflection of the product.
Fifth, when the window sill is mounted on the balcony, before installing it, it is necessary to let it stand for some time in a room with a temperature of about 18-20 degrees.

Showcase okna body
- How to put a window sill to a plastic window How to properly install a window sill on a plastic window? Which wallpaper is better to choose - vinyl or non-woven? ...
Functions performed by the window sill
A competently assembled structure will solve many problems in the house. The main functions that the window sill performs are:
- Protection of the room from the penetration of cold air into the room through the cracks in the window block. For this, the sill board must be correctly installed in compliance with all dimensions.
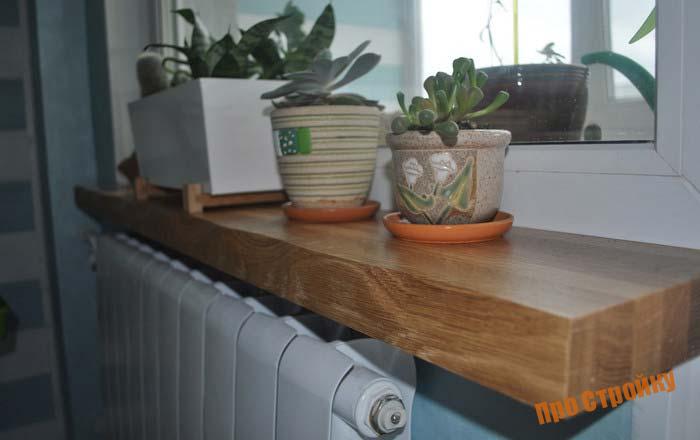
- Shelf for small light items. You can put flowerpots or other decorative elements of the interior on it.
- An additional place to work. In new homes, window sills are made much wider than before and are used as countertops. Here you can set up a computer, lay out books and other writing items.
- Completion of the decor. The window will look thanks to the slopes and the window sill.
Each of these functions in a wooden house will be fulfilled if the work is done efficiently.