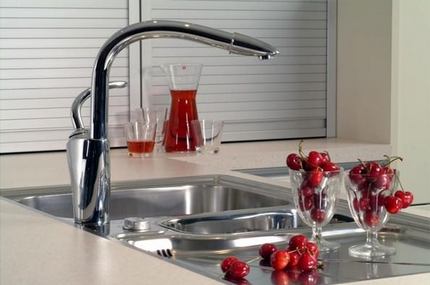
Today, apartments are equipped with mixers of various designs, including ball valves. They are more reliable than simple sealed valves, but they do break from time to time. It is quite possible to repair a ball valve with your own hands, although the design of such a mixer differs markedly from the usual design of a crane with rubber gaskets. Consider the order in which the repair should be carried out.
Almost every home craftsman with minimal plumbing experience knows how to change the gaskets in the tap. There is nothing difficult in performing this work, just unscrew a couple of nuts, remove the old gasket and install a new one in its place.
If a ball valve is installed on the kitchen sink or in the bathroom, then when doing repairs with your own hands this device will have to sweat. But if the master is well prepared and understands the design of the mechanism in advance, then the work will not require significant effort.
Possible malfunctions of ball valves and their causes
If the tap is leaking, then, first of all, it is necessary to find out the cause of the malfunction.
- Damage to the case. Such a malfunction is typical for inexpensive models, the body of which is made not of brass, but of silumin. This material is quite brittle, therefore, it can crack upon impact or other mechanical stress. Such cracks may not be noticeable at first glance, but over time, the body will burst at the site of damage and the tap will begin to let water through.
Advice! If the body of the mixer is damaged, then as an emergency repair measure, we can recommend a "cold welding" putty on the gap. But this will not help for long, so the mixer will need to be replaced in the near future.
Advice! With inexpensive mixers, clogging is often caused by wear and tear on the O-rings. Therefore, when performing repairs, it is necessary not only to clean the hole, but also to change the seal.
- If the water from the tap comes with a poor pressure, under the condition of normal operation of the water supply system, then the reason for this is most likely a clogged shutter.
Advice! To avoid blockages, it is recommended to install filters - in the water inlet to the house or on the pipe supplying water to the sink (washbasin).
Reasons why the ball valve is leaking
Ball valve device diagram.
If everything is more or less clear and understandable with conventional valve valves, then problems can arise with ball valves. Such a tap leaks for completely different reasons. Having found out why it is leaking, it will be easier to fix the problem quickly. A conventional valve often leaks due to a worn gasket or gland. And the repair of such cranes does not cause any particular difficulties for most men. But by design, the ball valve does not have gaskets and gaskets. That doesn't mean it doesn't leak, though! It's just that the reasons for the leak, and therefore the repair methods, are different from valve taps. Therefore, after opening the mixer, and not finding the gaskets there, many are confused and do not know what to do next.
The most common problems with ball valves, if you do not take into account factory defects and mechanical damage, are leaks, the problem of temperature control, as well as a weakening of the pressure.
If the faucet leaks, then the reason may be the ingress of garbage, which is more than enough in the kitchen, into the cartridge or the failure of any part of the system.This can be a crack in the body, and clogging of the cartridge, and clogging of the aerator, and wear of the gaskets on the spool. All these faults require repair. And you need to prepare for it, and you should also carefully follow the instructions, since the internal structure of the ball valve is extremely fragile and easily damaged.
Carrying out repairs
To carry out repairs, you need to have a certain set of tools.
Instrument preparation
A home craftsman should have on hand:
- Hollow screwdriver;
- Pliers;
- Adjustable wrench;
- Hexagonal socket wrench;
- A hammer.
- Means for instant rust remover (like "Liquid Key");
- Special silicone grease for sanitary ware (odorless and toxic).
Dismantling work
Any repair begins with the disassembly of the crane. The work goes like this:
Carrying out repairs
After the valve is disassembled, you will need to carefully inspect it, clean all cavities and replace worn parts. As a rule, these are the already mentioned seals with springs. In addition, sometimes the tie bolts are damaged, in which case they must also be replaced. When buying new bolts, you need to carefully monitor that they are exactly the same size as the old ones, otherwise the repair work will not give a positive result.
If in the process of work blockages are revealed, then it will be necessary to thoroughly clean all cavities. The mixer has its own filter (a small mesh installed in front of the ball), but if the quality of the water supplied through the pipes is not high enough, it will not save the day.
Therefore, it is recommended to install additional filters on the pipes. These preventive measures will significantly increase the life of the ball mixers. If, during inspection, severe wear and corrosion of the ball is noticed, then it is better to replace this part entirely. After the repair, the crane is assembled and the final check of its operability is carried out.
Ball mixers can be repaired by yourself. Beginners should not only read, but also see how the ball valve is being repaired - a video with a detailed description of the process can be found on relevant sites.
Our habit of solving small everyday problems on our own is ineradicable. And it's not even about saving finances, although they are never superfluous. There is something very attractive and understandable in living in an interior that is not only lovingly conceived, but also independently embodied. But the repair of modern plumbing fixtures, done by hand, can be complicated by the variety of designs of the same mixers. Today we will show you how to disassemble and repair a ball mixer. This will help you not to resort to professional help if you can fix the problem yourself.
Until recently, there was no alternative to the valve mixer. And so, with the advent of the single-lever mixer with a ball switch, users were faced with a choice: which tap to prefer? It turned out that it is the spherical structure that is in high demand. This is explained by the remarkable performance characteristics of this type of mixers.
Another undoubted advantage of the ball mixer is its modern and attractive appearance: it can easily fit into any interior
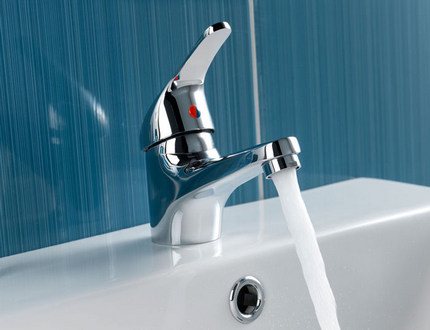
It is very convenient to use a new tap. You do not have to twist anything to set the required temperature and water pressure. Simply put the lever in the desired position. This elementary procedure is performed automatically over time.
Those who have long preferred this particular design know roughly what position the rotary handle should be in so that both the pressure and the water temperature are as comfortable as possible for a variety of purposes.For beginners, it is useful to know that the water pressure is regulated by moving the handle up and down, and the temperature - left and right.
The ball mixer is very functional: it is easy to adjust it to the pressure and temperature you need with one movement of your hand
In addition, it is believed that there is no more reliable ball mixer.
What is good about a ball valve?
Until recently, there was no alternative to the valve mixer. And so, with the advent of the single-lever mixer with a ball switch, users were faced with a choice: which tap to prefer? It turned out that it is the spherical structure that is in high demand. This is explained by the remarkable performance characteristics of this type of mixers.
It is very convenient to use a new tap. You do not have to twist anything to set the required temperature and water pressure. Simply put the lever in the desired position. This elementary procedure is performed automatically over time.
Those who have long preferred this particular design know roughly what position the rotary handle should be in so that both the pressure and the water temperature are as comfortable as possible for a variety of purposes. For beginners, it is useful to know that the water pressure is regulated by moving the handle up and down, and the temperature - left and right.
In addition, it is believed that there is no more reliable ball mixer.
Single lever mixer design with ball switch
Alas, modern mixers, like their valve assemblies, fail from time to time. Indeed, in their production, the same materials are used: metal, rubber and plastic, which can wear out during operation or under the influence of external factors.
To repair a ball valve, you need to understand its device and be able to dismantle it if necessary. The ball device includes:
- rotary handle; At its core, it is a lever that is sometimes called a "butterfly."
- stock; The stem seal is adjusted with a nut and washer, which are also included.
- body with nut; Inside this body, the ball cartridge and stem are located.
- ball cartridge; It is secured with rubber saddles.
A ball cartridge is a non-separable element with three holes: for incoming cold and hot water and for outputting mixed water of the required temperature and pressure from the device.
The operation algorithm of a crane of this design is quite simple:
- when the lever is lifted, the ball starts to rotate;
- the holes in the ball cartridge begin to line up with those in the seats;
- depending on the area of coincidence of these holes, the jet pressure changes.
If you handle the mixer with care, without exerting excessive forces where they are not needed, products of this design can serve without failure for a long time. Nevertheless, the following breakdowns can be called typical for them:
- When the lever is in the blocking position, the flow of water from the tap does not stop.
- A defective ball mixer provides too little water pressure, despite the fact that the pressure in your home's water system has not dropped, which can be checked by opening other taps.
- The regulation of the water temperature in the mixers was violated: it is impossible to achieve the desired parameters, since the mixing of hot and cold streams occurs in a chaotic mode.
A fairly common malfunction of the ball mixer is manifested by water leakage when the device itself is in the blocking position
Before proceeding with the repair, you should understand what is the cause of the malfunction, which manifested itself in one of the above ways.
DIY repair of a single-lever mixer: stages of work
When suddenly there are problems with the mixer, this does not mean that you need to immediately call the plumber. You can make repairs to a single-lever mixer with your own hands. To do this, you just need to understand the features of this device and have the necessary tool at hand.
Articulated faucet - the best option for the kitchen and bathroom
As you know, the mixer is designed so that you can mix cold and hot water and set the desired temperature. One of the popular models today is the single swing handle design. They are called mono-command, articulated and even joysticks.
The long service life is due to the absence of metal rubbing parts. Almost all the wear parts that are so common in a conventional mixer are replaced here with ceramic parts, which are processed with great precision. It is only badly affected by abrasive particles. Therefore, in new models, the filter is often installed directly into the mixer itself. But it is still better to provide good cleaning directly at the water inlet.
Single lever mixer device
They also appeal with their modern design. The body is distinguished by smooth lines and transitions. They are often finished with chrome, nickel or colored coatings such as black gold.
With one slight turn, you can adjust both the water pressure and the temperature. Simplicity is complemented by reliability and ease of use. Therefore, knowing the device of a single-lever mixer, it will be possible to quickly repair it. The main component is the cartridge. Therefore, most often it is necessary to replace this particular element. But first you need to figure out what such a device is directly:
- handle or lever for easy control;
- the adjustment stem is fixed with a nut and washer;
- inside the body is a ball valve or ceramic cartridge with three holes. The stable position is due to the rubber seats;
- there are also adjustment and steam collars and an adjustment ring.
The causes of malfunctions may be different, but if the cartridge is not damaged, then repairing the mixer will not take much time. This will depend in part on where it was installed.
Single-lever mixers - causes of breakage
Despite the fact that such mixers are of two types, the causes of breakdown are often similar, although there is some difference:
Articulated faucet for kitchen
- a ball valve mechanism is considered to be more reliable. However, over time, the steel ball corrodes. Teflon seals and gaskets will also wear out and then water will seep out. They can be quickly replaced. However, if the ball itself is cracked, then you will need to buy a new one;
- The ceramic disc cartridge is resistant to rust and hard water. A single-lever kitchen faucet like this will last for many years. The structure itself consists of thin plates that are carefully fitted to each other. The gap is hundredths of a millimeter, so trapped debris or a grain of sand can cause chipping and breakage. In this case, it will also be necessary to make a replacement;
- a blockage sometimes deforms the rubber seat and the valve itself. Therefore, you will need to disassemble, clean and replace the rubber;
- a loose lever will cause water seepage. To stop this, it is enough just to tighten all connections well;
- a small crack in the housing itself can be repaired with a sealant. If this fails, then it is better to find another mixer.
A common cause of malfunctions lies in the water itself, or rather, its hardness. Even a conventional cleaning filter will allow a single lever bathroom mixer to last much longer and without breakdowns.
Mixer repair: procedure
Before starting work, it is necessary to close the valves for hot and cold water, after which it is necessary to open the tap and drain the existing water.You can also cover the sink to avoid damaging it.
The algorithm of actions is as follows:
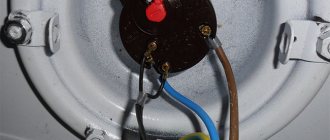
- using a screwdriver, you can remove the decorative plug and unscrew the screw that fixes the control lever;
- the lever must be removed very carefully, since for some models you will have to make a little effort;
- now you can see the dome of the crane and the plastic eccentric. Below it is the cartridge. Only such a decorative cap sometimes has to be unscrewed. It is better to do this by hand, since it is made from plastic or thin metal;
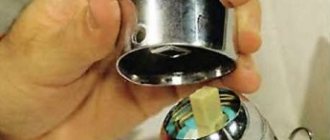
- all that remains is to remove the ball and make sure it does not crack. To get to the ceramic cartridge, you will have to remove the retaining nut. To do this, you need a Swedish adjustable wrench. In the event of a breakdown of the cartridge, you will have to buy a new one. It is very important here not to be mistaken with the choice, otherwise the replacement simply will not succeed due to the different shapes and sizes, since each manufacturer makes its own small changes; Disassembly of a mixer with one valve
- most often you have to deal with seals. They are sold both individually and as a set. The general rule is that the gasket diameter is slightly larger than the socket diameter. It will be very important to carefully tighten the nuts, as misalignment will lead to premature wear and water seepage. The springs that hold the ball valve in place are also best replaced with new ones. The old ones are usually not as resilient;
- if water leaks directly under the spout, then it will be necessary to remove it and replace the old sealing rings with new ones;
- rubber seats can often get clogged too. They must be thoroughly wiped with a rag. You can even wash off the dirt a little with a little water pressure;
- after cleaning and replacing the seals, which would be nice to lubricate with plumbing grease, all that remains is to thoroughly clean the seat nest from rust and small debris, as well as the overflow holes. Installing a new cartridge is carried out in reverse order.
Types of malfunctions
There is a space between the ball cartridge and the rubber seats that hold the element in place. Clogging is the most common cause of ball valve failure. Even a seemingly insignificant speck can lead to a violation of the tightness of the connection. As a result, the rubber seat may deform, causing the ball mount to become unusable.
Another common breakdown is clogging of the shutter. As such, repairs are not needed in this case. This problem is solved by simply cleaning the plumbing fixture. True, for this, the crane will have to be disassembled. But then, when you collect it, everything will be in order again.
Water may seep out from under the knob cap. In this case, tighten the connection. If the flow of water stopped, then the reason for it was hidden precisely in the loose connection.
A clogged aerator leads to insufficient water pressure flowing from the mixer spout, this malfunction is corrected by simply cleaning the aerator itself or replacing it
The easiest way to solve the problem is the clogging of the aerator. It is he who can become an obstacle to creating a normal water pressure. If you remove the aerator and try to run water without it, then by changing the pressure it will become clear whether the aerator was the cause of the malfunction. The aerator can be rinsed and replaced. Or you can simply change it to a new one, as they do in the event of a complete failure of this part.
O-rings can also wear out. In this case, water may seep out from under the base of the tap. Such a malfunction is eliminated by replacing the failed seals. Before starting work, we shut off the water supply, after which we remove the mixer, disconnecting it from the inlets and unscrewing the nut fixing it.The worn out gasket is replaced with a product of the same diameter. If the gasket is selected correctly, it will be forced into place. It remains only to assemble the crane.
The only breakdown in which you have to completely change the mixer is a crack in its body: even if the ball switch is mechanically damaged, only this element can be replaced
The situation is worse if the ball cartridge itself is broken. It can crack and, alas, then it cannot be repaired. We'll have to simply replace it with a new one. You will have to act in the same way in case of mechanical damage to the mixer body. Repair it to no purpose. It's easier to buy and install a new tap. If you are unable to replace the valve immediately, you can use a sealant to temporarily stop the leak, but remember that the device needs to be replaced. And the faster the better.
Most often, problems arise due to the increased hardness of the water circulating in your water supply system. And the type of mixer you use doesn't really matter. In order not to change the mixers indefinitely, you should install a filter that purifies the water. Even a coarse cleaning device is able to block those particles that cause major breakdowns in plumbing fixtures.
We start repair work
Let's say that all precautions have been taken, but still repairing the ball valve of your mixer is inevitable. You can, of course, invite a plumber to fix the ball mixer. But it's better to try to do this work yourself. There is nothing super complicated in it. Just heed our advice.
To carry out repair work, you will need tools, which must be prepared in advance so that they are at hand.
No special tools are required to carry out repair work with a faulty ball mixer: all these items are sure to be present in the arsenal of any home craftsman.
- adjustable wrench;
- a hex key of a suitable size;
- a screwdriver that can be used as needed and like a thin needle;
- pliers;
- flashlight.
To begin with, you should turn off the hot and cold water supply, otherwise your manipulations with plumbing fixtures can lead to a flood. Do not forget that there may be residual water in the tap, which should also be drained. Before starting work, you need to close the sink with a rag. This measure will protect her from possible damage.
Now you can start dismantling the mixer.
At the initial stage of repair work, remove the decorative plug with the image of hot and cold water, it closes access to the screw that secures the lever
The sequence of work in this case is as follows:
- There should be a decorative plug on the mixer body, which will have to be removed.
- There is a hole under the plug through which you can reach the screw holding the mixer arm. This screw should be unscrewed.
- The lever is now free and can be removed. If the crane has been installed for a long time, and no one has unscrewed it, considerable effort may be required at this stage. It is important to proceed with caution and not damage anything.
- So, the dome of the crane and the eccentric located under it, made of plastic, became available to us. Both parts need to be removed. Below them is a ball cartridge. All contamination that can be found during the dismantling process must be carefully removed.
- The ball switch is removed from the mixer. It must be examined from all sides. As mentioned earlier, if damage was found on this one, it must be replaced with a new one. Sealing the cracks on the ball is useless.
- We examine the rubber seals.They can lose elasticity or simply wear out. In place of the expired seals, you need to put new ones. The elements holding the ball switch are also better replaced. If they have worked for a long time, then this should be done even simply for preventive purposes.
Plumbing gaskets are consumables: they often fail and have to be changed; If you have to buy a new pad, take the old one with you so you don't get the wrong size
It remains only to assemble the mixer. This should be done in reverse order.
You can get more information about the repair from this video:
If you did everything correctly, the mixer should now work properly again. However, the leak can be under the spout, which is also called a spout or gander. Then you will have to remove the spout and replace the old O-rings with new ones.
Particular attention should be paid to the faucet if you have an old plumbing in your house. In this case, rust particles and other contaminants can clog the holes in the switch, through which hot and cold water flows. These blockages can be cleaned with a cloth or hands. Such a procedure should be performed periodically, even just for preventive purposes.
Another problem that may be of concern to ball valve owners is the annoying noise generated when opening the water. It occurs due to vibration generated by air and water currents. Due to its effect on rubber seals, they can also begin to vibrate. To avoid this effect, you can reduce the water pressure, install a filter, or achieve a tighter fit of the rubber gaskets.
Outwardly, a silumin mixer looks no worse than any other model, but such products rarely last more than a year; You can distinguish them by weight: silumin is very light
The service life of a ball mixer is influenced not only by external factors, but also by the material from which the valve itself is made. There are often cheap models on sale that are made from silumin - an alloy of silicon and aluminum. They are short-lived, but great for training lovers to do everything with their own hands. And for a long and trouble-free service, it is better to choose a more expensive, but also reliable model.
How to repair a ball faucet in a bathroom
This type of malfunction of the bathroom faucet, which we want to tell you about, is quite common. Therefore, we decided to consider this type of repair of a ball mixer in the bathroom with our own hands in this article. So, we are trying to switch the water from the faucet spout to the shower, but the switch lever spontaneously switches over. It turns out that the water flows from the spout normally, but it is impossible to put it into the shower.
Ball mixers are often used in the bathroom, they can also be repaired on their own; Typically, this repair is limited to replacing the top or bottom gasket.
We will try to find the cause of the malfunction ourselves. In this case, you will have to act at random, since there may be several reasons for such a malfunction.
The initial sequence of actions is as follows:
- unscrew the union nut, and then remove the hose;
- remove the upper gasket, after prying it with a thin knitting needle;
- we replace the newly removed gasket with a new one, moistening it with water before installing;
- we assemble the mixer, bringing it to its original working position.
If the upper gasket was the cause of the breakdown, then, with its replacement, the malfunction will be eliminated. If we are mistaken, then it's okay: gaskets are consumables, sooner or later they should be replaced anyway.
Shower still not working? Then we will deal with the bottom gasket.
For this:
- we shut off hot and cold water;
- remove the flexible hose;
- after that comes the turn of the adapter, spout and switch lever: we must also remove them;
- now you have access to the eccentric, which must also be removed;
- the spool should be next: we will also dismantle it;
- and here is the ring of the lower gasket, remove it and replace it with a new one;
- the mixer is assembled in the reverse order of dismantling.
Before heading to the store for new pads, be sure to check if you yourself have a stock of these consumables. Usually several spare parts of this type are included in the mixer package. If there are no gaskets or they are lost, then they can be made independently, using hard rubber 3-4 mm thick for this purpose.
To properly repair the mixer and not forget anything, this video will help you:
A coupling ball valve is often assembled by the manufacturer in such a way that its body is difficult to disassemble. Those. it is assembled in two parts on a threaded connection with the use of a strong hold sealant in the thread. As a result, it is very difficult to untwist such a connection in a domestic environment. In fact, the crane is considered not collapsible, but in the event of a breakdown, it must be changed entirely.
But nothing is impossible. To untwist the ball valve (threaded connection), you can do the following. Clamp the body in a vise, heat the body in the area of connection with the coupling with a gas burner until it darkens slightly, and unscrew the coupling with a suitable powerful wrench.
Thus, access to the ball valve and the seals between which it is located is obtained. This is the main point related to the repair of a coupling ball valve.
Another question is whether there are seals suitable for this particular crane model that need to be inserted to replace the damaged ones? If so, then you can start repairing the coupling ball valve.
Design
The ball valve has a fairly simple design and a minimum of details. To understand how to disassemble and how to repair the ball valve, just look at the picture presented here.
The following details:
- Housing.
- Seals in the body (two seals in the form of Teflon rings between which there is a ball-valve).
- Ball valve with a through hole located between the seals (seats).
- Ball valve control rod.
- Seals, bearing and stoppers on the control rod.
- Handle with fastening elements.
Disassembly sequence
- Unscrew the handle mount (bolt or nut), remove the handle;
- We unscrew the valve body with a large key;
- We take out the seal-saddle, ball valve, and one more seal-saddle;
- We take out the stem retaining ring (unscrew the stem nut), take out the seals, the bearing (if any), and then the stem itself;
The actual disassembly of the ball valve is complete. Now we inspect all the details. True, without proper experience, it can be difficult to determine the nature of the damage. But mainly the seals and possibly the ball valve are changing. If there are spare parts, we assemble the ball valve in the reverse order, inserting the necessary parts into their places.
How to repair
You can find out what parts it consists of, how the ball valve is disassembled and repaired from the video presented
Types of malfunctions
- Incomplete water shut-off.
- Leakage of liquid along the handle stem.
- Tight rotation of the handle.
Causes of breakdowns
- The ball valve or its parts are not made of standard materials. Simply, - we have a fake. In this case, there is definitely no point in repairing the crane, it is much more profitable to replace it.
- The supply of a chemically aggressive liquid to the valve, which has damaged the seals.
- Supply to the tap of a liquid contaminated with a high concentration of abrasive substances. Seals and valve ball are damaged.
The most important engineering system in every home is the plumbing.
With its help, hot and cold water is supplied to our homes.
To mix both streams of liquid to a comfortable temperature for consumers, a special technical device called a mixer is installed in the kitchen or bathroom.
Just like any other mechanism or device, mixers tend to break down. They sometimes become clogged and stop functioning normally.
Each owner in the house, if he considers himself as such, should be able to cope with the simple work of repairing plumbing equipment.
Ball mixer malfunctions
If you handle the mixer with care, without exerting excessive forces where they are not needed, products of this design can serve without failure for a long time. Nevertheless, the following breakdowns can be called typical for them:
- When the lever is in the blocking position, the flow of water from the tap does not stop.
- A defective ball mixer provides too little water pressure, despite the fact that the pressure in your home's water system has not dropped, which can be checked by opening other taps.
- The regulation of the water temperature in the mixers was violated: it is impossible to achieve the desired parameters, since the mixing of hot and cold streams occurs in a chaotic mode.
Before proceeding with the repair, you should understand what is the cause of the malfunction, which manifested itself in one of the above ways.
Types of mixers
There are three types of mixers:
- single-lever,
- valve,
- ball.
In this article we will talk about the most common type - the ball type of construction. The mechanism itself is quite simple - just a single swing arm.
When it is up or down, the water pressure is adjusted, and by turning the knob to the left or right, the water temperature is coordinated.
Due to the simplicity of the device, such mixers are considered the most reliable and economical.
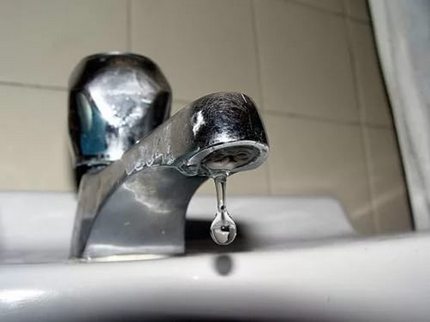
If you have to hear the annoying, monotonous sound of water dripping from the tap every day, this means that the tap has become unusable and needs to be repaired or replaced.
The faucet is considered to be such an important element of plumbing equipment that its damage requires your immediate attention.
The reasons for the occurrence of breakdowns may be the following reasons:
- the occurrence of tap leaks,
- reducing the volume of water flow,
- leakage of liquid from under the valve.
If you find at least one of the above signs, the product must be disassembled.
Do you want not only to dismantle the crane yourself, but also to try to fix the problem, and then also to assemble it correctly?
To do this, you need to thoroughly know the mixer device.
.
If you have information as to what components this device consists of, then you can insure yourself against errors and significantly reduce the time for its repair.
The difference between a ball valve and a conventional one
Having appeared relatively recently on the domestic market, the ball valve has become one of the most common mixer designs today. The ball valve has successfully taken root in everyday life and is used both in the kitchen and in the bathrooms. As you know, nothing lasts forever, so even such a reliable mechanism as a ball valve can fail and leak.
One of the most common causes of a ball faucet leak in the kitchen is debris getting into the cartridge, for this you need to disassemble the structure and clean it with a sponge and detergent.
If the faucet has leaked, first you need to get acquainted with its device in order to understand how to repair it.
The device of a ball valve is quite simple, although somewhat more complicated than that of a valve valve. Mixing of water takes place in the core, in which the ball is installed, which has three holes. This ball is made of stainless steel.Hot water enters one of the holes, cold water flows into the other, and water of the required temperature is supplied to the user in the third hole.
The ball is installed in a cartridge sleeve that can be easily removed from the body. For sealing, the ball is placed in rubber seats, to which the ball fits very tightly due to the action of the pressure of water.
Outwardly, it looks like a mechanism with one swing arm. By turning the knob in the up and down direction, you can adjust the water pressure. And by turning left and right, you can adjust the temperature of the supplied water. Ball valves are distinguished not only by simplicity and ease of use, but also by the high reliability of the mixer, which is facilitated by the simplicity of the design. Let's take a look at some of the causes of leaks.
Product structure
Ball mixers are characterized as reliable and durable devices due to the non-separable cartridge included in their mechanism.
All its constituent elements are carefully lapped in relation to each other.
The basic basis of these designs is a hollow ball, located in the valve body, polished to a high gloss with holes and a pin for attaching it to the handle, which ensures the rotation of the ball.
Cold and hot water through two brass pipes and flexible pipes enters this ball.
After that, it mixes there and flows out through a tap of a certain temperature.
Tightness is achieved due to the presence of gaskets.
As a preventive measure
from the user's getting burns, the tap cartridges are equipped with a special ring that limits the angle of rotation of the handle in the direction of hot water.
The cartridge inside can be made of stainless steel or ceramic.
Ceramic consists of two plates
, high-quality polished using ultrasound and perfectly ground to each other.
This surface polishing prevents liquid droplets from seeping between the plates.
If you disassemble the cartridge, remove the washers from it and put them on top of each other, then the elements should be attracted to each other, as if magnetized.
Using this elementary method, the quality of the cartridge is determined. In a single-lever device, no additional seals are provided in the mixer mechanism.
Due to the lack of seals and the strict compatibility of all parts, there is nothing to wear off in ball mixers.
Moreover, this work is not very difficult, and almost any man who has the following tools on the farm can handle it:
- hex key,
- flat screwdriver,
- small hammer,
- pliers.
Before you start disassembling the tap, you need to turn off the water supply in the house or apartment (read where the insert in the water supply network is located).
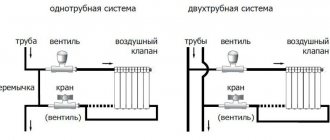
How to properly disassemble a 2-valve mixer
Cope with this job is also quite simple.
To accomplish this goal, you will need a screwdriver and an adjustable wrench.
- First of all, we shut off the water supply to the apartment (it is written about a storage tank for water supply of 500 liters).
- Remove the blue and red plugs from the taps. Dismantling them, you will find screws that must be removed with a screwdriver.
- After that, you will be able to see the condition of the rubber pads. By their appearance, you will understand whether they need to be replaced or the poor performance of the mixer is due to the fact that deposits have appeared (read about equipment for deironing water in the article) or loose connections.
- Another reason for the disgusting operation of the crane is limescale accumulated inside it. To remove it, take a long, flat screwdriver and use it to try to remove all the dirt.
There are springs in front of the sealing gum that need to be checked for functionality. If they do not fulfill their purpose, then they need to be replaced with new ones.
Please note that the new products are much longer and stronger than the old ones. This fact must be taken into account when installing the springs.
When changing the sealing gum, do not forget to use silicone grease, it will greatly extend their service life.
The rubbing parts of the mixer will be easier to "walk" if a small amount of lubricant is applied to them.
To assemble the crane, all actions are performed in a strictly reverse order.
Occasionally, leaks form at the top of the mixer or at the bottom of the mixer. You can fix this problem as follows:
- after removing the ball, lift the nose at the base and pull up a little.
The rotating outlet of the ball mixer is sealed with two rings. Namely, they tend to leak over time.
The gaskets must be removed very carefully. After replacing them and before reinstalling the ball mixer, the O-rings must be lubricated with silicone so that wear is minimized.
Buy parts that require replacement only of high quality, they will significantly increase the life of the product.
If you replaced the gaskets, assembled the tap, and the leak did not disappear, it means that the new parts do not fit in size or you did not press them well.
You may need to disassemble the tap again
, look for and eliminate the cause of the leak.
It should be borne in mind that in the modern plumbing market, ball valves are presented in various modifications. Therefore, the methods of disassembling them may differ slightly among themselves.
When installing the ball mixer and at each subsequent repair, all threaded connections must be sealed with a special thread or tape made of fluoroplastic.
Please note that dismantling work will be carried out much faster
if you think through all your actions in advance or sketch out a small plan that you will follow.
Keep the above guidelines in mind, and you can disassemble and reassemble the product quickly and without unnecessary fuss.
How to repair a mixer yourself at home, see the video.
Bookmark this site
- Choice
- Installation
- Finishing
- Repairs
- Installation
- Device
- Cleaning
- The device of ball valves
- Repair and maintenance of ball valves
Situations when it is necessary to eliminate malfunctions of ball valves at home on your own are quite common. By its design, the ball valve differs from other similar devices. However, almost every man with the minimum knowledge and skills necessary for this can carry out its repair. And for this you need to know the device of the tap and the principle of water supply.
Ball valve device diagram.
Many are accustomed to the fact that in an ordinary tap, you just need to replace the silicone or rubber gasket, after which you can continue to use it. In the ball valve, both similar malfunctions and many other breakdowns can occur, leading to its poor performance.
The device of ball valves
The ball valve consists of the following parts: a shut-off device is mounted inside the tap or mixer, which looks like a metal ball with special holes for water outlet. When this ball turns, the water pressure decreases or increases, or the tap is completely closed. The faucet has two openings for hot and cold water. At the outlet, there is a single hole for water outlet of the required temperature.
Therefore, if difficulties arise, the repair of such devices should be entrusted to a plumber, who will do it efficiently and quickly.
However, you can save a little and fix all the faults yourself.
Back to the table of contents
DIY ball valve repair
When it becomes necessary to urgently repair a ball valve, many (even experienced craftsmen) are lost.This is due to the fact that the design of the ball valve differs significantly from the usual one.
With an ordinary tap, everything is quite simple - you unscrew a couple of nuts, replace the gasket or the crane-axle box, tighten the nuts, check - it does not flow! But the ball valve can make you seriously sweat, especially if you take on its "swoop" repair, without proper preparation.
So, suppose you have a ball valve installed, which needs to be repaired on your own, at the same time - in a short time.
This situation is quite common, because the device of the ball valve itself, along with ease of use (excellent and very accurate adjustment of the pressure and water temperature), has a number of disadvantages: if a number of factors coincide, which we will talk about below, ball mixers either begin to flow, or - they simply stop providing temperature control by mixing hot and cold water in an arbitrary ratio.
Ball valve design
Before you repair the ball valve, you must familiarize yourself with the general diagram of its design.
Crane construction
Ball valves are produced by many plumbing manufacturers, but their structure is unchanged:
- In the center of the mixer there is a hollow ball made of stainless steel. In the cavity of the ball, water is mixed: hot and cold water comes from two inlets, and water of the required temperature comes out of the outlet.
- The ball itself is mounted in a special sleeve - a cartridge. To fix the ball in the cartridge, special rubber seats are equipped, which securely fix the ball under water pressure.
Ball Mixer Operation Problems
What are the most common problems with a ball mixer?
If you do not take into account the situation when the mixer has obvious mechanical damage (a crack on the body) or there is a problem with the water supply in general (for example, rusty water flows from the tap), then the following problems are most common.
Namely:
- Water leaks from the mixer
- Weakening the pressure (provided that the pressure in the water supply system has not changed)
- Temperature control problems (water is very hot or very cold)
The most common cause of a valve leak is a blockage in the space between the rubber seats in the cartridge and the ball. A microscopic speck, falling into the gap, can break the tightness of the connection, and over time, deform the rubber seat.
Aerator in which solids collect
The head can be adjusted by changing the position of the rod that connects the ball to the lever. "Playing" with the rod, you can set such a position of the supply pipes in relation to the holes in the ball, which provides the required water pressure in the mixer.
Also, pressure problems may be associated with the fact that the valve is partially clogged. In this case, the problem is solved by removing the aerator, cleaning it and returning it to its previous position. To avoid blockages in the future, it is possible to recommend the installation of water filters in the supply pipes - they will catch the solid particles that clog the mixer.