
Often the owners of private houses have an idea to implement backup power systems... The simplest and most affordable way is, of course, a gasoline or diesel generator, but many people turn their eyes to more complex ways of converting the so-called free energy (solar radiation, energy of flowing water or wind) into electricity.
Each of these methods has its own advantages and disadvantages. If everything is clear with the use of water flow (mini-hydroelectric power station) - it is available only in the immediate vicinity of a fairly fast-flowing river, then sunlight or wind can be used almost everywhere. Both of these methods will have a common disadvantage - if a water turbine can operate around the clock, then a solar battery or wind generator is effective only for a while, which makes it necessary to include batteries in the structure of a home power grid.
Since the conditions in Russia (short daylight hours most of the year, frequent precipitation) make the use of solar panels ineffective at their current cost and efficiency, the most profitable is the design of a wind generator... Consider its principle of operation and possible design options.
Since no homemade device is like another, this
article is not a step-by-step instruction, and a description of the basic principles of designing a wind turbine.
General working principle
The main working body of the wind generator is the blades, which are rotated by the wind. Depending on the location of the axis of rotation, wind turbines are divided into horizontal and vertical:
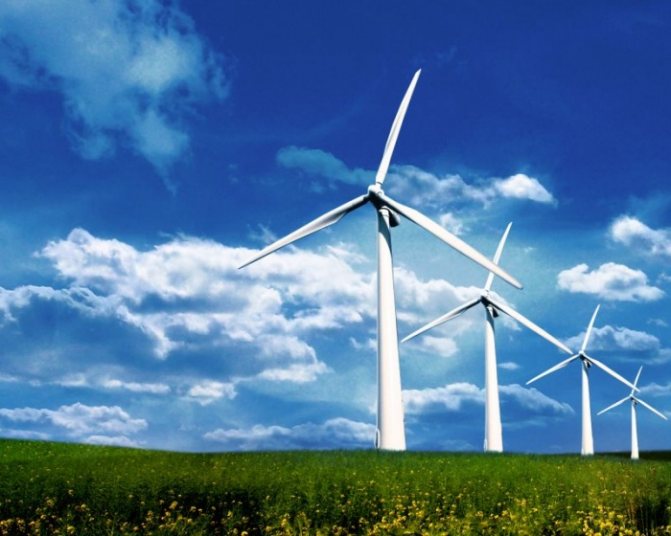
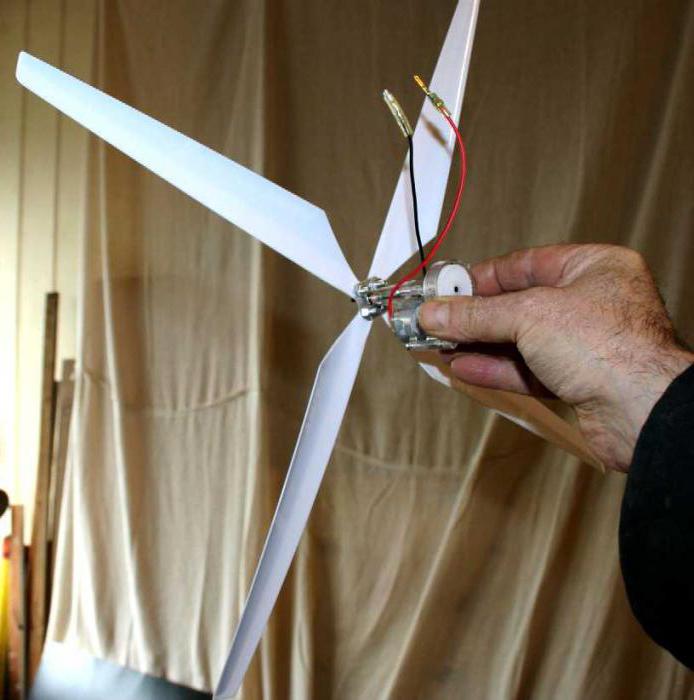
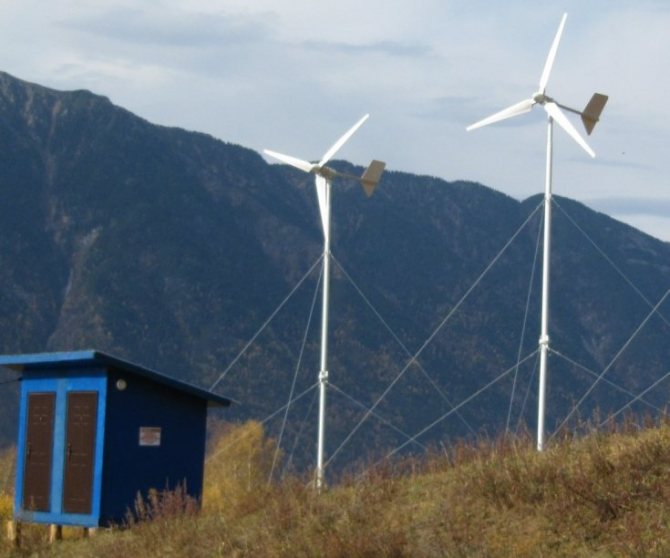
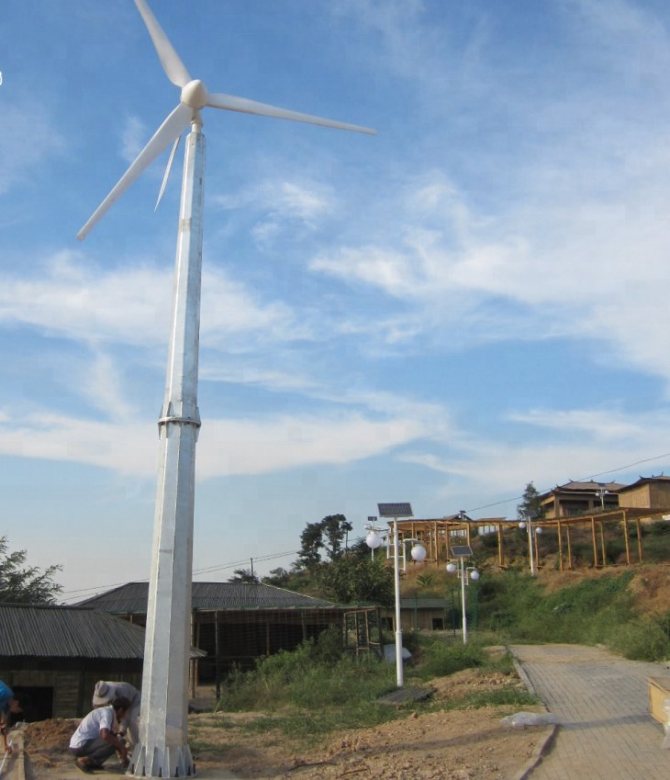
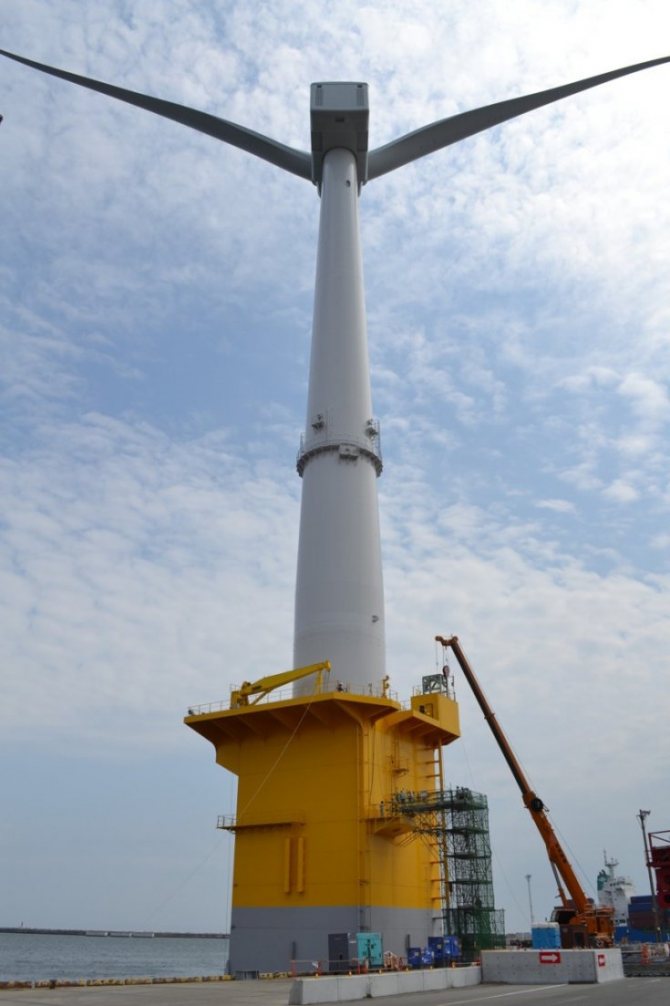
- Horizontal wind turbines most widespread. Their blades have a design similar to an airplane propeller: in the first approximation, these are plates inclined relative to the plane of rotation, which convert part of the load from wind pressure into rotation. An important feature of a horizontal wind generator is the need to ensure the rotation of the blade assembly in accordance with the direction of the wind, since the maximum efficiency is ensured when the direction of the wind is perpendicular to the plane of rotation.
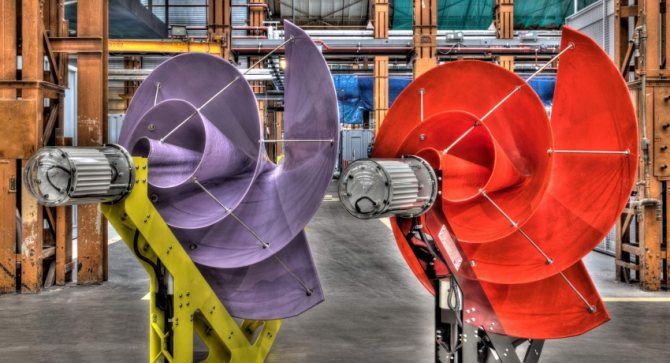
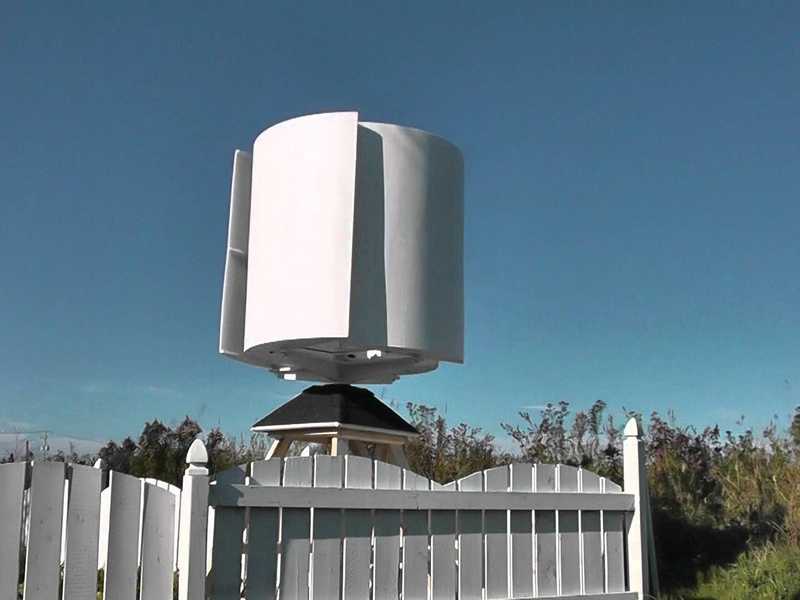
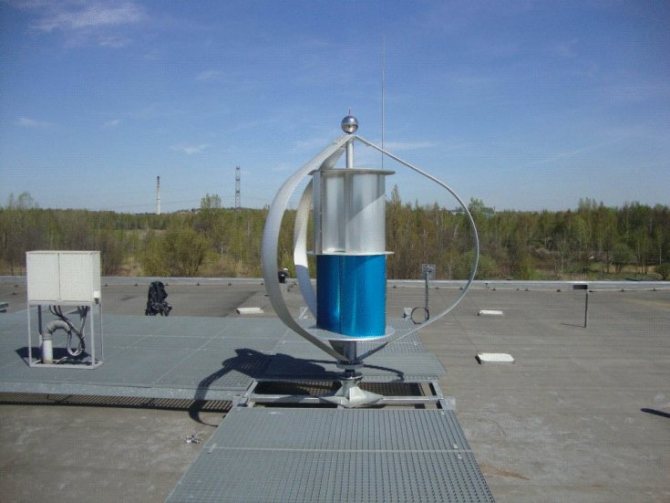
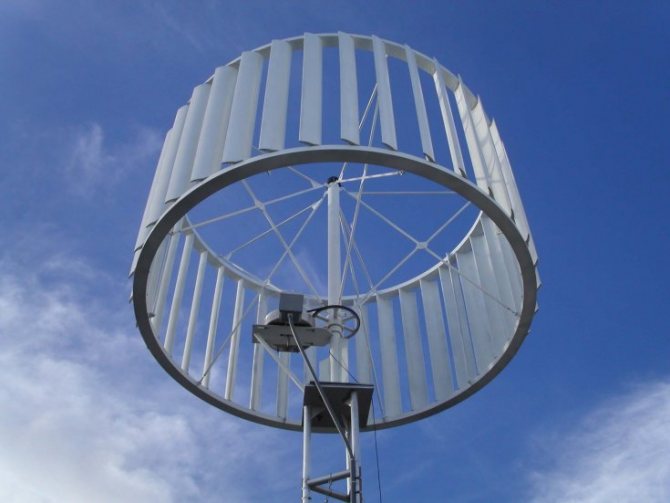
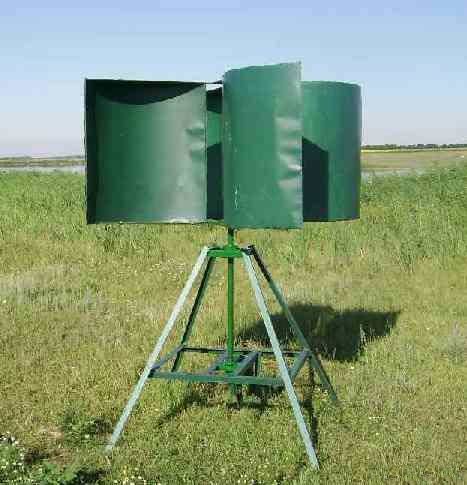
- Blades vertical wind turbine have a convex-concave shape. Since the streamlining of the convex side is greater than the concave side, such a wind turbine always rotates in one direction, regardless of the direction of the wind, which makes the turning mechanism unnecessary, unlike horizontal wind turbines. At the same time, due to the fact that at any given time, only a part of the blades performs useful work, and the rest only oppose rotation, The efficiency of a vertical windmill is much lower than that of a horizontal one: if for a three-blade horizontal wind generator this figure reaches 45%, then for a vertical one it will not exceed 25%.
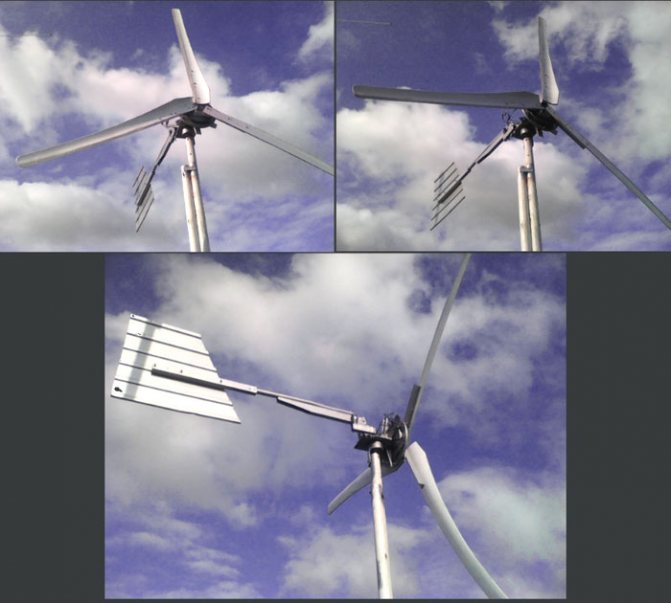
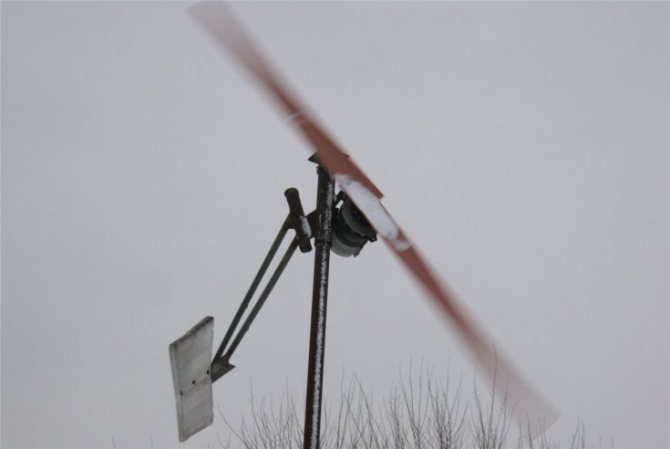
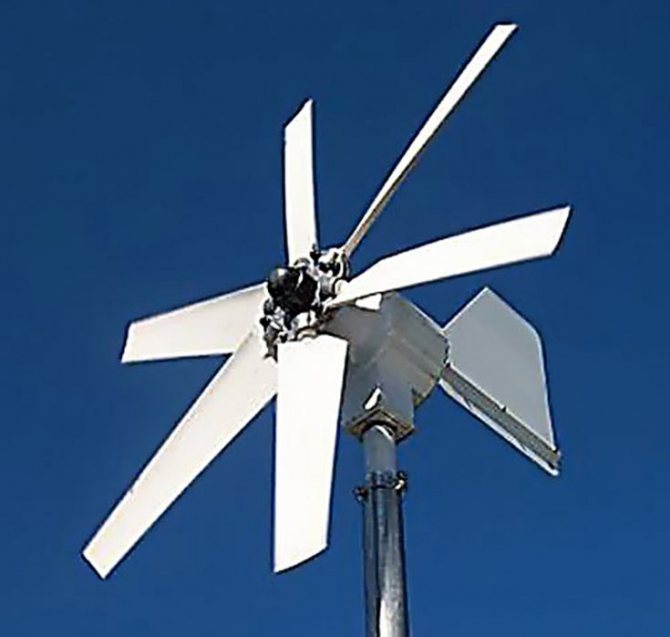
Since the average wind speed in Russia is not high, even a large wind turbine will rotate rather slowly most of the time. To ensure sufficient power, the power supply must be connected to the generator through a step-up reducer, belt or gear. In a horizontal windmill, the blade-reducer-generator unit is mounted on a swivel head, which enables them to follow the direction of the wind.It is important to take into account that the swivel head must have a limiter that prevents it from making a full turn, since otherwise the wiring from the generator will be cut off (the option using contact washers that allow the head to rotate freely is more complicated). To ensure rotation, the wind generator is supplemented with a working weather vane directed along the axis of rotation.
The most common blade material is large diameter PVC pipes cut lengthwise. Along the edge, metal plates are riveted to them, welded to the hub of the blade assembly. Drawings of this kind of blades are the most widespread on the Internet.
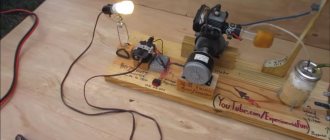
The video tells about a self-made wind generator

With your own hands
The purchase of a ready-made wind turbine is not affordable for most users. In addition, the desire to tinker with various mechanisms and devices is ineradicable among the people, and if there is also an urgent need, the solution to the issue is unequivocal. Consider how to make a wind turbine with your own hands.
The simplest wind generator for lighting a summer cottage
The simplest designs are used to illuminate an area or power a pump that supplies water. The process involves, as a rule, consumption devices that are not afraid of power surges. The wind turbine rotates the generator, which is directly connected to the consumers, without an intermediate voltage stabilizing kit.
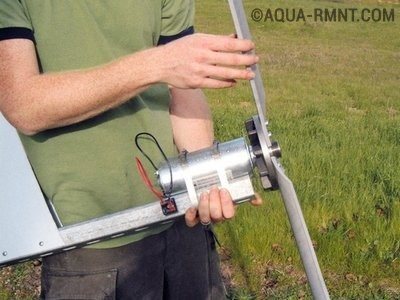
DIY windmill from a car generator
A generator from a car is the best option when creating a homemade wind turbine. It needs minimal reconstruction, mainly rewinding the coil with a thinner wire with more turns. The modification is minimal, and the resulting effect allows the use of a windmill to power the house. You will need a sufficiently fast and powerful rotor capable of rotating devices with high resistance.
Wind turbine from a washing machine
An electric motor from a washing machine is often used to create a generator. The best option is to install strong neodymium magnets on the rotor to excite the windings. To do this, it is necessary to drill holes in the rotor with a diameter equal to the size of the magnets.
Then they are installed in the sockets with alternating polarity and filled with epoxy. The finished generator is installed on a platform rotating around a vertical axis, an impeller with a fairing is mounted on the shaft. A tail stabilizer is attached to the rear of the platform, which provides guidance for the device.
Calculation of a bladed wind turbine
Since we have already found out that a horizontal wind turbine is much more efficient, we will consider the calculation of its design.
Wind energy can be determined by the formula P = 0.6 * S * V³, where S is the area of the circle described by the tips of the rotor blades (throwing area), expressed in square meters, and V is the calculated wind speed in meters per second. You also need to take into account the efficiency of the windmill itself, which for a three-blade horizontal circuit will average 40%, as well as the efficiency of the generator set, which at the peak of the current-speed characteristic is 80% for a generator with permanent magnet excitation and 60% for a generator with an excitation winding. On average, another 20% of the power will be consumed by the step-up gear (multiplier). Thus, the final calculation of the radius of the wind turbine (that is, the length of its blade) for a given power of the permanent magnet generator looks like this: R = √ (P / (0.483 * V³))
Example: Let's assume the required power of the wind farm is 500 W, and the average wind speed is 2 m / s. Then, according to our formula, we will have to use blades with a length of at least 11 meters. As you can see, even such a small power will require the creation of a wind generator of colossal dimensions.For more or less rational structures with a blade length of no more than one and a half meters in the conditions of do-it-yourself manufacturing, the wind generator will be able to produce only 80-90 watts of power even in strong winds.
Not enough power? In fact, everything is somewhat different, since in fact the load of the wind generator is fed by the batteries, the wind turbine only charges them to the best of its capabilities. Consequently, the power of a wind turbine determines the frequency with which it can supply energy.
Generator selection
The most logical option for a generator set for a homemade wind turbine seems to be a car generator. This solution makes it easy to assemble the unit, since the generator already has both mounting points and a pulley for the belt multiplier. It is not difficult to buy both the generator itself and spare parts for it. In addition, the built-in relay-regulator allows you to directly connect it to a 12-volt storage battery, and to it, in turn, an inverter for converting direct current to alternating voltage 220V.
But, as mentioned above, the efficiency of generators with an excitation winding is quite low, which is very sensitive for an already low-power wind generator. The second disadvantage is that when the battery is discharged, the car generator cannot be excited.
In a number of home-made designs, you can find the G-700 and G-1000 tractor generators. Their efficiency is no more, the only useful difference is the magnetization of the rotor, which makes it possible to excite the generator even without a battery, and the low price.
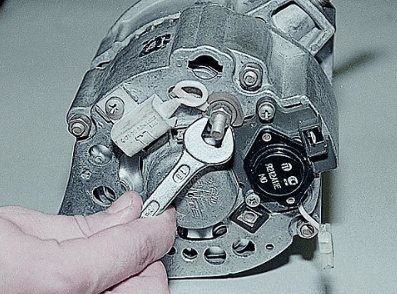
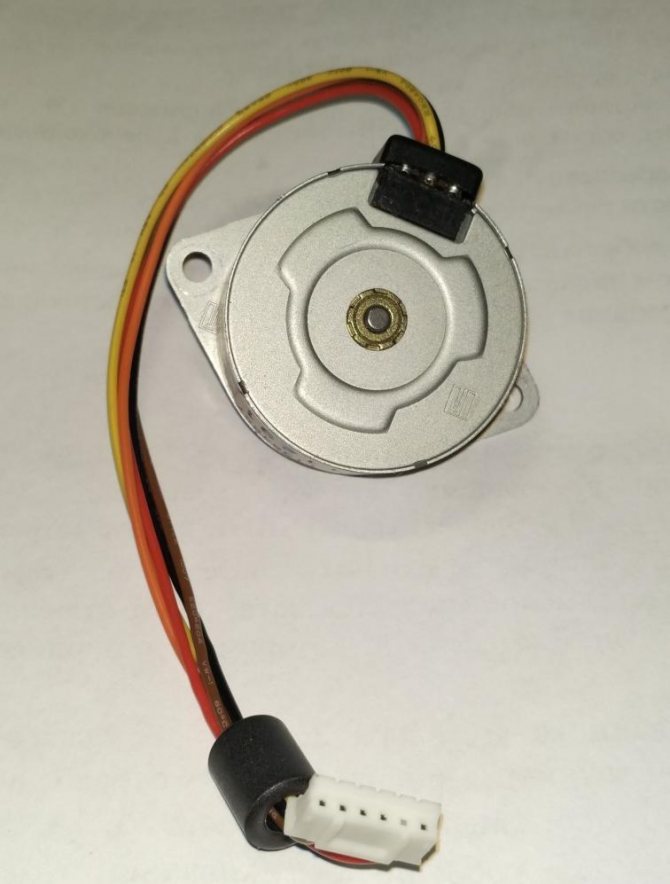
When building wind generators, some authors use the property of reversibility of collector electric motors - by forcibly rotating their rotor, direct current can be removed from it. The stator of this type of motors either consists of permanent magnets, which is more preferable for our purposes, or has a winding. To use the engine in generator mode, it is connected to the vehicle's relay regulator to provide the desired voltage. Consider the connection of a relay-regulator using the example of a node from the VAZ classics (it is convenient because it is not combined into one block with a brush assembly):
- Connect one of the motor brushes to the body - this will be the negative pole of the generator. Here, securely connect the metal case of the relay-regulator and the "-" terminal of the battery.
- Connect terminal 67 of the relay to one of the terminals of the stator winding, the second temporarily to the case.
- Connect terminal 15 through the switch to the positive pole of the battery (this will supply the field current to the winding). Give the rotor rotation in the same direction that the wind turbine screw will provide, and connect a voltmeter between the free brush and the housing. If a negative potential is found on the brush, swap the connections of the stator with the relay-regulator and ground.
The main feature of connecting a DC generator to a battery is the need to separate them with a semiconductor diode, which prevents the battery from discharging onto the rotor winding when the generator stops. In modern car generators, this function is performed by a three-phase diode bridge, and we can also use it by connecting its phases in parallel to reduce the voltage drop across it.
The greatest power can be removed from the generator, the rotor of which consists of neodymium magnets. Constructions based on an automobile hub with a brake disc are widespread, along the edge of which powerful magnets are fixed. A stator with a single-phase or three-phase winding is located at a minimum distance from them.
Windmill # 2 - Magnetic Axial Design
Axial windmills with ironless stators on neodymium magnets have not been made in Russia until recently due to the inaccessibility of the latter.But now they are in our country, and they are cheaper than initially. Therefore, our craftsmen began to manufacture wind turbines of this type.
Over time, when the capabilities of the rotary wind generator will no longer provide all the needs of the economy, an axial model can be made on neodymium magnets.
What needs to be prepared?
The axial generator is based on a hub from a car with brake discs. If this part was in operation, it must be disassembled, the bearings must be checked and lubricated, and the rust must be cleaned off. The finished generator will be painted.
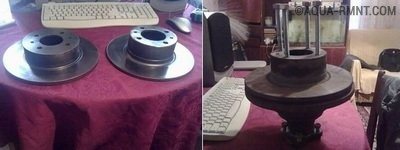
To properly clean the hub from rust, use a metal brush that can be placed on an electric drill. The hub will look great again
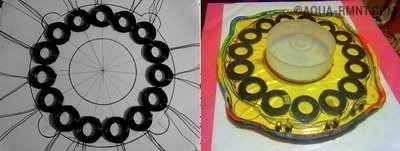
Distributing and securing magnets
We are going to glue the magnets onto the rotor discs. In this case, 20 magnets with a size of 25x8mm are used. If you decide to make a different number of poles, then use the rule: in a single-phase generator there must be as many poles as there are magnets, and in a three-phase generator it is necessary to observe the ratio of 4/3 or 2/3 poles to the coils. Place the magnets by alternating the poles. To ensure their location is correct, use a template with sectors printed on paper or on the disc itself.
If there is such an opportunity, it is better to use rectangular magnets, rather than round ones, because in round ones the magnetic field is concentrated in the center, and in rectangular ones - along their length. The opposing magnets must have different poles. In order not to confuse anything, apply a marker on their surface "+" or "-". To determine the pole, take one magnet and bring the others to it. Put a plus on attractive surfaces, and a minus on repulsive surfaces. On discs, the poles should alternate.
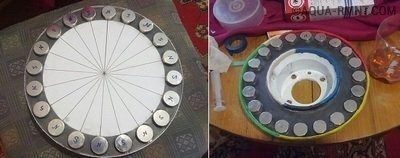
The magnets are correctly positioned. Before fixing them with epoxy resin, it is necessary to make the sides of plasticine so that the adhesive mass can solidify, and not glass on the table or floor
To fix the magnets, you need to use strong glue, after which the strength of the gluing is additionally reinforced with epoxy resin. It is flooded with magnets. To prevent resin spreading, you can make plasticine curbs or simply wrap the disc with tape.
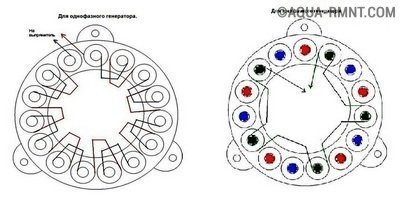
Three-phase and single-phase generators
A single-phase stator is worse than a three-phase stator, because it gives off vibration under load. This is due to the difference in the amplitude of the current, which occurs due to the inconsistent return of it at a time. The three-phase model does not suffer from this disadvantage. The power in it is always constant, because the phases compensate for each other: if the current falls in one, and in the other it increases.
In the dispute between single-phase and three-phase options, the latter comes out the winner, because the additional vibration does not extend the life of the equipment and irritates the hearing
As a result, the return of the three-phase model is 50% higher than that of the single-phase model. Another advantage of avoiding unnecessary vibration is acoustic comfort when operating under load: the generator does not hum during operation. In addition, vibration always destroys the wind turbine before its expiration date.
Coil winding process
Any specialist will tell you that you need to make a careful calculation before winding the coils. And any practitioner will do everything intuitively. Our generator will not be too fast. We want the 12-volt battery to start charging at 100-150 rpm. With such initial data, the total number of turns in all coils should be 1000-1200 pieces. It remains to divide this figure by the number of coils and find out how many turns there will be in each.
To make a wind generator more powerful at low speeds, you need to increase the number of poles. In this case, the frequency of the current oscillation will increase in the coils.It is better to use thick wire for winding the coils. This will reduce the resistance, which means that the current will increase. It should be noted that at a high voltage, the current may be "eaten" by the resistance of the winding. A simple homemade machine will help you wind high-quality spools quickly and accurately.
The stator is marked, the coils are in place. To fix them, epoxy resin is used, the drainage of which is again resisted by plasticine sides.
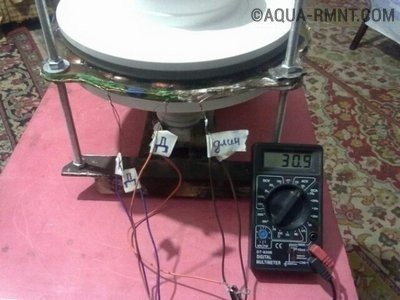
Due to the number and thickness of the magnets located on the disks, generators can vary significantly in their operating parameters. To find out how much power to expect as a result, you can wind one coil and spin it in the generator. To determine the future power, the voltage should be measured at certain no-load rpm.
For example, at 200 rpm, 30 volts are obtained with a resistance of 3 ohms. We subtract the battery voltage of 12 volts from 30 volts, and divide the resulting 18 volts by 3 ohms. The result is 6 amperes. This is the volume that will go to the battery. Although in practice, of course, it comes out less due to losses on the diode bridge and in the wires.
Most often, the coils are made round, but it is better to stretch them out a little. In this case, more copper is obtained in the sector, and the turns of the coils are straighter. The diameter of the inner hole of the coil should correspond to the size of the magnet or be slightly larger.
Preliminary tests of the resulting equipment are carried out, which confirm its excellent performance. Over time, this model can also be improved.
When making a stator, keep in mind that its thickness should correspond to the thickness of the magnets. If the number of turns in the coils is increased and the stator is made thicker, the disk space will increase, and the magnetic flux will decrease. As a result, the same voltage can be generated, but a lower current due to the increased resistance of the coils.
Plywood is used as a form for the stator, but you can mark sectors for coils on paper, and make curbs from plasticine. The strength of the product will be increased by fiberglass placed on the bottom of the mold and on top of the spools. The epoxy must not stick to the mold. To do this, it is lubricated with wax or petroleum jelly. For the same purposes, you can use tape or tape. The coils are fixed together immovably, the ends of the phases are brought out. Then all six wires are connected with a triangle or star.
The generator assembly is tested using hand rotation. The resulting voltage is 40 volts, while the current is approximately 10 amperes.
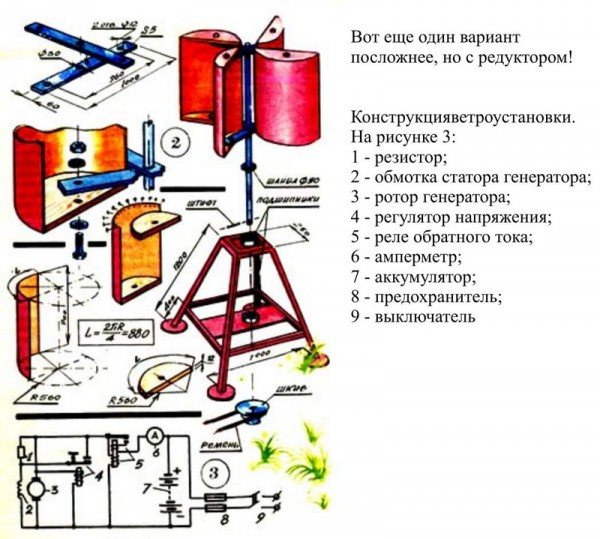
Multiplier calculation
The generator set has an inclined current-speed characteristic: with an increase in rotor speed, the maximum power delivered to it increases. Therefore, in order to ensure the highest efficiency of a low-speed wind turbine, we need a multiplier with a large increase factor.
For a homemade design, the most optimal solution is a belt multiplier: it is easy to manufacture and requires a minimum of machine work. The ratio of the increase in revolutions will be equal to the ratio of the diameter of the driving pulley connected to the axis of the screw to the diameter of the driven pulley of the generator. If necessary, the gear ratio can be easily adjusted by replacing one of the pulleys.
When designing the multiplier, it is necessary to take into account both the average speed of the blade assembly and the current-speed characteristic of the generator. If we use a serial car generator, then it can be easily found on the Internet, with homemade designs, most likely, we will have to go through trial and error.
For example, let's take a common tractor generator, which was already mentioned above.
Taking the calculated power of our wind turbine at 90 watts, we find a point on the graph corresponding to the generator's output to this power.At a nominal voltage of 14 V, we need a current output of at least 6.5 A - according to the graph, this will happen at a speed slightly above 1000 rpm. Let the propeller of our design rotate with the wind at a speed of 60 rpm (medium wind). This means that we need at least a twenty-fold ratio of the diameters of the pulleys - for a 70-mm generator pulley, the wind turbine pulley will have to have a diameter of almost one and a half meters, which is unacceptable. This unequivocally hints at how low the efficiency of wind generators of this type is - without a complex multi-stage gearbox, which in itself will lead to large power losses, it is almost impossible to bring a car generator to operating mode.
Advantages and disadvantages of a rotary wind turbine
When the wind turbine is done properly, it will function without any errors. With a 75A battery and a good 1000 W inverter, the wind turbine will easily provide light to the street, the area of the house, power the security alarms, video surveillance, etc.
Wind turbines of this type have the following advantages:
- ease of installation;
- low cost;
- profitability;
- malleability to repair;
- not picky about the conditions of functioning;
- reliability and noiselessness of work.
There are several disadvantages of the wind generator:
- small productivity of the wind generator;
- complete dependence of the windmill on the wind;
- blades can disrupt the air flow.
Preparation of materials for a wind turbine
The first step is to collect all the consumables and parts for the windmill. The wind generator you made will produce a power of no more than 1.5 kW. To make an aggregate you need to have:
- 12V car alternator.
- 12 volt helium or acid battery.
- Special converter from 12V to 220V and from 700W to 1500W.
- A large stainless steel or aluminum container: a bucket or saucepan.
- A simple voltmeter.
- Bolts, washers and nuts.
- Relay for charging the battery from the car and a charge indicator lamp.
- Wires with different cross-sections (2.5 mm2 and 4 mm2).
- Clamps fixing the wind generator.
- The switch "button" is semi-hermetic, 12 V.
- grinder or metal scissors;
- tape measure;
- construction pencil or marker;
- screwdriver, drill, nippers and drill.
Also, stock up on the following tools:
Wind turbine design work
The work consists in making the rotor and reworking the generator pulley. The stages are as follows:
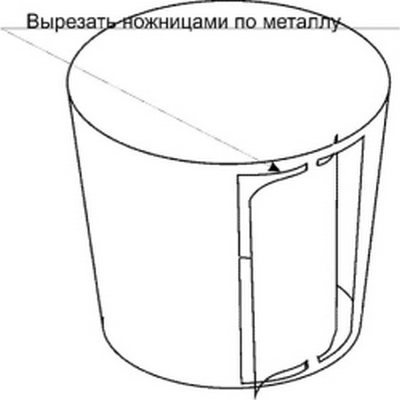
Note! When working with metal scissors, you need to cut a hole for them. If the bucket is not made of painted tin or galvanized steel, then you can use a grinder.
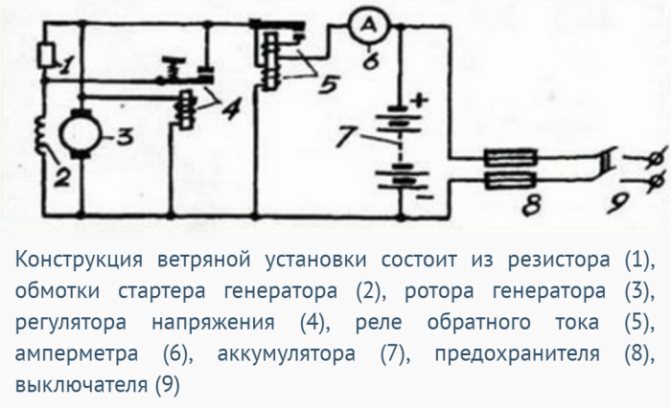
To connect the battery, take wires with a cross section of 4 mm2. The recommended size is no more than 1 m. And thanks to wires with 2.5 mm2, connect lights and devices. Do not forget to install an inverter (converter). Connect the device to the mains to pins # 7 and # 8 shown in the diagram below. Use 4 mm2 wires.
That's it, your wind turbine is now ready to go. It can not but rejoice that it is made with your own hands.
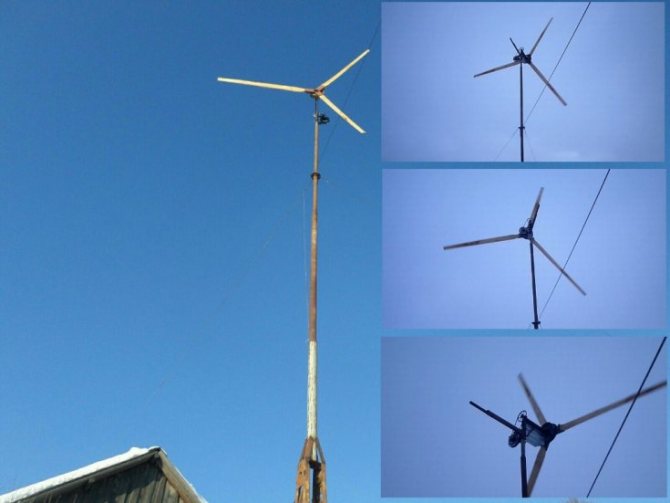
Mast
The mast on which the wind turbine is mounted - this is one of its most important nodes.
It not only ensures the safe operation of the windmill (the lower point of the circle described by the blades should be no closer than 2 meters to the ground), but also allows it to use the wind energy as efficiently as possible, the flow of which becomes more turbulent near the ground.
A high height leads to a low rigidity of the wind turbine mast and makes its strength calculation quite difficult not only for an amateur master, but also for an engineer. You can list only the main points:
- Place the mast as far as possible from the house and trees shading the air flow. In addition, in case of strong wind, the wind generator may fall on the building or be damaged by trees;
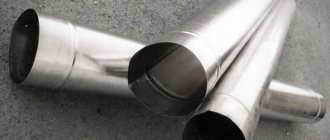
- Optimal mast design means openwork welded truss similar to power transmission towers, but it is difficult and expensive to manufacture. The simplest, but quite effective option is several parallel pipes with a diameter of 80-100 mm, welded with short seams to each other and concreted to a depth of at least one meter in the ground. It is highly desirable to strengthen the structure of one pipe with cable ties, which are also attached to the supports poured into concrete.
- To simplify the maintenance of the windmill, its mast can be made as a turning point: in this case, when weakening the stretching, going in the direction of the fracture, the mast can be tilted to the ground.
A story about a very simple wind generator from a home fan
Additional electrical equipment
As mentioned above, an integral part of a wind farm is a battery that takes over the power of consumers. when choosing it, you need to remember that the larger its capacity, the longer it will be able to maintain the voltage in the network, but at the same time it will take longer to charge. The approximate operating time can be defined as the time during which half of the battery capacity is depleted (after that, the voltage drop will already become noticeable, in addition, deep discharge reduces the life of lead-acid batteries).
Example: So, a battery with a capacity of 65 A * h will conditionally be able to give 30-35 Amp-hours of energy to the load. Is it a lot or a little? A conventional 60-watt lighting lamp will require, taking into account the presence of an inverter that converts 12 V DC to 220 V AC and having its own efficiency within 70%, a current of 7 amperes is a little more than four hours of operation. Our windmill with a nominal power of 90 watts, even in the best case, with a constant strong wind, will take at least five hours to recover the wasted energy. As you can see, when using a wind turbine solely as an autonomous source of energy, electricity in your home will be available only for a few hours a day.
The second node of the power supply system is the inverter. In our case, you can use both a ready-made automobile and one extracted from an uninterruptible power supply. In any case, it is important not to overload it with current consumption, given that its real operating power is 1.2-1.5 times less than the indicated maximum power.
As you can see, the attractiveness of using free energy rests on numerous restrictions, and even the only efficient option in central Russia - a wind generator - is unable to provide long-term autonomy.
But at the same time, this idea is not bad both as a source of emergency power supply and, especially, as a design task - the pleasure of creating a wind turbine with your own hands can significantly exceed its power.