
Advantages and choice of material for a wooden floor
The balcony is an auxiliary area. It is not designed for large, abruptly changing loads. In addition, as the age of the house increases, the load-bearing capacity of the balcony slab decreases.
Therefore, the choice of wood as a material for the floor on the balcony is quite justified. Light weight, low thermal conductivity and sufficient strength in combination are the most preferable qualities that a material should have for such a purpose.
Pros of wood for a wooden floor on the balcony:
Wood tolerates contact with sunlight and rain moisture normally.
Installing a wooden floor does not require a lot of tools and labor.
As the wood wears out, it changes easily.
Back to content
Wooden coverings
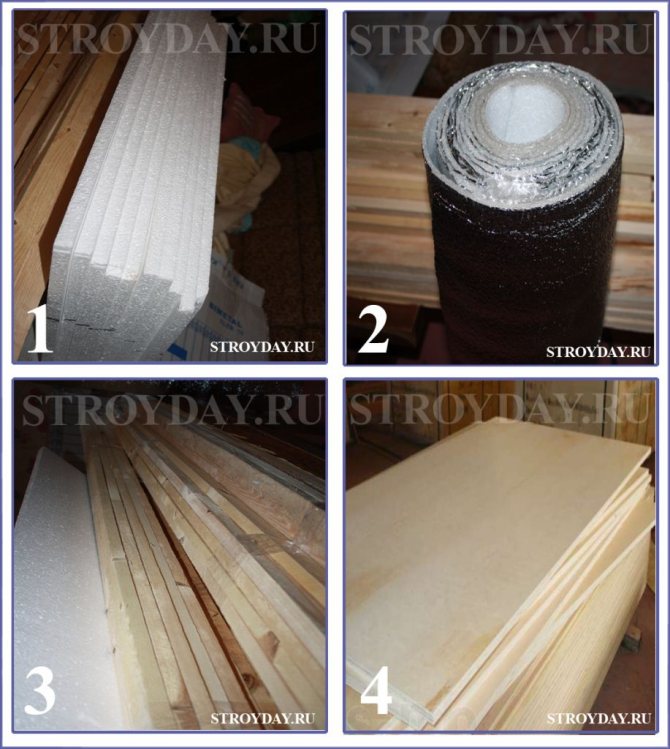
To build a wooden covering on the balcony you will need:
- Board 30 mm.
- Bars 30x40 mm.
- Cement, sand, water.
- Insulation 30 mm thick.
- Rotary hammer with a drill (6 mm)
- Screwdriver.
- Sharp knife.
- Self-tapping screws (6x65), dowels.
- Pencil, tape measure.
- Beacons.
- Linoleum.
- Plywood.
Such a "light" tie is needed so that the logs lie flat on it.
Before starting repairs on the balcony, assess the evenness of its slab. If the house is old and the screed is uneven, cracked, it is better to completely remove it. The slab is leveled with cement mortar 3-5 mm thick. Such a "light" tie is needed so that the logs lie flat on it.
The floor of the open balcony is filled with rainwater, which must drain somewhere.
Therefore, the balcony slabs are laid with an outward slope.
When making a new screed and installing logs, you need to remember this.
Related article: Wild grapes on the balcony: growing correctly
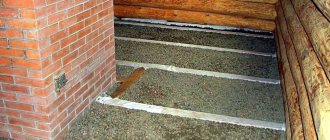
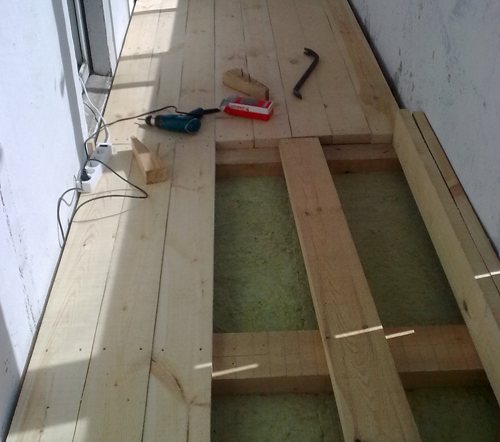
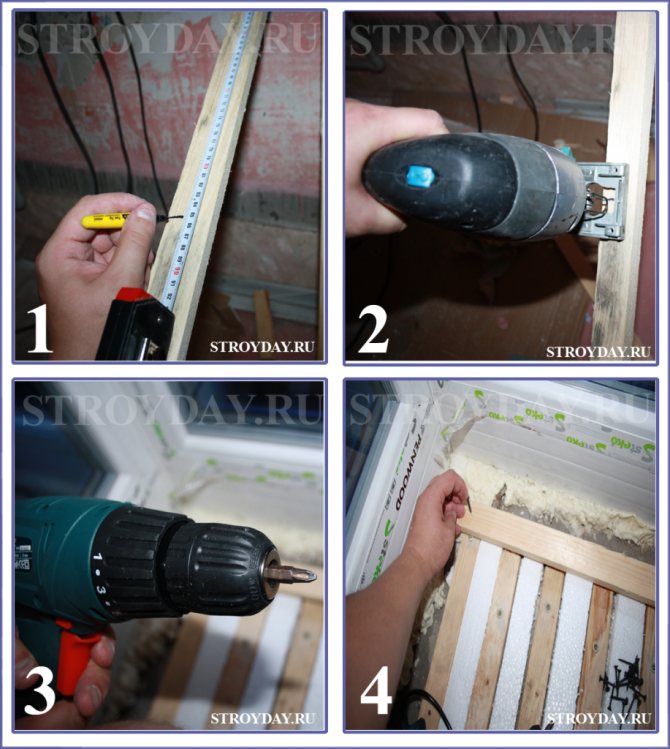
Wooden blocks are taken as lags. Lags and all other wooden parts are impregnated with an antiseptic. It will not be superfluous to paint them. This will protect the tree from rotting and damage by insects. This floor will last a long time. Lags are installed across the balcony (it is possible along, depending on how the boards on the balcony will be laid - along or across).
Due to non-observance of right angles, the dimensions of the left wall of the balcony and the right one are most often different. Therefore, it is undesirable to cut all the logs at once. Having measured one side of the balcony and taking away 1.5-2 cm, the first lag is cut off. It is laid, stepping back from the side wall by 10-12 cm. The dimensions of the following lags are determined similarly to the first, they are installed in increments of 50-60 cm. The last lag should also be 10-12 cm away from the wall. For this, the middle lags can be slightly shifted. Placed logs must be attached to the balcony floor. Boards laid on fixed joists do not creak.
When laying the lag, you need to monitor the horizontal plane. The bars are leveled first. The level is placed on the logs, and, where required, beacons are placed. As them, you can use pieces of aluminum profile or hardboard. Be aware of the slope. Check the position of the bars and relative to each other. For this, the board is laid on the outer two beams. If necessary, add (or remove) beacons under the bars, and in the same amount on both sides of the bar.
Check the position of the bars and relative to each other. For this, the floorboard is laid on the outer two beams.
Fix the logs to the balcony floor using a puncher. First, a hole is drilled through the beacon beam in the concrete slab.Next, a dowel with a self-tapping screw inserted into it is driven with a hammer through a bar into a hole in concrete, after which the screw is tightened to the end with a screwdriver. Each bar is attached with 3-4 self-tapping screws. Painted floorboards are laid on the aligned and fixed joists.
Related article: Design options for an arch in the corridor
Linoleum can be used instead of boardwalk. It can be laid out directly on the concrete screed, but the flooring will be cold. But if you first strengthen thick plywood on the logs, and then lay linoleum, then the floor will be warmer. The linoleum coating is easy to clean, it does not get dusty.
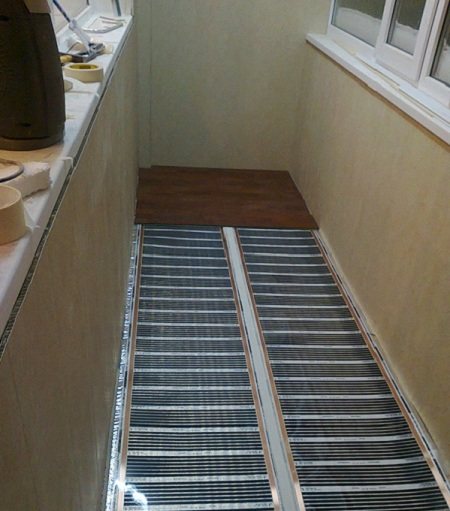
Above, the question was considered how to make the floor on the balcony, unprotected from rain and snow, so that it does not overload the remote plate and is durable. But on the loggia, the concrete slab can withstand greater loads than on the balcony. Therefore, answering the question of how to make a floor on a loggia, as the first option, you can offer the same wooden floors, but with additional insulation.
Features of insulation
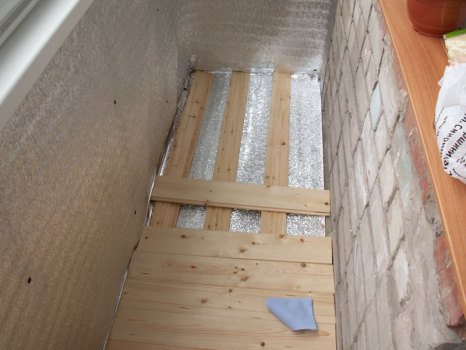
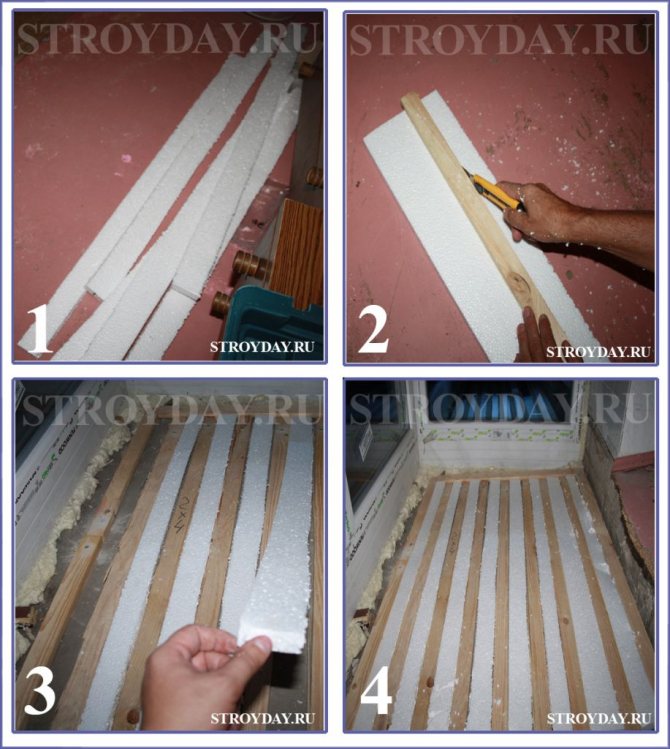
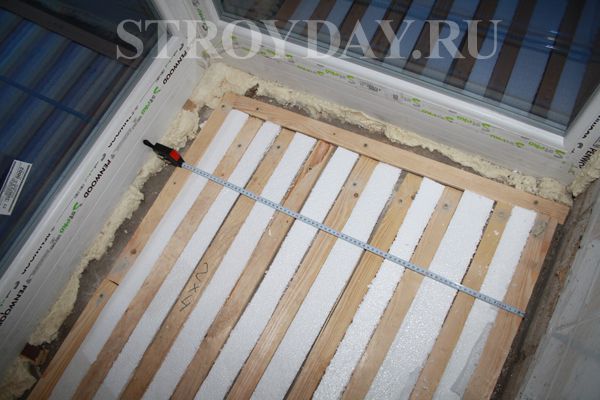
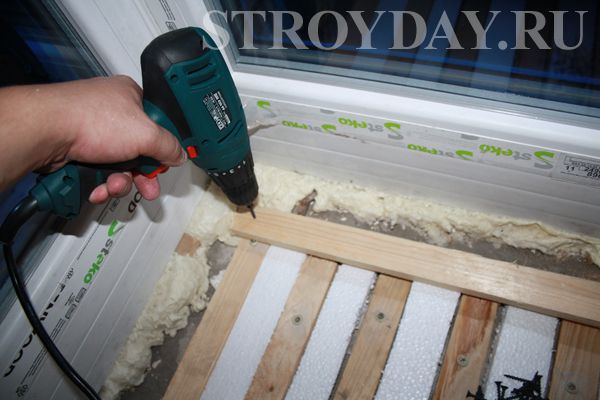
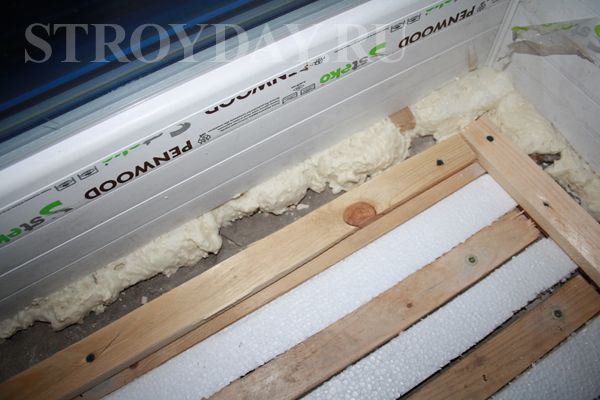
To do this, on the loggia between the logs, a heater is laid, cut according to the measurements taken between the bars.
The insulation is cut along the guide. A bar is used as it. A sharp knife with effort is carried out several times along the bar along the marking line and the insulation is bent to a break. It will break easily at the notch.
The cut pieces are laid out between the lags. If gaps have formed somewhere, they are filled with polyurethane foam. A board is laid on top. Everything, the insulated floor on the loggia is ready.
Preparatory work
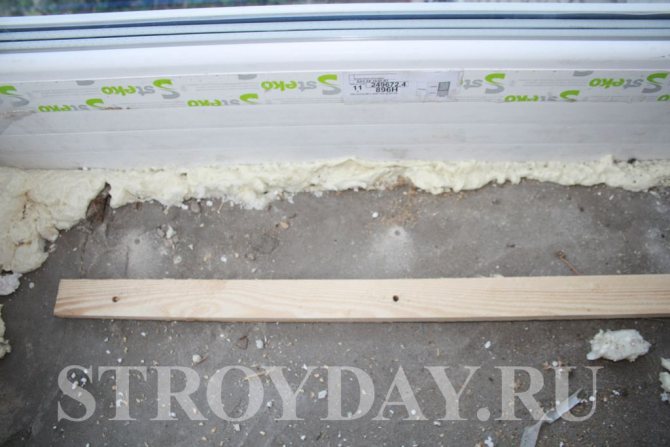
First of all, you need to remove everything from the balcony that is on it. Remove old coating (if any). If necessary, the existing defects of the concrete surface should be plastered, it is good to fill the cracks with polyurethane foam.
Inspect the metal fence, if necessary, weld, paint, remove rust. Purchase materials for coating - a substrate, a timber for a log, a floorboard, fasteners (screws, corners, dowel-nails).
You will need some kind of antiseptic for the boards, as well as varnish or paint to protect the finished floor.
Back to content
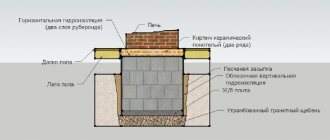
Balcony floor waterproofing
The need for waterproofing is not an insurance policy. Without proper protection, the floor can begin to gain moisture, mold, metal parts of the floor and fencing begin to rust.
First of all, it is necessary to provide a slight slope for the drainage of rainwater. You can't let her stagnate on the balcony. One of the options for a waterproofing coating can be called a concrete-bitumen screed.
It will allow you to bring the desired slope and at the same time protect the balcony slab from moisture collection. Roofing material is laid on the screed as a second layer of waterproofing, or some other insulating coating is used, the choice of which is wide enough, for example, a special waterproofing membrane.
The canvas should be wider than the balcony so that its edges overlap the wall by 20-25 cm.
Video:
Back to content

Advantages and disadvantages of a wooden balcony floor
Before making a wooden floor on the balcony, consider the main pros and cons of such a coating. Wooden floorboards are a natural material that is traditionally used for flooring. Wood has a low thermal conductivity, so a floor on a balcony made of planks is the best option for a comfortable and warm covering in a room without heating.
The advantages of such a flooring include the following:
- aesthetic appeal;
- the ability to use in any interior;
- ease of processing (fastening and cutting of wood is carried out without the use of special equipment);
- environmental friendliness is very important for homes with children and allergy sufferers;
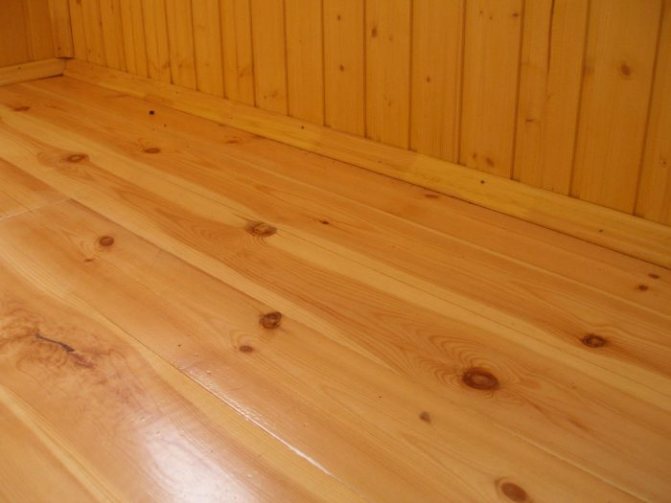
- if you lay a floor made of solid beech, oak or larch wood, then the surface will serve you for several decades while maintaining all operational characteristics;
- the best solution for balconies with a low floor is to cover it with a boardwalk along the logs (as a result, it will be possible to understand it to the level inside the room);
- to level the uneven base of a concrete slab, the easiest way is to put a plank covering;
- the installation of a wooden structure will allow for high-quality insulation of the balcony;
- it is possible to lay plank floors even on dilapidated concrete slabs, since the structure does not load them at all.
The wooden floor on the loggia or balcony has its drawbacks:
- wood is susceptible to decay, mold and insect damage;
- the material is highly flammable;
- wood quickly absorbs moisture from the air and deforms from this.
Important! All wood imperfections are minimized if the elements are treated with antiseptics to protect against decay and flame retardants to prevent fire. In order for the coating to absorb moisture so quickly, the floors are painted with paints and opened with varnishes.
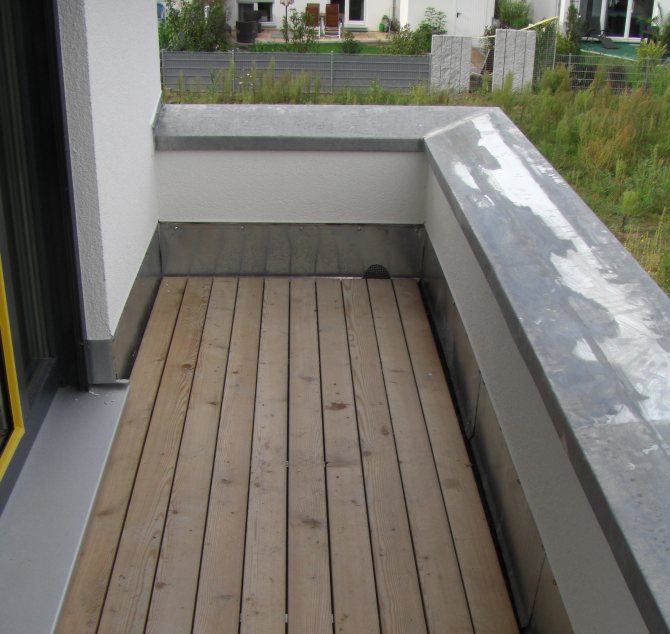
It is best to cover the floor with boards on a glazed balcony, so the operating conditions will be as close as possible to the living space. If you decide to cover an unglazed balcony with a plank floor, then carefully consider the choice of wood. Give preference to moisture resistant species, such as larch, and get ready for more thorough surface care.
Laying a wooden floor
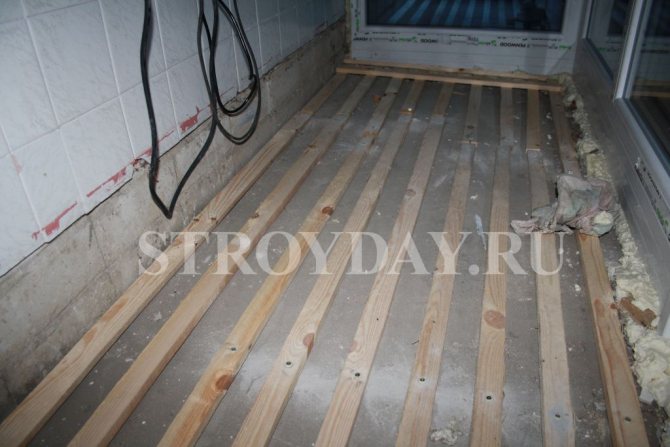
The first step is to strengthen the first row of logs. The distance between them should be about 45-50 cm, they are attached across the balcony and attached to the floor with dowel-nails. They should not reach the walls by 2-3 cm in length.
The second step is the laying of the second, longitudinal layer of the log. This layer is the main one, it is made of a thicker bar and carries the floorboard layer.
The lags of the main layer are located along the balcony, the distance between them is 45-50 cm, from the walls - about 3-5 cm.
This lag layer must be leveled horizontally, placing pieces of wood under them, if necessary, to adjust the level. Between the lags, it is advisable to lay a layer of insulation - mineral wool or some similar, which is cut with a knife to size and located in the intervals. There is a separate article for this.
Then they start laying the floorboard. It is cut into pieces across the balcony in such a way that there is a gap between the board and the wall of about 1 cm.From the extreme board, you need to cut a spike and attach it to the logs with self-tapping screws. The screws must be screwed into the groove at an angle so that they cannot be seen after attaching the next board.
Sometimes, instead of a floorboard, thick plywood or chipboard is used, but this option seems short-lived due to its low resistance to moisture, and even atmospheric humidity will destroy such a coating pretty soon.
Video lesson:
Back to content
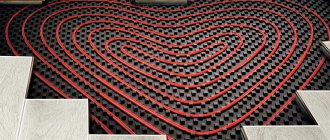
Insulation of the floor on the balcony with foam
After the logs are laid in length, the next stage is insulation. To do this, we cut the foam into equal strips of 7-8 cm in length. Cutting foam is best done with a regular construction knife. After the foam is cut, we place it between the wooden joists, as shown in the photo. When the foam strips are completely laid, the floor will look like this (photo below).
We lay the foam between the logs for insulating the floor on the balcony
Our next step is to mount the second layer. Using a tape measure, we measure the size of the lag we need in width.
Styrofoam laying completed
After we have measured the size of the rail we need, we transfer it to a wooden plane. Next, the jigsaw comes into play. With its help, we saw off the timber of the required size. Now it's time for the screwdriver. Trying on the bar and places for fastening the screws.By the way, for fastening we use wood screws with a size of 3.5 x 35 mm.
Installation process of horizontal battens
Now we attach the lag to the self-tapping screws.
Fixing the lag on self-tapping screws
The lag, fixed with a screwdriver and self-tapping screws, looks like this.
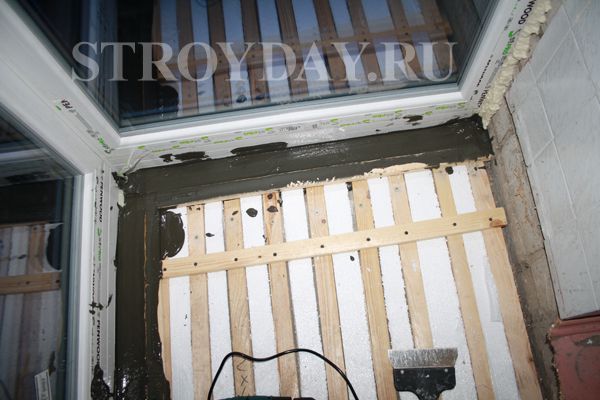
The next rail, which we will fasten in length, is part of the formwork. It must be fixed a little "overlapping", that is, with a ledge closer to the balcony frame. It is mounted on self-tapping screws.
The final view of the side lags
After we have secured the second layer of the formwork, we proceed to the stage of pouring the formwork. To do this, we prepare a solution of frost-resistant glue for tiles or cement of the Portland-M500 brand. When the mortar is ready, we apply it with a spatula to the inside of the formwork. The mortar is applied to the inside along the entire perimeter of the formwork.
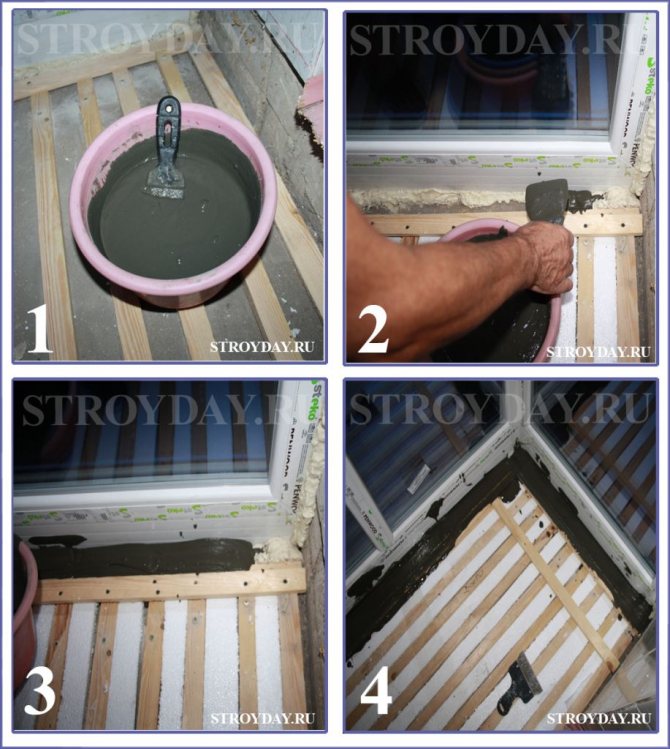
The process of filling the formwork with cement
When the entire inner part of the formwork is completely filled, proceed to the stage of mounting the rails in width.
Installation of horizontal bars
We fasten the lags with self-tapping screws and a screwdriver. Screw the screws using the board-to-board method (as shown in the photo). In the same way, we mount all the other logs, which we lay in width. In this case, it is important to observe a step of 15 cm between the slats.
When the next layer of slats is mounted, we pass to the passage of all the remaining slots. We fill the slots with a solution of frost-resistant tile adhesive. After all the cracks have been processed and repaired, we leave the solution to harden. This usually takes one day. After 24 hours, the solution should completely harden and harden. In this case, the formwork should look like in the photo.
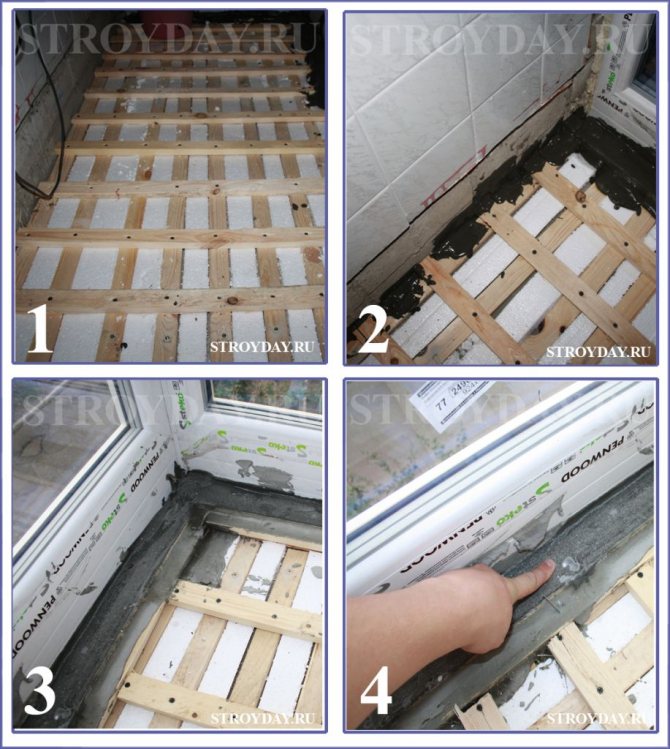
Sealing the gaps in the floor with frost-resistant tile adhesive
We check the formwork for strength. To do this, it is enough to try it with your fingers, if everything is dry and hard, then everything is in order, you can safely proceed to the next step.
Insulation of the concrete floor on the balcony with a second layer of foam
The sequence of actions is as follows:
- Cut the styrofoam into 15 cm wide pieces.
- We put the cut foam plastic in the distance between the wooden slats.
- We fill up the gaps in the floor with small pieces of foam plastic so that a surface is formed without gaps and crevices.
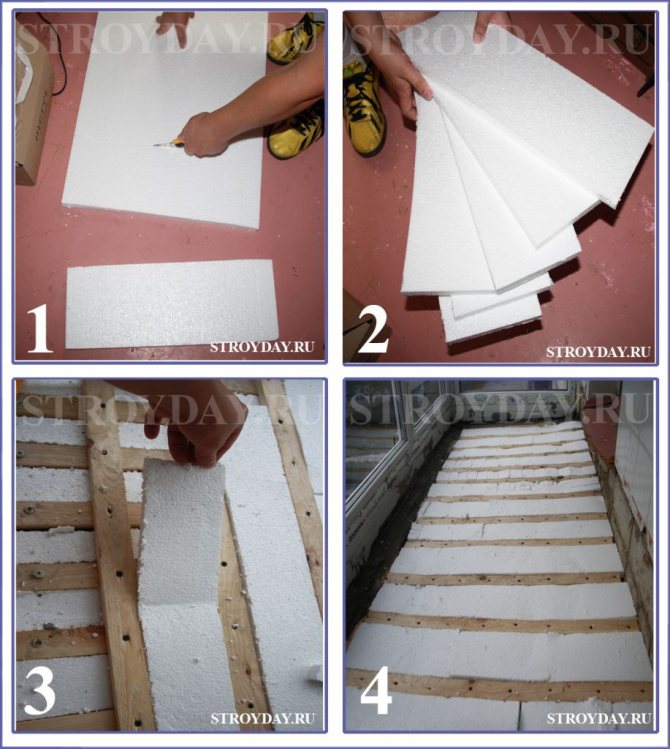
Insulation of the floor on the balcony with foam plastic
Prices for popular types of insulation
Insulation