Tile is a material with high thermal conductivity. This means that its surface for the most part remains, if not cold, then cool. In winter and in the off-season, when the temperature outside the window is low, walking on such a floor is not very comfortable.
The problem of a cold floor is more relevant for residents of the first floors. The best option would be to insulate directly from the basement side, sheathing the concrete floor with foam sheets.
Therefore, when installing such a coating, it is recommended to insulate the floor under the tiles.
What kind of insulation to choose?
- Glass wool and its modifications.
Nowadays, you can buy the following varieties of this material: glass wool, mineral wool, basalt, stone, shpak. All these heaters have a cotton wool structure and differ in the source material from which they are made. Their production method is practically the same: melting. For example, the components of mineral wool are molten glass, rocks and spats.
The thermal insulation characteristics of different types of this material are also identical. Each of them can be rolled and in the form of mats of different thicknesses. The most famous and popular brands: Isover, Rockwool, PAROS, URSA. They can insulate the floor if there is no high humidity in the room or basement. Any of these materials are hygroscopic and deteriorate when wet.
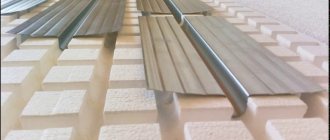
- Penofol.
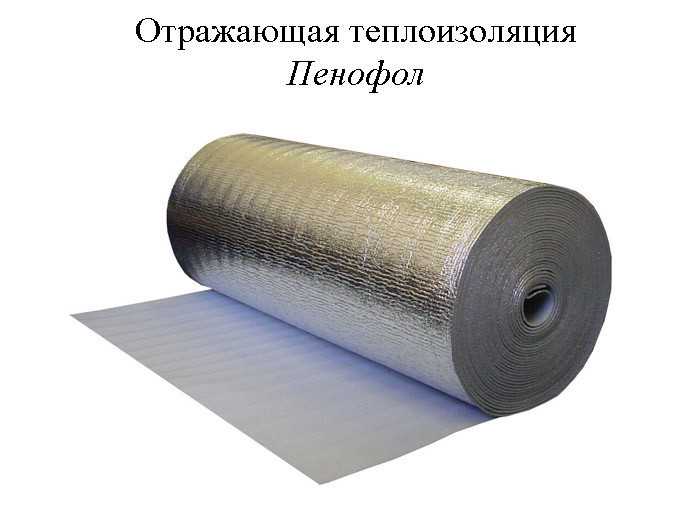
Penofol is a roll material, as a rule, foiled on one of its sides, or on both sides at once.
This is a new generation of insulation. It is a roll material, as a rule, foil on one of its sides, or on both sides at once. This heat-reflecting coating distinguishes it from other insulators and is therefore a unique product that prevents heat leakage. Penofol can have a self-adhesive layer, which only increases the reliability of the barrier for cold air access. It is produced in rolls and comes in different thicknesses.
- Styrofoam.
It is a universal insulation, the most popular and used everywhere. Sheets of this material can have a thickness of 2, 2.5, 3, 5 and 10 cm. Standard sizes: 100x100 cm and 100x200 cm.
Polyfoam can be of different densities. Moreover, the higher it is, the higher the thermal insulation properties of this material. Floor insulation is made of solid and high quality, with a high degree of density. This is the most preferable option for laying under a tile.
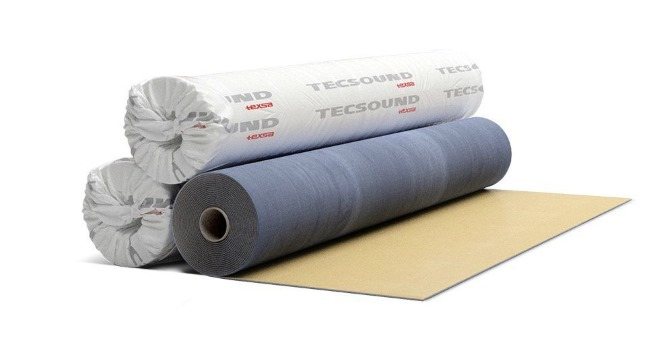
Soundproofing materials for tiles
Reinforced concrete floors do not provide sound insulation. Soundproofing the floor using additional layers is the optimal solution to this problem. Masters distinguish several types of soundproofing material:
- membranes;
- bung;
- substrate.
The substrate is cheap, but the cork is more appreciated due to its composition. Membrane protective sheets for tiles are an optimal alternative, since the floor covering ceases to perceive shock vibrations from the outside and the noise level is reduced.
Membranes are suitable for private houses, but they will not solve the problems of apartment buildings. If a person lives in a high-rise building, then it is better to use more serious material or create multi-layer sound insulation. Rockwool or Isover slabs are great. Their thickness ranges from 5 to 10 cm, they are able to isolate sound vibrations even through concrete floors. Noise is guaranteed to be reduced by 30 dB or more.
We recommend: Step-by-step instructions: soundproofing a wooden floor
If the floor screed is tight, one layer of insulation is sufficient.
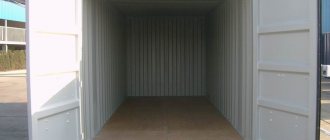
Insulation of the concrete floor under the tiles
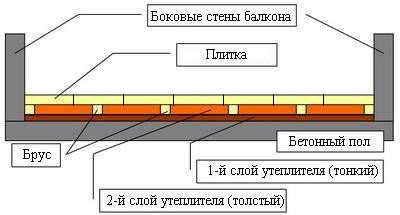
Tiles can only be laid on cement-sand or other masonry mortar.
Tiles can only be laid on cement-sand or other masonry mortar. Therefore, the floor in such a room will be concrete. He, like ceramic tiles, does not retain heat well, therefore it needs high-quality insulation. The technology of work in houses with and without a basement has slight differences. Let's take a look at each of these methods.
- Insulation of a concrete floor in houses with a basement.
The problem of a cold floor is more relevant for residents of the first floors. The best option would be to insulate directly from the basement side, sheathing the concrete floor with foam sheets. But in practice, this method is rarely used. Therefore, the insulation works are carried out in the apartments by the tenants themselves. Sequence of work:
- Dismantling the top, usually a wooden covering.
- We clean the surface of the concrete slab from debris and dirt.
- Using the hydro level, we make markings on the walls of the room, which should correspond to the height of the future floor, taking into account the facing. The lines must be strictly horizontal.
- We lay the waterproofing material. Roofing material is most often used, but you can use a more modern method: treat the surface with any of the bituminous mastics.
- We lay insulation between the lags. If the climate of the region of residence is warm, you can simply fill in a layer of expanded clay.
- We lay a vapor barrier material on top of it (if foam is selected, then one is not required).
- Next, we lay the reinforcing mesh with a bar section of at least 5 mm.
- We prepare a concrete solution in a ratio of 1: 3, where 1 part of cement and 3 - sand.
- We fill the floor with concrete layer by layer, focusing on the marking lines. Each subsequent one - only after the previous one has hardened. The last layer is leveling, so the concrete should be more fluid.
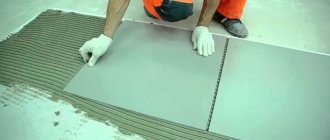
- We make laying of tiles or porcelain stoneware.
- Thermal insulation of the floor under the tiles in houses without a basement.
Often these buildings stand on piles and their lower floors are located close to the ground. The technology of their insulation differs in that a large thickness of insulation is required. All work is carried out indoors. Their sequence is similar to that described above.
Warm floor system
All of the above methods of floor insulation, of course, can be used in the bathroom, but they all have one common drawback. The fact is that each of these methods leads to a rather tangible increase in the level of the floor, and in accordance with safety requirements, the floor in the bathroom should be lower than in other rooms. Therefore, the most acceptable way to insulate a bathroom floor is to install a "warm floor" system.
Underfloor heating systems are of two types: water and electric. In the first case, heat comes from hot water, which circulates through pipes laid in the floor, and in the second, from a special cable connected to the mains. Of course, the choice of the "warm floor" system is a purely individual matter, but you need to clarify right away that water systems require the installation of an additional water heating boiler, since it is strictly forbidden to connect the "underfloor heating" system to central heating systems... Naturally, this significantly increases the cost of the "warm floor", so the most popular today is the electrical system.
It is worth making a reservation that if we are talking about a private house with an autonomous heating system, the installation of a water-heated floor can be quite economically justified.
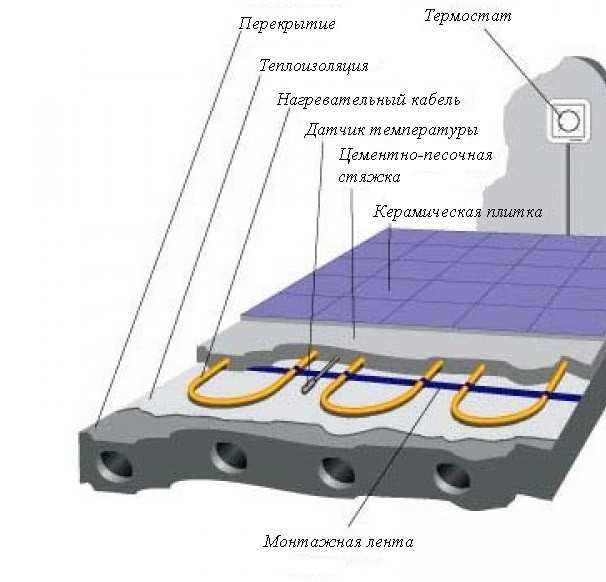
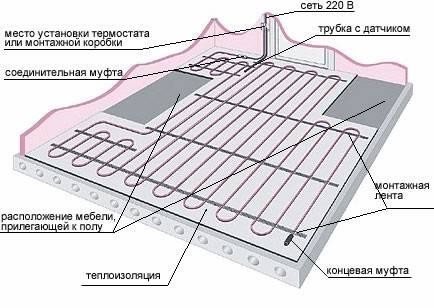
Installation of the electrical system "warm floor" is quite simple and consists of the following stages.
Installation of the "warm floor" system as an option for floor insulation under the tiles
- We prepare the base. We remove the old coating and clean the space between the lags.
- If necessary, we level the flaws with a cement-sand mortar.
- We install waterproofing.
- We lay the insulation. The best option is polystyrene, penofol, polyurethane foam plates 3-5 cm thick. A special insulation for the "warm floor" system is also sold, it has recesses for pipes, which greatly facilitates the work.
- In order to avoid deformation of the insulation during the heating of pipes, it is recommended to leave a gap of at least 0.5 cm between the foam and the wall. The gaps between the sheets can be sealed with polyurethane foam.
- We make pipe laying. The best option is to use metal-plastic or polypropylene, as they are durable, strong and have good flexibility. Their installation is possible in one of the following ways:
- spiral;

The distance between the pipes should be 30-40 cm.
- snake;
- a spiral with an offset center;
- double snake.
No matter how the pipes are laid, the distance between them should be 30-40 cm. We bring the supply and return ends to the collector cabinet. You can attach pipes to the insulation in the following ways:
- laying between "bosses";
- using U-shaped spring brackets;
- mounting aluminum plates;
- mounting on a special metal mesh with plastic clips for fastening pipes.
We connect the system to the water supply, set the necessary adjustments in the collector cabinet, fill the pipes with coolant, turn on the system.
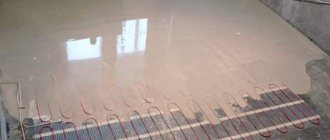
Underfloor heating with water heating
This method of floor insulation is very popular, despite the rather high cost. Therefore, in order to save on installation and not involve specialists, you can install the system yourself. Installation of a warm floor under the tiles is carried out in the following sequence:
Floor heating scheme with water heating.
- Preparation of the base. The old coating is removed, all debris is removed in the intervals between the lags.
- Laying waterproofing and insulation. It is better to use penofol, foam or polyurethane plates as insulation. Also on the market you can buy insulation specially designed for the warm floor system. Its feature is the presence of recesses for pipes, which greatly facilitate installation. It should be noted that a space of at least 5 mm must be left between the wall and the foam, since when the pipes are heated, the material may deform slightly.
- Pipe laying. It is recommended to use polypropylene or multilayer pipes, as they are strong, durable and have good flexibility. There are two ways of styling: a spiral and a snake. When the pipe is arranged in a spiral, the entire floor area heats up more evenly, since the supply and outflow of water are parallel. When laying with a snake, the floor above the beginning of the pipe heats up more, but this method is indispensable when you need to bypass any obstacles or areas. To distribute heat evenly (for any installation method), the distance between the pipes should be approximately 30 cm. The pipes are attached to the insulation using U-shaped brackets, plastic brackets, clips or other special devices.
- Underfloor heating connection. After laying, the supply and return pipe ends are removed and connected to the manifold. Then the entire system is connected to the water supply.
- Pouring the screed and laying the tiles. After checking the correct installation of the system, you can proceed to the finishing screed.It is not necessary to fill the pipes with water before pouring, as they are sufficiently rigid and should not deform under the pressure of the concrete solution. It is not recommended to turn on the heating at full capacity for some time after pouring, in order to avoid the formation of cracks. After the screed dries, the tiles are laid.
Related article: Electronic door lock: varieties by opening method
How floors are insulated with infrared heating
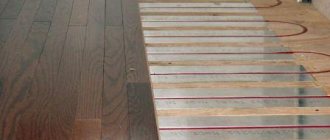
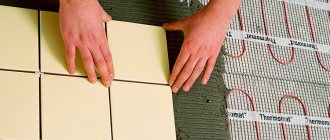
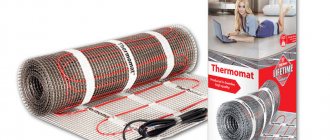
This method is the most modern. It consists in installing infrared mats, which act as heating elements. Despite the fact that this option is much more expensive than the previous ones, such insulation is mounted much faster. For its installation, no screed device or dismantling of the old coating is required.
Infrared mats require a flat surface. Therefore, it will be necessary to do the appropriate work. The floors are insulated with these elements directly under the tiles. The mats are attached to the base with glue. The minimum of "wet" processes and ease of installation make this method of home improvement the most preferable.
511
Do-it-yourself soundproofing
Before starting work, a site is prepared, tiles and related products are purchased. Soundproofing on the floor is carried out in several stages: first, the screed is carried out, then the protective plates are laid, and at the end the tiles are laid.

Necessary materials
The first stage is the screed. If you have settled on a flooring made of oriented strand boards, then you will need:
- damping pad;
- lathing board;
- membranes;
- sand;
- vapor barrier;
- tile;
- polyethylene;
- screwdriver, self-tapping screws;
- mix for laying tiles.
Preparation includes dismantling the old flooring, leveling the base and removing debris.
Step by step actions
Step-by-step implementation of noise insulation:
- The slabs are being laid. For this, a board is laid over the entire area. The elements are laid as tightly as possible so that there are no gaps. If the tree is not processed, it is painted over with impregnation. This substance increases the service life of the board several times.
- The wooden structure is covered with sand. It is closed with a vapor barrier.
- Membrane plates are laid. The panels are fixed with self-tapping screws at the edges. In some places, the sheet is cut, but with an allowance so that the edge can fit more tightly into the niche. Additionally, stripes are laid along the side walls. The resulting sandwich is pressed down.
- The membranes are covered with polyethylene, and then vertical damping elements are installed.
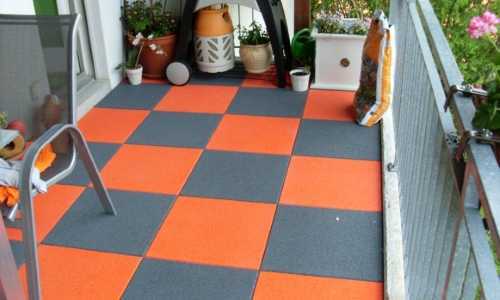
- Tiles are laid.
We recommend: Advantages and disadvantages of modern materials for noise insulation of the ceiling