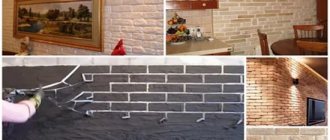
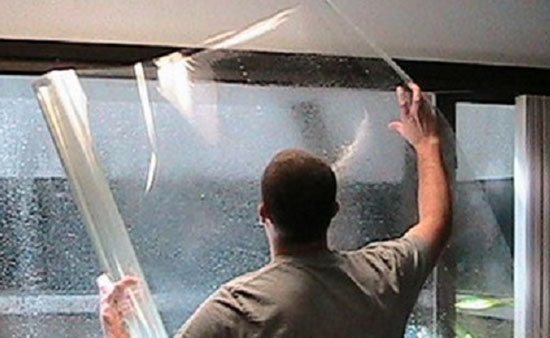
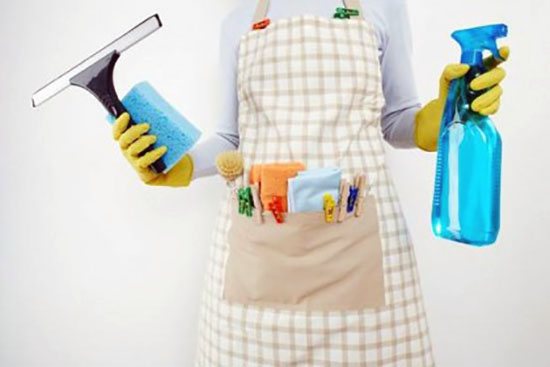
Companies producing modern PVC windows always inform customers about the need to remove the protective film from the profile of the structure as soon as possible after its installation. Experts warn about possible problems if this rule is ignored, and the special danger of their occurrence near windows located on the sunny side. Unfortunately, buyers do not always listen to valuable advice and then suffer for a long time, bringing new windows to their proper form. Many window owners, who did not get rid of the protective film in time, make another mistake - they try to remove the tightly adhered coating with completely unsuitable tools: metal scrapers, knives, scissors, and also experiment with solvents and other harsh chemicals. This is completely unacceptable! Such actions, perhaps, will clear the windows of adhering film, but, most likely, they will hopelessly ruin their appearance.
For those who forgot to get rid of the factory profile protection in time and want to know how to remove the film from plastic windows as safely as possible, we have prepared useful recommendations, the effectiveness of which has been repeatedly tested by specialists.
Protective film on windows - features and reasons for difficult removal
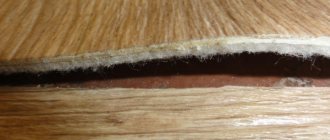
To prevent damage to windows during transportation, installation and repair work indoors, manufacturers cover them with a special two-layer film. The outer layer is transparent, dense and strong enough - it is easily separated from the inner part without creating any special problems. Difficulties arise with a thin inner layer that is sensitive to sunlight and is very fragile. Reacting to ultraviolet light, the thin white film quickly “cakes” and adheres so firmly to the plastic that it is almost impossible to separate them. These same rays disrupt the structure of the material, reducing the strength of the coating and making it even more difficult to remove.
For this reason, installers carrying out the installation must warn buyers about the presence of a protective film on the windows and the need to remove it as soon as possible. Unfortunately, this is not always the case (for example, if the windows are installed in a new house before the occupants enter it) and the owners often have to put the windows in order several months after the period recommended for removing the coating. It is quite difficult to do this, but it is necessary, because protection spoils the appearance of structures, especially if they have a colored decorative coating.
Laminated windows are even more difficult to clean - they cannot be washed with gasoline, acetone and other substances containing solvents. Methods of mechanical cleaning are also not suitable here, because the decorative layer is very easy to damage. There are several safe ways to clean your profile as gently as possible. And we will consider one of them right now.
Waterproofing tape for PVC windows: characteristics, application
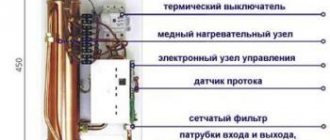
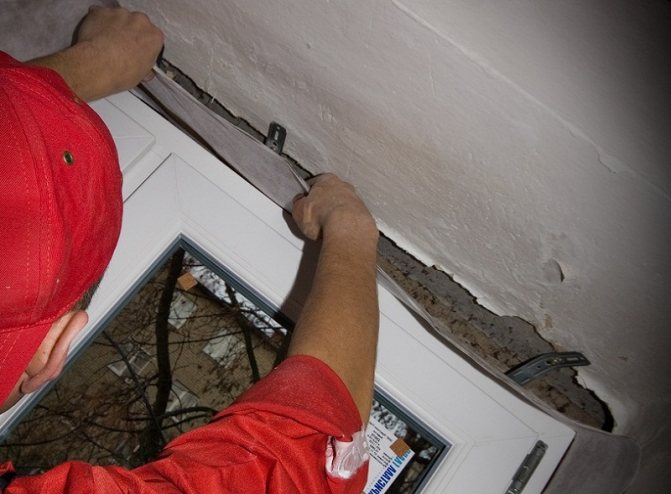
During the period of operation, window frames are subjected to enormous stress. Therefore, it is especially important to carry out their installation taking into account all the necessary requirements.
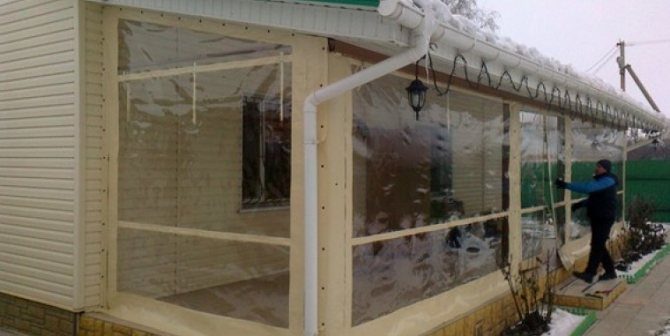
If the windows themselves are made of high-quality materials, but the installation technology is not followed, there will be no need to talk about their effective “work”. In the cold season, condensation will accumulate on them, possibly even icing.Avoiding such troubles and at the same time creating comfortable temperature conditions in the apartment is quite simple if you use a special waterproofing tape for pvc windows during installation.
Getting rid of old film is simple and effective
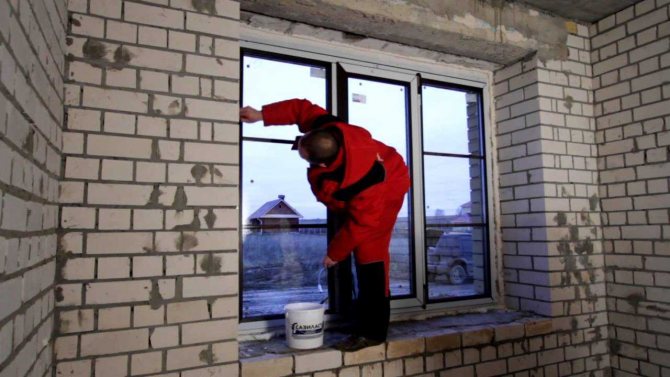
The simplest and most effective way to remove the protective film from windows is steam steaming. Yes Yes! This is how you can call the procedure for getting rid of the pasting of windows with film by exposing it to hot steam. The method is available to almost everyone and guarantees the safety not only of the profile, but also of the lamination layer on it.
For work, you will need a household steam generator. The simplest model can be bought in a regular hypermarket, but it is better to purchase an apparatus with a hose for attaching the attachment. Such a tool is more convenient than the option in which steam comes out directly from the nozzle, since they can reach hard-to-reach areas near the windowsill.
We fill the steam generator with water, plug it in and, as soon as the water heats up, we start working. First of all, we warm up a small area at the edge of the profile - it is easier to pick up the film there and start separating it. The device should be held close over the film and the nozzle should be directed towards the surface, practically touching it. It is very important to simultaneously warm up a small piece of film over the entire width and try to pick up the edge with a fingernail or a plastic (!) Scraper. If the coating is old and does not come off the first time, let it cool down, and then try again.
It is necessary to separate the film from the profile carefully along the entire width. Only after it has been possible to do this in a small area, it is possible to heat up the next segment and move on. In order for the coating not to tear and separate evenly over the entire area, it is necessary to act slowly and carefully, treating the film with steam from both sides - from the outside and from the inside (along the line of contact with the profile).
If the film is torn or a part of it is torn off, heat the remaining adhered fragment and try to pick it up again. Only when the edge has been captured and the separation line has been restored across its full width can the removal procedure be continued. At that moment, when the removed part of the film becomes too long and starts to interfere, it must be cut off, leaving a small strip (2-3 cm) to hold the coating during further cleaning.
After you can completely remove the old film from the window, you can proceed to the final stage - removing the white plaque left by the protective coating. Film traces are difficult to wash off with ordinary soap or powder, but any glass cleaner does an excellent job with them.
Vapor barrier tape for PVC windows
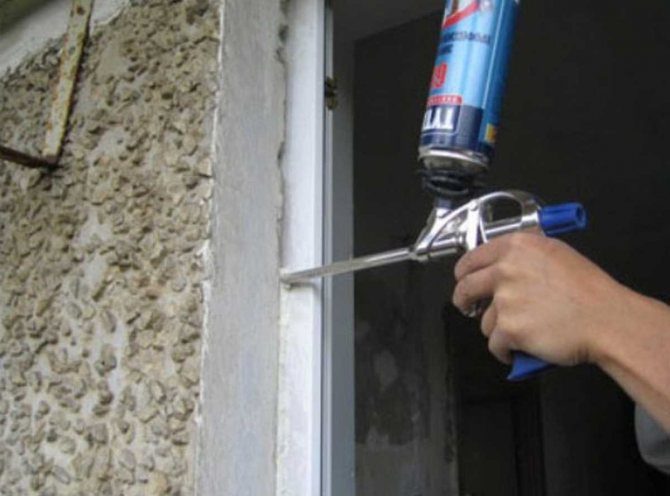
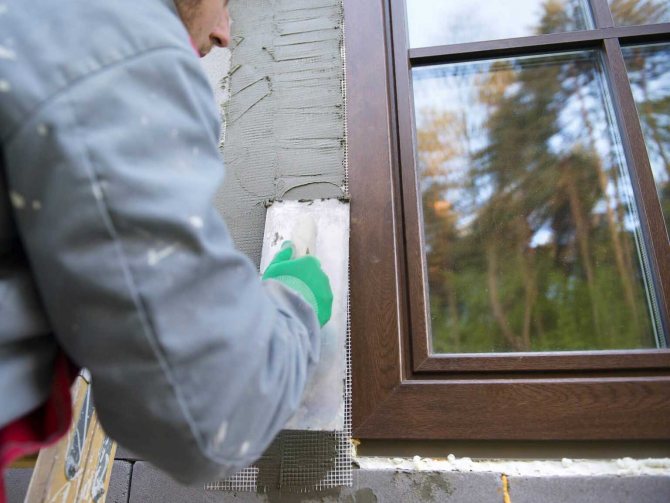
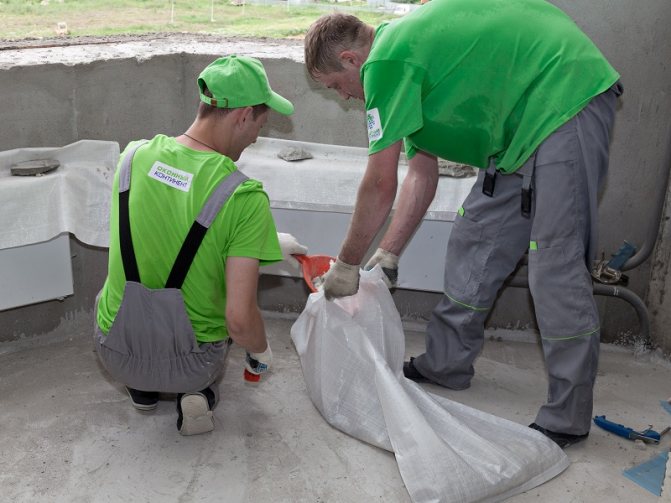
Joints and seams are always the most unprotected places, including when installing windows. Moisture can seep through them, condensation can form, heat can escape and sound insulation is disturbed. Mounting tapes will help eliminate these problems. Waterproofing tape for PVC windows will not only improve the climate, but also simplify the installation.
How to avoid problems with the protective film?
It is quite simple to avoid difficulties when removing the protective film from PVC windows - you need to follow the manufacturer's recommendations on time. The operating instructions for window systems, as a rule, state that the protection from the profile must be removed within 10-12 days after the installation of structures. If it is not possible to do this on your own, you can ask the installers to do the work by prescribing this clause in the contract in advance or by negotiating with the installers in private.
In any case, when making such a valuable purchase, you should not ignore the manufacturer's instructions - this will help to maintain the impeccable appearance of the products without spending extra money and energy.
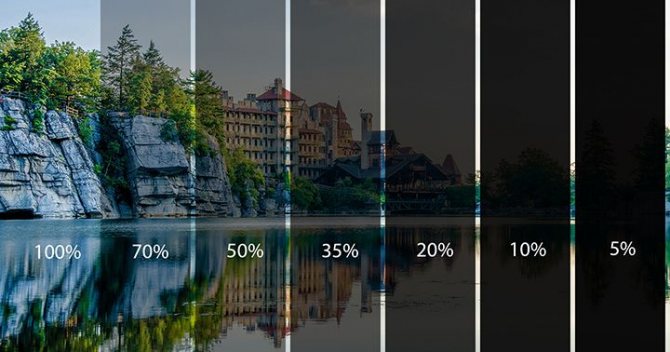
Types of tint films
For plastic structures, several basic types of tint films are used.
Sun protection film
This type of film tinting is applied in order to protect the interior of the room and curtains from burnout, reduce the appearance of glare on the TV, and reduce the penetration of ultraviolet radiation into the room. Sun-protection tinting is ordered in apartments facing south.
Mirror film
Such a film is applied to double-glazed windows in apartments of the first and second floors, office premises, on window structures of country and private houses. The one-way mirror effect lasts until dark. At night, the lighting inside the room is greater than outside, and the glass unit begins to shine through. Mirror tinting can be done in color, complementing the design of the facade of the building.
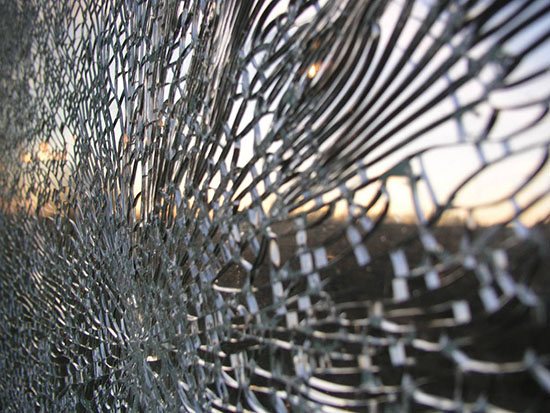
Protective film
This type of toning is used to enhance the strength of a glass unit. Protective films are preferable for installation in apartments with small children and in buildings with a high risk of glass damage. With the help of additional protection in case of accidental damage to the integrity of the glass, the fragments do not fall out, but remain on the film.
Matte film
Matt tinting is used for installation in office partitions and doors in medical institutions. This is an excellent and inexpensive solution for creating a comfortable environment and protection from unwanted prying eyes.

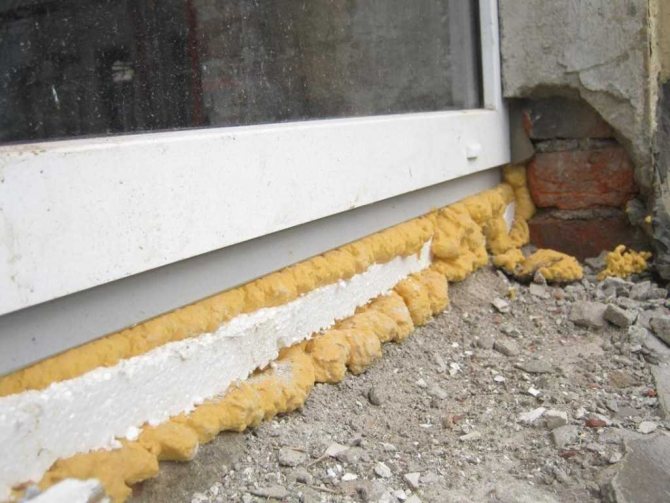
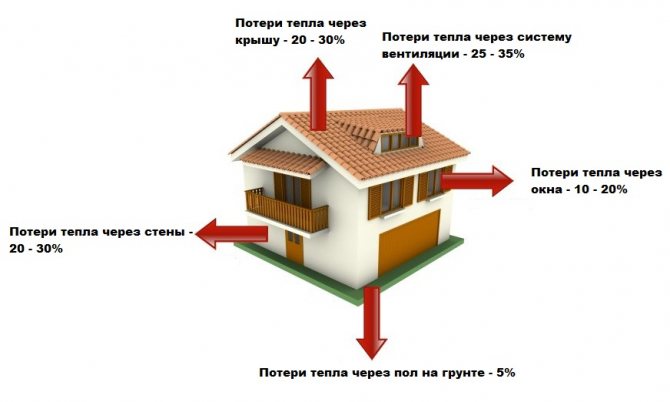
Common blowing spots
Before starting work on sealing windows, it is necessary to identify the blowing points.
Common blowing spots in wooden windows:
- slopes;
- windowsill;
- the junction of the window frame and sash;
- wooden frame;
- glass.
Very often, the weak points in wooden windows are the joints of glass and glazing beads, window sashes and frames (in particular, vents that often open). It is also worth noting the vulnerability of the junction of the window frame to the opening. To determine the place of blowing in plastic windows, it is necessary to inspect the inside of the window profile. If a layer of dust forms on it, then there are problems with thermal insulation in these places. The exception in this case is the upper hinge of the window profile. At this point, the formation of dust is due to the design features.
Build on your lot: a goat barn, a sheepfold, a pig house and a chicken coop.
Plastic windows have the following blowing points:
- sash perimeter;
- windowsill;
- slopes;
- the junction of the impost and the frame;
- window hinges;
- sealant.
Did you know? Through research into various radiation protection products, Japanese scientists have identified materials that reflect heat when applied to glass surfaces.
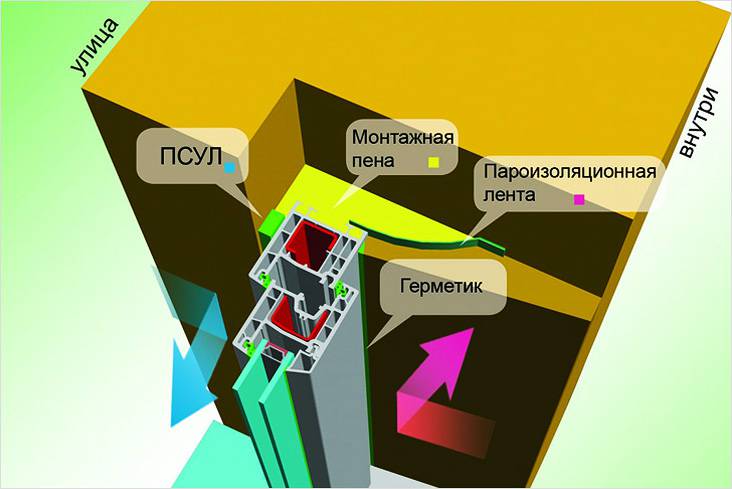
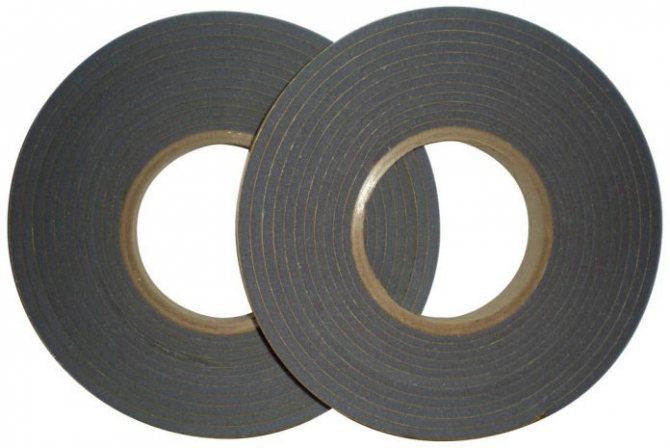
Classification of vapor barrier for windows
For the installation of a PVC window, a vapor barrier tape of all varieties and a diffusion vapor-permeable tape are used.
Tapes can have one or two adhesive surfaces. The first ones are installed on the frame itself, the second ones can be installed in the window opening, gluing them to the wall and to the window profile. The assortment is divided into winter and summer options. Summer ones are intended for installation at temperatures from +5 degrees to +35 degrees, winter ones - for installation at temperatures of +5 degrees and below. Moreover, when installing in winter, it is necessary to warm up the surface of the window opening.
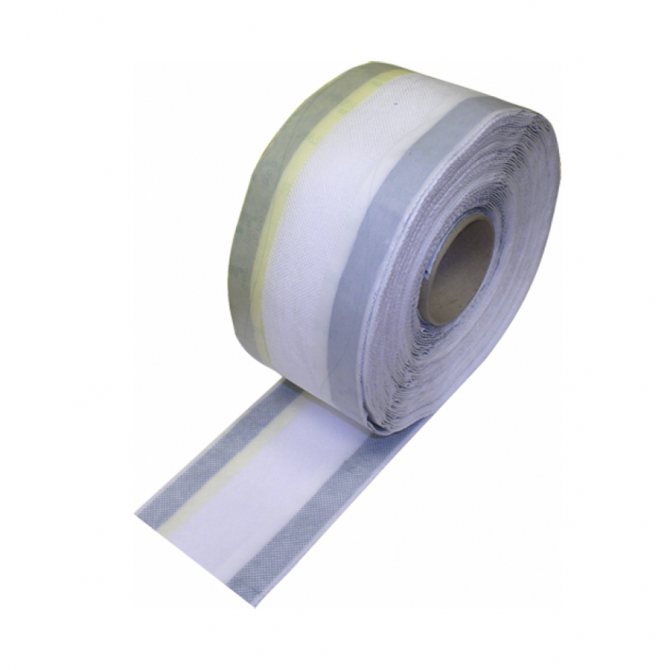
The tape should be about 5 cm wider than the width of the assembly seam.
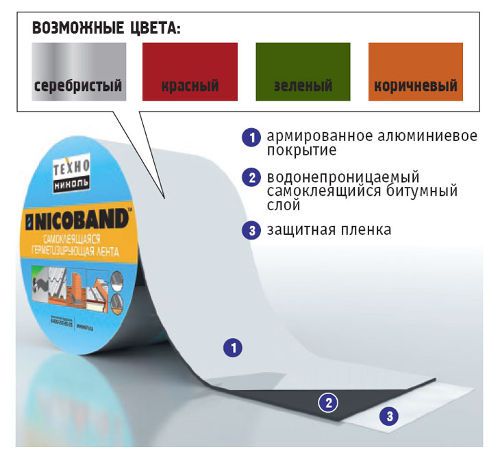
According to the material of manufacture, two types of tapes are distinguished:
- Butyl rubber tape with non-woven fabric reinforcement for sealing joints.
- Metallized tape designed for installation in wet rooms.
Wet bonding of decorative films
Some manufacturers produce decorative (stained glass) shrink films that are glued to wet glass and then dried with a household or building hair dryer.
In work, these stained glass films are much more convenient than those that have a synthetic adhesive base.
For work, it will be necessary to prepare the glass in accordance with the previous section. The film is cut according to the same rules. Exception - allowances at the edges of the workpiece can be large - 10-15 mm.
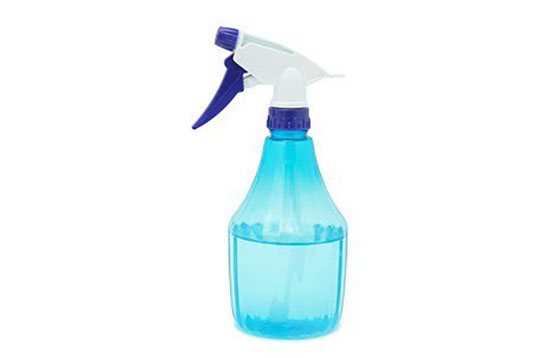
For gluing, a soap solution is used (colorless shampoo, dishwashing liquid, shampoo for washing windows) diluted in a ratio of 1: 200 in water.
Before gluing, the glass is abundantly moistened with a solution from a spray bottle. The upper edge of the decorative stained glass film is applied to the upper glazing bead. The assistant aligns the film with the protective base vertically and also slowly releases it from the base.
Initially, the adhesive should hold the film by pressing it firmly against the glass to prevent slipping on a damp surface. The air from under the stained glass film is removed with a rubber spatula (squeegee). The displacement of air bubbles is much easier. If it was not possible to completely displace the bubble, the film can be slightly peeled off from the glass. Then remove the bubble, moisten the surface with soapy water and press down again with a squeegee.
After the decorative film has been fully pasted, the excess is trimmed along the glazing beads. At the same time, unlike the first version of the sticker, the knife should not be held parallel to the edge of the glazing bead, but at an angle of 30-45 ° to it. So that the edge of the knife goes between the glazing bead and the glass.
This is necessary in order to compensate for the shrinkage of the film during the drying process and the formation of transparent, not sealed stripes.
After that, the decorative stained glass film is wiped from excess soap solution with a dry cloth and dried with a hair dryer. Do not direct a stream of warm air to one place. This can lead to deformation (melting) of the film. The hair dryer must be moved evenly along the entire plane of the glass.
The drying process can be controlled as fine air bubbles disappear under the film.
Preparing a window for decorating with self-adhesive film
The final result largely depends on how well the glass is prepared.
The first condition, when decorating with transparent stained glass films, is the integrity of the glass itself. Ideally, it should be new, free of cracks, scratches, irregularities and "streaks". All these defects will be visible through the film and nullify your work.
The second stage is a thorough cleaning of glass from mechanical impurities - paint drips, splashes, layers of insect excrement. For mechanical cleaning, it is moistened with an aqueous solution with the addition of surfactants (surfactants), which can be:
- washing powder;
- shampoo for washing windows;
- regular colorless shampoo (for children);
- soap solution (laundry soap).
The glass is cleaned with a retractable scraper for windows (aquariums). Doing it dry is strongly discouraged! Microscratches remain on the glass, which, in the future, will look like a cloudy spot.
After cleaning, the window (glass) is washed with a solution with the addition of ammonia, which gives the surface an increased shine.
The final stage is glass degreasing. To do this, use either acetone or gasoline of the "Kalosha" brand (for lighters). Before using acetone or gasoline, make sure that they do not leave whitish streaks on the glass.
It is advisable to degrease the glass surface 10-15 minutes before starting work.
If you plan to decorate a wooden window with a film, the glass in which is held by glazing beads, it is advisable to remove it from three sides: from below, to the left and to the right. Leaving only the top one so that the glass does not fall out of the frame.