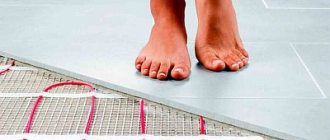
The main pros and cons of electric floors
Before making underfloor heating with your own hands, it is important to study all the strong and weak edges of this coating, in order for the installed underfloor heating so that they serve you for a long time.
The undoubted advantages of this product include:
- The ability to use a warm electric floor, both as the main source of heat and as an auxiliary one;
- Smooth and most importantly correct heating of the entire room;
- A wide range of applications in various kinds of rooms, from ordinary living quarters to offices;
- Electric underfloor heating is organically compiled with all kinds of final layers, for example, tiles, laminated floors, linoleum;
- It is permissible to regulate the temperature regime and heating, both in the whole room and in individual zones;
- The installed heat-insulated floor of this type does not require additional installation of special equipment;
- No specialized knowledge is required to install an electric floor;
- Stealth. Installation of electric underfloor heating is done under the finishing layer, which means that the finished circuit is completely hidden;
- Quite a long period of operation with all the recommendations for operation.
Since any modern product, unfortunately, in addition to the pros is endowed with minuses, then when you decide to make an electric warm floor with your own hands, you need to take them into account.
Electric floor connection
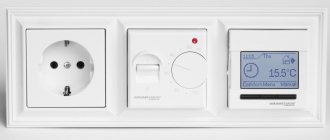
The installation of an electric underfloor heating begins with determining the place where the thermostat will be installed. Most often it is located on one of the walls, not far from the outlet. If the total power of the heating elements is higher than 3 kW, the installation of an RCD is mandatory. In principle, even with less power, such a device will not hurt: safety is paramount. Therefore, the power supply is first turned on to the machine, and then taken out to the thermostat.
When installing an electric floor, the first step is to install a thermostat.
Thermostats (thermostats) are of two types: overhead and mortise. Mortise fits perfectly into a standard junction box and looks quite good when mounted. The appearance of the invoices is far from ideal, but they are often placed either in separate rooms designated for heating equipment, or they are hidden together with the RCD in a special cabinet. By the way, this is a good idea if you have small children: they are very attracted to all kinds of knobs / buttons, and it is better to hide everything behind a closing door.
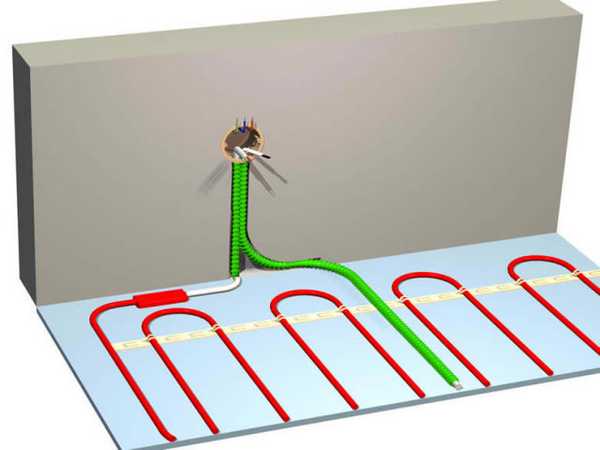
If a mortise model of the thermostat is selected, a hole is cut out in the wall under the junction box, and the junction box is installed there. They turn on the power supply, isolate the ends and do not connect them to the thermostat yet. From the box down to the floor, a strobe is laid, in which the wires from the electric floor will be located and a corrugated pipe through which the floor temperature sensor is inserted. The strobe continues along the floor at a distance of 50 cm from the wall - this is where the sensor will be located, and the corrugation is needed in order to replace the broken sensor, if necessary, without disassembling the entire structure.
The corrugation is fixed in the groove on the floor, the other end is brought to the mounting box and also fixed. The sensor is inserted there (it is lowered from the mounting box on its own wire).After you see that the sensor has appeared on the other side of the corrugation, you need to pull it back a little, and seal the open edge of the pipe with electrical tape or foam plug so that the solution does not get there. Having installed the sensor, connect the wires from it to the corresponding terminals on the back of the thermostat housing.
One of the options for connecting wires to the thermostat
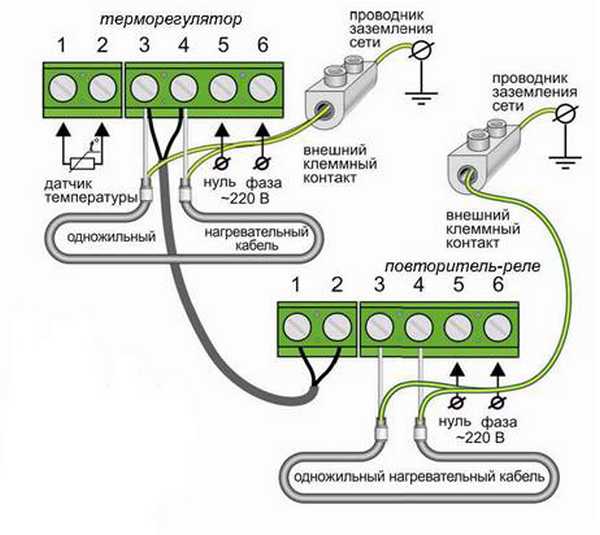
The next step is to lay and connect the cables from the electric floor heaters. They are also connected to the terminals on the thermostat. And only then can the supply wires be connected. And an electrician should do it. The electrical part is the only thing that it is undesirable to do on your own when installing a warm floor. Still, it is better to invite a specialist. Actually, this completes the connection of the electric underfloor heating. Next, you need to check the operation of the system (turn it on for a while) and, if everything is normal, proceed to the next stage - pour the screed, lay the tiles on the glue, or, if a film-heated floor is used, immediately lay the laminate, parquet or floorboard on the substrate ...
Basic methods of laying an electric floor
The ways how it is permissible to lay an electric warm floor with your own hands are divided into three types:
- Direct installation in the screed, and then the final layer (cable underfloor heating) is mounted.
- Laying on top of a screed under a tile covering (electric mats).
- And direct installation under the flooring (infrared heated floors).
The above types of execution allow you to lay an electric heat-insulated floor in absolutely different rooms of your house or apartment.
Video on how to lay the cable floor under the screed:
Video on how to install the heating mat:
Preparation of the base
When we make an electric underfloor heating with our own hands, it is important to carefully prepare the base.
At the stage of preparing the foundation, we carry out the following activities:
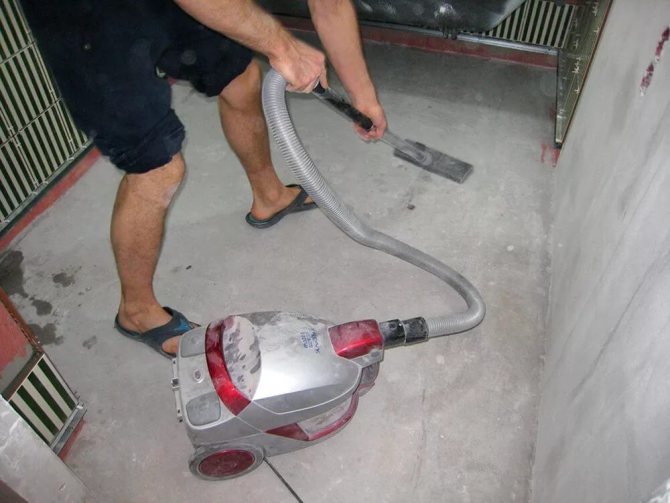
- We remove the old coating and revise the screed. In the event that it is required to mount an infrared thermal floor and the screed is in a satisfactory condition, then the surface is simply thoroughly cleaned from dirt and dust. If the installation of a wired heat-insulated floor is needed, then it will not be possible to do without removing the old base, since a new screed is required in order to hide the cable, and this will "eat up" the height of the ceilings.
- The next stage is the laying of a moisture-proof coating, a polyethylene layer is widely used in this regard, but if desired, it is permissible to use your own version, for example, roofing material. Then a damper film is attached to the walls of the room. It guarantees compensation for thermal expansion during heating.
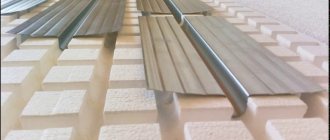
- Then a heat-shielding layer is laid. Laying this layer will significantly reduce heat losses through the base of the floor. The type of thermal protection is selected depending on the orientation of the room and the type of base.
- If there is an unheated room under the floor, then the thickness of the insulating material should be at least ten centimeters, if a warm basement or other living rooms are made under the ceiling, then it is permissible to do with a thickness of five or two cm.
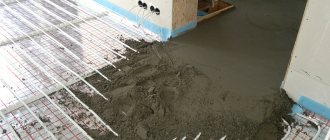
- Further, if the cable type of the underfloor heating is laid, then the cable is laid with further filling of the screed, and if it is just necessary to level the surface, then self-leveling floors or screed are made.
Types of electric underfloor heating
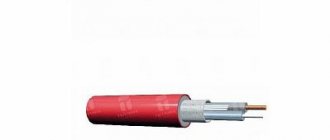
Industrial cable heating elements are of several types:
- Cable, coiled into coils on spools.
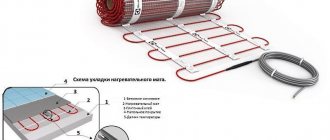
- The next option for cable heaters are standard width matsrolled into rolls. In them, the cable is laid in a "snake" with a certain pitch between two layers of reinforcing construction mesh.
- Cable heaters can be manufactured as separate sectionsconnected to the system during installation.
The use of each type of cable heater is determined installation method floors. This is how the mats are placed directly into the tile adhesive and the sections into the screed layer.
In the simplest case, the cable from the reel is laid on the floor with a snake with a certain pitch, calculated depending on the length of the segment. The contour along which the laying is carried out must take into account the peculiarities requirements for the safe operation of a warm electric floor. The heater in the form of a laid cable, connected in a series circuit of mats or sections, is connected to the power supply through the thermostat unit.
Each of the two types of resistive cable, single and double-core, provide additional options for laying systems:
- single core cable fits with the expectation of the obligatory return of the second end to the point of the beginning of laying for connection to the thermostat unit;
- two-core cable greatly simplifies the placement of the contour even in rooms with a complex layout, since the entire circuit is ready from the beginning, you only need to short-circuit the veins at the end of the section to be laid.
Self-regulating cables much more durable but more expensive than resistive ones. Their working element is a polymer matrix, which automatically reduces the temperature of the overheated section of the cable.
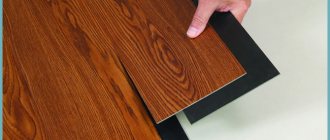
Gaining popularity warm electric floor based on special films even more convenient to lay. It is quite possible to place it under tiles, laminate or linoleum. If necessary, easily removable and is installed in a new location. The industry produces two types of films that differ in their properties:
- Carbon allows the use in any premises and in open space, can be easily placed on any horizontal or vertical surface (floors, ceilings, walls). Structurally, it consists of two layers of lavsan film, with a resistive heating layer between them.
- Bimetal represents a sectioned polyurethane film strip containing a bimetallic compound of copper and aluminum inside (as you know, the flow of current through the twisting of copper and aluminum wires causes the compound to heat up). Each section has a standard size and the same structure including a bus bar. The power connection must take into account the peculiarity - the absence of grounding. The film is specially designed for installation under laminate, carpet, linoleum, parquet, etc. The maximum temperature is +28 degrees Celsius, which does not harm the floor coverings.
Installation of underfloor heating elements
A competent layout of the heating elements provides for a distance of 15 cm from the wall, and 10 cm from the subsequent heating units.
- If a thermal cable floor is chosen, then the cable is laid with a selected step throughout the room, it is fastened to the base and connected to the mains and a mandatory check with a multi-ammeter for correct connection, then the screed is poured.
- If energy mats or foils are chosen, then it is necessary to put them in places where furniture and plumbing will not be placed.
- The laid mats and infrared film are also connected to the mains and checked for serviceability.
It is not difficult to do an electric warm floor with your own hands, especially if it is an IR film. During installation, the film is attached to the base with special tape, and the heating mats have their own adhesive layer.
When installing the wire, make sure that it is not stretched, and the bends are smooth and without kinks. This will ensure a long service life for the floor.
After checking the correct installation of the connected systems, you can proceed with the installation of the final coating.
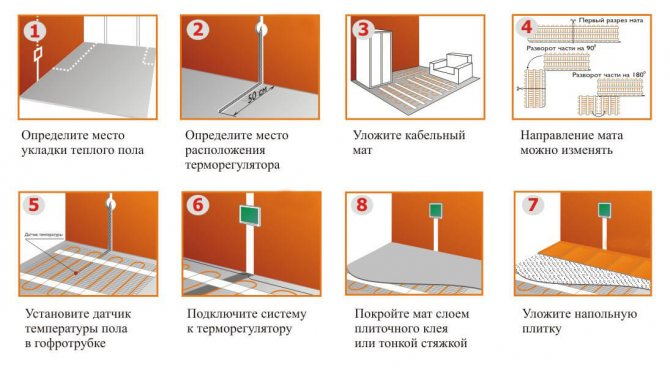
Algorithm for laying heating mats
In this article, we examined how to install and how to lay a warm electric floor. Knowing all the subtleties and nuances, you can easily carry out this procedure without outside help.
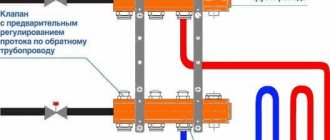
The device and characteristics of the warm floor
The warm floor consists of a shielding film, a heating element and a cladding layer. The design is also equipped with temperature sensors. There is a control unit. The design can be water or electric. It should be noted that the device of a warm electric floor is somewhat similar to a heat supply system in which water is used as a circulating liquid. There are practically no differences in the styling method. The only difference is that with the electric version of the floor, the cable acts as a heating element.