By insulating a glazed balcony or loggia, you can get additional usable area and use it with great benefit. In order for the insulation to be effective, it is necessary to choose a high-quality and good insulation. Penoplex building material is very popular, which today is the best insulation. With the help of penoplex, it is quite easy to carry out the work on insulating a loggia or balcony with your own hands. Those who have not yet worked with this material must first familiarize themselves with its characteristics, study the features of the use of penoplex and watch the training video.
- 2 General rules when working with penoplex
- 3 Preparing a loggia or balcony for insulation
- 4 Do-it-yourself ceiling insulation
- 5 Do-it-yourself floor insulation with penoplex
- 6 Insulation of the balcony walls with penoplex
6.1 Surface finishing after balcony insulation
- 6.2 A few useful tips for foam insulation
The main characteristics of penoplex
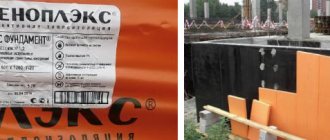
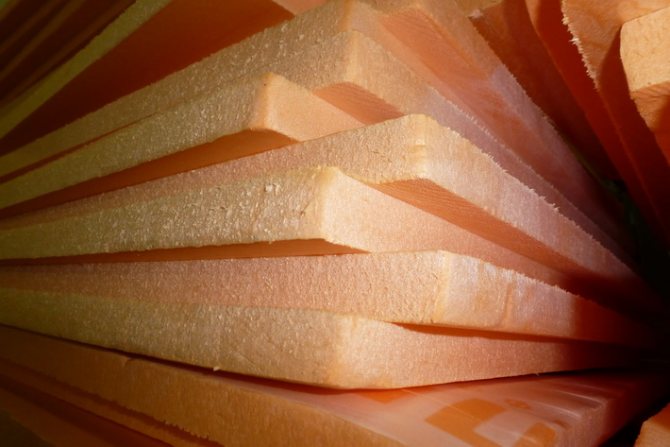
Penoplex is a foamed extrusion material that is gas-filled. It is made of expanded polystyrene by extrusion and possesses moisture resistance, thermal conductivity and great strength.
Due to its characteristics, the material can withstand maximum loads, therefore it is suitable for floor insulation. Penoplex is thinner than polystyrene, which allows it to save indoor space when used. Despite the high cost of insulation, due to its properties, it is widely used for insulation of various kinds of premises.
Penoplex advantages:
- Insulation is stronger than mineral wool and foam. It can withstand high compressive loads and is resistant to deformation.
- Penoplex is a very light material, which is important for its use when insulating balconies.
- Insulation, consisting of dense balls with air, therefore does not absorb water at all. Thanks to this property, it can last for at least fifty years.
- Penoplex, which contains flame retardants, is non-flammable. When buying material, you should pay attention to the marking, which should contain the letter C.
- The environmental safety of this insulation is higher than that of other similar materials.
- Penoplex has a convenient size, it is easy to cut and fasten, so you can use it to insulate the balcony with your own hands, without the help of professionals.
Along with its advantages, Penoplex has several disadvantages. Firstly, the material does not tolerate contact with petroleum products and solvents, and secondly, it is unstable to sunlight.
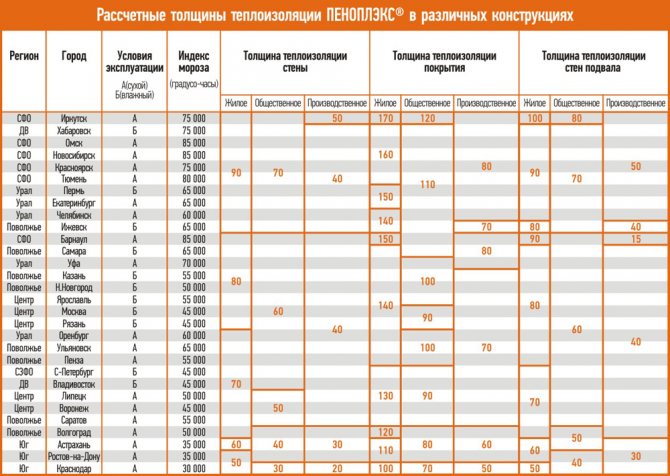
What thickness is suitable for a balcony?
Many apartment owners, starting the repair of the balcony, ask themselves the question: "How thick should the insulation be?" When buying insulation, you should take into account its thickness - the choice depends on the climatic zone. It should be remembered that 3 cm of expanded polystyrene replaces 60 cm of brickwork, 120 cm of concrete and 10 cm of wood. It is better to choose the minimum thickness, since the balcony area is not rubber.
For Moscow and the Moscow region, 3 cm thick expanded polystyrene is suitable. The most popular insulation at this time for repairing a balcony is Penoplex-35. Penoplex-45 is suitable for laying insulation on the floor, since it is able to withstand heavy loads, practically without changing its original shape.
General rules when working with penoplex
Before starting work on the insulation of the balcony, it is necessary to completely empty the room and clean the surfaces of all coatings.
When working with penoplex, you should adhere to a few rules:
- All surfaces on which the insulation will be installed must be free of protruding screws and cracks.
- For better adhesion, it is recommended to coat walls, floors and ceilings with a primer.
- If the surface is flat, then the penoplex can be mounted with glue. Otherwise, the material is attached with mushroom dowels.
- When using foam, you should pay attention to the fact that it should not contain tolour, which is often found in all-purpose or winter polyurethane foam.
- Whole tiles that do not fit are easy to cut with a knife.
- To make the edges of the tiles even, they can be glued with tape.
- For protection from moisture and additional insulation, foil-clad polyethylene can be placed on top of the foam. But this is optional.
- Insulation can be covered with drywall or specialized plaster.
It should be borne in mind that you should not lay the penoplex with a crate. In this case, wooden or metal slats, on which the material will be laid, will become cold bridges, which will reduce the effectiveness of the insulation.
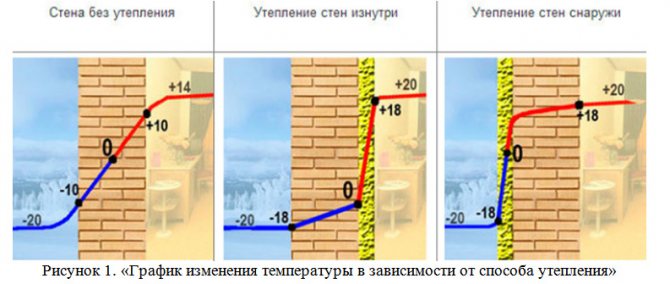
Why choose Penoplex
If you decide to insulate the balcony with penoplex with your own hands, then you can decide whether this material is suitable for carrying out these manipulations. The degree of protection from the cold will depend on the quality of the insulation material. Among the features, one can single out an insignificant coefficient of thermal conductivity, especially when compared with foam, mineral wool or glass wool. This allows you to save square meters, as well as money.

In addition to additional positive characteristics, it can be noted that penoplex is not able to absorb moisture during the entire service life, which can reach 50 years. During this time, the material will retain its quality characteristics. Consumers also choose penoplex because of its strength: the sheets do not crumble and do not crumble during installation and operation. It is impossible not to pay attention to environmental safety, the material has quality certificates. You can also count on absolute fire safety. This insulation perfectly copes with pressure loads, it is easy to cut and does not rot. The structure of this heat insulator remains unchanged at a fairly wide temperature range, which varies from -500 to +750 degrees. On sale you can find sheets, the thickness of which can vary from 20 to 100 millimeters.
Preparation of a loggia or balcony for insulation
First of all, you should purchase materials and tools that will be needed during the work.
Required tools:
- construction knife;
- electric drill;
- puncher;
- a hammer;
- level;
- ladder.
Before starting work with insulation on a loggia or balcony, you need to prepare the surfaces. They must be made even and durable, then the insulation will hold on to them reliably.
Preparatory work:
- Unevenness on the walls is leveled with plaster mortar.
- Loose areas, cracks, potholes and fragile areas of the wall are eliminated and sealed with putty.
- The floor is leveled with a cement screed.
- The ceiling of the balcony does not need preparation, as it already has a smooth surface. It will only need to be coated with an antifungal or bactericidal primer.
After the floor, ceiling and walls of the loggia are prepared, you can start installing the penoplex, having previously prepared materials required for this:
- dowels with wide caps;
- self-tapping screws;
- dry adhesive for tiling;
- polyurethane foam.
Preparatory work
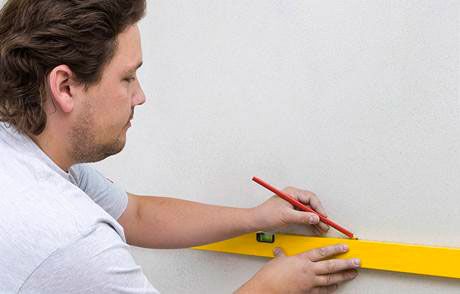
Draw vertical lines to indicate the outside and inside edges of the wall
Before laying the wall on the foamed concrete loggia, preparatory work must be done. The labor intensity and material consumption of subsequent works depends on the clarity and quality of their implementation. Preparation includes the following operations:
- preparation of materials, tools and workplace;
- wall markings;
- setting an order to control the laying of each row;
- preparation of glue or solution.
Do the masonry, focusing on the stretched nylon thread
To insulate the loggia with foam blocks, first mark the future wall.
On the existing walls, to which the foam blocks will adjoin, using a level and a plumb line, vertical lines are applied, indicating the outer and inner edges of the wall.
Then these lines are connected along the ceiling and floor. Since the blocks have the correct geometric dimensions, using the markup, you can lay out the wall of foam blocks with high quality and accuracy.
To control the horizontal laying of each row, a nylon thread is pulled, which can be attached to wooden slats with high-rise markings of each row, installed along the edges of the future wall.
Adhesive for foam blocks
Then glue is mixed in the proportions indicated on the packaging of the material, or a cement-sand mortar in a ratio of 1: 4.
Since foam blocks tend to actively absorb water, this must be taken into account when preparing a solution and knead it using more water than with conventional brickwork.
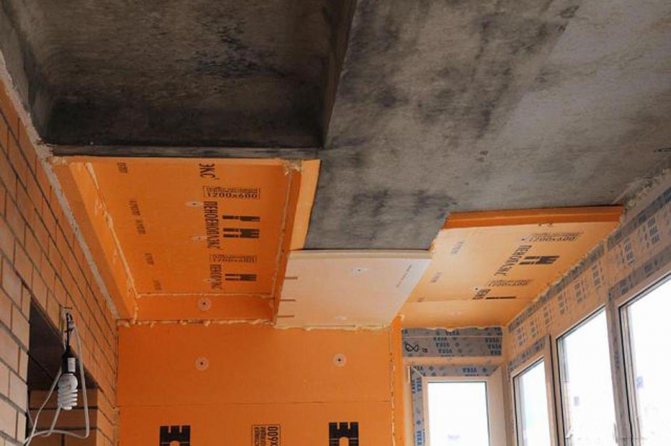
Do-it-yourself ceiling insulation
You should start insulating a loggia or balcony from the ceiling.
Stages of work:
- The first penoplex slab fits into the corner of the balcony, then the next sheet of insulation is closely inserted into its groove.
- If decorative panels or drywall are to be installed on top of the insulation, then the foam sheets should be fixed using dowels in the form of fungi.
- To attach the panels with dowels, a hole is drilled into them and only then a nail is driven in. Five dowels are taken on one sheet.
- If putty is applied to the installed penoplex, then it should be mounted first on glue, and then on dowels. For this, the sheet is treated with an adhesive, pressed tightly against the ceiling and screwed in with dowels.
If the slabs need to be cut, then it should be done with a construction knife, cutting them along the entire length and breaking them with your hands.
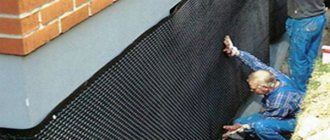
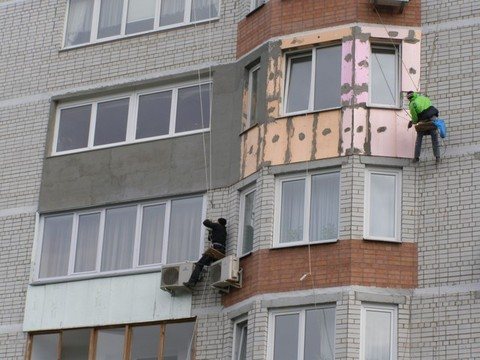
Installation of foam for insulation of the balcony outside
Step one
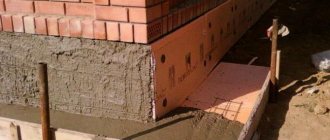
Having cleaned the surface of the walls and floor (from the bottom of the balcony) with a spatula, we prime it with a single layer of front primer. Then we cover the seams and abutments with mastic. The width of the waterproofing strips must be at least 120 mm. Better to apply it in a continuous layer.
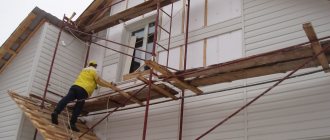
Advice: You can carry out the work yourself if the balcony is not higher than the second floor. If the balcony is higher, then it is better to use the services of qualified specialists.
Step two
Having finished with the priming work, we proceed to the installation of the plates. Having smeared the glue on each plate that has already been previously tried on in place with a notched trowel, we firmly press it to the surface that we are insulating. We wait a minute and again squeeze it against the wall, squeezing out excess air from the space between the stove and the wall. We fix all the plates. We are waiting for the glue to dry completely (approximately 24-48 hours).
After about a day, you can fix everything with dowels (fungi) and apply putty, at the same time spreading the mesh for reinforcement, pressing it with a spatula (400 mm) between the layers. We put perforated corners with a mesh, cutting to the length we need with metal scissors. Usually such corners are 2.5 meters long and are made of plastic with a mesh (mesh 5 * 5 mm).
Step three
Cleaning and painting from the outside is done in two stages. First, having cleaned out large strips and protrusions, we prime the surface.Then, diluting the paint in a ratio of 10: 2, where 10 parts of paint and 2 water, cover the balcony with a primer layer.
The second layer of paint is applied as follows. After the surface has dried, you must first carefully examine it for defects, scratches and pits. We putty them with a facade mixture and after a couple of hours we clean them with a grater. We paint the second time with undiluted paint. Any color can be added to the paint!
Important: When choosing a facade mixture for filling the last layer, be sure to ask whether the paint on the base is suitable for this type of glue. The primer is selected according to the same principle.
Do-it-yourself floor insulation with penoplex
This is a fairly simple job, since it is not necessary to fix the insulation with glue or dowels to the floor. Penoplex sheets just need to be connected with grooves and tightly laid.
The wooden floor on the insulation is mounted without preparation. For ceramic tiles, the floor is pre- filled with a screed from cement mortar, the thickness of which must be at least four centimeters.
After all the slabs are laid on the floor, the gaps between them must be blown out with polyurethane foam.
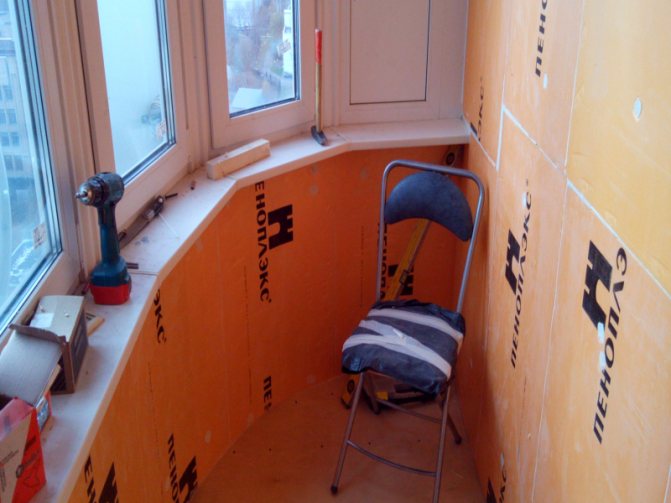
Insulation of the balcony walls with penoplex
You need to install insulation on the walls with your own hands immediately after applying foam to the floor. It shouldn't have time to dry.
Stages of work:
- The first sheet should be placed end-to-end, placing it directly in the foam. As a result of such actions, the effect of the solidity of the floor with the walls will be obtained.
- It is necessary to mount the material on the walls using dowels. And if finishing materials are installed on the penoplex, then the sheets will need to be pre-treated with an adhesive mixture.
- For better insulation of the outer wall, it can be pasted over with two layers of foam. To do this, the sheets are installed so that their seams are not aligned and the second layer is attached using polyurethane foam.
- So that the vertical seams do not coincide with each other, it is recommended to fasten the insulation panels "apart".
If desired, a foam foam vapor barrier can be installed on top of the penoplex, which is attached with metal tape with the foil side outward. However, in this case, it will be problematic to hide penofol with some finishing materials.
Surface finishing after balcony insulation
After installing the insulation, the surface of the balcony or loggia should be refined with decorative materials.
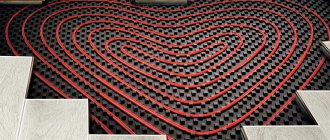
On the screed sex any material can be laid - ceramic tiles, linoleum, laminate, wood flooring. You can also install underfloor heating based on heating mats or infrared underfloor heating.
On the ceiling and walls finishing materials are mounted using a frame, which is erected from narrow boards treated with an antiseptic. The frame is installed on a penoplex, which makes the structure strong and reliable.
Most often, wooden lining, drywall or plastic panels are chosen as a decorative material for the ceiling and walls. If drywall is to be used, the crate should be made of metal profiles. The lining will not only look beautiful on the walls, but also keep the heat in addition.
After the decorative material is installed, you will need to attach the baseboards for the floor and arrange the corners between the walls.
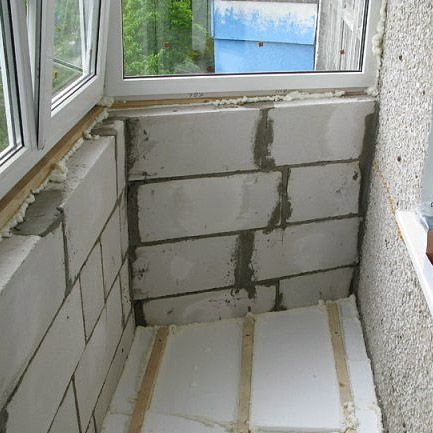
Insulation with foam blocks
You do not need to buy balcony windows first, first of all decide what they will stand on. Without a doubt, on the balcony railing. But to make it stable, we dismantle the old fence made of metal gratings and clear a place for laying the fence. But in this case, it would be unwise to lay out a brick parapet on the balcony, like a building material brick very heavy. In this situation, a foam block with a side width of 10 cm will be more suitable.Foam concrete for insulation from the inside has the main advantage that its structure is bubbly, therefore it is characterized by high strength and lightness. True, the foam block, unlike brick, must be finished with something outside, for example, plastic panels or something similar.