A wide range of modern building materials can significantly simplify the procedure for thermal insulation of balconies and loggias.
In our article, we will tell you how to insulate a balcony with Penoplex, focusing on the peculiarities of independent performance of the main stages of this process.
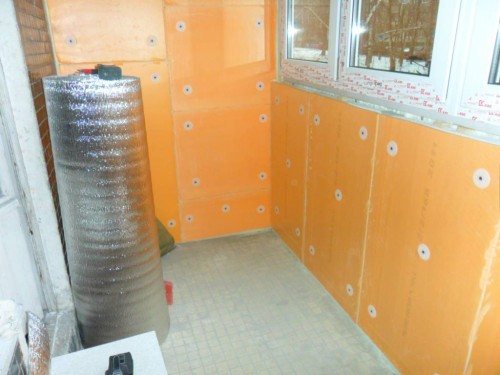
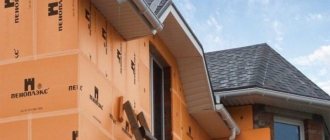
The combination of Penoplex with foil material is especially effective
The main tasks of thermal insulation
The materials used to insulate the balcony from the inside can be very diverse. Mineral wool and solid insulation materials such as polystyrene, penoplex, penofol and other analogues are suitable. It is worth noting that it is much more convenient to work with a solid insulation that does not split into fibers. Installation is faster, no additional insulation from the insulation itself is required, it is easier to attach to the walls, it does not allow cold air to pass through, so a vapor barrier is not needed, which significantly reduces the cost of work.
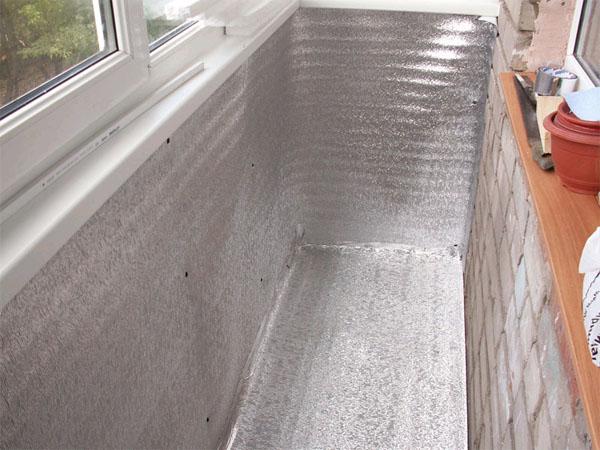
Option for warming the loggia with penofol
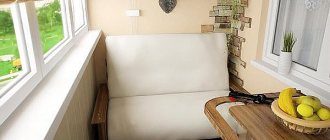
Balcony insulation with penofol can be done by hand. This process will not cause difficulties, does not require special skills or tools. Having glazed and insulated the loggia, you can turn it into a useful space that can be used at any time of the year, regardless of weather conditions. Such a hinged structure will allow not only to keep warm in the room, but also to expand the space of the room by several square meters. They can be used as a recreation room, study, library, storage of various items that require certain temperature conditions and lack of moisture.
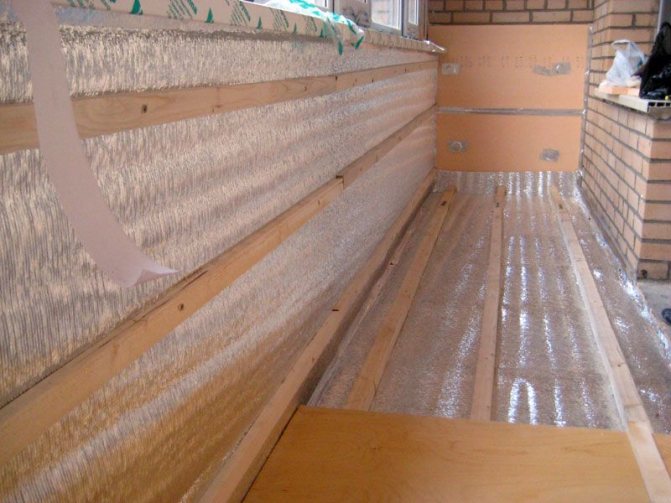
Laying scheme for insulation penofol on the balcony
Insulation of the balcony with penofol or similar materials will allow you to quickly and effortlessly isolate cold air, making the room comfortable. At the same time, the cost of work and purchase of material will be minimal.


Ceiling insulation
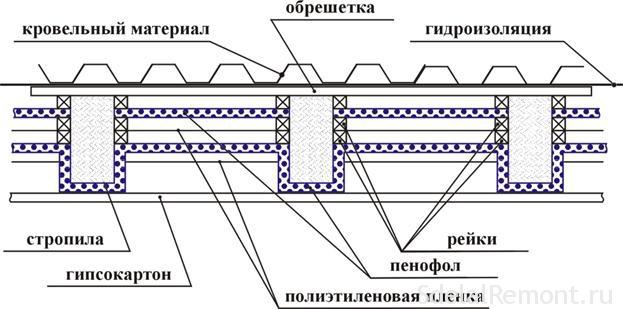
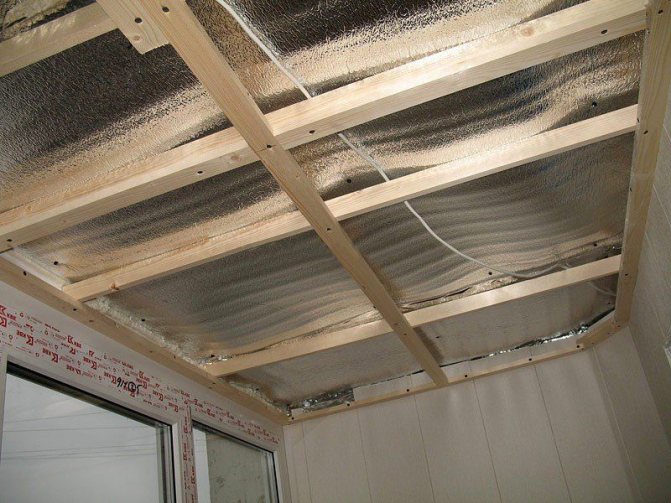
The ceiling is not the warmest part of the balcony, so penofol should be laid in two layers, the first layer is mounted using transverse slats, and the second with longitudinal slats, usually three pieces are enough, all joints and cracks are sealed with polyurethane foam. The second layer of insulation should be stacked end-to-end with foam foam on the walls. The outer battens are used to attach the trim, so they must form a flat surface.
At the stage of installing the external lathing and covering the walls, ceiling and floor with finishing materials, it is necessary to immediately provide for the presence of electrical wiring, warm floors and sockets.
Summing up, it should be said that with minimal knowledge and skills, it will not be difficult to insulate a balcony with penofol with your own hands, because the installation of this material is simple and convenient.
Insulation characteristics
- Penofol is a modern material that has a high ability to isolate cold air from the room. In addition, the material does not absorb moisture at all, it protects well from steam, and therefore no additional vapor barrier is required.
- Penofol is usually produced in rolls, which may differ in thickness. Due to the solid form and standard dimensions, the installation of the insulation is much easier: you do not need to make a crate to fix it, you can attach the sheet to the wall with liquid nails or any other glue, you can also use special plastic dowels.
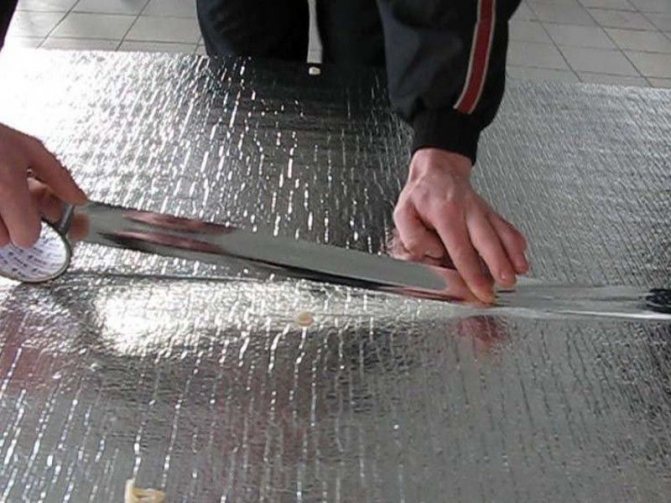
- Warming the loggia with penofol will not burden the structure. Penofol is made of foamed polyethylene, then covered with a layer of foil, due to which the material acquires the ability to repel heat. The sheets can be folded or cut as needed. They are easy to cut even with a clerical knife.
- The insulation is thin enough, but effective, it does not take up a lot of space, while creating sufficient noise and heat insulation.
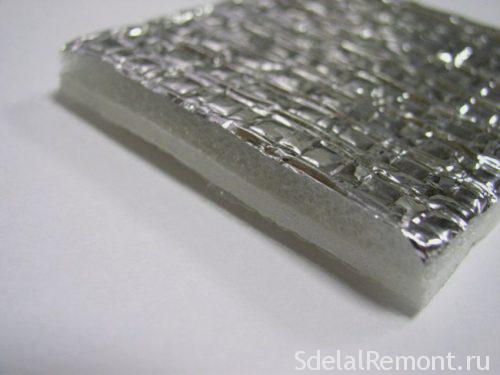
Penofol
Installation of foam insulation
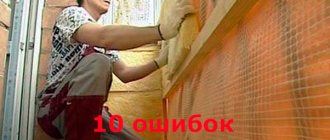
Do-it-yourself installation of insulation will take a little time, in the case when the measurement work has been accurately performed and all the necessary material and an arsenal of tools have been selected.
When insulating the walls of the loggia, penofol is laid on a layer of penoflex. Before insulating the balcony with penofol, slabs of this material are mounted to the walls using special dowels that securely hold them. Subsequently, the joints are processed with polyurethane foam to exclude the appearance of cold thresholds. The thickness of the first layer of insulation largely determines the efficiency and quality of the overall work package. Also, before insulating the balcony, the required foam foam thickness is selected. The most popular are the brands of penofol with a thickness of 3 to 10 mm.
Important! Penofol must be laid with the foil side inside the room. This ensures the presence of a so-called protective screen, which retains the heat inside the room.
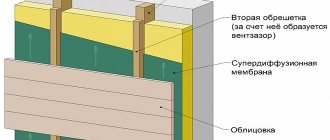
After gluing the foam foam on top of its surface, a wooden lathing made of bars with a section of 20x40 mm is mounted. This crate will serve as the basis for the subsequent installation of decorative finishing materials and will provide an air gap. The bars are mounted at a distance of 40-50 cm from each other.
Facing the loggia ceiling with foam foam is carried out according to the same principle as wall cladding, however, wooden slats can be fixed at a shorter distance, which will eliminate the sagging of the insulation. Often, ceiling slats are mounted at a distance of 30 to 40 mm from each other.
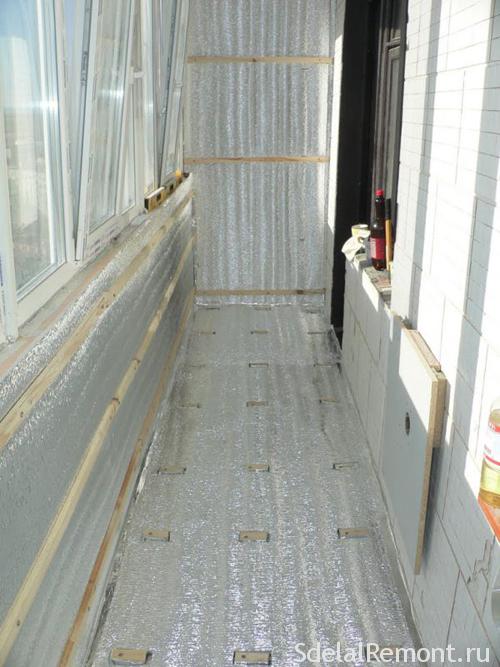
Do-it-yourself insulation of the loggia floor follows a similar principle, however, in this case, thicker slats or logs are used as the basis for the frame. These details will be the basis for the flooring. In all cases, the joints are glued with a special foil tape, which allows the entire foam foam layer to be a single whole and significantly improves its functional characteristics.
Penofol varieties
When deciding how to insulate a balcony with penofol, it is necessary to take into account that there are different types of this material. Most often, you can find type A on sale: in this case, the polyethylene base is covered with foil on only one side, which needs to be placed in the direction of the room.
Insulation type B has a double-sided foil coating. Due to this, you do not need to think about which side to fix the material: it repels heat in both directions, this allows you to keep warm air inside the room in winter, and to tear it away from the balcony in summer, creating a pleasant coolness inside.
The insulation of the walls of the balcony from the inside can also be done with material of type C: such material is covered with foil on one side only, and glue is applied to the other side. For installation, you just need to tear off the protective film, press the insulation against the wall, and it will immediately attach without the use of additional materials. This method of installation is especially convenient for places that are difficult to get into, surfaces that have a semicircular or round shape.
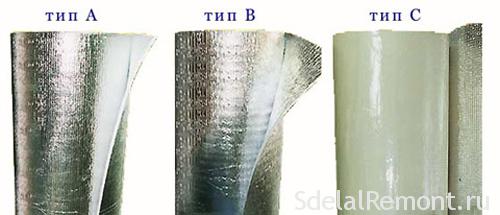
In order for the glue to stick well to the wall, it must be dry and clean.
Less often, insulators of the M and R type can be found on sale. They differ in that one of the sides has a relief shape. The M type has a flat part foil, the R type has a raised part.Insulation of such a structure is used in multilayer structures, for example, for roof insulation. The foil can be additionally covered with plastic wrap: this is done for better preservation. Such insulation is well suited for installing a warm floor.
What is Penofol?
Penofol is a new generation of insulation with high thermal insulation properties with a minimum thickness of three to ten millimeters.
The insulation creates highly effective steam, sound and thermal insulation thanks to polyethylene foam, which has closed air pores in its structure.
On one or both sides, the polyethylene is covered with aluminum foil. Its thickness can be no more than fourteen micromillimeters. Aluminium foil reflects up to 96% of heat and several times enhances the thermal insulation properties of polyethylene.
Insulation of a balcony with penofol is a reliable method of thermal insulation
Penofol is produced in rolls, and has several types, depending on the characteristics of the coating:
- Penofol type A - coated with aluminum foil on one side only;
- Penofol type B - aluminum foil covers the sheet on both sides;
- Penofol type C - one side is covered with foil, and the other has a self-adhesive layer;
- Penefall types R and M have a special relief and are covered with foil on one and both sides, respectively;
- Penofol type ALP has a layer of laminated polyethylene film on one side and aluminum foil on the other.
Using penoplex instead of penofol
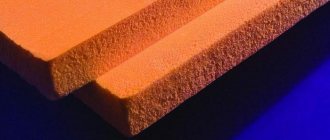
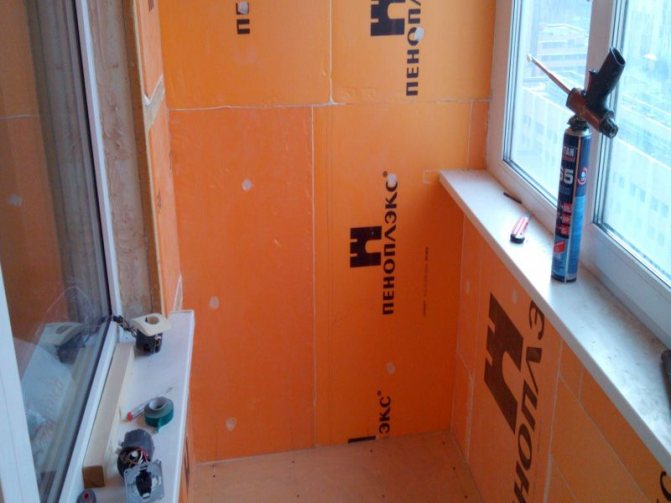
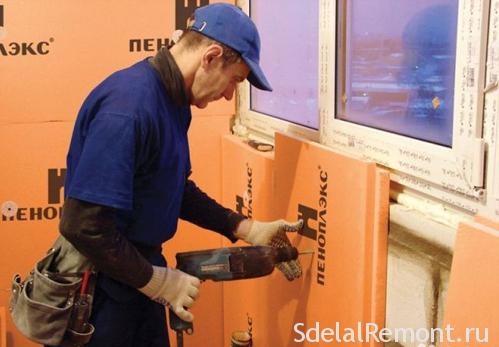
Insulation of the balcony from the inside with foam is also a common option. This material is available in the form of lightweight, compact boards that are easy to mount with glue. Also for installation, you can use plastic dowels with a special plate.
When laying out the next row, shift it. Avoid overlapping vertical seams, otherwise the structure will blow through.
Penoplex slabs are easy to cut, so you can adjust the size of the slab to the area of your structure, cut out a part of any shape using a clerical knife or a metal file. The technology of insulating the balcony from the inside with the help of penoplex provides for filling all joints with polyurethane foam. Thanks to this, it will be possible to make the room airtight, getting rid of all the cracks.

Loggia insulated with foam
Balcony insulation with penoplex can be combined with penofol. This approach will allow you to get additional insulation, reflect warm air, and raise the temperature in the room by several degrees. After you have fixed the penoplex, glue the penofol on top of it. As a result, you will get a reliable sealing of the balcony, the thickness of which will be minimal.
List of tools and materials
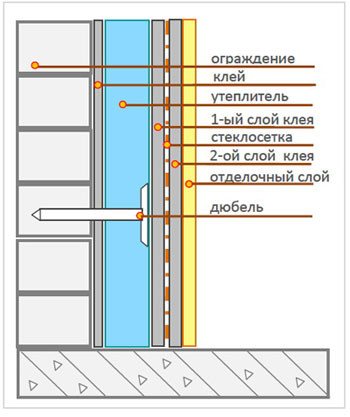
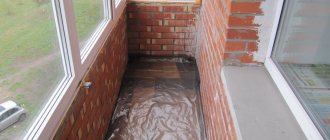
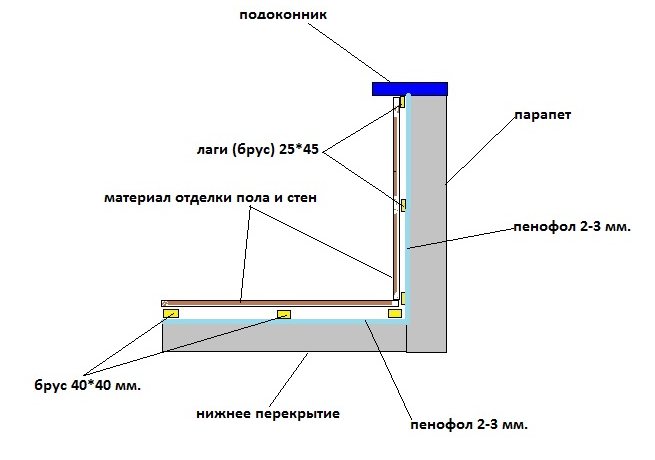
Balcony insulation scheme from the inside without installing a vapor barrier.
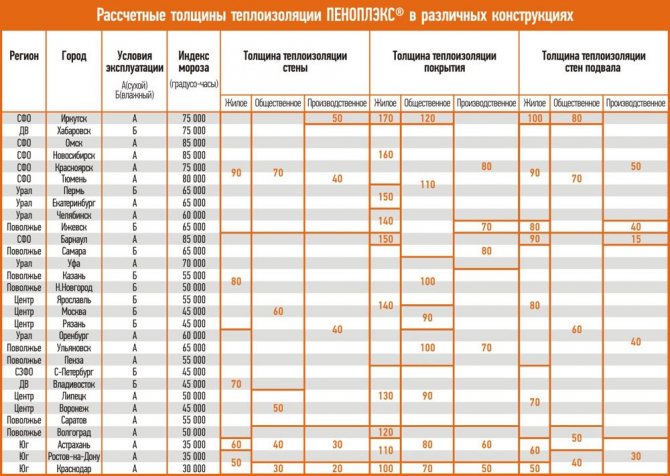
To organize the insulation of the floor, ceiling and walls of the loggia, you need to purchase the necessary tools and raw materials. To insulate the floor, walls and ceiling, you will need: a building level, penoplex plates, foam rolls, dowels, nails, a hammer, a screwdriver, a drill, adhesive tape, polyurethane foam, primer (putty), glue. In addition, cladding material (panels) will be required. When insulating the floor with penoplex, for the preparation of concrete, sand, crushed stone, water and cement are needed. To insulate the floor, walls and ceiling of the loggia, you will also need wooden slats with a section of 20 x 40 mm.
Comprehensive insulation of the floor, walls and ceiling of the loggia with penofol and penoplex is the best option.
How to install insulation?
The technology of insulating a balcony with penoplex and penofol is not very complicated, and you can master it yourself. First of all, it is important to prepare the wall. It is necessary to cover all large gaps with a cement mixture or fill them with polyurethane foam.The wall itself must be cleaned of debris, grease, dirt in order for the glue to set well. After that, you can glue the insulation. Make sure that the foil looks into the room; penofol, like penoplex, is mounted joint to joint. Foil tape can be used to close the seams.
If a fine finish is planned, lathing may be required for it. For this, wooden slats are usually used, the size of which is 20 by 40 mm. There should be free space between the decorative coating and the insulation, the resulting air gap will create a layer of additional insulation.
The slats are placed at a distance of no more than 45 cm from each other. This should be done parallel to the ceiling or floor. Check the evenness of the laths with a building level. You need to start mounting from the bottom up.
Do not forget that you will have a plinth, so the first rail should not be placed close to the floor, but with some indentation, which will then cover the plinth.
After the crate is ready, you can attach any materials you like for wall decoration to it. Plasterboard or lining is often used.
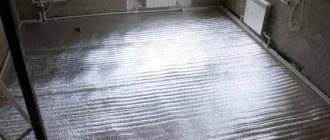
Insulation of the floor and ceiling using penofol
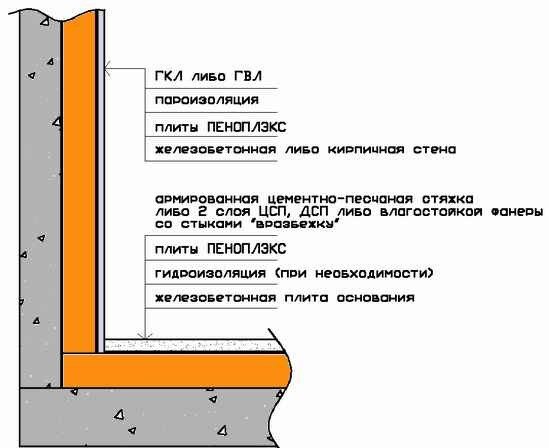
The scheme of insulation of the loggia with penoplex.
Floor insulation is an important component of the renovation. The technology is similar to the previous one. At the beginning, you need to level the floor surface, remove old skirting boards, and so on. Then a crate is made of beams. Their height depends on how many layers of insulation are required. The frame is attached, retreating 10 cm from the edge of the wall. The step between the beams is 50-60 cm. The crate is fastened with a perforator, hammer. First, a hole is drilled, a dowel is inserted and a self-tapping screw is nailed. At the next stage, the insulation is laid. It is important that the rolls fit snugly together. It is recommended to cut penofol sheets slightly larger than the distance between the bars. This will ensure a snug fit.
After that, the plywood sheets are laid. When fastening them around the entire perimeter, it is imperative to leave a small gap of 1 cm. The sheets are fastened with self-tapping screws every 45 cm. Penoplex thermal insulation assumes a concrete screed with a layer of about 4 cm. Ceiling insulation is similar to floor insulation. But there are also differences. Here, after laying the first layer of insulation, it must be fixed with a wooden lath using self-tapping screws. The slats are taken with a length equal to the width of the loggia. The joints are filled with polyurethane foam. The second layer of penofol will be fastened with horizontal strips.
Their length is equal to the length of the loggia. That is, you get a kind of crate of crossed slats. The extreme slats are spaced about 10 cm from the wall, and the third is placed between them. Penofol is overlapped with a margin. Next, the slats are fastened with self-tapping screws with a pitch of 50 cm. In conclusion, the structure of the ceiling, like the floor, is leveled and finished with panels.