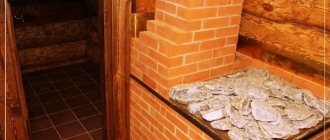
The housekeeper stove is essentially a modified concept, familiar to everyone - Russian. The difference lies in the combustion chambers, if the Russian device has one chamber, then the housekeeper is conventionally divided into two halves: one of them consists of 2 heating chambers of different sizes. The upper part has a hob and vault. From this article, you will learn how you can build with your own hands, relying on the guidance of the drawings and the recommendations of specialists. You will also be informed about the main functions and technical characteristics of the furnaces.
Device and functions
Depending on the thickness of the seams, the dimensions are approximately 1400 * 890 * 2240 mm. The outstanding feature is the ability to warm up over the entire height, starting from the floor. In this case, the temperature spread will be only a few degrees. In addition, an attempt is made to implement several advantages at the same time.
The presence of a cooking chamber, as in an ordinary Russian one, - two fireboxes of different power, a cast-iron stove, ventilation and moderate dimensions. Use the crucible and both fireboxes for cooking. Moreover, the first is used in the summer, avoiding unnecessary heating of the room. The greatest thermal efficiency is achieved when using the main firebox, and the second one can be heated or heated. You can install a hot water box, and the device will change.
Features of the Podgorodnikov model
The main idea of the author of the modernized design, which is also known as the Russian teplushka stove, is to make the lower part of the stove, traditionally considered cold, as part of a chimney. This part is called the lower chamber. Smoke can enter it through small holes in the hearth.
There are two ways to heat the podgorodnikov's stove:
- The first is that the fire is melted in a large furnace - a crucible, this method is considered traditional, since it was used in Russian stoves. Before preparing food, it was necessary to heat the stove, collect the coals and only then put them on under the pots with porridge or soup. Until now, this method is called "in Russian".
- The second method is realized in a closed firebox with a grate, this firebox is covered from above with a hob with two burners. A distinctive feature of the model is that the stove plays the role of a shelf in front of the crucible.
Good to know: How is a baby brick oven built, from foundation to masonry
The gas exhaust system is thought out in such a way that, regardless of which firebox had to be heated, warm air enters the lower chamber, heating the furnace body, and if the furnace is heated from a large firebox, the stove will also heat up. This feature allows you to save fuel and get a high output efficiency. The Russian stove housekeeper can be used in winter for heating or in summer for cooking. Moreover, in summer mode, the damper blocks the path to the lower chamber and the smoke from the firebox enters the chimney immediately.
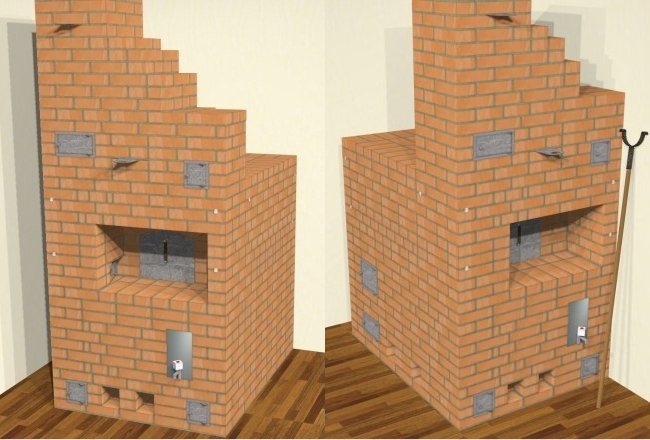
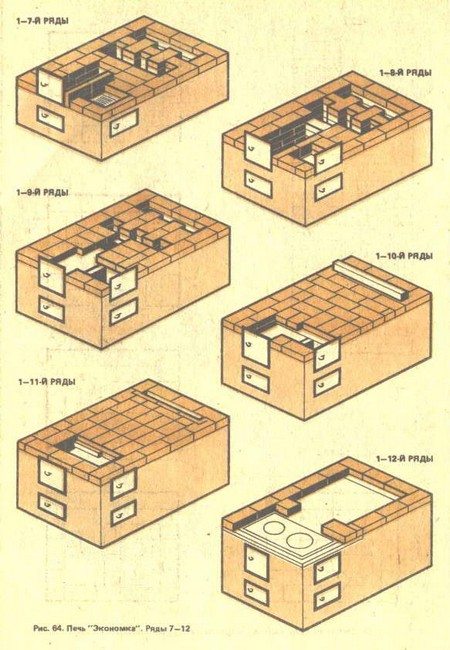
Popular furnace design
The main differences
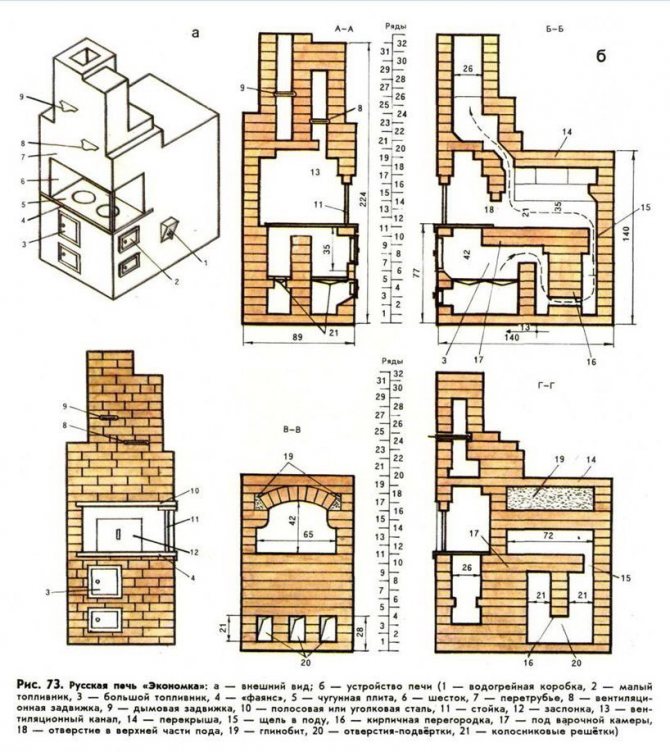
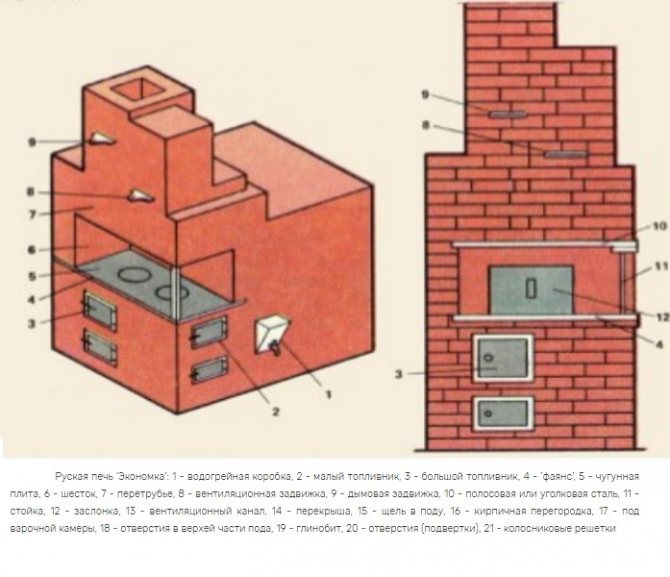
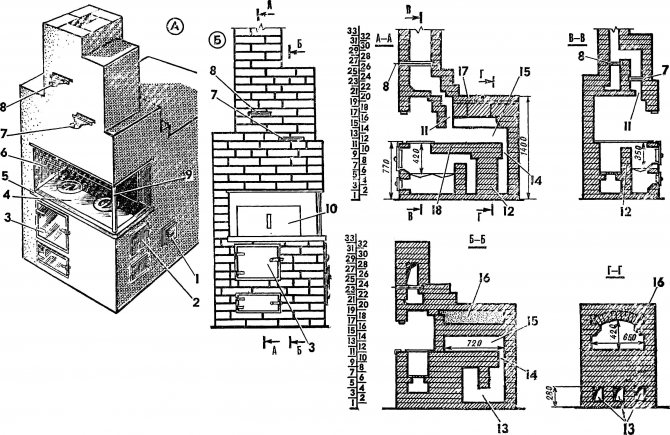
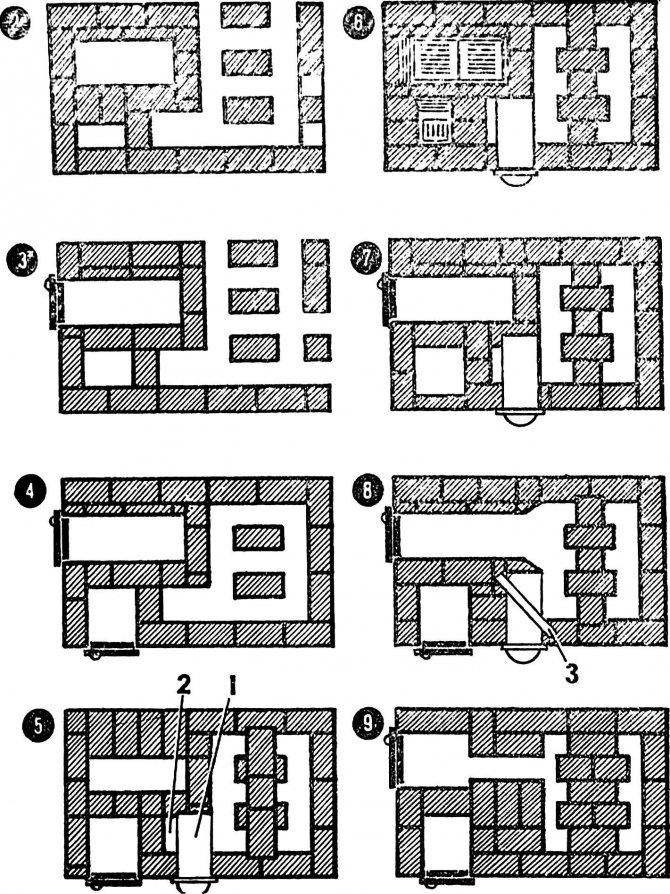
Both lower combustion chambers (2 and 3) have their own grates and doors, above them there is a cast iron plate (5), with concentric rings. Combustion products move along the path: a small firebox, a large one, after the turn of the heating and cooking chambers. Access to the space, called the sixth, is open from two sides. The hanging angle of the overtube is supported on a support from an angle or pipe (11). To strengthen the outermost pole, a metal corner is used, which is called faience (4 and 10).A 25th corner of 3 mm thickness is used, which, like the doors, is desirable to be walled up in the seams with the help of a wire. The cooking space can be closed with a shutter (12) with a handle.
On the front side there are valves for closing the smoke and ventilation ducts in the pipe. The latter begins above the pole, making it possible to remove odors arising above the stove and ventilate the room. The heating cavity is divided into two sections. The partition (16) consists of 3 separate columns, forming the so-called sub-folds (20), measuring 12 by 21 cm and a solid wall. The hot smoke, passing through both sections, cools down and goes out into the hearth slot (15), into the cooking space. Passing and heating it, the gases move to the brow, where they go into the pipe.
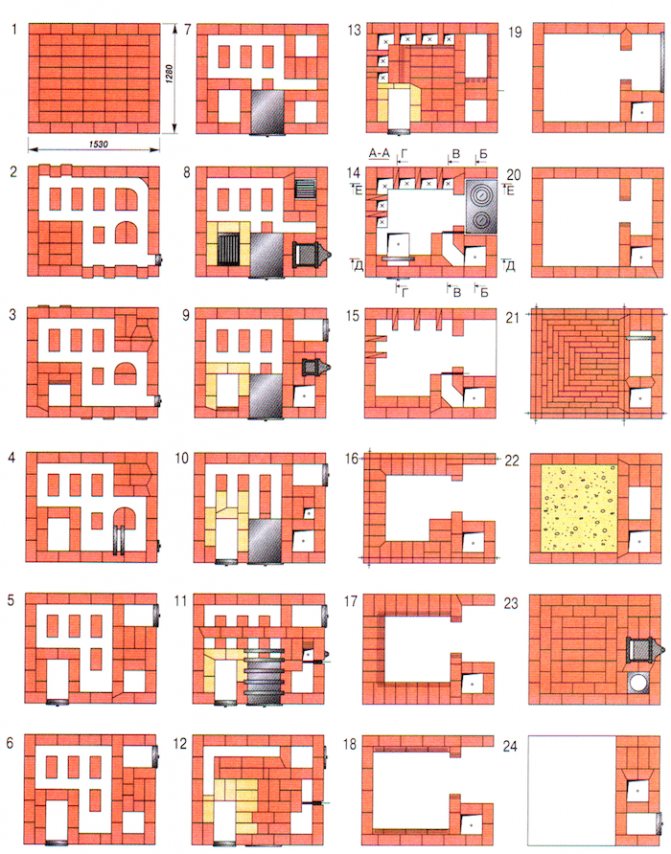
Ordinary masonry plan
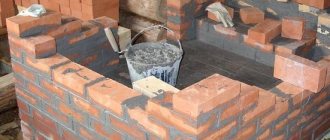
In the first layer, the bricks around the perimeter are taken whole, the middle can be filled with halves and fighting.
In the second, the columns of the partition, cleaning windows and blowing out of the larger of the fireboxes should be laid. The lower edges, at the outlet of the ash pan, are best cut for easy cleaning.
The third layer - the door of the mortgaged ash pan and doors are installed. To increase the volume, you can lay the ash pan of a small furnace, or you can do this in the next row. (cleaning doors are not indicated on the diagram)
Fourth - installation of the small firebox door. We close the cleaning holes. If you decide to replace the doors, leave the windows open until the end of the masonry. At the end of the work, you can finally clean up the remains of clay and lay them in protruding halves. It will be easy to find holes along the protrusions.
Fifth - the barrier from the columns becomes solid and connects to the walls. The door of the large blower is closed, and the perimeter of the large blower is reduced before installing the grate. At the moment, under the partition, twists should form, through which the smoke will flow from the first section to the second. To increase the mass that accumulates heat inside, the partition is lined with bricks lying along and across.
All grates will be laid in the sixth layer, and they will slightly overlap. The front and rear overlap of the small grate, it is desirable to make beveled, this can be seen in the diagram. Thus, the coals will roll towards the center, which will make it easier to burn even damp firewood in a small firebox.
In the seventh, a large door is placed, and the 8th is small and, with the help of cut edges, an expansion of the chimney is formed, towards the heating partition.
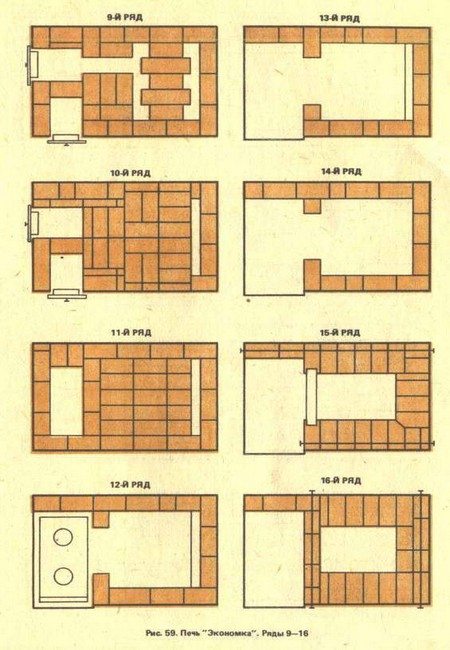
In the ninth, the outlet from the firebox narrows, overhanging the previous river.
In the next, the outlet path is overlapped from above, along with half of the heating chamber. In fact, this is the first layer of the double bottom of the crucible itself. We leave the gap open through which the smoke will enter the cooking room. It will stretch from one wall to the other, and it will be a quarter wide. On the side cut, you can see that underneath, it consists of two layers laid flat. It is supported by masonry above the folds. When using it for cooking, it should be heated like a Russian, cleaning underneath if necessary. If the main firebox is lit, the cooking chamber and stove can be used. It is noteworthy that a smaller furnace burns fuel more vigorously, while being less demanding on it.
Then you can close the doors of the fireboxes and put a second continuous layer, leaving a gap.
12 - we lay the cast-iron plate on a thin layer of clay, and reinforce both ends of the pole with a metal corner. Conditional "cheeks" are laid.
The 13th and 14th are completely ingenuous, a link is made. In the next one, for reinforcement, in longitudinal layers, along the edge, tapes or wire with washers or threaded ends at the ends are laid. The brow itself is covered with a metal corner, and not an arch for simplicity. The lower ribs forming the taper can be trimmed.
The 16th fits in the same way, but this time the reinforcement is done across, and the forehead is overlapped in metal.The second row of constriction lays down rough.
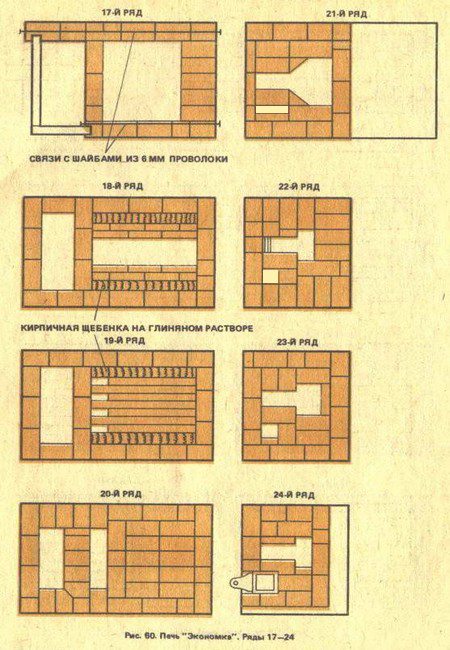
17 is very similar to 15 and also has a metal bond. The upper "faience" is installed on a pipe or other support. It is easier to start with a slope when starting to create a vault, rather than combing each rib. The shape itself should be chosen domed, in view of the geometric strength. At the same time, it is still advisable to strengthen the supports of the arch by laying additional rods or a tape, like the sixteenth. Fill the voids between the wall and the dome with adobe, which consists of thick clay mixed with debris and sand.
It is in this way that it is advised to lay the 18th row. Under the spoon side of the first stones of the arch, adobe is also laid, and on the metal reinforcement of the overtube, the first units are laid.
In the 19th, the vault is closed, but at the same time four or more holes are preserved, which subsequently flow into the collection path of the 20th. He is the mentioned collecting channel and the narrowing of the overtube. Its width is reduced from 25 cm to 18 cm, and the right corner is locked with a lock.
In the 21st, the prefab takes on a form that unites it with an overtube. A ventilation hole 7 by 25 cm is immediately laid.
In the twenty-second, the section decreases, it is better to cut the ribs. The ventilation duct becomes half a brick.
23 - there is a displacement to the back wall.
24 - a ventilation damper is laid.
25 and 26, prefabricated, narrows and turns into a chimney.

27 - smoke valve.
28 - paths are merged.
29 - the ventilation part is covered with metal strips.
30 - 33, a three-row plug is installed above the ventilation duct, in accordance with the fire safety requirement. The chimney takes on a cross-section the size of a brick.
The profile of the latter goes to the ceiling, after which a fluff is arranged to pass through the ceiling. The thickness of the wall of the fluff can be at least one and a half bricks and rise above the level of the attic floor by 25-30 cm. You can continue the pipe from other materials, however, be sure to use non-combustible insulating materials. I would like to warn about the presence of orders in the network that have errors. You should first comprehend the logical compatibility of the entire masonry.
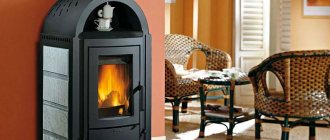
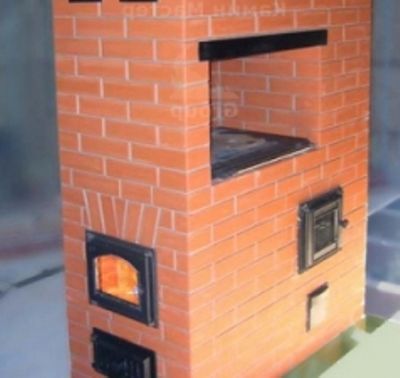
Features of the mini stove
It is very convenient to cook on this stove, because it has a separate firebox with a hob. The versatility of its design allows the hostess to cook up a huge number of dishes: cereals, pies, poultry, bread, pizza and much more. A few hours after the end of the firebox, you can still fry, steam or boil on it. At the same time, it can be installed even in the smallest houses, because the size of the mini Russian oven is 100 by 130 centimeters. The owner of the house can build it with his own hands, because the design is simple and does not require special knowledge in the field of engineering.
Has its own characteristics and firebox design... The main large is located on the front side, and the additional small is on the right wall of the stove. A cast-iron stove is superimposed on them, designed for cooking a wide variety of food, which has two burners of different sizes. The larger one overlaps the main firebox.
Fuel tanks have different functions. The main one is used for heating when cold weather sets in, and without restrictions - for baking traditional Russian dishes. At the same time, it is possible to burn fuel in the cooking chamber itself. An additional firebox is used in the warm season, mainly for cooking. It burns well a small amount of waste and fuel, including raw. With the onset of cold weather, this firebox is also used for cooking, but only if the entire array of the stove is warmed up.
The Russian stove without a stove bench has its own structural features of the channels for removing hot gas and smoke.
When the stove is melted, first all volatile combustion products come from the main firebox to the first section of the heating chamber. Then, in the second, through the rolls and, bypassing the gap in the hearth, they approach the rear wall of the cooking chamber, heating it. After that, the smoke enters the front block of the cooking chamber, on the top of the vault of which there are four holes. Volatile substances enter the collecting channel precisely through these holes, and from the channel - directly into the chimney. Smoke does not have its own exit system from the small firebox. It enters from there into the main firebox and from there it is discharged outside according to the above-described scheme.
The design of the Russian mini-stove provides ventilation duct... If necessary, it can be closed with a latch.
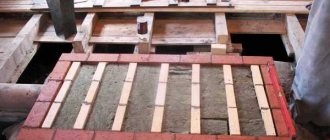
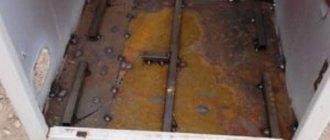
Foundation
The integrity and strength of any structure largely depends on the foundation. As in most cases, it should be laid under it to a depth of about 50 cm. The dimensions are increased by 10-25 cm on each side and the standard layers are filled in. Sand, crushed stone and ramming, water spillage. Pouring with cement with rubble stone or other filler. Dry and hard soil will allow the use of more solid brick and battle, provided there is good waterproofing. If the soil is malleable, then a more rigid base is needed, possibly with reinforcement.
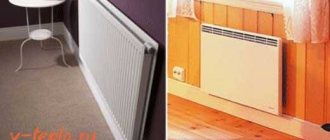
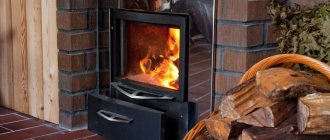
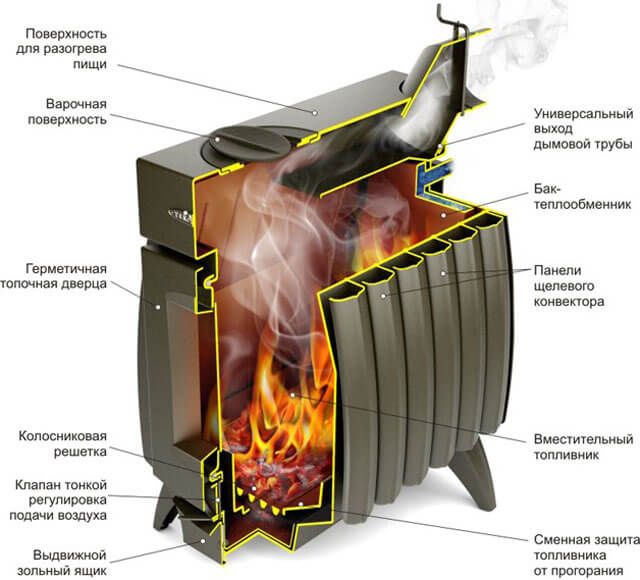
Features of the use of a long-burning oven and maintenance
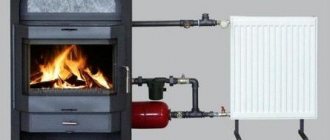
Long-burning wood-burning stoves, due to structural differences, have several individual characteristics related to the operation and maintenance of a product manufactured in an industrial environment.
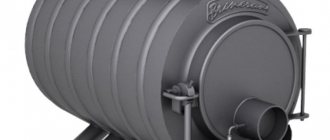
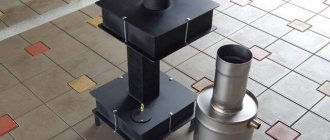
Long-burning furnaces are kindled in a certain way:
- The lid is removed from the unit and the pressing circle is taken out of the barrel, to which the pipe is welded.
- Load wood or any other solid fuel. The maximum loading level of the stove with wood should be located at the lower edge of the chimney pipe. The firewood should be stacked very tightly, leaving only minimal gaps. On top of the logs, you need to put a small amount of dry small branches, which are covered with a rag dipped in kerosene or other kindling liquid. When there is no rag, it can be replaced with plain paper.
- The pressure circle is returned to the barrel and covered with a lid. Only after that, a piece of rag or paper is set on fire and thrown into the pipe with a circle.
- To ignite the pyrolysis installation, you should not use matches, because during the time during which they fly inside the stove, the fire on them will go out.
- After the fuel has ignited well, after about 30 minutes it is necessary to restrict the access of air to the stove using a damper. Then all that remains is to enjoy the warmth and comfort for long hours.
When installing an economical wood-burning stove in a room, certain rules must be observed:
- Due to the fact that the unit for long-term burning can be very hot, any combustible and low-melting materials and objects must be placed away from it.
- Leave plenty of space around the pyrolysis device. It should be placed at a distance from interior items and walls so that they are not damaged due to an excessive degree of heating. This problem is partially solved by laying bricks along the perimeter of the heater.
- Always leave some ash when cleaning the oven. Such a measure is able to protect the device from burning out its bottom and, accordingly, the failure of the boiler.
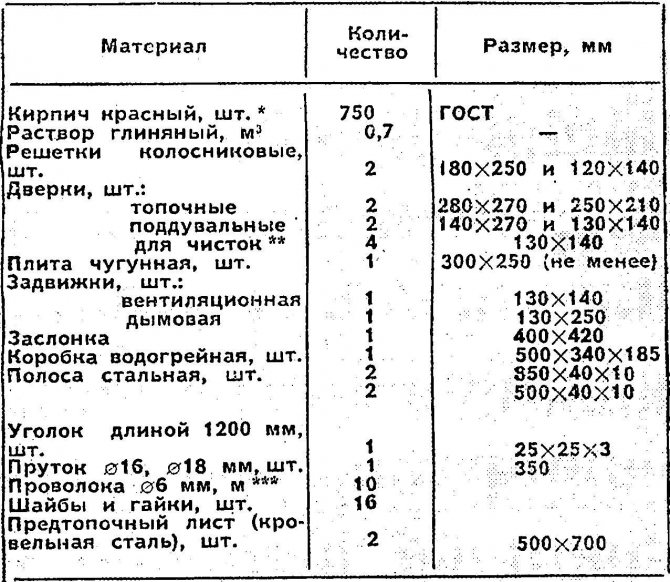
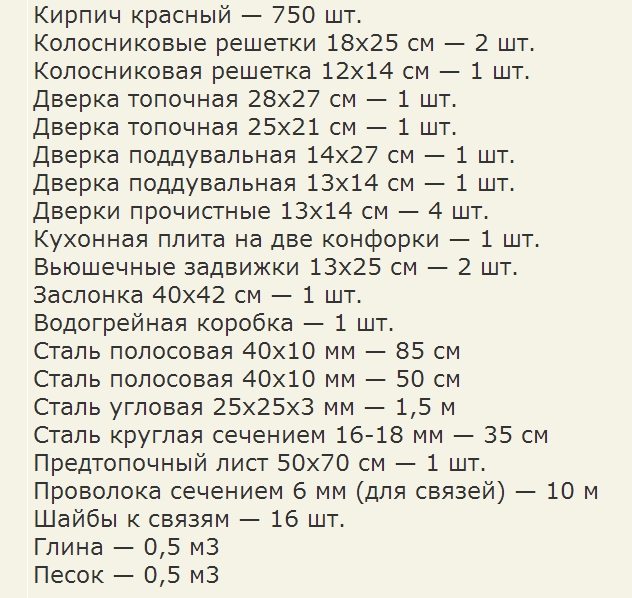
Materials (edit)
The composition of the mortar on which the masonry will be laid should not be underestimated. Naturally, the easiest way is to buy a proven dry masonry mix. But if you are forced to save money, you will have to study ways to determine the fat content of clay and the mixtures necessary for masonry. Don't overlook the fact that you will need three different formulations:
- Durable, heat-resistant with fireclay, in the area of fireboxes.
- Moisture and chemical resistant, limestone for smoke passages and chimneys.
- Strong and elastic at the same time, clay for the base.
Methods for determining the fat content of clay by dried balls, the degree of sticking to a stick or throwing cakes are easy to find on the net. The thickness of the seams should be within 3 - 4mm. The masonry will be more stable, and the chances for the solution to crumble are much less.
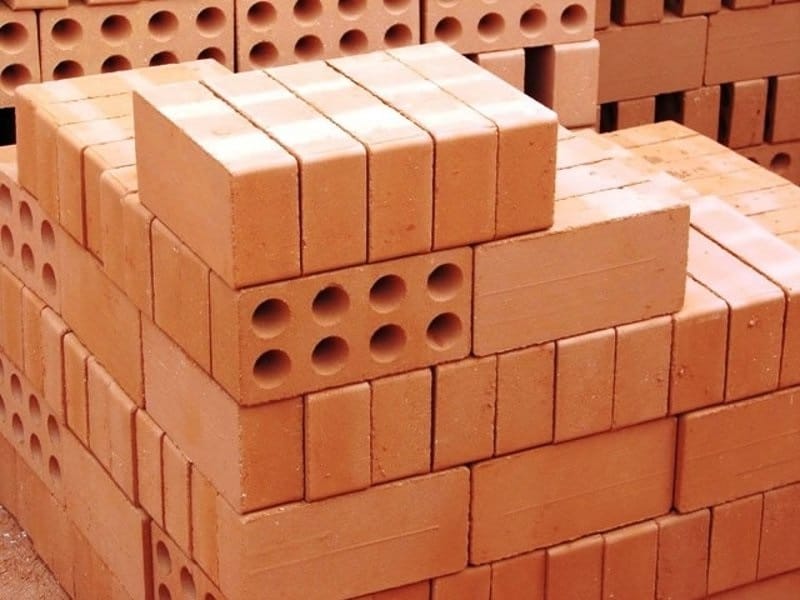
Brick should also be given its fair share of attention. Not every clay is suitable. In short, really fit can be identified visually by the way it is produced.
Pros and cons of long burning stoves
The advantages that economical wood-burning stoves have are many:
- Maximum complete combustion of the solid fuel bookmark. For this reason, boilers that burn wood for a long time have an excellent efficiency of up to 85%.
- It is quite simple to clean and maintain these heating units, since after the completion of the burning out of the wood, there is practically no ash left.
- Environmental friendliness of the pyrolysis process. With the complete combustion of natural organic compounds, only carbon dioxide and water vapor are the products of oxidation. In a pyrolysis furnace, solid fuel decomposes completely, therefore, as a source of thermal energy, all kinds of industrial waste can be used, which under normal conditions are allowed to be burned only at a considerable distance from residential buildings on specially equipped landfills.
- You will need to load the next portion of firewood or other solid fuel much less often, or rather, once within 10 - 15 hours, which is an indisputable advantage of these units in comparison with conventional stoves and stoves. Some models of factory-made pyrolysis boilers are capable of operating for a longer time on one tab.
- Rapid heating of the coolant, provided there is a heating circuit for heat exchange for private houses.
- The ability to perform accurate and high-quality adjustment of the power indicator of the unit. Under normal operating conditions, it is rather difficult to control the operation of solid fuel heating devices in comparison with analogs for which gaseous or liquid fuels are used. Since in a long-burning wood-fired oven, the gas released during the pyrolysis process is burned out in a special compartment, this problem can be solved quite easily.
Pyrolysis plants have a number of disadvantages, including:
- High price for finished heating boilers. This negative point can be eliminated by making economical wood-burning stoves with your own hands.
- Increased requirements for the moisture content of solid fuels. When deciding to use poorly dried firewood and trying to put the unit into working mode before they are completely dry, the fire will most likely go out and the full pyrolysis process will not be completed.
- Quite large dimensions. In addition to the fact that it is necessary to prepare a place for installing a pyrolysis boiler, it will be necessary to equip an area where solid fuel is to be stored.
- Inability to provide fully automatic work. Firewood must be loaded into the unit manually.
- When installing an industrial model of a pyrolysis boiler, additional blowing of the combustion chamber is often provided and pumping equipment is installed to circulate the working medium in the heat supply circuit. Therefore, for the uninterrupted operation of the installation, it is necessary to ensure a high-quality power supply.
- There is a risk that the pyrolysis chamber may go out as a result of the use of an overly cooled coolant from the heating circuit. To prevent such a nuisance, a bypass pipe, called a bypass, is mounted in the device.By means of it, hot water is added to the cooled working medium. As a result, the design of the heating boiler becomes more complicated and at the same time its price increases. But the self-assembled pyrolysis stove without connecting the heating system is devoid of this drawback.
Forming technology
- semi-dry pressing
- plastic molding
- slip casting
- raw atmospheric drying, etc.
- We are interested in the second option. You can distinguish it by the expressive traces of cutting raw materials, transverse risks and grooves on the verge called bed. This molding is similar in appearance to clinker. However, it is heavier and more expensive and therefore less attractive.
- From clinker, you can fold a base for a heavy structure or a mini-oven, which will have good thermal inertia.
- At the stage of preparation, it is worth sorting the stone by quality, smoothness and integrity. Put all rejection on the base and lower layers. Spoon surfaces that will be inside the channels can be additionally processed by cutting off irregularities or protruding small fragments.
- During installation, each unit must first be soaked in water for about 20 seconds.
- Of course, places subject to high temperature loads should be lined with fireclay. These can be the walls of the furnace, the beginning of the smoke channel and the partition. Purchasing chamotte will not be a problem now.
Using the "Housekeeper"
For predictable results of use, you should know:
- Do not light both fireboxes at the same time, since the performance of the larger of them can lead to smoke of the smaller one, through the rings of the stove and leaks in the door.
- If a fire is lit in the main firebox, the small door and the blower should be tightly closed. You will avoid the rapid consumption of firewood and will be able to regulate the combustion.
- During combustion, the damper must be closed, and when opening, the ventilation damper must be opened. This minimizes the possibility of smoke and gases entering the room.
- Effective use of the “crucible” is possible after a good warm-up. You can put the dishes on the underneath in 5-10 hours. For baking, you will need to determine the heating of the hearth surface. If a pinch of flour thrown on it turns brown, the temperature is right. White or black will indicate overheating or vice versa.