

Used for cooking various assortment of bakery products: rolls, loaves, pies, sweet dishes and even pizza.
Furnaces are ideal for optimizing work large scale production and for home use.
Odnoklassniki
Requirements for ovens for baking bread

Basic requirements for devices intended for baking:
- fire resistance;
- tightness;
- thermal insulation;
- mechanical strength;
- profitability;
- hygiene;
- cooking speed products;
- ergonomics;
- aesthetics.
Types of ovens for baking. Why is wood burning preferred?
The range of devices is quite wide:
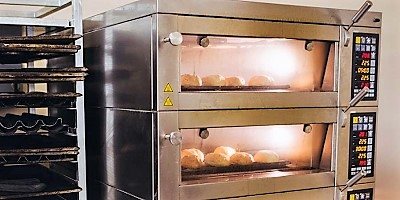
- Deck bakery. It is used to make ordinary bread and other baked goods, most often from rye and wheat flour. Its structure consists of several tiers to which heat is supplied.
- Hearth. It is used for the preparation of pastry and yeast dough products. It is most often found in restaurants or in manufacturing. The design feature is the presence of hearths on which the workpieces move, which ensures uniform baking.
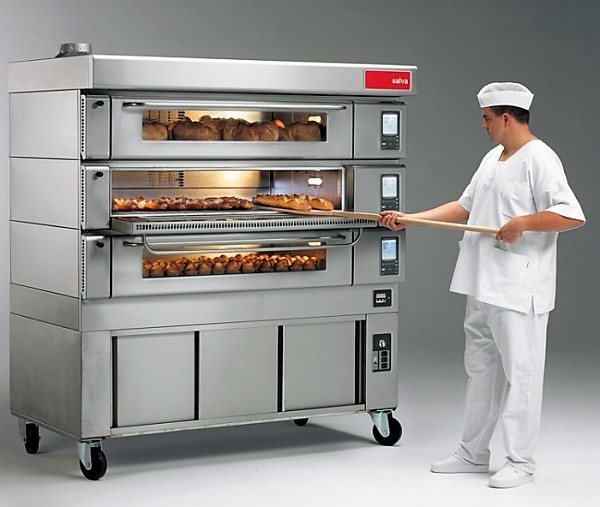
Photo 1. Hearth modular bread oven of the E series from the manufacturer Salva. Equipped with three cameras.
- Convection. It cooks not only traditional bread products, but also fish and meat. The device works on the principle of convection. It is used for both industrial and household purposes. Quite easy to operate.
- Tunnel. They are widely used in large continuous production. Cookies, buns, bread. Equipped with self-cleaning and oil supply systems.
- Electric bakery oven. It is the most cost-effective and economical. Designed for baking a huge range of products and cooking fish and meat dishes. Automatically maintains the optimal baking temperature.
- Rotary. Designed exclusively for confectionery. The main types of dough for such constructions are yeast, frozen and butter. The principle of operation is based on rotary circulation of hot air.
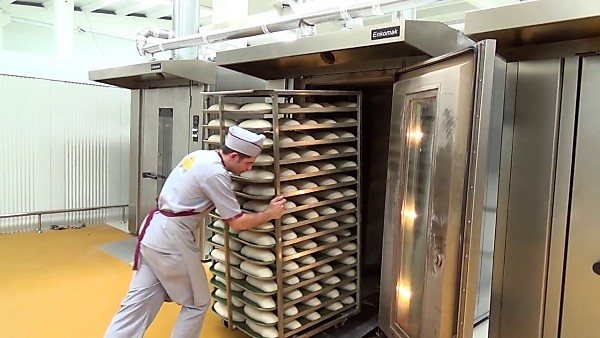
Photo 2. The process of loading a batch of bread into a large rotary oven from the manufacturer ENKOMAK.
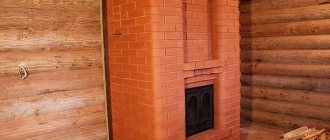
- Wood burning. Products in it are impregnated with the aroma of firewood, which increases the cost of finished products. The most economical, withstands the highest temperatures. It is considered environmentally friendly. It runs on wood and has many advantages.
Benefits wood-fired ovens:
- giving natural aroma smoke to the finished product;
- preservation of performance in the field in the absence of electricity;
- energetic competitiveness.
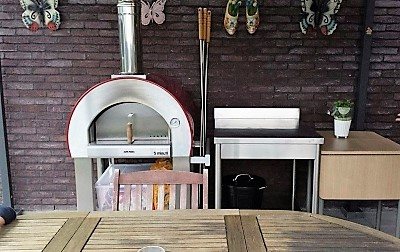
At home, ordinary electrical devices or wood-burning ones are most often used.
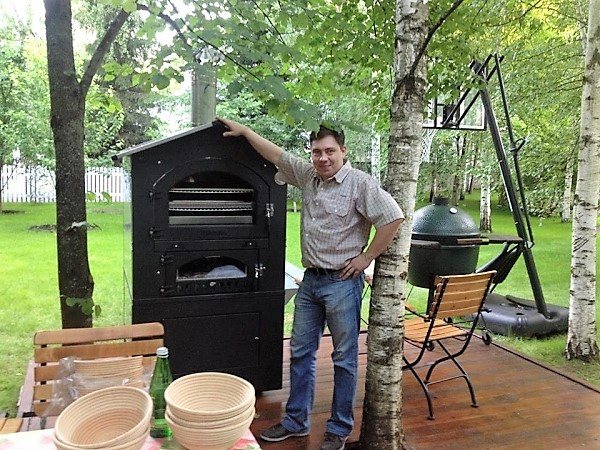
Photo 3. A wood-burning oven for baking bread can be installed in the yard, it is more mobile than an electric one.
Construction of baking ovens
There is a huge range of baking ovens: electric, wood-fired, tunnel, rotary, convection and others. Each bread oven has similar structural features:
- Working chamber... The volume of the chamber is of great importance for the baking device. The larger its size, the greater your possibilities. In the chamber, under the influence of high temperatures, a transformation occurs dough into finished bread... Before cooking, the oven chamber must be warmed up well to get good bread.
- Heating element... It is a special tube that is located under the very bottom of the bowl and covers the entire area intended for baking.
- Viewing window... It is necessary in order to observe and control the baking process of products.
- Work regulation system... Most modern hearths are equipped with audible signals that allow you to control the baking process in a more timely manner.
- Oven conveyor... It is a device in the oven that serves to transport products.
- Steam humidifier... Contains steam manifolds with perforated pipes, which reduce the presence of rejects and improve the quality of products by eliminating condensation.
Basically, all bread makers are similar to one another, but inside the device different functions are laid... Therefore, before purchasing an electric mini-baking oven for your home, you should first familiarize yourself with its individual characteristics.
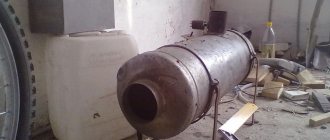
Wood-burning stove device
The wood-burning stove must have chimney, which will ensure the removal of gases. Her power depends on size and power consumption. The fire affects the coating of the device itself, which gives off heat to the food.
Important! It is convenient not only for creating baked goods, but also for heating premises.
The main elements of the device:
- heating element;
- window;
- belt or conveyor for products;
- steam humidifier;
- chimney.
Fuel
Mainly woodpressed pallets, fuel briquettes or peat... The advantage of firewood is its long-term preservation of heat, long-term support of the combustion process and environmental friendliness.
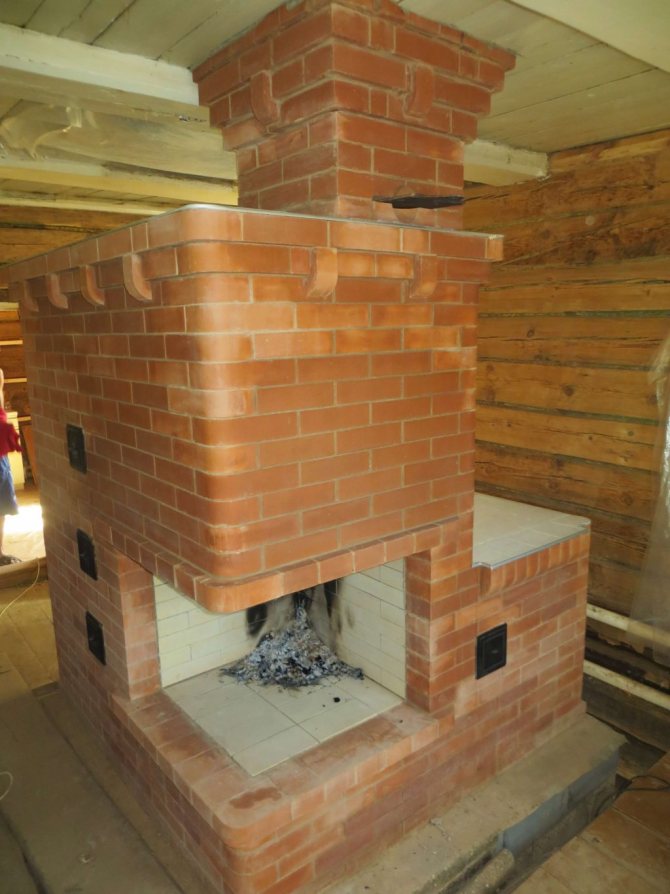
Do-it-yourself Swedish stove
A Swedish stove with her own hands can be erected only if the home craftsman already has stable bricklaying skills and, at least a little, experience with stoves.
The Swede herself is a rather complex structure, clearly not intended for primary training in such technologies.
Whichever model of the furnace is chosen, the work still begins with the device of the base-foundation.
The key material for the construction of a heating and cooking Swedish woman with your own hands is a red ceramic brick.
It is strictly forbidden to use previously used brick for masonry, for example, from an old disassembled stove. Use fireclay bricks for the firebox.
To make a small oven, you may need the following materials:
- Clay;
- Red and fireclay bricks;
- Doors of various types (blower, furnace, revision);
- Gate valves;
- Cooking cast iron stove;
- Grate;
- Steel corners and strips;
- Mortar.
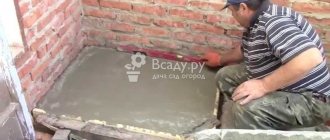
Like other types of brick ovens, the Swede should be laid on a foundation that must be prepared in advance.
Its installation does not differ from laying similar in the construction of other heating and cooking and other types of furnace and heating structures.
Remember that the size of the foundation must be larger than the size of the oven. It is laid out on the basis of crushed stone and broken brick, then poured with concrete layer by layer.
The last layer of the foundation is subject to waterproofing and then you can lay bricks according to the order of the structure.
The foundation is recommended to be made even at the stage of laying the foundation of the house itself, where the stove will be located.
But the oven is not always planned at the stage of building a house, so you often have to make holes in the finished floor. But in any case, the foundation of the stove and the base of the concrete building must be separated from each other. Otherwise, in case of unsuccessful shrinkage of one side, the other may also be skewed, thereby deforming the entire masonry.
To erect such a powerful unit, an appropriate foundation is needed, which will go into the depth of the soil by almost a meter, or rather 70 centimeters.If the soil freezes deeper, then the hole, respectively, should be dug deeper. This information should be taken care of in advance.
If the construction of the stove takes place in an already finished house, and not at the construction stage, then the markup of the future Swede is right on the floor with the condition that the hole in it must be 10-15 centimeters larger than the foundation size in all directions.
After the markings and the hole in the floor are made, you need to mark the ground and dig a pit. Cover the bottom with sand moistened with water. Tamp it down too. The thickness of the compacted sand layer should be 10–20 centimeters. Specific data depend on the depth of the excavated pit.
Then comes a layer of rubble of 15-15 centimeters, also well compacted.
Next, install the formwork, fix roofing material on its walls for waterproofing. The formwork should rise above the soil layer to the entire height of the foundation, which either does not reach the floor by 1 layer of brick, or rises 8-10 centimeters above it.
When laying, it is necessary to observe the evenness of the surface and strength. The inside of the channels should have a smooth surface, and the joints should not contain voids and excess masonry mortar.
Seams should be checked with a level, they should not be too thick. If ceramic bricks are used, the permissible parameter in this case is half a centimeter, and if chamotte bricks, then 0.3 cm, respectively. They should be bandaged on half a brick.
The main heat accumulator in the Swedish stove is the chimneys laid out in the wall or in the back wall of the stove.
The main option is vertical wells, the number of which depends on the owner's desire and the length of the wall.
The lower part of the wall warms up worse, but less soot is formed, and it is much easier to clean the channels.
Horizontal ducts warm up the lower part of the room better, but for cleaning more doors need to be installed and soot accumulates much faster.
Both options do not require special knowledge and great experience; their laying is carried out based on the specific dimensions and design of the furnace.
Be sure to keep an eye on the cross-section of the flue duct so that it does not change during the operation of the stove. If it begins to narrow even slightly, the flue gases will not be able to escape normally and may enter the room, forming smoke.
Masonry starts from the first row and it is very important to lay it out with maximum accuracy, because it is he who determines the reliability and strength of the entire stove. When laying it, use a level to control the evenness.
After the first row is laid out, place the blower door. Then follow the order when laying subsequent rows.
To form the inner space of the blower, the firebox and other internal elements of the furnace, the bricks should be slightly cut off.
It is very important that the upper masonry part and the height of the doors match. In the next row, the doors overlap.
Remember that bricks and metal have different configurations in terms of heat expansion, when installing them next to them, observe a gap of one and a half centimeters.
Fill the gaps with dry sand, and seal the space around the combustion chamber and the firebox itself with fireclay.
Do not allow deviations and distortions at this stage of work, so that you can easily put a cast iron hob for cooking on the masonry.
Any Swedish stove is a heating and cooking stove. This means that the firebox is covered with a cast-iron stove with hotplates, on which you can cook.
The stove is of a standard size, of course, the device is adapted to our two-burner product 410 X 710 mm.
For culinary manipulations, two modes are used - winter and summer. The summer direct passage opens when the main smoke circulation is cut off with the help of valves, this allows the kitchen not to overheat in the warm season.
In order for the surface to heat up well, the firebox is made relatively small in height - from 280 mm to 330 mm. Its width is up to 350 mm, and its length is up to 505 mm.
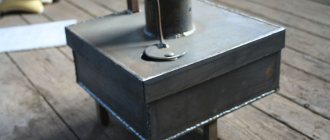
In most designs, an oven is a required element. It is designed both for baking dishes and for transferring heat into the room. In fact, this is the main function.
The box plays the role of a convective heat exchanger: when the heat generator is fired up, you do not have to wait for the bricks to warm up, a hot wave of air will immediately go out of the oven.
The oven is a steel box of almost the same dimensions as the firebox itself. The oven is installed immediately after the combustion chamber, but at some distance from the grate so that the flame does not particularly touch the metal.
A distance of about 25-30 cm or a little less is considered acceptable (you can move it closer if the wall closest to the burning firewood is protected with vermiculite or fenced off with refractory bricks, a quarter thick masonry).
A gap of about a quarter of the brick is left between the back wall of the oven and the masonry, so the product will be "washed" by hot gases from three sides.
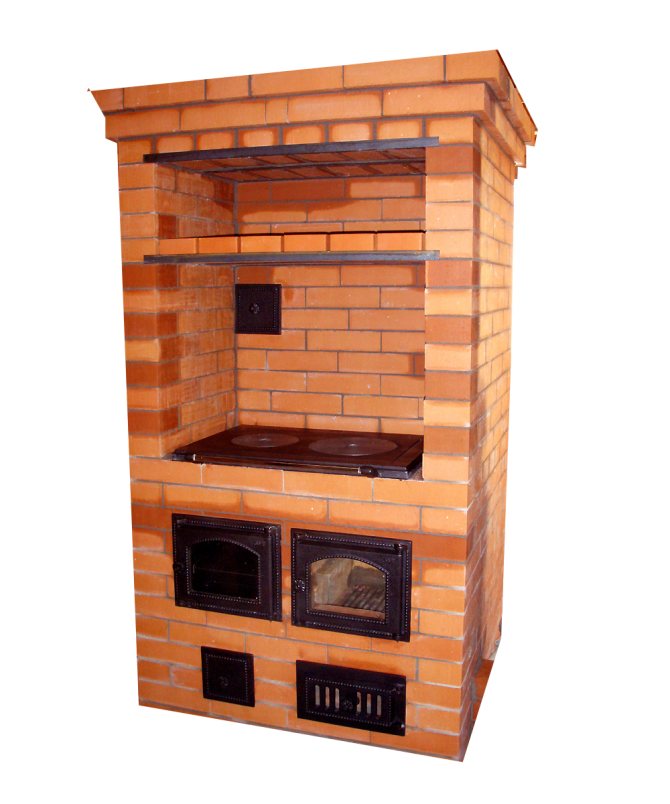
In most Swedish home stoves, several large niches are created on the front side (as wide as a stove, and 5-8 rows high). One is usually located above the slab, and the other is above it. Their direct purpose is drying clothes, shoes, berries, mushrooms, etc.
At the bottom, during heating, the heat is more intense, because the cast-iron plate heats up a lot, while the upper niche works only due to heat transfer from the brick.
And, for example, in the Simplified Swedish model, the second niche is not formed, the only overlap above the hob is just a convenient shelf.
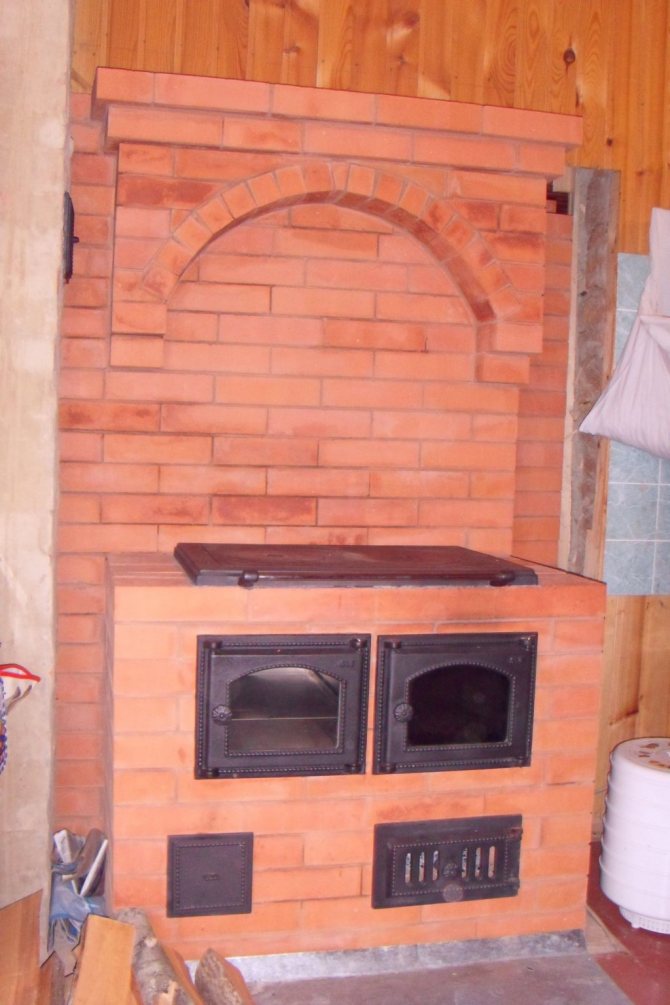
Overlappings are mainly made straight horizontal, only occasionally they resort to the use of arched structures, which look more elegant, but require more materials and are more difficult to execute.
Sometimes, for long-term preservation of heat, the opening of the niches is closed with metal doors or wood inserts, a kind of low-temperature oven is obtained.
It is better to finish the construction of the stove with your own hands in the warm season, since it must go through a drying period, otherwise you will have to dry it with an electric fan, which will lead to additional costs.
First, pre-drying is carried out for 2 weeks. Then - warm drying (the Swede is heated with a small amount of firewood also for 12-14 days).
And at the final stage, it is necessary to hot dry the device, that is, bring the temperature to maximum several times a day and back.
The Swedish stove is ideal for heating a country house or a small summer cottage.
Its design can be easily combined with other heating devices, for example, with a fireplace, and everyone can fold it with their own hands. The main thing is to have the desire, the material and the necessary tool.
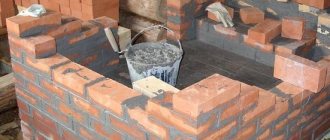
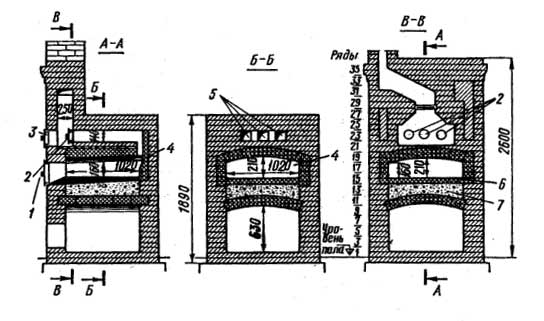
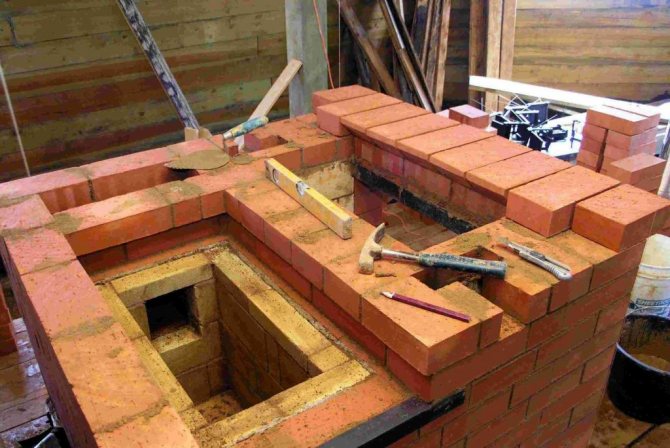
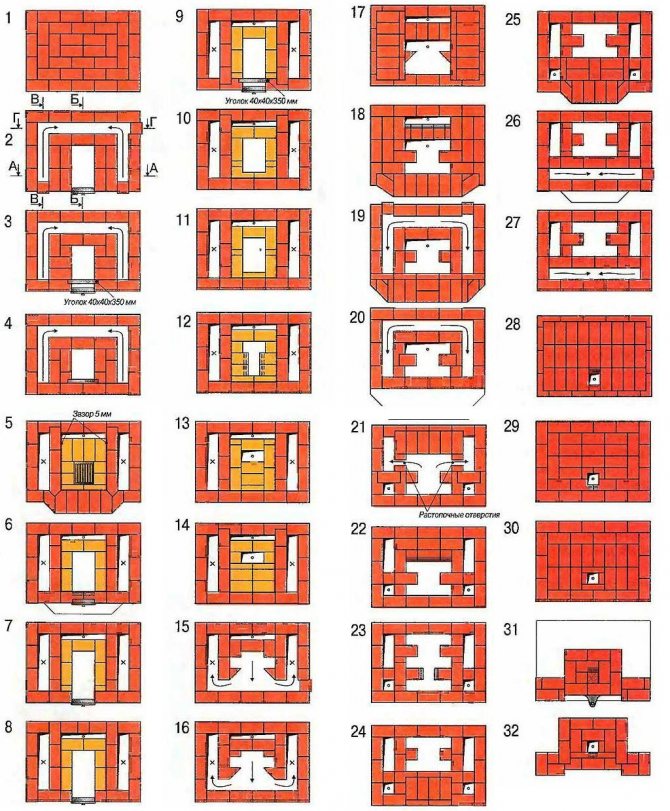
Kiln masonry process
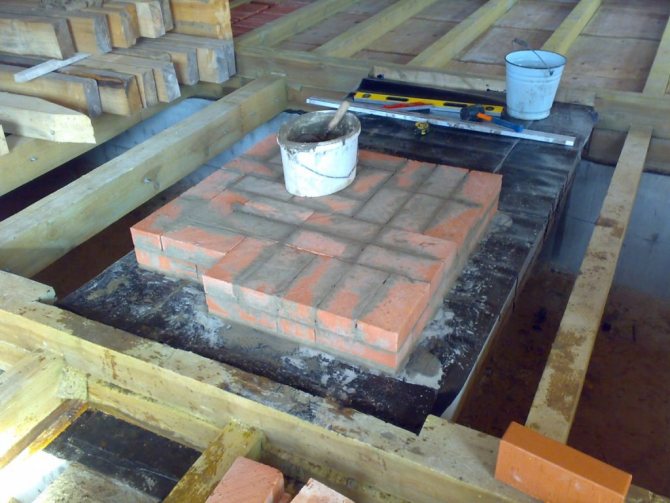
- The foundation of the structure is laid out from two continuous rows of red bricks, which are installed in a horizontal position. Using a square, you need to check the accuracy of the corners.
- On the 3rd row, it is necessary to provide for the laying of the ash chamber, the installation of the door, the laying of the lower chamber of the furnace, as well as the bases of the channels. This level of ordering is also made of red brick, while the blower is made of refractory elements.
- The 4th row provides for the further formation of previously laid down structural details: vertical channels, ash chamber, bottom heating chamber.
- As before, the blower should be laid out of refractory bricks, and the rest of the elements should be made of red. At the level of 3 and 4 rows, the channels are interconnected.
- In the 5th row, the masonry process begins from left to right. At this level, the blower door is closed and the ash chamber is finally formed.
- When installing the grate, it is imperative to take into account the expansion of the metal due to heating of the furnace. To do this, a small gap of 1.2-1.6 cm wide is left between the masonry and the lattice. This gap is filled with sand. The ashpit of the Swede is laid out from chamotte, and all other elements continue to form from red brick.
- On the 6th row, the base of the firebox is laid and a door is equipped for it. An oven is installed at the same level. A wall of chamotte is made between the fuel chamber and the oven, the rest of the masonry continues to be made of red brick.
- Previously connected vertical channels are separated at this level. 3 is made from one U-shaped channel.
- The 7th row assumes the further formation of the firebox from refractory bricks.
- On the 8th row, they continue to perform the firebox, and also close the first vertical channel.
- Row 9 is located on the upper level of the firebox door. So that the smoke from the combustion chamber smoothly passes into the chimney, on the 9th row, the bricks from below and from above are cut off at an angle.
- On the 10th row, the inside of the oven is formed from chamotte, at the same level the oven door is blocked. In the same way as in the above case, the bricks are cut at an angle. When laying this row, the wall between the firebox and the oven is not laid out.
- The finished 9th row is aligned strictly horizontally, after which a hob is installed on top of it. When installing the stove, a cutout should be provided with a small margin, about 1.2-1.6 cm, since the metal will expand when the furnace heats up. A metal corner 45x45 cm is installed flush with the outer wall of the structure.
- On the 11th row, they begin to lay out the cooking chamber. The hole to the right of the slab is filled with bricks. The row is made of red brick. At the same level, a door is sometimes equipped in order to be able to use the cooking chamber as a second oven.
- Row 12 is formed from red bricks. At this stage of work, the left vertical channels are combined into one.
- The 13th row is performed by analogy with the previous one, but in the process of laying the vertical channel is again divided into two parts.
- Rows 14 and 15 are laid out similarly to the previous one, red brick is used in the work.
- On the 16th row, you can overlap the cooking chamber. For this, metal corners measuring 45x45 cm are used. The level is performed according to the same scheme as the previous rows.
- On the 17th row, the cooking chamber overlaps. So that when cooking dishes, there is a place for steam to go out, when you close the chamber, you need to leave a hole half a brick in size.
- The 18th row is performed according to the ordering scheme, at this level a safety metal corner is laid, which will serve as a reinforcing element of the lower part of the drying chambers.
- In row 19, exhaust ventilation is formed from the cooking chamber, and drying chambers are also laid in the process.
- In the 20 and 21 rows, the laying of the stove is continued in the same way as the previous level.
- Row 22 is performed according to the same scheme, but at this level the smaller drying chamber is covered with a metal plate.
- On the 23rd row, the drying chambers are completely formed and the place where the valve of the exhaust channel will be located is prepared.
- In the 24th row, the first and second vertical channels are connected.
- When laying 25 rows, the hood is combined with the third vertical channel.
- The 26th row is formed according to the ordering rules. Chambers for drying clothes are covered with a metal corner and an overlap is made on it. A metal reinforcing mesh is laid on top of the structure.
- In the 27th row, the upper part of the Swede is completely closed, only the third vertical channel remains open. In the process of work, the perimeter of the masonry should be increased by about 3-4 cm.
- In the 28th row, a side is formed on the stove and the perimeter is increased by another 3-4 cm.
- When the 29th row is completed, the perimeter is returned to the previous indicators.
- On the 30th row, the base of the pipe is laid, a place for installing the valve is provided in the masonry.The further work process is aimed at forming a pipe of the required height.
Dry the finished stove. If it was laid out in the summer, then the structure will dry naturally; in winter, you can resort to using a fan, and then heat the stove for 2 weeks.
Oven operating rules
Like any other oven, before putting it into operation, the Swede requires compliance with the basic requirements:
- Do not heat the stove immediately after installation. It takes time for everything to solidify and dry properly. It is very important to take into account the weather conditions. If it is raining outside the window, you should wait until it stops.
- For the first fourteen days, it is drowned in small portions. This is necessary for the entire structure to dry thoroughly.
- Putting crumpled newspapers in the doors, you can maintain the required degree. The dried structure can only be considered when the paper has stopped smoldering and is completely dry.
Sometimes problems arise after installing the oven.
For example:
- The structure "fell over" to one side. This means that the foundation is not dry enough. This is a big nuisance. The stove will have to be disassembled and reassembled.
- The bed is not heated. This means that the air exchange system inside the furnace is incorrectly mounted. Probably, the furnace will have to be dismantled and checked according to the scheme, whether everything is done in strict accordance with it.
- The stove or oven does not heat, which means that the open fire is too far from them due to the large number of rows. They need to be reduced; for this, the system must be disassembled.
- Smoke remains in the room - the chimney and chimney do not function. This issue needs to be addressed urgently in order to avoid an accident. The oven is disassembled and checked for compliance with the scheme. The chimney can be very narrow and sometimes needs to be widened.
- The oven heats up very quickly and cools down quickly. Perhaps the wrong and low-quality brick was chosen, which does not meet the state standard. To solve the problem, you will have to redo all the work.
- Do not operate the furnace structure if the unit is not functioning properly. Better to take the time and remodel than to suffer from carbon monoxide or a weak firebox.
Basic recommendations for choosing
When choosing a wood stove, you need to understand purposes of exploitationand appliance: industrial or home.
Go for a leaner and more compact version if you're cooking for the family... It is unlikely that you need the amount of products that, for example, a tunnel oven produces.
Pay attention to kitchen area... Some devices take up a lot of space due to their size and the possibility of connecting a chimney.
Depending on the type of oven, it can cook not only bread, pizza, pies and pastries, but also first, second courses, fish or meat.