Why plaster walls with tile glue
In practice, there are often cases when instead of plastering walls, as well as floors in bathrooms and toilets, they are covered with tile adhesive. Is there any point in performing such work, no one can give an unequivocal answer. The number of different opinions is practically equal to the number of specialists in this issue. For the final clarification of this issue, it is worth considering the varieties and features of existing adhesives and the possibility of their use.
Types and properties of tile adhesive
The assortment of building stores has a large number of varieties of tile glue. The difference between them is in cost and composition. The latter difference can determine their strength, the ability to bond with the surface to be coated, the time it takes for the adhesive layer to dry completely and its viscosity.
According to their composition, all available glue mixtures can be divided into two large groups:
- Dry mixes based on sand or cement;
- Ready-to-use solutions, the preparation of which is carried out on a polymer base.
The first type of glue requires dilution with water without fail. The entire volume of the material obtained should be consumed within a few hours.
The level of its bonding properties is determined by the presence of added plasticizers in the composition. Its features include the following properties:
- If we compare it with cement, then it provides a faster setting of the applied mixture, as well as a more durable retention of it on the surface to be treated;
- Stable even in the presence of low temperatures and high humidity. This condition is characteristic exclusively for universal species.
- Low degree of fluidity, sufficient level of plasticity.
The above parameters make it clear that this type of mixture by its own indicators is an order of magnitude higher than an ordinary putty. The application of glue in a thick layer exceeding 1 cm should not be allowed due to the possible formation of cracks in the future. The main feature of the work is layer-by-layer application.
The second type of glue does not require the addition of water. But its cost is much higher than the previous type of mixtures. It can only be used on perfectly processed surfaces, and applied with a thin brush in neat layers.
Types of work in which glue is used
All materials used in construction have their own purpose. For leveling the walls, plaster is most often used together with putty. The first allows you to eliminate the presence of deep irregularities, the second gives the finished surface smoothness.
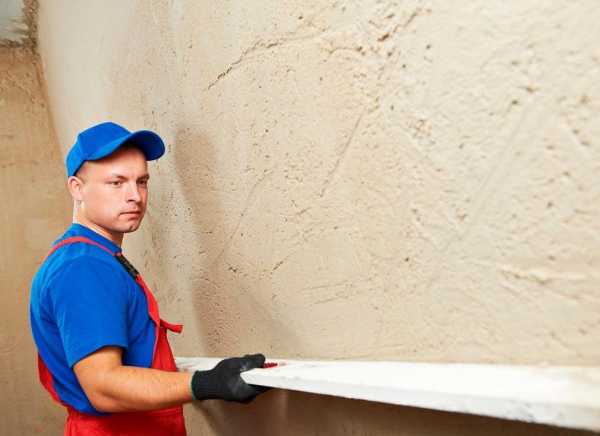
Carrying out work with its use is carried out in the same way as applying plaster to the walls. With careful and high-quality execution, such a wall or floor covering will serve for a long time. If, when applying such a mixture, all the developed technology is observed, then the result will be a long-lasting high quality plaster.
amstafkomanda.ru
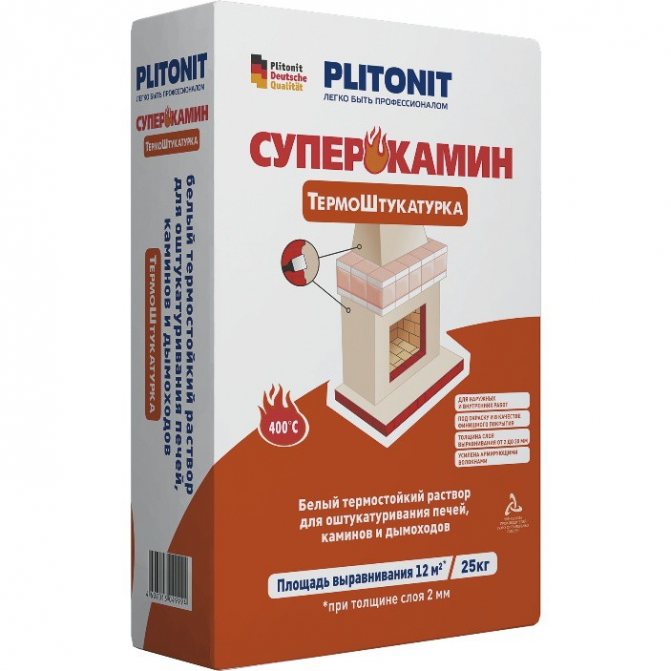

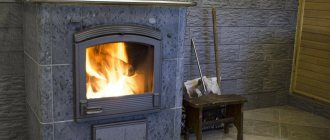
Furnace plastering tools
To do the work, you need to prepare a tool than plaster the oven with your own hands:
- maklovitsa is a large wide brush for wetting the wall surface with different types of oven solutions;
- a plastering hammer will help trim the walls, chop off excess, remove the old stove covering;
- a plumb line is a tool that allows you to assess how vertical the plastered surface is;
- a large container in which a solution for plastering the oven is prepared;
- the rack level is a measuring tool with which they control the installation of beacons in the horizontal plane, so that in the future it is easier to plaster the stoves;
- a bucket with a volume of 1 to 1.5 liters is used to throw the solution onto the plastered surface;
- a trowel or trowel is the most common tool for carrying a small amount of consumable;
- spatulas of different sizes will help to apply a high-quality coating in the right places;
- lighthouses made of galvanized steel are mounted before plastering the surface;
- corners for forming corners, made of fiberglass or aluminum, are used to obtain smooth joints of two perpendicular walls during operation;
- the rule is a special wooden or aluminum strip for leveling a large surface of the solution between the beacons;
Furnace plastering tools
- a grater and a grater are used for grouting the solution;
- the trowel is similar in design to a trowel, but it is usually made of metal and used for finishing the surface;
- a chisel and a hammer will be needed when removing an old layer of oven plaster;
- a metal bristle brush is required for oven cleaning;
- A mixer is a special drill or hammer drill used to mix plaster mortar.
With the presented list of tools, you can perform a very high-quality finishing of ovens.
Is it possible to plaster with tile glue
Alina asked a question:
If it doesn't bother you. Please give some advice. We still have a whole bag of tile glue. We didn’t calculate when we took it for renovations in the kitchen and bathroom. Can you plaster with tile adhesive? We have nowhere to use it for its intended purpose (in such quantities), but it would be quite enough to plaster the wall of a veranda built of blocks. It needs to be used somewhere before it gets damp. Can they be plastered or just glued tiles? Give answer. I really don't want to re-do the work if it falls off. What size spatula should I use? As I understand it, a notched tile will not work? Or do you need to take two, one large, the other smaller?
Tiler's answer:
Take a closer look at the foam blocks. They do not require large expenditures of plastering materials. And they do not need additional insulation. But this is a small nuance. Let's get back to business.
Isn't it a pity? Plaster is cheaper. I am answering your question. Tile adhesive can of course be used instead of plaster. It holds up better, lies well, but requires subsequent finishing putty. It's about its structure. It is coarser than gypsum mixes. This makes the surface rough to the touch. If you are satisfied, you can skip the finish line. But this is a matter of taste. I'm used to doing my job well. This is a fairly simple process if you follow the sequence of actions step by step.
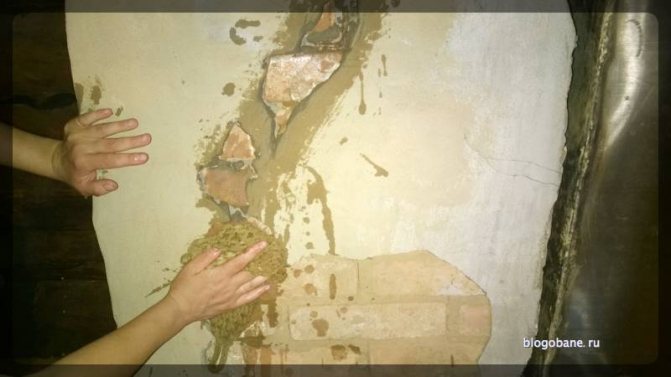
- If your masonry is uneven (and most likely it is), you will need to do several layers. For better adhesion to the surface, treat with a primer. A solution in several layers has a large mass. This will avoid the risk of repeated repairs.
- After priming, dilute the solution with a consistency close to sour cream. Take a wide molar brush and paint over the entire wall well. After that, leave to dry for a day. Repeat the procedure if necessary. But maybe once will be enough.
- Level the plaster profile. Fasten properly. Take the rule (this is the tool). It will save you time. Of course, you can use a regular spatula, but this is a long and laborious job. At this stage, the plaster is made with tile adhesive. The mortar should be thicker, lay down well, not stick too much to the trowel. Place the mortar on the wall with a trowel. After that, align with the rule.Do this with each section of the wall in order to completely plaster it.
- Leave to dry. After a day, you can shoot a profile. With tile adhesive, it is necessary to cover the voids from the profile, using a spatula. Then align the corners.
- The surface is prepared for the application of the filler. But you don't have to.
As you can see, the composition is quite suitable not only for gluing tiles. Compared to conventional gypsum plaster, it is moisture resistant and has increased adhesion. When it comes to tools, you definitely need a medium sized trowel, an angled trowel. Be sure to rule, otherwise your work will be done crookedly. A trowel for laying mortar is also necessary. And the last piece of advice. Since the glue dries quickly. You will have to scrape it off periodically. Do not dilute it in large portions. Do not leave the solution on for long. Otherwise, it will dry out. This will increase the consumption of materials.
izplitki.com
Improved plaster.
By applying some of the ingredients that we additionally introduced into the ready-made cement plaster, we have obtained an improved high-quality plaster from ordinary plaster. So further, in more detail about the composition of the improved plaster, properties, technology of execution!
Having experimented a little with ordinary plaster, we got, in our opinion, a fairly strong base of plaster, which does not crumble or crack after drying, and the performance at the time of application has improved significantly. It would be more accurate to say that from simple plaster, an improved high-quality plaster was obtained.
A digression from the topic, but all the same about plaster.
Recently, when working with sand and cement, some nuances were noticed regarding the mixing proportions of the mortar for plastering. Sand should be put not four portions, but three. Most likely this is due to cement, of the wrong quality, and maybe sand, which is not extracted from the ground, but is washed in the river, which greatly reduces the price of sand during extraction and increases it during sale. Well, cement, after the winter period in the warehouse, most likely caked and lost its properties. So, the recommended proportions for obtaining plaster at the moment are 1: 3, but to get an improved plaster, read on.
*** Looking at the topic, those who are interested in what to add to the putty for elasticity began to go. If so, then people need this, and in principle, too, which means that it is worth raising this issue (which makes the putty much more elastic). So add the topic to your favorites by pressing CTRL + D, soon there will be a link to the material - How to make the putty more elastic * !!!
To obtain an improved plaster *, we need to carry out the following steps:
- Collect a container with water and buy ordinary PVA glue, with which we will actually improve the characteristics of the plaster. It will be much cheaper than buying ready-made plaster mixes. It's all about the proportions! For twenty liters of water, we will need to add 150-200 grams of PVA glue (as much as possible), and then add cement and sand to the prepared water. The improved solution obtained with the use of PVA glue has many properties that were not previously inherent in conventional plaster mix. The improved plaster can be easily thrown on, applied to the walls and will not stick from the wall, it is easily pulled up by the rule, and the mixture is very elastic and does not tear during pulling up. When hardened, the improved plaster is much stronger and does not crumble, and it can also be rubbed off by simply moistening it with plenty of water. So we got acquainted with the article improved plaster, I hope the information received will be useful to you. The most important thing to remember is that plastered walls are rough finishes to which a good primer is applied *.
Gypsum improved plaster.
An interesting fact is that gypsum plaster can also be improved in this way. In order for the gypsum plaster to become a little stronger, although it is already strong enough, 100-150 grams of PVA glue should be dissolved in water. It is worth dissolving in a bucket of water with a capacity of 10-15 liters. After such an addition, gypsum plaster will acquire additional strength and it can be called improved with complete confidence.
By the way, if you even poorly primed the walls *, the PVA glue in the plaster will prevent it from moving away from the wall.
A characteristic of such an improved plaster.
As you understood from the above, the characteristics of the plaster have increased significantly!
- Conventional cement plaster has become improved and no longer permeates water.
- It became better to lie down and smooth out on the walls.
- The whole structure was not broken.
- The thickness of the plaster has increased. If a simple cement plaster before the introduction of an additive into it could be applied in a layer of up to 3-5 centimeters, now, from 5 to 8, without fear of cracking and additional reinforcement using glass reinforcing mesh *. That allows you to save a lot.
- Has become stronger.
- Now you can save on the primer.
The article was prepared by the administration of the site Construction from a to z. Yenakiyevo-Donetsk.
Plaster instead of tile adhesive - Construction portal

Plastering walls is one of the most important processes that is performed before laying tiles.
When repairs are done with their own hands, more than one problematic question arises for home craftsmen. Example - can you plaster the walls in the bathroom before tiling? So plastering the walls is not something that is possible - it is necessary, it will affect the quality of the finishing work. And the tile will take better, and aesthetically everything will be flawless.
Material content:
The content of the article:
Do I need to plaster the walls before laying the tiles
If you were covering the walls in the bathroom, for example, with plastic panels or instead of tiles you decided to use moisture-resistant drywall, you won't need wall plastering. But only before laying the tiles, plaster the surface without fail.
It is imperative to plaster the walls if they are uneven and damaged.
The choice of the mixture will involve two options:
- Gypsum-based mixtures. Not the best option for a bathroom, as gypsum is hygroscopic.
- Cement-based mixtures. And this option is exactly for the bathroom. It is intended for work in rooms with high humidity.
Also, when choosing a solution for wet rooms, make sure that it already contains antibacterial additives and the necessary plasticizers, which will protect against possible cracks on the walls. Sanitizing plasters are considered an excellent option - the walls are waterproofed, the walls are protected from efflorescence and mold stains, the material is environmentally friendly. Sanitizing compounds are intended only for internal work.
Is it possible to put tiles on gypsum plaster
As discussed above, this is undesirable. Yes, in some situations it is possible to apply gypsum plaster, but only if certain conditions are met. And these conditions are not always possible to fulfill.
So, the rules for applying gypsum plaster:
- The plastered walls will be completely finished with ceramic tiles, and the seams will be covered with a special moisture-resistant grout;
- The layer of gypsum plaster will not be more than 2 cm;
- The plastered surface will not be smoothed;
- Before laying the tiles, the surface will need to be treated with a special primer a la Aquastop.

Professionals in most cases do not recommend installing tiles on gypsum plaster
Nevertheless, the use of gypsum plaster is undesirable. Cement is many times better, gypsum plaster is simply not intended for work in the bathroom.Use it only in exceptional cases.
Preparatory work: plastering the walls in the bathroom under the tiles
Clean the walls thoroughly, get rid of the old coating. If there are stains on the walls, they must be removed. Rust stains can be removed with a mild acid solution. If it seems to you that the walls are too smooth, process them with a notch, they will become rough to the required degree.
Work begins with the application of a starter layer. The first layer is applied with liquid plaster. First, the base is moistened with some water, then the liquid plaster is "pounced" on the walls with a trowel. The starting layer should not be thicker than half a millimeter. And you do not need to smooth and level this layer.
Base and finish layer: plaster under the tiles
The main layer is also called rough. It must be applied over the starter layer, and its thickness is the same - half a centimeter. If a layer of 5 mm, as it seems to you, is not enough, then after the first rough layer has dried, apply the same second one. Only the plaster mixture should be thicker.
Thanks to the plastering of the walls, you can significantly extend the life of the tiles.
When you apply a draft layer, the plastering will take place like this: you throw the mortar on the wall, and level it with a special tool, a long trowel. In this case, movements can be in any direction.
The finishing layer of plaster is applied as follows:
- This layer is very thin, about 2 m;
- It is applied after the base layer has completely dried;
- Before applying this layer, the walls must be moistened with water, then work with the mixture and a spatula.
Then a special trowel evens out the still uncured layer. This is done in a counterclockwise circular motion. So, you were able to plaster the wall with high quality, it remains to wait for it to dry and you can lay the tiles.
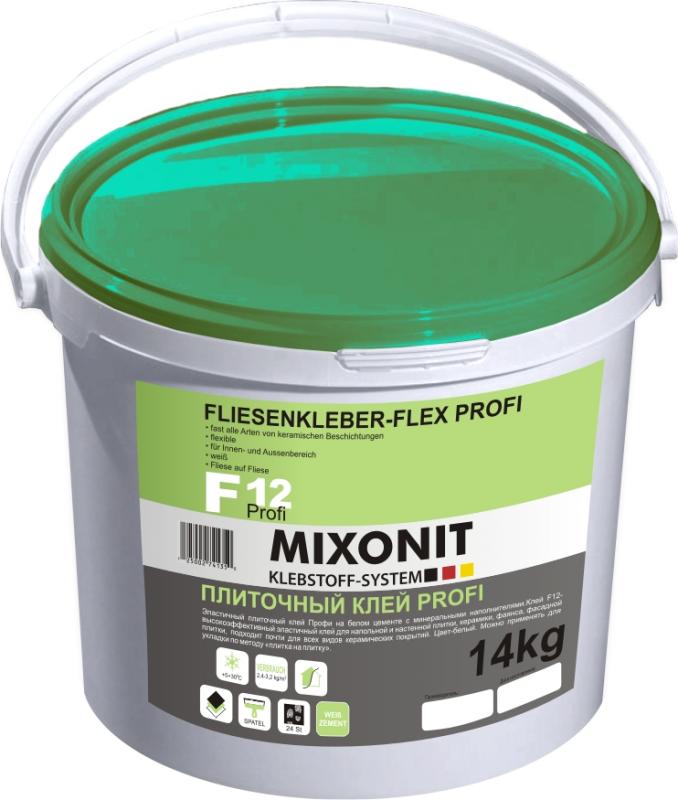
Types of plaster: is it possible to plaster with tile adhesive
Experts assure that in some cases, subject to certain conditions, the plaster mixture can be replaced with high-quality tile adhesive. It is produced both with a ready-made solution and with a dry mixture. Dry mixtures are traditionally diluted with water, and ready-made solutions containing polymers do not require dilution. But polymer compositions for plastering are not suitable, you can use only a dry mixture.
Before plastering the wall with glue, it must be prepared in the same way as in the case of the plaster mixture. The wall must be clean, if necessary - certain areas will have to be putty. Then a primer is applied to the wall in two layers.
Plastering with tile adhesive is recommended if you have the appropriate experience.
Tile adhesive plaster:
- Install beacons using a level and plumb lines;
- After that, you can apply the adhesive itself. The first layer should have the consistency of sour cream.
- Thoroughly trowel the walls with the mixture, trying to fill in all the cracks. This solution will dry out in a day. Then you can plaster further.
- For the second layer, you will need a thicker mixture. At this stage, it is required to achieve the desired layer thickness, therefore, at the end, the walls will be leveled. First, the rule is used, and the corners are conveniently formed with a special spatula.
- After this layer has dried completely, you can also glue the ceramic tiles to the surface.
As you can see, there is nothing hyper-complicated in this method either. The main thing is not to forget that the glue is not needed polymer, but in the form of a dry mixture. And to achieve the correct consistencies, as well as a two-layer application. Then everything will work out.
Plastering walls in the bathroom under tiles (video)
Of course, plastering the wall before cladding is not a desirable process, but an obligatory one. This makes your repairs of high quality and durable. So do not neglect the rules of competent repair, and the next one will not be needed soon.
Good work!
Source: kitchenremont.ru
Plastering walls with an adhesive mixture
Now let's look at how to properly perform plastering in order to end up with a high-quality and durable rough finish. Like any other construction work, this procedure is performed step by step.
Preparation of the base
First of all, it is necessary to qualitatively prepare the base. It should be free of crumbling or peeling areas, as well as dirt that impairs adhesion.
In particular, concrete slabs must be cleaned of the oil used in their manufacture. You can use warm water and detergents for this. If there are traces of mold or mildew on the surface, then it must be cleaned with a metal brush.
The final stage of preparation is the application of a primer, which will not only improve the adhesion of materials, but also protect the base from the effects of microorganisms. The solution is applied to the walls in two layers.
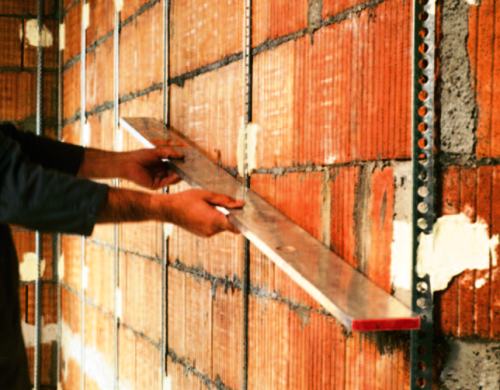
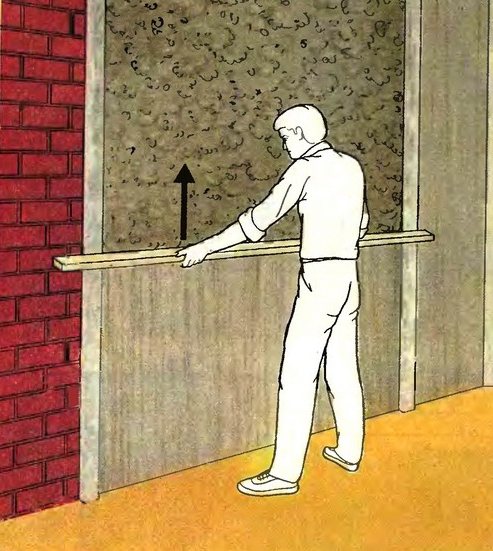
In the photo - checking the quality of the installation of beacons
Installation of beacons
This stage is quite difficult, as it requires extreme accuracy - all guide beacons must be located strictly horizontally, in the same plane. It depends on how smooth the walls turn out to be, i.e. what the plaster is done for.
As beacons, a special plaster profile should be used, which is fixed on the wall with lumps of gypsum or the same adhesive solution. To adjust the position of the beacon, self-tapping screws can be screwed on both sides. In this case, the profile with its edges "lies" on their hats.
Note! When installing plaster beacons, it is necessary to check their position several times with a building level.
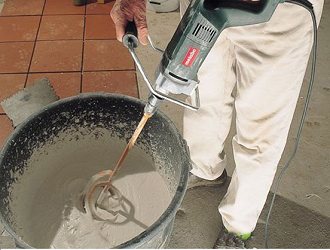
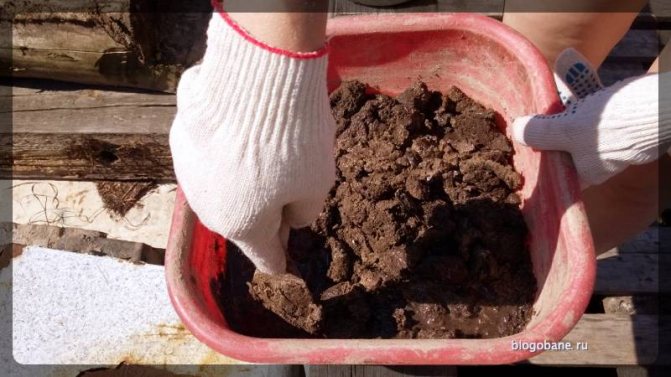
Preparation of the solution
Preparation of the solution
The peculiarity of the preparation of the solution in this case is that it can turn out to be too greasy, which will lead to cracking of the surface. Therefore, sand is usually added to it.
The fat content is determined during its preparation, if the solution sticks strongly to the instrument, then it is necessary to add sand. As a result, the composition should only slightly adhere to the trowel.
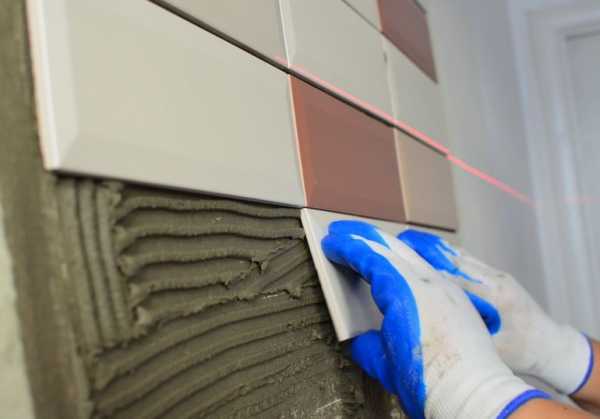
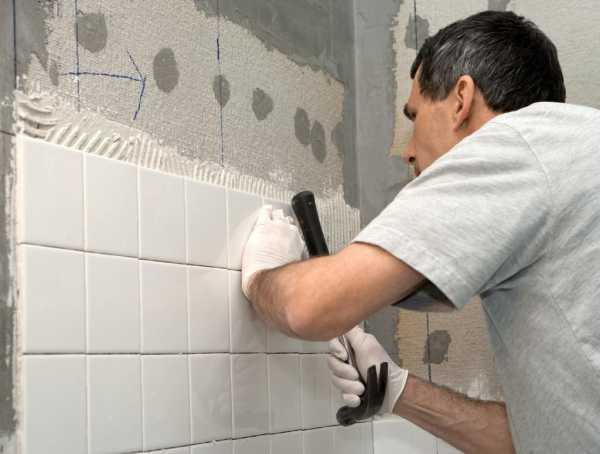
Applying the composition to the wall
After preparing the base and performing the mortar, you can proceed directly to plastering.
The instruction looks like this:
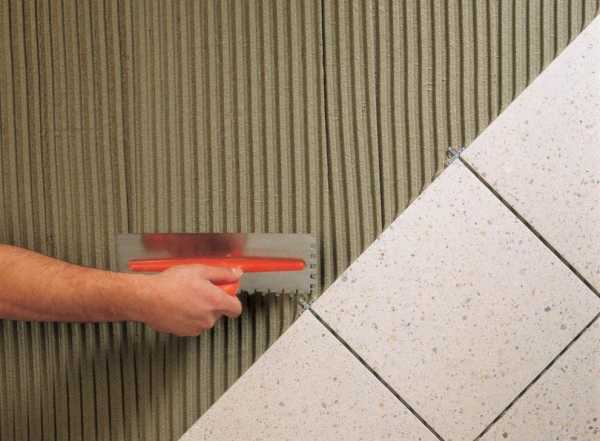
- The first layer is applied with a creamy consistency solution using a trowel. The mixture should fill all depressions, cracks and completely cover the surface of the wall. However, the thickness of the first layer should be no more than one centimeter, preferably even slightly less.
- After the first layer has dried, which usually takes a day, you can apply the second layer in the same way. If at the same time the required thickness is achieved, then the leveling of the surface should be performed using a rule that presses against the beacons and stretches from the bottom up.
- The final step is to align the corners. For these purposes, you can use a special angled spatula.
Surface alignment scheme by rule
This completes the plastering procedure. If technological errors are not allowed in the process of its application, then the adhesive plaster will turn out to be quite durable and of high quality.
We use glue instead of plaster: advice from experienced
Today, the choice of building materials in any store is huge. When planning to make repairs, you do not need to look for acquaintances who can sell imported wallpaper or scarce tiles from under the counter. And cement mixes no longer need to be mixed by ourselves.
However, on the forums, the question is often asked: "Is it possible to plaster with tile glue?" As a rule, the reason for such a craving for experimentation is banal economy. Firstly, it happens that tile adhesive costs an order of magnitude cheaper than a plaster composition from a good manufacturer.And secondly, if you are going to glue ceramic tiles in the bathroom and have already purchased the necessary materials with a margin, then plastering the walls with tile adhesive will help solve the problem of unexpectedly revealed surface irregularities.
Is it possible or not?
Manufacturers of adhesives based on Portland cement (for example, Ceresit) themselves sometimes indicate on the packaging the possibility of using glue as a leveling material. Plastering with tile glue, as practice shows, fully justifies itself if the instructions for use are followed (that is, the thickness of the layer must not be exceeded, it is imperative to wait until it dries, it is recommended to apply a primer before and after application).
However, when replacing one material with another, as in the case of using tile adhesive as plaster, one must also remember the differences in technical characteristics. If we compare, for example, SK KVARTs tile adhesive and the universal DSP M-150 of the same brand, we will see that the compressive strength of the cement-sand mixture is higher. In addition, dry mix is much cheaper. And, by the way, this universal plaster is used no less often instead of tile glue.
And if you connect?
The inquisitive mind of folk craftsmen went even further: on the network you can also find questions about mixing the above two compositions. According to the experimenters themselves, the resulting material is resistant to cracking and durable. But the exact proportions of adding glue to the plaster are difficult to determine. After all, it is necessary to proceed from the characteristics of this or that glue and plaster mixture. Therefore, we do not recommend carrying out such tests on the walls of your own home. Especially if you are new to decorating.
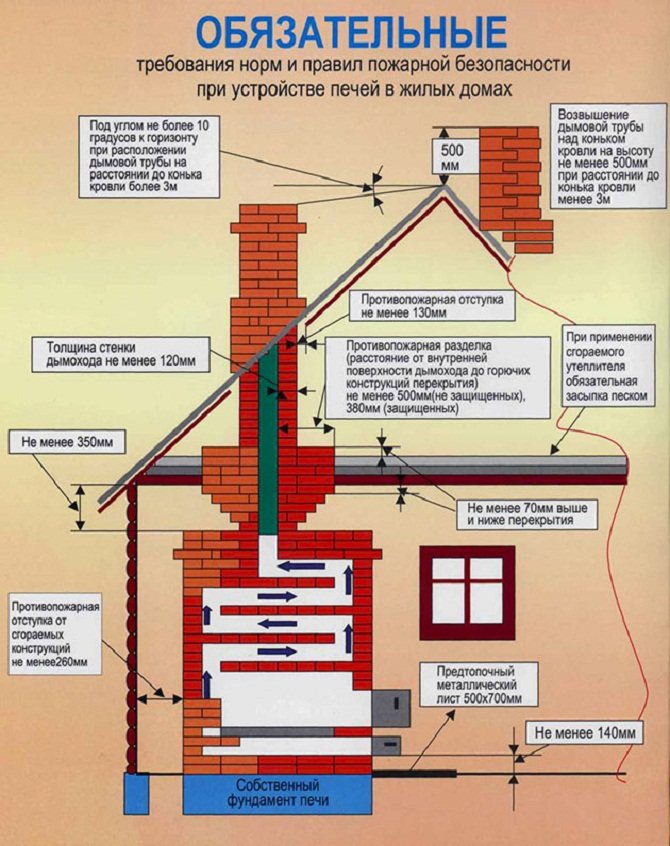
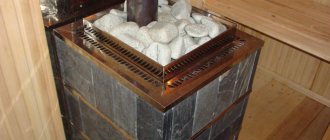
Norms and requirements
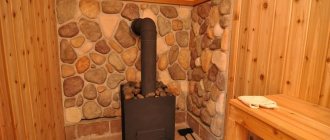
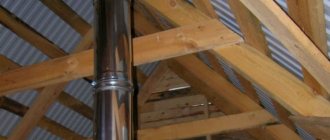
For the interior decoration of a brick bath, you need to use materials that will cope with the effects of high temperatures and moisture. Therefore, the use of plastic and ceramic mixtures, which emit odors and become covered with condensation, is excluded. Excluded for interior decoration of the steam room, brick baths and metal, as it gets very hot and can be dangerous with burns. It is best to use wood that has low thermal conductivity and is ready to last a long time even under difficult operating conditions.
The materials used when decorating a brick bath with their own hands should have not only an aesthetic appearance, but also good air permeability so that condensation does not accumulate in the layers, which will certainly cause fungus and mold. In rooms where the temperature will be high, it is not recommended to use coniferous wood, linoleum, fiberboard and chipboard. The last two options quickly deteriorate and absorb moisture well.
As for conifers, the lining of them releases resin when heated. Therefore, when decorating a brick bath from the inside, this variety is not used. When choosing materials that will come into contact with hot surfaces, their fire safety should be taken into account. A distance of 0.5 m should be maintained from the wood stove to the wooden elements of the walls and floor. To save space, when choosing a place for the heater, an angle is usually preferred, and the walls there are protected with heat-resistant materials. For example, you can use minerite or stainless steel, the latter of which is represented by protective screens.