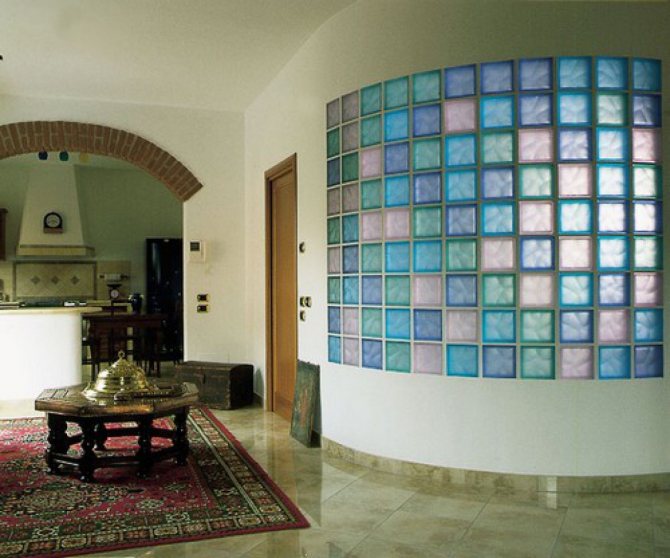
Hello everyone! For the construction of partitions indoors, glass blocks are increasingly used today. Such designs look aesthetically pleasing and stylish, they let light through and therefore do not visually clutter up the space, performing the zoning function. Another plus of the material is absolute resistance to moisture and aggressive environments, and the installation of glass blocks is not very difficult work. But how to properly lay glass blocks, read below.
What should you know when planning to use glass blocks in your home?
1. It is undesirable to build a wall with doors from glass blocks. An opening in the wall of glass blocks may be present, but the doors should not be fastened. It is also impossible to mount window systems in a glass-block wall.
2. Of course, a wall made of glass blocks cannot be load-bearing.
3. Glass blocks have excellent sound insulation. Do not be afraid that the glass-block wall separating the two rooms will only perform a decorative function.
4. Glass blocks are also a heat-saving material. They can glaze large window openings - and the room will be warm (just like with modern plastic double-glazed windows).
5. Glass blocks are a unique material that is both building and finishing. This is the particular convenience of their use. I erected a wall and you can think of nothing else: no putty, no painting, no cladding. This will save you money, effort and energy.
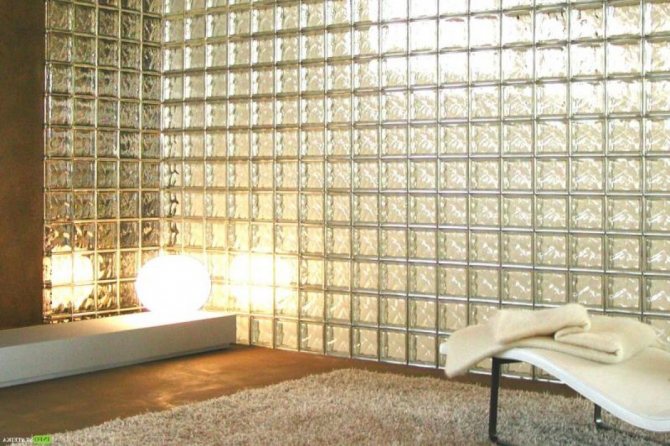
6. It is undesirable to create surfaces of more than 15 square meters from glass blocks. m.
Features and technical characteristics of glass blocks
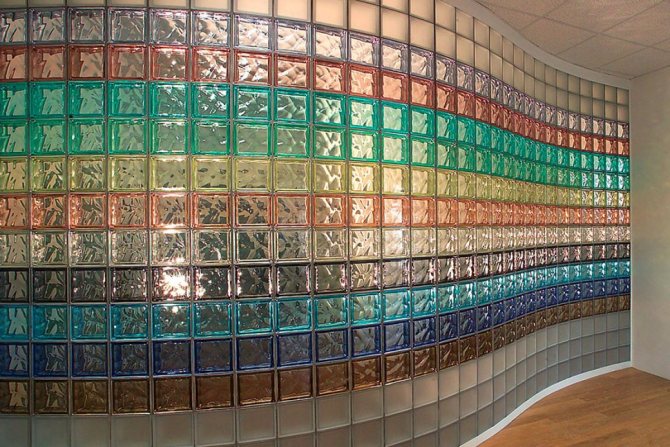
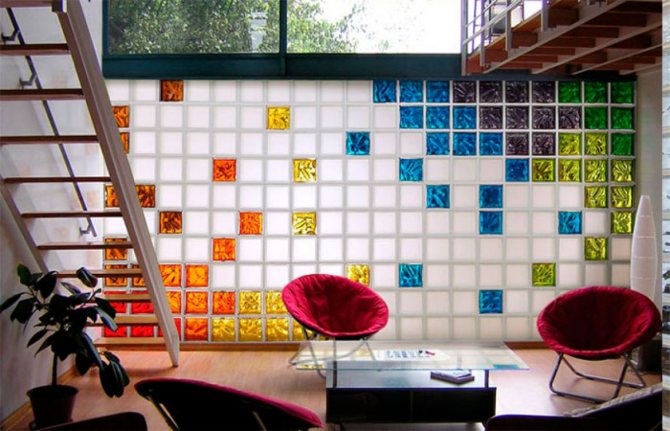
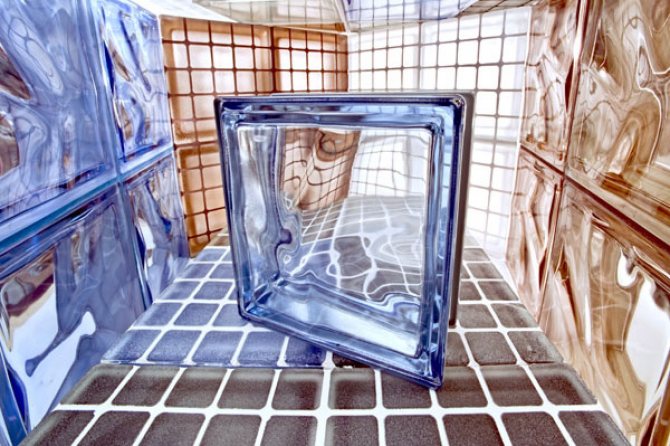
Modern glass blocks are a hollow material that is formed of two glass plates with a thickness of 6-9 mm, hermetically connected by pressing. Currently, they are produced on automatic lines, which guarantees the invariability of the qualitative composition of the molten glass and the tightness of the seam. The glass block can be transparent, matte, colored or corrugated. According to their light-optical properties, they are divided into translucent, light-scattering and light-guiding. The thickness of the tiles is 7.5-10 cm, the weight is within 4.3 kg. In addition to standard square and rectangular blocks, triangular, corner, round and half elements are produced. There are decorative glass blocks as well. They are presented in a wide range of colors and textures, which allows them to be used in various interior styles.
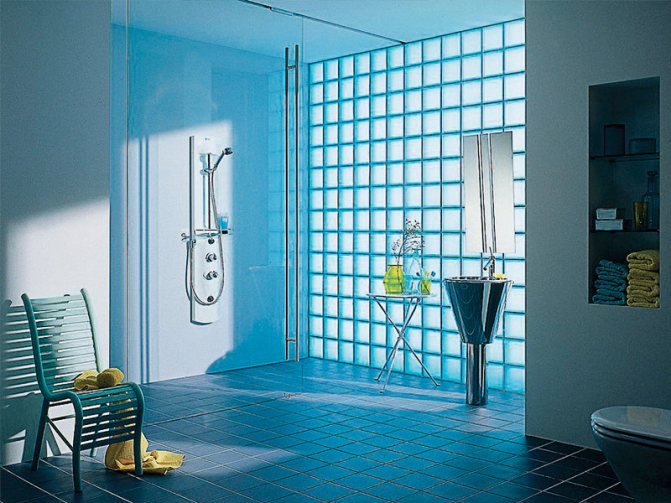
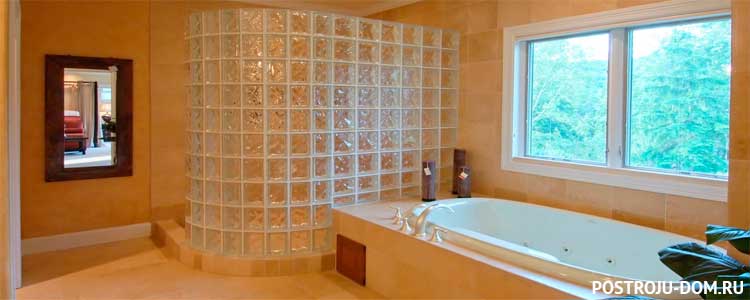
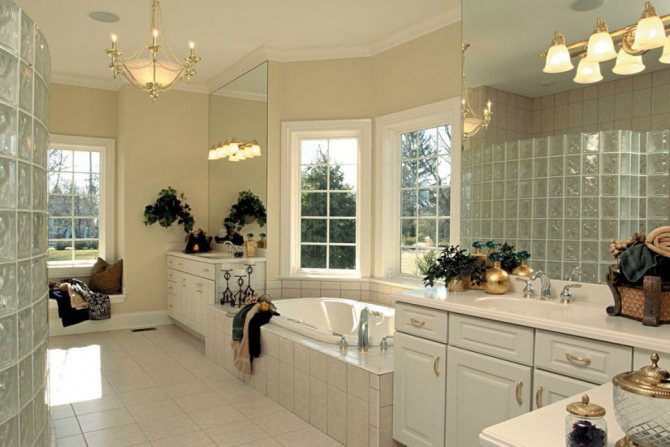
Glass blocks in the interior of the bathroom
Advantages and disadvantages
Like any other material, double-glazed windows have their pros and cons. This, in turn, affects the ability to use them for specific purposes. Benefits. • Moisture resistance. • Light transmittance. • Soundproofing. • Fire safety. • Frost resistance. • Easy to clean. • Does not require additional finishing.
Disadvantages.
• The wall remains intact. It is impossible to drive a nail into it or screw in a screw, as well as to carry out an electrical wiring or sewage system inside. • Glass blocks are not processed. They cannot be cut to use the correct size. All measurements must be calculated in advance. • In the room where the window opening is glazed with glass blocks, it is necessary to carry out additional ventilation systems.
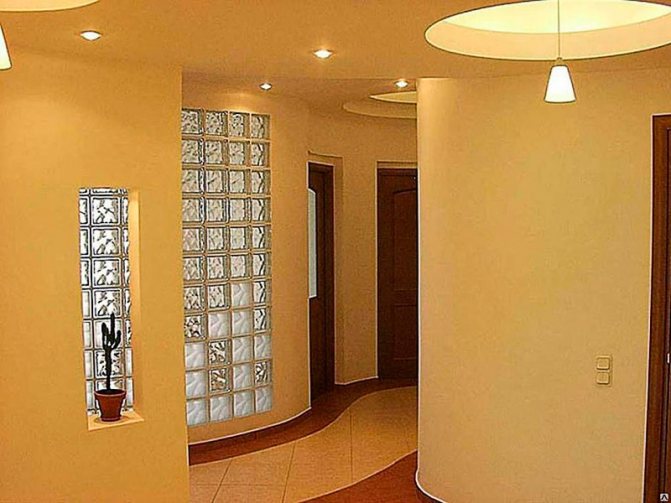
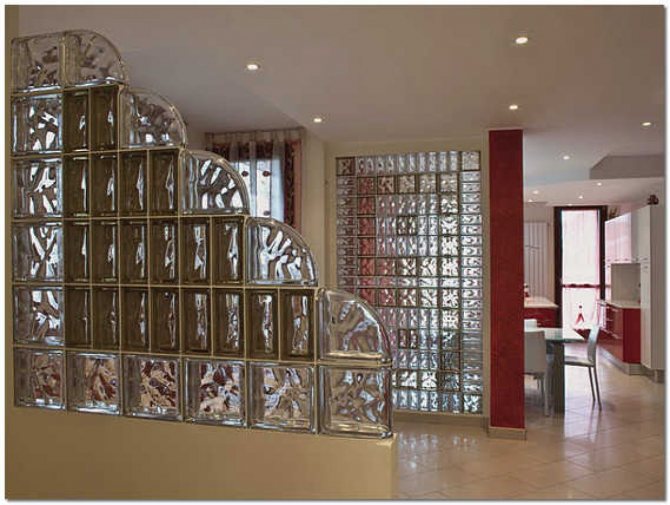
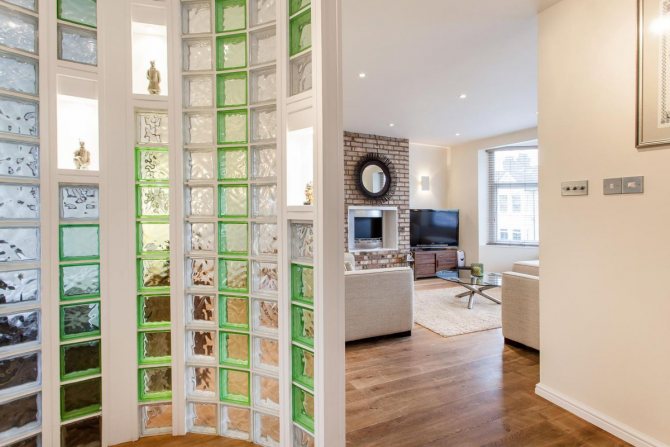
Glass blocks in the interior (hallway)
What do you need to know before starting work?
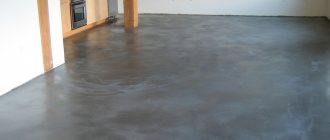
one.The surfaces to which the glass block wall or partition will adjoin must be prepared (at the junction). Namely, clean from the old finish, wash, let dry, prime.
2. Glass blocks are sold, as a rule, covered with a protective film. It is not recommended to remove the film until the end of the installation in order to avoid damage to the surface of the blocks, the appearance of scratches, stains from glue and cement, etc.
If the blocks were sold without film, you can protect them yourself - for example, by pasting the front surfaces of the blocks with masking tape.
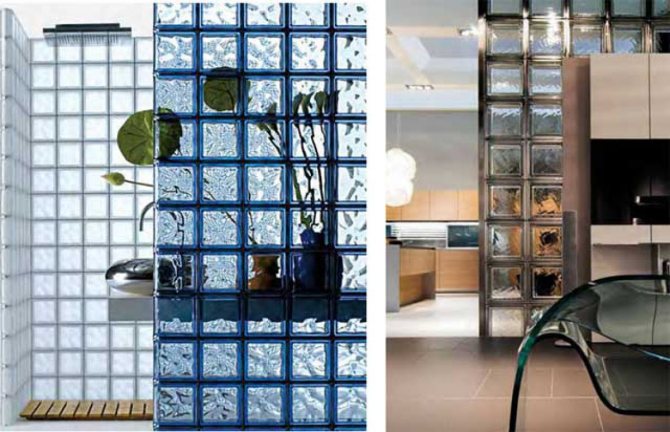
What is the texture of glass blocks?
Glass blocks may differ in appearance. Their textured surface can be smooth, embossed, light-scattering, that is, matte from the inside or outside, and light-guiding, namely, embossed from the inside.
In order to increase the permeability of light, the ends of the blocks can be covered with amalgam. The ends of euro glass blocks are covered with white paint. Thus, after laying them, the solution will remain invisible. Also, sometimes a hole is made at the ends to fill the block with paint.
Installation of glass blocks on cement
For work, use cement or tile glue. The cement must be of high quality, homogeneous, without large grains of sand (they can scratch the glass, hitting the glass block). Tile adhesive is preferred.
In addition to cement or glue, you will need special spacer crosses and metal rods (section 4-6 mm).
Spacer crosses help to leave a fixed distance between the blocks, so that the surface of the glass blocks is flat. In addition, crosses make the wall stiffer. Metal rods are needed for reinforcement, that is, to strengthen the glass-block wall.
Having laid a row of glass blocks, a new layer of glue is applied and a metal rod is laid horizontally, after which the second row of blocks is laid. The rods are also laid vertically if the area of the structure is large enough. Some experts recommend reinforcing not all rows, but only every third one.
Spacer crosses are installed in the joints between glass blocks. The “hats” of the crosses remain outside. After the cement is completely dry, these protruding plates need to be chipped off. The crosses themselves remain inside the wall, making it stronger.

The building level should always be nearby. With its help, you should constantly monitor the evenness of horizontal and vertical rows.
It is not recommended to lay more than three horizontal rows of glass blocks at a time. We laid out a plot of three blocks high - paused. If the installation of glass blocks is carried out with tile adhesive, work can be stopped for a couple of hours and then continued. If the glass blocks are laid on cement, you will have to wait a day. Why is a pause necessary? If you go above three rows, at some point the structure may "float" or completely collapse. Be sure to take breaks!
If the glass block structure will be adjacent to other surfaces, then the "seam" between them should be no more than one centimeter.
By the way, about the "seams" or joints. If the glass blocks were laid on cement, after its complete drying, the joints can be rubbed with a tile grout of the desired color. But it's even easier to buy colored cement / glue and put glass blocks on it. In this case, the joints must be immediately made neat, removing excess cement, and then after drying, no additional processing is required.
After laying all the glass blocks, the structure should dry well. It is worth taking 10-15 days for this. And only after this time you can start grouting the interblock joints.
Tools and materials
To install glass blocks, you will need:
- tape measure, building level, marking pencil, building square;
- special crosses for laying glass blocks and plastic wedges for leveling the floor;
- a grinder or nippers (for trimming crosses, cutting reinforcement), an electric drill, 6 mm drill bits for tiles or concrete and a whisk;
- tile adhesive of white color, fiberglass reinforcement with a diameter of 6 mm, container for the preparation of glue;
- medium spatula, beta-contact primer, masking tape, sponge and quick-setting glass glue;
- glass block and end glass decorative strips.

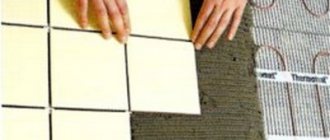
Frame method for installing glass blocks
This method of installing glass blocks is suitable for creating small lightweight structures - for example, semi-partitions for zoning rooms. Soundproofing qualities will be significantly lower than with a cement installation method. Strength indicators are also not comparable.
The advantage of this method is aesthetics (the blocks are framed, as it were), the cleanliness of the work and the possibility of replacing single blocks.
The frame is made of wood (polished boards). They make it to order - for example, in carpentry workshops. The frame is a structure with equal cells and resembles a rack or lattice. The cells correspond to the dimensions of the glass blocks.
Blocks are inserted into cells and reinforced. To do this, use rubber gaskets or silicone sealants. Sealants are more often used - this strengthens the structure, since the blocks are literally glued into the cells. However, there is also a drawback: if the block is installed with a rubber gasket, it can be easily removed if necessary, in order, for example, to replace a cracked block. If it is glued with a sealant, it will be more difficult to remove it so as not to damage the entire structure.
Before filling with glass blocks, the lattice frame must be fixed by attaching with dowels or anchors to the main surfaces - the floor, the supporting wall, the ceiling.
If you want to give the frame a certain color, you need to paint it in advance, before filling it with glass blocks.
The work is easy enough, but it must be done carefully, being careful, remembering that glass is a fragile material.
The installation of glass blocks into the wall is carried out in the same way. In the wall, you need to create a cell for a glass block and insert it, securing it with a rubber seal or sealant.
Manufacturers of glass blocks also produce ready-made modules for fixing blocks. The frame is assembled from the modules. Moreover, it is assembled simultaneously with the installation of blocks. The modules themselves are made not only of wood, but also of PVC.
Such modular systems for the installation of glass blocks must be asked in the same stores that sell this material. Working with ready-made modules is quite simple - it is similar to assembling a constructor. It must be remembered that the design is also very fragile: it is impossible to glaze the window with this method, but you can fence off the sofa from the bed in the living room bedroom.
If you are already registered, enter your login information!
Previous article Next article
Glass block stacking technology
It is strictly forbidden to:
Before starting a conversation about the features and methods of installing glass blocks, it should be mentioned that all structures made of glass blocks are mainly decorative, soundproof, heatproof and dustproof functions and, in no case, cannot serve as walls and partitions, which will later be assigned the function of load-bearing walls.
In other words, floor slabs between the floors of the building, as well as floor beams, must absolutely not be laid on walls made of glass blocks, since walls made of glass blocks are not intended for these purposes and cannot bear a large load on themselves.
Starting our conversation with this question, we would thus like to immediately protect you from a gross mistake when installing glass blocks, which can lead to very unpleasant consequences, for example, to a partial or complete collapse of your building.
Selection of tools and consumables
To successfully carry out work on the installation of glass blocks and the manufacture of structures from glass blocks of any size, complexity and variety without any difficulties, you will need a certain set of tools and specific consumables
Consumables:
| one.Cement mortar or dry mortar for laying ceramic tiles or porcelain stoneware, preferably frost-resistant. 2. Reinforcing rods are intended for reinforcing glass-block masonry, they perform an additional fastening function when installing glass-block structures into the masonry. The rods used for these purposes must be made of stainless steel or, at a minimum, must be galvanized so as not to corrode. | |
| 3. Laying crosses They play an important role in the control of the thickness of the joints between glass blocks and are laid in each corner joint. After the completion of the installation work, they remain inside the cement masonry and are rubbed. | |
| 4. Grout for joints, intended for filling the joints between glass blocks and giving them the required color, since the color range of glue solutions on which glass blocks are laid is very limited and not always acceptable in color to those glass blocks that are laid on them. To grind the joints between glass blocks, it is recommended to use a moisture-resistant grout, since it is not afraid of exposure to water and can be used both indoors and outdoors. | |
| 5. Silicone sealant in a special tube for fixing glass blocks. 6. Fixing dowels and anchors for fixing frame structures. | |
Tools for laying glass blocks: | |
| 1. Level, the longer the partition, the longer the level should be applied, this will increase the accuracy and quality of laying glass blocks. The length of the levels produced by the industry ranges from 40 centimeters to 2.5 meters. | |
| 2. A tool for measuring and marking, that is, a tape measure complete with a construction pencil with a thick lead, they come in different colors. | |
| 3. Marking cord for marking and drawing long straight lines, as well as for checking the evenness of laying glass blocks. This tool necessarily comes with a special marking powder. | |
| 4. Grinder with a flat abrasive disc, designed to cut excess reinforcement rods. It is advisable to use an abrasive disc with a diameter of 115mm, as it generates less vibration. | |
| 5. Rubber or foam rubber float, it is intended for applying grouting and rubbing with it the seams between glass blocks, as well as removing the remnants of the adhesive solution after laying the glass blocks. | |
| 6. A trough for the preparation of adhesive solution, preferably plastic and with a capacity of 5 buckets, that is, for one batch of solution. | |
| 7. A construction trowel is used to lay the adhesive solution on the surface of the glass blocks to be laid. 8. Sponges for preliminary cleaning of the laid glass blocks from the remnants of adhesive solution and grout. | |
| 9. An electric drill is used for drilling holes for reinforcing rods in cases where the installation is carried out in conjunction with wooden base elements, as well as for stirring the adhesive solution during its preparation. | |
| 10. Mixer of the correct size for mixing the adhesive solution. | |
| 12. Perforator, for drilling holes for reinforcement rods in concrete and brick foundations. | |
| 12. Drills for drilling wood with a diameter of 8 - 10mm. 13. Special drill bits for hammer drills with a diameter of 8 - 10 mm. | |
| 14. Rubber hammer, for correcting glass brick masonry, if necessary. 15. Stepladder or portable scaffolding for easy installation of the structure, if it is quite high. | |
| 16. A leveling trowel, sized to match the thickness of the joint, for opening joints between glass blocks. | |
| 17. Expanding trowel, for removing the adhesive solution from the seams and forming a groove for subsequent filling with grout. | |
| 18. Spatula, for removing dirt and old materials from the surface of the substrate. | |
| 19. A gun for silicone sealant, it allows you to freely work with the sealant with one hand. twenty.Dry rag, preferably felt or flannel, for fine cleaning and grinding of glass blocks. | |
Methods for assembling structures from glass blocks
There are several methods for installing glass blocks. All of them differ from each other in many respects, such as: labor intensity, aesthetics, cost and speed of work performed to manufacture a structure from glass blocks.
Traditional method of stacking glass blocks
is the cheapest, easiest and fastest way, but it is also not the most aesthetic, which is its biggest drawback compared to other methods of installing glass blocks.
When making a partition using the traditional method, you must first clean the surfaces of the base of the walls, floors and ceiling in the place where the partition will be made from chalk, dust, linoleum, parquet and other pollutants and old materials.
The next stage of work is the marking of the future structure directly on the surface of the bases along the perimeter using a level, a construction pencil and a marking cord. All the necessary data and measurement results are applied directly to the surface of the base in those places where they were received or will be used at the time of laying the glass blocks.
After carrying out the marking work, you need to start making the glue on which the glass blocks will be laid.
With the traditional method of laying glass blocks, as a rule, either ordinary cement mortar is used (in a proportion of 1 bucket of cement + 3 buckets of fine-grained clean river sand + 1 bucket of clean water), or, at best, a conventional dry mortar for laying tiles or for brickwork.
In the case of using ordinary cement mortar, it is recommended to add 200 grams of PVA glue to 5 buckets of ready-made mortar while stirring to increase the plasticity and adhesion of the glue.
When using ready-made building mixtures, this does not need to be done, since they already include all the necessary components, that is, adhesives and plasticizers.
When installing glass blocks, it is advisable to use white adhesive solutions so that the color of the glass blocks themselves does not change, and also when using solutions based on white cement, in the future more aesthetic joints between glass blocks will be obtained.
Thoroughly mix the adhesive solution chosen for laying in a special convenient, preferably plastic, dish using an electric drill and a mixer of the required size to a creamy consistency and leave to “ripen” for about 3 - 5 minutes.
After “ripening” the solution should be thoroughly mixed again and it is ready for use.
A properly prepared adhesive solution should not be very thick, but it should not run off from the trowel at the time of laying the glass blocks.
It is not recommended to prepare a large amount of glue solution, since you may not have time to use it for laying glass blocks before the onset of the primary drying process.
It is not recommended to use a solution diluted after drying for laying glass blocks, since all adhesives in this solution have already been crystallized, and the solution itself has lost its adhesion properties.
Laying a partition made of glass blocks begins with laying the first two reinforcing rods on the base of the floor.
The rods used for reinforcing the masonry of glass blocks must be made of stainless steel or galvanized in order to avoid, firstly, the appearance of rust, which in the future may appear outside the masonry and spoil the appearance of the structure, and secondly, when the reinforcing rods are corroded, the structure weakened ...
To lay the first reinforcing rods, it is necessary to drill holes in the wall, into which the first two rods will then enter.Holes should be drilled at the very junction of the wall and floor according to the dimensions of the inner walls, prepared for laying glass blocks.
Reinforcement rods, with this manner of laying, will perform the function of embedded elements along the entire height of the laid out structure.
In addition to horizontal rods, it is also necessary to lay vertical reinforcing rods after each laid glass block and also drill holes in the floor for adhesion to the floor base.
If we imagine this structure in a finished state without glass blocks, then it will be a metal mesh made of steel rods, in which glass blocks are laid.
After laying the first two rods, use a trowel to apply adhesive solution to the surface of the base and spread it evenly over the entire surface intended for installation. Carefully lay glass blocks, parallelly inserting vertical reinforcing rods into prepared holes in the floor and filling the joints with glue solution between glass blocks, controlling their thickness using special crosses that fit into each corner joint between glass blocks.
Special crosses provide the same seams between the glass blocks and remain walled up in the glass block masonry at the end of the installation work. With the traditional method of stacking glass blocks, only 3 to 4 rows of glass blocks can be stacked in one go.
Since ordinary cement mortar dries relatively slowly, it is necessary to allow it to dry for at least 12 hours between each next installation.
After the end of each installation, it is necessary to remove all excess glue solution from the surface of the glass blocks with a sponge or rag and free the interblock seams from excess mortar using a jointing trowel.
If this is not done in a timely manner, then after the mortar dries you will get unsightly seams and dirty glass blocks, which are very difficult to clean.
If you plan to grind the joints between the glass blocks with colored grout after installation, then you do not need to use a jointing trowel, you need to free the grout joints using a special spatula, creating recesses in them for filling with grout.
When the installation work is already coming to an end and it remains to lay about 3 - 4 rows of glass blocks to the ceiling, it is necessary to do the same work with the ceiling as with the floor, that is, drill holes in it according to certain dimensions for laying the remaining final vertical reinforcing rods and continue laying glass blocks before completion of installation.
After the installation of the glass block partitions is complete, it is necessary to again clean or embroider all newly made seams from the adhesive solution and first wipe the surface of the glass blocks from the adhesive solution.
A completely finished structure must completely dry out, until the adhesive mixture is completely dry, at room temperature this period can be approximately 5 - 10 days.
To reduce the drying period, you can use special construction dryers or, as they are also called, construction hair dryers, which, by increasing the ambient temperature, reduce the drying time.
After final drying, it is necessary to wipe the interblock seams with grout, usually grout is used to match the color of the glass blocks themselves, this material is offered in a wide range of colors.
It is advisable to use a moisture resistant grout, because it will not wash out with water and will last you much longer than a regular grout, considering that you will have to wipe your partition during cleaning to keep it clean.
The grout is applied diagonally to the surface of the glass brick masonry using a foam float and rubbed into the previously prepared grooves of the joints until they are completely filled.After grouting all joints, remove all excess grout from the surface of the structure with a damp sponge or cloth.
After the partition has dried from wet cleaning, it is necessary to bring its surface to an ideal state by rubbing the surface of the glass blocks with a dry, clean cloth. This operation will ensure the final erasure of small grout residues and give the glass blocks a perfect shine and cleanliness.
Perhaps, after rubbing the partition with a dry cloth, we can say that your partition is ready for use.
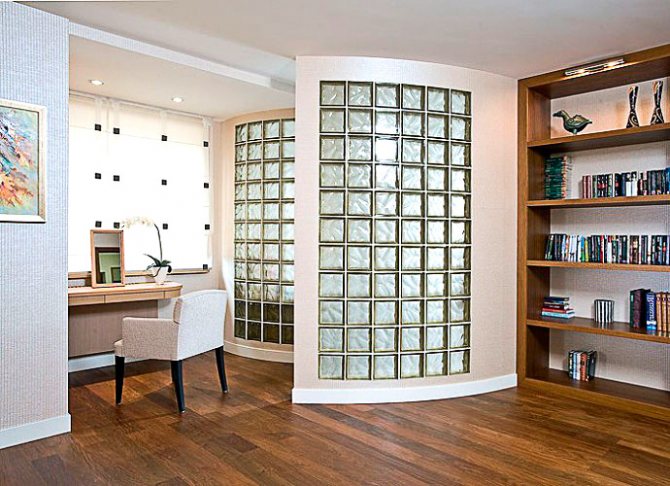
Arched walls and partitions
When installing walls and partitions made of glass blocks, which have rounded shapes, all stages of installation work are identical to those described in the section on traditional laying of glass blocks.
The difference in laying in this case lies in the fact that the reinforcing rods are bent in places where the partition is rounded according to its shape, that is, they duplicate the rounding of the wall.
In this case, the seam crosses are placed in the masonry of the glass blocks only inside the curvature in order to maintain the thickness of the internal seams. Outside the curvature of the wall, the seams automatically assume the same width, which depends only on the radius of curvature of the partition.
No need to worry if you notice that the second half of the seam crosses, or rather their thickness, is far from the thickness of the outer seams between the glass blocks.
The outer part of the crosses only adjusts the horizontal joints between the glass blocks. To perform wall rounding fragments, it is recommended to use half glass blocks of the same color, since, firstly, a larger number of vertical reinforcing rods will be used in the rounding places, which will give your partition additional strength, and secondly, due to the use of smaller glass blocks it will be possible reduce the discrepancy between the thickness of the internal and external seams.
Frame method of installation of partitions from glass blocks
This method of installing glass blocks is technologically more complicated than the traditional one. It is also more expensive and naturally more aesthetically pleasing than its traditional counterpart.
The advantage of this method is that when it is used, cement glue mixture is practically not used, and the structure itself is much lighter.
Installation work begins with measuring the dimensions in the place where the glass block partition will be mounted.
Based on the obtained dimensions and linear dimensions of the glass blocks used, a wooden frame is made from dry boards of the required size and thickness.
In the manufacture of the frame, it is necessary to very accurately observe all the cells, into which glass blocks will then be inserted and fastened.
The discrepancy between the dimensions of the cells and the dimensions of the glass blocks used is not more than 2 mm. The smaller the gap in the cells, the better the work on the installation of glass blocks will be done.
The main difficulty of this method of installing glass blocks arises precisely in the manufacture of a frame system, since this process requires increased attention when performing measuring and computational work. The process of manufacturing the frame itself does not give the right to the slightest mistake, since in the future this will have a very negative effect on the appearance of the entire mounted structure. The frame is assembled by gluing or by screwing with the help of special hardware.
The frame is made only from a sanded dry board.
After making the frame, it must be painted in the color required for the design using a thin-layer paint and, of course, dried until completely dry. The painted frame is installed in a previously prepared place and, using special dowels or anchors, is attached to the walls, ceiling and floor.
After making sure that the frame is installed evenly, correctly and reliably fixed with anchors to the walls, ceiling and floor, the installation of glass blocks begins. Glass blocks are inserted into each prepared cell and, thus, they collect the entire partition completely.
After all the glass blocks are set into the cells, it is necessary to fix them with colorless silicone, applying it at the junction of the glass blocks and the wooden frame in order to prevent the glass blocks from falling out of the frame.
Colorless silicone sealant is practically invisible on the surface of any color and does not spoil the appearance of the entire structure of the partition after drying.
The time for complete drying of the sealant is approximately 8 hours. After complete drying, the silicone resembles a hardened transparent rubber. After the silicone sealant has dried, it can be assumed that the structure is ready for use.
In places where glass blocks join with drywall, you should use ordinary putty. The silicone sealant will leave marks on drywall when dry.
Previous article Next article
Creating a rounded wall from glass blocks
Rounded walls can be made of cement. In this case, the reinforcing rods have to be bent to the shape of the future wall, which is not so easy. To facilitate the process, thinner metal rods are used than when erecting straight walls.
Spacer crosses are inserted between blocks only inside the rounding. From the outside, the seams remain the same, and their size depends on the radius of the rounding. There is a discrepancy in the size of the seams inside and outside the rounding. This cannot be avoided if one-piece glass blocks are mounted.
Reducing the dimensions of the joints in a rounded wall allows use of "half" glass blocks... And the smaller the radius of curvature, the more desirable the use of narrow blocks.
Some foreign manufacturers of glass blocks offer special systems for erecting curved walls. But this is still the same frame installation method that is not suitable for creating a solid, sturdy, water-resistant wall. But you can create a light rounded partition. Ask for such systems in stores that sell glass blocks.
Spacer crosses
You can speed up and facilitate the laying of glass blocks using special plastic crosses. They are used, as well as when laying ceramic tiles - they are inserted between individual blocks. This makes it easy to control the evenness and neatness of the masonry. In addition, the seams in the construction are guaranteed to be the same size.
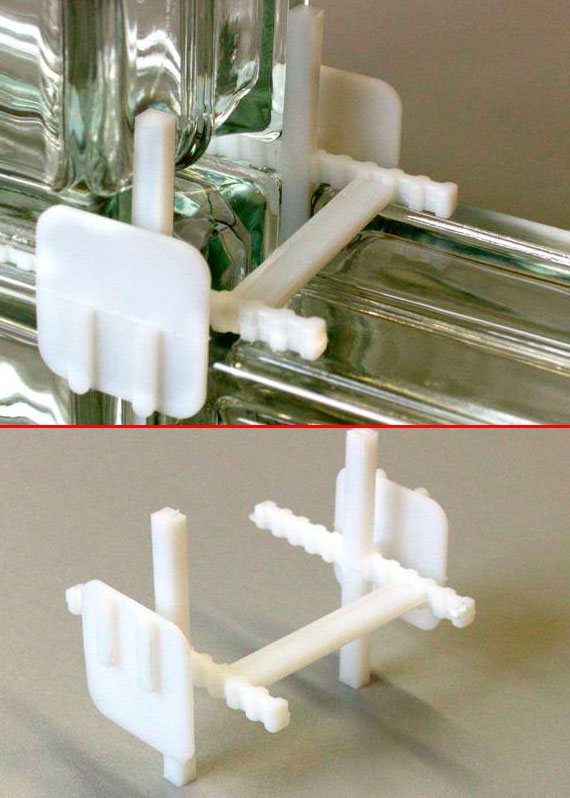
Spacer cross for laying glass blocks
Adhesive way of laying glass blocks?
- The block located on the edge is fixed to the guide horizontally.
- To connect vertical surfaces, special dividing strips are used.
- Before you start laying the second row, set the guide horizontally again, and attach it to the wall.
- The glue can harden both quickly and for a long period, it depends on its type.
- At the end, all joints are grouted with the required color, and then the blocks are washed out of the solution that has fallen on them.
How to lay glass blocks?
Modern building and decorative material in the form of glass blocks provides ample opportunities for interior decoration. Using these glass "bricks", you can implement the most unexpected solutions for decorating rooms.
Such structures are very convenient in operation - they perfectly transmit light, are characterized by high rates of thermal and sound insulation. To mount a wall or a partition made of glass blocks, you will need to take into account some of the features of working with this material.
Advantages and disadvantages of glass blocks
Translucent blocks let in enough light so they don't use basic lighting and save on electricity.But even colored products, due to translucency, do not create the feeling of a closed space.
Other advantages of the material are:
- Non-flammability. Blocks keep high temperature for at least an hour.
- Good sound insulation and heat retention due to internal cavities. Thanks to this, the blocks are used to decorate the facades of buildings.
- Resistant to odor absorption.
- Environmental friendliness and health safety.
- Moisture resistance combined with the inability to form mold and mildew.
- Undemanding care. Such partitions can be cleaned with common household glass products.
- Variety of decorative possibilities.
However, partitions made of glass blocks have certain disadvantages. You cannot hang a shelf or cabinet on them, since it is forbidden to make holes in the blocks. It is also impossible to hide communication highways behind them or inside them. If the window in the room is decorated with glass blocks, the installation of a ventilation system will be required - after all, the window cannot be made. Also, the disadvantages of glass blocks include the high cost of quality products.
Bulkheads made of glass blocks require accuracy in measurements and accuracy in laying. But the beauty and functionality are well worth the effort to create them.