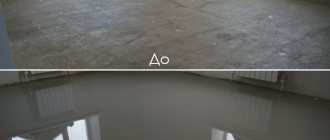
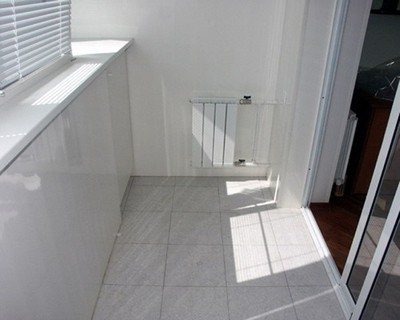
The floor on the balcony (loggia) in most city apartments is a concrete slab without finishing. This means that when landscaping a balcony, a considerable part of the cost and time will have to be devoted to leveling the floor and preparing it for laying the topcoat. Let's figure out how to do it yourself.
- 2 How to determine the level of the finished floor?
- 3 Leveling with cement screed
- 4 Leveling the floor with self-leveling mortar
- 5 Performing dry screed
- 6 Leveling the floor using a lag
Floor leveling methods
You can level the floor surface in different ways, which will depend on what functions the balcony will perform in the future:
- ceramic tiles;
- garden parquet;
- using a log and plywood covering;
- dry or wet screed.
In some cases, insulation for the room is simply necessary, and sometimes it will be unnecessary. But in any case, before you start leveling the base, it is necessary to carry out preparatory measures.
Why do the screed and when it is necessary
Before starting work, the general condition of the balcony slab should be assessed. For this, it will be enough to conduct a visual inspection. The presence of cracks, emerging red spots, swollen places is a prerequisite for the manufacture of a screed. In addition to the restoration of the slab itself, work may be required in the following cases:
- Floor preparation for laying tiles, linoleum, laminate, etc.
- Thermal insulation of the base.
- Arrangement of the warm floor system.
In all these cases, making a floor screed on a loggia is recommended and even mandatory. The options for carrying out these works may differ significantly. Therefore, even before starting them, you should answer some questions:
- Is the balcony (loggia) open or glazed?
- For what purpose is a screed needed?
- What is the maximum load per 1 sq. m. slabs?
- Which screed option suits my situation best?
The answer to these questions will help determine with the choice of the option of how to make the floor screed. You can consider various methods, their advantages and features.
Leveling the floor on the balcony with a screed
Preparation of the base on the open balcony
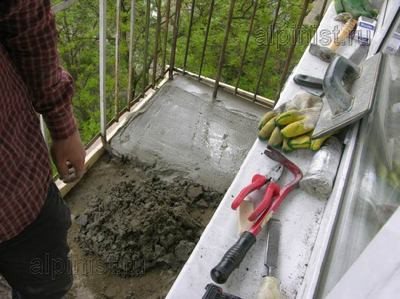
On an open balcony, the floor surface should not only be leveled, but also have a slight slope, so that during rain or snow melting, water does not accumulate, but flows down into the drainage system. At the same time, the slope must not be allowed to be too great, otherwise it will be uncomfortable to stand on the floor.
- If the surface of the open balcony has an old cement screed, it must be dismantled. This must be done very carefully so as not to touch the stove. This process is best done with a puncher.
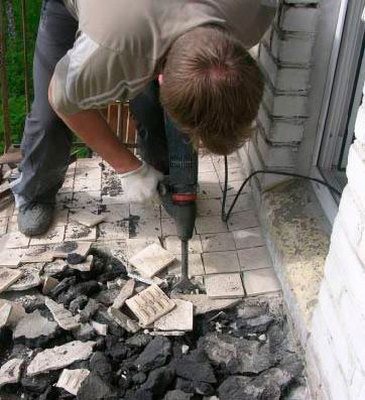
Time-consuming but necessary work - dismantling the old coating
- This tool may also be needed when leveling the floor on a closed balcony, if you plan to carry out repairs using a wet screed. If you do not remove the old one and lay the new one according to all the rules, these layers will seriously weigh down the concrete slab, which should not be allowed, since the balcony may collapse.
- The slope of the floor from the wall on an open balcony should be from 3 to 5 degrees, if there is no connection between the floor and the fence, then the water will freely flow down the surface.
- If the floor and the wall of the balcony are connected to each other, or a small curb is arranged along the edge of the slab, then you will have to make a drain for the water - this can be a small groove along the wall and a drain hole or embedded in a PVC screed - a pipe and a drain anywhere floor. In this case, the slope of the screed must be directed exactly towards the drain hole.
- But first of all, old concrete and small stones are cleaned from the slab, and then the floor is covered with a primer.
- The next step is to install the formwork around the perimeter of the balcony. The joints between the formwork and the floor must be caulked so that the leveling mortar does not flow downwards.
The screed is poured
- A reinforcing lattice made of thin wire is laid on the floor, beacons are installed and fixed on it. On an open balcony, you cannot do without them, since in any case you will have to set the direction of the water to the drain.
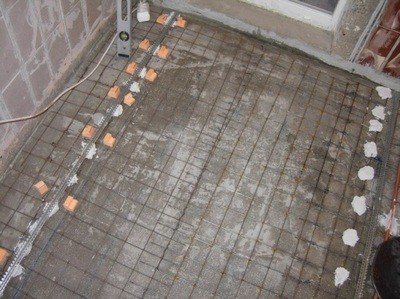
Reinforcement and beacon system
- Beacons are placed along the long wall of the balcony at a level from which the slope of the floor can be immediately determined.
- Next, a solution is mixed, made of cement and sand. You can also add small expanded clay there, which will make the surface warmer. The mixture should be homogeneous and flexible, and have good adhesion.
- The solution is laid out in parts on the prepared surface 3-5 cm above the beacons and leveled using the rule that is carried out along the beacons.
Pouring screed on an open balcony
- When the screed is completely finished, it is left to dry, but to keep it strong, the concrete is sprayed daily with water.
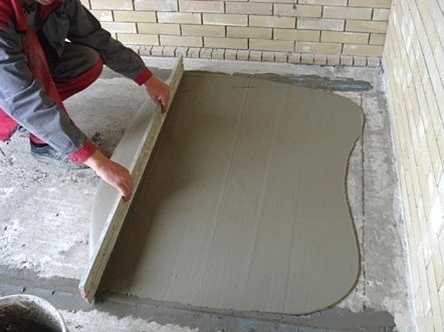
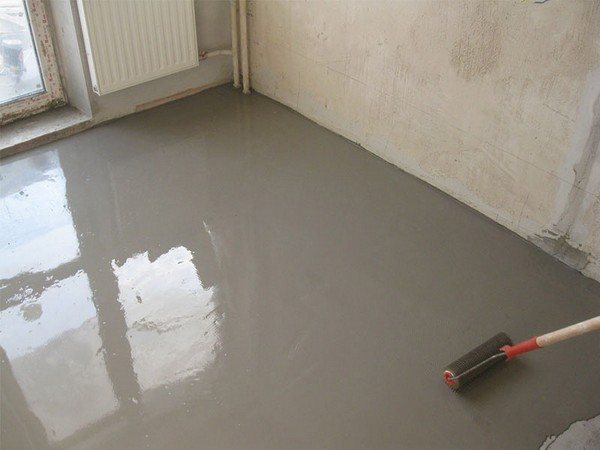
- This creates the desired screed slope on the open balcony. And, for example, in order to perfectly level the surface for a decorative coating on a glazed balcony, you can use a mixture for a self-leveling floor. Dry formulations of such coatings are sold ready-made and are easily diluted with water to the consistency indicated on the package.
self-leveling floor
The solution should be homogeneous and thin, it is poured in the form of small puddles and spread over the surface with squeegees, followed by rolling with a needle roller. This layer will not make the screed particularly heavier, since its thickness can be only two to three millimeters.
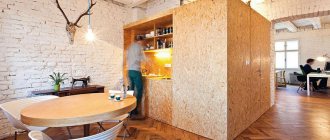
- The top can be laid with ceramic tiles or garden parquet. Ceramic tiles will provide additional protection for the substrate. If a garden parquet made of thermowood is used, then water will not be able to stagnate on its surface, passing between the lamellas on the screed, and flowing down the arranged downward slope.
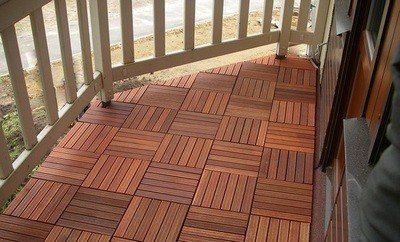
An excellent solution for an open or closed balcony - "garden parquet"
Fill
For mortar, you can use the ready-made mixture in bags or make it yourself (the ratio of sand to cement is 3: 1).
The solution is stretched along the beacons in the direction from the corners to the center.
Important: in dry hot weather, the screed must be periodically watered with water to avoid cracking. In rainy weather, it is better to cover the new floor with foil. After a couple of days, the surface is leveled with a float.
The formwork is removed on day 3, the uneven edges are covered with thick cement mortar. You can walk on the floor in a week, but the final drying of the screed depends on the weather conditions. But, just in case, do not put heavy objects on the balcony.
The surface will be ready for finishing in 3 weeks. For cold balconies and loggias, ceramic tiles or linoleum are suitable. For insulated or glazed - any materials used for interior work. From laminate to carpet.
Leveling the floor with tiles
If the surface is in good condition and has the desired slope from the wall, but minor cracks and chips have appeared on it, then the floor can be leveled with floor tiles.
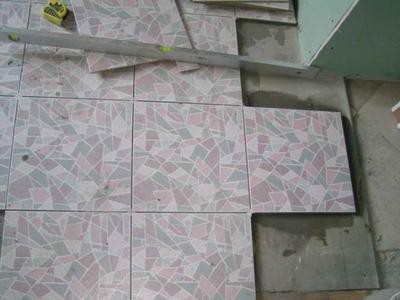
Small surface imperfections can be smoothed out immediately with ceramic tiles
- First, all damage must be repaired - this is done as follows:
- cracks and chips are expanded and cleaned of dust, treated with a primer;
- then they are sealed with cement or special repair mortar and are well leveled.
- The tiles are laid on glue designed for outdoor work - it is resistant to temperature extremes and moisture. It is kneaded into a homogeneous mass, taking into account the requirements of the instructions.
floor tile
- The glue is spread on the surface and spread with a notched trowel. Since the surface is uneven and needs to be finished to perfection, the glue is often applied a little more than necessary. Then a tile is laid on it, the back surface of which is also desirable to spread with glue and level it with a notched trowel. The direction of the furrows during laying should be perpendicular. Calibration crosses or other special devices are installed between the tiles to maintain the thickness of the joints and the direction of laying.
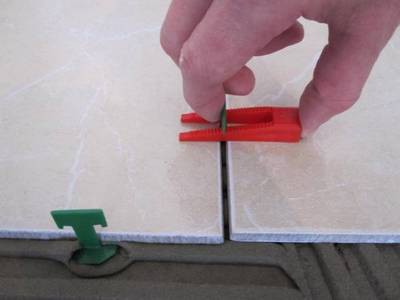
Convenient modern fixtures to maintain joint thickness and tile level
- If excess glue comes out between the tiles, then it must be removed. The seams must be hollow, since after the glue dries, they must be sealed with a moisture-resistant grout - a joint.
Before grouting, the leveling elements are removed - they are carefully knocked down with a rubber hammer or just with a foot.
Leveling the floor on a closed balcony
Usually, they begin to level the floor on a closed balcony when it is decided to insulate the entire room. This task is more complicated and laborious, but the apartment will expand by one more room.
Alignment in combination with insulation can be done in several ways:
- raise the floor on logs and insulate with mineral wool, expanded clay or foam;
- lay the extruded polystyrene foam, and lay a screed on top of it;
- insulate and level the floor with a dry screed.
All of these methods require the same surface preparation.
Surface preparation on a closed balcony
The preparation of a closed room is carried out more thoroughly, since both the insulation and the evenness of the floor will depend on this process. All of the above methods require careful sealing of the cracks.
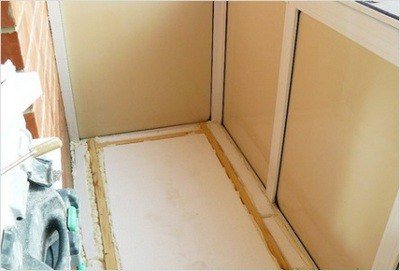
- First, the largest gap, which is usually present at the junction of the balcony fence and the floor, is closed up - this is best done with polyurethane foam or sealant.
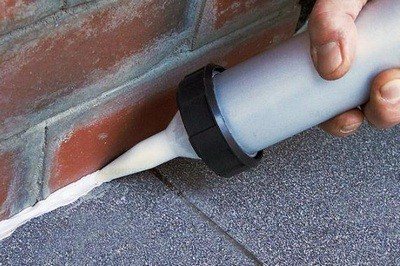
Sealing the joints between the base of the floor and the wall
- The cracks in the floor, discovered after careful cleaning, are first expanded and then sealed with plastic cement mortar or also with a sealant.
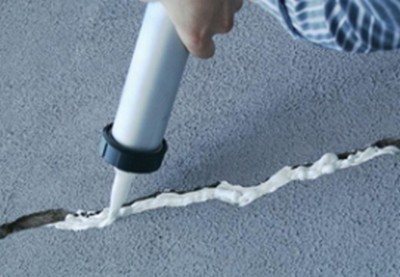
Surface repair involves the obligatory sealing of cracks
- After the material has dried, the excess must be cut off.
- Then, it is recommended to install a damper tape along the entire perimeter along the walls if you plan to install any type of screed.
- The next step is to lay the sheets of waterproofing. It can consist of a regular thick polyethylene film or roofing material, which is glued to bituminous mastic.
- Waterproofing must necessarily rise to the walls at the height of the future insulation and leveling system.
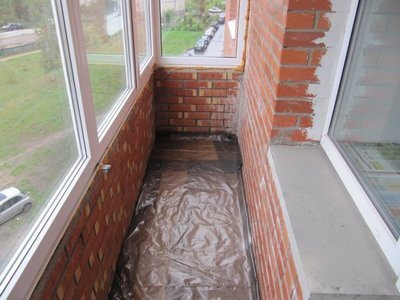
Balcony with a layer of waterproofing film
- We must not forget that the waterproofing material must be laid tightly, preferably without joints. If it is impossible to do without joints, then the material is laid with an overlap of 10-15 cm and the joint is sealed with construction tape or, in the case of roofing felt, by surfacing.
Next, you can proceed with the installation of the selected floor leveling system.
How the self-leveling effect is used
Balcony floor leveling can be achieved using a special self-leveling mixture, which is sold dry. To use the composition, it is enough to dilute the mixture with water according to the instructions. This composition provides an even smooth layer 5-30 mm thick. The work is carried out in the following order:
- Surface preparation: cleaning from dirt, sealing cracks, removing dust with a vacuum cleaner.
- Primer: Apply a thin layer of priming solution over the entire area of the concrete slab with a paint brush or roller, and then dry it for 20-40 hours.
- Self-leveling compound preparation: Thorough mixing with water using a construction mixer.
- The solution is evenly poured over the entire floor with leveling with a spatula, and to eliminate air bubbles, a needle roller is rolled over the entire surface of the liquid mass.
Required tools: metal spatula, needle-type roller, paint roller or brush, construction mixer, metal ruler, brush for surface cleaning and vacuum cleaner.
Lag alignment
With the help of a lag, you can simply level the base, or you can combine this with insulation and raising the floor to a certain height.
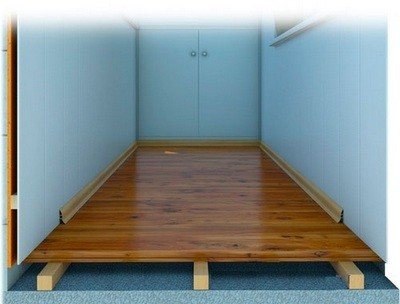
With the help of a lag, you can get a perfectly flat floor surface on the balcony
- Lags can be fixed directly to the base or raised using special devices. Today, there are many types of such elements on sale.
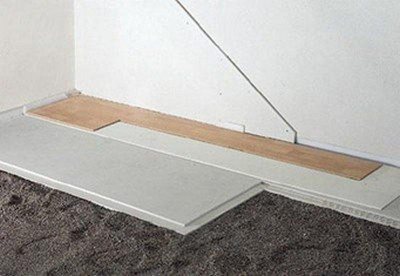
- If the decision is made to lift the coating from the base, then an accurate measurement of this level must be carried out. Usually the floors are leveled against the concrete threshold of the balcony door.
- To raise the lag, adjustable fasteners are used - these are metal pins, stands, holders or pins made of plastic. All of these elements are threaded, which helps to raise one of the sides to the desired height above the concrete slab.
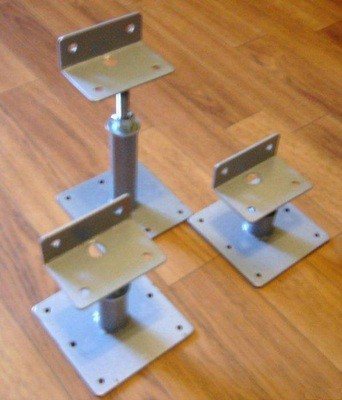
One of the types of adjustable racks for logs
- First, logs are installed along the walls, at a distance of 80 - 100 mm from them, since it is imperative to lay insulation material between them.
- Having installed and secured to the base of the stand with lags, they adjust the level by raising or lowering to the desired height, aligning the two lags with each other in the longitudinal and transverse directions.
- Further, in the same way, one or two middle logs are installed and they are adjusted in height to the side ones.
- Any kind of insulation can be used: fill in expanded clay, lay one or even several layers of mineral wool or foam.
In this case, expanded polystyrene is used as a heater.
expanded clay
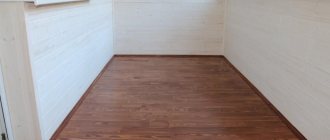
- The covering, laid on leveled joists, will make the floor perfectly flat. Cover the logs with thick plywood or massive boards.

The floor is covered with plywood - you can proceed to the topcoat
Any chosen decorative coating is laid on top of the plywood. Under it, if you wish, you can even mount an infrared film of a warm floor. In this case, it is convenient in that the heating is turned on as needed, which helps not to waste electricity.
Why level the floor
Many apartment owners reduce the leveling of the floor to a banal struggle with bumps and pits on the balcony slab. But there are other, more compelling reasons:
- the stove is tilted, which is dangerous - you can slip and get serious injuries. In addition, it is difficult to install furniture and household appliances on a sloped floor;
- it is planned to lay a topcoat of laminate or tiles. They need an even base;
- without a leveling screed, it is impossible to mount a "warm floor".
Leveling with extruded polystyrene foam
Extruded polystyrene foam has a high density (about 45 kg / m³), so it can be used to level the surface of the balcony floor.
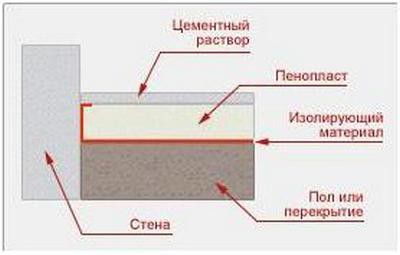
An approximate diagram of a screed device for extruded polystyrene foam
- Expanded polystyrene mats of the selected thickness are placed on the prepared waterproofing surface.
- Along the perimeter of the gap between the insulation and the walls, they are sealed with polyurethane foam to form an almost airtight layer.
- On top of the insulation, it is advisable to lay another layer of waterproofing made of polyethylene film or roofing material.The second material is preferable because it is denser and harder to damage with the reinforcing material.
- A reinforcing mesh with cells from 50 to 100 mm is laid on the waterproofing material.
- If the balcony has a traditional rectangular shape, then metal guides - beacons are installed along its length, along the walls. They should be installed at the same height and the thickness of the future screed, which can be from 30 to 50 mm.
- Further, a concrete mixture is laid on the surface area 20-30 mm higher than the beacons. The solution for it should have a thick consistency.
- As a rule, the solution is leveled and slightly compacted, since it should take up the entire thickness from the reinforcement to the height of the beacons.
- The leveled screed is left to harden and ripen. Starting from day 2, it is regularly moistened with water - thanks to this procedure, the screed will gain the proper strength and will not crack.
- Any decorative coating can be laid on the finished hardened screed.
- If the surface of the screed turns out to be too porous, it can be refined with a self-leveling floor, and the desired coating can be put on top.
It is easy to lay any decorative coating on the insulated screed.
Laying the floor covering
After fixing the sheets, you can theoretically start laying the flooring. But you can go to this stage of work only if you have already done all the other work on the repair of the premises. That is, they insulated the walls, the parapet, completed the finishing of the walls and ceiling, and installed double-glazed windows.
On a flat and hard floor of a glazed balcony (it does not matter, concrete or plywood / OSB), you can lay absolutely any floor covering: even parquet, even laminate, even linoleum. Naturally, the choice is yours, but I would recommend using semi-commercial or household linoleum on a foam base. The protective layer of a semi-commercial coating ranges from 0.4 mm to 0.6 mm. Accordingly, for household - from 0.1 to 0.3 mm. I suppose that the floor on the balcony will not be exposed to frequent and intense mechanical stress, so a coating with a protective layer of 0.2–0.3 mm will be quite enough.
On our site there are separate articles on the topics of how to lay linoleum on a wooden floor and how to lay linoleum on a concrete floor. I recommend that you familiarize yourself with these materials in order to avoid mistakes when laying. And now we will find out how to level the floor if you decide not to install double-glazed windows on the balcony.
Leveling with a dry screed
This method of leveling the floor on the balcony is becoming more and more popular due to the ease of installation and speed of work.
- A special mixture of fine expanded clay can be poured onto a base with an arranged sealed waterproofing. The layer of material can be from 50 to 100 mm. However, it should be remembered that if the thickness is more than 60 mm, then an additional layer of sheet material will have to be laid approximately in the middle.
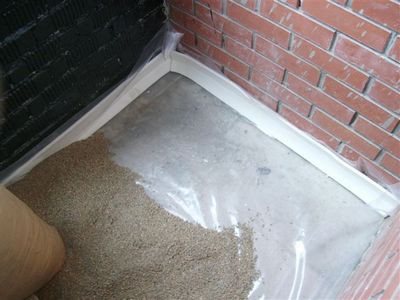
A layer of waterproofing must be laid, a damper tape is installed along the walls
- Beacons can also be installed along walls and raised to the desired height. The embankment is made above the beacons, the excess material is removed by the rule when leveling.
- A dry screed can be arranged in parts, or it can be immediately poured over the entire floor area of the balcony.
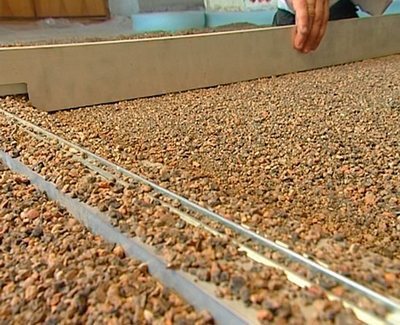
Leveling dry screed
- On top of the embankment, after removing the guides - beacons, gypsum fiber panels are laid with special locking parts, with the help of which the plates are assembled into a single canvas. The joints are coated with glue, and then, after laying, they are twisted with self-tapping screws.
Laying dry screed sheet elements
dry floor
- If the second layer of expanded clay will be laid, then the intermediate flooring of gypsum fiber panels must be connected to the wall with a sealant.It will not allow particles of expanded clay to get into the joint between the wall and the panels.
- Further, beacons are again installed to the thickness of the second layer of the screed, and a new batch of expanded clay is poured out, which is also leveled and covered with slabs. The evenness of the surface should be controlled using a building level.
- The cracks between the wall and the slabs must again be sealed with a sealant, and after it hardens, the excess must be cut off.
- Any decorative coating can be laid on top of the slabs, under which a warm infrared floor can be easily mounted.
The dry screed is not only easy and quick to install, making the floor even - it is an environmentally friendly construction that does not emit any harmful fumes.
We level the floor with self-leveling mixture
Self-leveling floors are an expensive but effective material for leveling floors with a slight difference (up to 3 cm) in the horizontal level. Consumption depends on the condition of the substrate and the type of mixture. But on average, 1 m 2 will require 1.5 kg of composition for pouring a layer of 1 mm.
For leveling the floor on the balcony, self-leveling mixtures based on cement with the addition of quartz sand or polymer are suitable. Such compositions can be used both indoors and outdoors. They can be used as a topcoat in a layer of 2-3 mm or as a full-fledged screed up to 80 mm thick.
Advantages of self-leveling floor on the balcony:
- simple application;
- does not require lighthouses;
- fast drying, in some cases from 3 hours
Disadvantages:
- high price.
Unlike concrete screeds, which are tolerant of a small amount of dust, the base under the self-leveling floor must be absolutely clean. Therefore, vacuum cleaners are used to clean the surface.
As for the preparation of the concrete slab, it is necessary to remove the loose, cracked areas with a hammer drill. Deep cracks are rubbed with putty. The prepared surface is primed in 2 layers.
The use of a primer when installing self-leveling floors provides good adhesion to the base and reduces the consumption of the building mixture.
Important: when using self-leveling floors, do not cover the concrete with waterproofing.
Since self-leveling mixtures have a high linear expansion (spread), only the formwork will not help in this case. Additional insulation with damper tape will be required.
Operating procedure
Initially, the composition is mixed with water in the proportion indicated by the manufacturer. In this case, the mixture is poured into a container with water, and not vice versa.
Tip: you can check the spreadability of the solution in a simple way. A ring is cut out of an ordinary plastic bottle (it is better to take a small volume), set on a flat surface. After that, the solution is poured into the resulting form. The ideal indicator is if, after removing the retaining ring, the solution covers an area that is 3 times larger than the initial one.
The mortar is poured into the middle of the floor and leveled with a notched trowel or trowel. Remnants of air are "expelled" from the surface with a special needle roller.
Drying time depends on the thickness of the coating layer, grade and composition of the mixture.
Do not use building hair dryers to speed up the drying process. Since, if the technology is violated, the coating may crack.