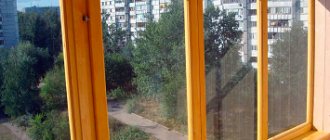
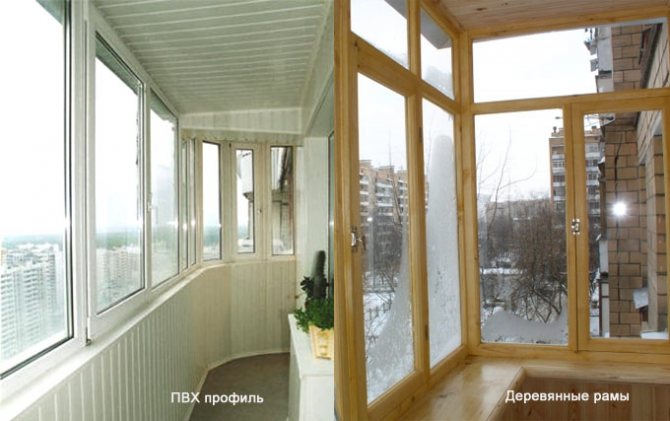
Most of the apartments in panel houses are complemented by loggias. These external structures are used in different ways. Their functionality depends on the presence of glazing and insulation. Open balconies and loggias can be actively used only in the warm season, but in this case precipitation and wind cause many inconveniences.

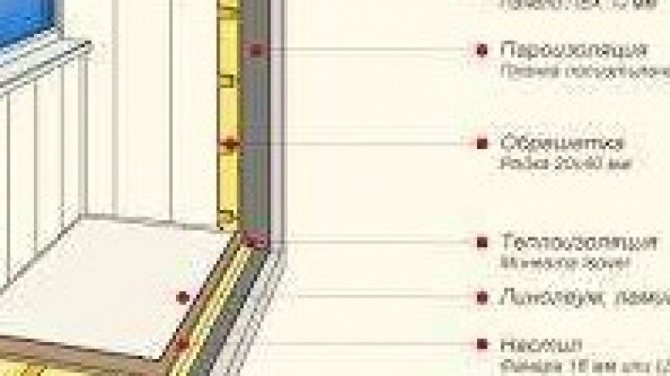
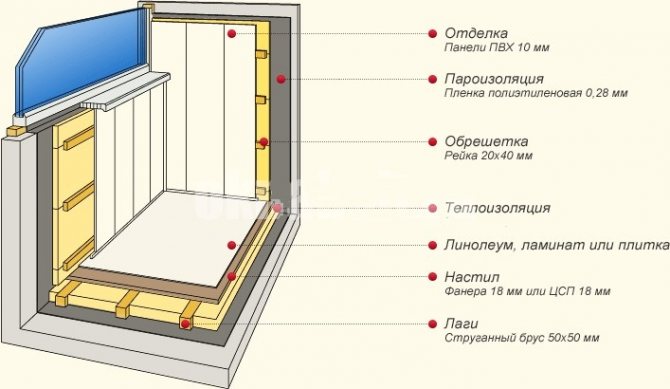
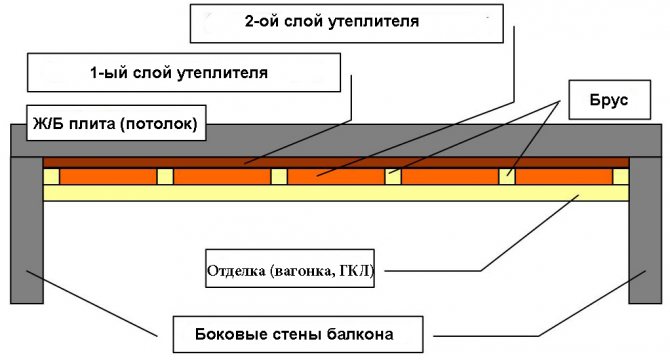
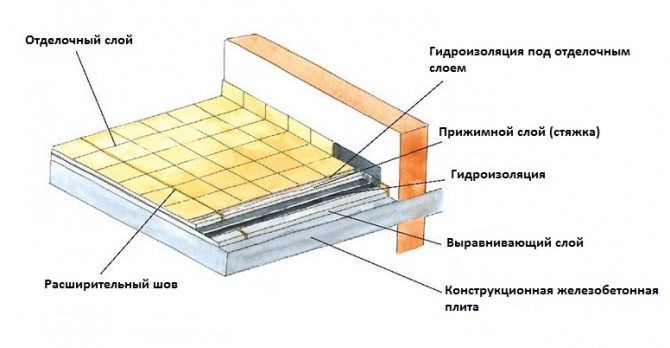
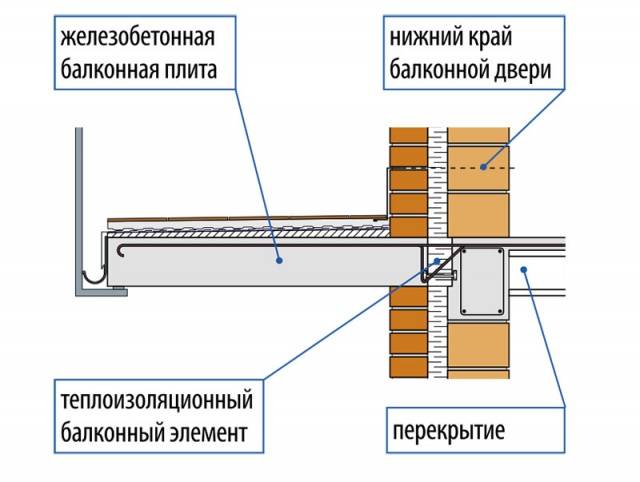
Fig. 1 Insulation of a loggia in a panel house - scheme
Glazing will protect the balcony space from precipitation and other negative factors, but without insulating all surfaces, the winter temperature will be too low and uncomfortable. Thermal insulation will make the space more functional and comfortable if you know how to insulate a balcony in a panel house.
Choice of materials
This is the first secret of successful work. You need to decide on the progress of work, and then select materials for the ceiling, walls and floor.
Perfect fit:
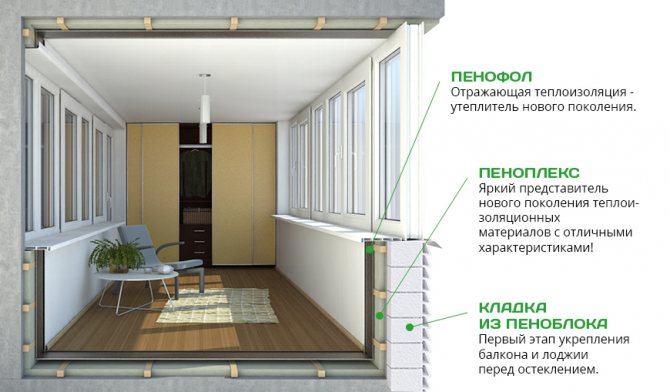
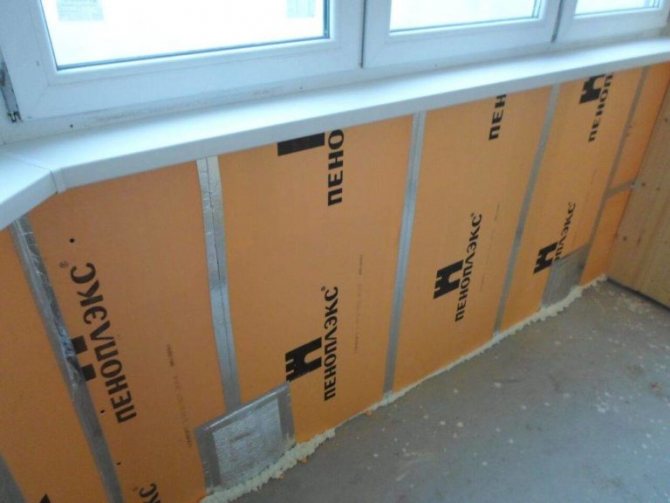
- Expanded polystyrene - during installation, it will create the effect of a thermos inside the loggia, keeping all the heat there.
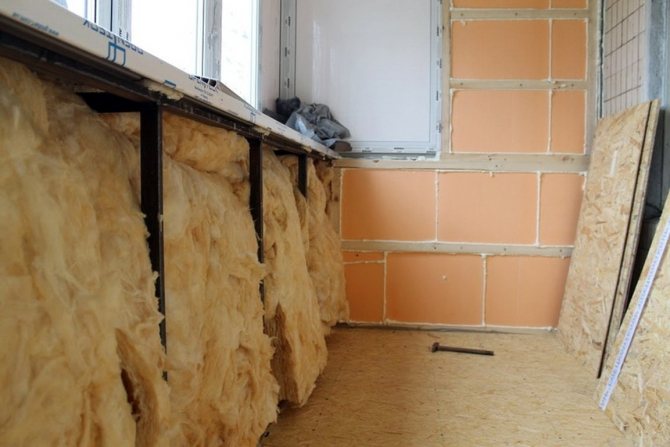
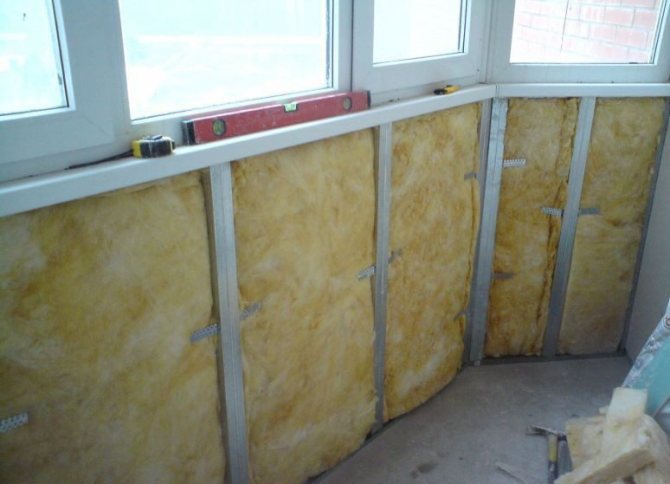
- Mineral wool is cheaper, but first it is necessary to make high-quality waterproofing for it.
- Penoplex is ideal for floor and ceiling installation. Denser than polystyrene, although somewhat more expensive.
These materials will help protect the room from freezing and keep the heat inside.

The procedure for insulating the balcony ceiling
There are many options for insulating balcony ceilings, but the order of work is about the same.
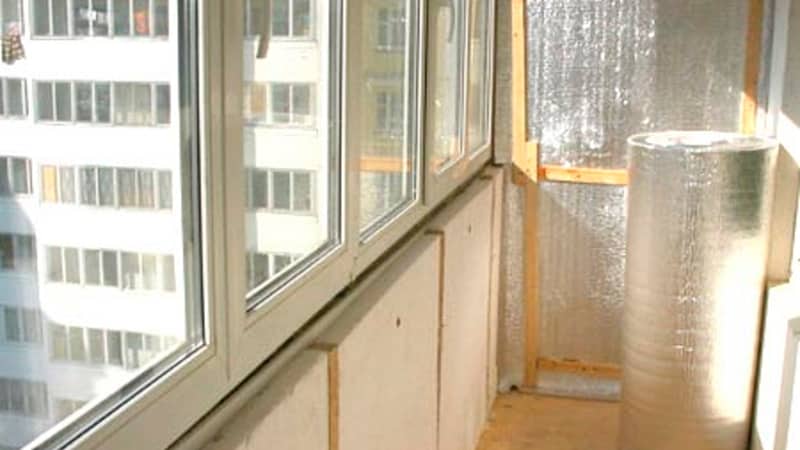
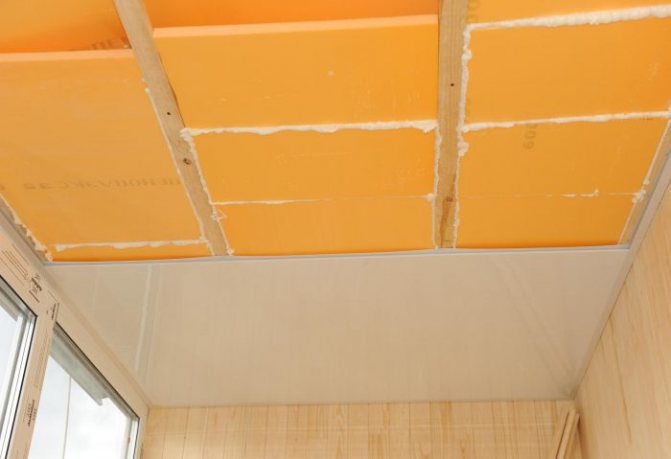
First, the surfaces are treated with a mold-proof primer. Foil material is glued to the prepared ceiling. It can be penofol. The material can be glued with PVA glue or tile, as well as with polyurethane foam. It is important to ensure that the insulation fits snugly against the ceiling.
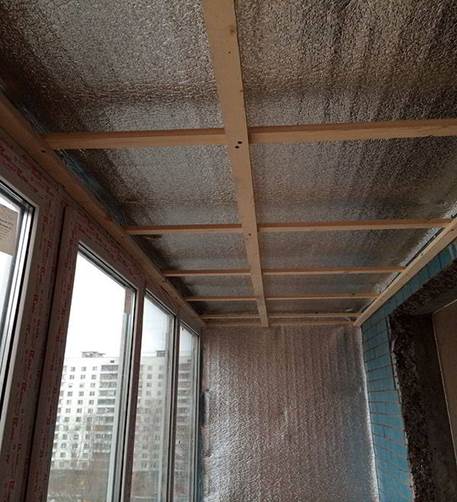
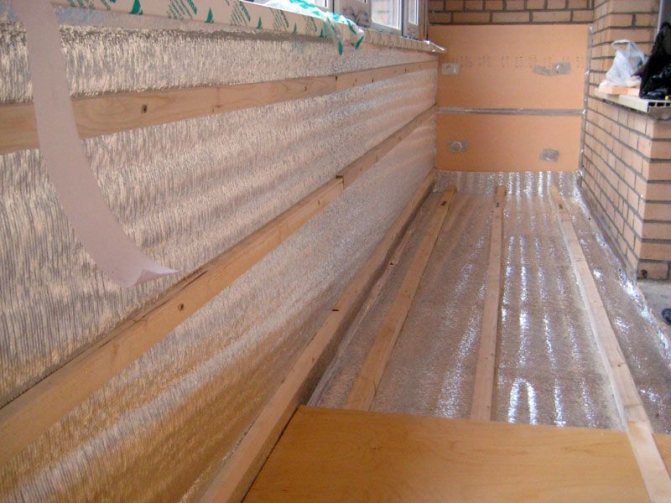
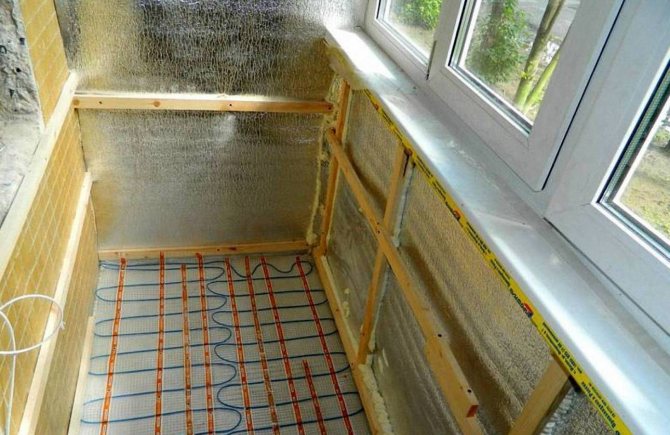
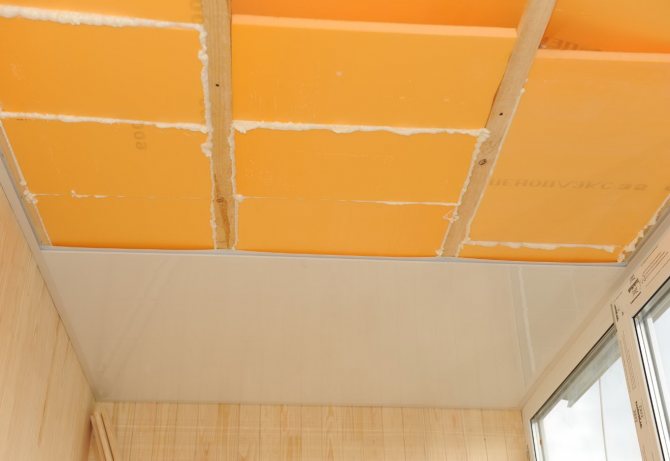
Fig. 5 Balcony insulation - we use penofol for the ceiling and walls
A crate is installed on top of it. A finishing material is attached to this frame.

Finishing
After choosing a high-quality material and installing insulation, it remains to decide on the finish, taking into account the following nuances that will help to avoid mistakes even when buying material:
- To sheathe the loggia with wooden clapboard, you need to make a crate on the wall for fastening.
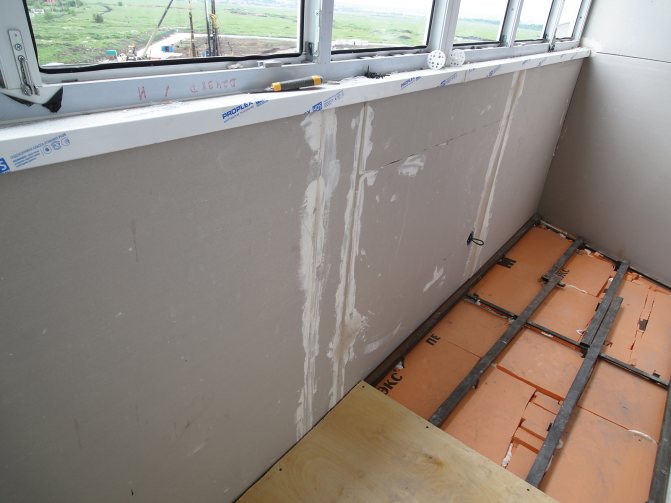
- If you plan to glue wallpaper, you must first install drywall, fixing it on a wooden crate.
- Decorative plaster can be applied immediately to the insulation.
This is the third secret to getting good results.
Loggia design solutions
Let's see how you can use the additional area resulting from the insulation of the loggia. In practice, you get one more room at your complete disposal, and it is up to you to decide what it will be.
For our part, we can offer several ideas on how to dispose of new opportunities.
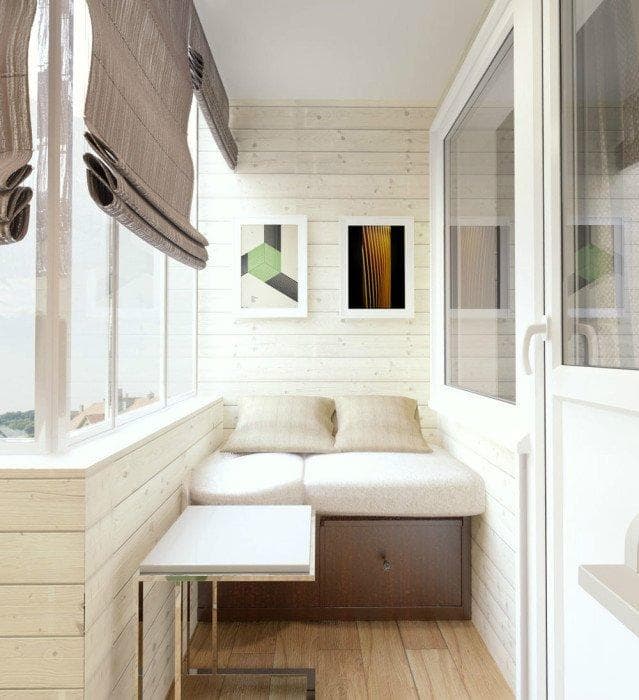
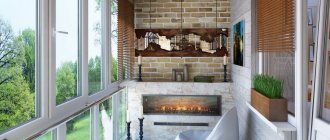
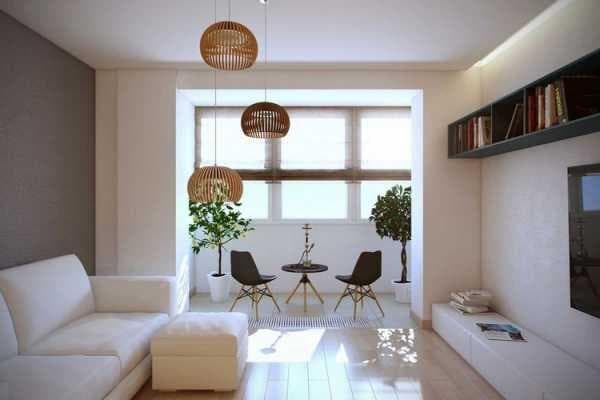
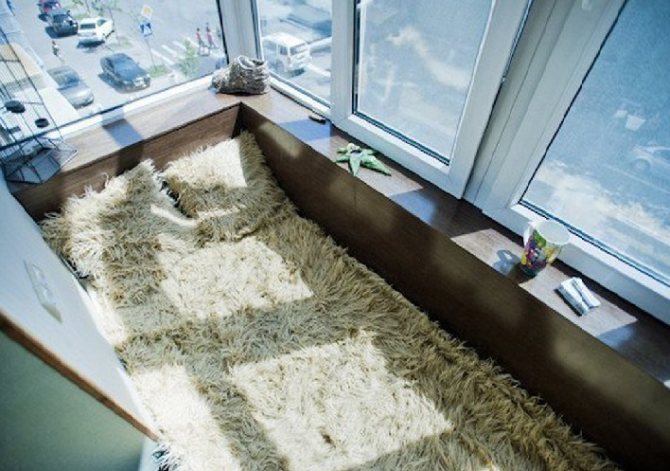
The warmest transformation - the loggia turns into a cozy little corner for relaxation. Here you can enjoy the silence with a good book or handicraft. If necessary, there is enough space for installing a TV or a small table for a laptop.
If a large family lives in an apartment, it is sometimes difficult to find a comfortable, calm place for your favorite business. Despite the small space, your new insulated loggia will allow you to place even two separate corners for activities dear to your heart. For example, a cozy recliner can be placed in one corner, and a small laptop table in the other.
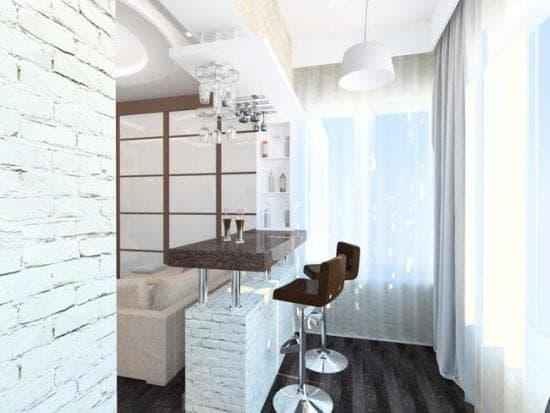
A very stylish modern option, suitable if the exit to the balcony is from the kitchen side. You can even transform the loggia into a kind of dining room.
Ideal for parties, especially in the case of high floors and an attractive view from the window, the window sill can easily replace the bar counter.
Small details like lighted candles can be used to create the atmosphere for a romantic dinner. Fresh fragrant air and watching the sunset on warm summer days, and in winter - cozy blankets, candles and mulled wine.
If you install glass sliding doors instead of standard doors, you can, if necessary, delimit the space.
A bold design solution suggests expanding the living room space onto the loggia. The wall that previously separated the rooms has been turned into a comfortable table.
In this case, the area of the former loggia can be used as a study or a hobby room.
By combining the two spaces, a large window opens up from the living room, which increases the illumination, you will feel it well in winter, when there is always a lack of light.
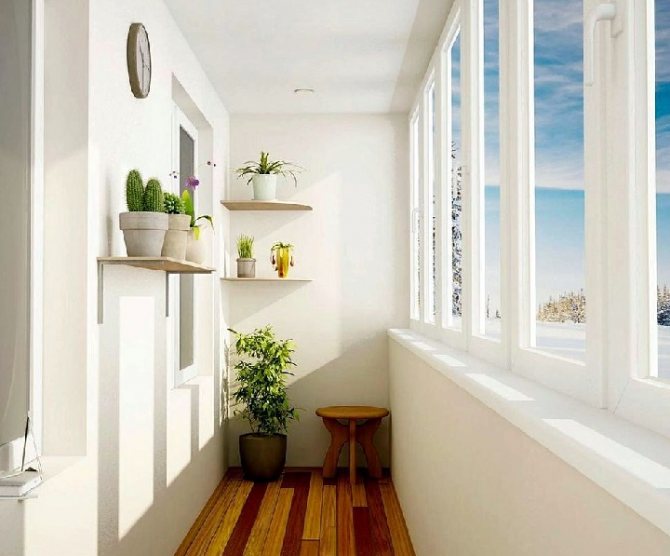
It is not difficult to come up with the use of additional warm space, everything is limited only by your flight of imagination. A winter garden, a workshop, an office, even a sportswear - everything is doable.
Therefore, if your apartment has a loggia, and you still have not thought about insulating it, get down to business urgently.
Heating
The fifth secret of a good repair, which needs to be thought out at the very first stage of work, because the very insulation of the loggia will simply protect it from freezing and will only raise the temperature by a few degrees compared to the street temperature.
- Electric underfloor heating is expensive, difficult to install, but the most effective.
- Central heating radiators are a great option if you decide to remove the partition and connect the loggia with the apartment.
- The convector is a good way out if the room needs to be used only periodically.
Combined with wall and floor insulation, heating will provide a comfortable room temperature.

Thermal insulation step by step
Let's analyze the stages of work on how to insulate a balcony from the inside with our own hands in a panel house.
Room measurements
Before buying, you need to determine the amount of insulation by the surface area. Loggia is completely freed from unnecessary items. The old thermal insulation is carefully removed.
Preparation of tools and materials
To complete the work, you need to prepare in advance tools, insulation, bars or a metal profile for the lathing on the balcony. The home master's kit should contain:
- screws, nails, staples;
- drill for concrete (perforator);
- screwdriver;
- level.
A membrane is used to protect against wind and moisture.
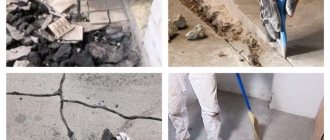
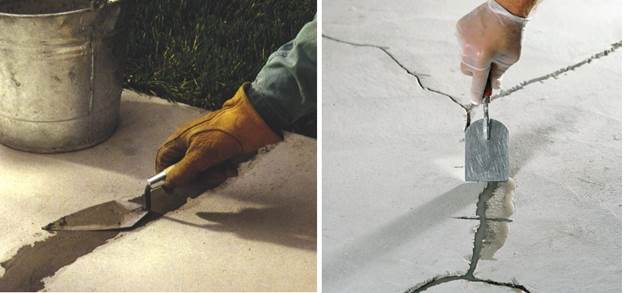
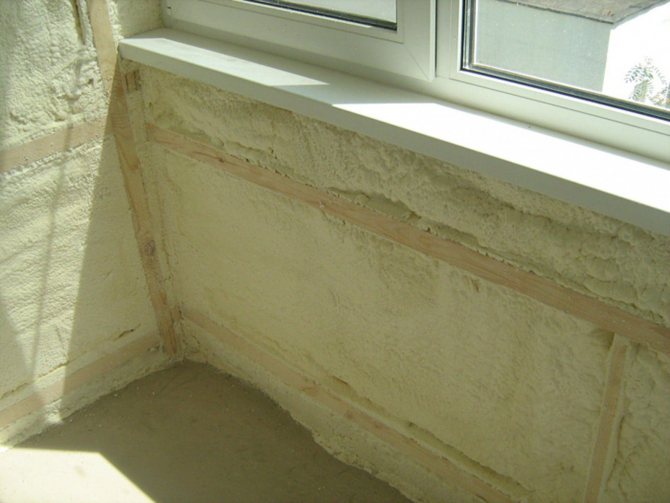
Sealing cracks
If it is necessary to level the surfaces, regardless of the type of insulation chosen, grout is done. If there are potholes, the gaps between the panels and the balcony slab are redecorated surfaces. On a concrete floor, it is easy to eliminate defects with cement mortar or ready-made plaster mixtures. With small gaps, polyurethane foam is used, it completely covers the unevenness and prevents air circulation from the street.
The trading network offers penetrating compounds for sealing joints in the wall between panels. In addition to cement, they contain additives (organic + inorganic). After filling the gaps, the mass penetrates deep into the slab, solidifies and crystallizes. The result is a high-quality surface repair.
Check for leaks from the ceiling. In any weather, moisture should not get inside the room of the balcony or loggia. If a leak is found, it is repaired with a polyurethane sealant. It works perfectly with concrete, resulting in a rigid connection.Before the sealant, the surfaces are cleaned of grease stains, paint residues, dirt.
To seal leaks, you need a sunny day, the seams are checked for moisture. If the distance between the panels is great, first work with a sealant or polyurethane foam. Finishing - sealant.
Read more in the article "How to seal the cracks on the balcony from the rain".
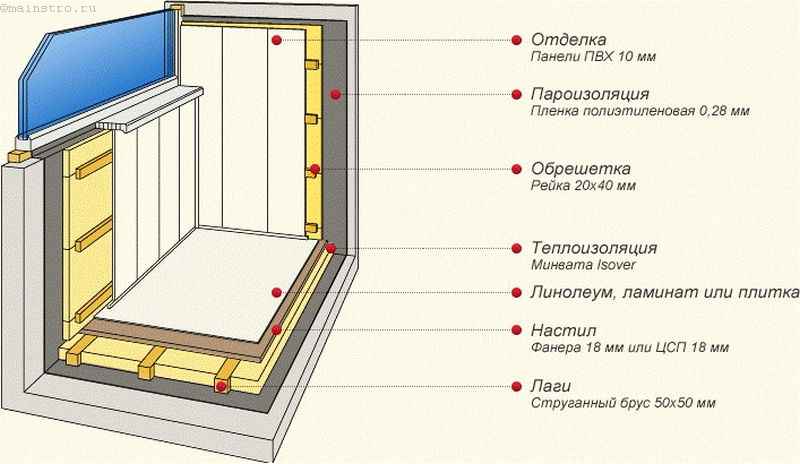
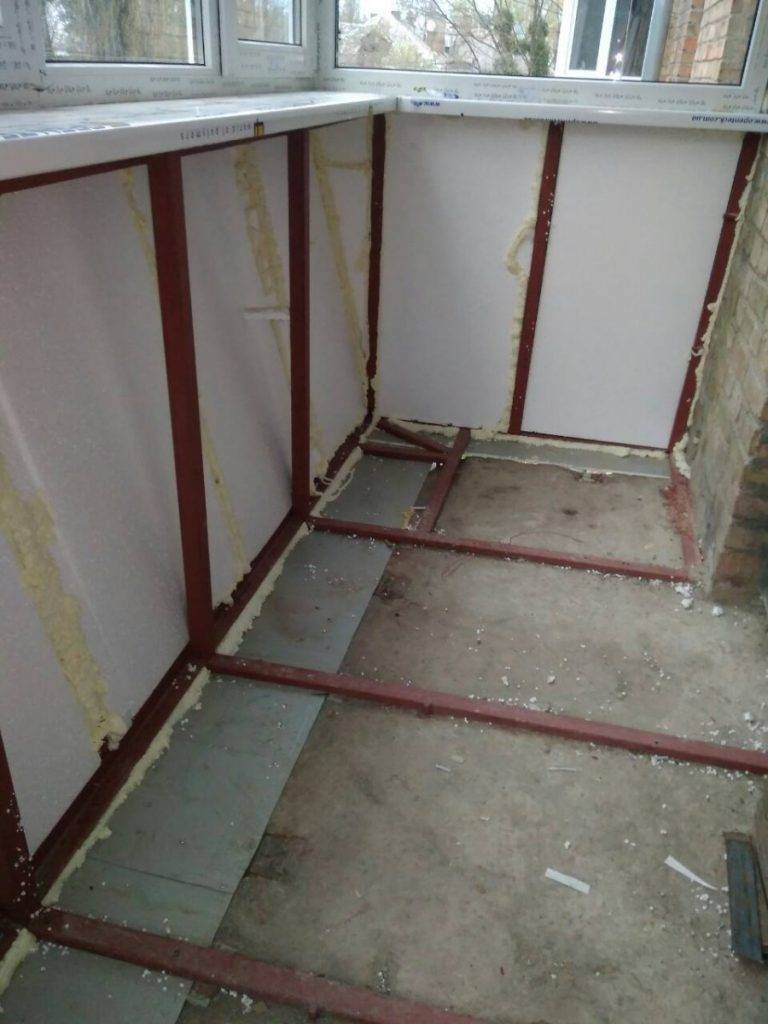
Lathing
If the landlord has decided to choose mineral wool as a heater, you must first create a wooden frame around the perimeter of the room. Bars with a cross section of 40 mm are used. Installation work is performed round, from the walls, then the ceiling and floor. Fastening is carried out using dowels, 6-7 mm in diameter, 7-8 cm long.
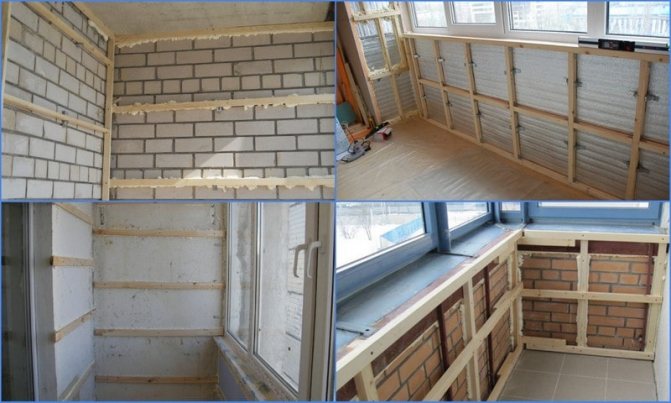
It is recommended to fix the bars at an equal distance of 45 - 50 cm between themselves. The result is nests - squares. The lathing begins with a starting bar, then the corners are mounted.
In the corners and along the length of the glazing, it is better to fill vertically with additional beams in order to distribute the additional load.
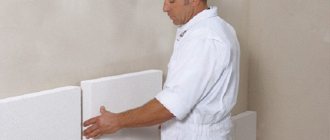
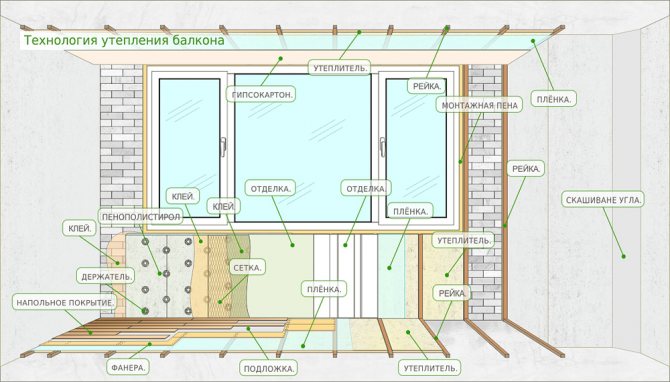
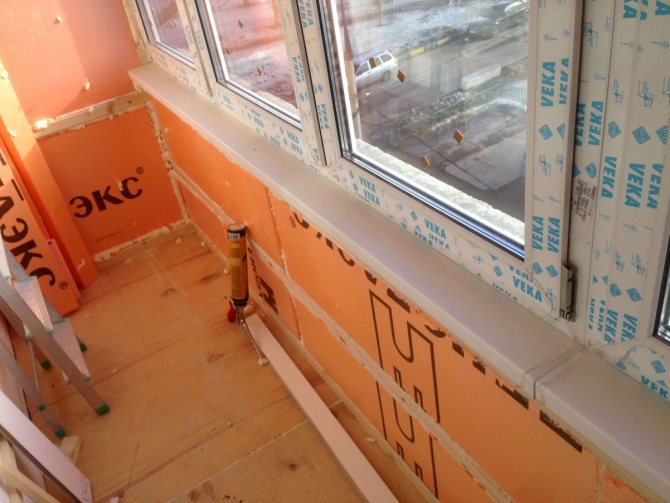
Wall insulation work
In terms of the volume of the upcoming installation of vertical areas, this is the longest stage of work. If a thick insulator is chosen, you will need to additionally secure the supports under the battens of the sheathing.
To do the work accurately and quickly, you need:
- adjust the sheets of thermal insulation according to the parameters;
- fix with special glue to the frame beams;
- fill the gaps with foam, remove the excess with a spatula;
For large depressions, pieces of foam are suitable, they are treated with polyurethane foam on top. The sheets are fastened with plastic mushroom-shaped dowels. Usually 6-7 units of fasteners are enough per sheet. If the owner plans to plaster the surfaces after cladding, the foam is glued with polyurethane foam or tile adhesive.
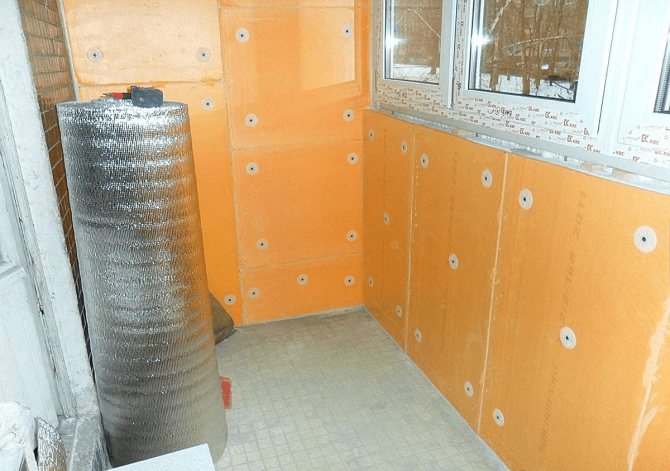
To protect against condensation and waterlogging, the insulation is covered with a vapor barrier film.
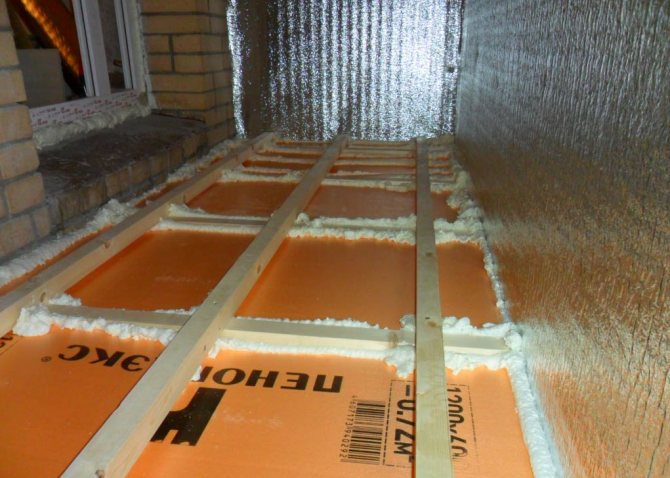
Thermal insulation of ceilings inside balconies
Not the easiest, but really feasible amount of work to insulate the ceiling on the balcony is performed sequentially:
- clean concrete from dust, cover with an antiseptic so that there are no molds;
- roll material is glued, the option with penofol is preferable;
- fix the lathing from rails or metal profiles;
- carry out the installation of the cable for the ceiling light (for more details, see the article "electrical installation on the balcony");
- sheathed with the chosen finish.
For rigid fixing of the insulation, different methods are suitable:
- PVA glue, but it requires rolling with a foam roller to eliminate bubbles;
- polyurethane foam;
- tile adhesive.
If the owner of the room wants to avoid glue work, fix the thermal insulation with self-tapping screws. They are chosen with larger hats. The option for securing materials is determined by the situation.
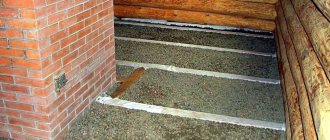
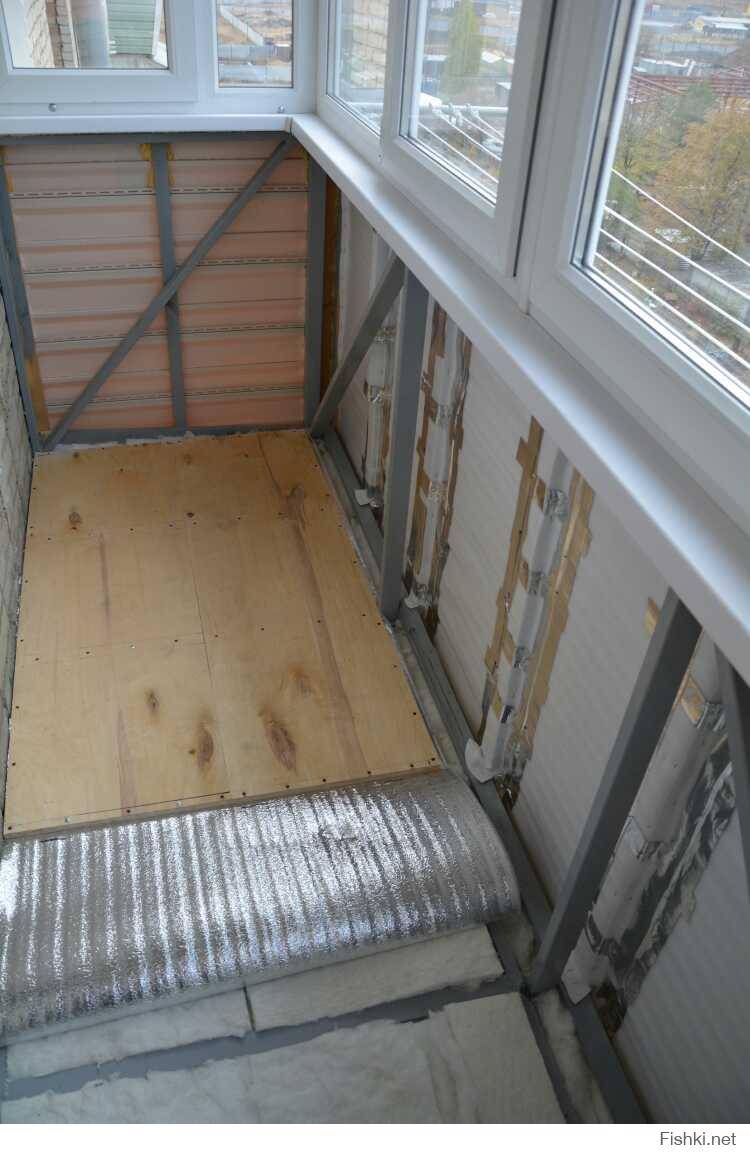
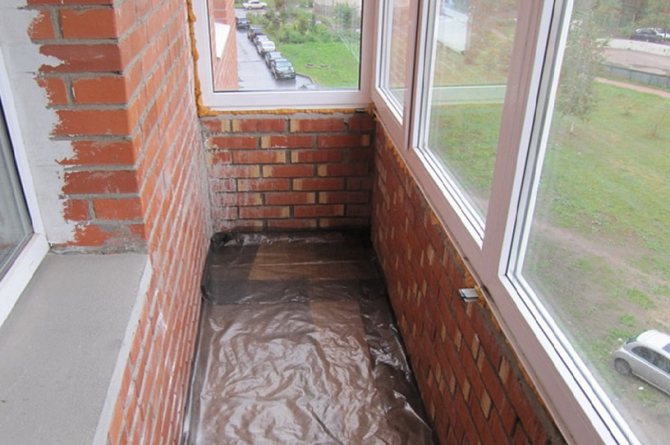
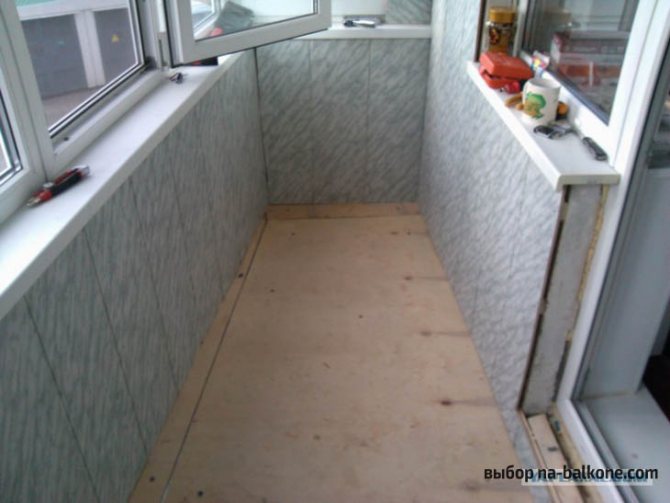
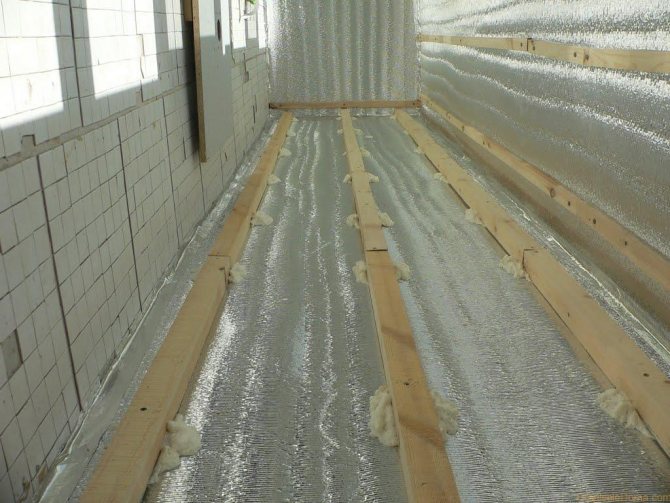
Floor insulation
To prevent water from penetrating into the structure, an insulating layer is laid. Its role will be perfectly performed by polyethylene. On top, logs from a bar are mounted on the level, between - the insulation itself. Sheets of mineral wool, foam are performed as tightly as possible. The slots should not exceed one centimeter.
Above is a film for vapor barrier, then a subfloor. It is convenient to mount the rough covering on the balcony from 1 cm thick plywood sheets or OSB boards. Fastened with self-tapping screws.
Read more in the article "How to insulate the floor on the balcony".
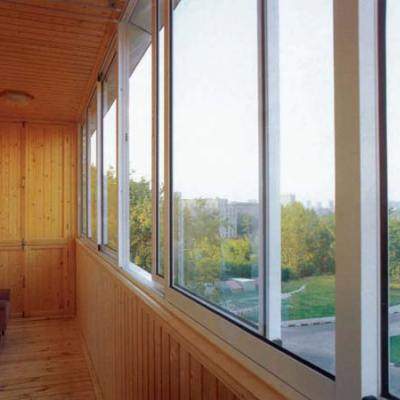
Surface finishing
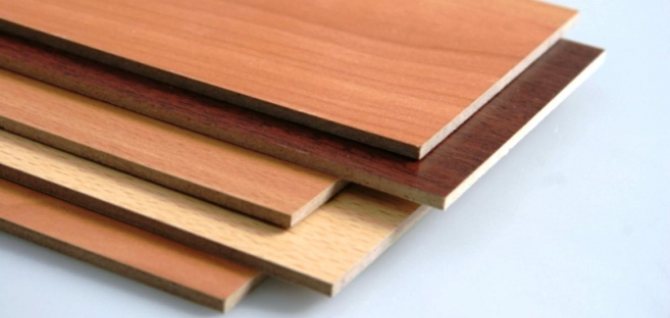
After completing the fixing of the thermal insulation, proceed to the last stage. The choice of cladding for the owner of the apartment, more often they use lining, MDF or plastic panels. Fasteners are carried out with self-tapping screws, a stapler (according to the existing crate). The floor is covered with linoleum, laminate, plywood sheets. The finished floor is framed with plastic or wooden skirting boards along the perimeter of the balcony.
Lining made of wooden planks is safe and environmentally friendly, but there is a minus - the high cost of the material.Plastic panels with patterns imitating natural materials (wood, marble, stone) can really be purchased by an average-income person. They are fastened with "liquid nails".
Elimination of cracks and destruction
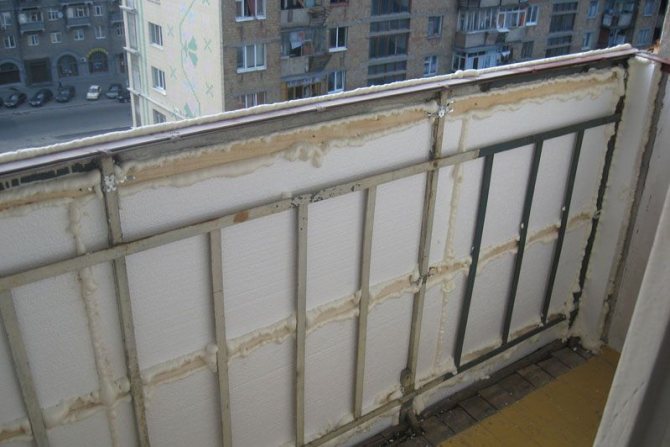
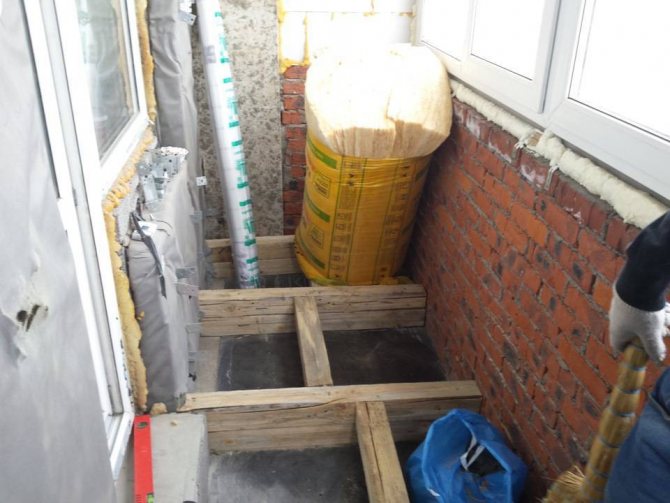
Fig. 4. High-quality insulation requires the absence of cracks on the structures of the loggia
The presence of cracks, fractures and voids on concrete slabs requires cleaning and priming. Before proceeding with the installation of thermal insulation materials, it is necessary to cement the voids and cracks with an adhesive-based mixture. Additionally, a thorough check of the cement joints for their destruction will be required.
Glazing in the corporation "Windows of the 21st century"
Windows 21 Century Corporation has many years of positive experience in glazing in houses of almost all series, including P-44, P-44T, P-3, P-3m, P-46 and many others.
You can be sure that:
- all work will be done professionally
- after installation, you will not have any problems with operation
It is worth considering that even in typical houses, the size and configuration of balconies may differ from those shown on our website. Therefore, it would be more correct to use the services of a professional measurer, who, moreover, will calculate the exact cost of your order.
You can call a measurer and order standard glazing by contacting our company by phone-1 or by visiting our nearest office in Moscow.
Which heat insulator is better to use?
Types of heaters
For finishing the balcony, you can use both rolled and tiled materials, which provide reliable thermal insulation:
- foam: an inexpensive tile material with sufficiently high thermal insulation properties has two significant drawbacks; the first is the large thickness of the sheets, when using it, the already small area of the balcony will be significantly reduced; the second drawback is high fire hazard; to ignite it, a lit cigarette accidentally thrown from the upper floor is enough; therefore, for balcony cladding, purchase material of class G2 that does not support self-combustion
- penoplex (extruded polystyrene foam): in composition, this material is similar to polystyrene, but due to a special production method with equal thermal insulation properties, it has a smaller thickness, greater mechanical strength; however, the cost of penoplex is higher; since the material has a low coefficient of water absorption, in order to avoid condensation, the balcony will need to be regularly ventilated; how to insulate a balcony with foam from the inside, we will tell you just below
- "Penofol": foamed polyethylene, protected on both sides by aluminum foil, which serves as both wind and moisture protection; a significant plus is the minimum thickness, for insulation it is enough to use a material with a thickness of several millimeters; Izolon, Penolon, Teplofol, Energofol have similar composition and properties; disadvantage - high price
- mineral wool (glass, slag wool or basalt wool): the undoubted advantage of all these materials is their high thermal insulation properties; some experts believe that the increased moisture permeability of the material in the case of balcony insulation is only a plus - absorbing excess moisture well, the material will protect the room from the accumulation of condensation on windows, walls; however, over time, mold can form in the mineral wool, so it must be reliably protected from moisture penetration from both sides with the help of hydro- and steam-hydrolysis
It is undesirable to use heat-insulating materials with a significant mass (for example, brick) for insulating balconies. After all, the bearing capacity of the balcony slab is limited. With an excessive load, such a structure simply cannot withstand the additional weight.
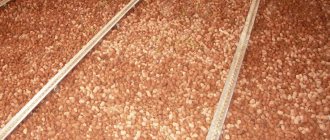
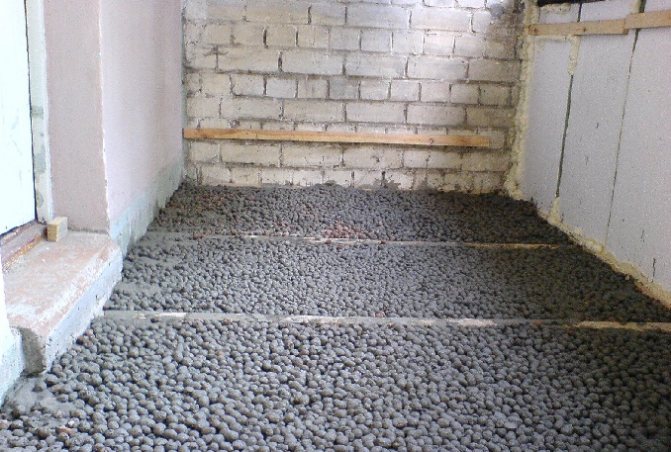
The use of expanded clay for floor screed is also not recommended. Its significant disadvantage is its ability to absorb moisture. As a result, its mass increases significantly.
Perennial flowers (TOP-50 species): garden catalog for summer cottages with photos and names | Video + Reviews
How to get started?
If the planned scope of work involves the implementation of redevelopment in the apartment, then you need to start by contacting the appropriate supervisory services in order to agree on the list of works and obtain permission. Having received the necessary documents, you can safely start work.
If the wall panels in the house do not provide the required level of thermal insulation, then it may be worthwhile to insulate the balcony from the outside.
This is associated with such difficulties as high-rise work (in the case of a multi-storey building) and, as a result, the involvement of specialized organizations. You can also carry out internal insulation. This type of work can be performed without the involvement of third-party organizations.
First you need to clean up the entire balcony, patch up all cracks and existing damage. It is especially worth paying attention to those places where the reinforcement was exposed. This will avoid further structural damage, and will also make it possible to produce high-quality glazing of the balcony. Also, do not forget about the treatment of insulated surfaces with antiseptic compounds. This will help prevent mold and mildew from growing in the future.
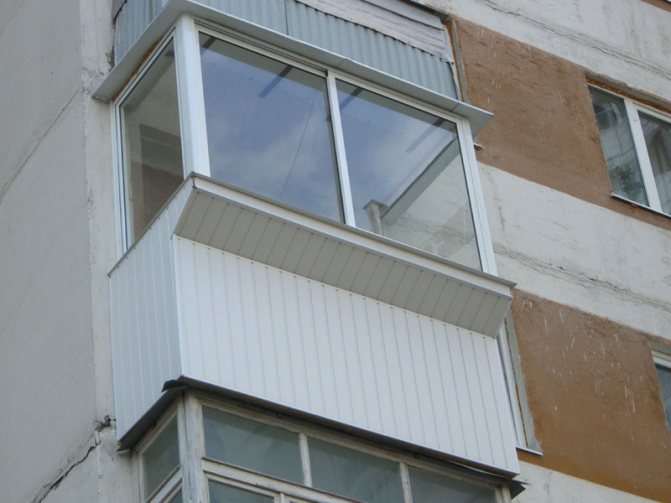
Loggia glazing
The choice of glazing should be approached especially responsibly, since the quality of the glazing will directly affect the level of thermal insulation of the balcony. Today, the most attractive in terms of price / quality ratio are metal-plastic windows with 5 - 6 chamber profiles and double glazing. You can, of course, be limited to single-chamber glazing. In this case, it is necessary that the glasses have an energy-saving coating.
Balcony glazing
It is also possible to install aluminum windows, the design of which provides for the presence of a thermal break. That is why this type of windows has a higher coefficient of heat transfer resistance. Such windows will help keep the warmth on the balcony during the winter season.
Another option is the possibility of installing wooden windows that combine the advantages of metal-plastic and aluminum windows. Such windows will also be the most environmentally friendly, as they are made of natural wood. However, it is worth considering that the cost of such windows is the highest. In any case, whichever option is chosen, the main thing is high-quality glazing.

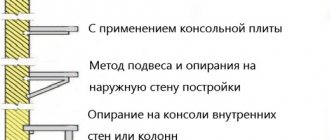
Slab reinforcement, glazing, external cladding
Reinforcement of the balcony slab
The preparatory stage looks like this:
- Remove from the balcony all the "unnecessary" items that will interfere with the work.
- Dismantle the handrail from the fence, remove the sheathing. Assess the condition of the metal, the strength of attachment to the facade If the rust damage is insignificant, and the attachment points are not loosened, then the lattice is left as a supporting subsystem. In this case, old paint and rust are cleaned from the fence to metal, degreased, primed, painted in two layers.
- Mount the frame for the cladding, tying it to the fence lattice. It can be made of a wooden bar or combined - a profile on the outside, a bar on the inside. The timber must be treated with an antiseptic. A profile is attached to the top of the fence. Its width should be such that the window block and ebb tide will fit. The distance between the posts of the lathing is chosen equal to 600 mm (according to the size of the EPS sheet). The total width of the profile (wall height) or timber must correspond to the thickness of the insulation. And when reflective insulation is additionally used, another 20 mm is added. Or a counter-lattice is also attached to the racks, which will create the necessary gap between the foil surface of the insulation and the inner lining.
- If the grille is heavily corroded or the strength of the fastening to the facade is in doubt, then it is dismantled. Instead, a supporting structure made of a galvanized square pipe is mounted. The frame is fixed to adjacent surfaces
- In the apartments on the top floor, together with the frame, a truss of pipes and a canopy corner (visor) is installed above the balcony.
- Reinforce the slab. If a balcony is equipped with an extension, then the reinforcement and frame profiles are combined in one structure.
- The slab is repaired if necessary. The crumbling areas are cleaned from all sides (preferably from below). Find cracks. Small (threadlike) cracks are covered with a repair compound. If there are large cracks, then they are widened. If there are areas with bare reinforcement, then the metal is treated with an anti-corrosion primer, and then covered with a repair non-shrinking compound. When the area of destruction of concrete occupies more than 40% of the surface, then it is completely repaired - a new reinforcing frame with fastening to the facade is laid, the screed is poured, the integrity of the ends is restored, the cracks are covered up from below.
- They carry out a rough "cosmetic" repair of the facade inside the perimeter of the balcony - they clean the dirt, old paint. They are treated with a primer with an antiseptic, cracks and chips are closed. The surface of the upper balcony slab is repaired in the same way.
- Install window frames. Fastening to the facade and from above (to the slab) is carried out through expanders. The size of the section of the upper profile of the expander must be greater than the thickness of the insulation plus the ceiling sheathing. The height of the front expander profiles should protrude beyond the facade finish inside the balcony (a layer of decorative plaster or wall panels together with the lathing).
- Install a visor or canopy. The sheathing of the fence is attached from the outside. Blow out the cracks with foam. External and internal decorative corners are attached to the sheathing of the fence.
- Cover with external strips the adjoining to the facade of the lateral expansion profiles of the window frames. Install the ebb. Double-glazed windows are installed.