02/04/2019 Emmett Brown MOCs
Plastic windows can be easily opened. Even a small child can handle this procedure. This is unsafe. To prevent pets from falling out of the window, you need to install a special stopper. It significantly improves operational safety. How to install a stopper on a plastic window will be discussed later.
What it is
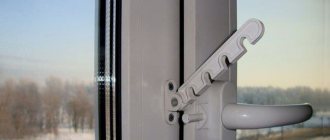
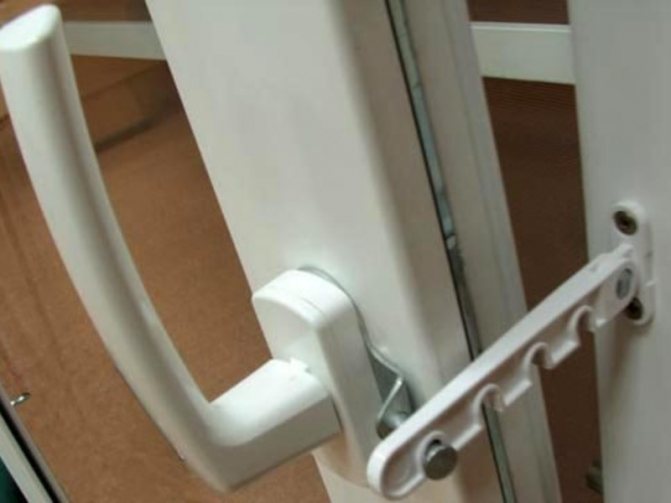
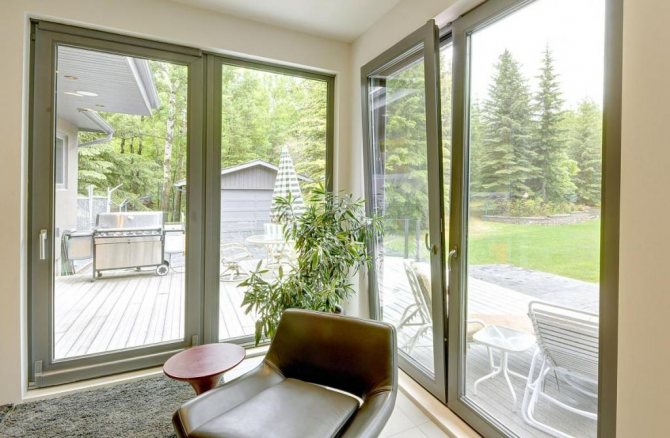
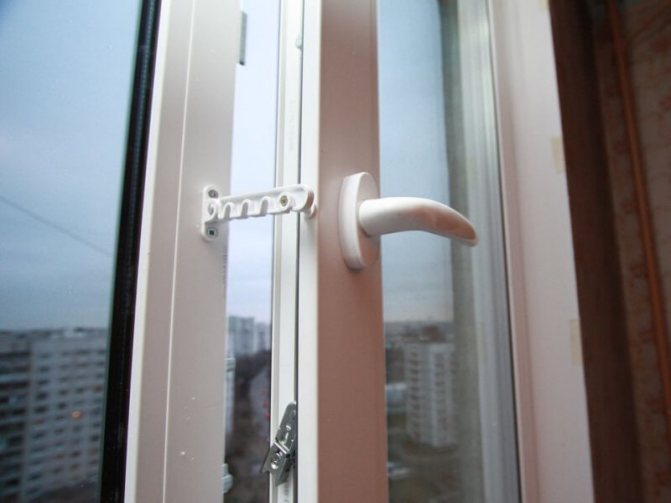
The device that fixes the position of the sash is called a comb. It allows you not to fully open the double-glazed window, but to a distance of up to 7 cm. Thanks to this, fresh air enters the room.
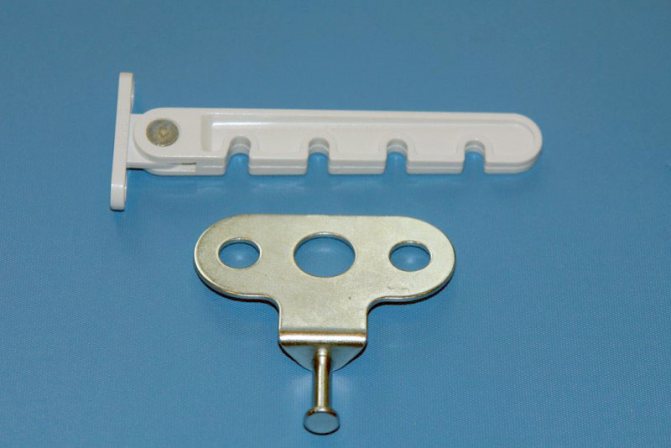
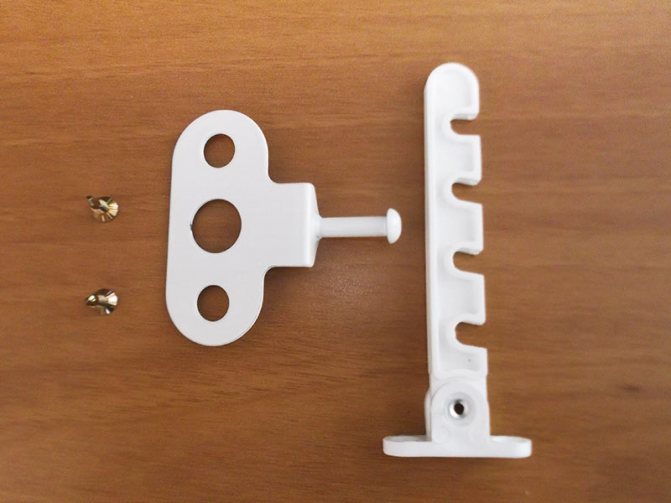
There are cut grooves on the mechanism itself. Usually there are about 4 of them. A counterpart is attached to the handle, with a special plug that falls into one of the cut grooves. They fix the window profile at the selected distance.


Classification
Limiters for opening plastic windows are divided into categories. The classification takes place depending on the material from which the device is made. They are divided into categories according to external features and purpose.
The following varieties are distinguished, depending on the material used in the manufacture:
- PVC.
- Metallic.
In appearance, they are divided into the following:
- THE USSR.
- Euro.
Classify by purpose:
- for normal ventilation;
- for safe ventilation.
Important! The latter type of ventilation is understood as protecting the system from children.
Comb for normal ventilation
Comb for safe ventilation
Areas of use
Select products of a certain type depending on the area of application. Since there is no one universal design.
For ventilation of the room in winter, choose the euro-version. They allow you to open the window frame to the smallest distance. It is enough for a small amount of fresh air to enter and not enough to completely cool the apartment.
The USSR comb will provide more complete ventilation, because it opens to a greater length. This feature is useful in summer. To combine two systems, install two fixtures at the same time.
If there are children in the house, it is better to think about special safe devices. For large drafts, metal systems are better suited.
Plastic
PVC products are classified by purpose. Their cost is much lower than that of metal ones. They are not as durable, but due to the low cost, it becomes possible to change them more often.
Therefore, before buying a limiter for plastic windows, you should study all the features. If there are kids in the house, then it is better to choose safe ones.
For normal ventilation
There are several types of such mechanisms. They are distinguished by the way they are attached to the handle.
Conventional devices create a minimal gap to allow some air to enter the room. However, they are not safe for children.
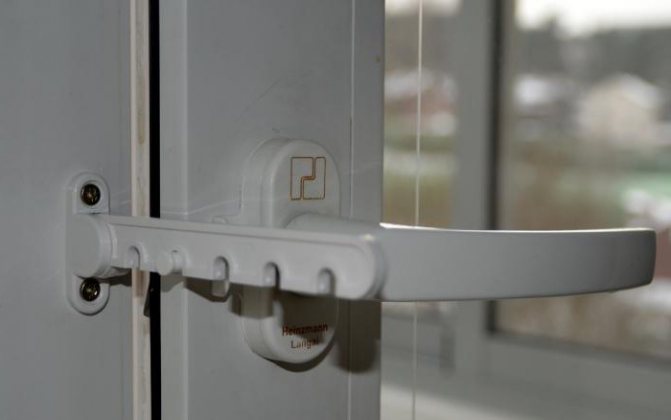
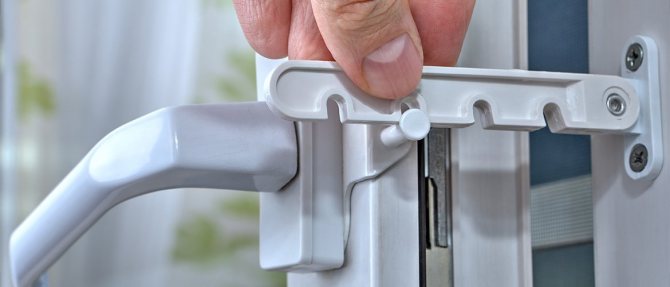
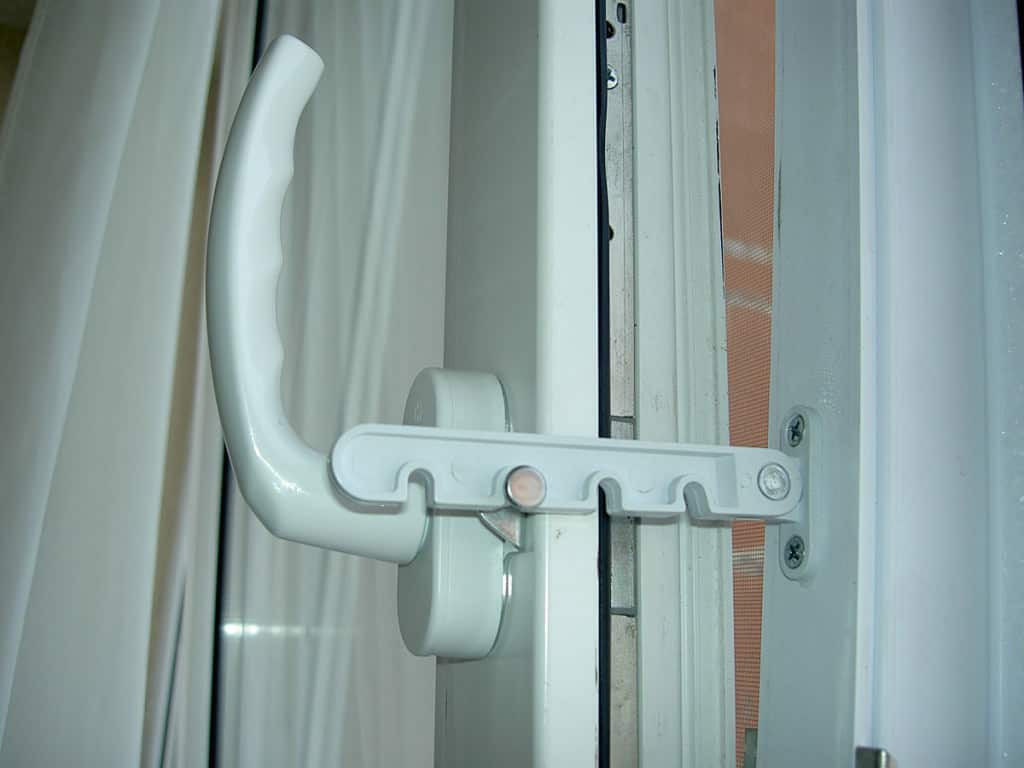
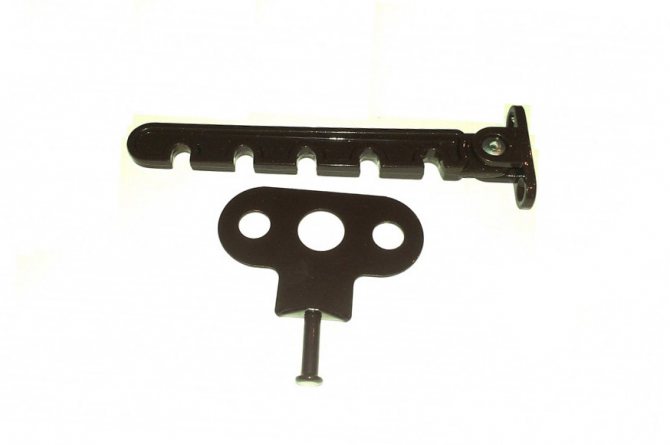
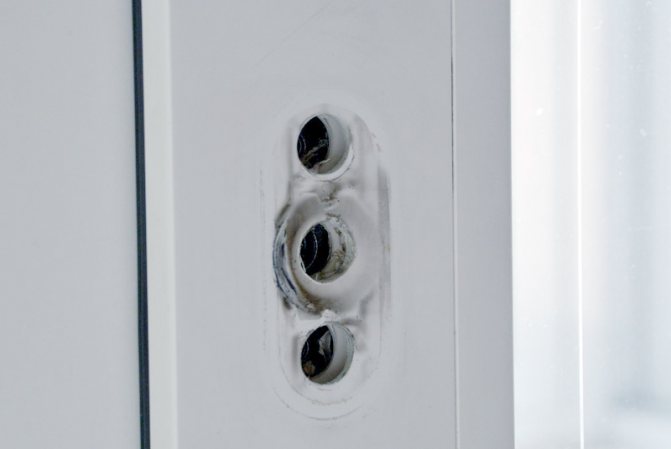
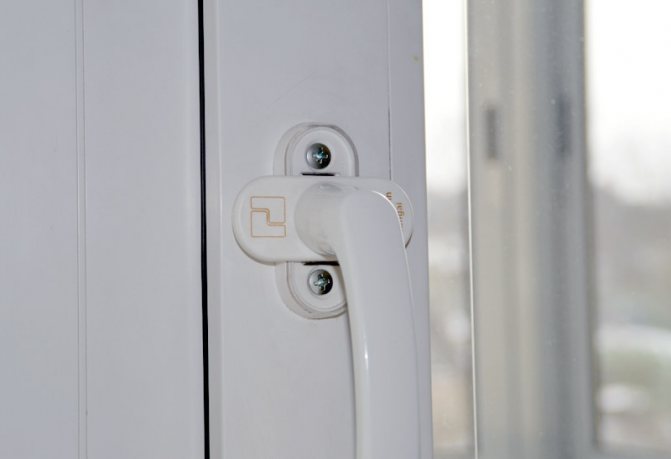
Euro plastic with pin
A distinctive feature in this case will be the mounting method. The base pin is secured under the window handle.
It is presented in different shapes: rectangular or oval. It is chosen depending on the handle itself.
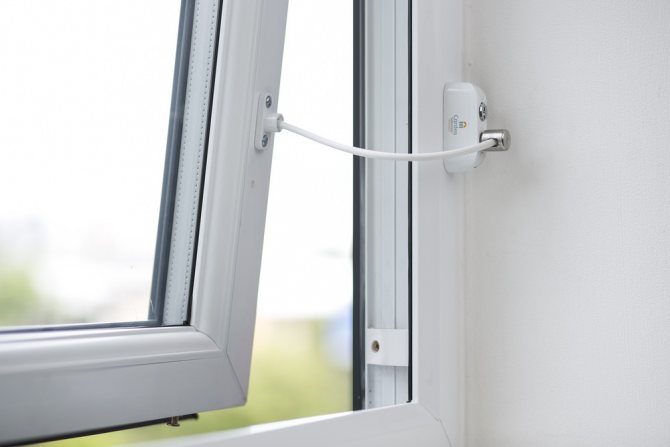
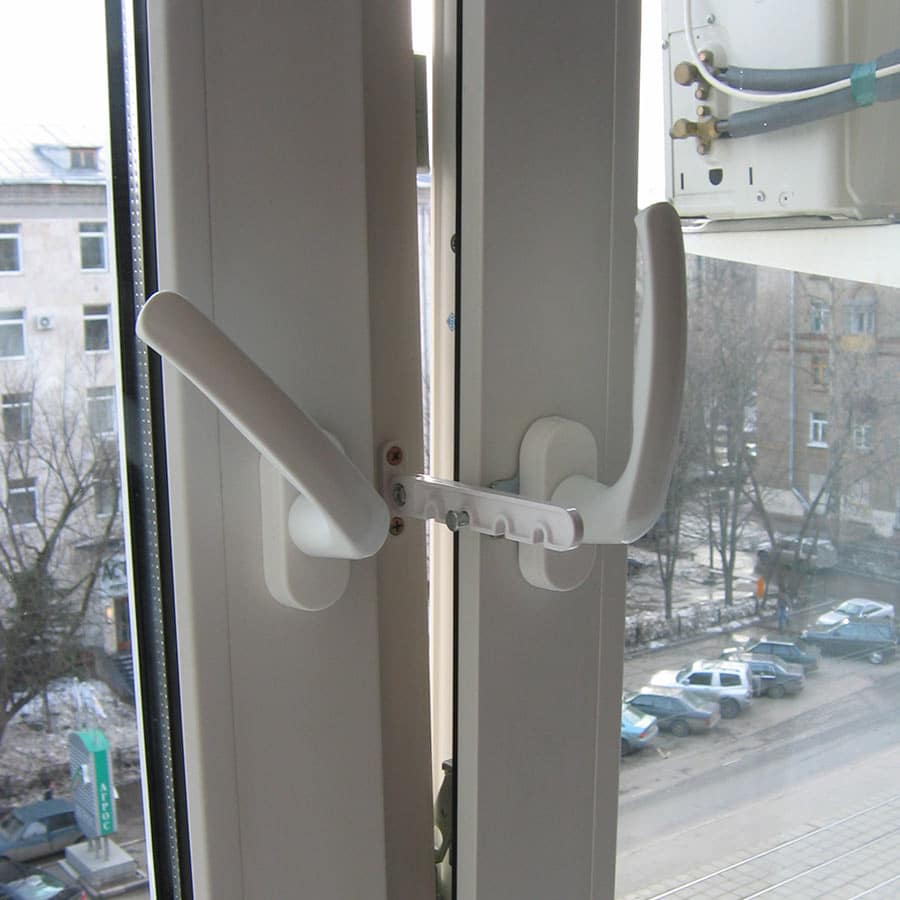
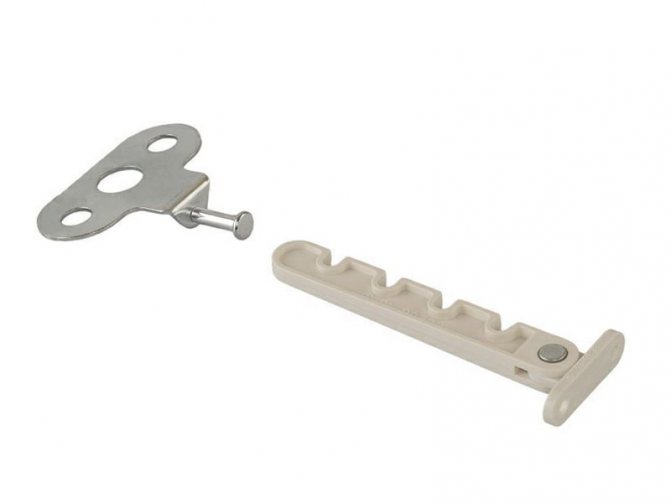
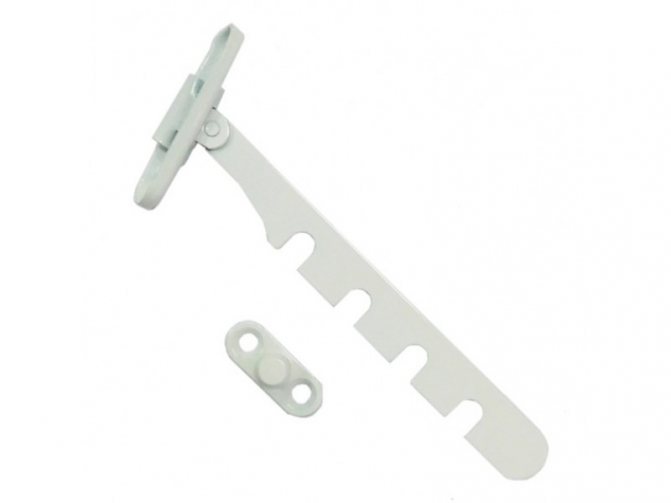
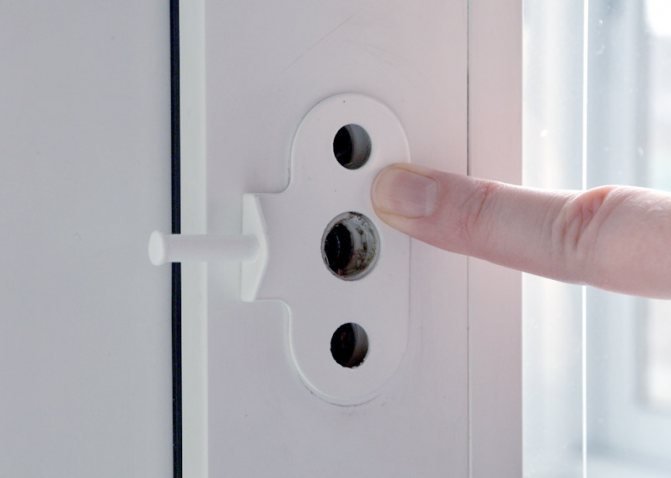
Euro plastic with bead pin
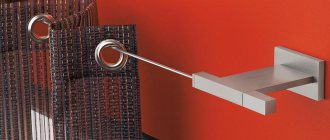
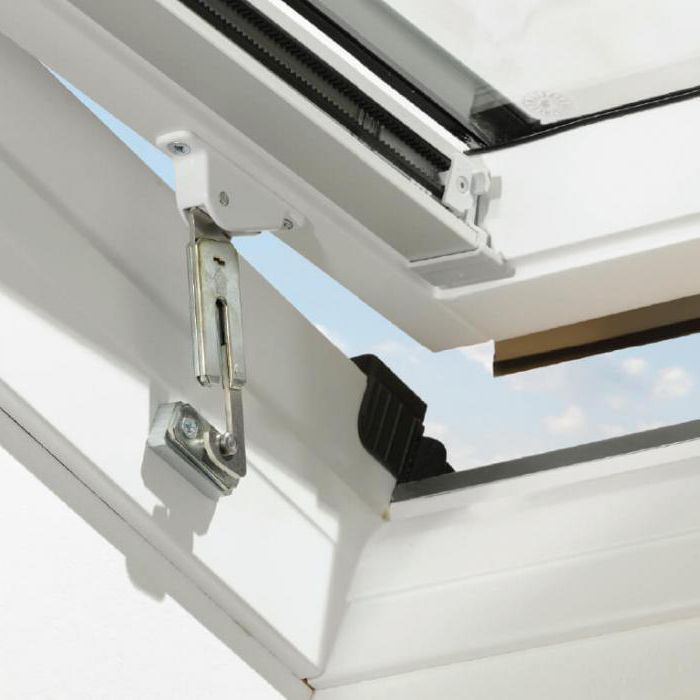
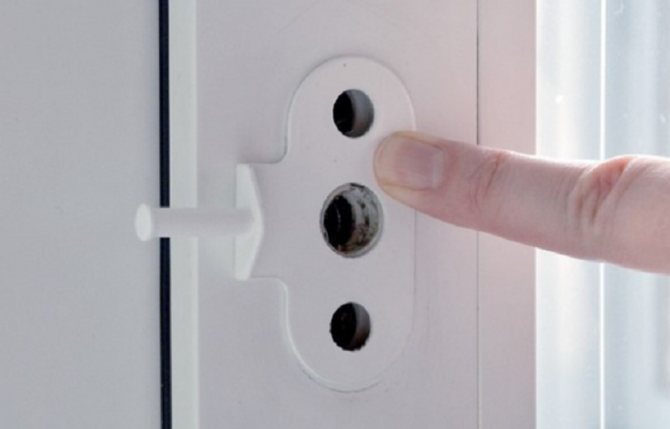
This design replaces the disadvantage of the previous type.Its main feature is that it can be fixed at any height of the window opening. This is possible because the plug does not need to be attached to the handle.
The device is installed in the sash inflow. Therefore, the system can be placed in any part of the opening.
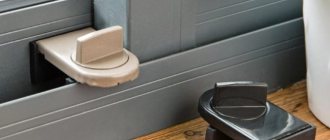
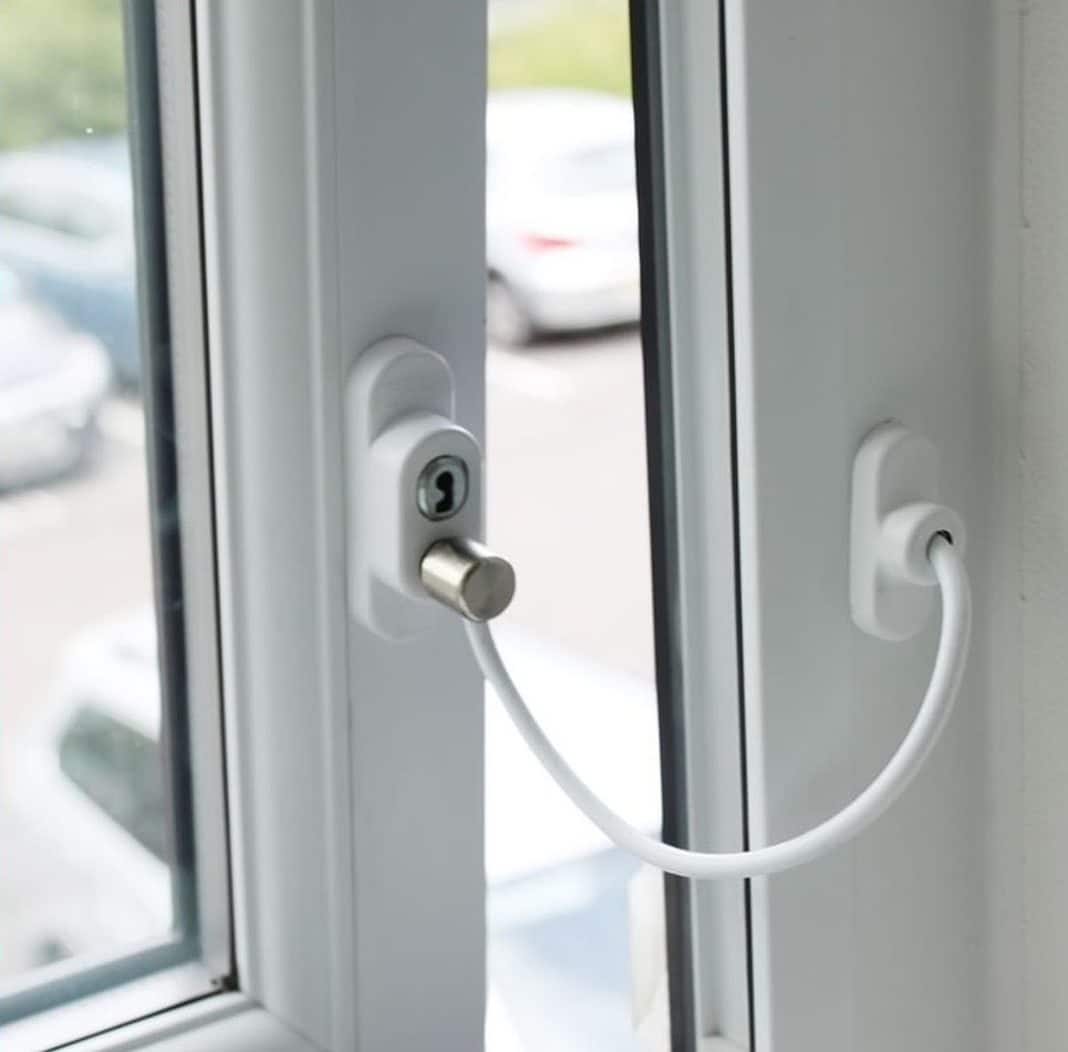
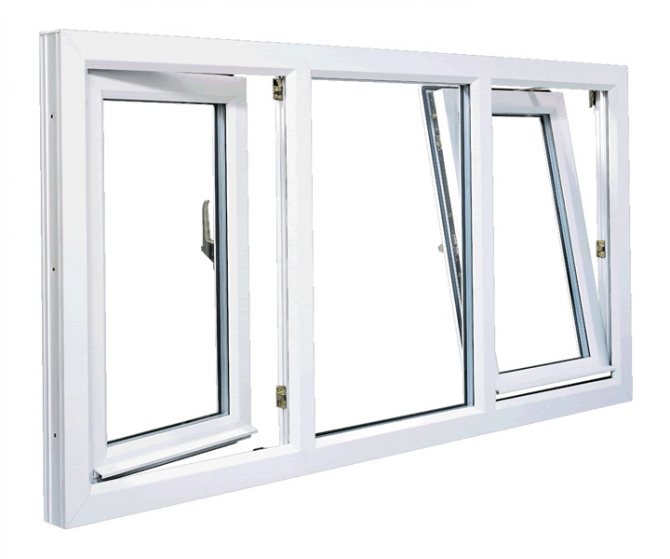
For safe ventilation
The function allows you to protect curious children and the mechanical structure itself. It is allowed to be placed at any height of the opening.
Children will not be able to open or close the sash, even if they reach it. This is possible thanks to a protective mechanism. The window comb can only be removed from the base plug in one position.
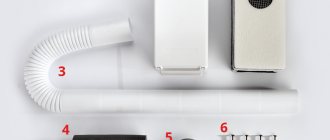
Climatic valve
Considering the recommendations on how to install the limiter on a plastic window, you should pay attention to one more variety. This is a climatic valve, which is one of the most modern types of such designs. It allows you to ensure sufficient air microcirculation in the room. In this case, the window does not have to be opened.
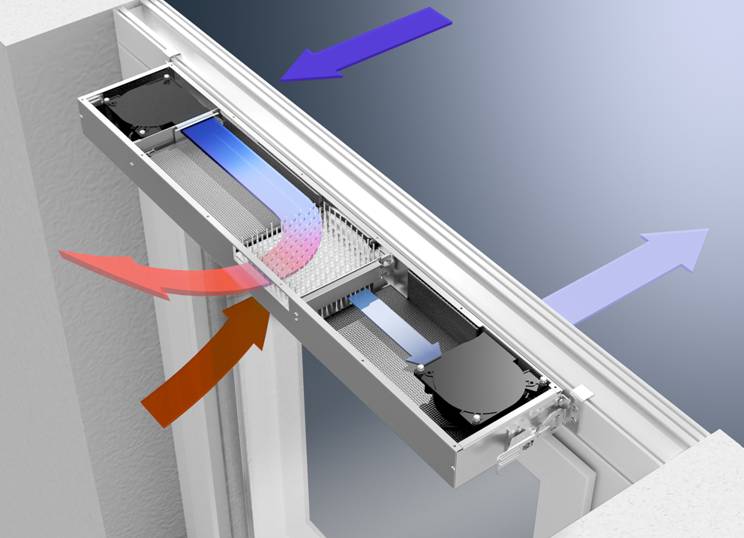
The advantage of installing a climatic valve is the fact that humid air is constantly removed from the room, but heat loss will be minimal. Passing through the complex valve system, the external air masses have time to warm up. Therefore, the room is still warm.
By installing a climatic valve, it is possible to normalize the humidity level in the room. This avoids the appearance of condensation on the windows. At a normal level of humidity, fungus and mold do not develop, and people living in an apartment are much less likely to get respiratory ailments.
How to attach the stopper to plastic windows of the presented type depends on the features of its design. In the upper part of the sash, you will have to drill a hole to install the system. This work must be entrusted to a professional. If a wizard with no experience performs a similar procedure, he will most likely just ruin the window. Therefore, the climatic valve must be installed by a master who gives a guarantee for his work, has sufficient experience and theoretical knowledge of performing this procedure.
Decorative overlays are installed outside and inside the window. Therefore, the appearance of the frame will not be damaged. Modern systems of such devices allow you to regulate the level of humidity in a room without using power.
Metallic
A metal window stop is more durable than a plastic one. This is due to the material from which it is made. But, at the same time, it is more expensive.
Here the choice is for the buyer. It is better to purchase quality material once.
For normal ventilation
If the euro window needs to be left for ventilation and there are no children in the house, ordinary systems are chosen. They are classified according to the country of production.
So, there are imported mechanisms and Russian ones. They also differ in material. Structures are made of steel, copper, aluminum and zinc.
Euro imported and Russian
The imported one differs from the Russian one. The support is attached to the profile itself, so it doesn't matter at what height the system is located.
The cover of the plug is rubberized. This means that there will be no rattling during a strong wind. Do not install such a stopper on wooden systems.
During installation, holes are made in the profile, where the device is fixed. In a strong wind, cracks may appear on wooden ones.
Russian manufacturers do not assume the presence of a rubber coating. This means that the euro window will rattle in the wind. In addition, the plug is not secured firmly in the grooves.
The base may loosen due to the fact that the window comb itself moves only up and down, and does not bend.
USSR-variant
The stopper is made of steel and has five fixings.At the same time, the first slot is at approximately the same distance as the second slot for the euro. This feature leads to the fact that it will not work to make the minimum gap.
The device itself is elongated. This is one of its drawbacks.
For safe ventilation
For a long time, only imported metal devices existed for this air exchange. Now, they are made by Russian manufacturers as well.
The device will not allow small children to open the sash without the help of an adult.
For aluminum windows
The metal stops are also suitable for aluminum frames. They are similar to the USSR products. There are five pin slots. The support is installed under the window handle.
As with plastic devices, there are a few things to pay attention to before buying. First of all, this concerns the size and shape of the handle.
Varieties of window restraints
Let's take a closer look at the types of window restraints, their disadvantages and advantages.
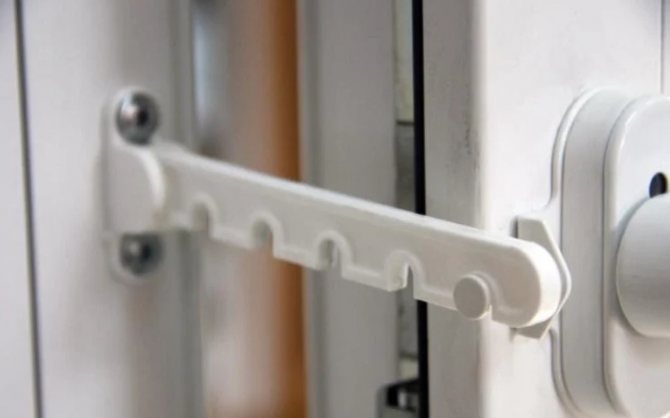
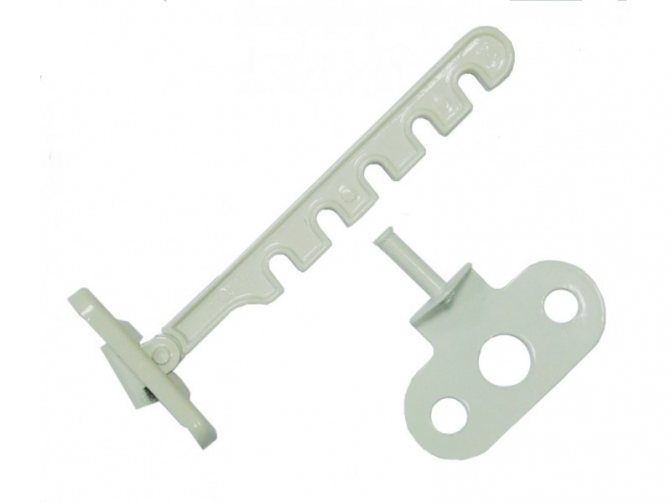
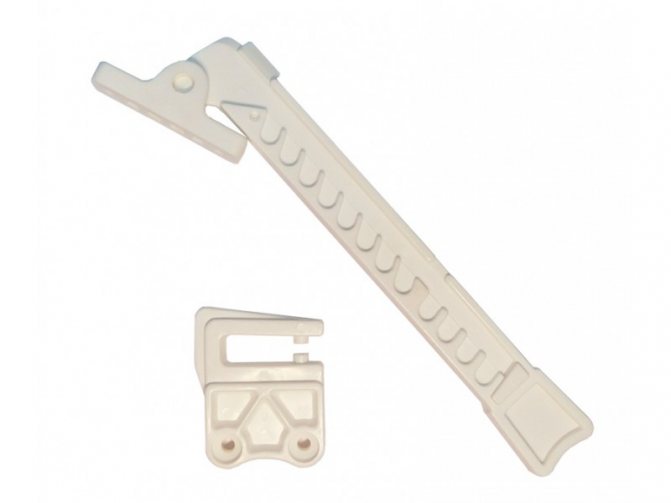
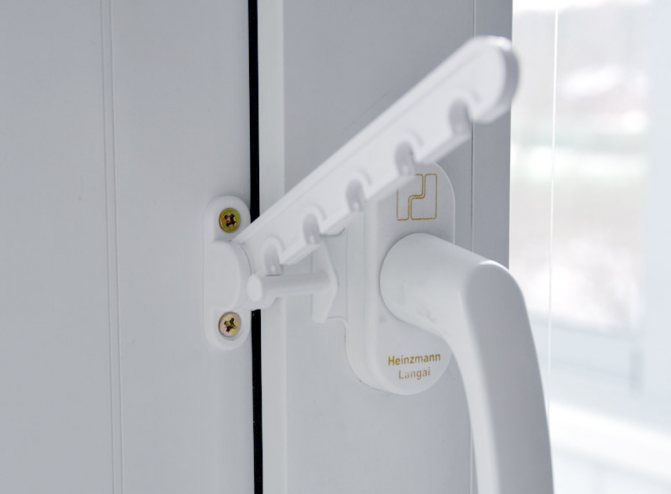
Plastic comb
It is a device of two elements: the comb itself (strips with teeth) and a retainer. The latter is installed on a movable window sash, and the comb is installed on a fixed frame. Such a limiter is very inexpensive.
Application guidance is reduced to the selection of the desired volume of air, the flow of which will occur through the gap between the window and the frame. The bar is fixed on the protruding pin of the retainer, and the gap will remain so until you close the window or change the position of the comb.
The gap that can be obtained with the bar is usually 1–7 cm, but may differ slightly from manufacturer to manufacturer.
The advantages of a plastic comb include low cost, ease of installation, and the choice of color for the installed window. The disadvantages include low physical strength.
Metal comb
The principle of operation is the same as that of a plastic comb.
The list of advantages includes higher strength characteristics. Among the disadvantages: the price is higher and the limitations in the color range. Metal without external coating will be visible against the background of the window and will appear as a relatively foreign element.
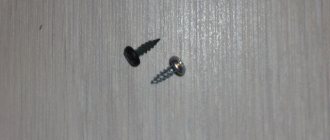
To install the comb, special skills are not required, it is enough to cope with screwing a self-tapping screw into the frame and sash.
Don't know how to install a plastic window sill yourself? In this article you will find detailed information about the features of installing a window sill.
On our website in the section - https://vse-postroim-sami.ru/category/building/windows/ - you will find interesting information about windows and glazing.
Dimensions (edit)
Sizes vary depending on the species. At the same time, even PVC products with different fasteners differ in their size.
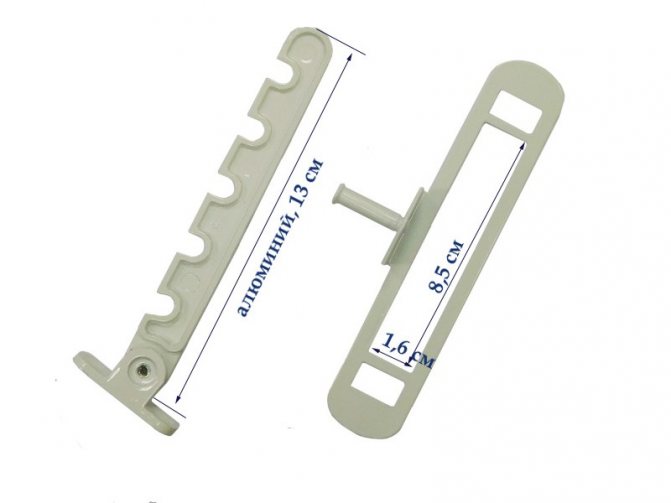
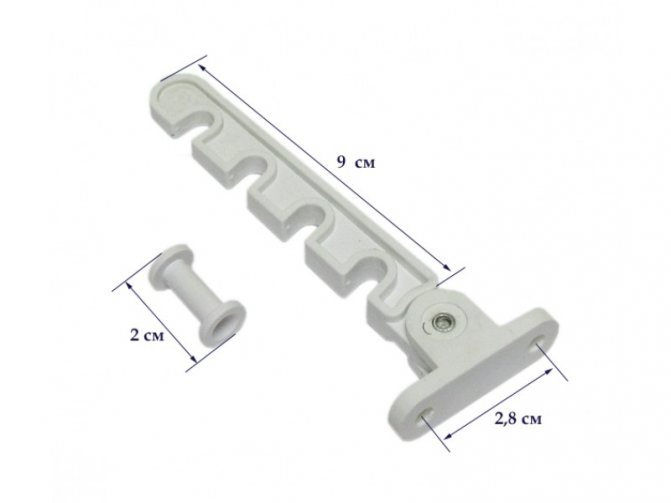
The width and height of PVC devices fixing is 40 * 12mm. The height of the mechanism itself is 20 mm. The design has four slots. They are located at a distance of 24, 44, 64, 84mm for euro with a support under the handle.
For a base with a bead, the distance of the slots will be 40, 60, 80, 100mm. It is calculated from frame to sash. The length of the plug is also different.
If it is placed under the handle, its length will be 1.6 cm. If the support of the euro-comb is in the influx, then the length will be 2.1 centimeters.
For metal euro devices of imported and Russian production, the dimensions will be as follows:
- Width and height of attachment to the frame: 55 * 15 mm for imported, 40 * 12 for Russian.
- Construction height: 19 mm for imported, 20 for Russian.
- Fixation is carried out at such a distance from the frame: 57, 77, 100, 121 mm (imp.) And 24, 40, 58, 73, 87 (Russian).
- Pin length: 11 mm (imp.) And 1 (dew.).
The dimensions of the metal USSR devices differ from the previous ones. The width and height of the attachment point will be 25 * 16 mm. The height of the product varies depending on the type from 18 to 22 millimeters.
The length of the plug depends on the method of attachment of the base. If it is attached under the opening lever, its size is 16 mm. The size of the base, if it goes into an influx, will be 20 mm.
The distance between the frame and the slot is also different. For the first type, the dimensions are as follows: 51, 75, 98, 123, 150 mm. For a pin in a bump, the distance will be 65, 89, 113, 139, 166 tenths of a centimeter.
How to install
When replacing old windows with plastic ones, you can order the installation of a limiter. If the windows are already standing, then you can install it yourself.
There are two types of attachment: to the end side of the window frame (float) or under the handle that opens the sash. In this case, in both versions, the retainer is installed on the movable sash, and the plate with holes on the fixed one.
The easiest and most affordable option is to install under the handle; this does not require special skills. If this option is not suitable, then it is worth contacting qualified specialists to install the float limiter. Since incorrect installation can lead to a deterioration in the tightness, sound insulation and thermal insulation of the profile.
Pros and cons
The advantages and disadvantages of the device largely depend on the type chosen. But there are general ones, which will be listed below.
Among the advantages of the mechanism, the following are distinguished:
- Easy installation.
- Affordable price.
- The structure is easy to replace in the event of a breakdown.
- The ability to ventilate the room in winter without significant hypothermia of the room.
But there are also significant disadvantages, including:
- During installation, the integrity of the product is violated.
- Even Safe Mode is not complete protection for children.
- Cold air enters through the cracks that form. Especially in sub-zero temperatures. Then the room will cool down quickly.
Installation
To understand how to install an opening limiter for a plastic window, you must follow the instructions. Before starting the installation, you need to decide on the classification of the structure. For this, all the advantages and disadvantages of each type should be taken into account.
Manufacturers offer installation services. But the process itself is not complicated. You can install the product yourself.
Required tools
To install the device with your own hands, you will need the following tools:
- Purchased product.
- Drill.
- Drills with a diameter of 2-3 millimeters.
- Self-tapping screws are included, but it will not be superfluous to post your own.
- Simple Pencil.
- Crosshead screwdriver.
Important! The length of the self-tapping screws should not exceed 13 mm.
Step-by-step instruction
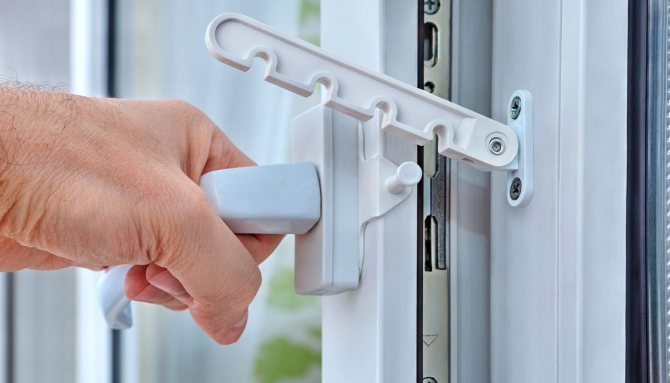
If the base is fixed under the handle itself, then it is disassembled. To do this, the lid is pushed off with a knife or rotated 90 degrees. There are self-tapping screws under it, which can be removed to disassemble the system. After that, you can start installing the mechanism.

- Insert the fasteners into the holes of the base.
- Return the handle to its place.
- Fasten the pin to the first position of the plastic window opening limiter. Leave a gap of 3 mm.
- Mark on the frame where to attach the stopper with a pencil.
- Secure the structure.
After that, you can use a comb on the window. If the pin is installed in the bead. Then, instead of disassembling the window handle, you need to attach the base to the panel.
When you need to change an element
Before replacing the old plastic window limiter with a new one, it is worth considering some familiar points:
- The details of the new sample should be identical to the old ones. All parameters and dimensions of the device, including the distance proportions between the holes, must match the original limiter.
- The clamps, different in the model range, do not coincide in size, and in the location of the grooves of the bar.
- If at least one part of the system has become unusable, the entire structure must be replaced.
- To hang a new bracket, you need to unscrew two self-tapping screws.
When the new bar is attached, be sure to follow the following rules:
- residual plastic parts are removed from the self-tapping screws - violation of this prescription is likely to lead to the breakage of the thread at the moment the bolts are tightened;
- it is recommended to move along the old thread - you can first scroll the self-tapping screw counterclockwise, and as soon as the fasteners "fall off", change the direction.
When the holes of the new stop are not correct with a 1.5-3 mm cut, it is possible to bore them with a file, and fix the bar with screws with wide heads and press washers.
It is advisable not to put the comb in the cold winter. Strong gusty winds, heavy rains put a significant load on the limiter. The pressure may exceed the capacity of the blocker. In such a situation, it is better to close the window in time.