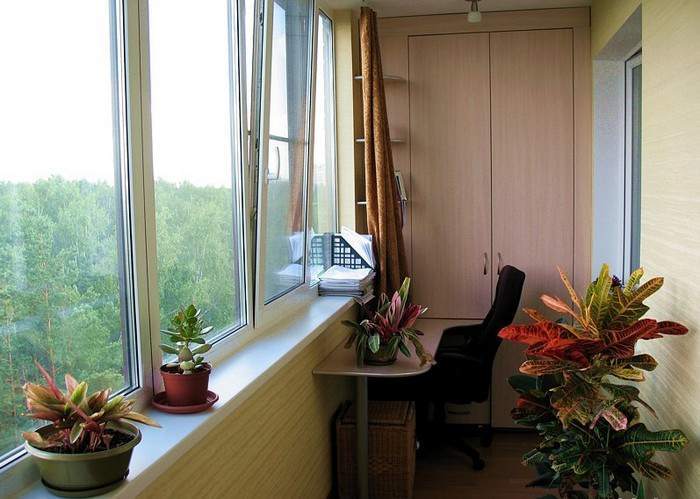
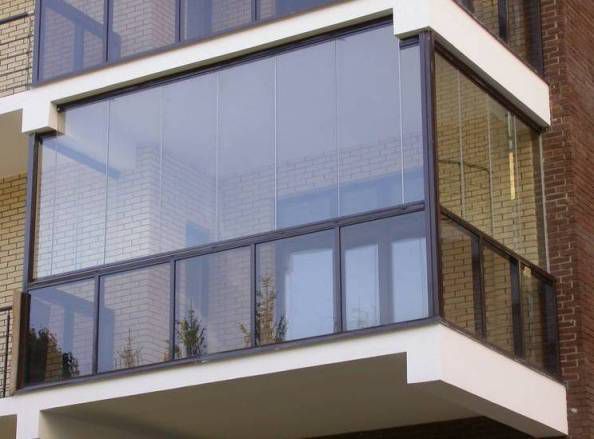
Glazing of the balcony allows you to turn an open, uncomfortable area into a comfortable room. Provided that the glazing and insulation are correctly performed, the balcony can become an extension of the room, which will significantly expand the living space.
Do-it-yourself balcony glazing
It is possible to independently cope with the glazing of the balcony. To do this, you need to familiarize yourself with the features of the existing varieties of balcony structures, choose the appropriate option and complete the main stages of work in accordance with the instructions.
Do-it-yourself balcony glazing
How to glaze with your own hands
First, it is worth deciding how the balcony frames will be installed:
- Directly onto the parapet, if the original structure is of course strong enough.
- To the full height of the loggia with the primary dismantling of the parapet and tinting of the window opening.
- Installation of a profile on an additional structure (foam blocks) in order to increase the reliability of fastening, to strengthen the base.
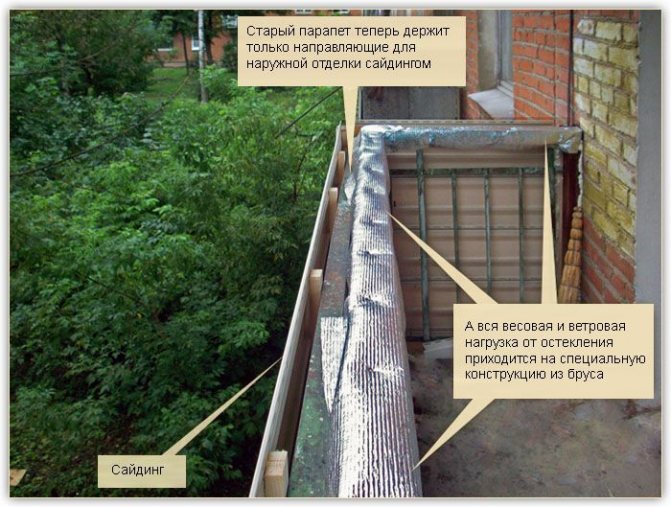
- With a take-out, in which the balcony is first sheathed from the outside. Then glass frames are installed on the powerful parapet.
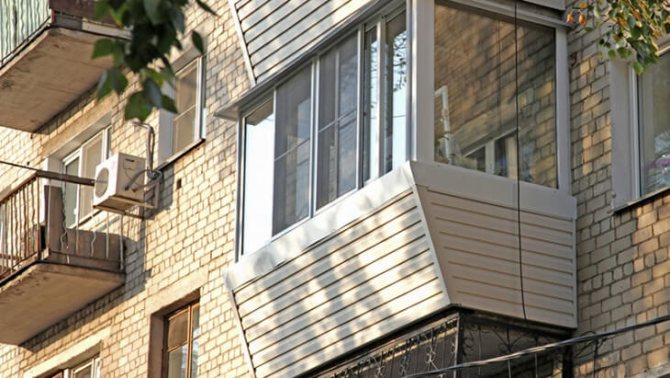
Aesthetics and design
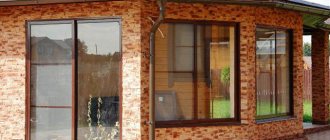
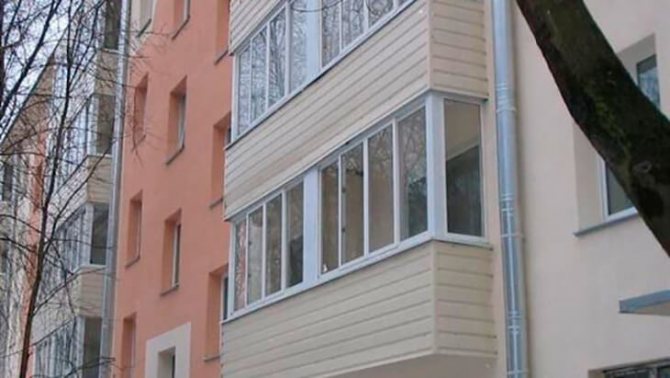
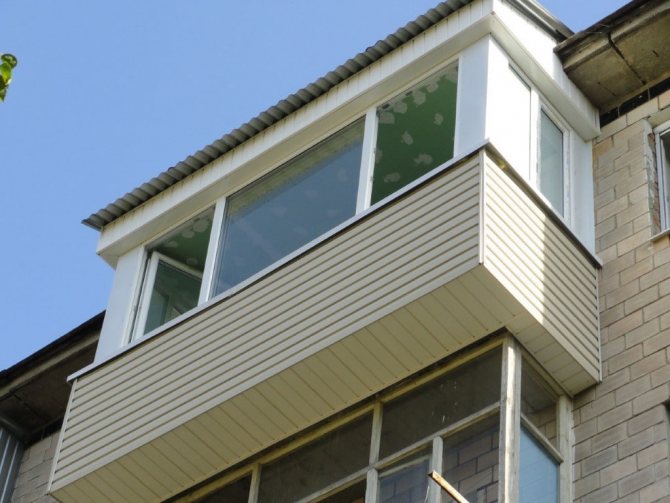
To give the space a modern look, the outside glazing is sheathed with siding panels to accentuate the stylistic decor.
This completes the preliminary preparation, then call the window company, which will provide all subsequent service. A professional approach guarantees safety, and the protective functions will remain in place for decades.
Further on in the video, you can familiarize yourself with useful tips on how to properly take out the balcony.
Tweet
Glazing and insulation of a balcony - general concepts
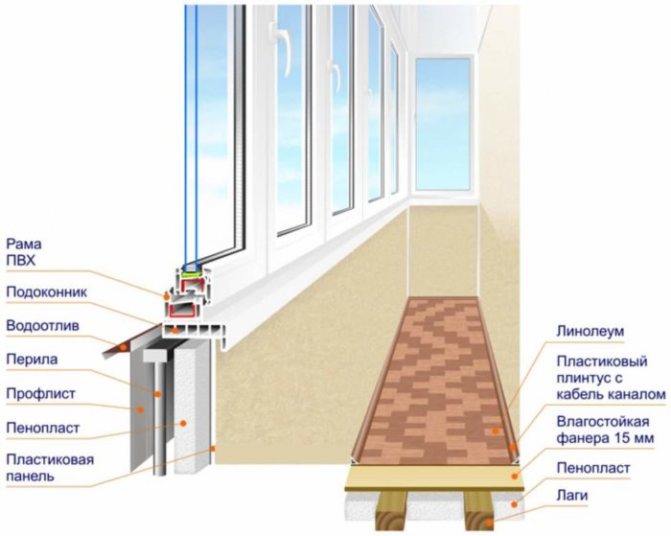
The whole process as a whole consists of 5 stages:
- preparatory work;
- sealing the cracks with a sealant;
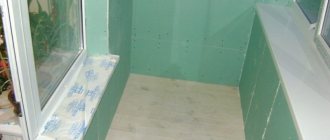
- thermal insulation;
- installation of double-glazed windows;
- finishing (lining, drywall).
New PVC double-glazed windows and a thermal bridge are being installed to reduce heat loss. At the same time, the original appearance of the street facade of the house does not change. If on the sides of the loggia there are thin concrete slabs, and in front there is a lattice parapet, then the walls are first prepared by laying ceramic bricks.
Further:
- double-glazed windows are mounted;
- the cracks are hermetically sealed with polyurethane foam;
- the floor is prepared, leveled with a concrete screed;
- a layer of waterproofing is placed on top;
- finishing of the ceiling, floor, walls is carried out.
With the insulation method, it is important to insulate the walls from the inside and outside. So drops of moisture will not settle on the walls of the room, and the dew point will remain outside of it. For wall insulation:
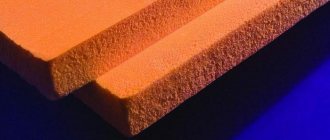
- expanded polystyrene plates are glued;
- reinforcing mesh is applied.
To insulate the walls from the inside, penofol is first attached. Above - expanded polystyrene plates. The joints are glued with aluminum tape.
The ceiling is insulated in the same way. The waterproofing layer is attached. Then foam plates on plastic dowels and a reinforcing mesh.
Attention! As additional insulation after thermal insulation, it is worth considering installing a heat source.


The main types and types of glazing
There are 3 options for installing glass blocks:
- Cold (1 frame). It requires laying a powerful insulation between the windows so that the balcony can be used as a refrigerator in winter.
- Warm with insulation of the loggia inside, outside. Frames are equipped with thermal inserts.Although the option of retaining and retaining heat in the room may result in the appearance of mold, condensation on the glass. Natural ventilation is indispensable here.
- Sliding. Suitable for small loggias, saving space and protecting from dirt, precipitation. The mechanism of action is to slide one sash behind the other. Although the option is not suitable for the harsh conditions of the Russian climate. In winter, roller mechanisms may not withstand and freeze. Another disadvantage of the design is single glass. It will be cold on the balcony in winter.
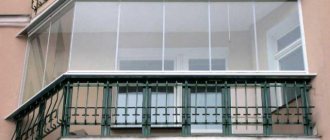
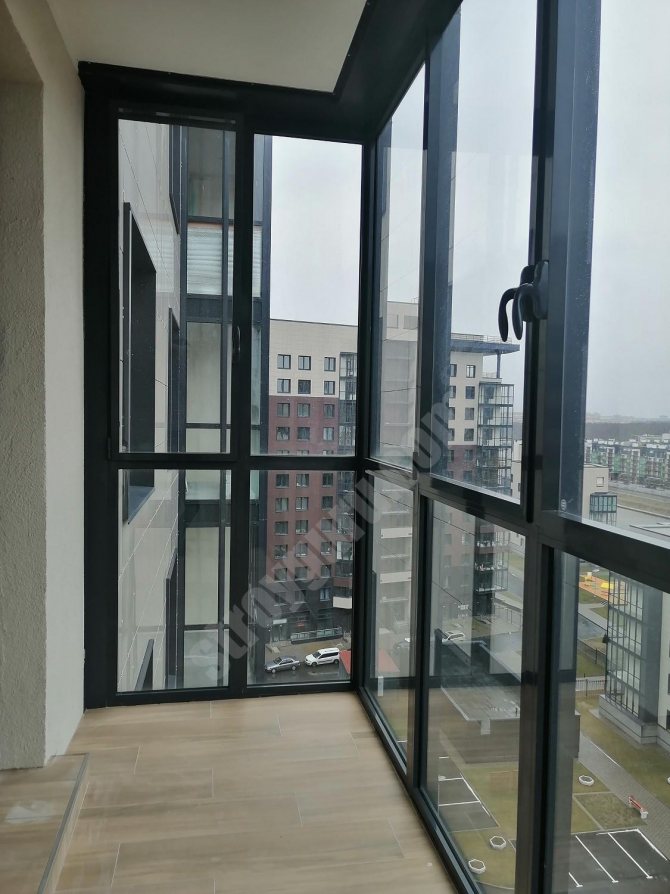
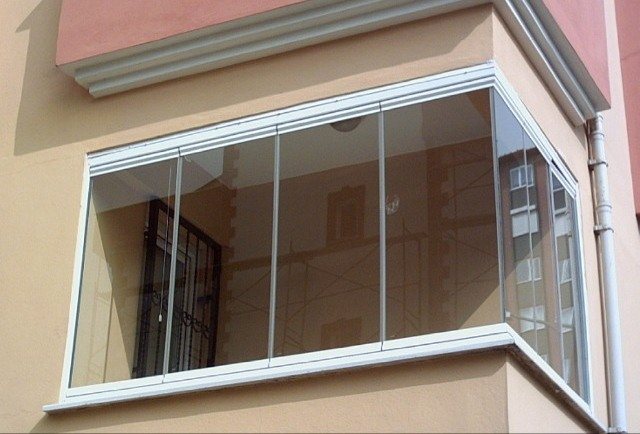
- Panoramic - a type in which there are no frames. Guides are mounted with grooves at the bottom and top of the balcony. Strong, thick glass with maximum insulation is inserted from floor to ceiling in a swing, sliding or folding way.
- With the takeaway. Modified version. Steel profiles are welded to the parapet. The window sill is taken as a basis. The entire plastic (aluminum) structure is mounted on it. A good option if the balcony is small and narrow, and the parapet is strong.
- With supporting frame. A durable, durable method with the ability to transform a loggia into a warm living space for 20 years to come. But you will have to radically change the outer sides. One person cannot do it. I need a specialist assistant.
Stage three - the choice of the glazing method.
The variety is surprising, just look at the neighboring house. What you will not see there, but we focus on the methods.
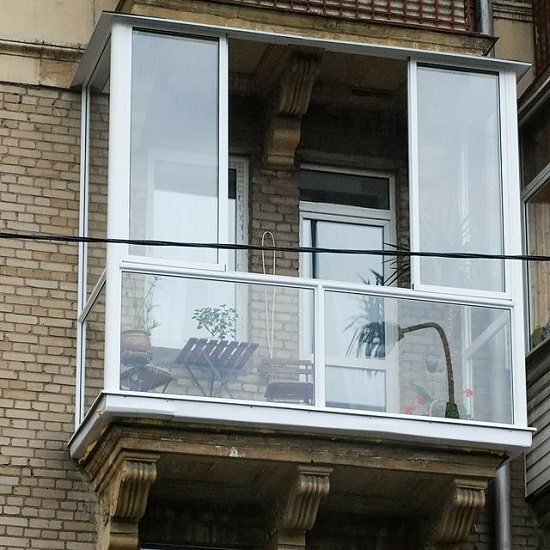
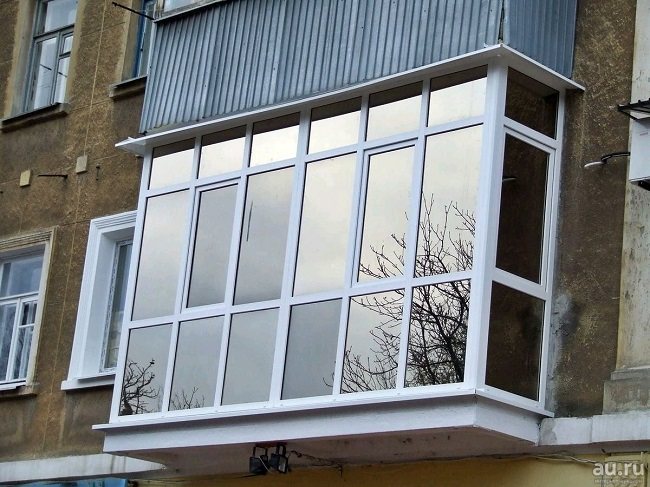
a) With the removal. The internal space becomes wider due to the removal of the window profile (relative to the main fence). The increase is insignificant - 20-25 cm. A windowsill can be placed on such a frame.
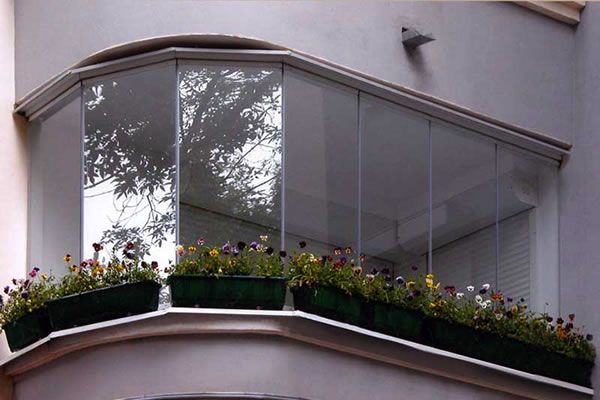
b) Frameless. In fact, you get a panoramic window without vertical frames and horizontal partitions. A lot of light is a plus. A problem with leaving (like washing) is a minus. The design is quite durable, so you shouldn't worry about bad weather.
c) Art decoration. This method is relevant when, for example, we install stained glass windows. It is difficult to do without an artist-designer here (unless, of course, you have a talent for drawing). Also read the article: Interesting Loggia Designs.
What is cold glazing of balconies
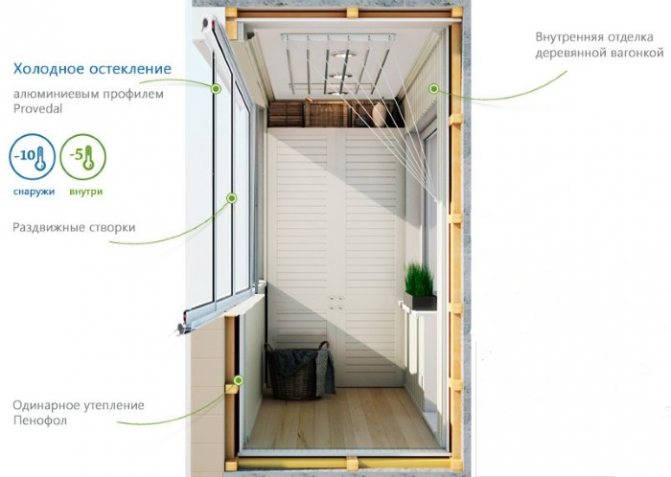
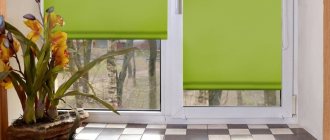
Simple construction using a thin single-layer frame. Will protect the room from wind and dust, although it does not guarantee high thermal insulation. If European frames are installed or made of wood with one glass, then the method is optimal when deciding to make a small office or a greenhouse for flowers out of the room in the warm season.
Additional insulation procedures are not carried out. Although it is possible to lay wood flooring on the floor for comfort.
If wooden frames are used, then in order to avoid the appearance of dampness, mold and the formation of condensation, effective ventilation, waterproofing on the floor and parapet must be organized.
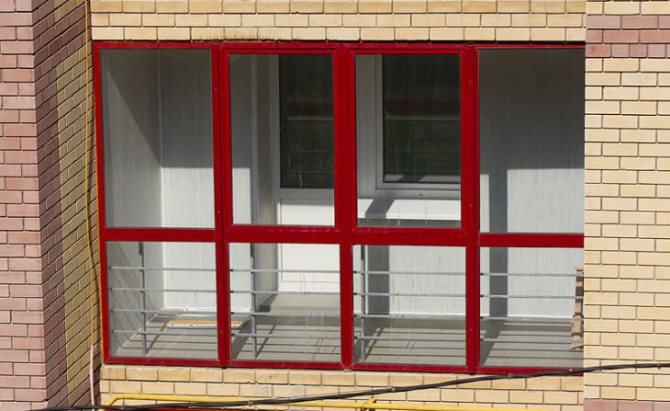
What is aluminum glazing
Method using aluminum frames, 1, 2 glasses and thermal inserts. Frames are installed on a parapet or a panoramic structure is constructed from them.
If you wish, you can make a "French balcony" by installing glass blocks exclusively in front of the parapet.
Aluminum frames:
- do not burn;
- do not corrode;
- have good heat resistance indicators;
- will last up to 70 years;
- do not need painting.
The construction with aluminum glazing is lightweight, with good sound insulation properties.
What is warm glazing
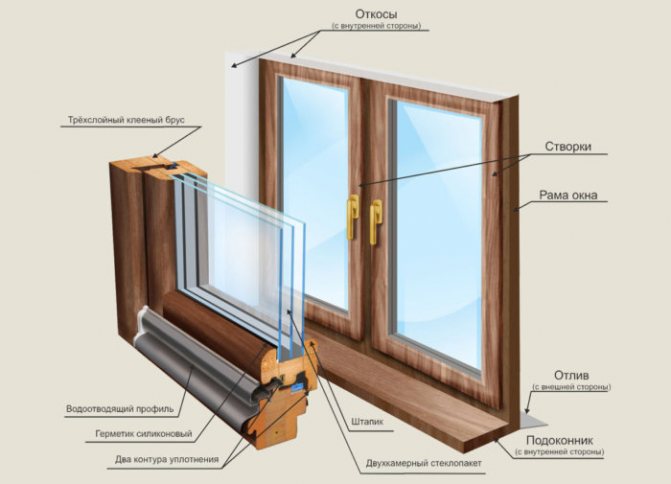
Frames are installed with double, triple glass units or with thermal inserts (Eurovariant). Thermal packs consist of 2 vacuum chambers. The main thing is that during installation a dew point does not form between the glasses after being taken out of the perimeter of the balcony.
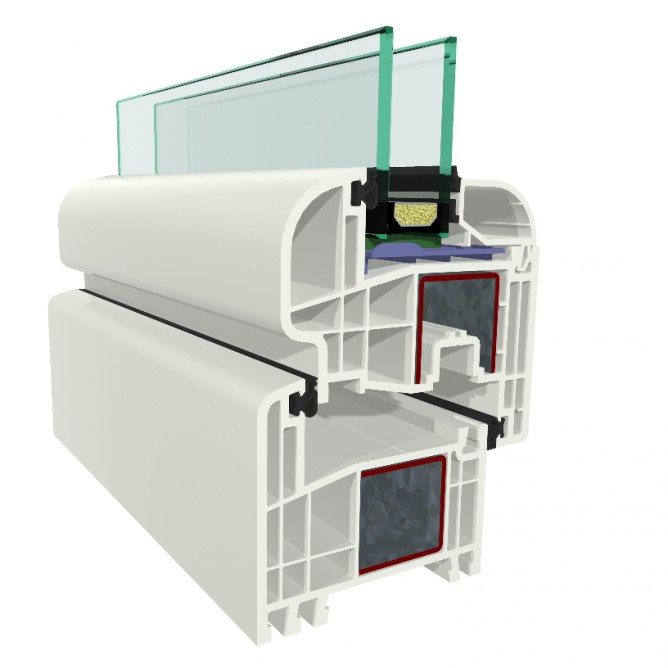
Double-glazed window
The main goal is to achieve the correct balance of the temperature effect on the windows, i.e.think over insulation.
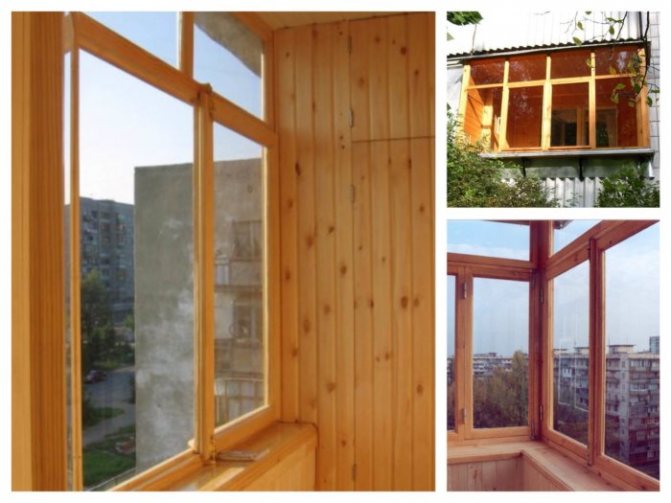
Advantages and disadvantages of wood glazing
Wooden window blocks:
- reliable;
- environmentally friendly;
- outwardly attractive;
- suitable for self-assembly;
- good noise suppression from the street;
- have increased thermal insulation properties.
Minus - water penetration or icing of window systems. Especially with a sliding structure. It's easy to produce.
If you assemble all the doors correctly, then the temperature inside the loggia should rise by several degrees. Although the problem often arises when installing glazing beads from the back side, if the floor is higher than the first. Experts recommend that you first insert the glass into the frame, then install it on the base. If the design is voluminous, then it is better and safer to do all the work from the inside.
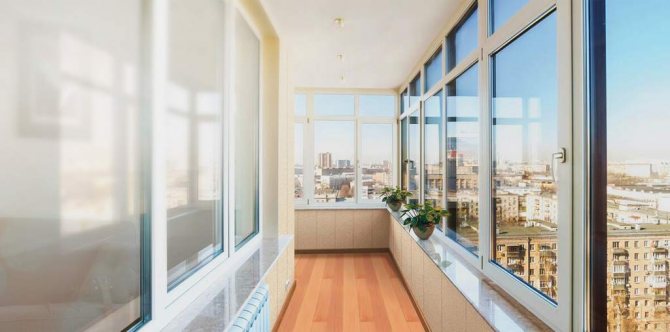
The advantages of glazing and insulation of balconies with plastic windows
Plastic windows are long-livers, because they will last over 40 years. The frames are equipped with a drainage hole. This means that they will not freeze even at low subzero temperatures.
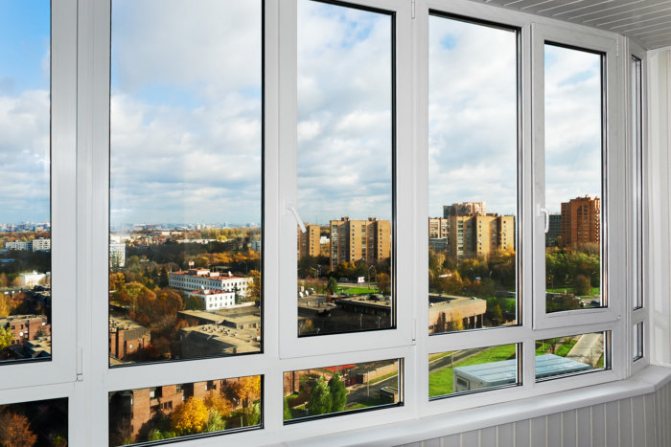
Plastic windows:
- provide a comfortable temperature regime on the balcony at any time of the year due to increased thermal insulation;
- have a high level of sound insulation, keeping the room quiet and comfortable;
- protect from drafts, precipitation;
- easy to clean thanks to high-quality fittings and easy opening (closing) of the sashes;
- stylish, therefore they will harmoniously complement the interior of the room, improve the appearance of the facade of the building;
- budget and reliable if installed correctly;
- cope with any load.
Attention! Plastic windows with parallel sliding sashes are more suitable for cold glazing, since they have low thermal insulation properties.
Stage two - design selection.
Of course, the process itself is not that difficult, considering that almost every man, to one degree or another, has little knowledge in the field of construction.
But, glazing without the help of specialists, you must be prepared that not only "dirty" work is done with your own hands, but also other accompanying work. One of which is the choice of design.
It makes no sense to say that there are standard and non-standard double-glazed windows. This is understandable to everyone. But the expected result from the design matters. The traditional division into warm and cold glazing. What is the difference?
- Cold materials are made using cheap materials, and warm materials are made using expensive materials.
- Cold glazing does not retain heat inside the room; the temperature is always the same as outside. Warm, however, assumes insulation, which will allow you to maintain room temperature at any time of the year. Read more in the articles - do-it-yourself interior decoration and balcony insulation and waterproofing.
Having dealt with the functional load, we will solve the issues with the material. Wood, aluminum, PVC. For today, these are all possible options for finishing the balcony:
- Wooden euro windows have a long service life, so you shouldn't worry that they will rot or dry out under the influence of external factors.
- Aluminum frames are cheap, lightweight and are most often used for cold glazing.
- If we take PVC, then they have a wide range in the field of additional functions - noise insulation, thermal insulation, imitation of a certain style in architecture, etc. Of course, they are heavier than aluminum ones and are used for warm glazing.
What about the room illumination? In addition to frames, you should pay attention to glass. You have a sunny side, and on the balcony you want to make a playroom? To prevent the baby's delicate skin from being exposed to ultraviolet rays, sun-protection glasses are used, which are covered with a film through a special technology.
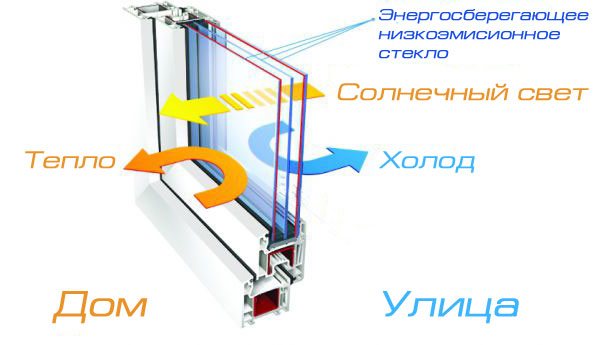
How Energy Saving Glass Works
This glass absorbs almost 99.9% of the radiation.Or maybe the balcony is a future greenhouse? For this, tinted glass is used, which does not allow the sun's rays to penetrate the glass and create a "magnifying glass" effect.
Colored glass, stained glass - these are ideas for specific styles of both interior and exterior. Well, and finally, energy-saving windows. At the factory, a thin layer of metal is applied to the glass surface, which retains heat inside the room.
Glass, construction, reinforcement - all preparatory issues have been covered, the decision has been made. It remains only to understand how you can glaze it at all. To do this, go to the next step.
Video - what is and what are the possibilities of energy-saving glass:
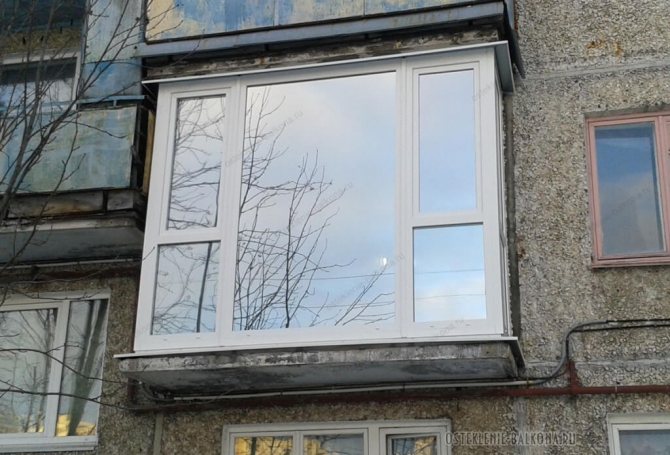
Glazing with extension (extension)
The best option when deciding to set up a winter garden on the balcony. The allowable overhang is up to 35 cm. Unlike standard glazing, you will need:
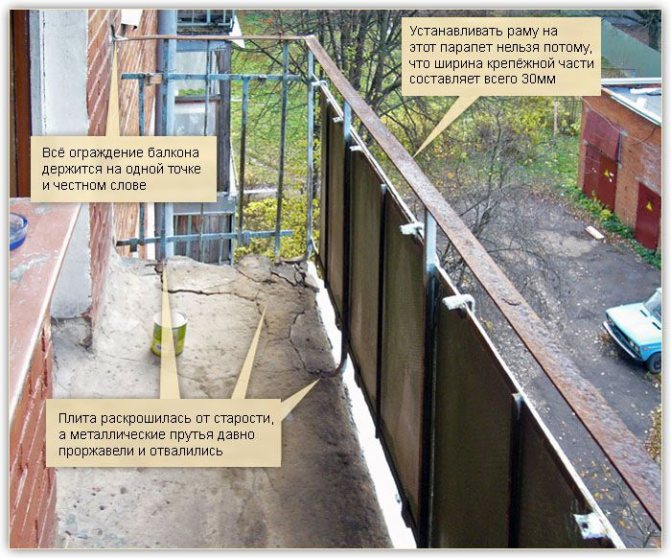
- strengthen the parapet (especially in old houses), because this type of glazing will exert the greatest load;
- equip a durable and large visor.
Double-glazed windows are installed on a metal structure, which is mounted additionally. Glazing is taken out on the windowsill, due to which the balcony area will increase.
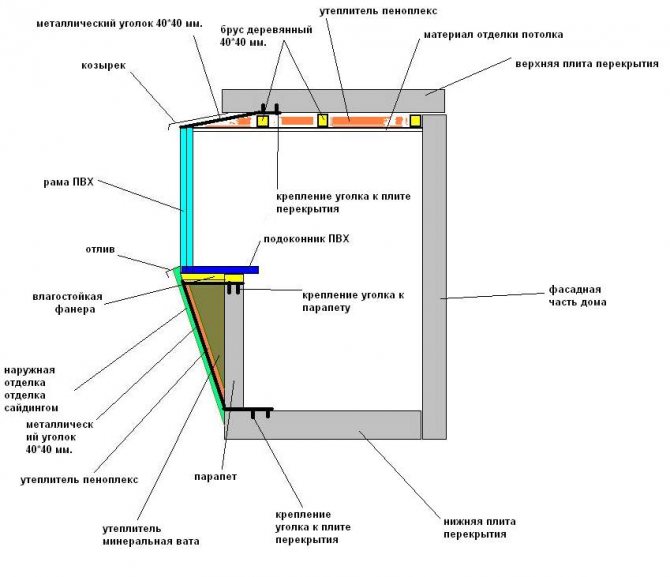
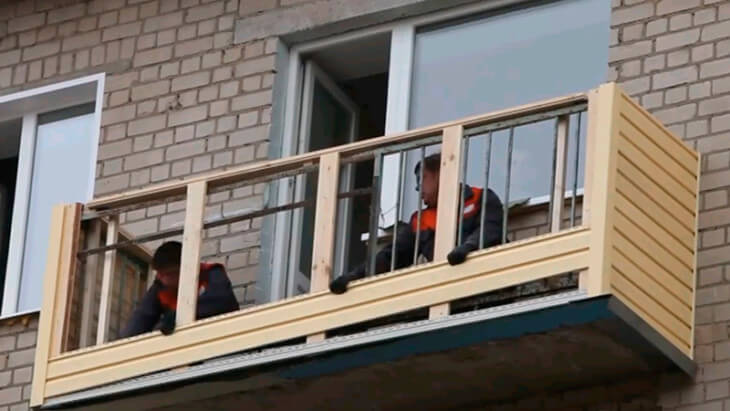
The take-out design is complex. First, the base of the parapet is prepared, metal corners are installed in the form of a kind of shelf or metal profile. Beforehand, wooden blocks are attached to the floor and parapet.
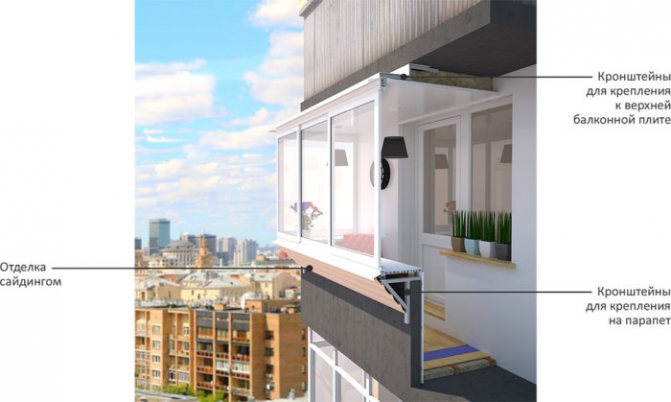
Outside the parapet, to give the frame the greatest rigidity, brackets are attached in the form of triangles or corners. Then they are fastened to the structure of the protruding part, to the load-bearing wall along the height of the entire loggia. With aluminum glazing, the frames are attached to the top.
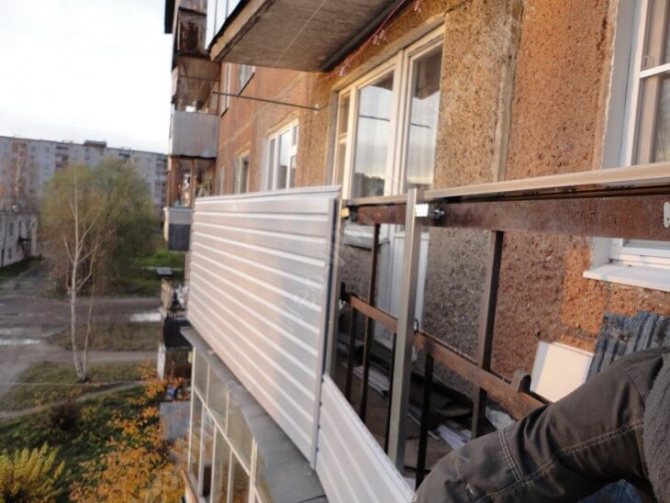
Attention! The width of the square increases by 200 - 300 mm, the upper part of the window sill, which is placed outside the balcony, by 250 mm. For expansion, a metal structure is used, attached to the wall of the balcony with an extension outside the frame. Then the frames are mounted.
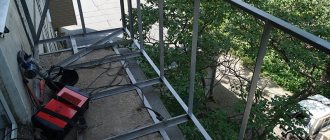
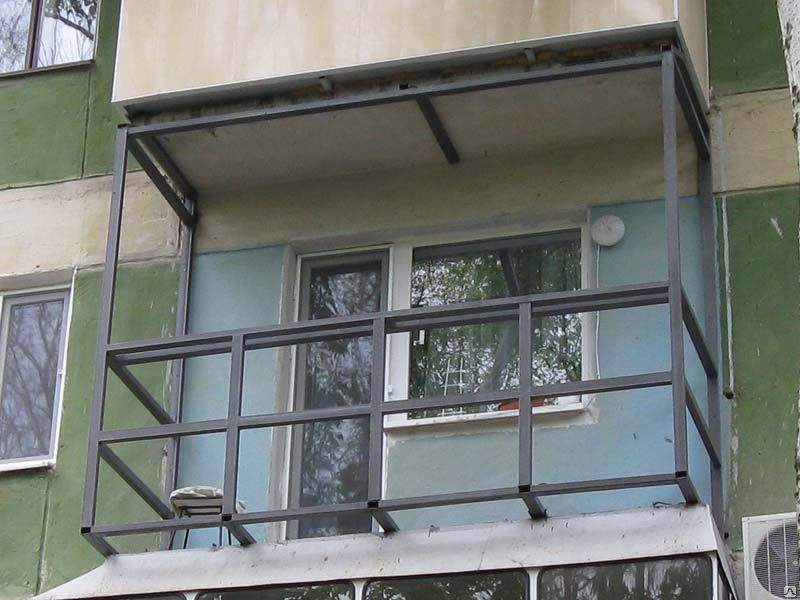
Metal reinforcement
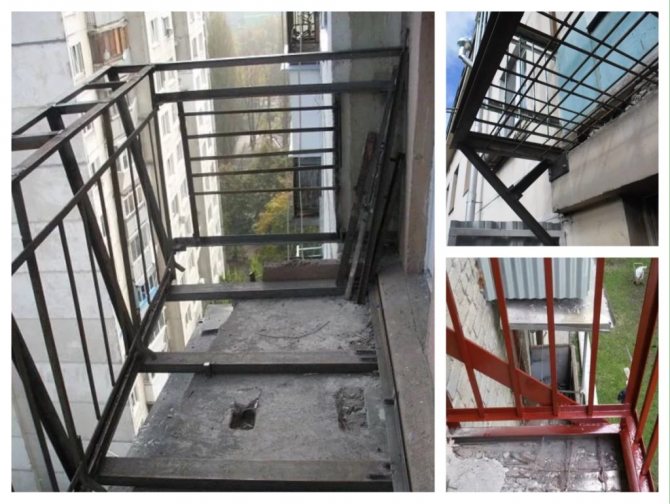
Metal reinforcement looks like this:
- If the technical condition of the parapet is acceptable (does not require radical measures), then its strengthening can be done by welding metal corners to the necessary sections of the old reinforcement.
- In case of severe wear, the old metal parapet is carefully detached and then replaced with a new one.
Options for strengthening the balcony parapet in front of the glazing Also, a good option for strengthening the parapet is the use of a building foam block, the qualities of which perfectly strengthen the balcony parapet.
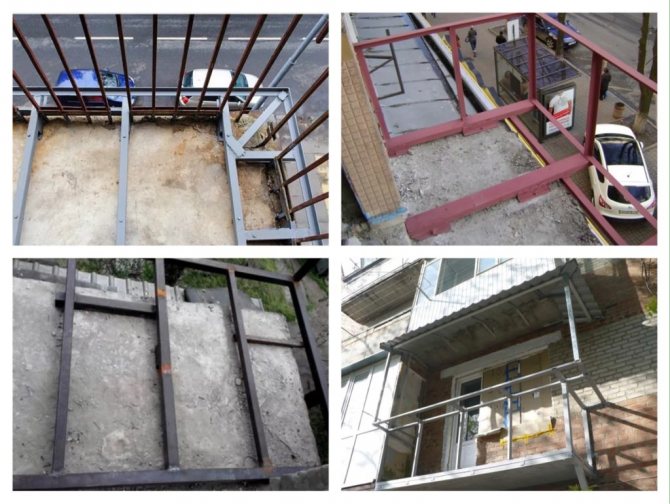
Reinforcement of the balcony structure
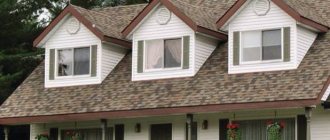
Glazing with roof
An excellent solution if the balcony does not have a roof. Tree leaves, snow, raindrops are constantly falling. If aluminum frames are mounted, then it is reasonable to install a dependent roof, attaching it to the wall of the house and the block of frames.
The design is lightweight and reliable. Although only suitable for a narrow balcony.
If it is decided to build an independent roof, then a wooden or metal frame is made without reference to the glazing. Glass can be inserted later if desired.
Glazing a loggia and roof is a dangerous occupation. It is better not to conduct it yourself and entrust it to the masters. Also, in order to avoid the breakdown of the structure by the wind, it is important to make the most accurate calculations for the frame and brackets.
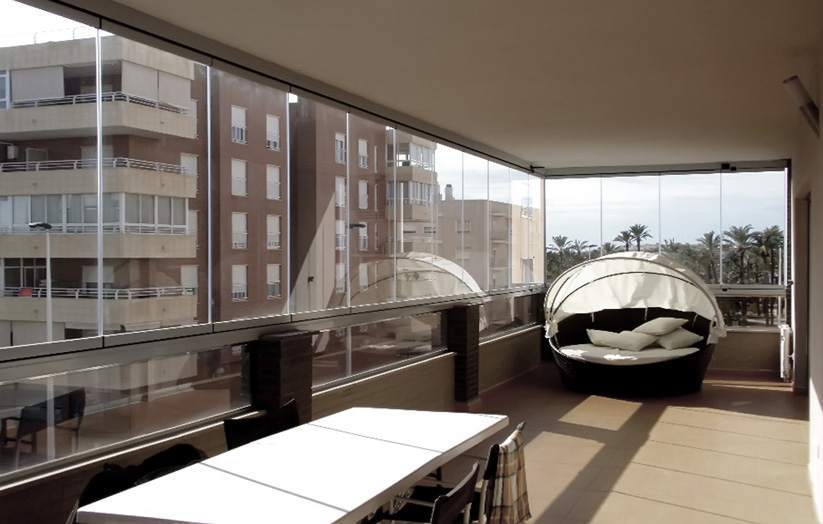
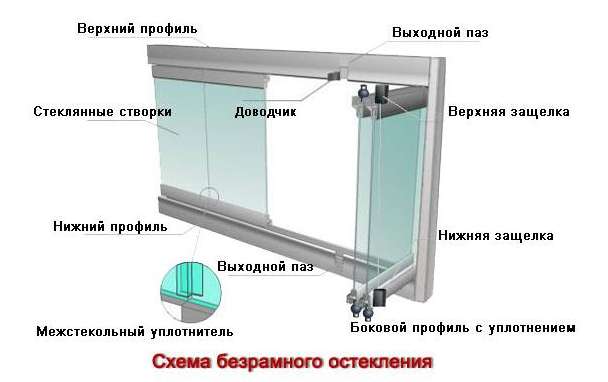
Technical features of frameless glazing
Frameless glazing is a sliding system made of transparent, stained or impact-resistant glass. Partitions and frames are not provided. Glasses are mounted on metal profile rails. A rubber seal is inserted between the leaves and the aluminum profile.
The system is lightweight, durable with a glass thickness of 8-10 mm. Although not warm.After installation, there will certainly be gaps, gaps due to the impossibility of fitting the glasses close to each other.
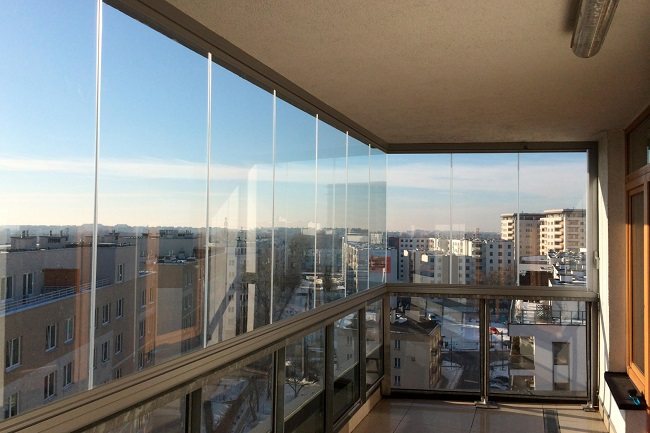
Professionals consider frameless glazing to be universal. The absence of frames allows the room to be heated by the sun and muffle the noise from the street. Although the temperature on the balcony is unlikely to rise by more than 2 degrees, unlike outside. Suitable for gardeners looking to grow plants.
Frameless glazing uses thick, tough, impact-resistant tempered glass with round brushed edges.
The advantages of this glass:
- withstanding high loads;
- the inability to get hurt.
The option is suitable for dark rooms when you want to add sunshine. But it assumes the complete demolition of the parapet. This means that we are already talking about reconstruction and you will have to contact the appropriate services for obtaining a permit.
Classification by construction type
The most common and available traditional way of glazing is an opaque finish on the bottom along the perimeter and a frame with double-glazed windows at the top. There are also frameless options, French balconies (panoramic), stained glass and custom designs.
Frameless glazing
The leaves are not framed by the profile visible to others. Visually, the structure looks like it is assembled from separate sheets of glass. Each section from above and from below is attached through guides to the supporting elements of the balcony, on the sides the blind sections are connected to each other on a sealant. Suitable mechanisms and seals are provided for the opening elements.
The advantage of frameless solutions:
- Maximum possible transparency as there are no posts or partitions.
- Glazed balconies in this way look original, light and airy.
- The safety of the structure is ensured through the use of durable impact-resistant glasses and reliable fasteners.
Disadvantages:
- Low thermal insulation. Energy efficient solutions are expensive and weigh a lot, which significantly limits their installation options.
- Relatively low absorption of external noise. Sounds louder than 10 dB, especially in the low frequency range, will be heard indoors.
- Qualified specialists are required for installation.
- The most flat plane is required around the installation perimeter.
How it looks - see our video:
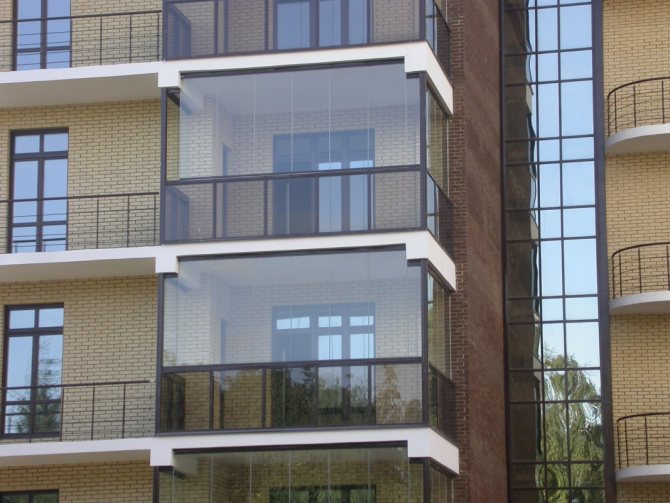
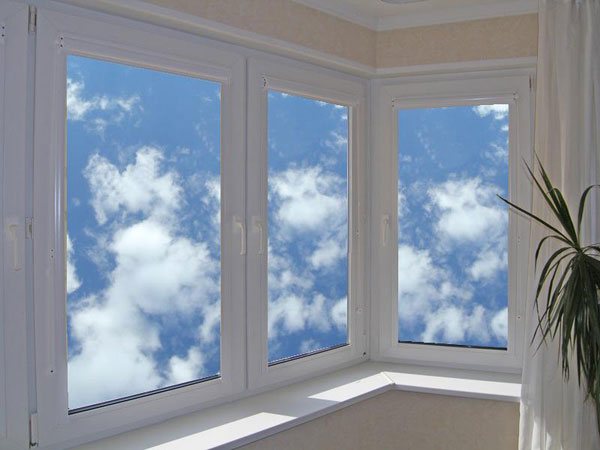
French type of glazing
The installation of French balconies is carried out directly on the lower concrete slab. If there was a blind fence before, it will be completely dismantled. Depending on the wishes of the customer, the structure can be assembled from solid blocks or from groups of elements. The filling is made transparent, tinted, matte, or double-glazed windows with an adjustable level of light transmission are installed.
Advantages of French type balconies:
- High degree of natural light during daytime, which helps to save energy.
- The absence of a bulky fence increases the usable area, in addition, such structures themselves look more spacious.
- High level of energy saving and noise absorption, which allows equipping warm balconies.
Disadvantages:
- Relatively high price, especially when using special double-glazed windows as filling (energy-saving films, light transmission adjustment).
- In the summer, excessive heating of the room is possible, in particular on balconies installed on the sun-side.
- The sealed design requires additional ventilation.
- Warm balconies are usually made of PVC profile, glazed with massive energy-saving double-glazed windows. This places a serious load on the base plate, which must be taken into account when designing.
Coordination of glazing of a balcony / loggia
If the glazing (especially with the removal) is not coordinated in advance by contacting the BTI (Urban Planning Department), the work performed may become illegal.
First, the specialist must:
- come, inspect the balcony slab;
- draw up a protocol;
- issue an opinion and permission with the designation of the characteristics of the house.
The next stage after glazing is reworking the plan for a house or apartment with the introduction of the changed characteristics.
Reference! The work being carried out involves changes in the design, therefore, the glazing of the loggia is equated with redevelopment. You must take permission. If you do not first agree on the work with a specialist, then you can get a fine and you will not be able to sell the apartment. Glazing will be considered unauthorized. Moreover, it leads to a heavier structure as a whole. This means that it potentially increases the likelihood of a complete, partial collapse.
Typical repair errors
Many owners start insulation, but do not take into account the nuances of the work. To extend the service life, it is required to clearly outline the work plan and avoid typical repair errors.
These include:
- Loggia glazing on brackets.
- Using only one layer of insulation.
- Lack of vapor insulation.
- Use of a sealant without the use of protection.
- Warming of warm areas.
- Execution of work without permission to work with load-bearing structures.
In conclusion, we suggest watching a short training video on insulating a balcony or loggia.
How and how to properly glaze a balcony
The ideal glazing option for year-round use of the premises is a metal-plastic construction with high thermal insulation qualities. Although it is better to entrust the installation to specialists.
Plastic double-glazed windows are good because they do not need additional insulation of the balcony. The level of thermal protection will depend on the thickness of the glass units, the width (gap) between them.
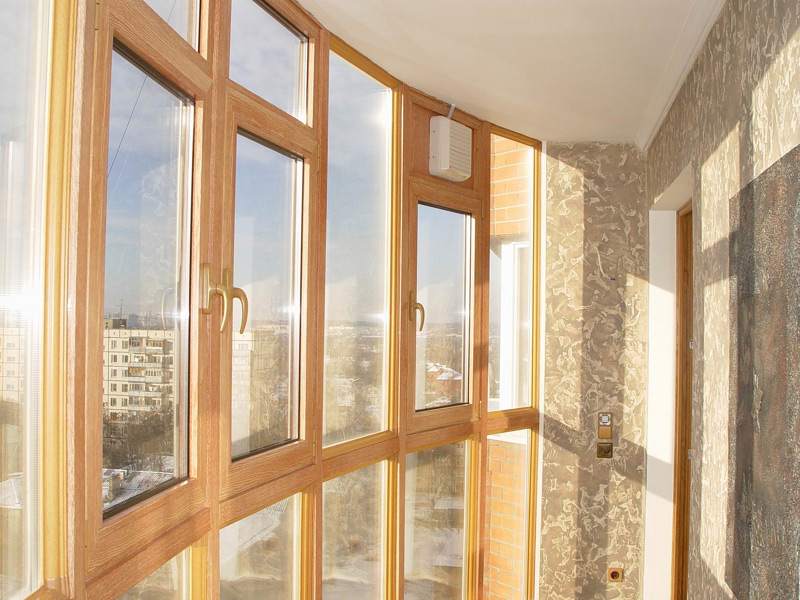
The current option is an aluminum profile - a light material that does not load on weak floors in old houses, which allows you to visually expand the space due to a frame with an extension. The profile, unlike plastic, wood will let in a lot of light into the room, allow you to use the balcony for a completely normal living space.
To give the room a panoramic view, frameless glazing can be preferred. Instead of frames - narrow, metal profiles like guides.
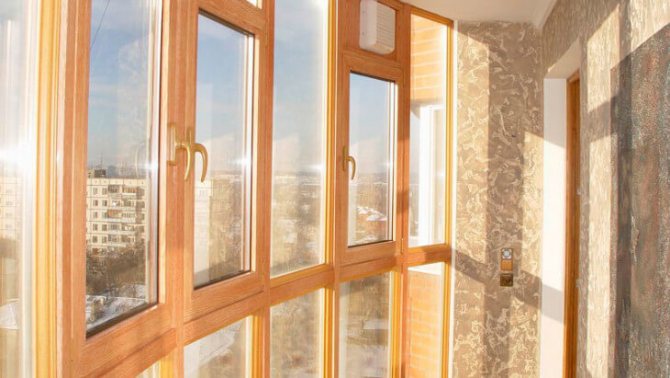
Wooden window structures are easier to install yourself.
Wooden window construction
Let's consider in the form of step-by-step instructions:
- Measure window openings.
- Mount a wooden box, fix it at the level of the upper beam and balcony railings.
- Attach the side rails to the metal brackets to the right and left wall.
- Install lathing for interior decoration.
- Sheathe the ceiling, wall surfaces and floor with clapboard.
- Install frames. Attach brackets or support posts made of wooden beams treated with an antiseptic (sealant) to the walls.
- Remove the glass from the frames.
- Carry out frontal and then side glazing without distortions.
- Place the frames on the anchors, self-tapping screws for fixing.
- Seal the seams with polyurethane foam.
- Align the double-glazed windows, then the sashes so that the glazing beads fit snugly against the frames.
- Treat the cracks with insulating material, polyurethane foam (tow).
- Install casters (after thermal insulation).
- Treat wooden areas with a protective compound in several layers.
Stage five - step-by-step instructions for glazing.
Of course, the balcony should be freed from everything that was previously there: chairs, flowers, linoleum, tiles, old rubbish and so on. The question of strengthening was touched upon earlier, so we will omit the description of this procedure.
Installation of wooden windows.
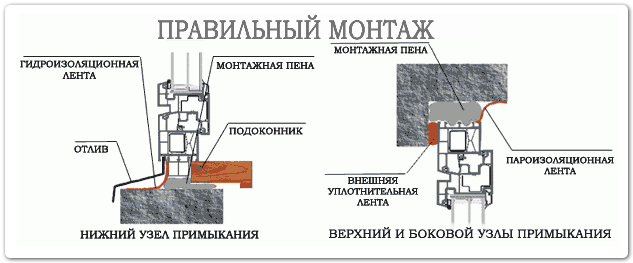
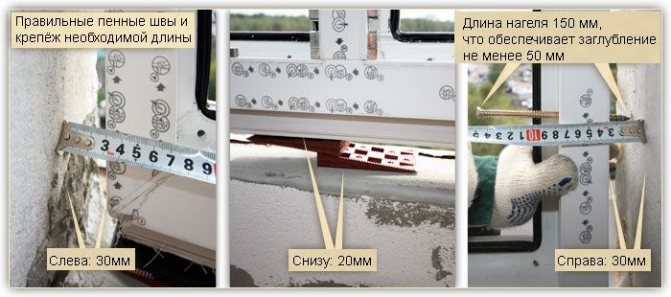
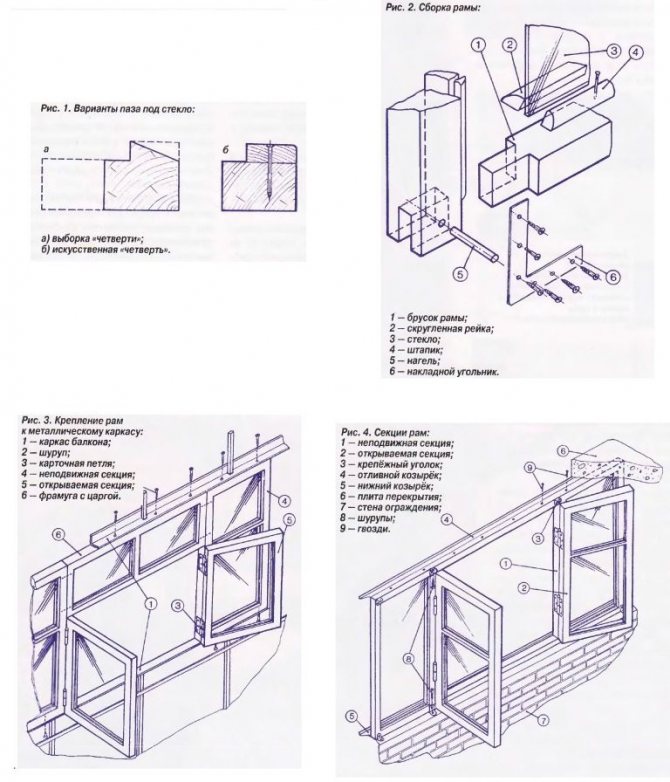
Correct installation according to gost
Installation of the frame.The bars that serve as the base are pre-treated with a sealant (but only the mounting surface). Further, a wooden structure is constructed along the perimeter using mounting dowels.
Installation of windows. Frames must be glazed, as the glass can simply break. Installation is carried out in the following sequence: frontal structure - side elements.
After - it is obligatory to seal the seams with the help of sealant and polyurethane foam. When everything hardens (at least a day), you can glaze. But first, all grooves must be treated with silicone sealant. The beads, with which the glass is fixed, must firmly press it against the frame.
Video - how to glaze a balcony with wooden windows:
Installation of an aluminum frame.
- We eliminate all unnecessary things, namely: we remove all the opening elements, so as not to complicate our life, we remove the glazing, as in the previous case.
- Plates for mounting are attached to the frame (with self-tapping screws for metal), with a step of 700 mm or more.
- Installation of the frame in the opening, followed by alignment (horizontal, vertical, plane).
- Fastening the mounting plates to surfaces with dowels.
- We hang the sash, return the glass.
- All holes and gaps are eliminated with polyurethane foam.
Video - how to install an aluminum frame with your own hands:
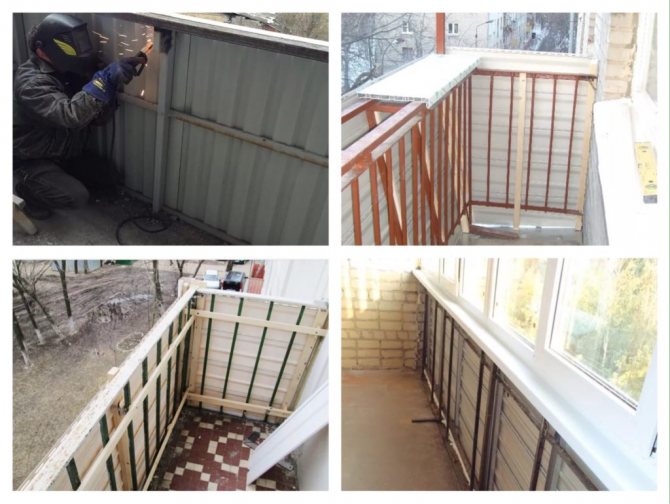
Preparatory work
Reconstruction activities begin with the preparation of the premises:
- the parapet is checked for cracks, cracks;
- gaps are measured, the necessary pieces of galvanized sheet are cut off;
- embedding is carried out with fastening to self-tapping screws after placing under a tree from the outside;
- the old parapet is demolished, a new one is erected in case of a disapproving decision by a specialist;
- laid out in a width of 1 brick, so one by one on a sand-cement mortar;
- all work is monitored with a level to obtain a completely horizontal structure, problem-free glazing and without distortions;
- a frame is made, if necessary, on which the frame will be attached to self-tapping screws, dowels along the perimeter of the opening;
- the sashes are removed from the frame and the retainer is removed from the upper sash hinge.
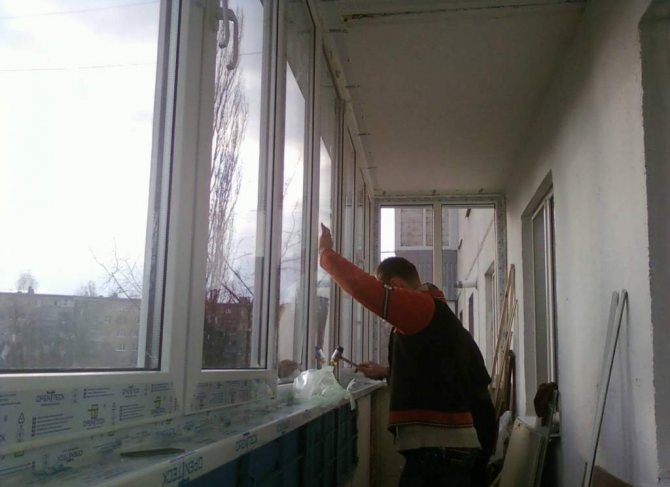
How to install metal-plastic frames with your own hands

Step-by-step actions:
- Prepare slats (10-15 pieces) to align the parapet line and optimally align the window to the horizon.
- Remove the double-glazed windows from the frames, laying them on thin foam rubber.
- Remove the sashes from the window hinges.
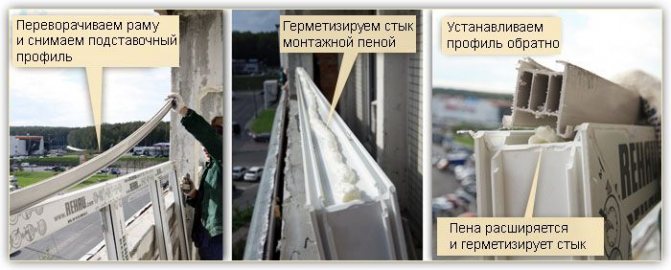
- Mount the base profile by turning the frame 180 degrees.
- Insert the profile into the groove, fix on the underside of the frame with a wooden mallet.
- Mount frame fasteners, 15-16 cm away from each edge of the frame.
- Fasten the plates to the top panel by placing them on the screws.
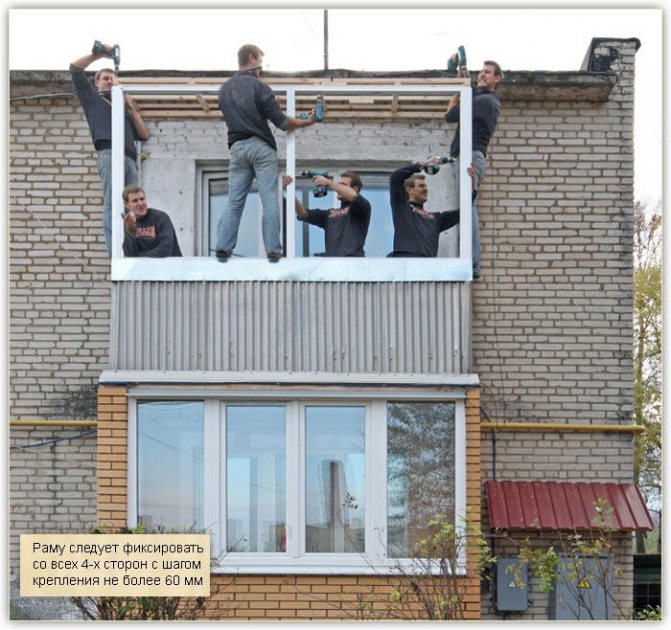
- Install the windows by fixing the frames to the parapet. Attention! The stage is dangerous, therefore it is better to carry out with an assistant.
- Fix the upper frame level, then all other sides. Plant on self-tapping screws, maintaining a distance of 6-7 cm.
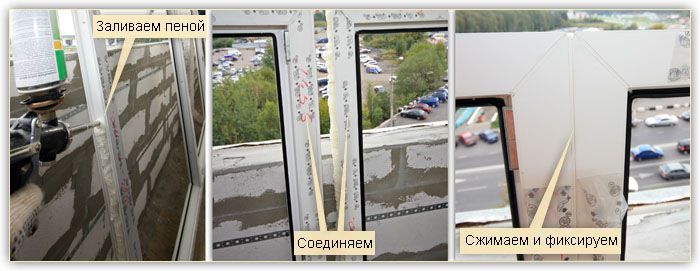
- Align the connected frames using a plumb line and a level.
- Seal the gaps and cracks on the outside with sealant.
- Mount the window sill, then - slopes and ebb.
- Treat windows, joints around the perimeter with silicone.
- Insert double-glazed windows, secure.
- Hang the sashes.
The sequence of works for the installation of an aluminum frame
Let's take a closer look at the installation of aluminum frames on the balcony. First you need to prepare the necessary tools for installation.
Instruments
For work on cold glazing, you will need the following tools and materials:
- hacksaw for metal;
- roulette;
- drill;
- self-tapping screws;
- screws;
- screwdriver;
- brush seal (Schlegel);
- weatherproof silicone sealant;
- polyurethane foam;
- hex wrench.
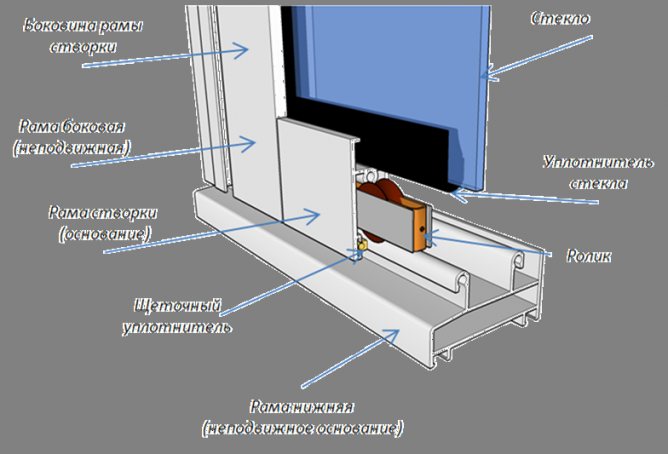
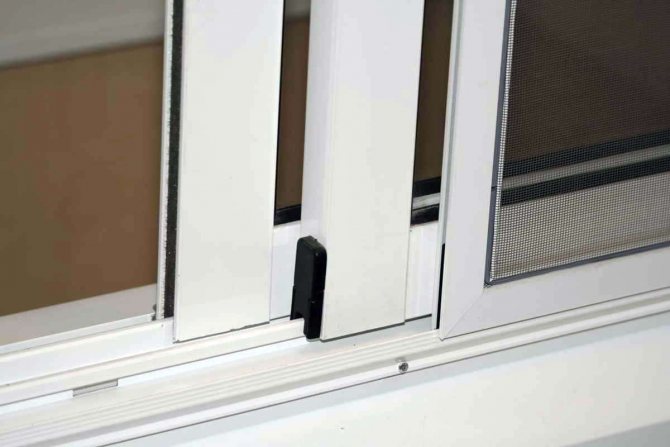
Aluminum sliding frame device
The balcony is glazed with an aluminum profile in this order:
- dismantle the old frame (if any);
- clean the parapet and slabs from debris and cladding fragments;
- assemble a frame from fragments;
- fix the assembled structure to the parapet using galvanized self-tapping bolts and mounting loops;
- install guides for the sash, for which measure the length of the horizontal sides of the balcony opening, transfer the dimensions to the guides and cut them out
- polish the place of the cut with a file;
- drill holes in the opening for self-tapping screws with a step of 0.3 m. install the guides with screws. The gap between the outer edge of the frame and the guide should be no more than 5 cm so that the frame does not freeze during the winter season;
- install a brush seal along the contour of the flaps;
- insert the sash into the upper guide, and then use the rollers into the lower one;
- put a steel visor under the mounting hinges, covered with a decorative and protective polymer coating;
- connect the visor to the balcony slab using self-tapping screws;
- draw a low tide on the polymerized steel strip. Cut it out with roofing shears;
- install the ebb outside the frame;
- seal the joints of the ebb and the visor with a weather-resistant silicone sealant;
- fill the corners between the frame profile, balcony slabs, walls and parapet with polyurethane foam;
- to mount the glazing of blind sashes. To do this, install the clamping strips for a tight joint of the frame with the glass.
Installing a sliding aluminum frame on a balcony is the most acceptable and economical option for balcony glazing. Detailed instructions will help you to install it yourself without much hassle.
https://youtube.com/watch?v=CCxjajGSOJY
Approximate cost of glazing
The cost depends entirely on:
- type of construction and double-glazed windows;
- balcony conditions;
- number of storeys of the house;
- the type of profile you are using.
The price for the cold aluminum version is lower. Wooden, plastic warm glazing will cost more.
When arranging a turnkey loggia, the price includes the following types of work:
- calling a specialist;
- dismantling, removal of old glazing;
- preparation of the base for installation;
- erection of a parapet or roof (if absent)
- strengthening of load-bearing elements;
- removal of the roof and balcony;
- production, delivery of window systems;
- installation of window blocks with attachment of the frame, sealing of adjoining installation sites, ebb canopy and window sill;
- siding finishing;
- carrying out interior finishing works (insulation, installation of slopes and electrical wiring).
Tips & Tricks
- Before glazing a balcony, it is important to choose a suitable profile.
- All installation options are associated with certain difficulties in execution, therefore, they are carried out in a certain sequence and are adjusted to the structure of the loggia.
- Measurements are taken, calculations are performed after the profile selection. Then the old glasses, frames and fixtures are dismantled, starting from the ceiling of the balcony and up to the parapet.
- It is worth making all measurements with maximum accuracy in order to avoid problems during installation. Sometimes a few millimeters spoil the installation.
- Think over how the sash will open in the future. Wouldn't you have to risk your life to reach the distant blind windows?
- It is advisable to hide the external joints with the help of additional fittings so that the finish of the double-glazed windows looks smooth and beautiful outwardly.
- It is imperative to align, adjust the openings during installation with respect to the bottom wall in order to avoid bulging of the cladding, leaving gaps.
- Full glazing is carried out only after the expert has issued a final permit.
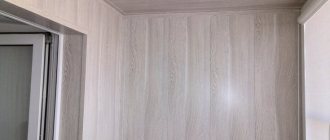
Siding
In addition to the glazing of the balcony, I was interested in the option of the external cladding of the balcony. And for this I chose siding. Such material is the most optimal, it is durable, consists of PVC and is not afraid of sunlight, precipitation. In addition, it enhances the thermal insulation on the balcony. Siding has a wide range of colors, and the manufacturer claims a service life of at least 50 years.
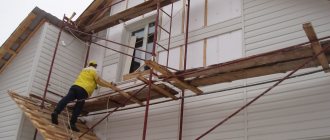
Balcony siding with your own hands
Advice! For those who decide to carry out all the work on glazing the balcony on their own, you need to know that it is better to perform the outer cladding of the balcony before glazing. This will save time and money. After all, after glazing the balcony, it is not so convenient to carry out external cladding, and the call of the masters who, with the help of climbing equipment, will do all the work, will cost a lot of money.
It is quite possible to perform siding work on your own, but in the event that you are confident in your abilities and have the skills in such work. Otherwise, it is better to entrust all work on cladding the balcony with siding in apartments to qualified specialists who have professional equipment.
Balcony decoration with siding
The instructions for covering are described by me below:
- First you need to build the fastening belts from wooden beams - upper and lower. In the future, siding will be attached to them.
- We fasten the beams to the wall using liquid nails. Connects them together with iron corners
- We proceed with the installation of siding - you should start from the sides. Do not overtighten the screws; they should be left in the middle of the hole.
- After completing the installation of the siding, we hide all the screw heads with the platbands
Balcony cladding with siding