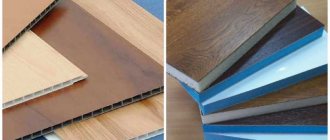
Sandwich panel slopes
The sandwich panel consists of two plastic PVC sheets between which there is a layer of insulation. Extruded polystyrene foam is used as a heater. The thickness of such panels can be 6, 8, 10, 16, 24, 32 mm.

Installation of such panels is quite easy, and the window slopes made from them are neat and have good thermal insulation.
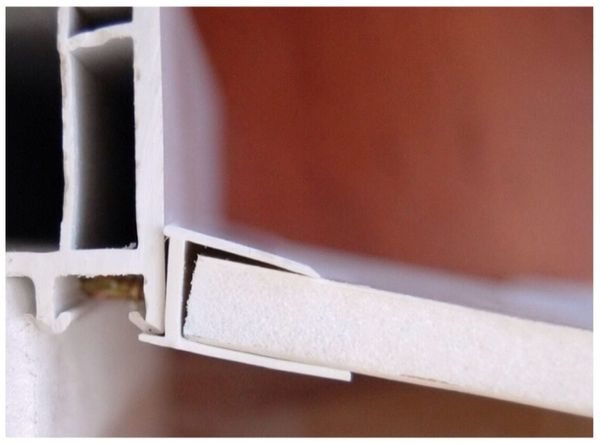
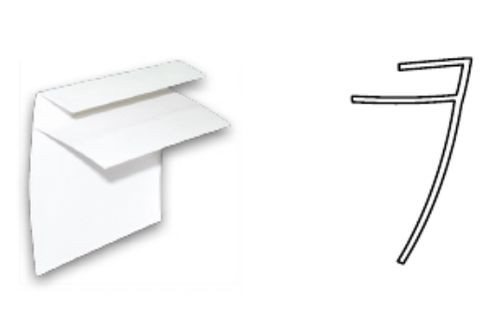
The sandwich panel can be installed in two different ways: using the starting U-shaped profile and without it. In the case of using a starter profile, the sandwich panel is installed inside it.
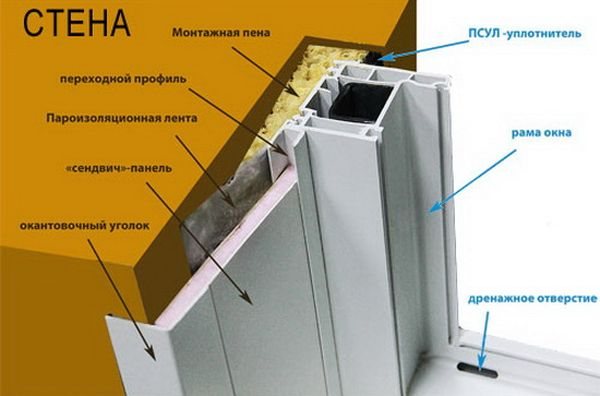
This figure shows the installation of a sandwich panel using a starter profile. In the figure, it is designated as a transition profile.
The choice of this or that installation method depends on the personal preferences of the wizard and the availability of free space at the ends of the window block. But if we consider the installation of slopes with maximum insulation, then the option using a starting profile is preferable. Since this type of installation of a sandwich panel allows you to move it away from the wall and lay insulation between the wall and the slope.
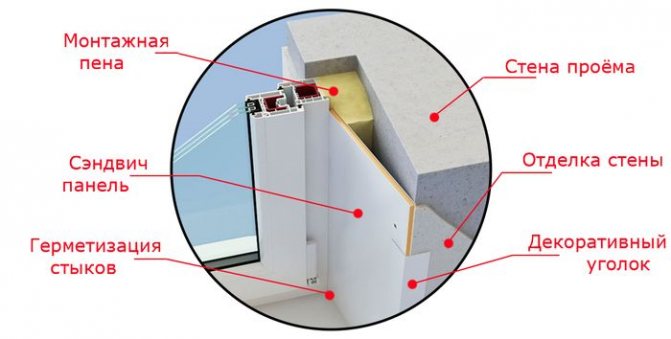
This figure shows the installation of a sandwich panel without a starter profile. The sandwich panel is installed at the end of the window block.
When installing slopes from the end of the window block, some craftsmen choose a groove in the foam and install the panel into it. Here I would like to draw your attention to the fact that if the installation of the window is made in accordance with GOST, then it is not possible to choose mounting foam, since it must be covered with a special vapor barrier tape. If there is no such tape, then the foam should not be strongly chosen, since this violates the thermal insulation layer. The panel must be wound behind the end of the window literally by 2-3mm. Based on this, the foam should be trimmed no deeper than 2-3 mm from the front plane of the window.
We recommend reading:
How to properly install a plastic window
There are two types of starter profile: regular U-shaped and clip-on profile. The clip profile snaps into the groove at the end of the window block and thus it is fastened. The U-shaped profile is attached using small self-tapping screws directly to the edge of the window block.

Installation diagram of the initial profile.
Installation of a U-shaped initial profile at an angle to the window block.
Depending on how the slopes will be installed, at an angle to the window or perpendicular, select the appropriate starting profiles. They can be straight or slightly angled.
An example of an initial profile for installing sandwich panels.
Stages of installation of slopes from sandwich panels
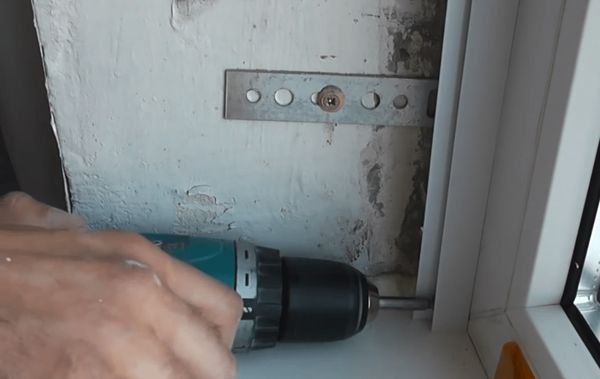
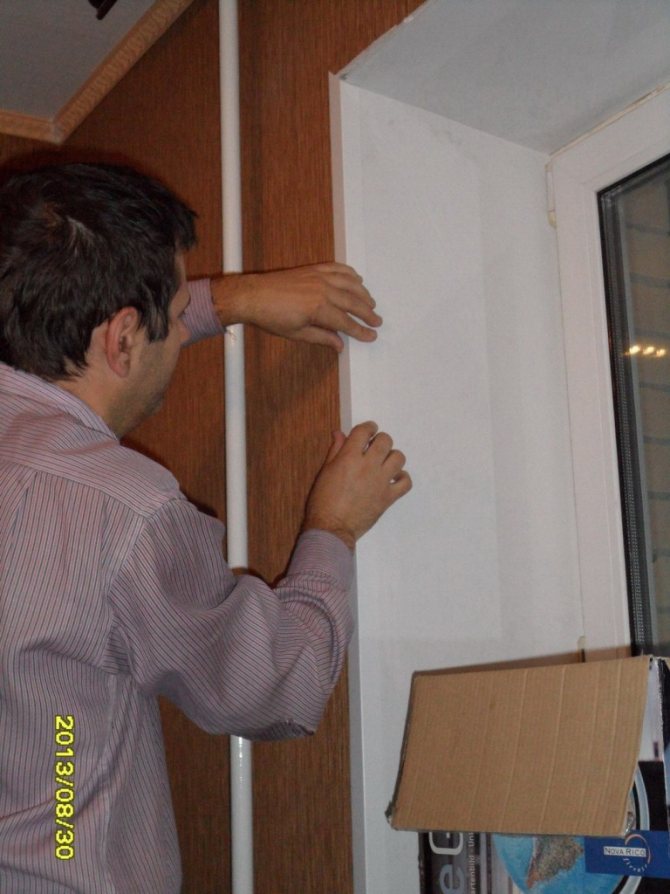
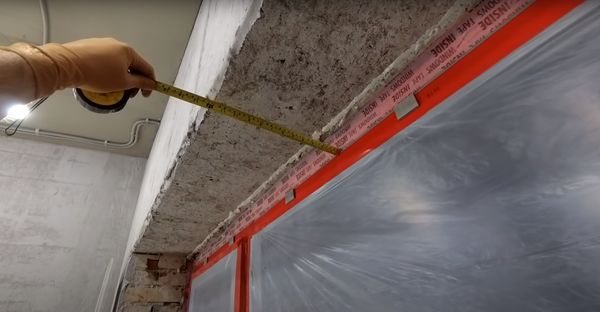
We measure the required length of the initial profile along the window block, cut it to the desired size and fasten it along the perimeter of the window.
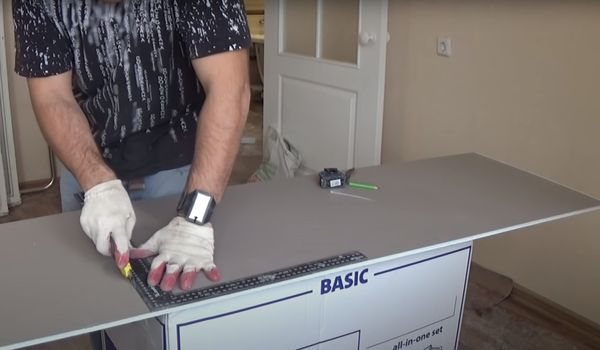
We measure the length of the sandwich panels. We start from the top. We mark it with a square and cut it to the desired size.
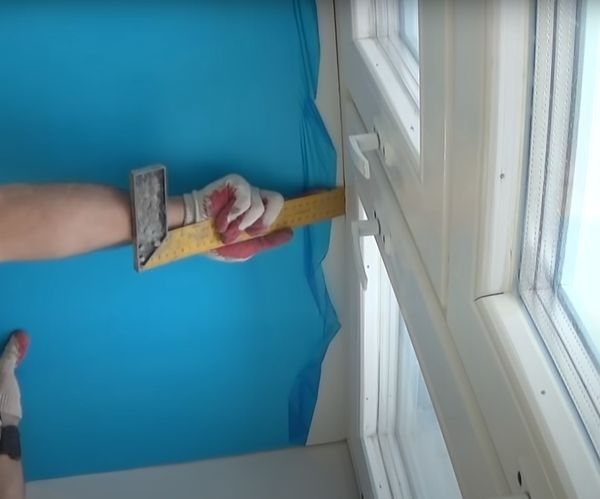
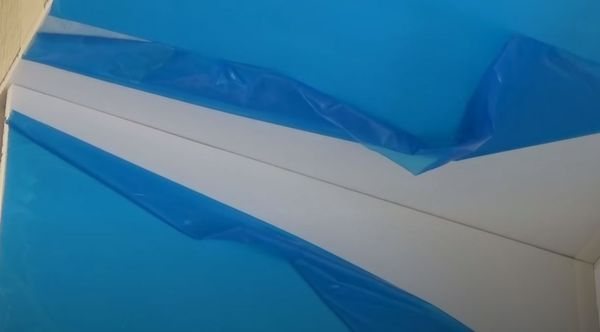
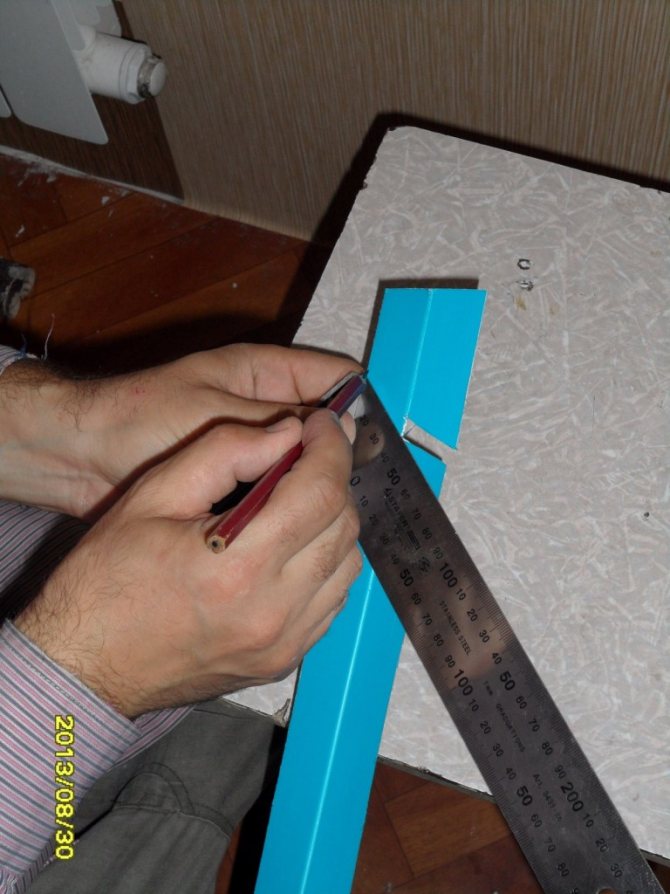
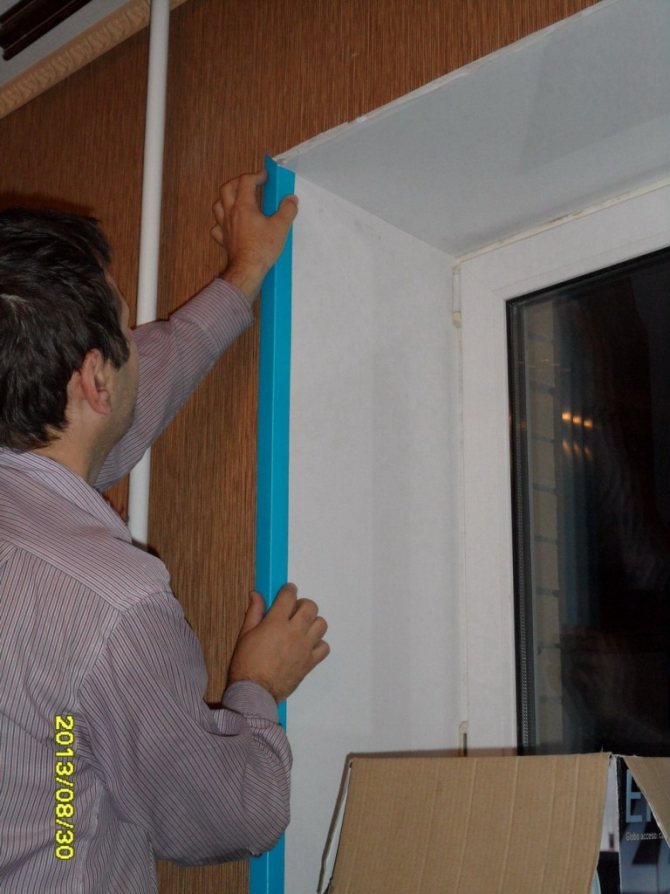
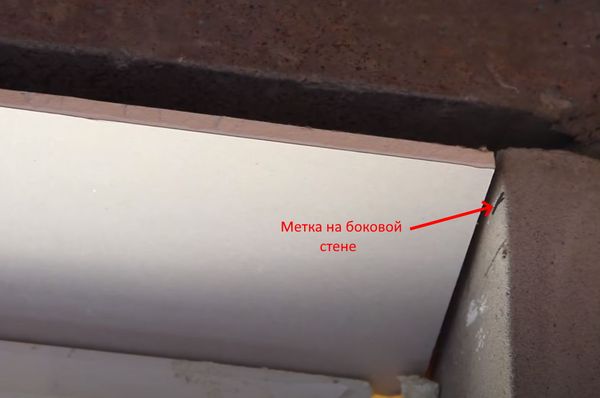
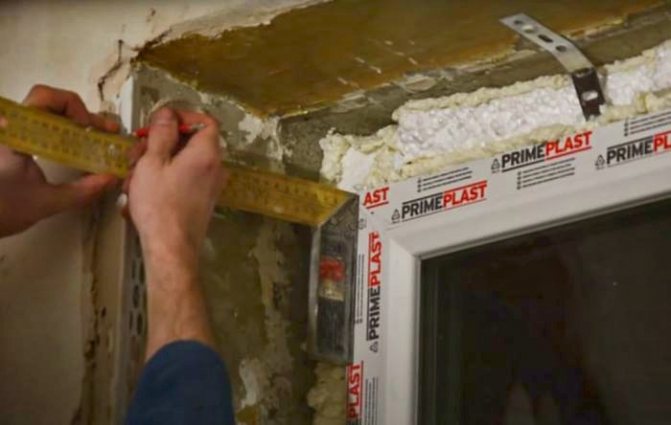
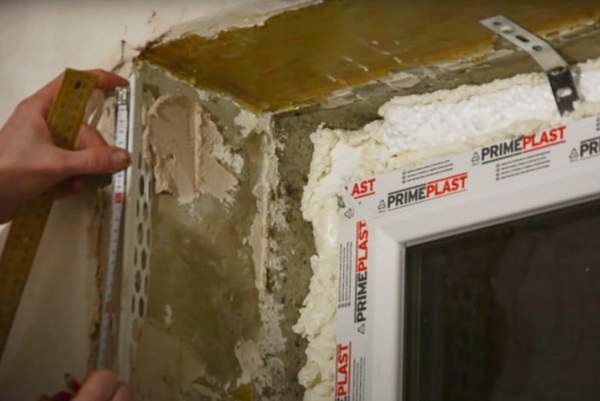
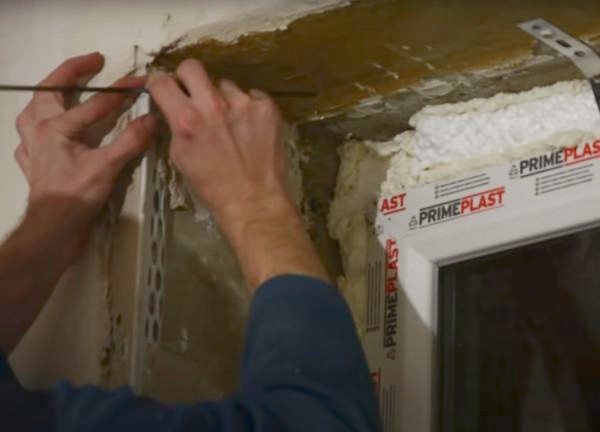
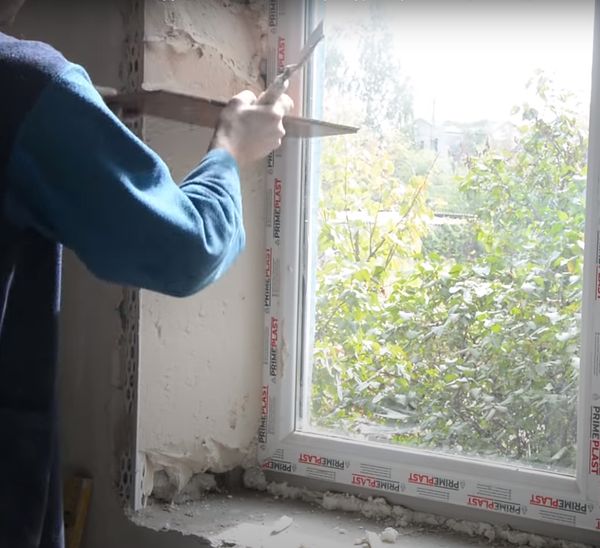
We mark the so-called angles of dawn using a square and a tape measure. Basically, the deviation of the slope from the perpendicular to the window block is selected in the range from 2 to 4 cm per slope width. If you plan to install the slopes perpendicular to the window, then just apply a square to it and draw a perpendicular line. How exactly to install the slopes, perpendicular to the window or at an angle is a matter of taste for a particular person.
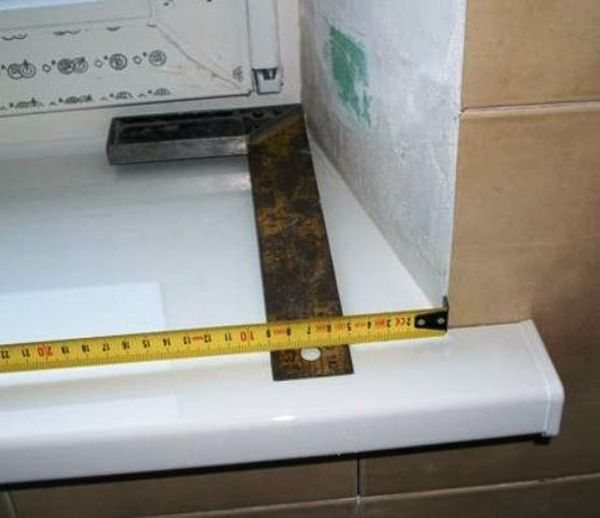
The photo shows that the deviation of the slope from the perpendicular line to the window is 5 cm.
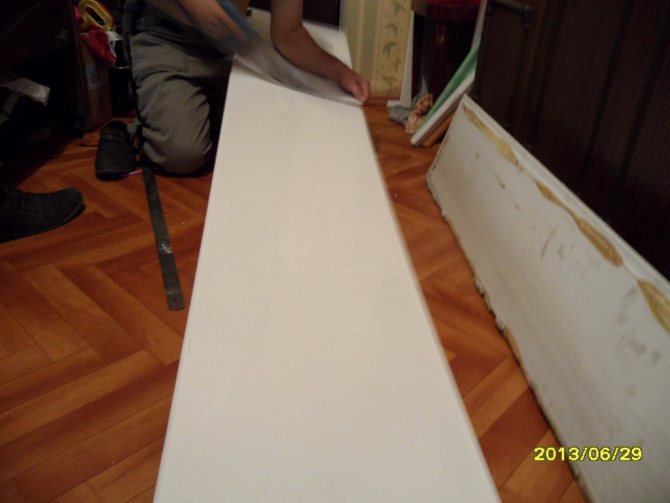
We install the panel in place. The side of the panel, covered with a protective film, should be directed towards the interior of the room. Before installing the panel, the protective film must be slightly removed from the edges, since after the panel is in place, it can be problematic to do this.
When installing the panel into the initial profile, help with a spatula or any other flat tool. The spatula is inserted between the panel and the wall of the starting profile and thus helps to snap the panel into the profile.
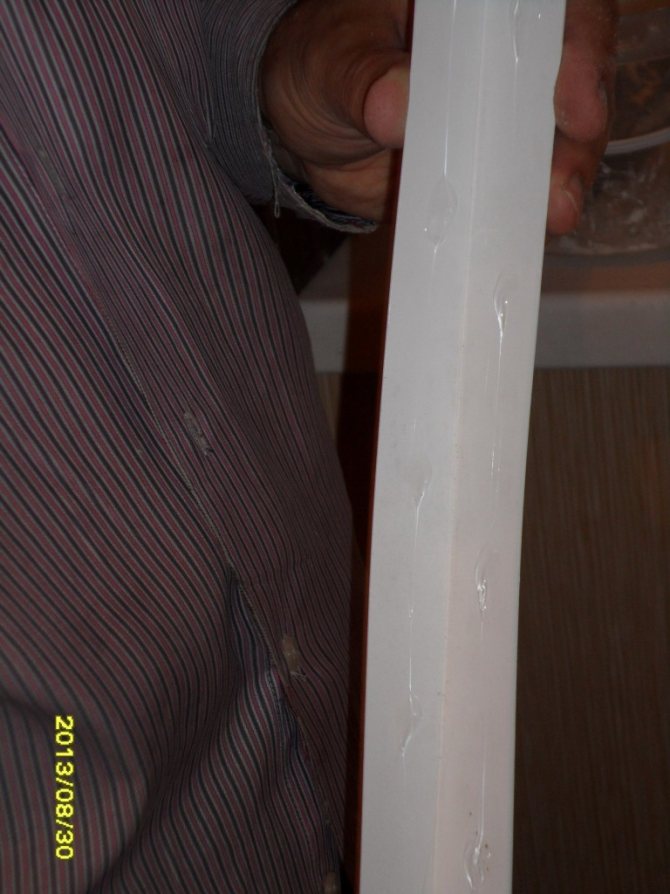
We apply polyurethane foam in the space between the panel and the wall. Do not apply a large amount of foam as it expands and can squeeze out the panel. If the distance between the panel and the wall is large, then it is better to fill it with some kind of filler, for example, glue a piece of foam plastic to the foam, and then glue the panel to this foam using the same construction foam. Thus, additional insulation will be obtained and the panel will not squeeze out a large amount of foam.
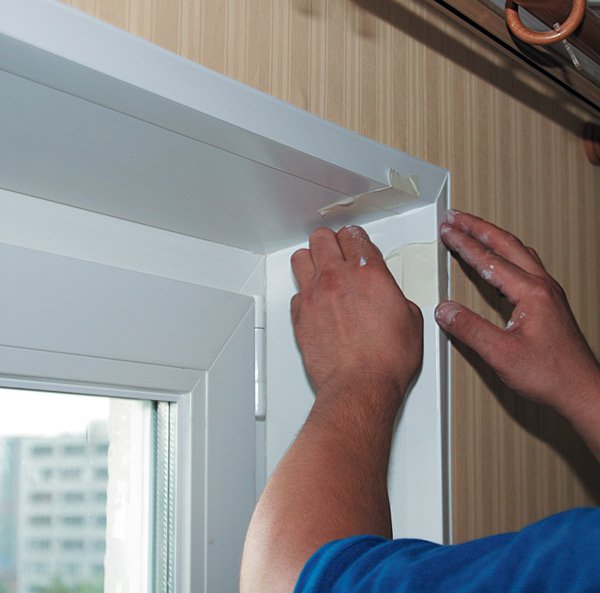
Align the unfixed edge of the panel according to the previously made markup. We fasten the panel to the wall with masking tape. Before applying masking tape, I recommend checking it somewhere on an inconspicuous place. In some cases, it can stick strongly and can only be partially torn off with wallpaper. If this is just such a case, then you need to take scotch tape from another manufacturer.
After the construction foam has completely solidified, the masking tape can be removed.
We glue the edge of the panel to the wall with masking tape.
We mark and cut to size the side sandwich panels. If the slopes are made with dawn angles, then do not forget to mark them on the panel.
The installation of the side panels is done by analogy with the top panel, but there is a slight nuance here. The vertical installation of the panel should be controlled using a building level, and the angle of dawn according to the previously applied markings on the windowsill. Also, the side panels must be lifted so that they are close to the top panel, and we will close the possible gap that forms between the bottom edge of the panel and the window sill with a segment of the starting profile. To do this, put the starting profile on the lower edge of the panel and move it close to the window sill. It is not necessary to fasten this segment of the starting profile, as it will sit tightly on the sandwich panel.
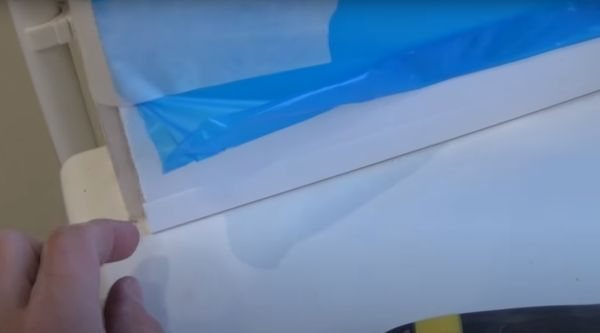
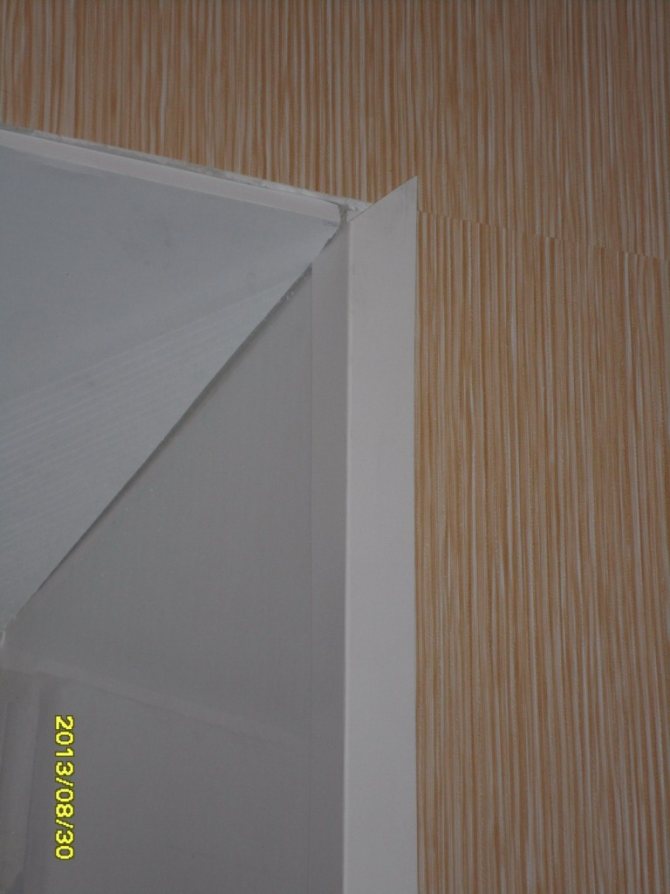
The photo shows a side sandwich panel. The bottom of the panel goes into the starting profile, which is adjacent to the window sill.
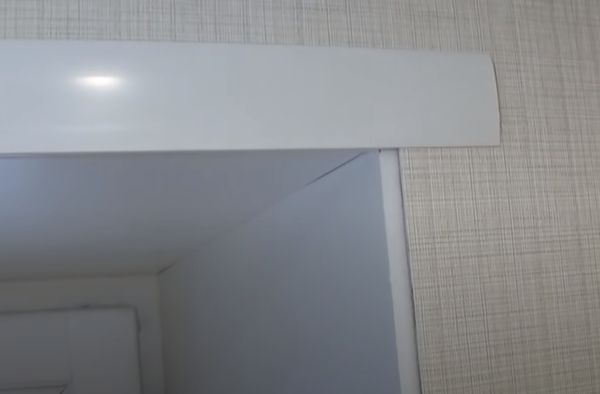
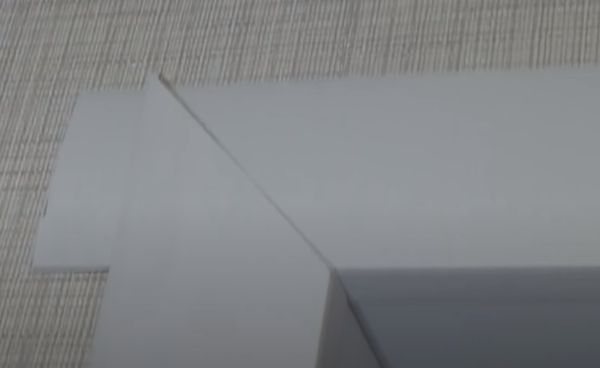
The photo shows the junction of the top and side panels.
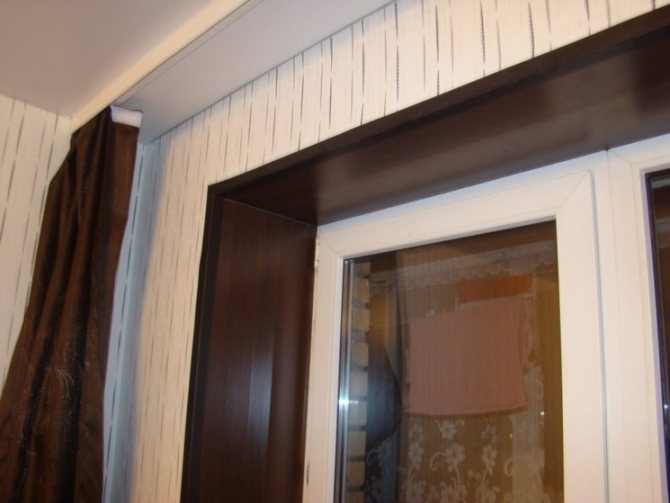
We install framing decorative corners. We use a special F-shaped profile as corners. In addition to the F-shaped profile, simple plastic corners and universal platbands, consisting of two parts, are also used to frame the corners.
F-profile. A sandwich panel is inserted into it. It serves as a decorative window trim (casing).
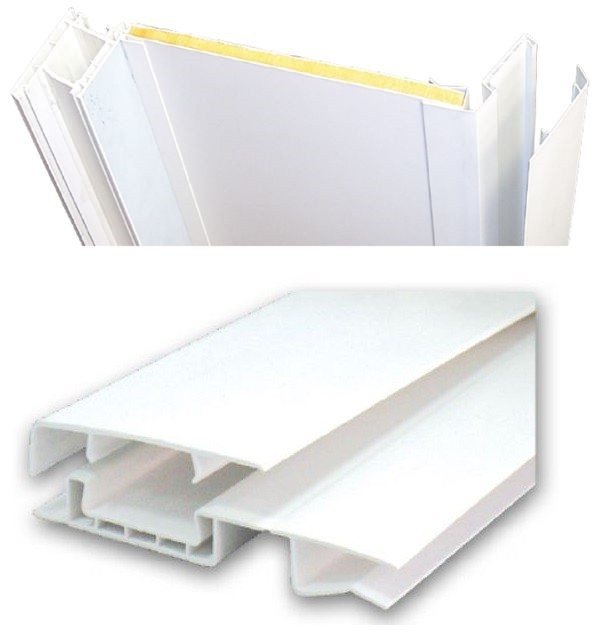
Universal platband for framing slopes made of sandwich panels.
Before installing the F-profile, measure its length. We start from the top. The length of the top should be equal to the distance between the side slopes + two widths of the F-profile + 2 cm of stock. Extra centimeters will be cut off after installing the side corners.
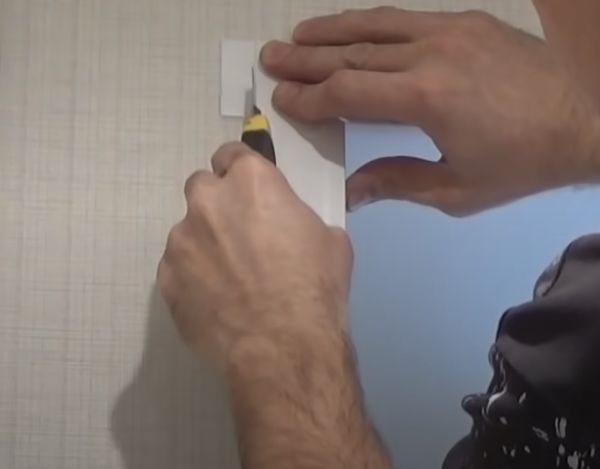
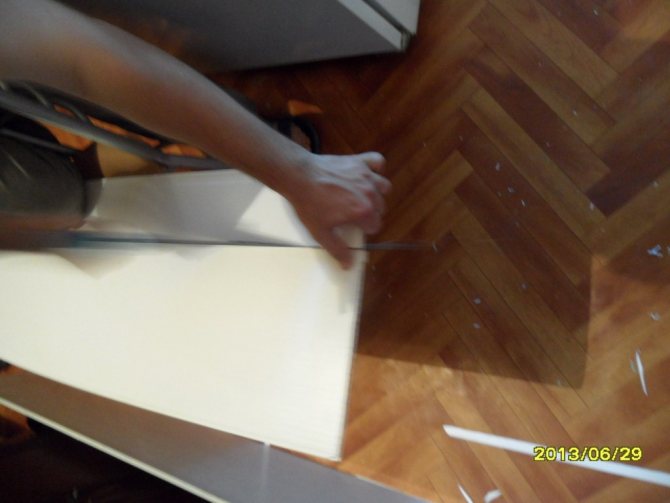
The edges of the F-shaped profile are cut with a clerical knife, as shown in the photo below.
Place the top profile in place.
We measure the length of the side profiles. Their length should be equal to the distance from the window sill to the upper edge of the upper F-shaped profile.
We cut one of the sides of the side frame in the same way as the upper profile. Then we make the markings using a 45-degree square and cut off the corner. Please note that on the two side blanks, two different edges must be cut, as it is necessary to obtain the left and right framing corners.
We install the side corners, and their edges, cut off at 45 degrees, we overlap on top of the upper framing corner.
Cut off excess material from the top frame. It is enough to make an incision with a clerical knife, after which the plastic breaks off easily.
We glue the edges of the corners together.
This method of overlapping corners avoids the appearance of gaps between them over time.
The final stage in the installation of the slopes from the sandwich panels will be the smearing of the joints between the side and top panels with liquid plastic or sealant. I want to draw your attention to the fact that if the gap is large, then the liquid plastic will shrink and a crack may form as a trace. Unlike liquid plastic, the sealant closes the crack well, does not shrink, but may turn yellow over time.
Video: How to install a sandwich panel slope with your own hands? A very simple way.


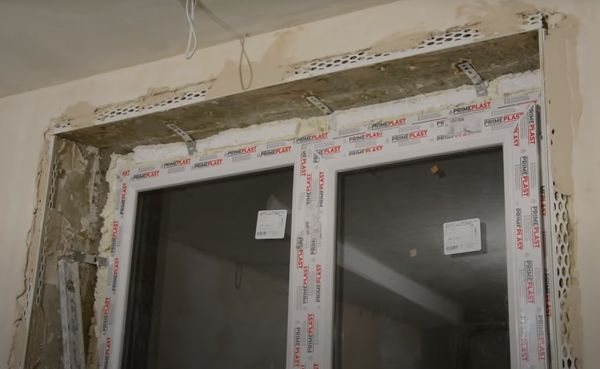
How to trim the slopes of windows with plastic - preparatory work
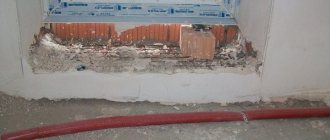
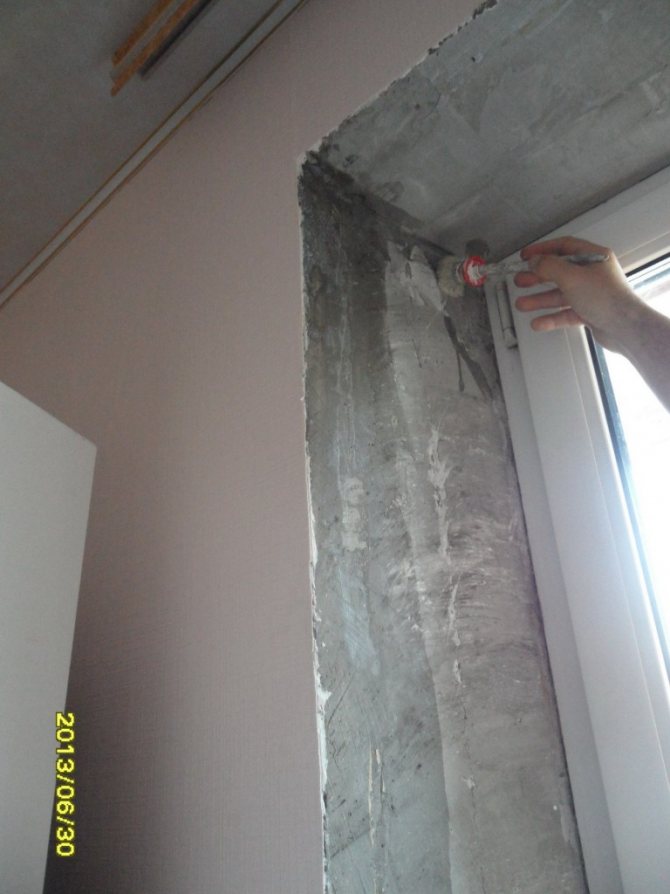
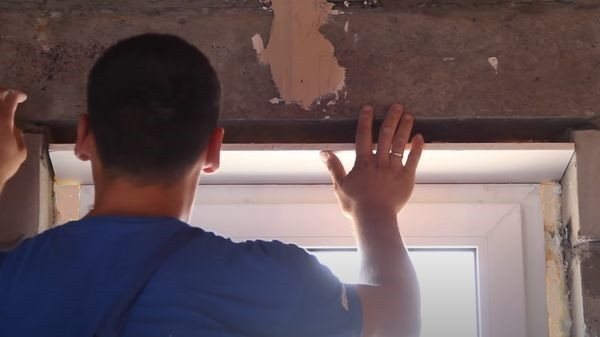
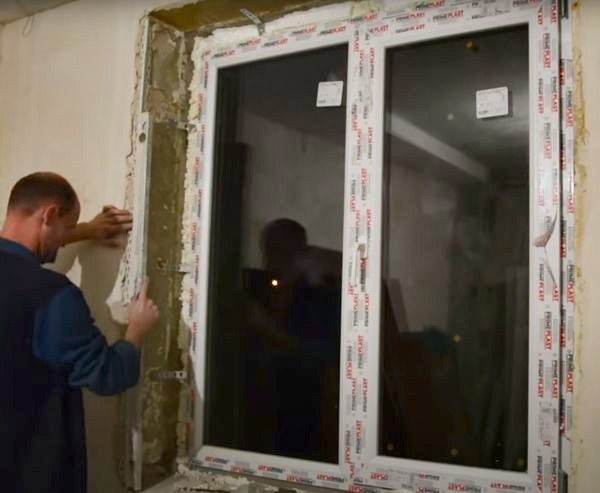
Before you start installing plastic slopes, you need to clean the place of work from construction debris, cut off the mounds of polyurethane foam. After that, it is necessary to carry out work to prevent the formation of mold and fungi under the plastic panels with special agents that coat all the elements that fall under the plastic - walls, frame elements, a window sill.
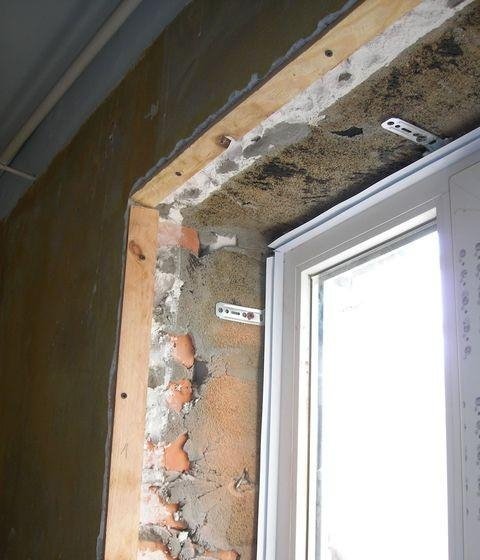
After that, we proceed to the construction of the frame for attaching future plastic panels. The frame, of course, is said loudly, our structure will be a wooden lath stuffed along the outer perimeter of the window opening. The rail should be chosen with a thickness of 8–10 mm and a width of 25–30 mm.
When choosing, you need to carefully look at the quality of the lath itself and the wood. It should be dry, not damaged by insects, and the product should be even along its entire length, without twists and bluish spots, which indicate the beginning of the decay process. To attach the rail to the structures framing the window, you will need dowels and wood screws.
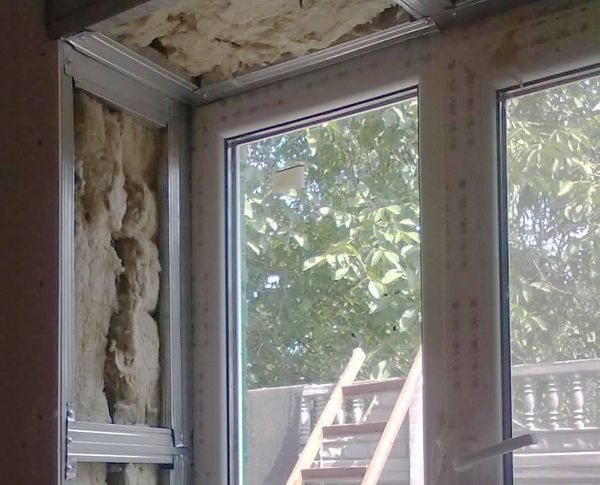
Plastic panels are a rather rigid material and cannot close all the smallest gaps at the joints of a window - a wall, through which cold air will subsequently penetrate. To prevent this from happening, finishing the window slopes with plastic involves laying insulating materials between the wall and the finishing material. It can be: a thin layer of mineral wool, isolone, expanded polystyrene or any other insulation. Such a gasket will reliably protect the interior of the house from drafts and street noise. It is important that the thickness of the insulation does not exceed the thickness of the frame rail. Any adhesive is used to fix it, it is important for us to fix the insulation in an upright position until it is pressed by a plastic panel.
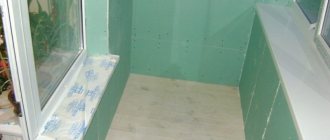
Plasterboard slopes
Plasterboard slopes are not the best solution, since in some cases they can freeze, get wet and become moldy. Therefore, for the installation of slopes, only moisture-resistant green gypsum board should be used.
Although often the reason is not in the slopes themselves, but in poor-quality installation of windows. Nevertheless, some masters make such slopes.
GCR slopes can be made in different ways. As they say, how many people, so many opinions.
To avoid the formation of a crack between the gypsum board and the window, some craftsmen use a starting profile for sandwich panels. It is screwed to the window and the gypsum board is installed in it. But then it's not clear why not just use sandwich panels instead of drywall?
If the distance between the window block and the wall is large, then the installation of drywall sheets can be done on a metal frame. For its manufacture, you will have to use special metal profiles for mounting drywall. The free space between the gypsum board and the wall is filled with mineral wool insulation.
Method number 1 (drywall is wound up behind the end of the window block)
In my opinion, the most rational and simple solution is to put a 5mm drywall sheet behind the window opening, and first you need to install the upper slope, and then put the side slopes.
If the foam interferes with the installation of a drywall sheet, then it should be cut to a shallow depth, about 5 mm from the plane of the window.
First, we mark up the top panel.
A sheet of drywall is wound with one edge of the end of the window by about 5 mm. You should not start deeper, since such an action violates the thermal insulation of the window block.
We set the upper slope to the desired angle of dawn according to the previously made markings on the side walls.
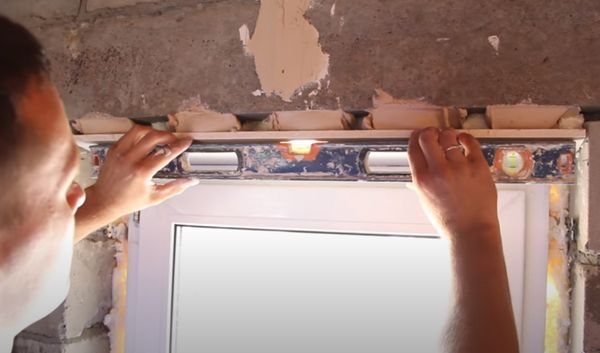
We attach the upper slope to drywall glue, for example, Baugips fix glue. All slopes during installation must be checked for verticality and horizontalness with a building level.
After the glue dries, the free space between the slope and the wall is filled with polyurethane foam. You can do with one polyurethane foam without using glue. In this case, you need to think about how to fix the panel in the desired position. The upper slope can be fixed with a spacer made of scrap materials. Also, the free edges of the drywall can be fixed to the walls with screws using plastic dowels.
After mounting the top panel, take the dimensions for the side panels, taking into account the slope of the upper slope. Cut out the side panels and install them. In this case, the top sheet should rest on the side sheets.
The space between the gypsum board and the wall is filled with foam. A painting plastic or galvanized corner is applied to the corner. Then the slopes and corners are putty.

The joints between the drywall and the window will only have to be treated with dap alex acrylic silicone sealant.
Video: Plasterboard slopes on windows
Method number 2 (drywall is installed end-to-end to the window block)
The method of mounting slopes from gypsum plasterboard, described below, according to some readers, may be too complicated. This installation method can be used when it is not possible to lead a drywall sheet behind the end of the window, for example, if the window is installed using a vapor barrier tape. But despite this, from this method, you can take some techniques for working with a gypsum board sheet, which can be useful when installing any drywall structure.
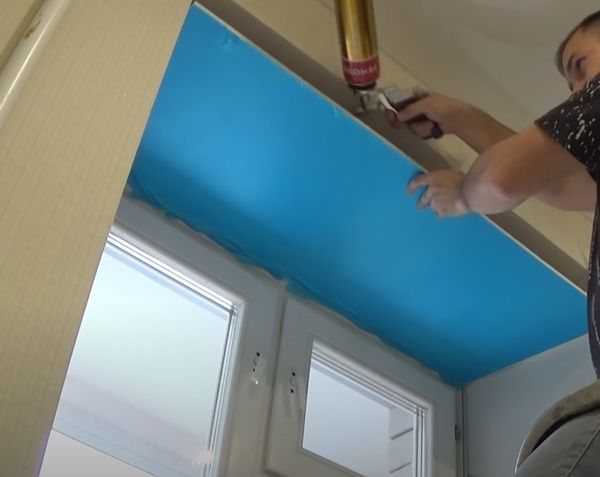
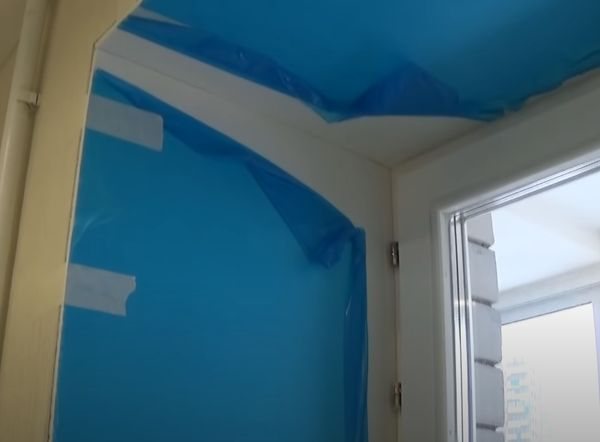
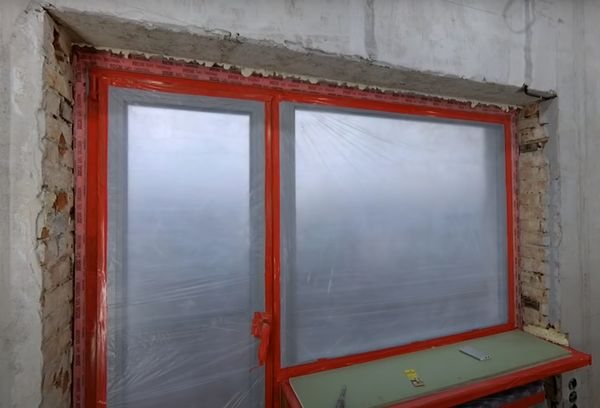
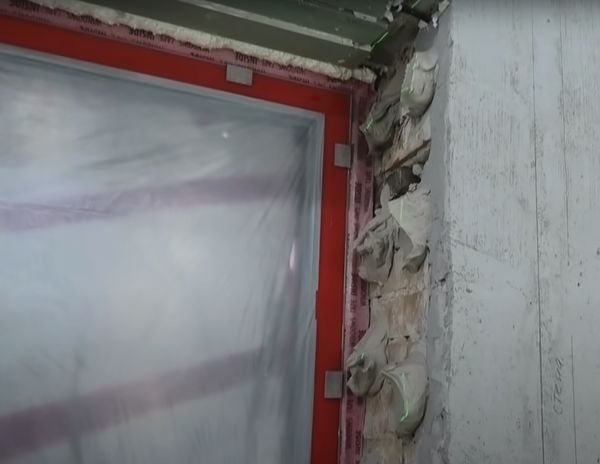
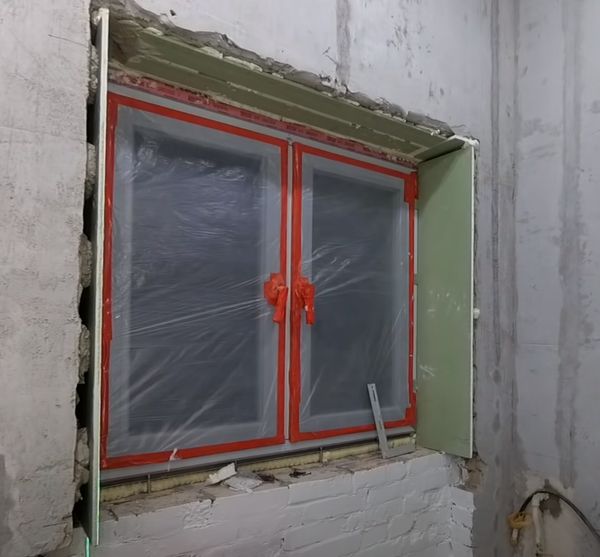
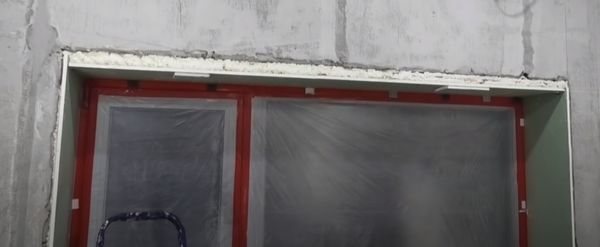
- Before installing the slopes, we close the windows and the heating battery under the window with plastic wrap. This can be easily done using regular tape or masking tape.
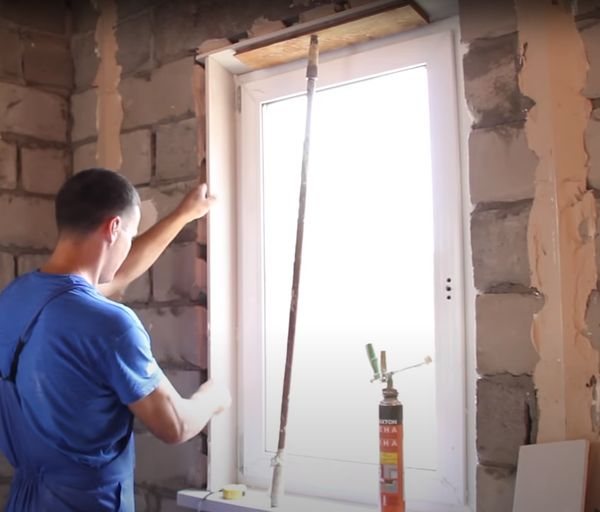
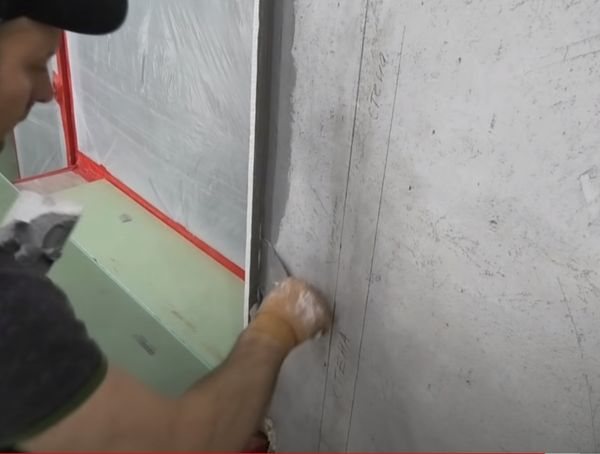
We ground the slopes.
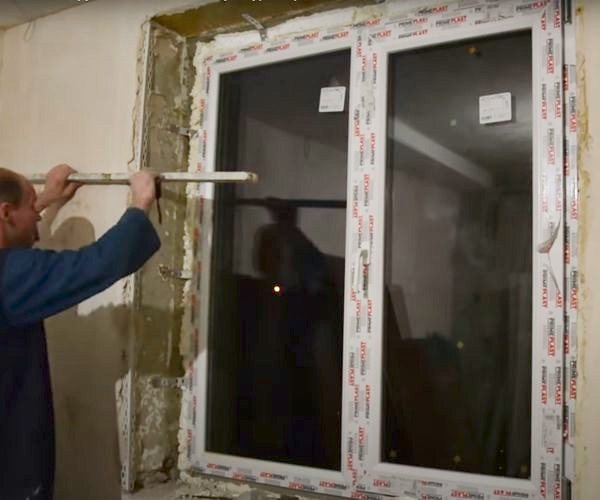
We measure the slopes.
Cut out pieces of drywall according to the dimensions taken. A sheet of drywall should be cut with a margin of 2-3 cm in width.
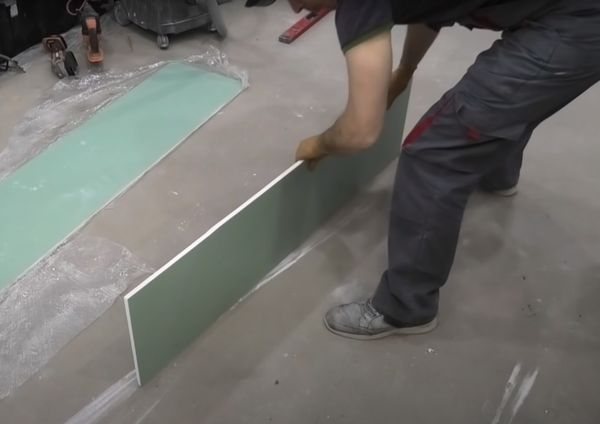
If there is no gypsum planer, then you can level the cut edge of the drywall sheet simply by rubbing it on the floor. This is provided that the floor in the room is flat.
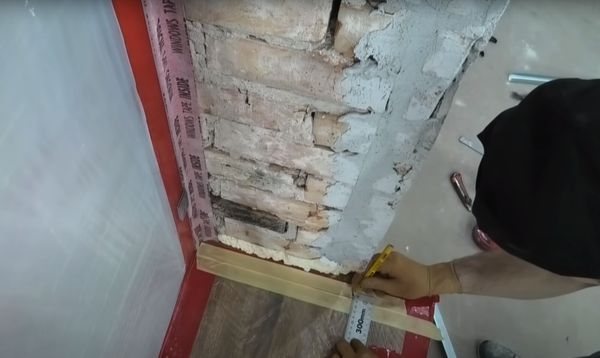
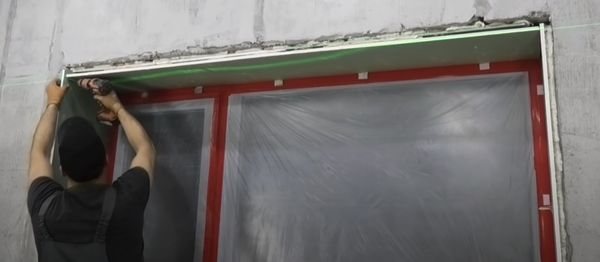
Using a square, we mark the installation site of the gypsum board.
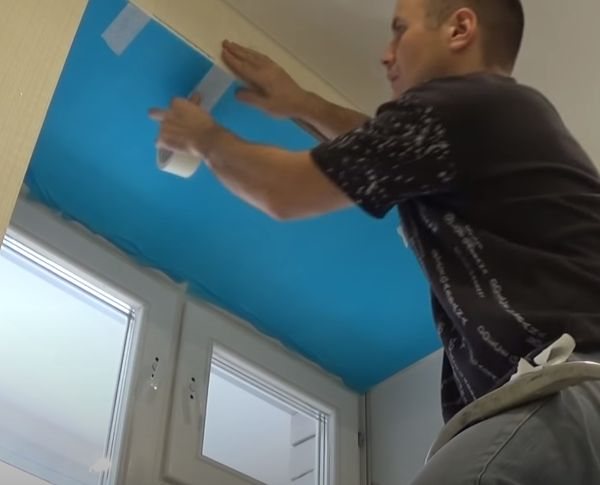
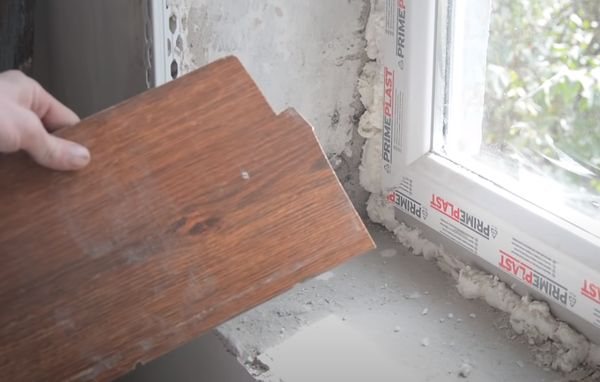
To facilitate the installation of the upper slope, you can use two tricky tricks. Pieces of some material should be glued in one line to the window using double-sided tape. Small pieces of plywood or laminate will do. These glued-on pieces will act as a support for the drywall sheet. But such a support will not be able to fully keep the drywall sheet from sagging, therefore, a small piece of plywood sheet should be glued to the foam in the center of the upper slope. During the installation of the upper drywall sheet, it will be possible to light it with self-tapping screws to this piece of plywood and thus completely eliminate the sagging of the slope from the drywall.
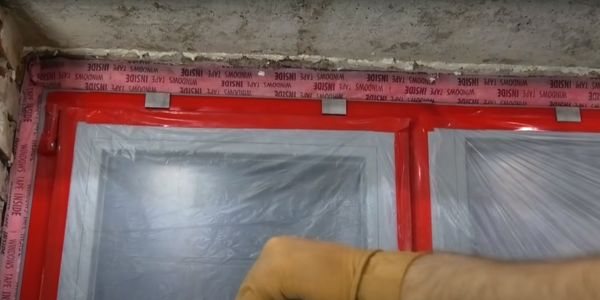
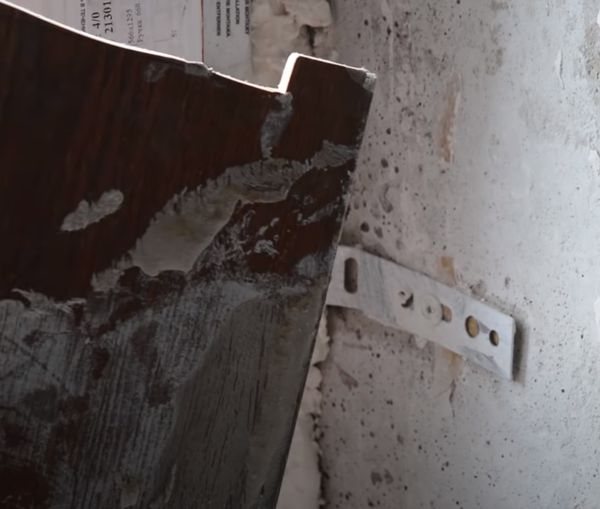
The photo shows the glued stops in the form of small rectangles.
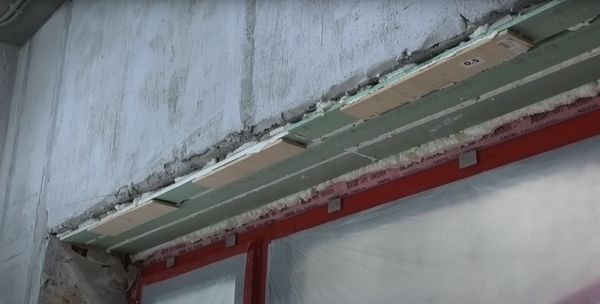
The photo shows the remains of drywall sheets and pieces of plywood glued to the upper slope. It is not necessary to glue the remains of drywall sheets, in this case the master glued them in order to reduce the amount of foam between the slope and the wall.
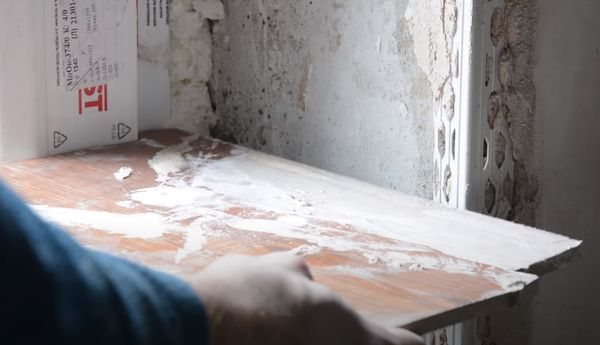
We knead the glue for gluing drywall sheets. For example, Baugips fix glue. Not to be confused with gypsum plaster, the glue is more sticky and allows frameless installation of drywall. The consistency of the glue should keep its shape on the spatula.
We put the glue on the wall with a spatula.
We install the side sheets of the slopes according to the previously applied markings. The deviation of the sheet from the vertical is controlled using a building level.

After the glue has set, fill the remaining voids between the drywall and the wall with construction foam.
On the installed side slopes, we make markings, along which the upper horizontal sheet will subsequently be installed. Then we apply glue to the slope and glue the drywall. We rest the drywall sheet on the previously glued stops and screw it to the plywood sheet with self-tapping screws.
To prevent the drywall sheet from sagging at the edges, we twist the self-tapping screws into the side sheets, which will act as a stop.
After the glue has set, fill the voids with polyurethane foam.
We cover the gaps between the gypsum board and the wall with gypsum plaster.

We cut drywall along the wall using a painting knife.

After trimming the gypsum board, a high-quality even corner should be obtained.
The slopes are almost ready, it remains to put a perforated painting corner, apply putty, primer and you can paint them.
Video: Do-it-yourself drywall slopes. All stages.
What is liquid plastic
Liquid plastic has recently appeared on the construction market. It was used in many areas, including for the installation of plastic slopes.
Liquid plastic is used for gluing plastic slopes
Liquid plastic is a type of modern sealant that can be used as an adhesive when attaching plastic slopes. The content of liquid PVC in its base gives this material many positive qualities.
Mode of application
Using this glue, you can guarantee a strong adhesion of the material and the surface.
Using liquid plastic when processing joints and seams, you can be sure that it will never turn yellow, as is the case with silicone analogs. This ensures a neat appearance of the window opening.
With temperature fluctuations inside the room, plastic panels fixed with silicone can lose their tightness. And the panels, planted with glue in the form of liquid plastic, will hold in place for many years.
When working with this material, it is important to take into account that it hardens in one minute.... This is the interval for which it must be applied and distributed over the surface. You need to work quickly and efficiently the first time.
It is also worth considering that liquid plastic is quite poisonous due to the ongoing chemical reaction, therefore, when working with it, you must use a respirator and ensure the flow of fresh air into the room.
It should be noted that after the liquid PVC glue dries, it will become completely harmless to the environment and people.
Positive qualities of liquid plastics
The emergence of this modern material did not go unnoticed for specialists involved in the installation of metal-plastic windows. For them, the question of how to glue plastic slopes has disappeared forever. For liquid plastic, the following positive qualities are characteristic:
- When processing joints, the highest degree of sealing is achieved;
- It cannot be washed off with water, like a silicone analogue;
- It does not turn yellow over time, does not exude or absorb foreign odors;
- The material does not change its qualities after even 10 years;
- Possesses moisture resistance;
- Does not rot or mold;
- Does not deteriorate or fade when exposed to sunlight;
- Resistant to mechanical stress;
- Has an affordable cost.
If you glue the slope onto liquid plastic, you get a neat monolithic structure.
Plaster slopes
Slopes can be plastered in two ways. The first method is based on plastering on pre-installed beacons. The second way is to use a special template, it is also called a mala. Below we will consider a method for plastering slopes using a template.
First of all, you need to glue the hinges on the windows with masking tape. If this is not done, then it will be quite problematic to remove the dried plaster later.
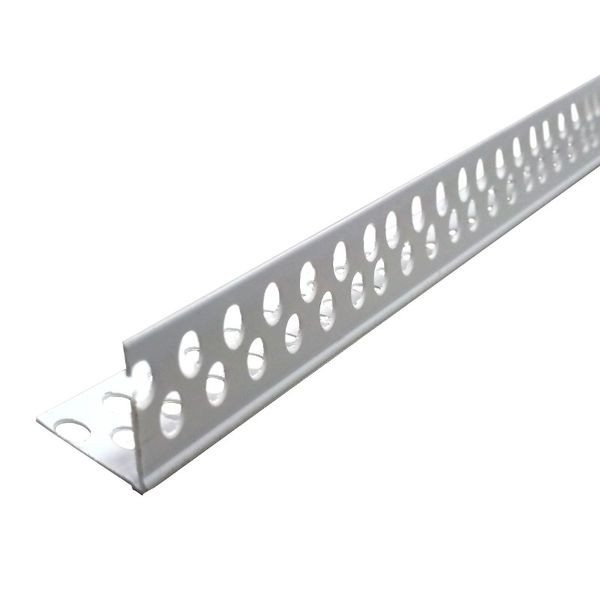
For plastering the slopes, you will need special plastic corner profiles for plastering. On sale you can find corners with and without mesh.
We mark with a square the place of installation of the side corners and glue them on gypsum plaster, for example, knauf MP 75. The corners must be installed so that they are flush with the wall in which the window is installed.
We align the corner along the wall.
The correctness of the installation of the corners must be checked with the building level.
With the help of a square, we transfer the mark of the edge of the window block to the plastic corner.
Using a tape measure or a ruler, move the mark 2-4 cm up. This must be done in order to obtain the so-called dawn angle of the slopes. If you plan to make straight slopes, then this mark does not need to be transferred.
With a cloth for metal, we cut the plastic corner according to the previously applied mark. This must be done in order to lay the upper horizontal corner on the side corners as on supports.
We glue the upper corner on the gypsum plaster.
We make a template from the remnants of a laminate or a piece of plywood.
One side of the template should rest against the window, and the other against the plastic corner, which was previously glued with gypsum plaster.
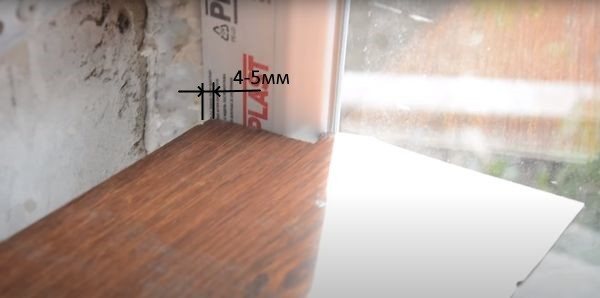
The template should become in such a way that its edge does not reach the end edge of the window block by 4-5mm. If this distance is made larger, then the appearance of the window block after plastering will not be very beautiful.
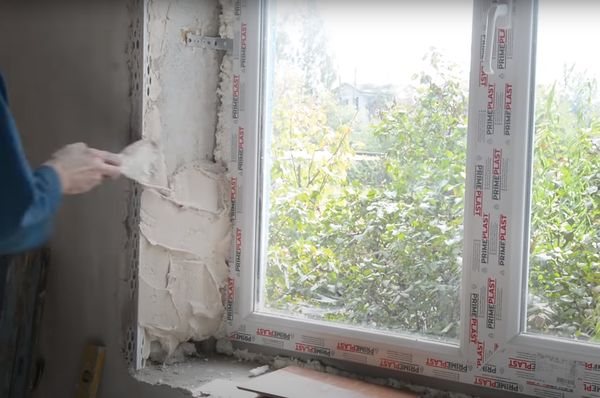
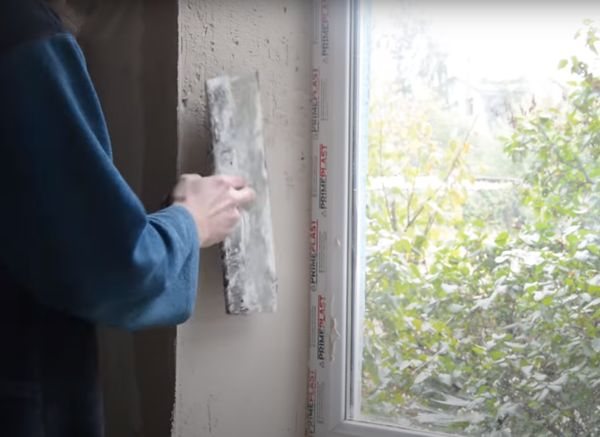
We put the plaster on the wall. We start at the bottom of the side slopes.
We carry out the template over the plaster. On the one hand, we support the template on the window block, and on the other hand, on the plastic corner. Add plaster if necessary and repeat the operation until an acceptable result is obtained.
In order to make the plaster from the side of the opening window, you need to make a second template. It will differ from the first template in its profile. Also, a new profile can be cut on the other side of a previously made template.
Template for plastering slopes.
During work, we rest the template with one side against the profile of the window sash, and with the other side against the plastic corner.
In places where window hinges are installed, this pattern cannot be applied. Therefore, at first, all available places are plastered, and the missed areas are then filled flush with the rest of the plaster.
The upper slope is made using two templates. One part of the slope is the first template, and the second part above the sash is the second template.
Puttying of slopes.
After the plaster hardens to a state of plasticine plasticine, it can be putty. We putty the slopes, wait for them to solidify, clean them and can be painted. Before painting, be sure to prime the surface.