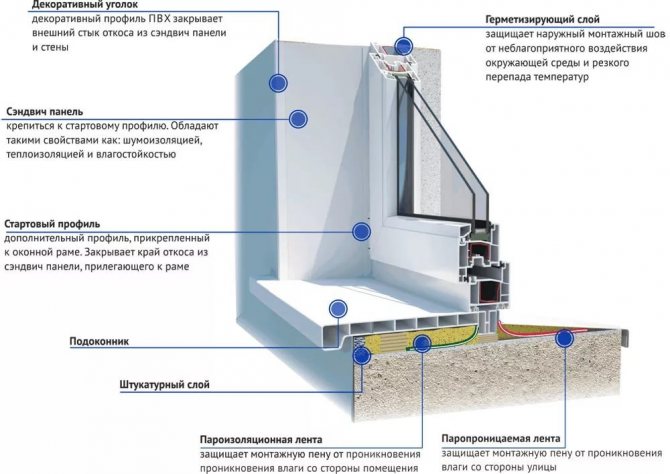
What are they needed for
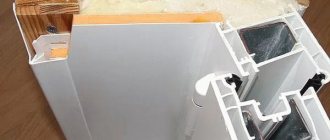
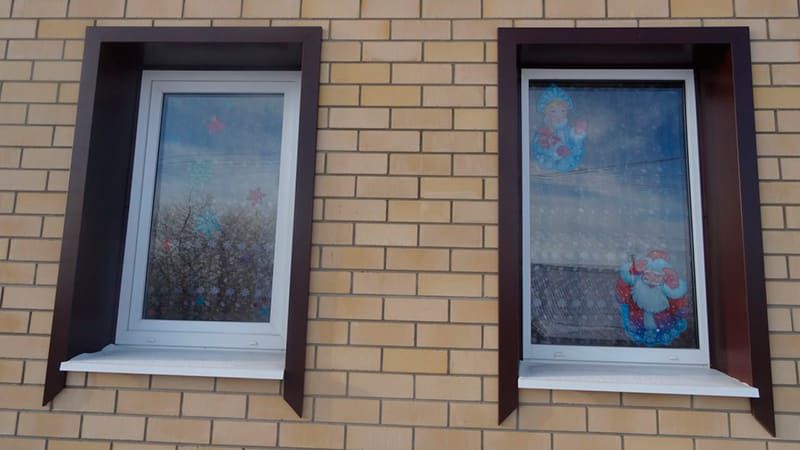
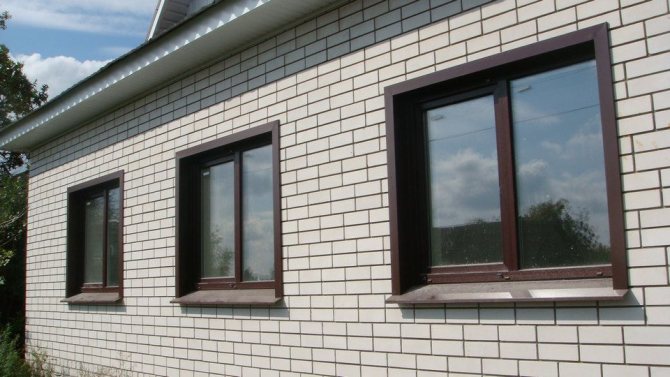
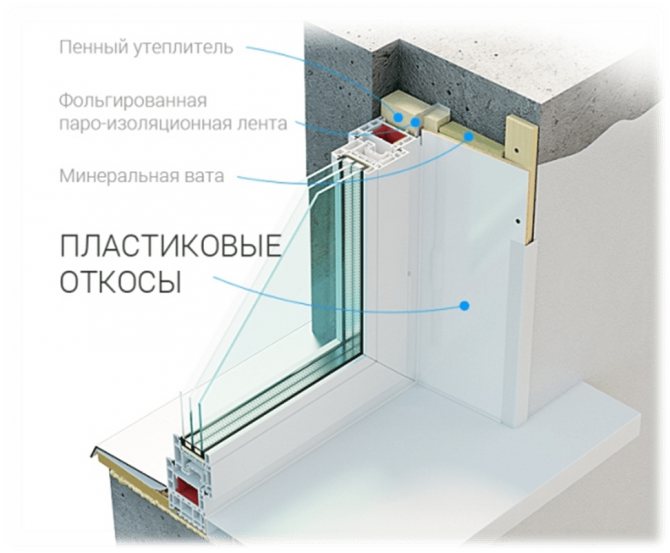
A plastic trim device is the most common way to ennoble the space of a window opening. PVC slopes have a pleasant glossy surface and are combined with the material of the window profile. Plastic panels protect the assembly seam from sunlight and moisture.
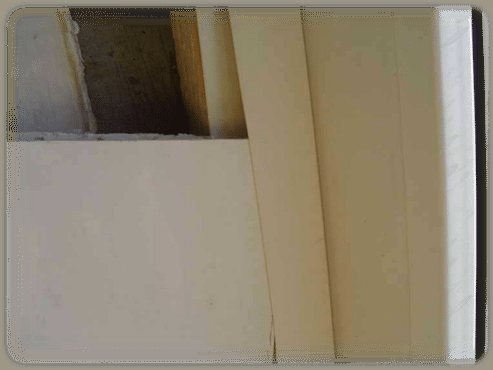
Finishing the slopes after installing the window is performed using plastic
Mounting foam, with which the window system is fixed in the opening, is a water-repellent material. But if it is not protected from exposure to direct sunlight, then it will begin to collapse and moisture will freely penetrate into its pores, destroying it from the inside. Therefore, the slopes for plastic windows must be installed as soon as possible after installing the window. How to make slopes on plastic windows will be described in this article.


Pros of plastic sandwich panels for window slopes
The main advantage of the panels is 100% resistance to moisture, which means that there will be no mold and mildew on the slopes, condensation will not appear on the window. Comparing drywall and sandwich panel, the plastic sheets are easier to install, the installation process is easy, in addition, there is almost no debris during operation.
The cladding does not require special care, it will be enough to rinse the surface when needed and that's it. Installation work does not require a special tool, a standard set and a knife or jigsaw, which can be used to cut and saw the material, are enough. The expense of funds for the slope is minimal, the cost of the panels is acceptable, given the advantages of the material.
How to make sandwich panel slopes correctly (video)
Properties of plastic slopes
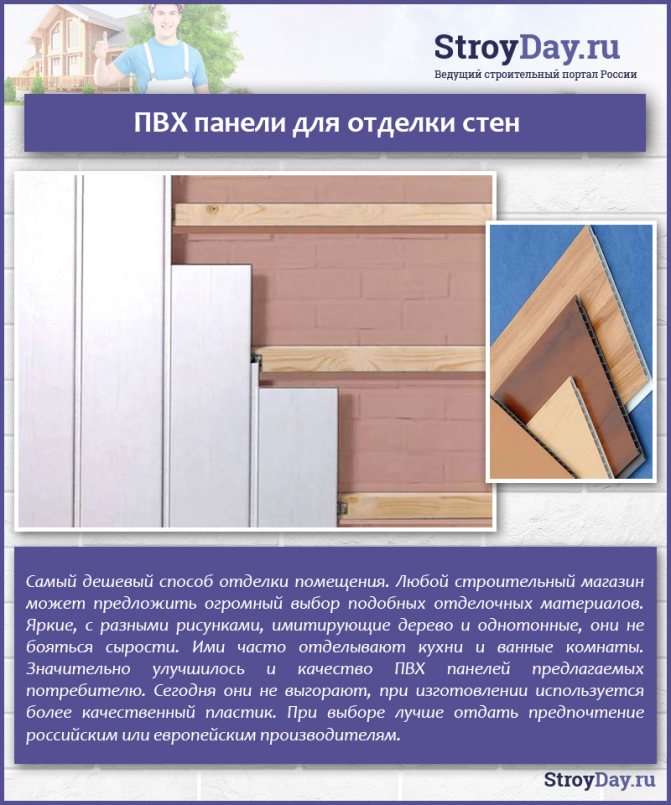
Slopes for plastic windows can be made of two types of material - it can be window slopes from PVC panels or from sandwich panels.
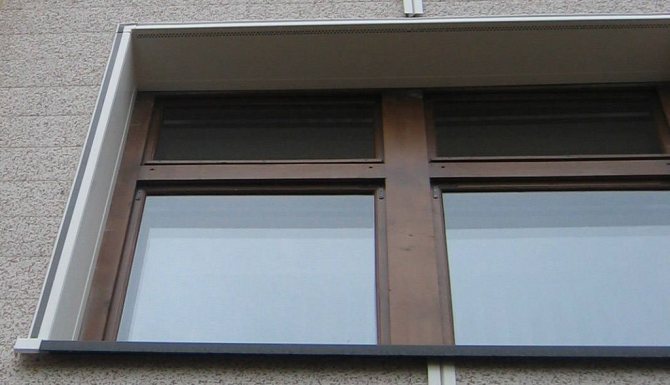
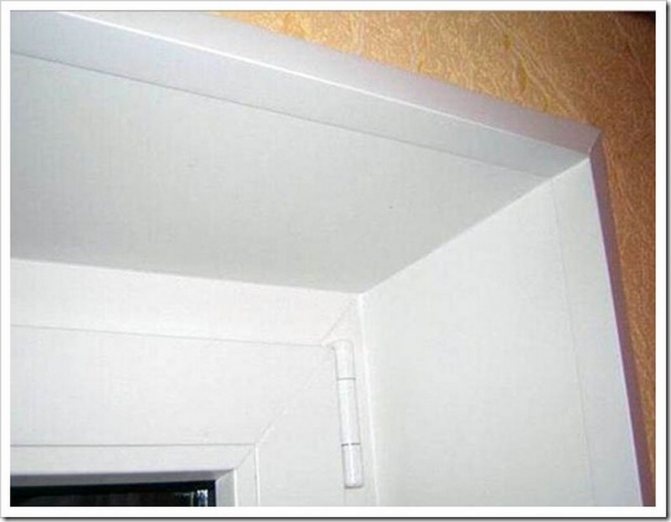
The slope protects the foam from destruction
For both types of plastic panels, common positive qualities are characteristic:
- long operational life;
- plastic slopes for windows have a decorative appearance and are combined with the material from which the window system is made;
- finishing the window slopes inside with plastic allows you to reliably protect the foam from the effects of the environment;
- installation of plastic slopes is possible for finishing arched openings, since flexible PVC casing can be used;
- you can install PVC panels with your own hands, without professional skills and special expensive equipment;
- plastic panels for slopes can be cut with a hacksaw for metal, but this must be done carefully, without exerting effort, so that the PVC panel does not crack;
- do-it-yourself installation of plastic windows occurs quickly and without the formation of serious pollution and construction debris;
- it is easy to take care of the PVC panels - it is enough to wipe them sometimes with a rag soaked in soapy water;
- they have low thermal conductivity;
- the plastic window element is highly moisture resistant;
- finishing the slopes of plastic windows will reliably protect them from freezing.
Characteristics and features of the material
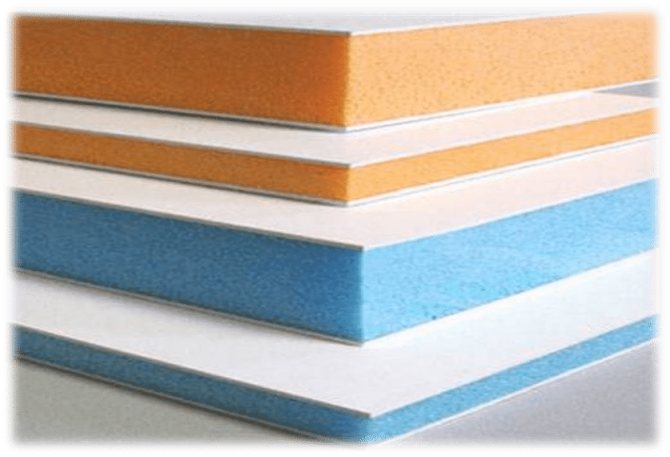
A pair of layers consists of plastic, the third, the inner layer is insulation. Such panels are used in construction almost everywhere, any work can be done, but there are some differences in the insulation used.
Advantages of sandwich panel slopes
Panel insulation is most often mineral wool.The sandwich construction is ideal to install it on the slope of the window, the material does not allow extraneous noise and cold to pass through, due to which the window will retain heat in the house. The characteristics of the panels do not end there, because mold, fungus does not appear on them, they do not undergo temperature changes. A sandwich panel can be made of different materials, which stands on the outside, for more details in the table:
| Material: | Description: |
| Cink Steel: | Installation of panels is easy, operation is simple. Not used for windows. |
| Aluzinc: | It is extremely rarely used for windows, due to the fact that the view of the window will be spoiled. |
| Drywall: | Suitable for creating panels on slopes. Easy to use, the slopes will look beautiful. |
| Plastisol: | Durable material, because the panels contain special additives that make the panel stronger. Not subject to destruction due to weather conditions, resistant to mechanical damage. The composition is without toxins, which means that sandwich panels of this type can be installed for window slopes, both inside and outside. |
| Polyvinyl chloride or polypropylene: | Most often used to create a sandwich panel, ideal for window slopes. |
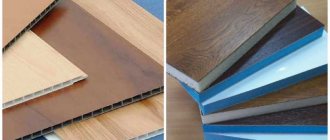
Important! It is convenient to sheathe a window with such material, because PVC panels are produced in different colors, white material or wood imitation is used.
Products from PVC panels
Before installing plastic slopes with your own hands, you need to familiarize yourself with the qualities of the material that is used to make them. One of them could be a PVC panel.
Material description
Another name for this material is ceiling panels. They are made from polyvinyl chloride.
They consist of two plastic plates with stiffening ribs inside. For some models, the presence of tool joints at the ends is provided.
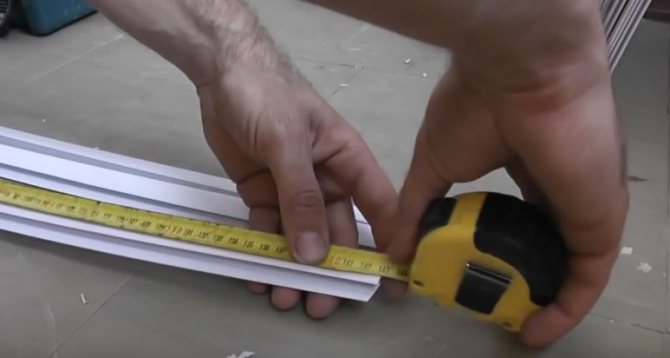
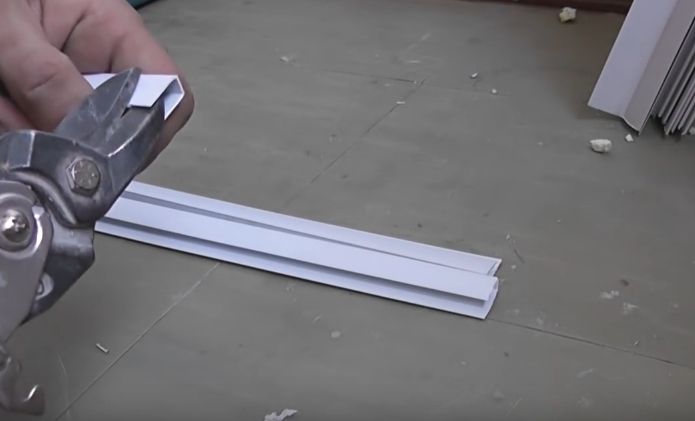
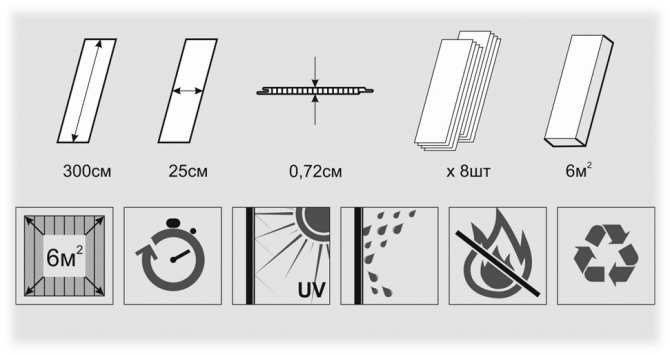
The panels can be of different sizes, but during installation they still have to be cut according to the required dimensions. Despite the fact that the panels can be 3 and 6 meters long, you should purchase 6-meter products... The thickness of the panels varies from 0.5 to 1.2 cm. The type of products can also be different: panels, strips or PVC sheets.
Components for plastic panels are also purchased. The kit should include fasteners and plastic elements. Their description is presented in the figure below.
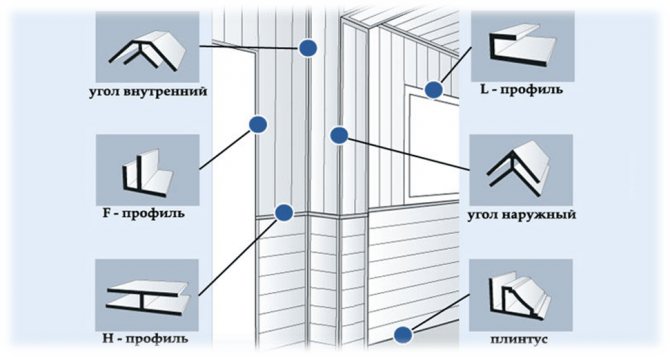
Accessories for plastic panels
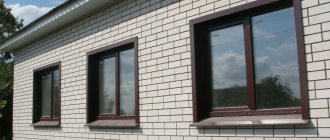
One of the advantages of any plastic panels is their wide range of colors. Colored PVC slopes can be matched to any interior.
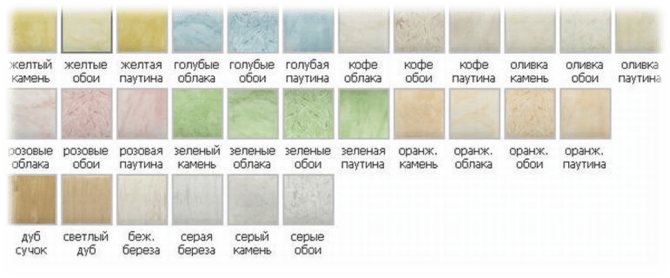
The color of the finishing plastic can be matched to any interior
The interior decoration will look original when covering window openings with plastic panels with an image or imitation of any natural and artificial material. When the windows are colored or brown, painted products can be used. It is important that in this case the window fittings are combined with them.
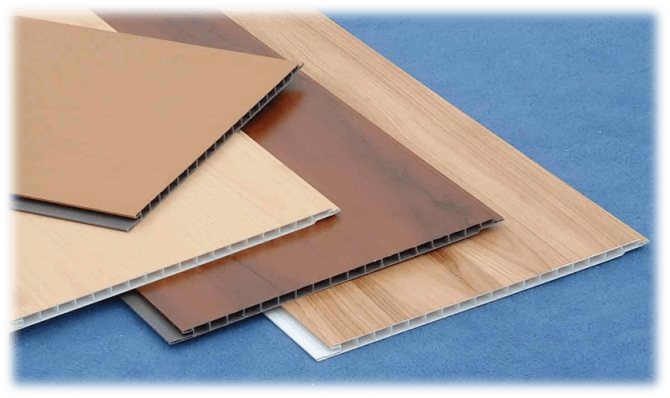
PVC panels can imitate a wooden surface
Panels can be monochromatic, laminated, varnished, have a printed pattern or an image applied by thermal printing on their surface. Installing plastic slopes will give the windows a neat decorative appearance. How to make plastic slopes will be described below.
Positive qualities of the material
Do-it-yourself high-quality finishing of slopes with plastic is obtained thanks to the properties of the ceiling panels.
- the material is not toxic;
- have high moisture resistance;
- they are easy to install and maintain;
- have low weight, therefore they do not create a load on the base;
- plastic is non-combustible, but when melted, it emits poisonous corrosive smoke; products are resistant to temperature extremes;
- have frost resistance;
- create an ideal flat, rigidly fixed surface;
- have a modern look and are suitable for any interiors;
- honeycomb structure provides reliable sound insulation;
- do not accumulate static electricity on their surface;
- panels are resistant to household chemicals.
Installation
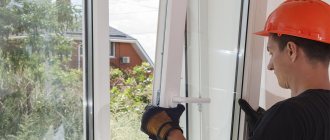
How to install plastic slopes on windows with your own hands in stages is shown below. Before you start finishing the slopes with panels, you need to make measurements. The inner sides are measured twice - at the window and at the wall.
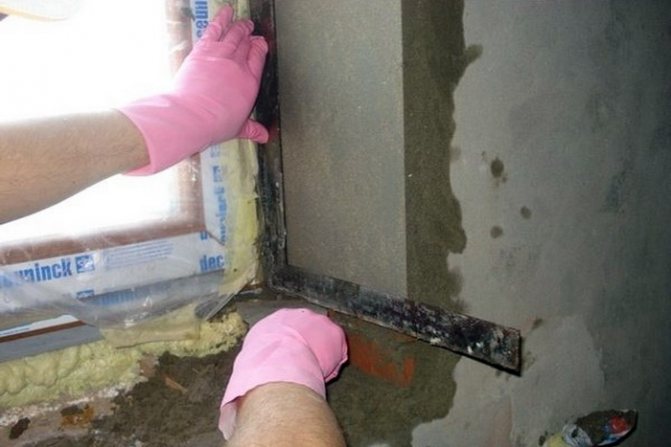
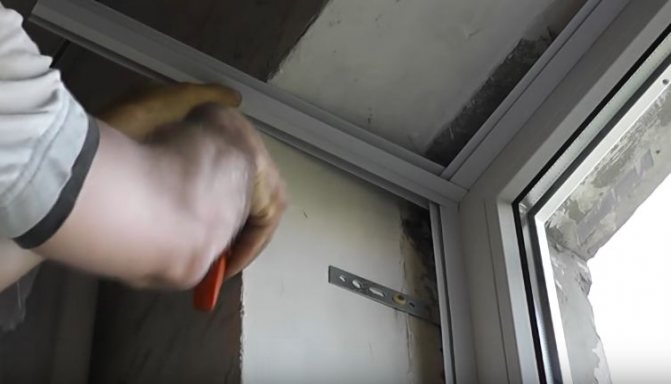
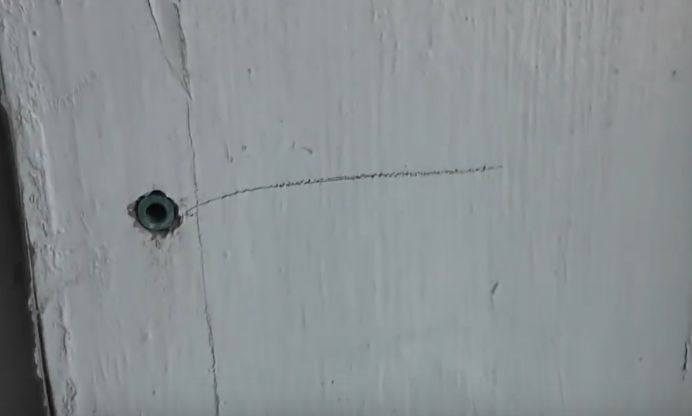
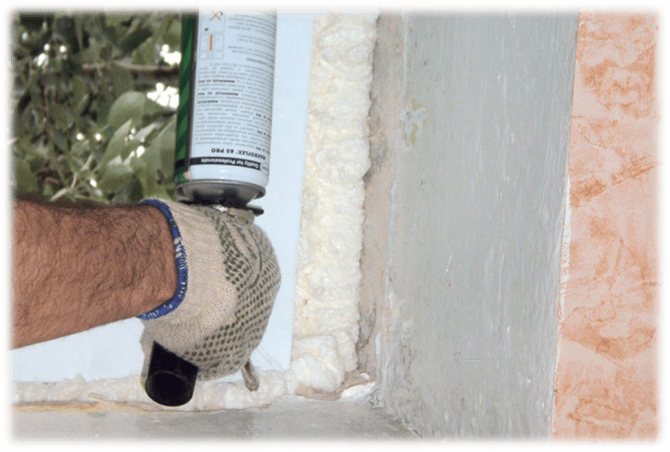
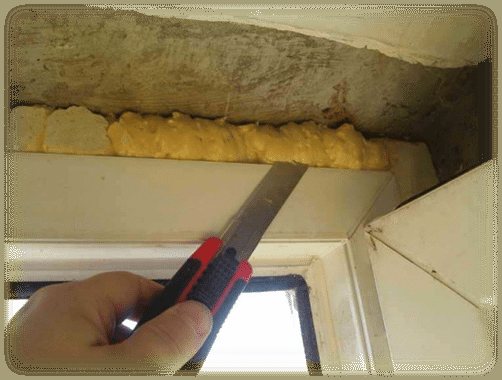
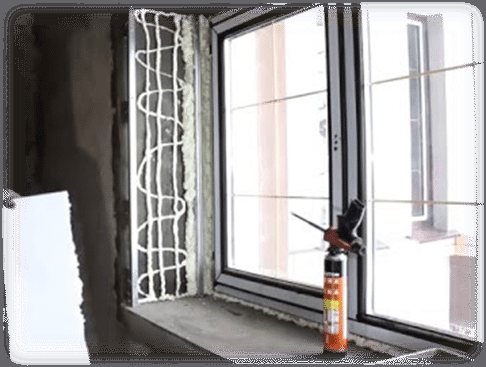
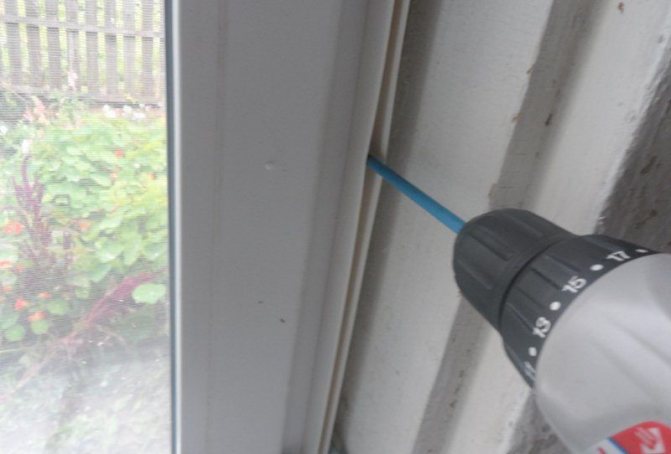
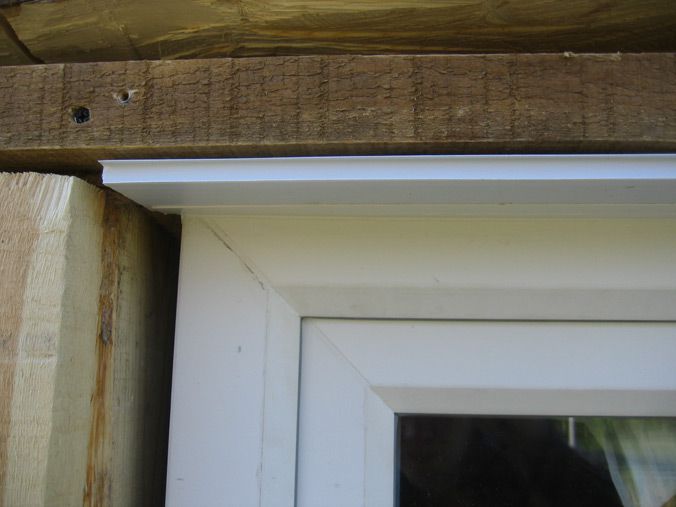
- the installation of plastic slopes on the windows begins with the removal of the mounting foam that has gone beyond the seam along the perimeter of the window frame. To do this, you need to use a sharp construction knife;

Before installing the slopes, remove excess foam - along the perimeter of the window frame, it will be necessary to fasten a wooden block. When making a bar, you need to make a slope on one of its faces. This is done so that you can firmly fix the bar near the window frame;
For fastening the slope, a wooden block with a slope is made - ready-made bars should be installed around the perimeter of the window frame in such a way as to go over it a little. Fastening can be done using self-tapping screws or dowels;
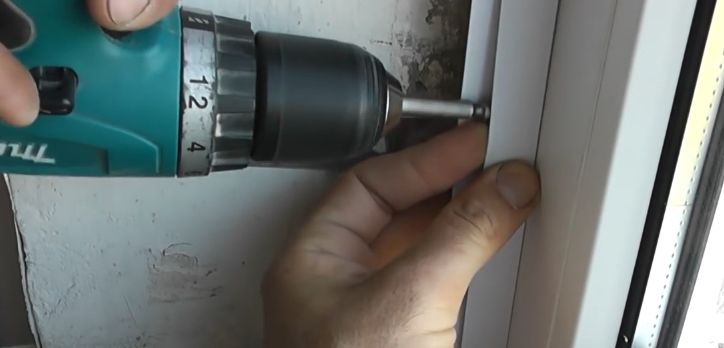
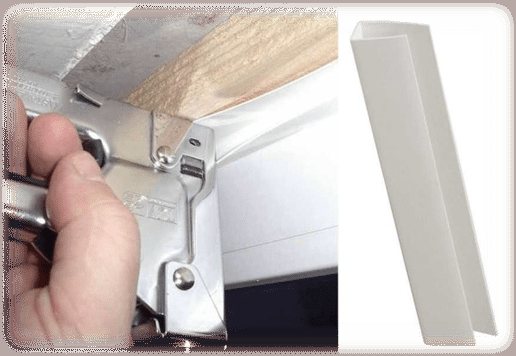
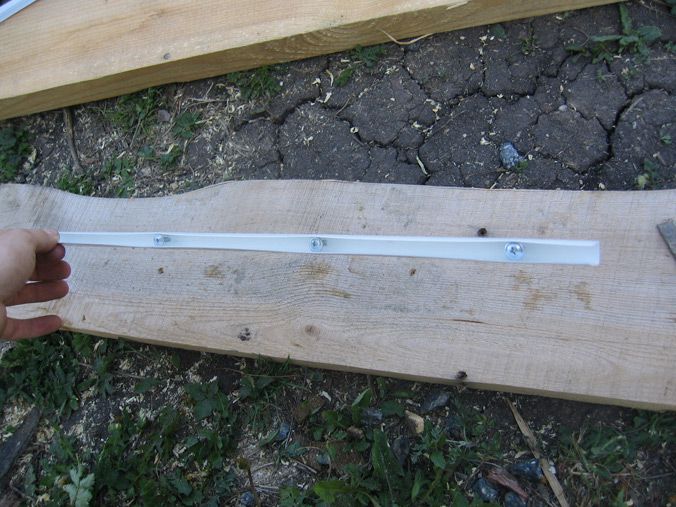
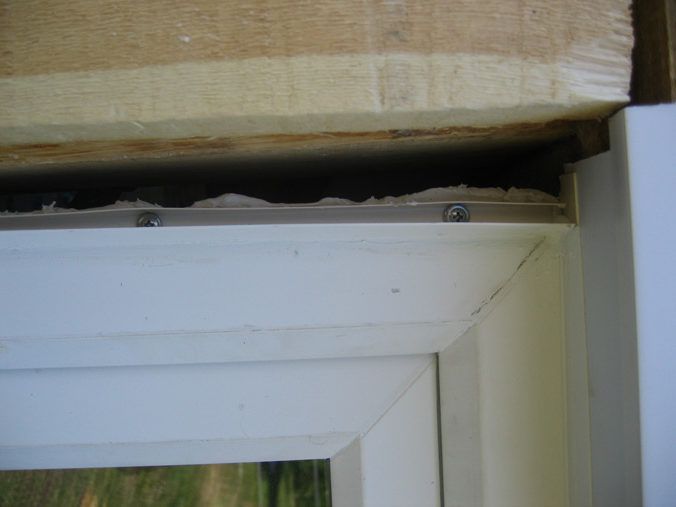
The bar is fixed with self-tapping screws along the perimeter of the frame - a plastic strip, called a starter profile, is available from a hardware store. Using a construction stapler or self-tapping screws, attach it around the perimeter of the window to a wooden block;
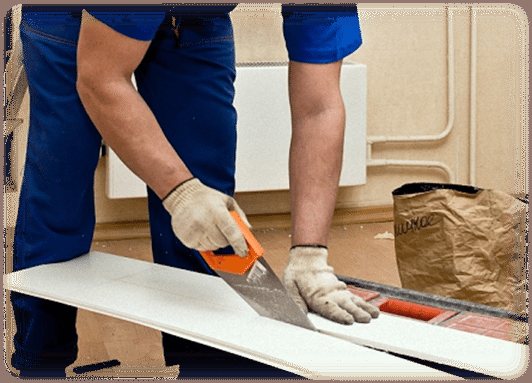
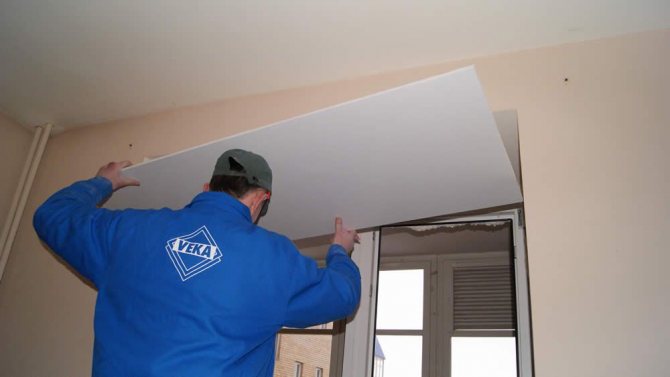
A starting profile is mounted to a wooden bar - according to the previously obtained dimensions, we manufacture the necessary elements. We cut the plastic carefully so as not to damage;
Cutting the PVC panel must be done without strong pressure - the panels must first be installed on the side walls of the window opening. The panels must be placed in the start profile;
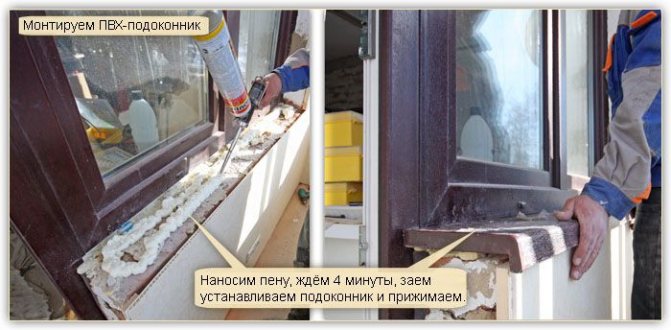
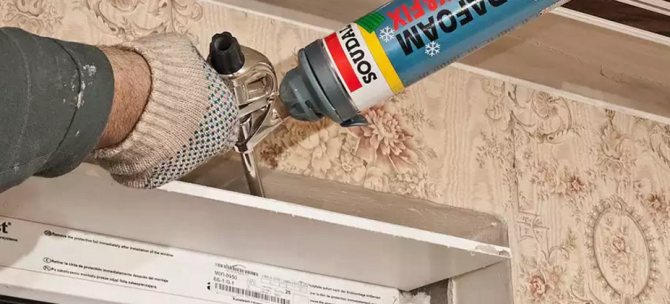
The panel is inserted into the start profile - the part must be separated from the wall and the space must be covered with polyurethane foam. Then put it in place and press down a little so that the foam grabs;
The PVC panel is fixed with polyurethane foam - in this way it is necessary to finish the entire window opening;
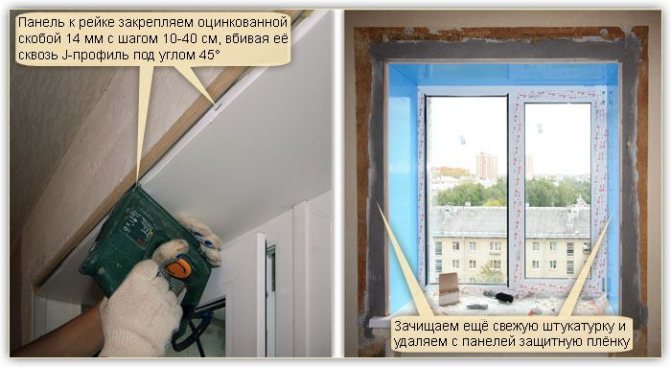
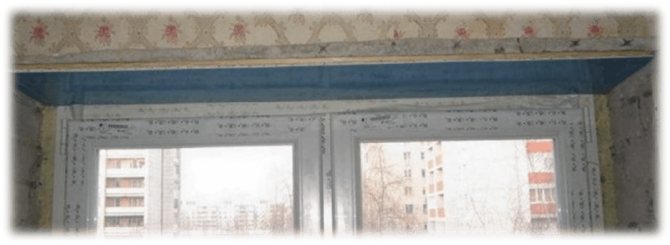
- in order to correctly make plastic slopes, decorative corners are attached to the trimmed fragments. The finished product is fixed with masking tape until completely set.
The slopes are fixed with masking tape until the foam is completely dry


By installing slopes on plastic windows, platbands can be fixed on their corners. How to make slopes with a platband is shown by the step-by-step instructions below.
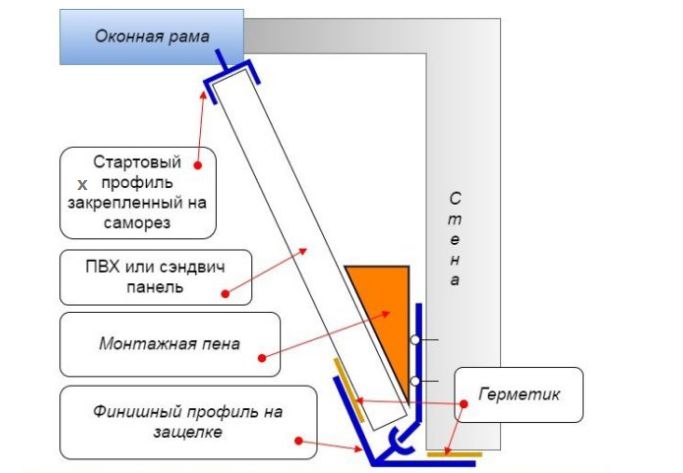
Installation scheme of a slope with a platband
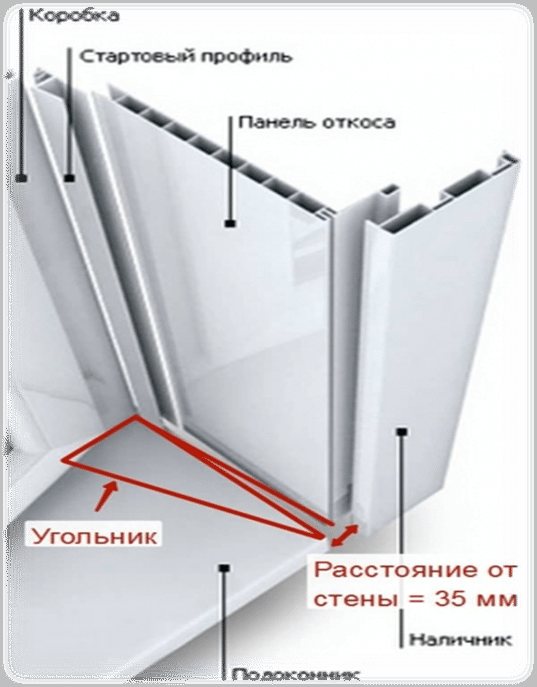
Installation of a slope with a platband
do-it-yourself installation rules with and without a start profile
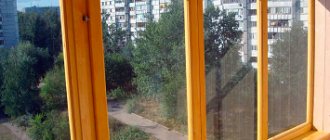
The window opening after the installation of plastic windows looks unpresentable. Pieces of plaster, polyurethane foam stick out, in some places the material of the walls is visible. To close all this, they use various methods. The most affordable and practical is the use of plastic slopes. It is better to equip them from sandwich panels, when expanded polypropylene is laid between two layers of plastic. They are durable, dense, made of quality material.
How to make slopes on plastic windows? In total, there are two key methods: with and without a start profile. Both of these methods are effective and give good results.
No start profile
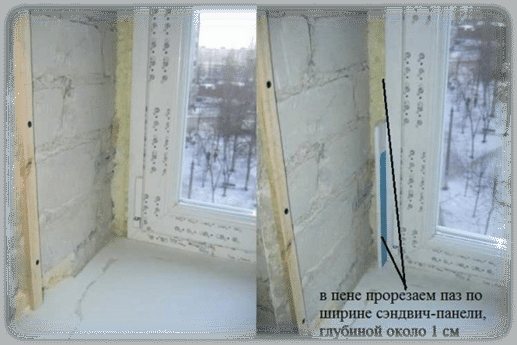
It is possible to use this method of installing window slopes when there is too little distance from the window frame to the wall. In this case, installation with a starting profile is either very difficult or, in principle, impossible. Arrangement of the slopes of plastic windows begins with the preparation of the opening. In this case, the fragments of the foam are cut off with a clerical knife. It doesn't take too much effort to remove it.
You should not cut the polyurethane foam, you must remove it evenly. In this case, it will cope with its function of fixing the frame.She will also insulate it, not letting in drafts from the street. It is also necessary to remove pieces of plaster, which interfere with the work and protrude, giving the window opening an unattractive appearance. If they hold up well, you can leave them alone. The foam will creep less.
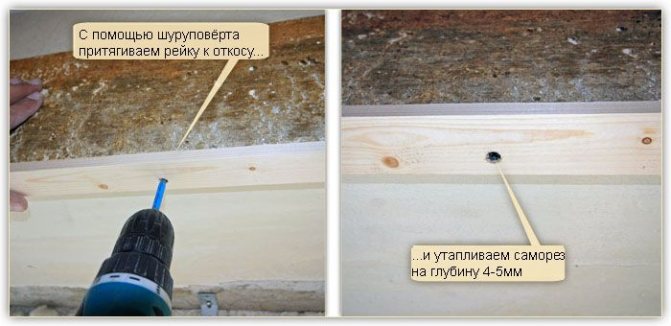
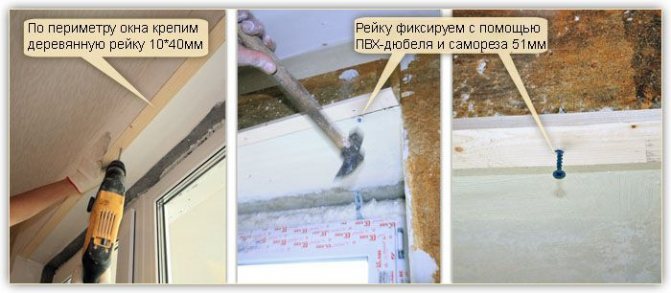
A thin strip 10 x 40 mm is nailed along the perimeter of the window with the wide side to the slope. It is usually nailed as is, but it can be leveled by placing thin planks and pieces of plywood in the required places. Following this, the foam is cut along the perimeter of the frame so that the sandwich panels will also stand here. It should go 1 cm.
The foam must be cut carefully so that the plastic is not damaged. After that, they begin to process the plastic panels. You can do the standard by making a stencil after all the necessary measurements. To do this, take a paper sheet. It should be larger in size than the window slope. They attach it to it, squeeze it, remove the excess. Cut the paper along the folded edges, try it on, make adjustments as necessary. The top of the frame is the best place to start.
After the formation of the paper stencil, outline it on the plastic. Approximately 1 cm will go into the foam groove. You need to cut it with a small margin, since it will be easier to cut it off than to cover it up later. Using a hacksaw for metal, they try on plastic, make adjustments so that it stands up straight without bending. Align so that the panel is flush with the plaster. The edges turn out to be almost even, where necessary, they carry out part-time work with a file.
After removing the strip of material along the outer edge, which will be nailed to the bar, drill a hole along the thickness of the nails, stepping back 6 cm from the edge. This will make it easier to fix the plastic without damaging it. The slope is then put back in place. They take a cylinder of polyurethane foam and gradually fill the entire lumen with foam. We must try to get as deep as possible, but a large consumption of material is undesirable. Foam can spill and shred plastic.
Working with polyurethane foam
If there is a smooth plastic, the foam provides good adhesion to it. If it is necessary to process the surface directed towards the wall, it is necessary to apply a primer or sand it with a sandpaper for improved adhesion. Another caveat is that moisture is required for optimal foam polymerization. That is why, before installing the plastic, the slope must be sprayed with water from a spray bottle. There should be no dust on the wall. It is brushed or removed with a vacuum cleaner. If the solution is loose, the opening is pre-treated with a penetrating primer. It carries the function of binding concrete particles together.
In the future, the panel is lifted. Nails are inserted into the hole and the outer edge is fixed in the bar. The inner surfaces are fixed against the window frame.
The work is carried out according to the same algorithm:
- cut out a paper template, make a fitting;
- transfers it to plastic by cutting out the side of the plastic;
- process the edges with sandpaper so that there is a minimum of space between the upper slope and the panel.
Further actions include:
- Fitting parts to a perfect match at the bottom and top.
- Installation of elements in place. In this case, one edge is driven into a groove near the window.
- Drilling a hole for nails along the outer edge.
- Reinstall the panels.
- Filling the gaps with foam from bottom to top. This should be done in small portions in order to penetrate the maximum possible space.
A slightly different approach requires working on the vertical parts of the slopes. Foam is applied here before the parts are installed. The panel located along the far edge is processed if it is already ready for installation. It is brought under the frame. Apply a strip of foam in a thin stream, stepping back a little from the edge. After inserting the plastic part, the cut groove is filled with the rest of the foam gap. Before doing this, be sure to wet the wall.After that, the slope is pressed, leveled and fixed in the bar with nails.
So that during polymerization the foam does not move the edges of the slope, the joints are glued with masking tape in the lower and upper parts. But even in the case of perfect execution of all manipulations, small gaps will remain. They are covered with acrylic. It is sold in tubes, similar to packaging with polyurethane foam. The product is applied in the same way, through the assembly gun.
Next steps
All excess gaps must be rubbed and leveled. Excess acrylic must be removed with a damp cloth or sponge. This must be done carefully until the surface is completely clean. The manipulation is carried out in small areas. Acrylic must not be allowed to harden, otherwise there will be problems with its removal. It is more convenient to seal the cracks right away. The horizontal slope panel is processed first. After that, there are joints, then they move down. First, the gaps are closed on one side, then on the opposite. Last but not least, the joints with the window sill are processed.
Drying takes 12 to 24 hours, depending on the characteristics of the sealant. If the gaps are large, the acrylic can be pulled into the seam. All these areas must be reworked using the same technique. After the second layer has dried, in the presence of irregularities and roughness, these defects can be smoothed out with fine-grained emery paper, folding it in half. It is recommended to carefully level the materials while they are gray, otherwise the plastic may get mechanical damage.
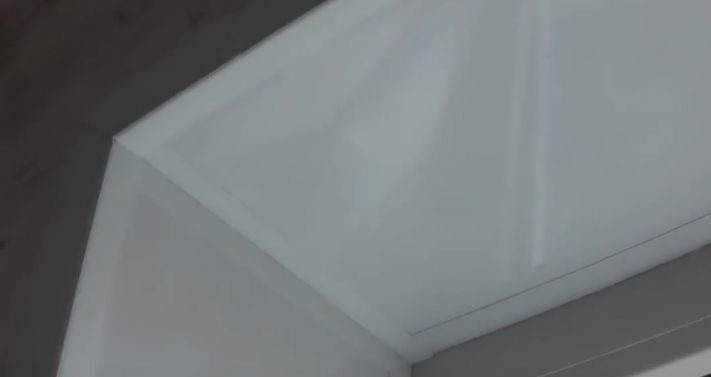
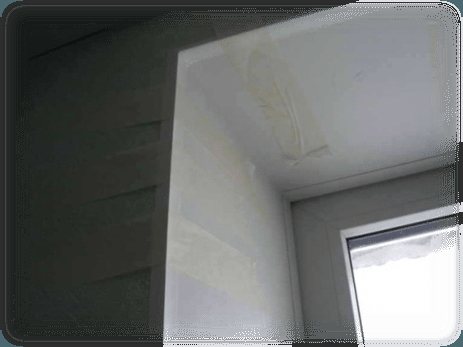
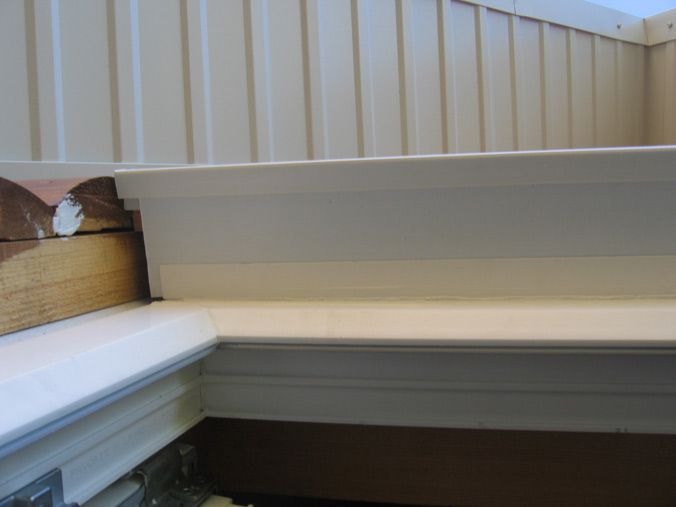
Slopes can be considered established. They should be putty when the foam has completely polymerized. Their surface should be flat relative to the plane of the walls. The protective blue film is then removed.
Panels are considered the most unreliable material for mounting plastic slopes. Even the wall ones are easily squeezed through, and their front layer is imperfect. It is enough to direct light on them, as the jumpers will be immediately visible. This is not observed in plastic window sills and sandwich panels.
Installation with starter profile
To install slopes on plastic windows with their own hands, first prepare a window opening. How it's done:
- cut polyurethane foam;
- remove all elements that are not secured well enough;
- clean the surface from dust;
- the working area is treated with a primer for improved adhesion.
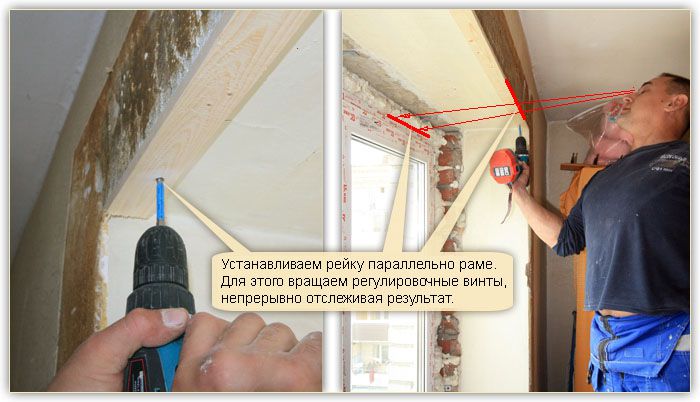
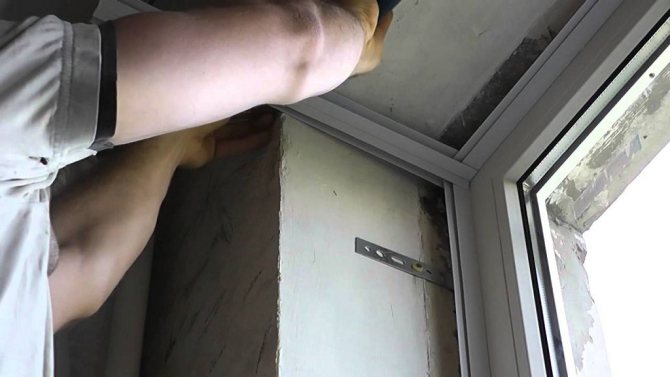
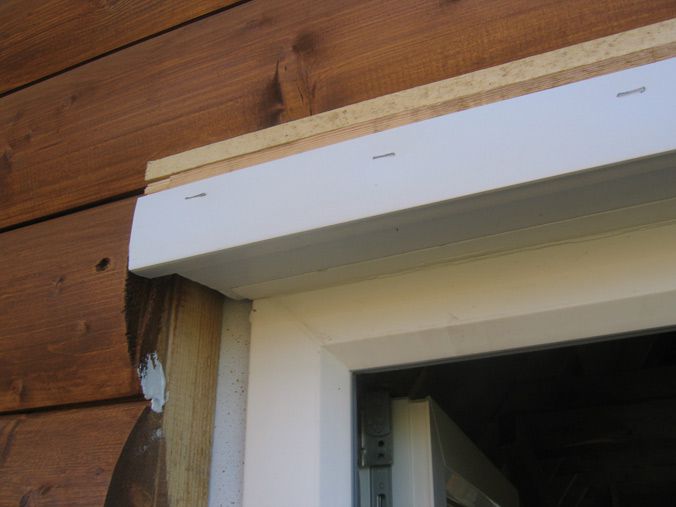
A wooden block is fixed along the perimeter of the opening, but already near the frame. The thickness is selected depending on the distance. It should almost fit into the frame. Correct one side of the bar with a plane, make a slight tilt. In this case, an angle is formed that is comparable to the angle of installation of the slope. You can saw off, but it is rather difficult to do such work with precision. And in terms of labor costs, this is quite problematic, except if a circular saw with an adjustable angle is available.
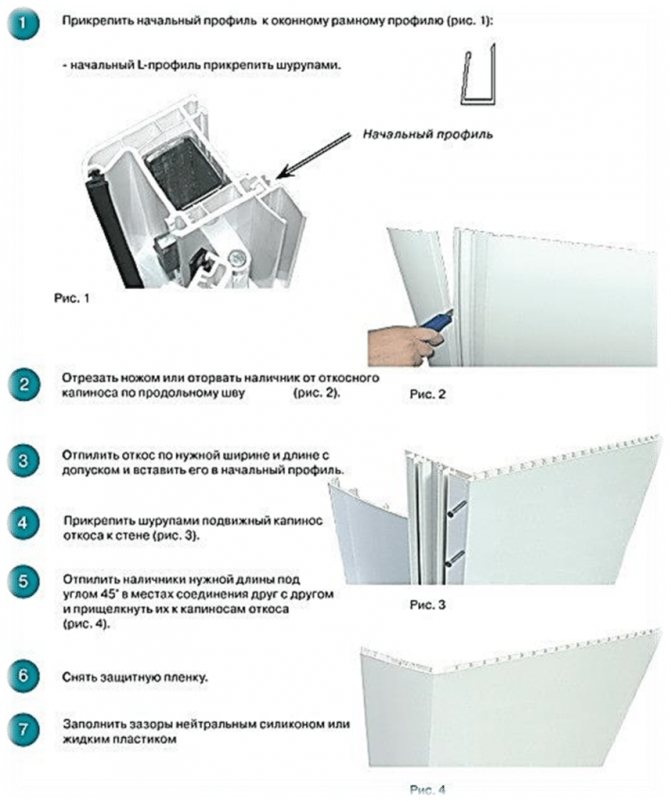
After processing, the bar is screwed along the perimeter of the opening onto the walls. The method of fastening depends on what material it is made of. If the wall is brick, you can put the block on self-tapping screws. For concrete, you need to put a dowel. A start-up profile is purchased at the store. It is installed with the long side to the bar, fixed. Fixing the construction stapler with staples is more convenient in this case. If there is no such device nearby, self-tapping screws with flat heads or small nails can be used.
Setting up a start profile
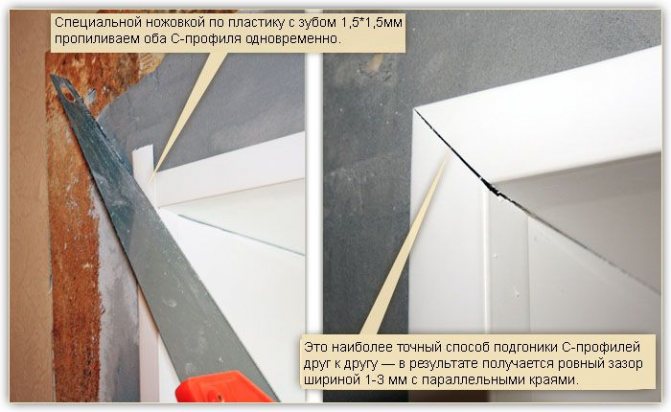
When choosing a starting profile, you need to take dense modifications. They are more expensive, but they will also need less, only 3 m per window. The dense profile fixes the plastic well. A soft product bends and turns out to be ugly in appearance. Another important point is the need to firmly press the profile against the frame.Due to this, the absence of gaps will be possible, or they will be minimal. In the upper part, when joining the horizontal and vertical profiles, you need to be especially careful. They need to be cut at a 45 degree angle. If there are small gaps, it is necessary to seal them with acrylic.
It is most convenient to start working with this technology from the sidewalls. The starting profile is not fixed, after which the panel is inserted into it. But it is better if it is equipped with a thick layer of plastic and is made of dense and expensive modifications. If we take cheap ceiling models, then the front wall will turn out to be thin. In bright light, jumpers can be seen. Among other things, such plastic can be easily pressed through even with a finger.
The plastic panel should be wider than the slope. If the resulting area is not enough, two products are used for joining. But in this case, in the joint zone, it will be necessary to additionally equip a vertical bar on which the first strip is fixed. A panel inserted into a profile is usually longer than the opening. Supporting it with your hand, you should mark the line of the opening. Having removed, cut off the products along the marked line.
The panel is reinstalled, while it is pushed a little more away from the wall and filled with polyurethane foam, trying not to allow gaps, but also preventing excess from forming. Start from the far bottom corner. Near the nailed strip, they pass from the bottom up. Once it reaches the top, the foam expands slightly at the bottom.
Again they draw a line with polyurethane foam, but try to stick to the edges. The closer to the outer edge, the less foam consumption, since the panel is placed under a slope. Having reached the middle, a strip of foam is laid out on the remaining surfaces and the panel is pressed as it should be in the final version. Align and check. Fix it to the wall with masking tape. In the same way, part 2 is installed, and then the upper part. You can cut it out in the same way by cutting out the paper template, and sandpaper the edges to a perfect match.
Work after installation of parts
As soon as all parts of the slope are installed and secured with masking tape, the object is left for complete polymerization. In the future, in order to avoid filling the gaps between the wall and the slope, a plastic corner is glued onto liquid nails. The main task is to ensure a flat plane in the corners. On both shelves of the corner, a thin strip of glue is applied and pressed. Run your hand along and hold for several minutes. Parts are installed around the entire perimeter. Until the glue dries, glue the corner shelves with masking tape and leave.
A day later, the tape is removed. You can consider the plastic slopes ready. If gaps are found anywhere, they must be closed with acrylic, as described earlier. Silicone is not recommended. In the light, it will acquire a yellow color. After a few years, the windows will not look quite solid. A white acrylic sealant is the best option. It is ideal for masking defects.
planken.guru
Sandwich panel products
Do-it-yourself installation of plastic slopes can be done using a multilayer material covered on both sides with decorative plastic. Installing plastic slopes with your own hands using sandwich panels, you do not need to produce additional thermal insulation.
Sandwich panels have high thermal insulation properties
Installation of PVC slopes when using this material is quick and with a minimum amount of waste. The use of slopes made of pvc panels of this type protects the window from freezing.
Sandwich panels have the following characteristics:
- PVC provides reliable heat and sound insulation;
- finishing window slopes with this material increases the energy efficiency of the window system as a whole;
- if you correctly make the slopes of the panels with your own hands, then the window opening will acquire a neat appearance;
- do-it-yourself plastic window decoration is done quickly and efficiently;
- even an unprepared person can make slopes of plastic with insulation.
Installation
The sandwich panel can be attached in the same way as the PVC panel. How to properly make such a finish yourself is shown below.
Slope device using sandwich panels
How to trim window slopes with plastic without a starting profile step by step is shown below.
- this installation method is relevant with a small distance from the frame to the opening, when there is simply nowhere to mount the starting profile;
- excess foam is carefully removed. A thin rail is attached to all sides of the opening; in this case, the panel is set in foam by 1 cm, so the latter is cut accordingly along the entire perimeter;
Installation of sandwich panels is carried out in a groove in the polyurethane foam - first, the upper part is inserted into the resulting groove. Folds back a little, and the resulting space is covered with a small amount of polyurethane foam; the panel is attached to the rail with self-tapping screws;
The sandwich panel is fixed with self-tapping screws - the side fragments are mounted in the same way.
Using drywall
This material has been very popular lately. A lot of structures are made from it, including slopes for walls. When installing it, you can face difficulties, but there are much fewer of them than when finishing with plaster.
The indisputable advantages of using this material are:
- Relatively low material cost.
- Little waste after installation.
- Installation can be done by hand.
- The damaged part of the drywall can be painted over or repaired with putty.
- Long service life.
But, like any other material, drywall also has its drawbacks:
- During the installation, a large number of tools and materials are used.
- It is very sensitive to high humidity, so it is best not to use it in an aggressive environment.
- Insulation is required.
Now you can go directly to the installation of slopes. Tools and materials required for installation:
- Construction or office knife.
- Hacksaw.
- Scissors.
- Drill or hammer drill.
- Roulette, hammer, pencil.
- Screwdriver.
- Rollers and brushes.
- Sandpaper.
Now that the necessary tools are near, you can get to work. First, we fix wooden blocks along the entire perimeter of the window flush with the wall. The bars are fastened with dowels. Then, using a clerical knife, a sheet of foam and drywall is cut. Insulation is laid between the bars and pressed with the help of a ready-made slope segment. Drywall is screwed into wooden blocks with a step of about 20 cm around the perimeter.
After all the slopes are fixed, we proceed to puttying. The putty mixture is applied to the sheet in a thin layer and covers the irregularities and caps of the screws.
The next stage is painting. You can paint in the usual way, the task is not to stain the windows. When the paint is dry, you can start decorating the corners. For this, plastic corners are cut to the required length and attached with glue to the surface.