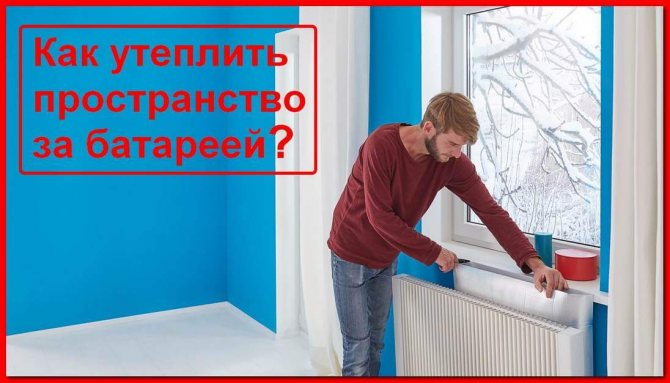

During cosmetic repairs, you can get free access to almost any area of the surface. However, in almost every room there is a place where it is very problematic to get close. This place is the surface of the wall behind the radiator. How the walls are finished behind the radiator, we will consider in detail in the material of this article. Including we will consider the issue of finishing the wall behind the battery without removing it.
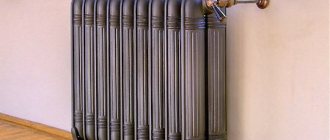
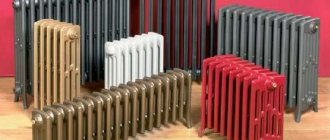
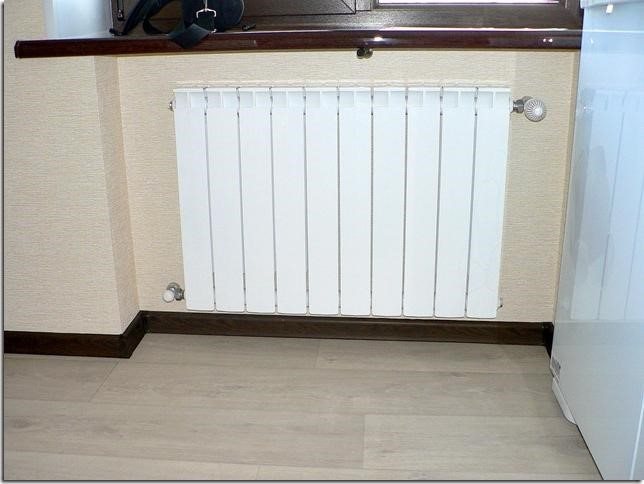
When working with the area behind the radiator, the first step, of course, is to try to remove the battery. Today, heating radiators are mainly found in two types: aluminum and cast iron. Moreover, both types of radiators differ in the way they are connected.
How to remove a heating radiator for wall decoration
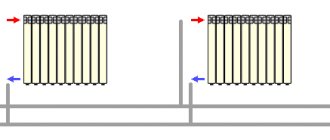
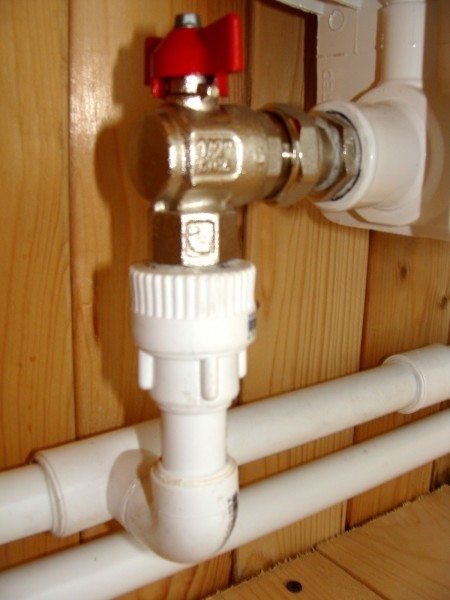
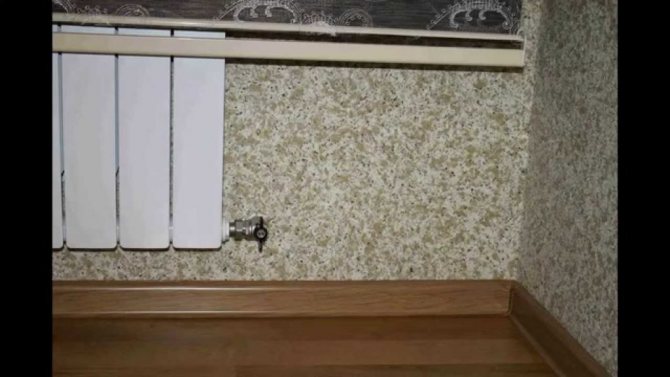
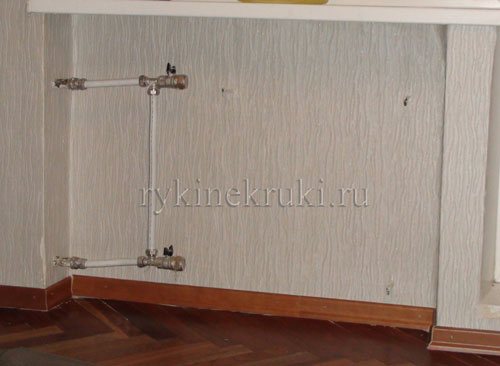
All radiators, both aluminum, cast iron, and other materials, have the same general connection principle. Regardless of the number of sections, the battery has a tap that regulates the supply of hot water, a return shut-off valve, and a Mayevsky tap - an air vent designed to release an air lock from the radiator.
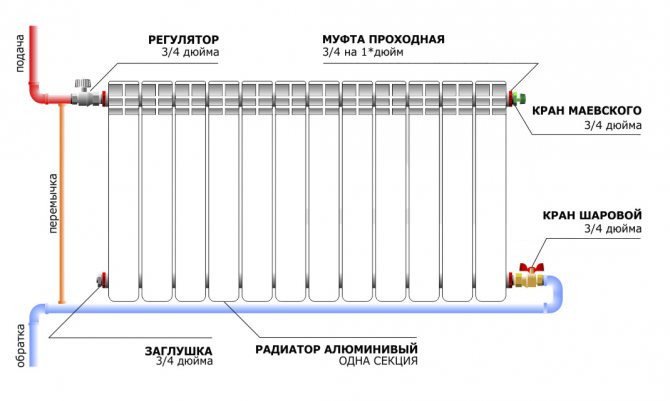
Battery connection diagram. With a small number of sections, the plug and the return pipe are interchanged.
On the supply and return of hot water in the radiators, couplings with union nuts are installed, to which a water adjustment valve is attached at the top, and a shut-off valve at the bottom. After both taps, couplings with an external or internal thread are installed. And after the released couplings, either American couplings with clamping nuts, or couplings for crimping are installed. One way or another, the supply and return heating pipes are connected to the latter.
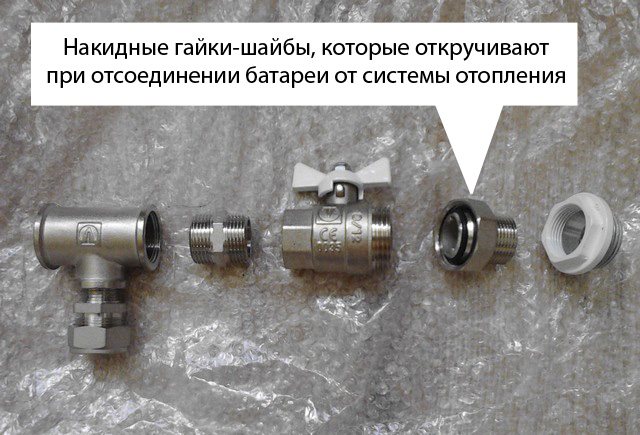
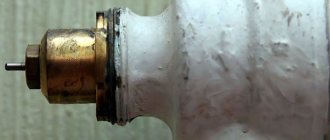
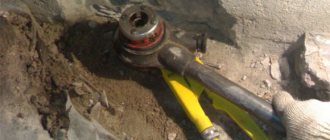
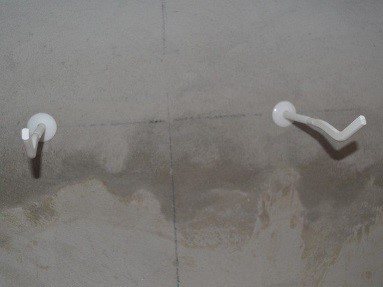
Nut that must be unscrewed to remove the battery.
In order to remove the aluminum radiator, it is initially necessary to close the water supply control valve and close the return valve. After that, you need to open Mayevsky's tap. Its external design can be different. Modern air vents have a comfortable grip. Old-style air vents are opened with a screwdriver, which completely unscrews the bolt.
At the next stage, a basin or a low bucket is installed under the battery to be removed and, using either 2 wrenches or 2 adjustable wrenches, the union nuts connecting the radiator couplings with the taps are unscrewed. Considering that the air vent was previously opened, then you need to wait until all the water drains from the radiator and remove the battery itself from the brackets.
Washing with boiling water and a mop
If you have planned a major cleaning and want to forget about dusty batteries for a long time, then this method is perfect for you. For a thorough cleaning, you will have to arm yourself not only with boiling water and a mop, but also with a baking sheet, which should be placed directly under the radiator. After that, directly from the kettle, start pouring boiled hot water into the battery. All dirt along with water will be in the baking sheet. All that remains is to wipe the accessible surfaces with a rag, and collect the remaining water on the floor with a mop!
How to bleach yellowed plastic quickly, easily and inexpensively
How to disconnect a cast iron radiator from metal pipes
As a rule, in old cast-iron batteries, the pipe connection is as follows. At the inlet and outlet of the water in the radiator, there are cast-iron couplings of adapters - sleeves. The outer thread of the foot allows it to be screwed into the hole of the last section. The thread cut in the inner hole of the foot is designed to connect a 1/2 in. Metal pipe.After the buttress, a metal pressure washer is located on the thread of the metal pipe.
In houses of an old building on cast-iron radiators, as a rule, there are no taps for regulating the water supply and a shut-off valve. All shut-off valves are usually located in one place at the outlet and at the inlet of water to a gas boiler, or in the basement, if we are talking about an old apartment building connected to a central heating system.
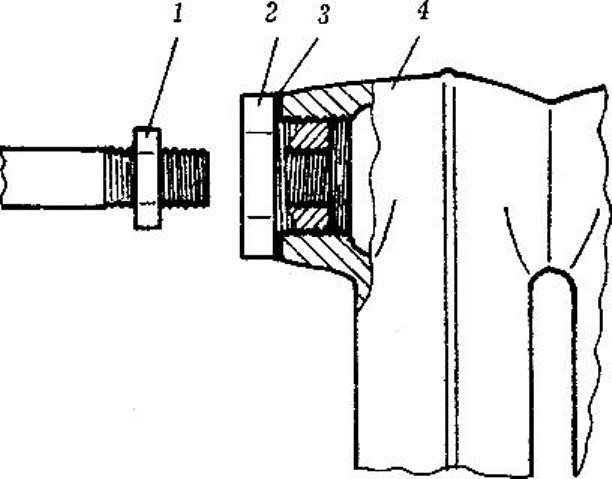
Connection diagram of a cast iron heating radiator.
In the figure, the numbers indicate:
1 - hold-down washer (lock nut);
2 - adapter sleeve (foot);
3 - gasket under the footboard;
4 - base of the cast iron section.
After making sure that the water supply to the radiator is shut off using 2 adjustable wrenches, initially the pressure washer is released on the pipe, about 4-5 cm.After that, substituting a container for collecting water under the battery, unscrew the case from the radiator section, which will move along the thread on the pipe towards the released washer. In this case, it is advisable to calculate and remember the number of revolutions, since the installation of the radiator will be backward sequential.
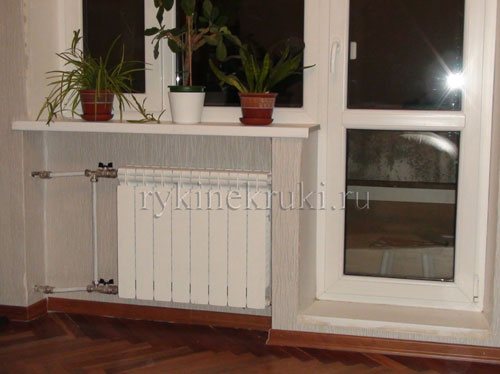
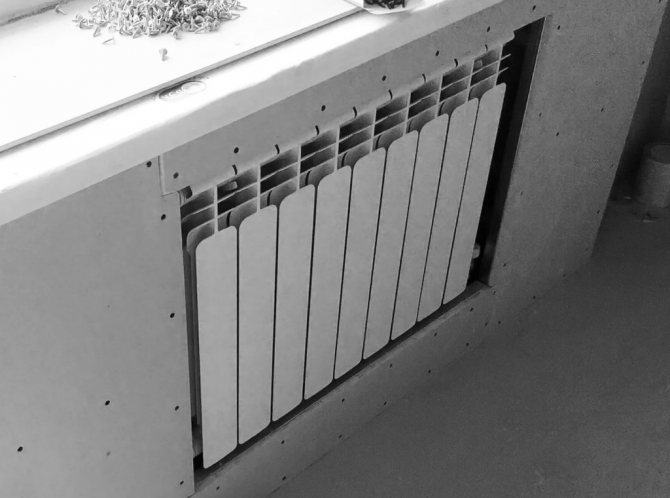
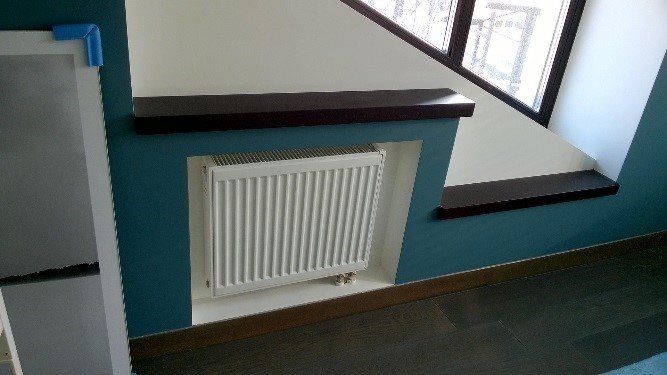
Wall decoration behind the battery without dismantling it
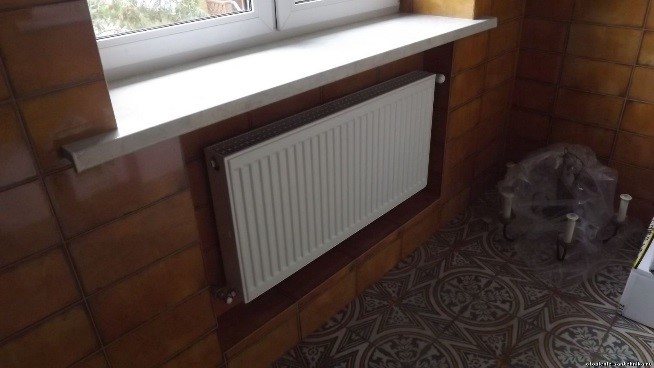
For various reasons, it is not always possible to remove heating batteries. For example, if the repair is carried out in winter and at the entrance and exit of the radiator, and there are no shut-off valves. In this case, there are two options. If the battery is installed close to the wall, that is, the gap is minimal, only 10-20 mm, then it is better to wait until the end of the heating season and still temporarily dismantle the battery. If the gap between the radiator is 4-5 cm, then the wall surface can be finished without removing the battery.
Plastering and filling behind the battery
Plastering the walls behind the battery without removing it will not work fully. That is, you can perform plastering with a cement-sand mortar, but without grouting. It will be necessary to finally level the walls behind the radiator with putty. To apply plaster or putty, an aluminum strip is used with a length of 150 cm or more and a width of only 3-5 cm. The thickness of the strip should be about 4-5 mm so that the strip does not bend during operation.
When plastering or puttying, the mortar is initially made of a thick consistency so that it does not drip from the aluminum strip. A solution is applied to the edge of the entire length of the strip, or putty and at an angle of 45 degrees, the strip is passed between the battery and the wall. The work is similar to the principle of plastering with a rule, but here the main inconvenience is associated with the battery located on the wall.
Painting, priming the walls behind the battery
Given the small gap between the battery and the wall, priming and painting are more convenient to perform with a roller with a small diameter - a mini-roller. Mini-rollers rarely appear on the market, so they often have to be made independently from improvised means, using only its holder from a standard roller. You can also use homemade brushes or ottomans to apply paint to the wall surface. They use an aluminum wire with a diameter of 0.8-10 mm as a handle, which can be bent at the desired angle during painting. In addition, there are radiator brushes on sale. The radiator brush is a curved brush with a long handle.
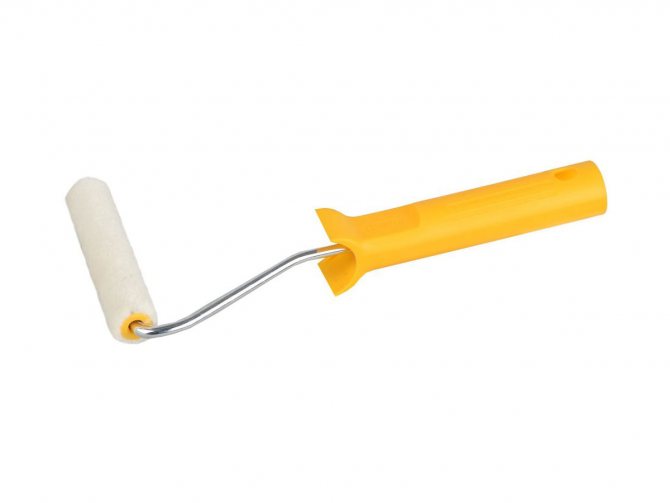
Mini roller for work behind heating radiators.
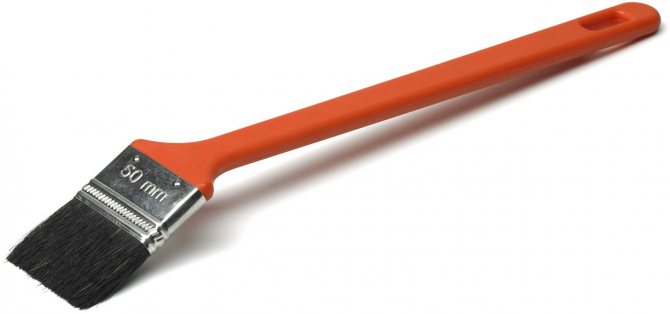
Radiator brush.
Pasting wallpaper on the wall behind the radiator
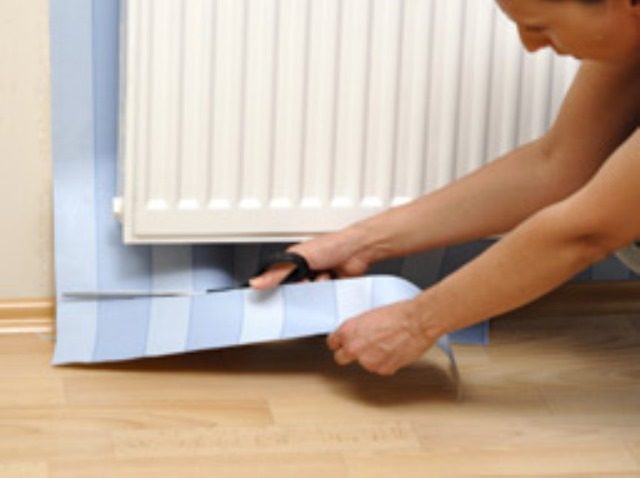
When wallpapering behind the battery, the wall surface is first covered with glue. The adhesive is applied in the same way as paint and primer. Next, cover the back of the cut piece of wallpaper with a roller. After that, a piece of wallpaper is passed behind the battery and in order to press it tightly to the wall surface and smooth it out, use a second dry and clean mini-roller or ottoman on a flexible handle made of thick aluminum wire.
Bonding tiles behind the battery
If the height and width of the battery are relatively small, for example, a radiator of 5 sections, then tiles can be laid behind it on the wall. The problem can only arise with the brackets on which the battery hangs. We'll have to make the markings for the tiles so that the horizontal seam between the tiles falls exactly on the location of the two brackets. If the brackets are made of smooth reinforcement, then small recesses are made on the edges of the tiles, thereby the upper and lower tiles will encircle the bracket released from the wall.
Other ways of decorating walls behind radiators
If it is very difficult to get behind the battery and it is unrealistic to remove it in the near future, then behind the radiator to the wall you can mount a glass-magnesite sheet (MSL) on the dowels, which can be pre-painted in the desired color. You can also glue wallpaper or tiles to the sheet. The advantage of LSU is that it can be purchased with any thickness from 2 to 10 mm. It should also be noted the good heat-insulating and waterproofing qualities of magnesite glass sheets. In addition to LSU, you can use other sheet materials, such as drywall, plywood, chipboard.
A simpler approach
The complexity of the work in this case depends on what kind of material you need to decorate the surface. If this is paint, then everything will be very simple - you just need to purchase a special brush with a curved handle or make yourself a semblance of a thin roller, fixing a foam rubber coat on the wire. It is more difficult with other materials, and there are several finishing options:
The most difficult thing is with the tile - it does not bend, it is difficult to push it into the narrow space behind the radiator, and aligning the tiles relative to each other is even more difficult. In addition, you will have to cut grooves in some tiles, into which the brackets on which the heater hangs will enter. That is why wall decoration behind the battery with tiles is usually performed with the removal of the heating device.
It is not so difficult to cope with wallpaper, and the most important point will be the tight pressing of the panel to the surface. The cut blade is smeared with glue, pushed behind the radiator and leveled there using a long brush with a curved handle or other suitable device. The bubbles cannot be completely removed, but in this place they are practically invisible and this moment will not be the most critical. The main thing is to glue a piece of wallpaper well so that it does not come off later.
The panels are also easy to attach. They can be fixed with glue or lathing. In the first case, the work is simple and there is no need to consider it separately. The second case is not that simple. You will have to arm yourself with a screwdriver with a very long sting in order to be able to screw the panels through the heater sections. In addition, the decoration of the walls behind the radiators with panels on the crate is possible without removing them only with the vertical arrangement of the panels. Otherwise, it is almost impossible to mount the crate. The most difficult case is with plaster and it is worth talking about separately.
In addition to all the above methods of decorating the surface behind the radiator, there is another universal option that is not suitable in all cases - finishing the walls behind the radiator with ceiling tiles. It is simply glued to the desired surface, easily pushing it into a narrow space. However, this method is not always suitable, since the decorated surface will be different from the rest of the space.
Screens for radiators
Another solution when decorating a wall behind a radiator and decorating radiators is to use screens for radiators. They are perforated panels of various materials and come in a variety of patterns and colors. Such panels cover the wall along with the batteries. Thus, part of the wall behind the battery itself is hidden from view.The disadvantage of this solution is some reduction in heat from the battery.
Screen for radiators.
If in the wall behind the batteries there is a recess for the battery - a niche, then the finishing technologies in this case are slightly different. You can find out more about them in a separate article: finishing a niche under a heating battery.
Walls play a major role in interior decoration. It is important that they are smooth and tastefully finished so that they, together with furniture and decorative elements, make up a complete design.
The interior looks impeccable when the tricky parts of the decoration are done with high quality.
But it often happens that the decoration of the wall behind the battery is relegated to the background, and they remember it when it is already clearly noticeable that unfinished batteries spoil the whole picture.
How to close radiators - 11 ways from a plasterboard box to a fabric screen
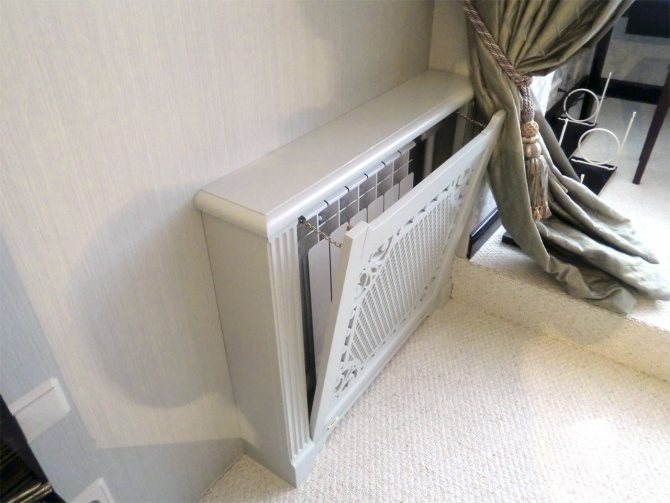
Decorative screen / HDF box
This option is one of the most popular because of the average price and beautiful appearance.
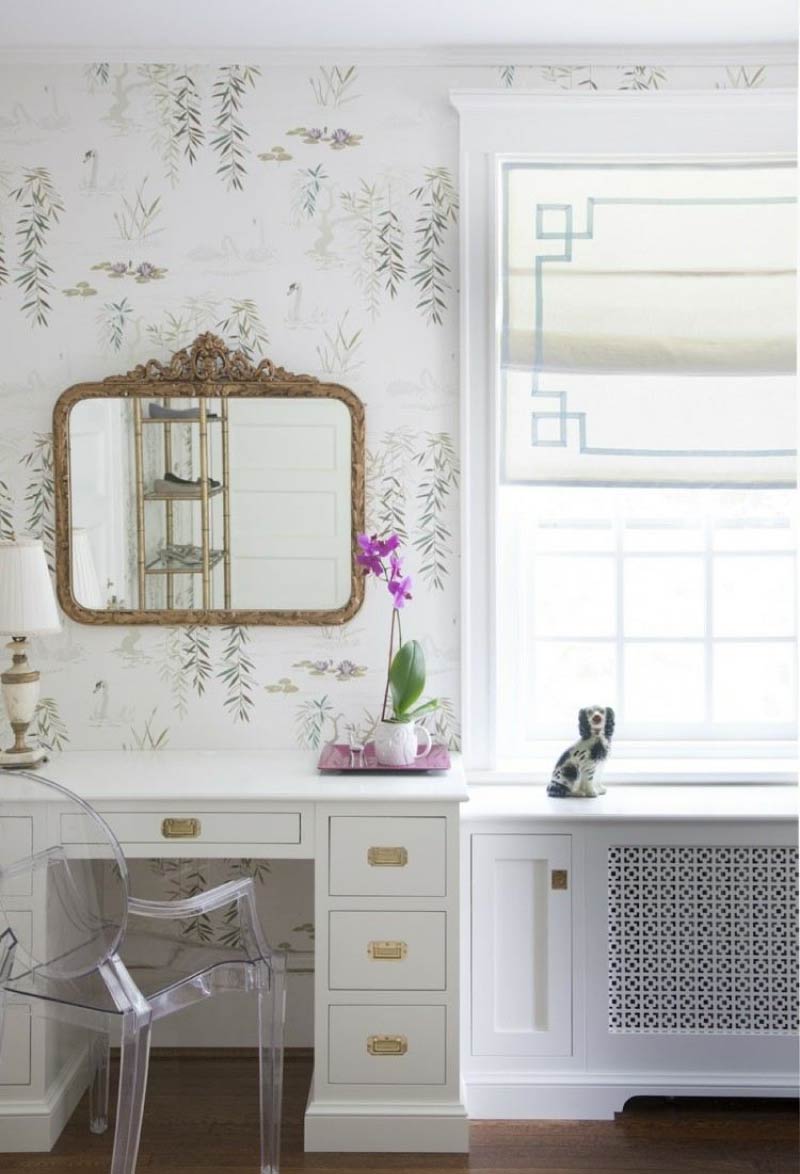
What is the difference between a box and a screen? The screen is designed for a battery located in a niche or under a windowsill (pictured above), therefore, only covers the front of it. The box completely covers the radiator on the wall from all sides.
The screen, like the panel of the box, is made of perforated HDF sheet (high density fiberboard, 3 mm thick), but the profiles of the box are made of MDF. Both materials are strong enough, durable and non-toxic when heated.
- Due to the original perforation, HDF screens / boxes look beautiful and fit into any interiors, especially classic ones.
- Heat resistance (the structure does not dry out like natural wood, and does not turn yellow like plastic).
- Easy to assemble and install without the help of specialists.
- Ready-made HDF screens / boxes can be white or imitate wood (wenge, beech, oak), and custom-made ones can be painted in any color, laminated, veneered with natural wood. True, the complexity of the design always affects the price of the screen.
- MDF and HDF do not tolerate prolonged contact with water. If the battery leaks or the pipe breaks, the elements of the box / screen may swell. Therefore, any emergencies must be dealt with immediately.
- Perforated panels, despite their thinness, are quite durable due to the high density of fiberboard. However, they must be protected from impacts and sharp objects.
- Slices of perforation in factory screens are not stained, and therefore are visible.
Price: from 1,500 rubles for a finished model and from 2,300 rubles for an individual order.
Selection tips:
- The size of the radiator recess must match the size of the inside of the screen.
- Screens and boxes for the battery can be either ready-made (assembled as a constructor) or made to individual sizes and designs (you can choose a perforation pattern).
Here is a small selection of photos of closed batteries.
Drywall box
How to cover the battery with drywall? Using this material, you can sheathe the radiator with a box or create a niche for it in a false wall.
- Environmental friendliness;
- Can be used in damp rooms;
- Material is available;
- With a false wall, you can close pipes, expand the window sill;
- You can close the battery with a drywall box with your own hands without special skills in a few hours of work;
- You can think over the configuration of the box and false walls yourself, if you want to equip it with shelves and niches, additionally close the pipes leading to the battery. Next, you can see a photo of a closed battery in a plasterboard false wall with an enlarged bench-sill and a built-in niche for books.
Design nuances
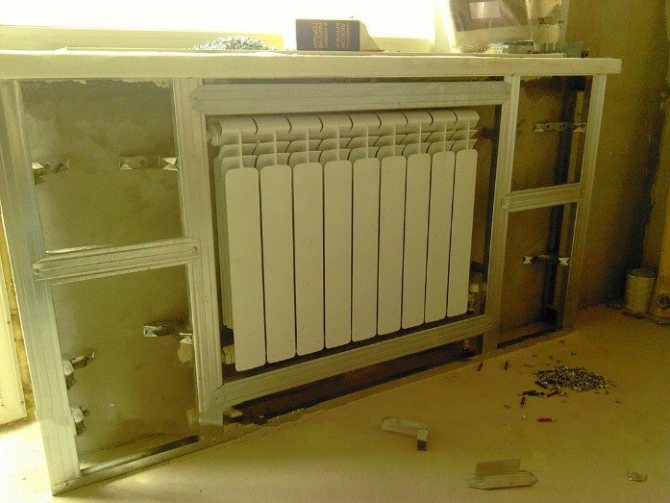
The radiator installation site is one of the most difficult to access for finishing, whether it is a hinged battery or hidden in a niche. The difficulty lies in the fact that bulky heaters take up the entire space of the niche, and pipes for supplying hot water, a lintel and a return flow prevent free access to the wall.It is most reasonable not to postpone the issue of finishing the space behind the batteries for later, but to do it simultaneously with the main walls at each stage of the repair. Ideally, if you bought an apartment in a new building and ordered a turnkey repair or build your own house, then the designer will think through everything to the smallest detail and the heater will organically fit into his idea.
Exterior finish with wood paneling behind the radiator
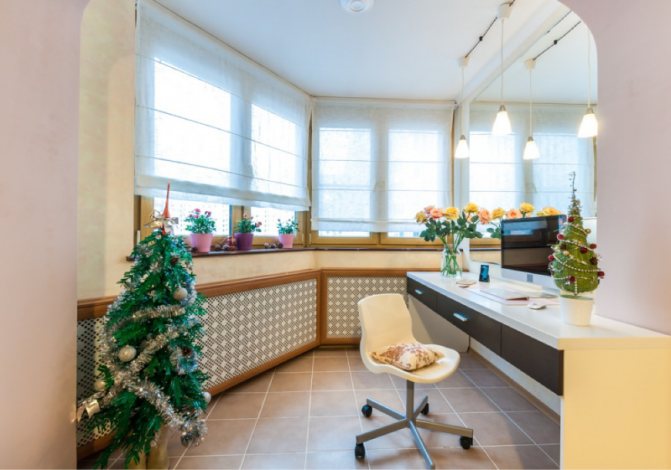
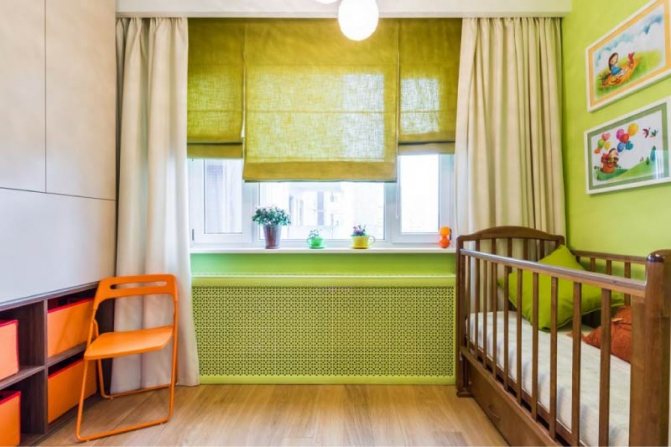
But most of us still live in Soviet buildings, which are more than a dozen years old, and during the times of Khrushchev and Brezhnev, no attention was paid to the surface behind the battery, the main thing was to quickly provide people with living space. So it turned out that the wall behind the radiator was somehow pasted over with wallpaper or painted over. It is clear that over time, the wallpaper peeled off from the constant exposure to warm temperature, and the paint peeled off. Basically, the batteries are placed under the windowsill and covered with tulles and curtains, but what if you want to make a modern design and use blinds, and square meters do not allow you to install a decorative screen on the radiator? We'll have to do wall decoration in this place.
When repairs are carried out with the replacement of the radiator, it is necessary to replace the supply pipes and plaster the wall behind the battery
A separate repair behind the battery will add the following hassle:
- in a completely made and clean room, you will have to start a mini-repair for a rather long time;
- dust and waste of building materials pollute the air and things in the room;
- a separate mini-repair will have a bad effect on finances: the purchase of building materials that are not all used, the call of the master to remove the battery - you have to pay for this.
If you have inherited sloppy walls behind the heater, you will have to make repairs. There are many options to close up the surface where the battery is located and to give the wall a finished look.
If the radiator is in a niche
In buildings where heating devices are located in niches, heat loss is higher.
The walls behind the radiators are thinner and colder than the others.
Heat is given off not to one, but to three low-temperature surfaces at once.
Therefore, if space permits, it is worth increasing the thickness of the insulating one to 10-15 millimeters.
In addition to the material, it is important how the heat-reflecting screen is attached to the radiator.
Illiterate editing will negate the entire expected effect.
Installation of heat-reflecting screens
Wall cladding methods
Decorating the wall behind the battery can be costly or cheap, but neither is done quickly.
Repair steps behind the battery:
- We remove the battery, otherwise it is impossible to fully seal the surface. When removing yourself, first shut off the water supply tap and return valve.
- There is water in the radiator, unscrewing it from the taps, substitute a low bucket or, better, a wide basin. The battery is removed from the holder when the water is completely drained. It is safer to call the master, because if the heating supply is on, and the ball valve on the lintel is old, it is dangerous.
- In order not to spoil the clean floor and carpets, you should stock up on large pieces of film and cover all the way from the front door to the radiator.
- Next, we examine the wall, which is not the object of defects and prepare it. We remove the mounds of old plaster and paint with a hammer and chisel, paying attention to the place where the plinth is, there should be as even as possible.
- We remove the debris and seal small cracks with putty. They are dry, we completely level the niche with plaster.
- The dried plaster is primed 2 times, the layers dry for 2 hours.
The battery is removed, the wall is prepared, now you can choose the finishing method itself, and there are many of them. By the way, there are "dry" finishes behind the battery, for which the surface does not need to be leveled, it is enough just to remove the protrusions and prime.
Putty and glue the wallpaper
Let's continue the plaster theme. The method is costly and long: you need to buy a lot of materials, and the plaster dries up to a week.Beacons are not exposed at the starting layer, this surface is small, it is quite possible to level it without beacons.
After drying (up to about 5 days), we prime the wall, it dries and we apply a finishing layer. To save time, it is better to buy a bucket of ready-made putty. The dried surface is sanded with a sharp spatula, so there is less dust in the room. Cut out the necessary pieces of wallpaper, take special glue and paste over. They begin to glue on two opposite sides, so that the joint of the pieces is in the middle, behind the battery. Next, measure the pieces of the plinth, drill holes in the hay for the fastener and install it.
We put drywall
Finishing the wall behind the battery also means finishing the wall with plasterboard. The method is well suited in a house with plasterboard walls, so there is less hassle: at the same time you make a crate under the gypsum board for the battery. With brick walls, this is also possible. A metal frame is made on which the sheets will be attached. GKL withstands the effects of warm temperature very well, does not crack from it over time and has low heat transfer.
In this regard, it is perfect for finishing the space behind and around the battery. If insulating material is installed between the wall and the gypsum board, then 10-30% of the heat will remain in the room. You just need to remember to drill holes in the drywall so that warm air from the battery flows into the room. The joints between the sheets are pasted over with a thin mesh and putty. With a thin layer of the finishing mixture, everything is aligned flush with the wall. When everything is dry, it remains to paint the wall.
There are also special heat reflectors that direct warm air into the room, but not everyone proves the effectiveness of such a device.
We glue plastic panels or ceiling tiles
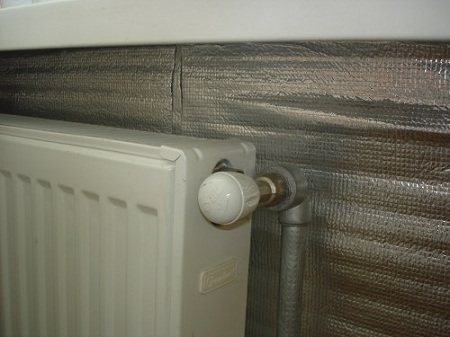
This option is the most budgetary, but it allows you to give the place under the battery a well-groomed look and even insulate well the thin wall where the niche is located. We are talking about the use of modern material - foil-coated polyethylene foam. It is mainly used for thermal insulation. It comes with double-sided aluminum coating and one-sided, with a denser polyethylene inside and ordinary, self-adhesive and not. The simplest one is also suitable for decorating a niche.
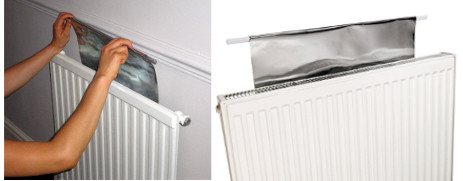
Heat shield on the wall behind the heating radiator
A hot battery transfers part of the heat from its surface by thermal radiation, which is directed in all directions. Naturally, a considerable part of it "falls" to the inner cold wall, which is a direct heat loss. If the battery is placed in a niche, then a thinner wall contributes to an increase in heat losses, especially in frosty weather. The radiator will heat the street, but not the home. Heat loss reaches 20%.
To avoid such a situation, it is advisable to place a heat-insulating material with a reflective surface between the heating radiator and the wall, which will provide:
- thermal insulation of the wall to prevent heat transfer due to the temperature difference between the street and the home;
- reflection of the heat radiated by the radiator into the room.
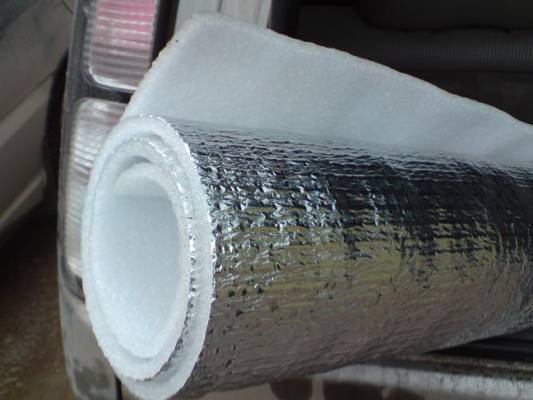
Currently, many modifications of foil-clad heat-insulating screens are being produced. They all represent a combination of a material with good thermal insulation properties, for example, foam or polyethylene foam, and foil as a means of shielding radiant energy. The foil is capable of reflecting up to 90% of the heat in the radiated range; further heat leakage is prevented by thermal insulation.
Polyfoam with foil is produced in rolls of small length, layer thickness is 3 mm. The most common reflective heat insulator is 4 mm thick polyethylene foam produced in long rolls. Its heat-insulating properties make it possible to replace a layer of mineral wool up to 100 mm thick.
The distance between the rib of the radiator section and the plane of the inner wall must be at least 4 mm.At a shorter distance, air circulation around the battery is impeded, which disrupts convective heat exchange, and accordingly, the heating efficiency decreases. The material is attached to the wall with a heat-insulating layer. In some cases, the location of the battery does not allow the installation of a heat insulator, then it is enough to try to attach at least aluminum foil on the inner wall. Its shiny surface is perfect for reflecting incident thermal radiation. For a brick wall with a standard thickness of 51 cm, a sheet of foil will reduce heat loss by up to 35%.
conclusions
The decoration of the walls behind the radiators was much easier if it was done at the same time as other repair work. But if there was no such opportunity, then you can always fix the situation by using modern building materials and tools. It is necessary to choose a finishing method based on the size of the space behind the battery, the heat loss of the wall itself, the result you want to achieve from the cladding and the cost of materials and your own skills. Then such repair work will take place with the least cost of money and time.
Recently I came across a topic such as decorating walls behind central heating radiators with my own hands. I want to share my experience, because there are nuances, and I think that they will be of interest to you.
Installing the battery in a niche.
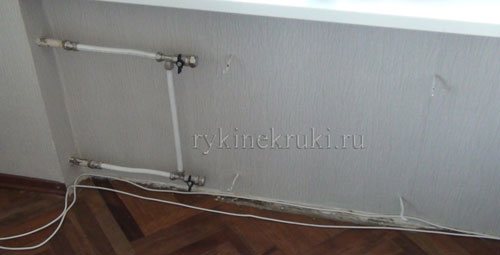
Upon completion of the repair, it remains to hang the battery in the niche. If a used radiator returns to its permanent place, then there is no need to philosophize a lot to pick it up on the old mountings. However, it is worth worrying about replacing the iron clogged pipes and threaded bends with connecting American pipes and plastic pipes.
If a new radiator has been prepared for a niche, then you need to start trying it on even before the start of all work and, according to its dimensions, prepare everything else: accurate hot water supply and placement of the return pipeline, dimensions of convective gaps, installation of mountings for a hinge:
- First of all, places for fastenings are marked. Depending on the length of the radiator, there can be two or three clips;
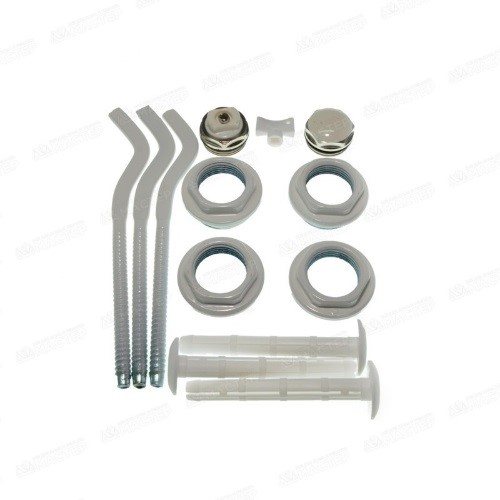
2. Measure its height with a tape measure and lay it on the wall from the lower edge of the niche. An increase is made on the convective gap and the margin is subtracted, which is equal to the elevation of the battery above the fastening hook. A horizontal line is drawn along the level at this height.
3. The resulting line is divided in half and holes are marked on it for future clips (two or three). The main thing is that the holes are located symmetrically and coincide with the gaps between the sections. Now the heating element is pre-hung on the clips;
4. Paths of outgoing pipe connections are marked. If the repair is carried out in the entire room, then it is better to hide the pipes in the gates and brick them up, having previously put on a heat-insulating cover on them;
5. When constructing a drywall niche, you first need to carry out communications, and only then fix the guide strips and hem drywall sheets;
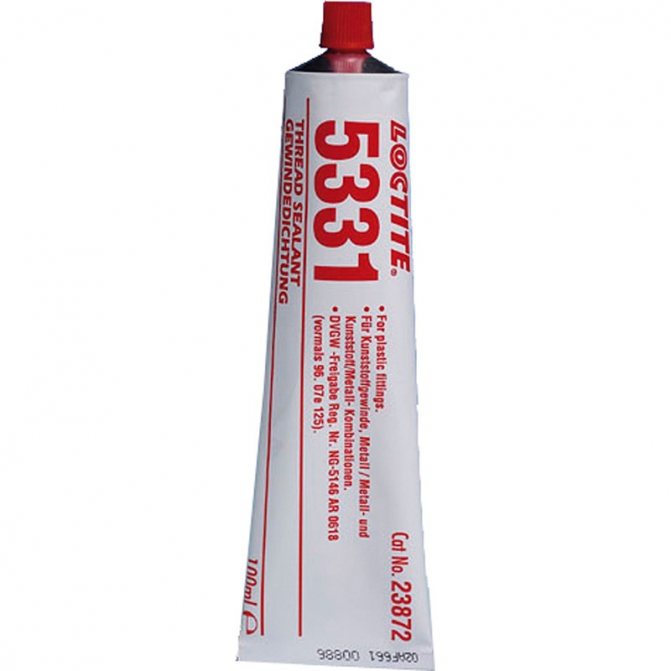
6. When everything is ready and you no longer need to remove the battery from the wall, you can finally assemble the threaded connections. You need to twist the American women tightly to compress the rubberized gasket. At the same time, you do not need to use fum tape, but it is better to additionally cover the thread with silicone.
Taking into account all these points, it is possible to turn the corners of the room that are corny to the eye into its harmonious components, without losing the operational qualities of the heating elements.
If there is no niche in the wall behind the batteries, that is, it is flat, then you can use other methods to finish it. You can find out about which in the article: wall decoration behind the batteries.
Wall decoration behind the radiators. Think about the little things
It turns out that when people make repairs in their apartments, they completely forget that the decoration of the walls behind the radiators is just as important as the decoration of the main walls. And after finishing the work, they realize that the batteries, in fact, are not completed, the wall behind them is ugly, and of course it needs to be brought into the appropriate form.
Why is this happening? Here are some reasons:
- the heating battery covers a part of the wall, so there is no need to do something behind it;
- there will be long curtains from the eaves to the floor and the batteries will not be visible at all;
- decorative screens will be hung on the batteries.
It is difficult to disagree with these points, since they are absolutely fair. But, not every family is able to plan all future repairs, as they say, on a turnkey basis, and many little things are thought out along the way. For example, after the completion of the repair, it turns out:
- probably in this room with such wallpaper, blinds are better, or short curtains to the windowsill, and not to the floor;
- the room is relatively small in area, and if you hang decorative screens on batteries, they will look very cumbersome and steal space in the room.
So it turns out that the primary vision regarding batteries has changed. It turns out that there will be no long curtains or decorative screens. So what then? A terrible untreated wall behind the radiators, which is very visible in the absence of curtains? By the way, there are houses where there are 2 windows in the rooms. So 2 scary walls will be visible?
What is the difficulty, you ask? Just think of a small piece of a wall, it can be done in a couple of days. However, this is an erroneous, at first glance, opinion. If the wall behind the batteries is really crooked or with potholes, then you can't just stick the wallpaper on it, most likely it will have to be leveled at the very least, which means you have to fiddle with the primer, and with plaster, and with putty. Read my detailed article on preparing walls for wallpaper. After gluing the wallpaper, you need to remember to cut out and fix the baseboards, which are solid external and internal corners under the batteries. The worst thing is that if your major repairs have already been completed, then the apartment is relatively clean. And just imagine, in a mini-version you actually have to repeat the entire repair from start to finish with a small piece of the wall.
True, I can reassure you a little, because there are certain assumptions that will still allow you to reduce the time. So let's get started. In parallel, I will take into account the time spent on such repairs.
How to close batteries correctly - technical rules and tips
Before closing the radiator, it is necessary to take into account several technical nuances:
- Keep in mind that heat transfer from a closed radiator is reduced in any case, whichever camouflage method you choose. The main thing is that the change is not significant. Ideally, the temperature drop in the room should be about 1-1.5 degrees.
- Before closing the battery, put it in order: blow it out, rinse it (this is done at the end of the heating season) and paint it.
- Keep in mind that the tighter the grill weave, the better it masks the radiator, but the worse it conducts heat. Therefore, when choosing a screen for a battery, try to look for a middle ground or rely on heat saving.
- To minimize heat loss, the screen can be placed on its legs, and a groove can be cut in the center.
- When closing the battery, it is very important not to block the convective air currents, otherwise the room will blow and the windows will start to fog up, which will eventually lead to the appearance of mold on the walls. Ideally, the sill visor should protrude no more than 30 mm above the batteries, the top and bottom of the battery should be as open as possible.
- There must be a distance of at least 35-50 mm between the battery and the screen. A gap of about 60-70 mm should remain from the radiator to the floor and to the window sill.
- To solve emergencies, it is necessary to provide free access to the radiator.For example, the lattice of the box can be removable, folding (see photo), opening on hinges or sliding out on profiles.
Dismantling the heating battery
The first thing to do is to remove the radiator. Although a jumper (bypass) is installed in front of it, and by shutting off the taps, you can independently carry out dismantling, you still need to take into account one point. If the heating in the apartment is not turned on, then you can remove it yourself, but if the heating has already been supplied, then who knows, in what condition you have ball valves that shut off the battery. What if they leak over time? In this case, self-catering can turn into a big trouble both for you and for your neighbors, and it would be better to call the master.
It is necessary to prepare a place for future repairs, purchase the necessary materials and tools. Plus, call the wizard to remove the battery and do not forget to include the time for the wizard's work themselves. We plan for everything for 1 day.
After the work of the wizard, we will see the following possible picture:
Difficult option
At the same time, the solution with the removal of the heater will be the simplest in terms of finishing work, and the most difficult in terms of preparation. The preparation will consist mainly of removing the battery completely. Not every home craftsman will be able to cope with this, and in winter, in the absence of a tap that shut off the water, this simply becomes impossible. If removing the radiator is not a problem for you, then the repair itself is not difficult - the technology for performing all the work will not differ from the rest of the room.
Therefore, there are only two ways to prepare everything here: remove the heating device yourself or call a foreman, who will first remove it, and then, after a while, install it back. You will need to call it two times - for removal and installation, and this will require additional costs. In this regard, finishing the wall with a battery with its removal is one of the most costly and difficult ways to repair the surface. It is much easier to make repairs without removing anything.
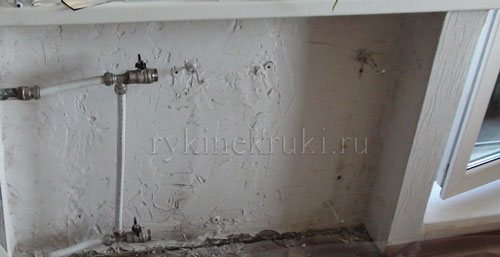
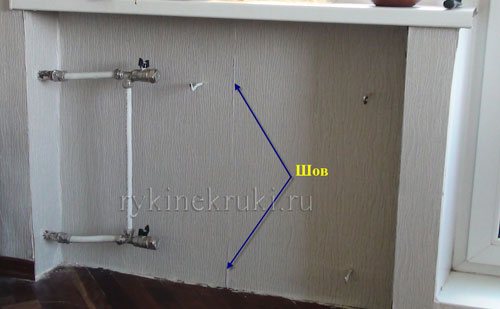
Initial treatment of the wall behind the battery
In the picture above, you can clearly see that the wall behind the battery has not been processed. If this is the first time you remove the battery, then most likely there will be not a white, but a gray dusty wall with old stubborn paint. It is clear that you cannot immediately glue the wallpaper on such a wall. If you decided not to glue the wallpaper, but to make the wall cladding a decorative panel, as can be clearly seen in the pictures in the article Correct installation of a central heating battery in an apartment, then in any case, the wall needs to be processed at least to remove the smells of old walls and old renovation (advice from my personal experience).
Arrangement of space behind heating batteries. - blogs - poremontu.ru
I have a rather old panel house. Almost twenty years have passed since its construction. Naturally, during this time, I, to one degree or another, redid almost the entire apartment.
The newest building materials and technologies that have appeared have allowed us to significantly expand the content of the very concept of repair. If earlier we were content with whitewashing and changing the wallpaper, today it can be called a repair only with some stretch.
Take any element of the apartment: floor, walls, ceiling - today, the repair of any of these elements can include a very diverse range of activities. For example, the ceiling, in place of the traditional whitewash, came with two or even three-level stretch ceilings. I'm not talking about the ceiling tile, it has already become so firmly established in our life that it is considered to some extent an outdated solution.
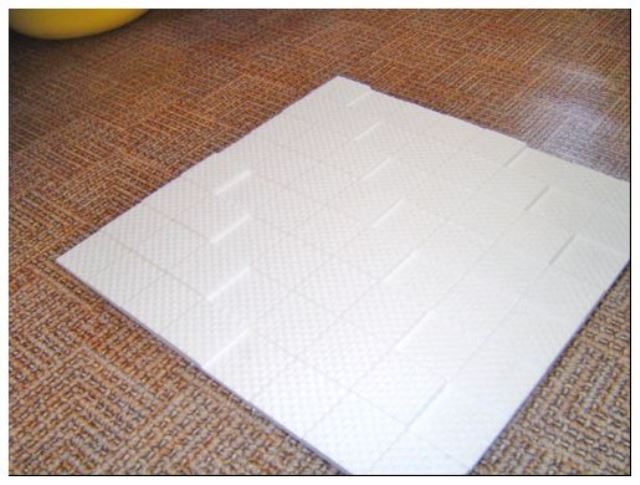
I have found another use for ceiling tiles.
The space behind the radiators is traditionally the bottleneck of any repair. Even just whitewashing there is quite difficult, glueing the wallpaper is also quite inconvenient, besides, very often the pasted wallpaper flies off. So the battery "flaunts" against the background of a somehow equipped wall.
And this space, I pasted over with ordinary ceiling tiles. It turned out to be quite simple to do this - the ceiling tiles fit very well for any configuration of supports for radiators. In addition, it is also very easy to measure the location of these supports before gluing the tiles - after all, all tiles are of the same size.
I started the sticker with the ceiling plinth, with which I framed the lower part of the window sill. And he began to glue the tiles from below, in the direction from the balcony door. Thus, the bottom, most clearly visible row, turned out to be composed of whole tiles. The same applies to the first vertical row from the balcony. I got two rows in total, and the top row had to be cut a little.
I glued the tiles to PVA glue, spreading it over the entire surface. I also coated the walls with glue before sticking. The adhesion of the tiles to the wall was good. Quality is time-tested. For more than a year now, the tile has been holding up perfectly and does not fly off.
The space behind the radiators, arranged in this way, began to look very good. From a somewhat whitewashed corner, it has turned into a completely refined niche. Everyone who saw my innovation rated it positively. Of course, this is just a small touch in the general decoration of the room, but the touch is quite noticeable. Now I have heating niches in all rooms in the same way.
How to plaster behind a battery
Next, you need to align the wall. From our initial picture, it is clear that the wall will have to be plastered. It is in this place that you can breathe out once with relief: it is not necessary to plaster on the lighthouses! Even if you lie a little and make a slight curvature, then it will definitely not be visible under the batteries. Therefore, we take the plaster and begin to level the wall by eye. I have a separate section on How to plaster walls.
We take about 3 hours to prepare the plaster solution and the work itself (for a non-professional):
And now an important point that many people forget. The plaster takes a long time to dry. 2 to 7 days. (if, of course, we want to do everything using the right technology). It all depends on the thickness of the plaster layer, the season, the dampness of the room itself. But still we take an average time of 4 days. A sign of complete drying of plaster, for example, gypsum Rotband, will be a change in the color of the wall from cream to snow-white, as will be seen in the following picture:
Yes, I almost forgot. If you are making repairs during the heating season, then I highly recommend that you install plugs immediately after removing the battery for your own safety. It is important to read about this here.
Installation steps
The most reasonable thing is to provide for the installation of a heat-reflecting screen during the construction phase - after the rough finish, before the installation of heating.
If the repair is complete and the radiator is in place, you will have to remove it.
The size of the screen must correspond to the working surface of the heater.
Then it will be invisible and will not spoil the interior.
In production areas where aesthetics are not important, it is worth increasing the area by 10 percent to ensure maximum reflective effect.
The wall under the window is cleaned of dirt and crumbling plaster, defects are putty, irregularities are removed with sandpaper.
You can start installing.
The heat-reflecting screen behind the radiator is attached with wallpaper glue, "liquid nails" or furniture nails.
If there is enough space, a more reliable option is a lattice base made of thin wooden planks.
Additionally, we obtain an air layer between the wall and the thermal insulation sheet.
It will have a positive effect on heat transfer.
The radiator returns to its place.
It is important to adjust the position of the device so that a distance of one and a half centimeters (minimum) remains between the foil cover and the back side.
If possible, make the gap larger.
The heat-reflecting screen does not need special care.
Sometimes it is enough to wipe dust on it.
If the aluminum layer is scratched or torn, metallized tape will help remove the damage.
The functionality will not be affected by this.
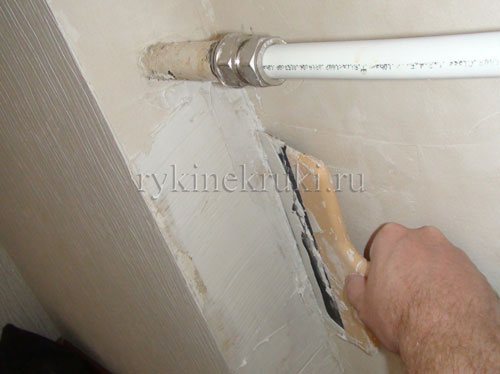
How to putty behind the battery
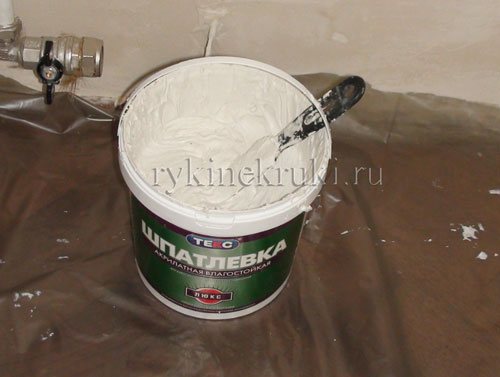
As soon as you have received a snow-white wall, you need to prime it once (we take 2 hours to dilute the primer, apply it, and dry it) and immediately proceed to the putty. Here you can also do it easier than we did when filling large walls. It is not at all necessary to buy a dry mix and prepare it. It is quite possible to do with ready-made putty. This will significantly save time:
By reading my blog, you are probably making repairs. Add to your bookmarks
this page... All useful home improvement stores are located here.
The putty is applied in a thin layer. I think in 1.5 hours you can do it quite well:
Drying time of the putty is 1 day. The second time, I think, is not worth puttingty.
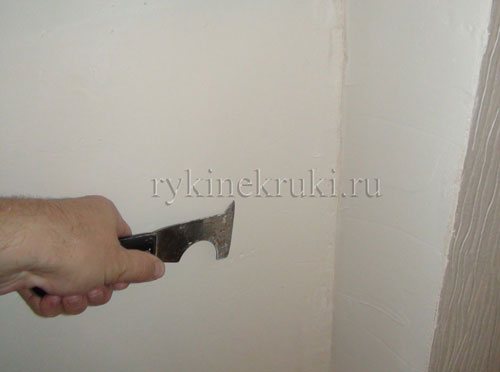
How to sand walls behind a battery
Now here's another important nuance. After the putty, if we follow the right technique, we have to sand the wall. But do not forget that sanding with sandpaper is a sea of dust. But the main repairs have already been done. Therefore, here you can go for a simplification, as in the case of plaster without beacons. We will not sand the wall with sandpaper. We'll just take a sharp spatula and cut off any excess filler micro-bumps. Dust will be minimized, and the wall will still be smooth enough. Even if the wall does not work out perfect, then for the case with batteries, as they say, it will do. Works for 0.5 hours:
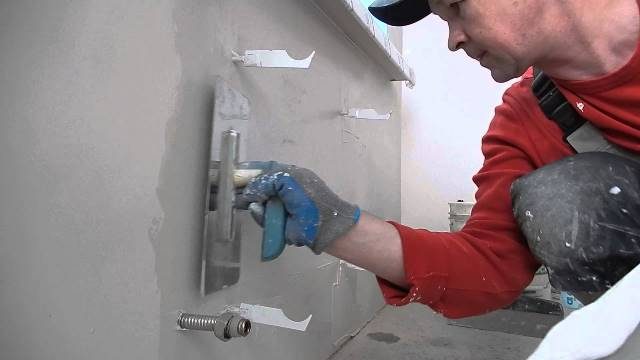
Plaster
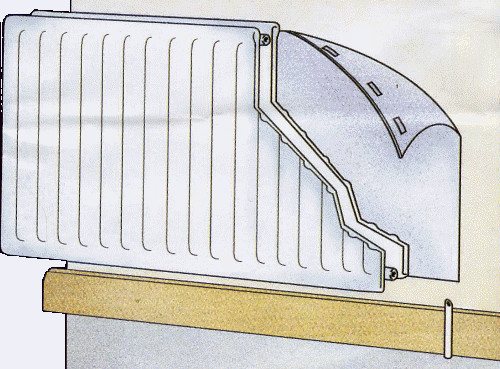
It is very difficult to apply the solution to the plane. For work, you will need a thin metal strip, 3 - 5 centimeters wide and 10 - 15 centimeters longer than the radiator. The plaster or putty is diluted a little thicker than usual so that it does not run off the narrow strip of metal. The solution is applied to the edge of the strip along its entire length, and the strip itself with the applied mixture is passed in the space behind the battery, at an angle of forty-five degrees. The process is very similar to working with the rule - you need to perform plastering according to the same principle.

When the solution is applied to the entire area behind the heating device, the mixture must be allowed time to dry, and then, using the same metal strip, grind the surface by attaching sandpaper to it.
«>
How to glue wallpaper behind a battery
Now we prime the wall for the last time (again 2 hours together with drying) and you can start pasting the wallpaper:
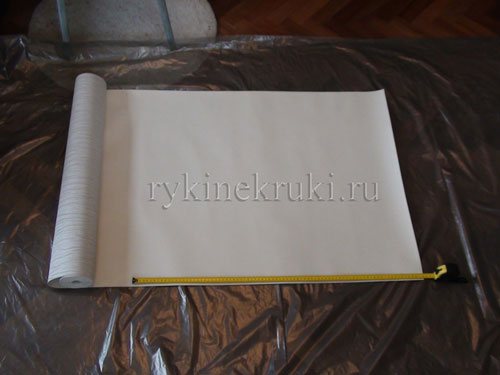
We select the glue that is suitable for this type of wallpaper. For example, in the picture, you see paper-backed vinyl wallpaper. This glue is suitable for them:
We prepare the glue according to the instructions and glue the wallpaper. We take 0.5 days for pasting, taking into account the preparation of glue, marking the rolls and pasting. There is an important comment on gluing panels. You need to glue one sheet on one side of the niche under the battery, and start gluing the second sheet on the other side of the niche. This is done so that the seam is exactly in the center of the battery, and not somewhere where it will be clearly visible, since our battery does not cover the entire niche:
If the niche is long, then we begin to glue the canvas on one side, the next to it end-to-end, but on the other side of the niche we also glue one canvas:
Niche trim options behind the battery
The space behind the radiator should be in harmony with the overall design of the room. The methods used for finishing heating niches are similar to the facing of window slopes. Any kind of coverage can be used here. The main thing is that it can withstand temperatures of about 70 degrees. It is impossible to clad OSB with panels, plywood or PVC tiles - from heating, formaldehydes and toxins begin to liberate abundantly from them. It is much better to use other decorating methods:
Painting the niche under the battery
It is carried out with tinted acrylic paints in one layer.The main thing is not to forget to prime the surface with a penetrating putty before starting the painting process. It is better to paint with a brush - it is not convenient to work with a roller in the inner corners and bypass the protruding elements of the radiator mounting. You need to try to apply the color scheme in the same layer, quickly, without allowing it to dry out - this will help to avoid the appearance of stains;
Decorative plaster.
Such cladding cannot replace preparatory plastering and puttying, because the technology of its application requires a perfectly even and monochromatic base. After preliminary priming, you can apply any kind of decorative plaster. Niches, the corners of which are decorated with stucco, look especially advantageous.
Pasting wallpaper to below behind the battery
It is permissible to use this traditional type of decoration in this case, but it is better to choose thick types of wallpaper that do not dry out and do not turn yellow from high temperatures. The choice of glue should be approached carefully - PVA and bustilate can change from heating. Non-woven and vinyl adhesives are devoid of a similar disadvantage.
Application of liquid wallpaper.
Silk plaster, as liquid wallpaper is also called, does an excellent job of improving the appearance of the battery niche and is its durable protection. You can use a single color application, as well as create texture and highlight with other colors. The uniqueness of liquid wallpaper is that it can be applied to the surface of the radiators themselves.
You can learn more about applying liquid wallpaper in a separate article: liquid wallpaper - types, application, drawings with liquid wallpaper.
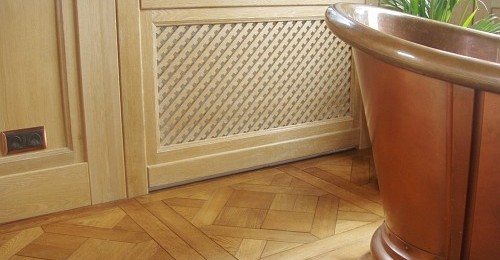
Decorating a niche with tiles and panels
If panel elements are used in the room: MDF, tile, decorative stone, plastic surfaces or laminate, then it is quite logical to continue using this style in niches behind the batteries. This option is preferable to others, since it is created for a very long time and in the future you will not even need to look behind the radiators to update the coating.
White niches
The easiest way is to leave the space behind the heating radiators white. It is easy to maintain in this condition during routine repairs, especially with removable batteries. This option is in perfect harmony with most other types of finishes.
Decorating these inconspicuous corners, you can significantly transform the overall appearance of the entire room, refine it and increase the space by removing masking curtains.
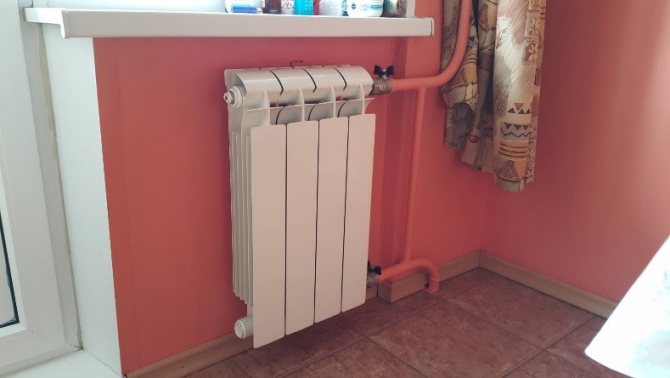
Heating radiator installation
So, everything is ready, and you can invite the master to hang the battery in place. Now, if you can probably remove the battery yourself, then hang it back - it is better to entrust the master. I highly recommend not doing it yourself. If you don’t twist pipes every day, don’t wind flax on threads, then you don’t have this skill. You do not know how much flax you need to screw in and with what force to tighten the nuts, but this work is very responsible:
Well, everything is ready, you can arrange flowers on the windowsill and admire your work: