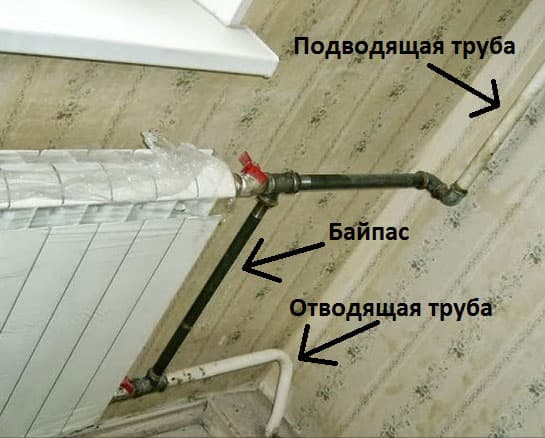
A bypass (jumper on the radiator) is a pipe that connects the inlet and outlet pipes of the radiator. Next, we will consider what a bypass is needed for heating.
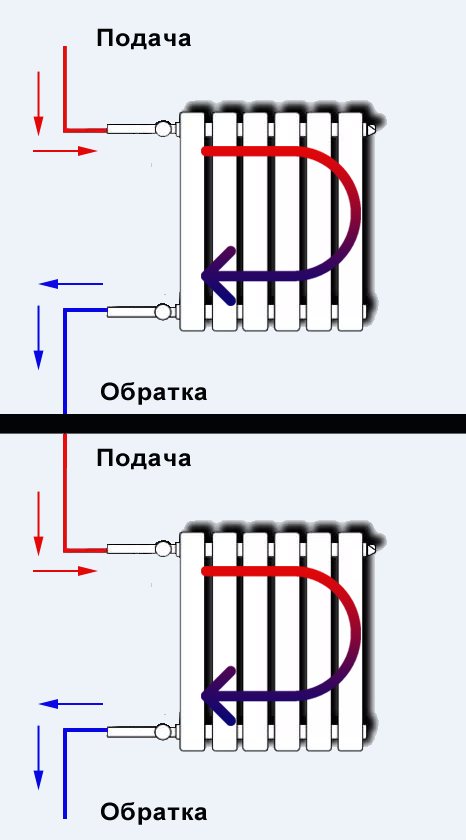
Typically, apartment buildings use a one-pipe heating system. Typically, hot water goes up the riser and then down, passing through the heating batteries. That is, first, the coolant enters the radiators of the upper floors, and then to the lower floors. There are houses where the coolant moves in the opposite direction (from bottom to top) - but the essence of the system does not change. The main feature of a one-pipe system is that the battery in your apartment is directly connected to the battery in the apartment from the bottom and from the top. The question arises: what will happen if someone turns off the battery - all the neighbors in the riser will be left without heat? This will be the case if the bypass (jumper) is not installed on the heating battery. If there is a bypass, the coolant will go further along it, bypassing the blocked battery.
When is a jumper not needed?
If there is no tap on the battery with which it can be shut off, then the bypass on the heating radiator is not needed. After all, there is still no way to shut off the battery without disconnecting the riser.
In cottages and some new buildings there is a two-pipe heating system. In this case, each radiator is independently connected to two pipes - supply and return. The jumper is not used with this scheme, since the batteries are independent of each other. The temperature in two-pipe systems is usually automatically controlled.
Rules for installing a bypass in the heating system
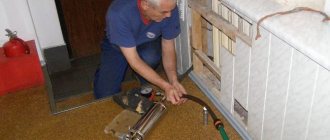
It is advisable that specialists take care of the installation of the bypass on the heating battery. They will mount all equipment according to the established rules and standards, carry out pressure testing of the system, and check for defects. But if a situation arises when you need to put the jumper yourself, use a number of rules that will help you do this.
- The decisive role in the installation of the jumper is played by the correctness of the calculations. The bypass diameter must be one size less than the pipe diameter. You can take a ready-made jumper, or make it yourself.
- If you have not previously mounted such elements, it is better to take a ready-made jumper. This will keep the chance of errors to a minimum.
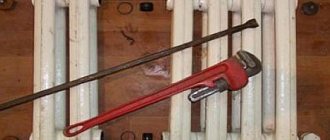
- The bypass must not be placed directly on the riser. Move it closer to the radiator. However, it must not be installed end-to-end, as this can lead to improper operation of the heating system and overheating of the return current. As a result, the effect of installing the jumper becomes minimal.
- After installing the bypass, it is necessary to carry out a pressure test with a pressure 1.5 times higher than the calculated one and check the system for leaks.
Subscribe to the newsletter
Earthing of pipelines is a mandatory measure designed to increase the safety of operation of structures in this group. To the greatest extent, the grounding of pipelines is carried out to protect them from the accumulation of static electricity, as well as from lightning strikes and current breakdowns in power grids.
Figure 1. Achieving continuity of the circuit - grounding straps on the pipeline flanges Even in accordance with the current requirements of the PUE, grounding of technological pipelines must be carried out without fail. The same rules govern the type of grounding to be performed.So that the grounding of the pipelines is effective, they must be a continuous electrical circuit throughout their entire length, which is connected to the ground loop in at least two places.
That is, in order to efficiently ground process pipelines, it is not necessary to separately ground each section of the pipeline. It is sufficient to meet the requirements for ensuring the continuity of the circuit. This is achieved by installing wafer-type jumpers made of PUGV or PV3 copper wire on a bolted or welded joint or by using conductive gaskets. To connect the pipeline to the GZSH, in order to comply with the TN-S system standards, it is enough only in two places, for example, at the beginning and at the end of the structure.
It will also come in handy for repairs:
- Stove fireplace bavaria instructions
- Heating pipes with a diameter of 57
- Drawings of a machine for the production of cinder blocks with your own hands
Is it possible to put a tap on the bypass?
Some apartment dwellers use a faucet on the lintel to increase their temperature control capabilities. However, in the case of an apartment building, this is a serious violation. The valve can interfere with the flow of liquid and prevent proper circulation throughout the riser.
Even with a valve, the battery will not get hotter. And instead of improving the microclimate in the apartment, you can turn off the bypass tap and forget about it. As a result, you will have to deal with neighbors from frozen apartments.
Important nuances when installing a heating radiator
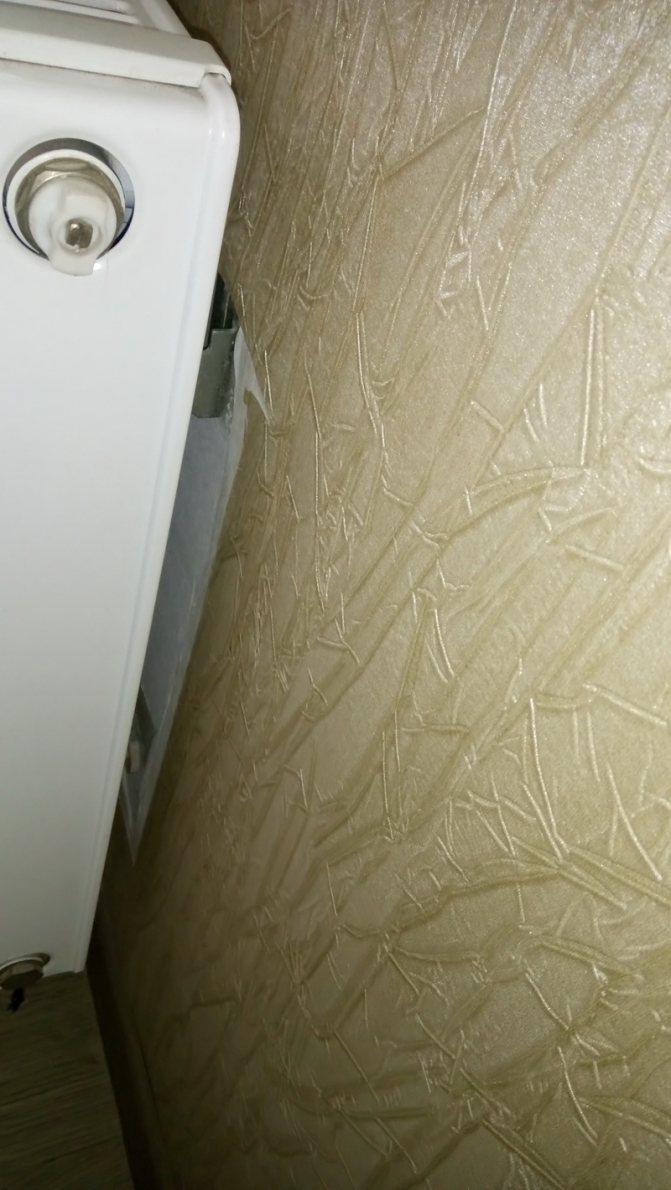
I am sure many of you have encountered such a problem: you decided to make cosmetic repairs in the room and re-glue the wallpaper, but you have no idea how to do this behind the radiator.
In fact, everything is simple - you need to remove it (the radiator) for the duration of the work, and then put it back. This is where the catch lies.
Often, especially in new buildings, heating radiators are installed in such a way that there are no shut-off valves (taps) in front of them. For example, it might look like this:
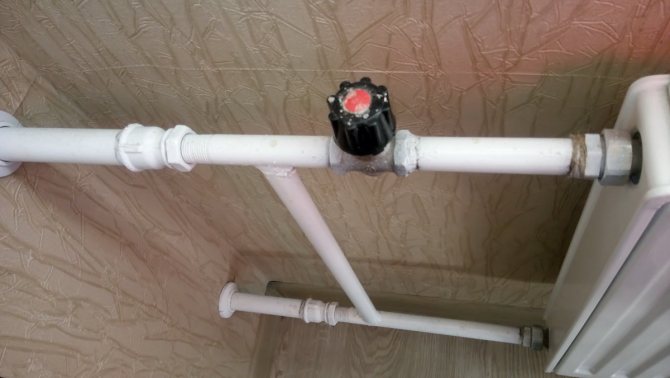
So what do we have here?
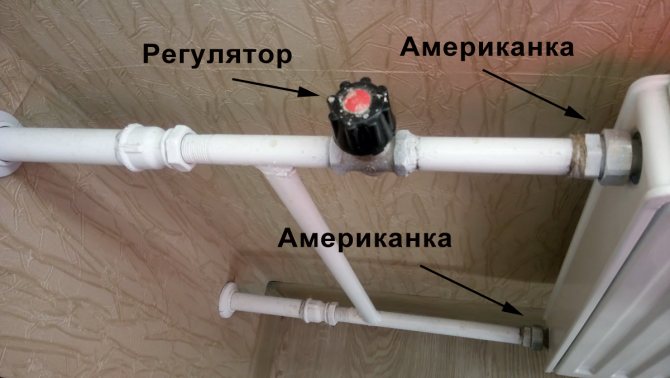
The radiator is directly connected to the pipes coming from the risers with the help of union nuts ("American"). There are no shut-off valves in front of the radiator, only a thermostat is installed: twist in one direction - the radiator heats up more, twist in the other - weaker. Shut-off valves must completely block the access of water to the radiator. And since they are not provided for in this diagram, it will not be possible to remove the radiator - just unscrew the nut, as the water whistles under pressure. The only way out of the situation is to call the utilities and drain the water from the risers.
We all know perfectly well that any gesture of the management company costs money, so you will have to pay for disconnecting risers. In addition, if you decide to make repairs, say, in winter, in the midst of the heating season, then no one will allow you to drain the water from the risers. An exception is an emergency if the pipe is broken.
Our task is to save money and competently approach the solution of the problem. What do we have to do?
Firstly, even before the heating season, it is necessary to provide for the installation of shut-off ball valves.
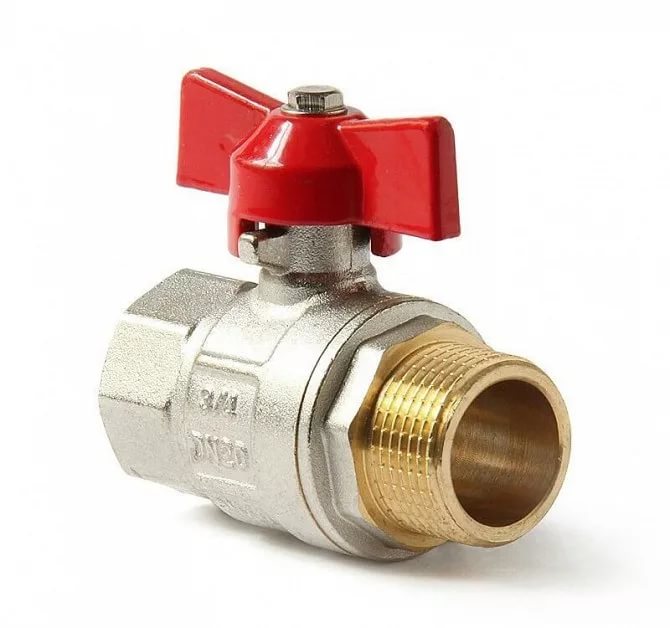
A ball valve is called a ball valve, because, as you might guess, it has ... yes, exactly, a ball. The ball has a through hole, and when it is turned by this hole to the flow of water, it flows through the pipes, and when the hole is turned to the walls of the tap, the flow rests against the ball, and the water supply stops. All ingenious, as they say, is simple.
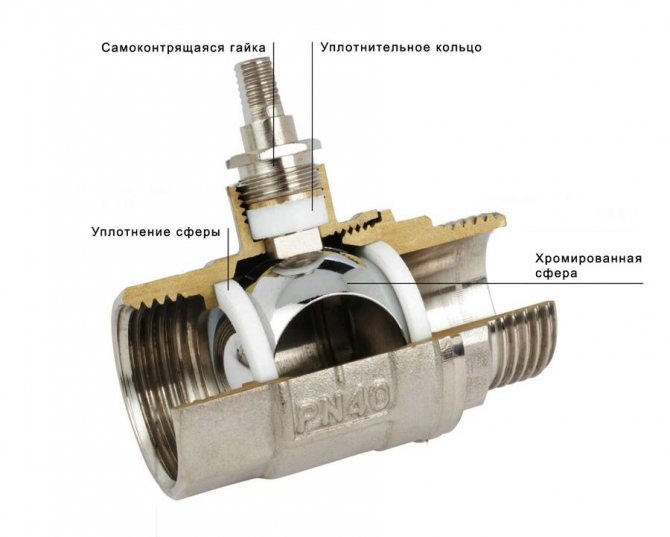
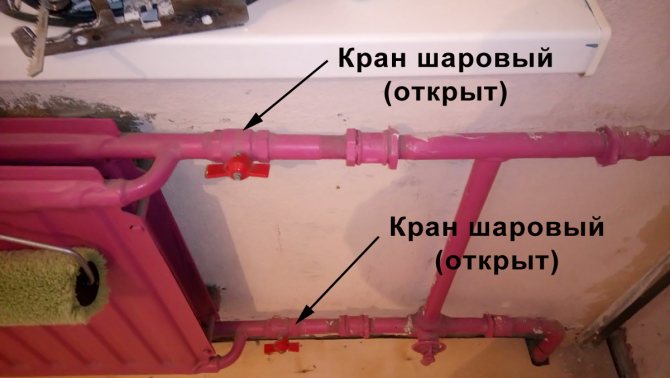
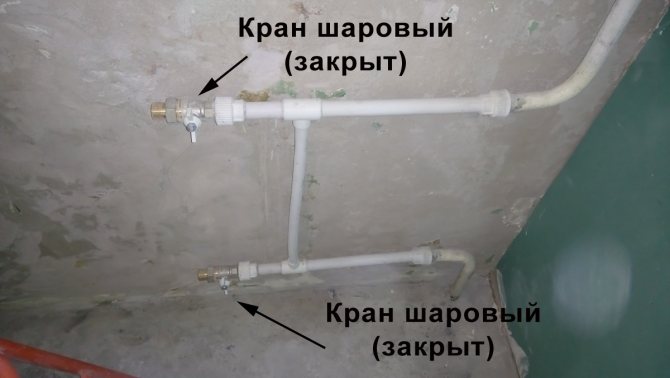
As we can see in the picture, the ball is turned with a hole towards the wall of the tap, so the tap is closed.
It is very easy to determine visually what state the crane is in: if the lamb looks along the crane, then it is open
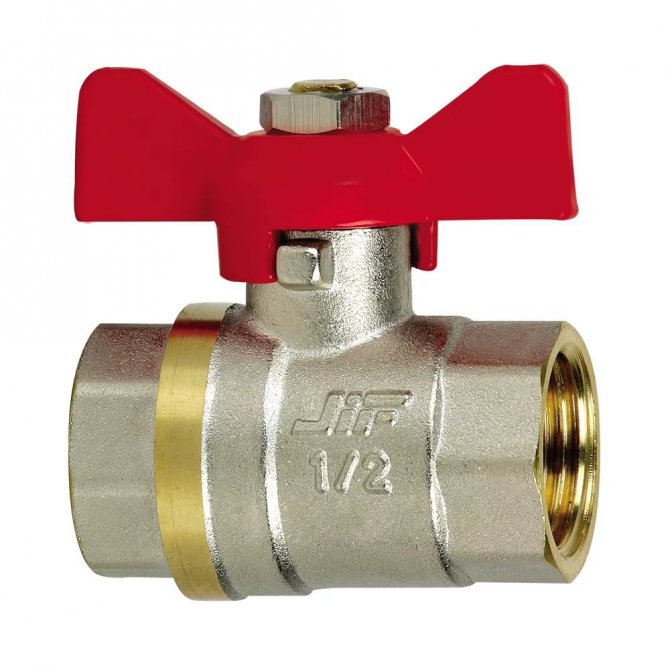
if it is across, then, accordingly, it is closed.
However, back to the radiators.
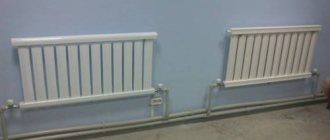
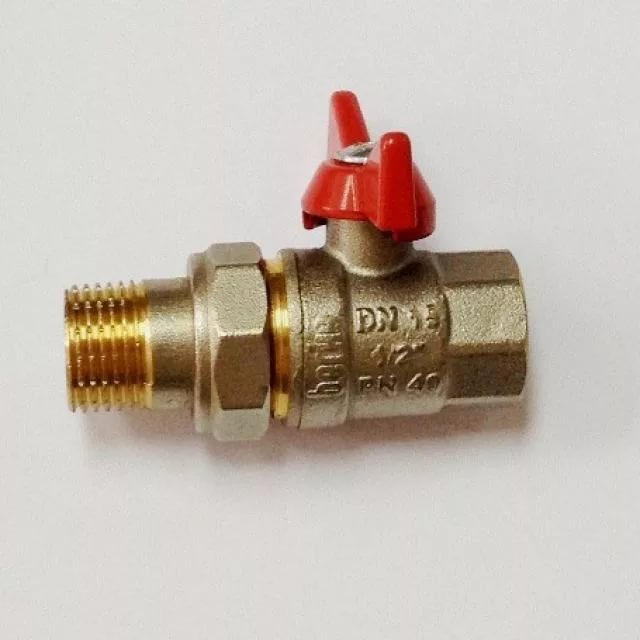
We found out that the system definitely needs shut-off valves - one at the inlet to the radiator, the second at the outlet.It usually looks like this:
The cranes are installed, now the radiator can be safely removed at any time of the year:
And then on the section of the wall behind it it will be easy to glue the wallpaper so that there is no such thing:
We decided on the cranes, now it's the bypass turn.
What is it and why is it needed.
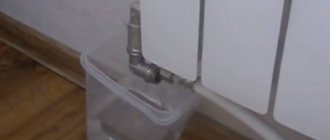
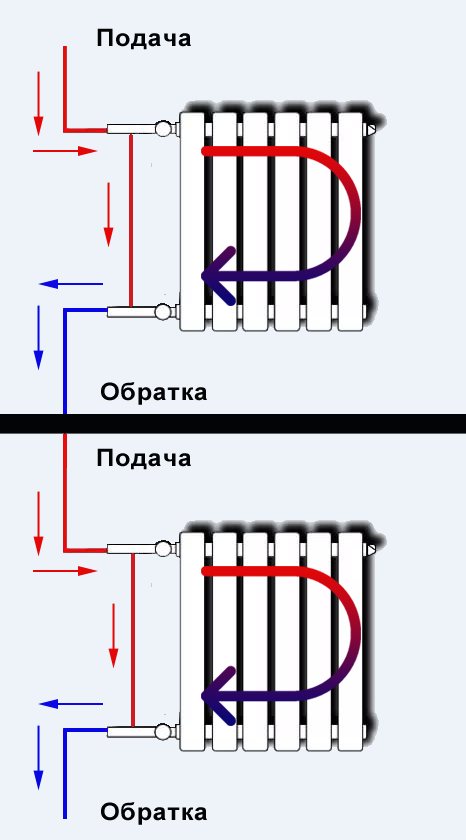
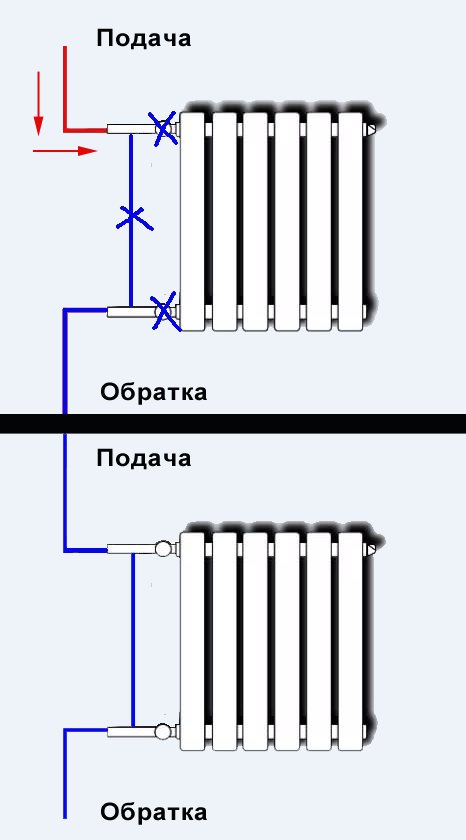
As a rule, if you live in a typical apartment, your radiator connection system is one-pipe and looks something like this:
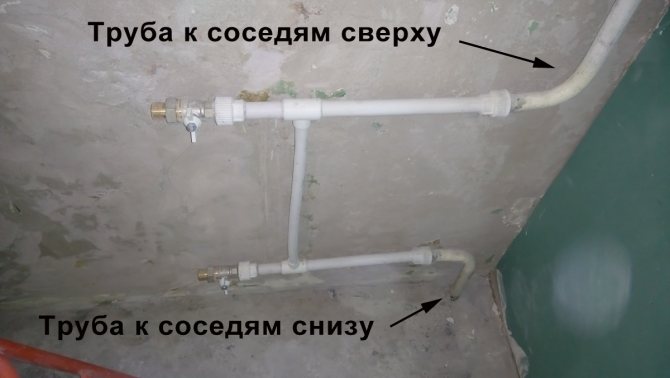
One pipe comes out of the floor, and the second goes into the ceiling. And a radiator is installed between them. However, in front of the radiator, for some reason, another piece of pipe in the form of a jumper is inserted between the pipes. This jumper is the bypass.
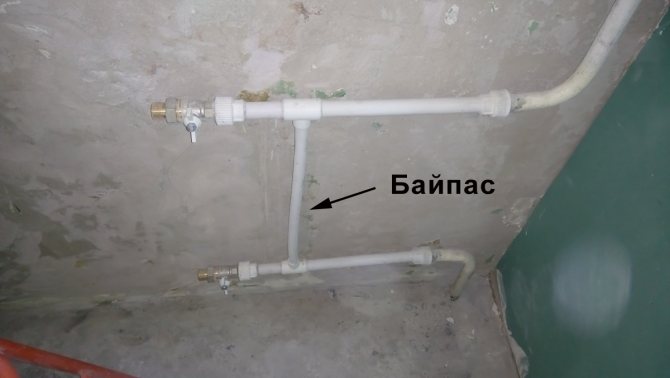
Bypass (from the English bypass) literally means a backup (alternate) path. Since water must circulate in the heating system, it is necessary to provide protection "from the fool" and not let careless residents freeze the entire entrance.
Let's analyze it clearly.
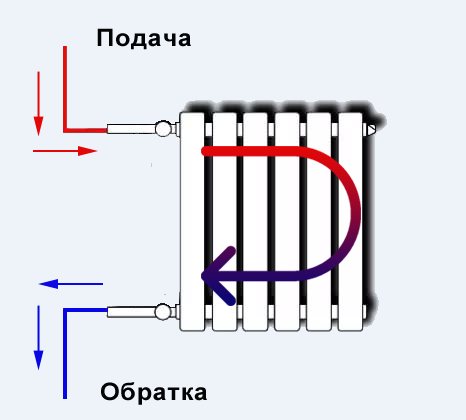
As we can see in the diagram, our radiator works as follows: hot water comes from a pipe going from the ceiling (supply) to the radiator, gives it its heat and goes out into a pipe going to the floor (return) to the neighbors below.
The downstairs neighbors will have a little colder water in the radiator due to the fact that it has already given up some of its heat in the apartment above, but, nevertheless, it will still be hot enough to warm the room.
Now let's pretend that we have installed the shut-off valves on the radiator and have not opened them. What will happen?
And the following will happen: by turning off the taps on our radiator, we completely cut off all consumers from the bottom from the supply and thereby stop the circulation of water in the system.
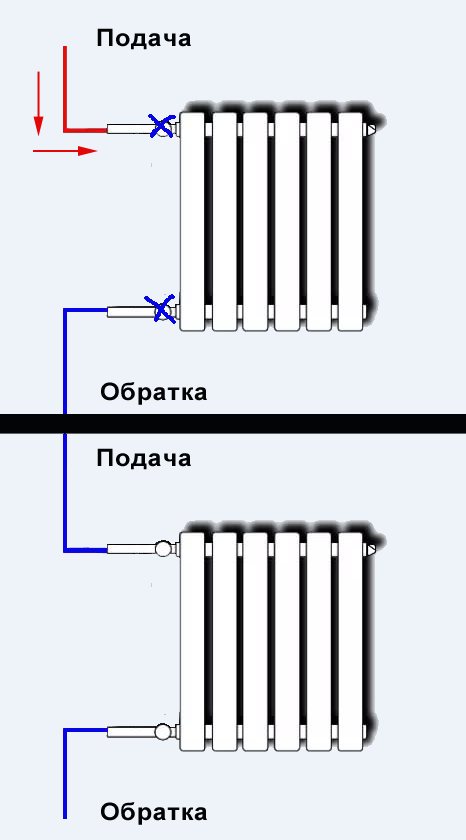
As a result, the neighbors are provided with colds and runny nose.
To prevent this from happening, they use a bypass - they make a tie-in of a jumper on the riser directly to the shut-off valves.
If there is a bypass, the water flow will be divided: most of it will go through the radiator, and some will go through the jumper.
In this case, if we close the shut-off valves on the radiator, the water in the riser will still circulate, and angry neighbors will not come running to sort things out.
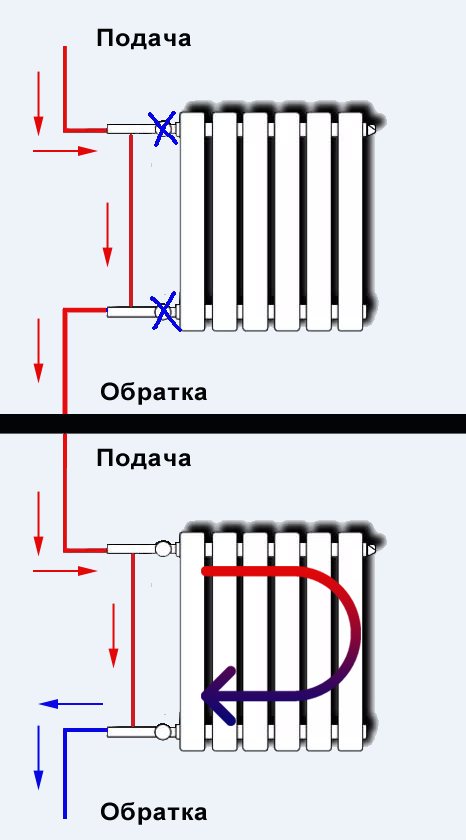
Remember! A shut-off valve must never be installed in the bypass line!
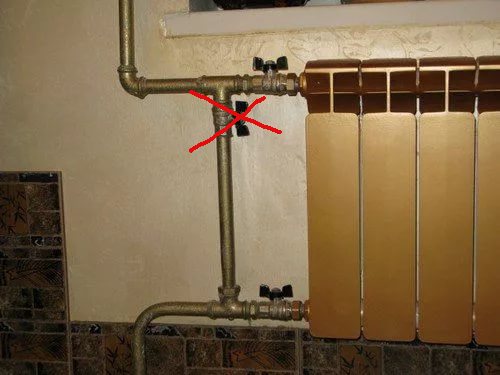
If you close it at the same time as the shut-off valves in front of the radiator, there will be no circulation in the system, and the neighbors will again come running to sort things out!
So, what we have learned and must remember when installing a heating radiator:
- Shut-off valves must be installed in front of the radiator
- A bypass line must be provided in a one-pipe system
- Do not install shut-off valves on the bypass
Follow these simple rules and make the right repairs. On this I say goodbye. In other articles, we will look at a few more aspects of installing radiators.
Did you like the material? Please support the author, share the link with others.
Author: Vladimir Omelchenko
* All materials posted on the site belong to their respective owners. Full or partial copying is permitted with the consent of the administration of the resource sbk-remont.ru or with a direct link to the source.