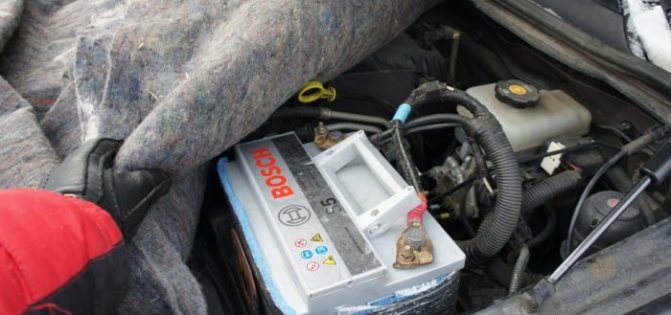
In winter, it is cold not only for living beings, but also for technology. Dampness, frost, cold piercing wind, icing affect the operation of technical devices. Dampness and frost significantly increase the stress on car batteries. In winter, the car needs to consume more electricity when the headlights, dimensions, heated windows, seats, warm air in the cabin are involved. As a result, the battery does not have time to charge, it remains in the cold at night, while the car refuses to start in the morning.
Without proper maintenance, the battery will not last long in winter.
Battery storage
Winter divides motorists into two groups. The first includes those who continue to operate their car even after the onset of cold weather. And the second group consists of people whose cars spend the winter in garages or even just on the street. If you belong to car owners of the second group and are going to close your iron friend in the garage until spring, then it is recommended to disconnect one of the battery terminals. Then it is discharged very insignificantly and you will not need to recharge it. But with the onset of severe frosts, in order for the battery to stand all winter without problems, it is better to completely remove it and bring it into a warmer room, unless, of course, your car does not winter in a heated garage. How to save your battery in winter:
Storage conditions are different for dry-charged or electrolyte-filled batteries. With a dry-charged battery, it's somehow easier. The most important thing here is that it is stored in a dry and well-ventilated area. Direct sunlight is harmful to him. If they hit the case, they can damage the plastic. A dry-charged battery should be left for storage, making sure of its tightness and tightness of the plugs on the cans
Make sure the battery is not damaged. Like a dry-charged battery, a battery filled with electrolyte must be stored upright
It is impossible to drain the electrolyte during storage - you risk being left without a battery at all. After removing the battery filled with electrolyte, clean its body from dirt, especially from traces of electrolyte. When the level of electrolyte in the cans drops, you need to top it up to the set level. Distilled water should be added. Do not use acid or water from the mains for this, it is a death sentence for the battery. After refilling, the battery is fully charged. The battery should be recharged periodically during storage so that it does not completely discharge.
Craftsmen are trying to protect the battery from frost in various ways.
There are situations when a motorist does not have the opportunity to check the safety of the battery and recharge it until the very onset of heat. In this case, boric acid, or rather its 5% solution, will help. After completing all the procedures, namely topping up the electrolyte to the set level and charging the battery to the maximum, you need to drain the electrolyte solution within 15-20 minutes. The next step is to thoroughly rinse the battery with distilled water. You will need to wash it twice, holding the distilled water in the battery for about 20 minutes. And now you can pour a solution of boric acid into a clean battery. All that remains is to wipe the battery and put it away for storage.It is worth remembering that with this method of storage, the temperature in the room should not fall below 0 ° C so that the solution does not freeze. The use of this method will completely exclude the possibility of self-discharge of the battery during the entire storage period. When you need to use the battery after winter, you will need to carry out a few simple procedures to "wake up" her. Within 15-20 minutes, the boric acid solution is drained. The electrolyte is immediately poured. After 40 minutes, the density of the electrolyte should be checked. If it has not changed, you can install the battery in the car. When the density decreases, it will be necessary to bring it to the required level.
Accumulator charging
(Charging the maintenance-free battery)
Replacing the battery in the DVR. Step by step, do it yourself
* more fully ways to charge car batteries are described on the page
1. The battery is charged with a current of 3.5 - 4 A. Continue to charge the battery with this current until an increase in the density of the electrolyte is observed. You can stop charging the battery four hours after the last increase in density. 2. Alternatively, the 1.5 A battery can be charged safely overnight. 3. Charging too fast, allowing the battery to fully recharge within 1 to 2 hours, is not recommended as this can cause serious damage to the battery plates due to overheating. 4. When charging the battery, make sure that the electrolyte temperature never exceeds 37.8 ° C.
Maintenance-free battery:
1. A full charge of this type of battery takes significantly longer (up to three days with significant discharge). 2. A charger with constant voltage is required for charging. After connecting, the device must be set to a voltage of 13.9 - 14.9 Volts at a current below 25 A. With this method of charging, the battery will be usable after three hours, giving out a voltage of 12.5 Volts. Such a charge period is realistic if the battery is only partially discharged, a full charge takes much longer. 3. If the battery is being charged from a completely discharged state (voltage below 12.2 Volts), entrust the charging to a workshop, as this process requires constant supervision by a specialist.
Official recommendation for charging Varta batteries:
It is recommended to recharge the battery before installing the battery on the vehicle! It is recommended to charge at a constant current equal to 1/10 of the battery capacity. The charge is considered complete 2 hours after the battery voltage reaches 16.0 V.
Battery insulation methods
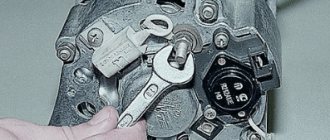
DIY car battery terminal repair
You can often find advice on the comprehensive insulation of the entire "podkapotka", but this is not economically justified. The pluses of such an event include:
- Insulated radiator, the engine will "thank" you during operation, for it it has a positive effect on work.
- In addition to the engine, the fuel system, the starter are in a heated state, all this cools down rather slowly and for a long time, which subsequently affects the ease of starting.
- The battery, due to the single insulation with the motor, will freeze less, which means that the likelihood of starting the car in the morning increases.
Comprehensive car insulation
The car must be insulated in the following sequence:
First of all, pay attention to the radiator, initially you need to insulate it. If there is no special material, you can make insulation from ordinary cardboard.
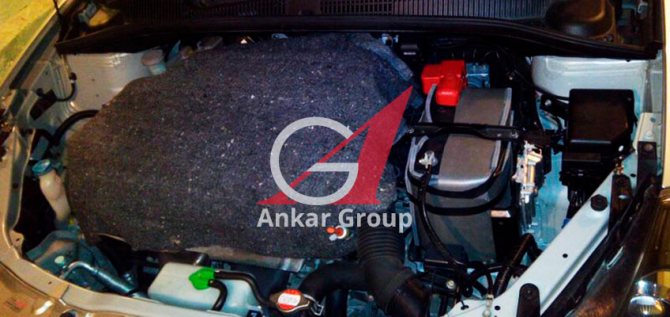
The main thing is to install it correctly, that is, you need to close the pipes from hypothermia. Then we insulate the engine, for today there are a huge variety of all kinds of "blankets" on sale, even for different motors and models.Or you can simply buy the required piece of insulation yourself and cut the required piece. With the help of it, either the motor is covered, or it is attached to the hood. After that, a heater for the battery is made from the same material, it is better to leave one side from the engine side removable so that the battery can be warmed up while the power plant is running.
Thermal cover functions
The thermocase performs several functions at once:
- heating protects against freezing in winter;
- thermal insulation prevents overheating of the battery;
- reduces the amount of dirt and dust entering the power supply;
- reduces the likelihood of an increase in the self-discharge rate at low temperatures;
- protects against mechanical damage;
- battery heating, provided by the operation of the motor, allows you to charge the battery well before long parking.
So, a thermal case can be called a very effective means of protecting and improving the performance of a power source in a car, as well as a means of extending the battery life.
The modern market for car accessories allows you to purchase a thermal case of various models, manufacturers, and quality. It can be bought at the market, in stores, or ordered online. However, you can save a lot by making a thermo case with your own hands.
Rating of the best heaters
Do-it-yourself battery indicator controller
First of all, we will discuss heaters for the engine, since they are more popular products than their counterparts for the radiator and battery. According to the reviews of motorists on the Internet, the most common trademarks under which these products are produced are TORSO, STP HEATSHIELD, SKYWAY, Avto-MAT and Avtoteplo. They will be discussed further.
Car blanket TORSO
A distinctive feature of the TORSO car blanket is its low price. For example, a product measuring 130 by 80 cm as of the beginning of 2020 is about 500 rubles. However, a significant disadvantage of this product is the lack of official certification. Car blankets are available in various sizes, so they can be used on both small cars and crossovers and SUVs. The warranty period for this car blanket is 3 years. The weight of a product measuring 130 by 80 cm is 1 kg. The article number is 1228161.
Insulation STP Heat Shield
StP HeatShield engine insulation
The STP Heat Shield car blanket also comes in different sizes for both passenger cars and SUVs. For example, there are sizes 600 by 1350 mm, 800 by 1350 mm and others. A distinctive feature of these products is the presence of not only heat, but also sound insulation. Also in the summer, the protection can be used between the engine and the passenger compartment, which reduces the noise load in the passenger compartment. The blanket consists of the following materials:
- non-woven fabric resistant to oil, fuel and other process fluids;
- noise and heat absorbing layer;
- an adhesive layer that is resistant to high temperature extremes and serves as a mechanical basis for insulation.
The product is attached using the included 8 clips. They can be used to secure the blanket in the summer. In winter, it can be laid directly on the engine housing. The cost of both these models is approximately the same and is about 1000 rubles.
Skyway car blanket
11 models with different dimensions are produced under this brand. The peculiarity of the products lies in the excellent ratio of price and quality. According to many car owners, the blanket lasts about 2.3 years without loss of performance
The conditional disadvantages include the easy possibility of damage to the surface of the product, which is why it is necessary to install the insulation carefully so as not to damage it. Despite the differences in size, the price of heaters is approximately the same and amounts to 700
800 rubles as of the beginning of 2020.
"Machine"
Under this brand, two types of car blankets for the engine are produced - A-1 and A-2. Both models are similar to the products described above. They are non-flammable, non-conductive, resistant to acids, fuels, oils and various process fluids used in a car. The difference between them is the maximum temperature. In particular, model А-1 can withstand maximum temperatures up to + 1000 ° С, and А-2 - + 1200 ° С. There is also a model A-3, designed for battery insulation. Its properties are similar to the first two. It differs only in size and shape. The price of an auto blanket for the engine as of the beginning of 2020 is about 1000 rubles apiece.
"Avtoteplo"
This is the most famous and popular blanket among domestic motorists. Its distinctive feature is the fact that the manufacturer positions it as a heater for the engine compartment, and not as a heater for the hood. The product can be used at temperatures up to -60 ° С, while it prevents icing of the engine starting mechanisms. Insulation "Avtoteplo" is a fire-safe product, and is able to withstand temperatures up to + 1200 ° С. The car blanket is not afraid of moisture, oil, fuel, acids and alkalis. It has a significant service life and can be used with both passenger cars and trucks. According to the reviews of motorists, it is best to buy an appropriate car blanket, produced by a company from Chelyabinsk with the same name "Avtoteplo". Also, when buying, check the availability of all permits and a passport for both the purchase itself and the product. The price at the beginning of 2020 is about 1,500, 2,000 rubles, depending on the size. Blanket article number 14 - AVT0TEPL014.
Bonus not malus
Over the past couple of years, the imposition of special stages along with auto insurance has become widespread. So, last year, in many cities of Russia, insurance companies simply stopped selling OSAGO policies to drivers if they refused to take out additional life insurance.
To find out how things are going in the current year, I am going to issue a motor third party liability policy at one of the offices of a major player in the insurance market in Volgograd.
Time is 11 o'clock. There is a line in front of the insurers' door. About ten people, no less. It's only two hours later that my turn comes. I go into the office.
“This year, OSAGO comes out 2882 rubles 60 kopecks, - the agent announces the amount of the policy. - Diagnostics 902 rubles and life insurance 1000 rubles. Last year life insurance was 2,000 rubles, and now it is cheaper. In total, 4784 rubles 60 kopecks from you. This is the amount for which I can sell you the policy now. "
"Why so expensive?! - I am indignant. “Last year I bought a policy from you for 1386 rubles!”
"The base rate has changed several times, and, if you have heard, this year the amount of insurance payments has been increased to 900,000 rubles."
Unusual ways to insulate the battery
Interesting insulation methods include:
- "Chill";
- onboard network;
- nichrome thread;
- factory insulation.
Heating by "chilled water"
Many people know how the engine is heated - by circulating antifreeze through special channels. Here we will consider a similar system, when a branch is made from the stove, or from another place. Several or one tube is made from it, encircling the battery. There is a simultaneous heating of the antifreeze and its circulation around the battery.
Such a system is very rare; additional work is required to lay the pipeline. Moreover, removing the battery will be laborious. Moreover, in this way, it is quite likely even to overheat the battery. In this case, the electrolyte will boil, and the subsequent actions are simply not realistic to predict, given its explosive properties.You can, of course, protect yourself, carry out additional insulation, but in our experienced opinion, this work is not worth the "candle".
Heating by means of the on-board network
In this way, you need to make parallel circuits. Keep in mind that in each circuit, the resistor is in series. The resistance will depend on the expected temperature and current. Thus, energy costs will increase and thereby increase heating.
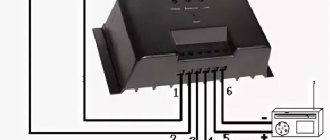
There is also a significant drawback in this method, namely, during the night of such work, the battery will simply "run out". Therefore, there is no sense in such a "design", unless, of course, the car is constantly in a running state. Or you can solder a controller that will disconnect the network when the voltage in the battery drops below 12 V. In this case, you will have enough capacity to start.
There is also another option, namely, "powering" does not come from the main battery. That is, power is taken from the second battery. For this, a regular AGM from an uninterruptible power supply is suitable. In addition, if you have skills in electrics, you can be so "confused" that you put the second battery on charge from the generator.
Heating with nichrome thread
The principle is generally similar to the previous method, but here a nichrome thread is used as a heater. Instead of resistance, it is wedged into the circuit. It can even be used in some kind of wrapper. By the way, such threads are often used to heat the steering wheel, seats, so finding them is not a problem.
Dimensions, cross-section are selected depending on the power of the heater. The increase in power occurs by increasing the number of threads around the battery.
Factory insulation
Often they differ only in better quality performance, but, in fact, they have similar schemes with a combined mode. That is, there is thermal insulation, threads or chains inside. The wires are brought out from the heater, which can be "light" in the car or connected to a backup battery. As already mentioned, you can use no chrome threads, either in a combined way or separately.
How to keep the battery warm in winter if the car has been parked for a long time

The above methods work well if the car is not idle for a long time. The fact is that this kind of insulation has disadvantages:
- Keeping warm for a long time will not work. If you leave the car overnight, even with insulation, the battery will still cool down. Keeps warm for an average of 4 to 8 hours.
- Due to this kind of insulation, the heat from the car engine does not come. As a result, the battery will still freeze and discharge.
We repeat once again, the battery insulation by various wrapping methods works only if the car is used regularly and without interruption.
What then to do, and how to insulate the battery for the winter with your own hands, if the car is idle at night and trips are not frequent?
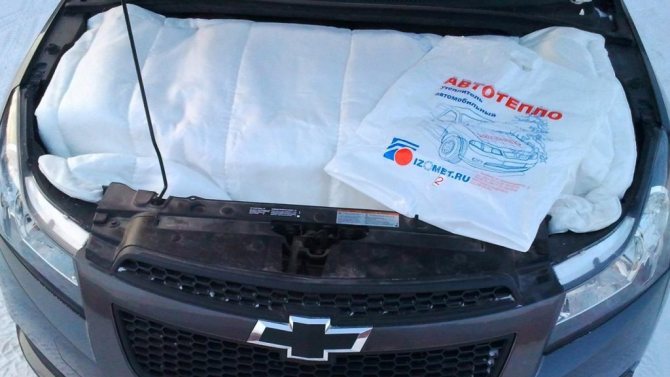
Thermo blanket. Thermal insulation of the battery with the engine
Many drivers speak positively about this method, because it is the most practical and efficient. It also keeps the engine warm.
You can sew a special cover yourself, or you can purchase it at a car dealership. It covers the engine and battery, which is why the battery, being next to a warm engine, does not have time to cool down.
You should also cover the radiator with cardboard so that the oncoming cold air does not enter, this will give additional protection. And the battery itself is insulated
It is very important here that you do not need to insulate the side facing the engine. Warm air must flow from the motor and warm the battery
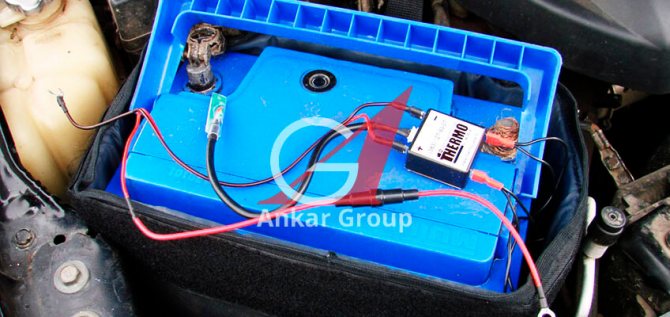
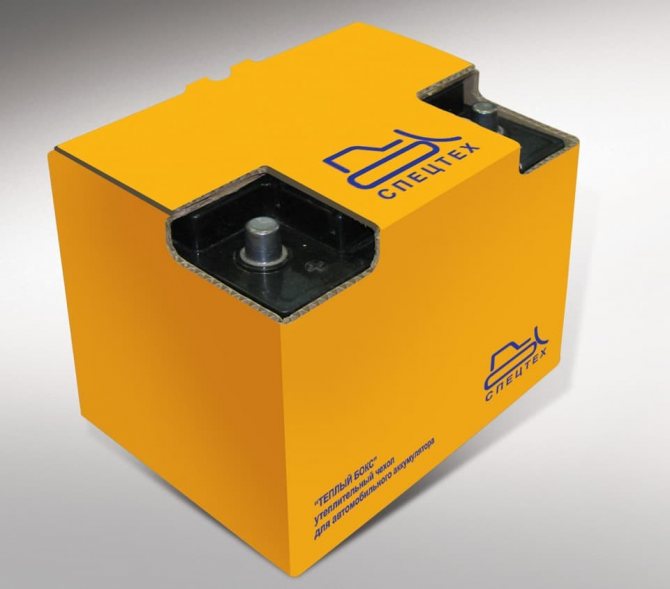
In a car dealership you can find on sale a thermo case for a heated battery. The heating elements keep the battery at the optimum temperature.
The principle of its operation is as follows:
- The battery is placed in this case.
- When the engine starts, the plates begin to heat the battery up to 25 degrees.
- When stopped, the heating stops, and the thermal case itself retains heat, reducing heat loss.
Such thermal protection for the battery against frost is very effective, because In this case, the battery cools down longer than usual.
On the Internet, you can find many ways to insulate a battery for the winter with your own hands. Each has its own pros and cons. Remember that these methods are only suitable if the car will not stand in the cold for a long time. Avoid frequent and short trips in cold weather, drive a sufficient distance so that the battery has time to warm up and fully charge, this is the only way to ensure an easy and stable engine start even in the most severe frost. Otherwise, it is better to use special heaters or auto start of the car engine.
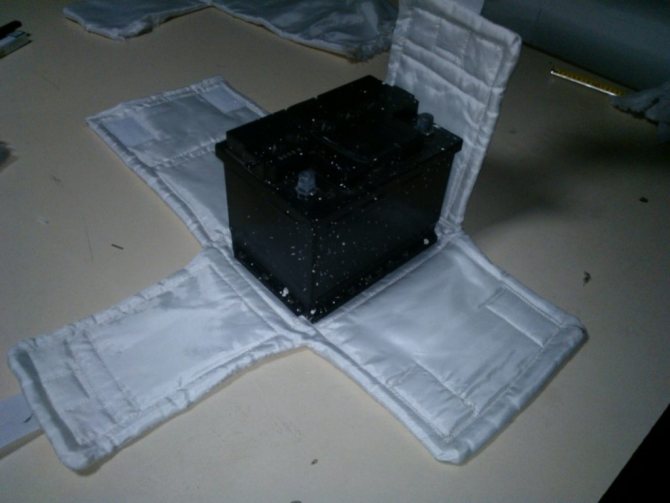
Do-it-yourself battery insulation and heating
Method number 1
Wrapping the battery, for example, in a fur coat. But this method is not very effective. It is only suitable for people who drive every day. The battery is not able to heat up from charging. If the car stands for a long time on the riser, it will freeze anyway. But if you drive several times a day, then the battery does not have time to freeze, and you can subsequently start up. It is for this reason that this method is of little help, since it saves only for a few hours. Moreover, there is one more disadvantage of this method. Hot motors will also not affect the battery. Thus, the thermal insulation will not allow heat from the engine or cold from the street to pass through.
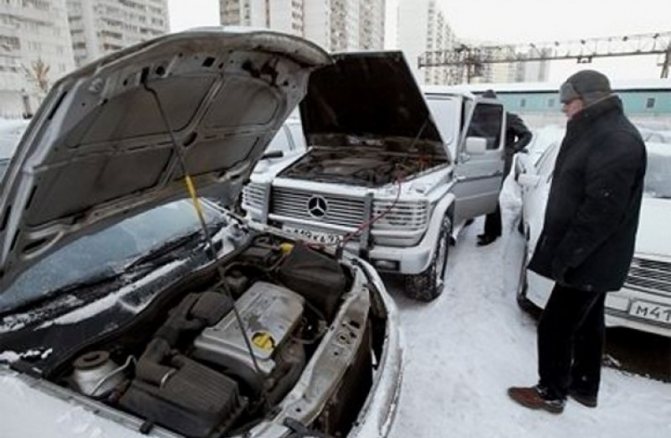
Method number 2
By right, this method is currently considered the most effective and efficient, but there is a small nuance. This method, namely the method of the engine compartment, needs to be spent a little. This is a minus, but on the other hand, your car will start without problems every morning, and you will be proud to be able to light the cars of your neighbors. This method operates on the principle of a closed space. In this case, the engine and battery will always be warm and comfortable and will not be able to completely cool down or freeze until the morning, and the battery in the morning will be able to provide enough energy to start the engine without hindrance. How to properly insulate the entire engine compartment?
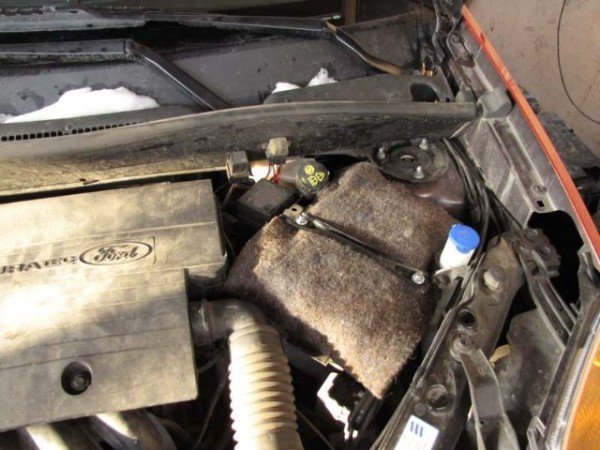
The first step is to insulate the radiator. Folk methods of warming a radiator include cardboard, which is inserted between the radiator and the decorative radiator grill. But the cardboard must be positioned in such a way that it is maximally closed from the cold (including the upper and lower branch pipes), now you need to insulate the battery from the side facing the radiator. Thus, the battery will be closed at the front, and warm air from the engine will warm it at the back.
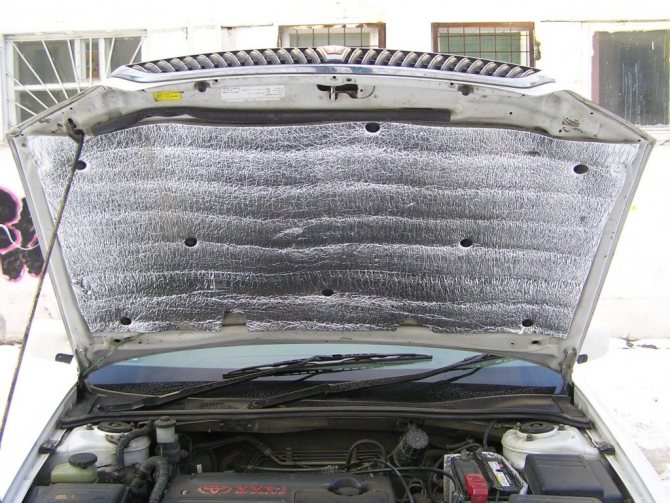
After that, you will need to spend a little. In any car shop you can find a special insulation made of wool or cotton wool, which is attached to the hood only from the inside. They are inexpensive and very easy to attach. The next step is to attach the special material to the wall between the engine and the passenger compartment. It is worth inspecting the standard insulation and make sure there is damage or internet. If there is damage, then it makes sense to replace all the thermal insulation in this place. After this work done, the car will start in the worst frosts.
Method number 3
Just as the antifreeze circulates throughout the cooling system, you can use the stove to heat the battery. You just need to make a branch towards the battery and wrap it up in tubes through which the antifreeze will pass and as the engine heats up, it will also heat up. But the main thing here is not to overdo it, because as a result of overheating, the battery can boil and subsequently simply explode or burst, which will lead to the leakage of electrolyte or the closure of the plates inside the battery.
In our country, as in many other northern countries, this method does not take root for the simple reason that no one knows for certain at what temperature the battery can burst or boil. Even masters with many years of experience know only the approximate boiling point of the electrolyte.
Method number 4
This is a heating method using parallel-connected resistors along the battery circuit. The method is suitable only when the engine is running or 15-20 minutes after turning it off, but the fact that you, using such a battery heating system, will not start the car in the morning is a fact. Some people make a plug in the cabin, buy an additional battery (for example, from a 12 volt and 7.5 ampere scooter) and thus in the morning connect such a battery through the cabin using a self-made plug and heat up their battery. It is also necessary to take into account the fact that you have to get up and go to your iron horse at least 30 minutes earlier than the usual exit and heat the battery in this way, realizing that in this way the battery will not warm up in 5-10 minutes after a cold winter night. Some drivers, on the advice of good neighbors, before starting the engine in the winter season, turn on the dipped headlights for a few seconds, ostensibly so that the battery warms up by applying voltage to the headlights. But the battery, including the headlights in winter, gives up a significant part of its energy and in winter conditions it may not even have enough energy to warm up the candle. This is especially true for diesel cars, which have to be 100% charged in winter for the simple reason that diesel cars require a lot more energy than gasoline cars.
Factory methods for heating your car's battery
Nichrome thread has become widespread due to the fact that it is inexpensive, the principle of operation is simple, and it is also very simple to install. This thread is mainly used for seat heating. They can be sold in PVC insulation, tape or plastic tubing.
A lamellar nichrome thread is used for the battery. It is sewn into an insulating material that runs the entire length and width of the battery. Moreover, the sizes are different, as well as the batteries. As for the cross-section and length of such a thread, they can be selected for the required heating power of the battery.
Also, there is exactly the factory heating, which is made by the car manufacturer, and which has the ability to connect through the cigarette lighter or directly to the battery. Such heating usually consists of a thicker thermal insulator cushion than a nichrome thread, inside which a heater is laid (like a spiral). This pad is designed in such a way that the pad fits around the battery without any vertical seams. Thus, the heater is not interrupted even for a millimeter. From this heater there are wires that are connected either to a cigarette lighter or to a portable battery.
Do not forget about the good old battery recharging, so if the situation with money is not good and there is a charger, then you can do with recharging the battery and spend 5 minutes more time the next morning than usual.
In addition, there are starters, but they are used in the event that there is an outlet nearby. Since such a device, as well as a charger, does not work from batteries. They only work from a 220 volt network.
But under no circumstances heat the battery with an open flame. This not only could blow up the battery, but also seriously injure yourself. This is worth remembering if it suddenly comes to mind to warm up the battery with a blowtorch or a kerosene lamp.
Good luck on a cold winter morning!
Advantages and disadvantages of auto blanket
The experience of using insulation for a car goes back to the old days, when cars were carbureted, and 76 gasoline was widely used. Naturally, such cars warmed up very slowly in frost, and cooled down, accordingly, quickly.However, these times are long gone, cars became injection cars, and gasoline became more high-octane. Accordingly, less time is spent on heating them.
Currently, there are three types of heaters - engine, radiator and battery. Let's start our review with the most common one - the "blanket" for the engine. The advantages of using it are as follows:
- The engine warms up faster at negative temperatures. This fact is provided by the effect of a heat shield, which prevents heat from the engine from rising up and spreading through the engine compartment and heating the hood.
- After stopping the power unit, the latter remains warm for a long time. This becomes relevant in case of short stops, then it is easier and easier to start the car.
- Thanks to the use of insulation for the car hood, the warm-up time is reduced. This follows from the first item on this list.
- If the car is equipped with auto-heating by temperature, the number of engine starts per night is reduced by 1.5. 2 times (for example, from 5 to 3).
- No ice build-up on the bonnet. This becomes possible due to the fact that the heat from the motor does not heat it up, and, accordingly, moisture from the outside does not crystallize.
- The insulation slightly reduces the noise load both inside the car and outside.
Before describing the shortcomings, it is necessary to clarify several nuances on which they may depend. In particular, the insulation works differently with turbocharged and atmospheric engines, at different temperatures (for example, -30 ° and -5 ° C), under different driving conditions (in the urban cycle and on the highway), when air is taken from the radiator grill or from the engine compartment. The combination of these and other objective conditions gives a different result of using car blankets for engines, batteries and radiators. That is why often such blankets can lead to the following troubles:
- overheating of the engine, which in itself is bad, and can threaten the failure of its individual parts;
- at a relatively high temperature (about -5 ° C ... -3 ° C), ignition coils and / or insulation of high-voltage wires may suffer;
- if warm air enters the system, there is a risk of late ignition, which may increase fuel consumption;
- as a rule, when using a heater for a car, engine power drops, of course, fuel economy is out of the question;
- when buying a low-quality blanket for the engine, it may catch fire !;
- most modern heaters for a car battery, its engine or radiator have a short service life - about one to two years.

Should I use a car blanket
Thus, the decision on whether to buy engine insulation or not to do it depends on many factors. In particular, if you live in latitudes where in winter the temperature drops to -25 ° C and below, and at the same time the engine on your car warms up for a long time, then yes, it makes sense to think about buying. But if the temperature in winter in your area rarely drops below -10 ° C, and at the same time you own a modern foreign car with a good heating system, then you hardly need to worry about a car blanket.
Installation and connection
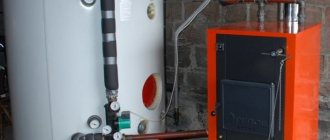
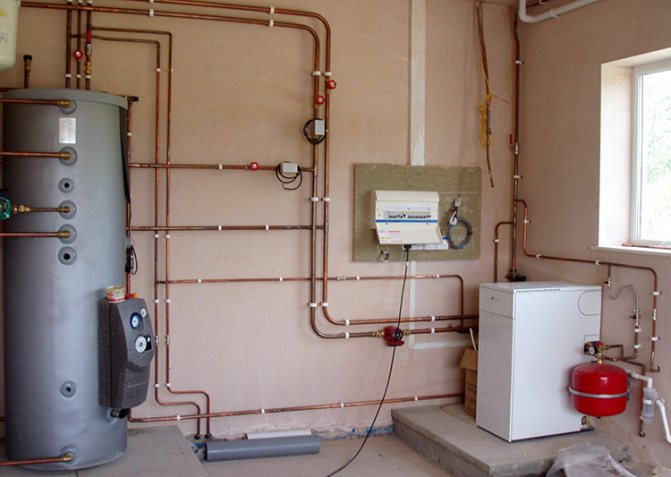
To connect the device, you will first need to choose a place for installation. The best option would be to locate it as close as possible to the boiler, then the temperature of the carrier will be high and the rate of heating the liquid in the container will increase.
The second stage is the construction of an additional foundation for the installation, since its weight is more than 2 tons. If the system provides for hot water supply, it will be necessary to conduct a water supply.
Each homemade device has its own wiring diagram. An approximate connection method for one operating boiler consists of the following steps:
- The return pipe runs through the tankso there should be a 1.5-inch inlet and outlet at the ends.
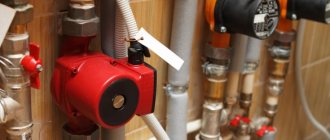
- First of all, it is necessary to connect the boiler return to the tank by placing a circulation pump between them.. It is required to distribute water from the barrel to the expansion tank, shut-off valve and to the heater.
- A shut-off valve is also mounted on the supply side. and a circulation pump.
- Connect the supply pipeline in the same way as the return, but without the installation of heat pumps.
If the number of circuits is more than two, then the connection scheme will become much more complicated.
The heat accumulator should be additionally equipped with a thermometer, an explosive valve and sensors that control the level of pressure inside. Overheating can occur due to continuous heat build-up in the drum, so the excess pressure should be relieved periodically.
How to use the battery in winter
Subzero temperatures greatly affect battery performance. In extreme cold, the electrolyte thickens, which complicates the chemical processes of the battery itself. This leads to a decrease in current generation and affects the start of the engine in cold weather. For low temperatures, there are electric accumulators with a large capacity, for example, 10 ampere-hours.
There are special heaters for the battery
In off-road conditions, the battery is subject to constant shaking. Electrolyte begins to escape from the plates, increasing the chance of a short circuit. For such needs, there are special batteries that have plates of the same polarity rolled into a separator.
Frequent use of the starter drains the battery, creating the risk of running out of power at the most inopportune moment. The problem can be partially solved by replacing the battery with an analogue, which has a self-charging function and is equipped with a plastic separator envelope.
Calcium batteries withstand temperature changes better
The above-described calcium batteries perfectly withstand both low and high temperatures, can be stored for many months without use, and are installed as easily as conventional batteries without needing to be recharged. However, most drivers will continue to use the alkaline batteries they are accustomed to. There are two rules for their operation:
- Monitor the battery charge level;
- Check the electrolyte level - it should cover all cells. Always have distilled water with you, because electrolyte tends to evaporate both in summer and winter.
Calculation of the volume of the storage tank
This solution lies in the fact that a self-made heat accumulator is an ordinary insulated container with two nozzles for connection to the heating system. The bottom line is that the boiler, in the process of operation, partially directs the heat carrier into the storage tank, when the radiators do not need it. After disconnecting the heat source, the reverse process occurs: the heating system is supported by water coming from the accumulator. To do this, it will be necessary to correctly perform the piping of the storage tank with the heat generator.
The first step is to determine the volume of the tank for accumulating heat energy and assess the possibility of placing it in the boiler room. In addition, the manufacture of heat accumulators for solid fuel boilers does not have to start from scratch; there are various options for selecting ready-made vessels of suitable capacity.
We propose to roughly determine the volume of the tank in the simplest way, based on the laws of physics. To do this, you need to have the following initial data:
- thermal power required to heat the house;
- the time during which the heat source will be turned off and its place will be taken by a storage tank for heating.
We will show the calculation method with an example. There is a building with an area of 100 m2, where the heat generator is idle for 5 hours a day. Enlargedly, we take the required thermal power in the amount of 10 kW.This means that every hour the battery must supply 10 kW of energy to the system, and for the entire period of time it must be accumulated 50 kW. In this case, the water in the tank is heated to at least 90 ºС, and the supply temperature in the heating systems of private houses in the standard mode is taken equal to 60 ºС. That is, the temperature difference is 30 ºС, we substitute all these data into the formula well known from the physics course:
Q = cmΔt
Since we want to know the amount of water that the heat accumulator should contain, the formula takes the following form:
m = Q / c Δt, Where:
- Q - total heat energy consumption, in the example equal to 50 kW;
- с - specific heat capacity of water is 4.187 kJ / kg ºС or 0.0012 kW / kg ºС;
- Δt is the temperature difference between the water in the tank and the supply pipeline, for our example it is 30 ºС.
m = 50 / 0.0012 x 30 = 1388 kg, which takes an approximate volume of 1.4 m3. So, a thermal battery for a solid fuel boiler with a capacity of 1.4 m3, filled with water heated to 90 ºС, will provide a house with an area of 100 m2 with a heat carrier with a temperature of 60 ºС for 5 hours. Then the water temperature will drop below 60 ºС, but some more time (3-5 hours) will be needed to fully “discharge” the battery and cool the premises.
Important! In order for a self-made heat accumulator to have time to fully “charge” during the operation of the boiler, the latter must have at least one and a half power reserve. After all, the heater must simultaneously heat the house and load the storage tank with hot water.
Preparation
- Stock up on containers for draining the used electrolyte and diluting a new one;
- Test the plastic for electrolyte resistance before use.
To raise the density of the electrolyte you need:
- container with measured marks;
- hydrometer;
- soldering iron;
- electrolyte;
- enema pear;
- storage water;
- drill;
- distilled water.
We measure the density in each jar. If it is 1.25–1.28, and the spread is not more than 0.01, then the battery is normal and can be used. If the indicators fluctuate at the level of 1.18-1.20, then you need to add an electrolyte with a density of 1.27.
- Pump out the largest possible volume of old electrolyte from the can with an enema and measure it;
- Pour in a new solution at the rate of half of the pumped out;
- Gently shake the battery to mix liquids;
- Measure the density - if the value is insufficient, you need to add more electrolyte;
- Fill the remainder with distilled water.
Battery behavior during temperature changes
As you know, the battery carries very strong loads, in addition, during temperature extremes, they are even more intensified. Depending on the weather. For example, in the summer season, the temperature of the "engine compartment" may well reach 100 degrees, and in the winter it can drop below zero. During the operation of the motor, the battery, due to its close proximity to the heat source, in the specific case, this is the engine, heats up quite strongly, this is especially noticeable in winter.
During a stop, parking, the battery is compared in temperature with the environment, and this threatens that at a certain moment you simply will not be able to start the car. It is known that even a small drop in temperature, say by 1 degree, "steals" from your battery about 1 mAh. This leads to the fact that you have much less capacity and, accordingly, attempts to start the engine. And given the fact that after a long stay (at night) in frost, the oil thickens, more energy is required for scrolling, and where does it come from if the capacity falls.
A more global problem lies in wait for the owners of diesel vehicles. The constant lack of energy in city driving is also added. As a result, getting up in the morning, you find a completely discharged battery. Keep in mind that if the frost is strong, with a discharged battery, the electrolyte may simply freeze.To try to avoid such embarrassment, it is better to keep the battery warm or take all measures to insulate the car battery with your own hands.
What is the bottom line
We add that the additional insulation in severe frosts does not allow the hood to freeze through when the engine is running and after it stops. This means that freezing rain or snow that falls on the hood will quickly melt and evaporate. In other words, a thick layer of ice does not form on the hood, which has a positive effect on the state of the paintwork (paintwork) on the hood surface, taking into account the absence of mechanical effects of ice and cracking of the coating during temperature changes.
- It should also be noted that it is possible to insulate the engine compartment of a car with the help of fireproof materials in a complex way. To do this, you need to close all the slots through which outside air enters under the hood. Work of this kind will require the owner to dismantle individual elements that are installed on the engine itself, as well as body parts (front fenders, head optics, front bumper, etc.).
- When installing the insulation, individual parts should be securely fixed, since tearing off the thermal insulation in motion can lead to damage to the engine or attachments. Adding thermal insulation to the cooling fan, drive belts, rollers or pulleys increases the risk of serious failure.
- When preparing the car for winter, remember that the engine runs on flammable fuel, there is electrical equipment under the hood. For this reason, the use of flammable materials and solutions that tend to accumulate static electricity are not allowed. Before installation, you should carefully study the properties of the insulation used. During placement, the thermal insulation should not come into contact with those elements of the internal combustion engine that get very hot during the operation of the unit (exhaust manifold, other parts of the exhaust system).
Separately, we note that during the complex insulation of the hood and engine compartment, the possibility of average daily temperature fluctuations should be taken into account. In other words, a change in the outside temperature from minus to plus can lead to overheating of the thermally insulated engine without any outside air flow to the radiator.
For this reason, in the area of the radiator, it is necessary to realize the possibility of quick removal of the insulation and simple re-installation if necessary. In parallel with this, the element must be securely fixed in the desired position, regardless of whether the insulation is open at the moment or the radiator is completely closed for air flow. And lastly, during the placement of the heat-insulating material, it is advisable to take into account the possibility of subsequent easy dismantling without the risk of damaging any elements under the hood, breaking various fasteners or scratching the paintwork.
Use of heat accumulators
A lot depends on how exactly solid fuel is burned in the boiler furnace. The combustion mode can be recognized by the color of the flame:
- White color means that an excessively large volume of air is supplied to the firebox and a significant part of the heat that could be absorbed is emitted along with it into the chimney.
- Yellow color indicates that the fuel burns in the optimal mode: the boiler efficiency at this time is maximum, and the exhaust is the most environmentally friendly. The boiler is designed so that it operates in this mode at its rated power.
- Red color indicates a lack of oxygen: the fuel burns longer and with less heat transfer, but the efficiency drops dramatically, and the exhaust contains many heavy hydrocarbon radicals (under-oxidized parts of fuel molecules) and a large amount of carbon monoxide.
When purchasing a boiler, we select its capacity based on the lowest temperature that can be observed in our region. And in severe frost, the heater operates at the rated power, at which the fuel burns in the optimal mode. But extreme cold does not reign for long, and the rest of the time the damper has to be closed, reducing heat transfer. In this case, the combustion mode turns from optimal to the least profitable.
The owners of Russian stoves are not familiar with such a problem: this unit is always heated in the optimal mode, and the excess heat is accumulated by the brick mass and then gradually released into the room over a long period of time.
It would be nice to apply such tactics to a steel or cast iron boiler, but the walls of such devices do not have sufficient heat capacity. There is only one thing left: to create and connect to the boiler a separate device capable of storing heat.
Heat accumulator for heating boiler
Along the way, the volume of carbon monoxide in emissions decreases, and it will be necessary to add firewood or coal much less often. At the same time, the possibility of overheating and boiling of the coolant in the boiler heat exchanger is almost completely excluded.
The heat accumulator will not interfere with the owner of the electric boiler. At night, as you know, electricity costs 3 times cheaper than during the day. If you have a heat accumulator, you can switch to a differentiated tariff and use the electric boiler only at night.
To organize economical heating, especially if the room is heated from a solid fuel or electric boiler, it is advisable to install a heat accumulator for heating boilers. We will tell you about the pros and cons of this system in the article.
Read on to learn how to make and assemble a heat exchanger with your own hands.
Have you decided to buy a domestic-made gas boiler? Here https://microklimat.pro/otopitelnoe-oborudovanie/kotly/gazovyj-konord-otzyvy.html you can read reviews from users of Konord gas boilers.