Door assembly
A modern interior door leaf has a lot of advantages: it is reliable, easy to install, and has a variety of designs. But some points encountered during installation require detailed consideration. Installation of interior doors involves several stages, each of which has its own nuances. Foaming a door leaf is not so easy, such work requires care and strict adherence to the rules, then you will get a good result.
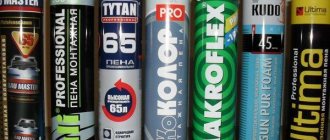
Varieties of polyurethane foam
Polyurethane foam is presented in two categories:
- professional - is produced in a cylinder with a ring valve for connection with an assembly gun;
- household - sold complete with a plastic tube that replaces the assembly gun.
Advantages and disadvantages of both varieties:
| Type of polyurethane foam | pros | Minuses |
| Professional |
|
|
| Household |
|
|
Depending on the temperature of application, the sealant is:
- summer - not suitable for use at subzero temperatures;
- winter - retains its properties and hardens well even in frosts down to -20 ° С;
- all-season - does not impose requirements on the ambient temperature.
Important! Consider high secondary expansion when using household foam. If you apply too much sealant, the door frame may move after installation.
Outcomes
Polyurethane foam is a convenient and lightweight tool for installing doors, windows and other critical structures. Key points of interest:
- it can be composed of one or two components. Its properties, price, operating parameters directly depend on this;
- to install the door, you need to fix it correctly, check the angles and levels;
- It is not necessary to use a gun, however, it will help to easily dispense foam and make the connection more accurate;
- commercial multipurpose foams should be avoided as they will not provide the desired effect. If you install in summer - summer foam, in winter - winter foam.
Criterias of choice
When choosing a mounting material, pay attention to the following characteristics:
- Primary expansion - shows how much the mixture will increase in volume in the first minutes after spraying. For high-quality foam, this figure should not exceed 30%.
- Secondary expansion - increase in mass in volume during polymerization (solidification). The lower this parameter, the less the doorway will deform.
- Foam output volume - determines the material consumption (for how long one cylinder will last). For professional products, the output reaches 65 liters, for household products it does not exceed 40 liters.
- Adhesion - the ability of the mixture to adhere to different surfaces that need to be foamed. For high-quality installation, high adhesion is required, which directly depends on the density of the sealant.
- Viscosity - determines the heat and sound insulation properties of the mixture. The higher the viscosity, the less heat and extraneous noise will penetrate through the doorway.
- Shrinkage - the material should give minimal shrinkage and keep its shape well. The allowed parameter is 5% after secondary expansion.
- Solidification rate - determines the efficiency of construction work and the possibility of correcting the sealing joints.
The permissible norms for the basic characteristics of the polyurethane foam are given in the table:
| Technical parameter | Norm |
| Consumption | For 1 running meter of a doorway with a seam depth of 5 cm and a width of 2 cm - ⅕ part of a 65 liter cylinder. |
| Drying time | Initial polymerization - up to 3 hours, final - no more than 12 hours. |
| Adhesion | From 0.19 to 0.48 MPa in relation to concrete surfaces. |
| Fire resistance limit | Up to EI360 - withstands heating from direct fire (temperature up to +1000 ° C) for 6 hours. |
| Shelf life | 12 to 18 months. |
These are average values that depend on the conditions for installing interior doors. For example, material consumption increases at low air temperatures, and adhesion on brick, concrete and wood surfaces will be higher than on plastic.
Important! Before use, the bottle with foam must be kept at room temperature for 12 hours, and shake vigorously for at least 20 seconds before spraying.
Which brands of polyurethane foam correspond to the best characteristics:
- Penosil - the line includes preparations for professional and household use;
- Soudal - sealants work well at low temperatures and have low expansion;
- Tytan - foam has high thermal insulation properties and is consumed economically;
- Illbruck - professional products for summer and winter use with high fire resistance.


They put up an iron door - the jambs are freezing. Can they foamed inside.?
IMhoDom ›Forums› urgent question ›They put an iron door - jambs freeze. Can they foamed inside.?
This thread has 76 replies, 40 members, last updated Max 2 years, 3 months. back.
- Berlinka
They put a street door, a sandwich, all the rules. The door is on the foam.
Two flaws - no quarters in the wall for the door were made
and the iron jamb turned out to be empty (it didn’t even occur to me to look, everyone was staring at the door - and now I looked into the locker - it’s empty)
There was no frost yet, and frost stood on the bottom of the jambs. I am seriously afraid that further the door may simply freeze and I will not open it.
- drill holes through 40-50 cm - and foam all internal cavities through the tube?
- make wooden platbands inside and outside ... ??
- to do the vestibule, so that the door was not so on the street.
Please advise what to do first ...
And as in other iron doors - the jambs are also empty. I just didn’t think about it before …… ..
Bath conditioners.
- Dewdrop
They put a door for me, when they arrived, the box was already pre-foamed. It is easier to remove the door together with the box, foaming the box around the perimeter from the inside and put it in place
- Restaurant Owner
Iron jambs are well insulated with felt. In different configurations)
- Rainbow
even inside the box, a heating cable is laid along the perimeter. the thing, I think, is not cheap to operate, in fact, heating the street, but a 100% guarantee against freezing. in door shops they offer a cable with a control unit. funny - you open the door, and her rib is warm
- no quarters in the wall for the door were made.
do not be upset: they are not needed for a piece of iron in its pure form. I don’t know the design of your door though. Take a picture.I don’t really know them, because the iron door in my understanding is not actually associated with the concept of “warm”.
You can, of course, zapenit boxes, the current bridge of cold from this will not go anywhere.
IMHO. Insulate from the outside all iron parts (box and canvas) in contact with the atmosphere. How - think about it. Possible materials: isolon, EPS. And already you can settle down a little under the “quarter” ..
Iron jambs are well insulated with felt.
)))))))))))))))))))) Tin. Felt in such places has long died as a class.
a heating cable is laid inside the box around the perimeter. the thing, I think, is not cheap to operate, in fact, heating the street, but a 100% guarantee against freezing.
This option is also possible. The better you insulate, the more practical the operation will be.
- Berlinka
Tomorrow I'll try to take pictures
Bath conditioners.
- Stepanovka
There is also such a problem.
The metal entrance door has several areas where condensation or frost appears more often than others. These include door handles, cylinders, eyes, the false part of a metal door (the so-called cold bridges, on which increased heat transfer occurs). This is due, first of all, to the concept of thermal conductivity of materials from which the entrance metal door is made.
For example, consider the part of the door - the vestibule. For doors made of "solid" it is wooden, for plastic doors it is made of plastic, and for metal doors, respectively, of metal. Wood, plastic and metal have different thermal conductivity, and in order for a metal door in its false part to have thermal conductivity as in the false part of a “solid wood” door, it must be 200 times thicker than a wooden one! Instead of 4 centimeters, the thickness of the vestibule should be 8 meters
How to define a quality product?
You can understand that you have a high-quality foam cylinder in front of you by the following signs:
- Packing condition... The cylinder must be intact, free of dents and visible damage. Only integral packaging guarantees the preservation of the high chemical and operational properties of the mixture.
- Shelf life... It is not recommended to buy an expiring sealant. There should be at least 2-3 months until the end date - the fresher the foam, the more reliable the installation.
- Uniformity of composition... To check, it is enough to turn the container upside down and shake it several times. Its contents should flow smoothly, without sharp blows typical for dried sealant.
- Color... Can only be determined after opening the package. A high-quality product has a light beige tint, and a dark color is a sign of polymerization of the composition.
The average weight of a can, which contains a quality undiluted mixture, should be about 910 g. This corresponds to 750 ml of foaming agent.
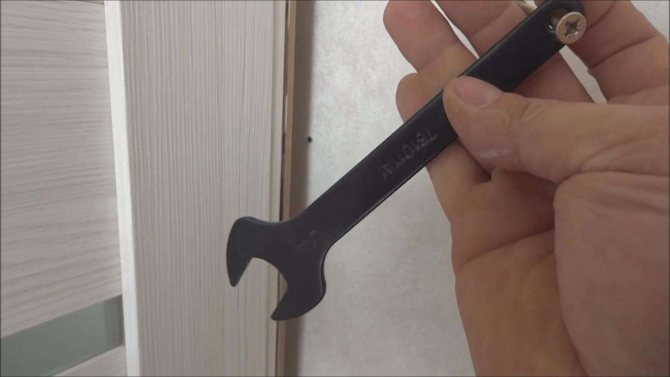
Pistol selection
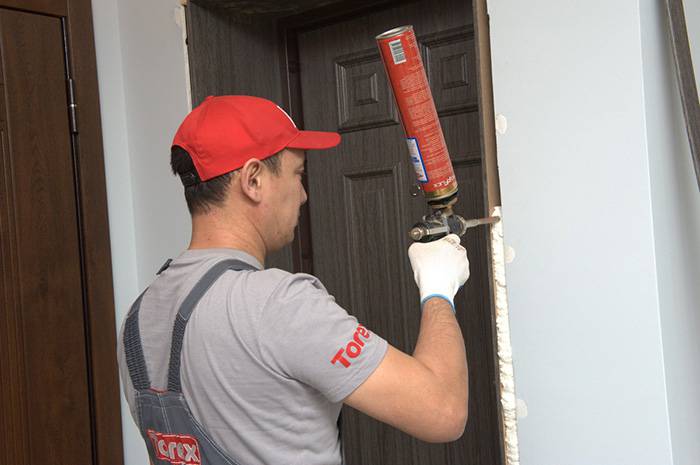
The foam of the professional segment can only be used with a pistol. This is a special nozzle that helps to fill gaps and voids after installing an interior door.
What criteria to rely on when choosing a pistol:
- Material (metal or plastic). Plastic nozzles are cheaper, but metal ones are considered more durable and easier to clean from the remains of the foam.
- Design... Reusable collapsible models are valued higher. Disposable nozzles cannot be effectively cleaned of foam, so they are immediately disposed of after use.
- Nozzle size... It is selected in accordance with the volume of the cavities to be blown out. The smaller the gap, the smaller the “caliber” of the pistol should be.
At the time of purchase, it is necessary to evaluate how comfortable it is to hold the nozzle in your hand, whether it is easy to adjust the supply of sealant.
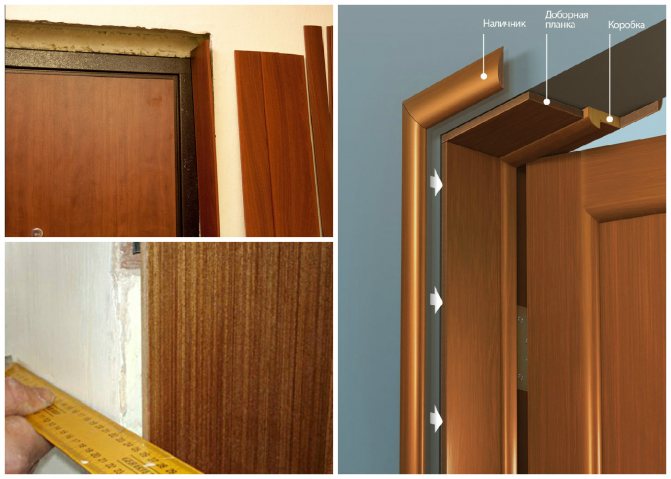
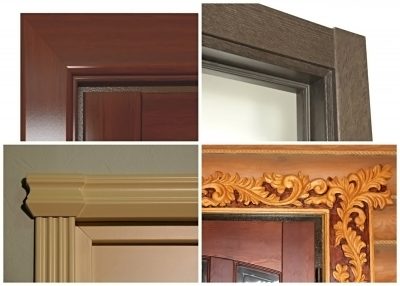
Framing the doorway with cashing
Replacing the interior door ends with the fastening of the enclosure to the door frame. To do this, you must first remove all the required dimensions.
After marking on the cash, we saw off the excess parts with a circular saw or a hacksaw with a frequent fine tooth. The upper parts of the casing are sawn at an angle of 45 °.
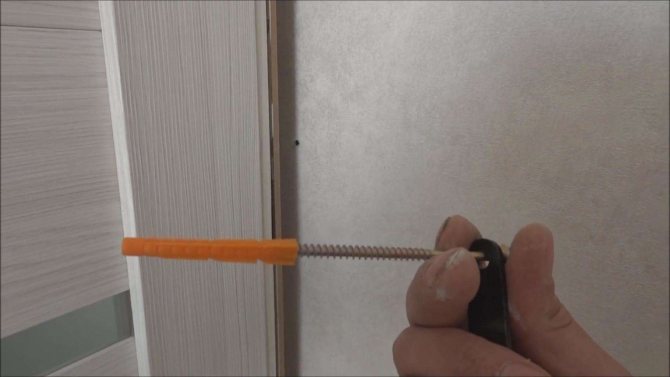
After fitting, all that remains is to attach the casing to the door frame. You can use finishing nails or screws for this. For the second option, decorative plugs are provided for the caps of the screws.
Now, thanks to our article, replacing an interior door will not seem difficult to you!
How to install an interior door on foam
To install a box with a door leaf, the old door is dismantled, tools and consumables are prepared.
For work you will need:
- polyurethane foam with a spray nozzle;
- level for correcting the position of the door frame;
- screwdriver;
- drill with a thin drill;
- roulette;
- door hinges;
- screws, screws or anchor bolts.
Step-by-step instruction:
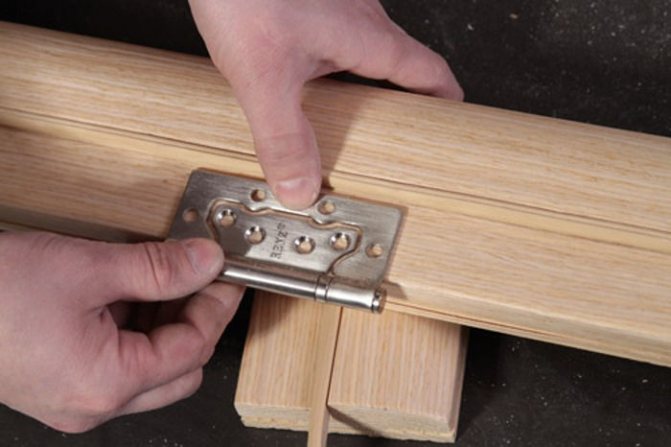
- Assemble a new door frame - connect the racks to each other using self-tapping screws and a screwdriver.
- Install fittings. If the door block is to be attached with hinges, they are first fixed to the frame and then screwed to the wall.
- Mark the bottom of the door leaf, leaving a gap between the door and the floor of 1-2 cm.If the floor is uneven or in the future it is planned to lay the floor covering, the door is lifted higher and fixed with wedges made from scrap materials.
- Install the frame in the doorway, carefully aligning horizontally and vertically. The door must remain stationary in three positions - open, half-closed and closed.
- Screw the fasteners to the wall, install the door hinges from above, trying to completely cover the bolts.
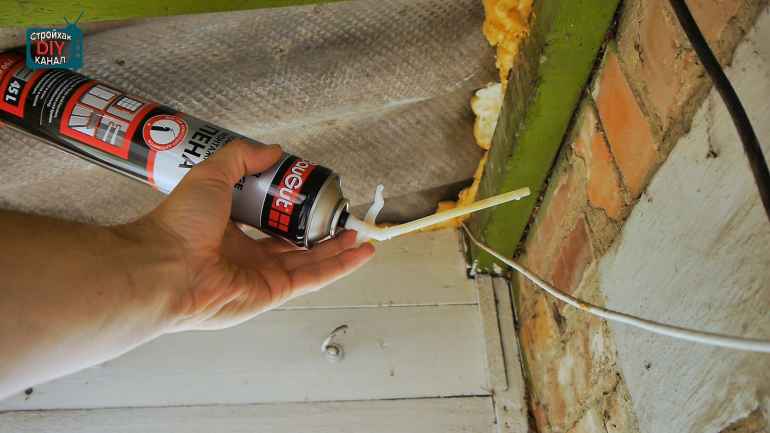
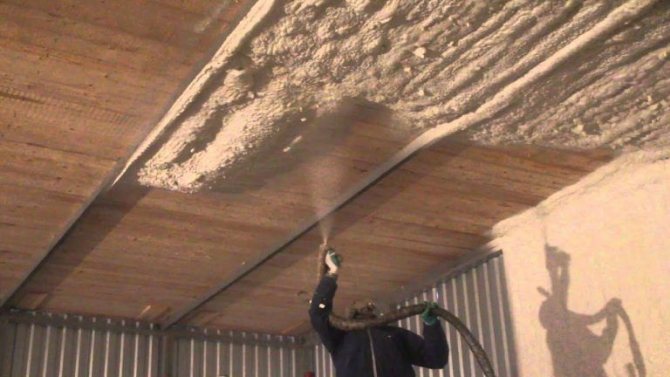
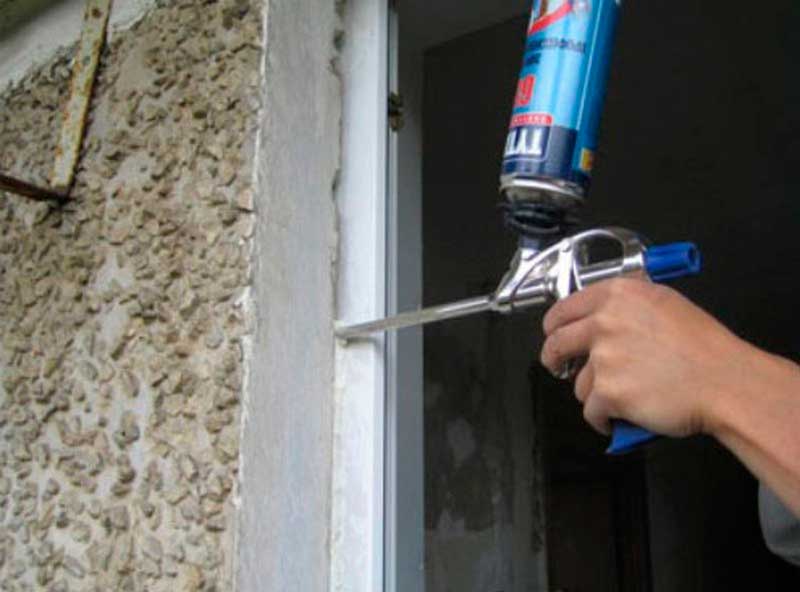
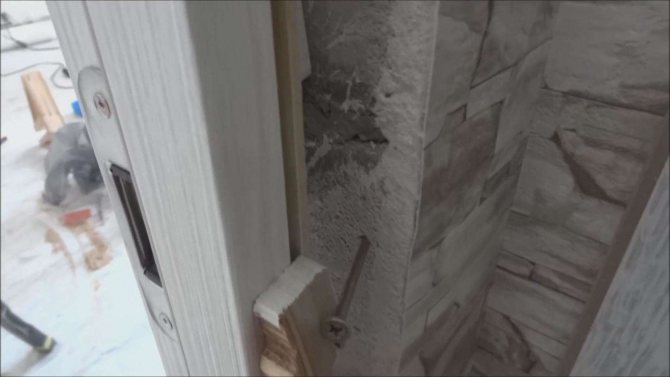
- Fill the gap between the wall and the door block with foam, moving from bottom to top. The foam is applied in several layers, with a 2-3 hour break between fillings.
Advice! To speed up the polymerization of the foam, the cracks and adjacent areas of the box are moistened with water. Moisture will help to solidify quickly and improve the adhesion of surfaces.
Can I not use fasteners?
Additional fasteners are not required if you use only foam and wedges from scrap materials for installation. For these purposes, pieces of thick cardboard or strong chips are suitable.
Spacers are installed in the space between the wall and the door block in three places - at the level of the lock, upper and lower hinges. By analogy, wedges are set on the opposite side of the opening.
The foam is applied in a thin layer from the outside and inside of the room. The spacers are removed from the gaps a day after foaming.
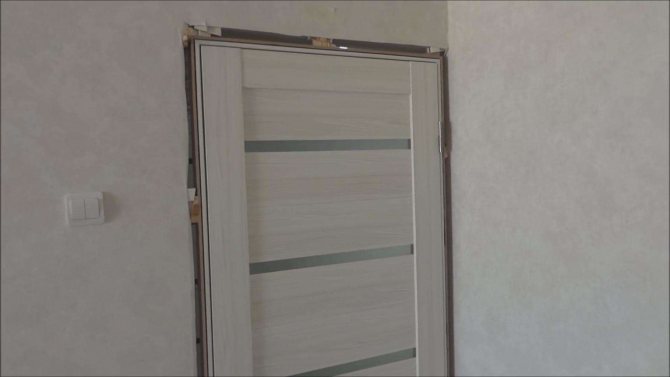
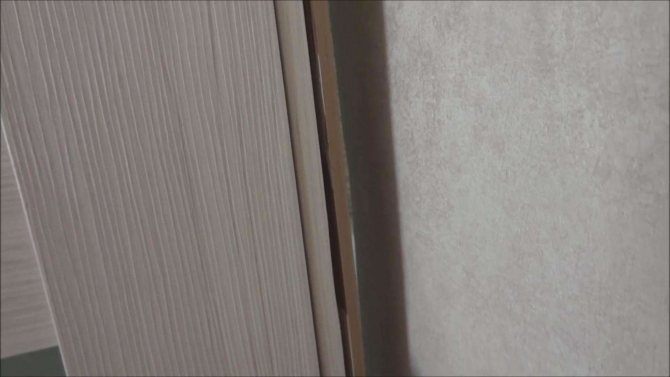
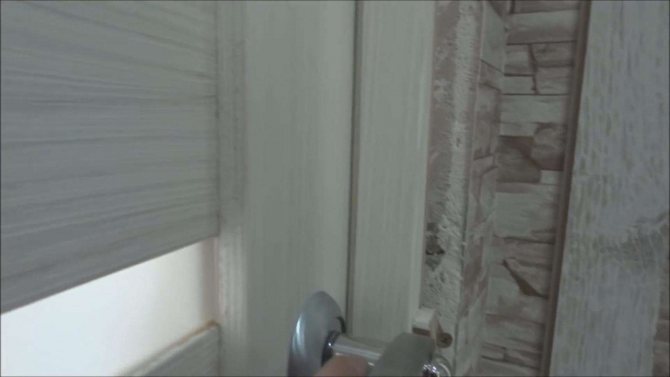
Installation of platbands
After the box is installed, and the joints are sealed with polyurethane foam, it's time to fix the platbands. They are nailed down. If these are platbands made of fragile material, then drill holes in them before installing. This will keep them from cracking.
It remains to remove the protective film and we can assume that the work on installing the door leaf has been completed.
Fastening platbands
How to clean surfaces?
Chemicals will help to clean the contaminated surfaces from the sealant:
- Foam cleaners - are produced in the same line with sealants and are suitable for both cleaning a gun and cleaning surfaces.
- Solvents - "Acetone", White Spirit, "Thinner 646" effectively deal with fresh dirt.
- Dimexide - a pharmaceutical product destroys the structure of polyurethane, removing it from different materials.
To soften the dried layer, it is allowed to use vegetable oil, water and vinegar. As soon as the sealant layer becomes pliable, it is scraped off with a spatula or wiped off with a rag.
Important! Test the chemical on an inconspicuous area to be cleaned. If the surface is not damaged or discolored, you can safely use the product.
Wood surfaces that are not coated with paint or varnish can be cleaned with a solvent. From the lacquered door, the sealant is carefully scraped off with a knife and polished with sandpaper. Then the product is re-painted and varnished.
Foam is removed from linoleum, laminate and parquet with a sharp object and the remains are removed with a special cleaner. The product must not contain acetone, otherwise matt marks will remain on the flooring.
see also
Comments 48
The same garbage, even with the second door made of wood www.drive2.ru/users/kav21124/blog/145943/ a neighbor slightly defeated freezing by installing an external wooden door ... I'm still fighting
Stamp the box and secure the second door. My option: a guest house from a change house; frame 100mm Rockwool insulation; a wooden door (the standard one from the trailer was sorted out and insulated with 10mm foam foam with foil) along the perimeter there is a two-strip seal on tape; cold glazed terrace, aluminum door with glass, polycarbonate roof. On Epiphany it was on the night - 26, everything is okay, only one lower corner is covered with frost - not critical. Second winter.
And you can also lay penoplex and sheathe the opening itself, flush with the box and foam the joint, I assure you, it will be much warmer, of course the width of the opening will narrow slightly, but not critical.
Yes, no, I already tuned in to the installation of the second door. And I'll drink the box when it's warm outside, otherwise the foam won't dry out with minus
I had a cottage, had such a problem. The solution is completely propened the box inside (drilled holes) and the door leaf itself (removed the trim), my door is Chinese-thermal insulation, almost cardboard was laid. For two winters there was no freezing. This fall, since it is also cool in the corridor, I installed a plastic door with glass, right now, in general, Tashkent. and in the summer there is good light and visibility, since I keep the iron constantly open.
the door is okay! Last winter it got colder, and I crawled into the depths of the hanger for a warm jacket ... so it froze like fur to the back wall of the closet in the hallway! barely tore it off!
... the canvas does not seem to be in frost, but the box is yes ... drill and foam, holes were drilled for some kind of plugs in order to close up the holes, with a step you will decide for yourself ... minus 38 is it in the Tver region?
-28C. 38 was not yet available. Although, if in Moscow time it is -17C at night, then it can easily be -35C. Yes, the Tver region, only 200 km from Moscow. We have a weather anomaly there. All summer long, Moscow and the Moscow region were raining, the neighboring villages were also all in the water, the carrots in the beds were rotting, and we water the beds every time, the dry is terrible! The temperature is the same bullshit.
Should cured sealant be trimmed?
Dried foam spoils the appearance of the installed door, therefore, the formed nodules are removed after hardening. This can be done no earlier than 24 hours after the completion of the installation.
For work, you need a construction knife with replaceable blades. Sagging is removed so that an even right angle is formed, and the level of the foam is aligned with the level of the walls.
If putty is used for further processing of the seams, they will slightly deepen into the sealant with a knife, cutting off a few millimeters of thickness.
How to putty foam joints?
Putty is the best option for protecting foamed joints from moisture and ultraviolet radiation. Primer mixtures are usually used in tandem with putty - they are responsible for better adhesion of materials.
Work progress:
- After cutting off the foam, the seams are thoroughly cleaned of dust and debris.
- A primer is applied to the surface and the composition is allowed to dry - from 6 to 12 hours, depending on the composition.
- Knead the putty according to the instructions and apply a starting layer. The leveling coating must be dense in order to mask all defects.
- After 20 minutes, apply the finishing layer, trying to achieve a smooth finish.
When the finishing layer is completely dry, it is sanded with fine-grained emery paper and treated with a primer. Now you can paint the slopes or paste over them with wallpaper.