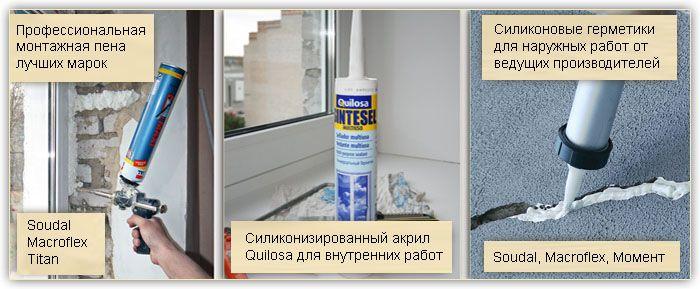
It all depends on the type of windows, or rather on their frames. They come in plastic, aluminum and wood. Also, in addition to the standard hinged window, there are also sliding windows. At this point, beginners have a question: how to remove sliding windows from the balcony, taking into account the design features. Each type has its own characteristics, and they all require a separate dismantling scheme. We will provide you with step-by-step instructions on how to remove windows on the balcony, and tell you about the nuances that usually arise during the work.
How to remove windows on the balcony: tips and tricks
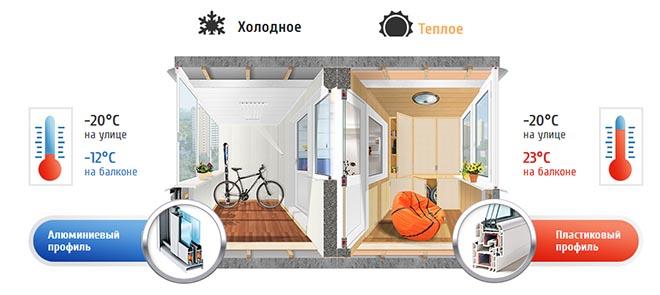
Dismantling of balcony structures may be necessary when replacing cold glazing with warm one.When carrying out repairs in an old house or apartment, people often face the need to replace windows on balconies or loggias. Dismantling the balcony glazing is quite long, however, not difficult work, for which many craftsmen require a fairly large payment. At the same time, you can remove windows on the old balcony yourself, saving a significant amount of money. But there are also a number of difficulties that accompany this work.

Preparatory stage
For effective dismantling of a balcony window, it is necessary to free up the working space and assemble a set of necessary tools. necessary tools.
First of all, all items stored on the balcony should be temporarily moved to the hallway or another room. In the room that is combined with a loggia or balcony, it is recommended to lay a plastic wrap with a self-adhesive inner surface on top of the furniture to protect it from dust. Some elements can be additionally covered with cardboard.
To work, you will need to prepare a number of tools:
- saw;
- scrap;
- grinder;
- a hammer;
- putty knife;
- several screwdrivers;
- sandpaper.
In addition, you will need a special protective film for the window panes. By gluing them, you can prevent cuts if accidentally broken.
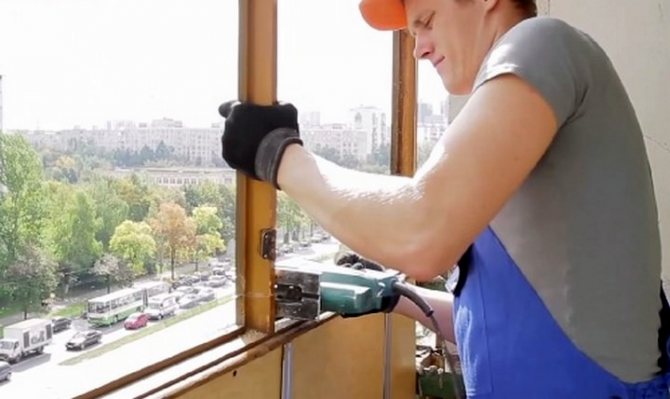
How to remove aluminum frames on a balcony
It is especially dangerous to perform such work in a multi-storey building, starting from the 4th floor - there is a high probability of accidentally losing balance and falling down. Therefore, in this case, it is imperative to comply with safety regulations, use construction safety belts and attract an additional friend for safety net. At the same time, there are also structural difficulties, for example, many do not know how to remove aluminum frames on the balcony or how to remove sliding plastic windows on the balcony. Dismantling plastic windows is somewhat more difficult than dismantling old wooden frames, but you can also do it yourself. We will discuss this in more detail below.
It is required to remove old windows when replacing them, in cases when it is required to glaze a loggia or perform work on glazing a balcony. But before starting any work, some preparation is required.
When carrying out preparatory work, one should take into account the features of the structures that need to be dismantled.
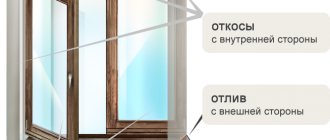
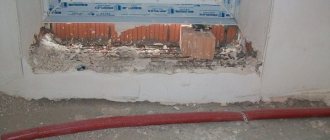
At the same time, dismantling work is not limited to removing only windows and frames, it is also necessary to remove old insulation materials, debris, dust, shutters (if any), window sill and ebb tides.
In the process of dismantling windows on a balcony or loggia, a significant amount of debris and dust will be released. This will happen even if relatively "clean" plastic windows are dismantled.If such work takes place in a residential apartment or house, then a significant amount of dust and debris will certainly get into the apartment from the balcony. This makes it necessary to take protective measures before removing the windows on the balcony.
Several important points should be highlighted in preparation for this work.:
- On the balcony, you need to free up all free space for work. To do this, they take out all things, furniture, etc. from him. The same is done in the room adjacent to the balcony. It is especially important to remove carpets (if any). This is necessary so that there are no disturbances during work that can cause some troubles during work.
- If there is furniture that cannot be removed for a number of reasons, it should be packed in dense polyethylene prepared in advance, with which the furniture is “sealed”, and the joints are fastened with tape. This will reliably protect the property on the balcony and in the room from construction dust, which has the properties of eaten into various materials.
- Particular attention should be paid to the flooring, both on the balcony itself and in the adjoining room and, possibly, in the corridor. After all, it can be damaged by transferring the removed structures, and construction dust is also strongly "eaten" into the floor. To protect the floor, it is securely covered with self-adhesive dense polyethylene. You can also cover the floors with thick cardboard or plywood - this is especially important if laminate, parquet or boards are used as a covering. Particular attention should be paid to windows and doors between the balcony and the adjoining room - they are also closed.

To dismantle the window metal structure for a balcony made of aluminum as simply as possible, it is important to know the method of its installation.
It is relatively simple and easy to dismantle wooden frames and structures that have a relatively low weight. It is much more difficult and longer to disassemble a welded metal structure, which is associated with the need to cut such frames with a grinder.
To remove old plastic windows and their frames, knowledge of the method of mounting frames and accuracy when disassembling the structure is required - the glass unit is quite fragile, it can be seriously damaged and cut yourself.
However, the dismantling of such structures itself occurs relatively quickly.
Removing the old balcony
To dismantle the old balconies, preparatory work is being carried out. For the safe movement of installers, the site is freed from unnecessary items and furniture. Permanently installed objects and windows are covered with plastic wrap to avoid dust and accidental damage.
Dismantling of the balcony can be complete or partial, therefore the list of preparatory work is agreed with the customer, based on the ultimate goals of the repair.
Most often, the following preparatory work is required:
- free the passage to the balcony. In some cases, you will have to remove the balcony door, but usually they just move the furniture aside, remove the curtains and blinds;
- cover the surfaces with plastic wrap. You need to protect not only objects and windows on the balcony, but also inside the room, since dust will penetrate when you open the balcony door. You also need to close the flooring;
- if an air conditioner is installed on the balcony, it is also dismantled before the main work is carried out;
- the tool and garbage bags are transferred to the loggia. Dismantling old elements is associated with the appearance of a large amount of waste that must be removed in a timely manner.
Dismantling of balconies is carried out in several stages:
- First, we dismantle electrical appliances and wiring.
- We dismantle wall finishing materials (walls and floors can be finished with PVC panels, laminate or clapboard).
- We remove the insulation from the walls.
- We disassemble the flooring and remove the insulation.
- We dismantle the old balcony glazing.
- Disassembly of supporting structures is in progress.
- If you intend to combine a room and a balcony, you will have to remove the door and window.
- Dismantling the balcony slab, if provided, is done last.
After freeing the balcony space from old coatings and structures, they begin to repair the slabs, walls and fences.
Dismantling is not always carried out in order to replace old trim elements. Sometimes removal of the base is required in an emergency. Balcony slabs lose their original characteristics 50% faster than walls or floor slabs. Therefore, in old buildings, it is often necessary to carry out a complete dismantling of all elements.
The balcony slab is dismantled in parts, carefully knocking out small pieces with a puncher.
Complete dismantling will not work on your own. To cope with the balcony slab, you will have to call high-rise installers. Only with the availability of special equipment and experience in working at height, it will be possible to disassemble the old base without damaging the neighboring structures.
When working with a balcony slab, the wall of the house may be damaged. In this case, it is required to immediately contact the housing inspectorate to conduct a study of the condition of the main structures of the building. Responsibility for the resulting damage is the owner of the home. Therefore, if a global redevelopment is to come, you need to get preliminary approval from the BTI.
When removing old finishes and base elements, a lot of construction waste is generated. It cannot be simply taken to the nearest containers and left. To dispose of construction waste, you will need to call special equipment and pay for removal services.
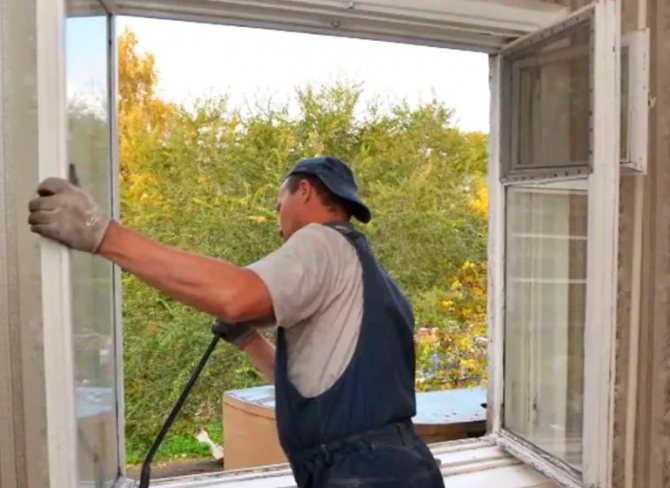
Dismantling balcony glazing: removing wooden windows
After completing all the preparatory steps, you can begin to dismantle the window openings. Usually, such work is carried out in stages, when carrying out repairs in the house. It is convenient to carry out such work together with repairs in other rooms, since this allows you not to stain a residential apartment with construction waste, which is quite difficult to clean up (even if all the necessary protective measures have been taken, the garbage will still end up in the rooms).
It is better to dismantle old wooden frames immediately before installing new window structures.
If the order of work has already been determined, and a decision has been made to replace the glazing, you should wait for the measurers, who will not only calculate the dimensions of the future window, but also indicate the required dimensions of the opening.
This will allow you to decide what should be dismantled and what should not, and sometimes you may need to beat off a few centimeters of the wall, which also applies to dismantling windows.
Of course, windows can only be removed on the balcony where they are installed, although at the moment the old wooden windows are most likely just an anachronism.
Dismantling wooden balcony frames (video)
Preparation for the installation of a new structure
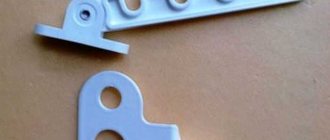
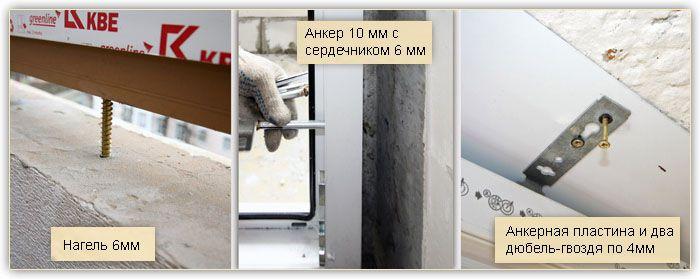
The preparation process includes cleaning the window opening from dust and debris, as well as checking that the necessary tools are available. To carry out the installation of the structure with your own hands, you need:
- Grinder or saw; Nail puller or small scrap; Suction cups for glasses; Anchor bolts and plates; Building level; Plastic or wooden wedges; Mounting foam; Self-tapping screws; The film is vapor-tight and vapor-permeable; Knife.
You can replace some tools with analogs, and some even exclude. You are given only an indicative list of the necessary devices so that you can carry out the installation without the help of specialists, that is, with your own hands.

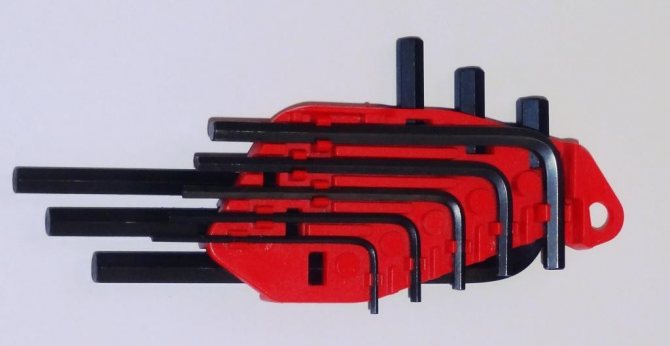
Photo 2. Approximate set of tools
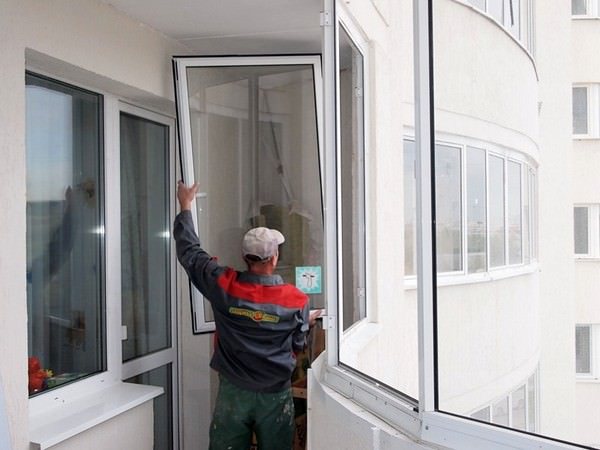
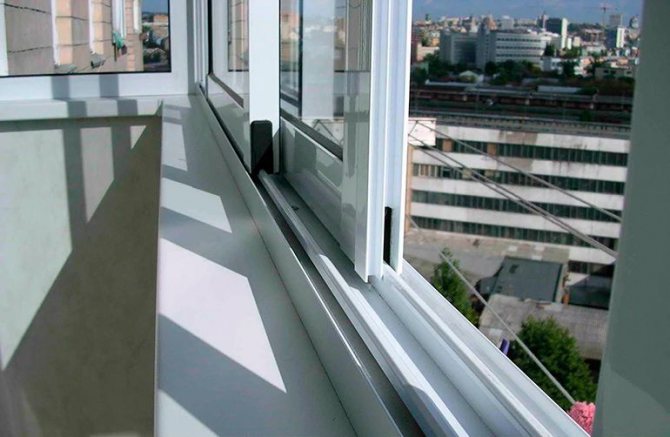
How to remove sliding windows on a balcony
Their dismantling begins with the fact that all the sashes are removed from the hinges.It is quite easy to do this without a tool, lifting the flaps using your own muscular strength.
Following actions:
- The first step is to remove all the glass by disassembling the frame for this (if you cannot disassemble, then you can saw it). Windows, which have fixed glass, are carefully sawn with a jigsaw and the glass is pulled out of them.
- The next step is to remove the windows themselves on the balcony. If the old windows are not planned to be used in other objects (sheds, summer cottages, etc.), then dismantling can be done quite roughly - sawing the frame in several places, cutting down the crosshairs and gradually taking out the debris.
- If the windows are to be preserved, the frame must be separated from the fasteners. This can be done with a grinder (grinder), walking along the perimeter of the frames from the outside, cutting the fasteners. This is the only surefire way to keep the frames intact, as searching for fixtures may not return any results.
Dismantling of enclosing structures
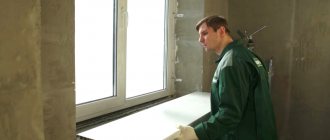
When the preparation is completed, you can proceed to dismantling the windows.
Features of work
When dismantling the windows, additional structural elements are also removed.
- It should be noted that dismantling works include not only the removal of canvases and frames. It will also be necessary to remove the thermal insulation material, ebb, shutters and window sill.
- Wooden windows are easy to remove. After all, they weigh a little. It is more difficult to remove aluminum and metal-plastic structures. They weigh a lot, while they have to be cut with a grinder.
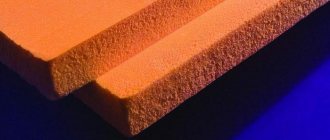
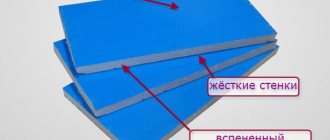
Double-glazed windows of plastic sheets are thick and heavy.
- Care must be taken to remove plastic sheets. Double-glazed windows are relatively fragile and heavy. They can be smashed, causing damage to yourself.
Dismantling balcony windows is a rather dangerous job. Especially in apartment buildings and from the second floor. After all, there is a risk of losing balance and falling down. Based on this, here you need to adhere to safety precautions, use a safety belt and do work with a partner.
When working in a multi-storey building, you must work carefully.
Removing wooden windows
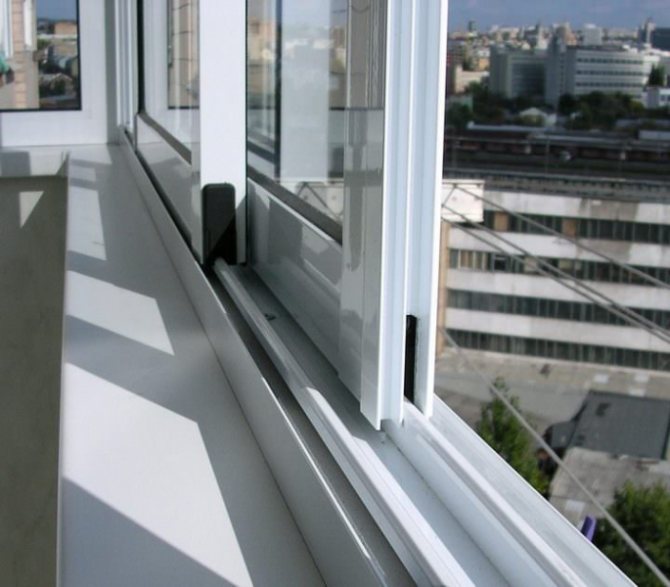
The design of all compartment windows is quite simple. Guides are mounted on their frames from above and below. And small rollers are fixed on the canvases.
Thanks to them, the sashes move along the guides. The glass is inserted into the canvas with a plastic seal.
First, the canvases are pulled out of the guides.
- Removal of wooden windows begins with the fact that all canvases are removed from the guides. This is done without using any tool. You just need to open the sash and lift it. And then, applying muscle strength, pull towards yourself.
- Next, you need to remove the glazing. For this, the sash is disassembled. If this cannot be done, the wooden frame is carefully cut with an electric jigsaw and the glass is removed from it.
If the window frames are not needed, then they are cut in parts with a jigsaw.
- The next stage of work is the removal of window frames. When the old enclosing structure is not planned to be installed on another object (for example, in a country house), then this can be done roughly. In this case, the frame is sawn in several sections, the crosshairs are cut off, and pieces of timber are gradually removed from the balcony.
The frame attachments can be cut off with an angle grinder.
- When the window blocks are needed intact, the frame must be carefully cut from the fasteners. This is done with a grinder. She needs to go along the perimeter of the frames, sawing screws or dowels.
- The last stage of work is cleaning the balcony. It is usually done with a trowel, spatula, etc.
Dismantling of plastic and aluminum sheets
Plastic compartment windows for a balcony and aluminum counterparts are removed in almost the same way as wooden ones. Except for some nuances.
Work instructions:
How to remove sliding plastic windows on the balcony
The procedure for dismantling plastic windows is almost the same as the previous one, but it has some peculiarities.
At the same time, there is practically no difference between how to remove sliding plastic windows on the balcony and ordinary ones.
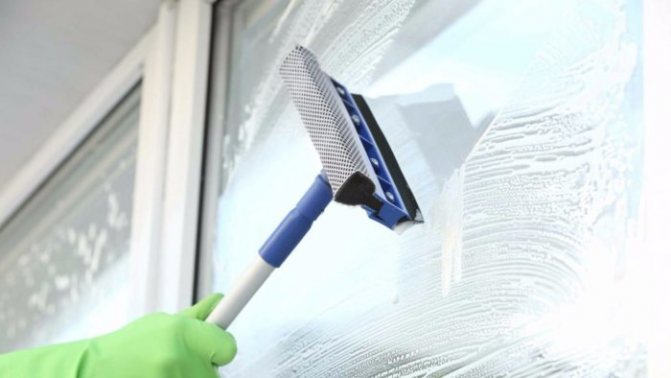
First of all, the windows should be prepared - the glass should be covered with a special self-adhesive protective film, which will protect it from cuts if the glass unit accidentally breaks.
Dismantling double-glazed windows is somewhat more difficult than pulling out simple glass, since they are several times heavier and more massive
Further, the fastening strips are removed, which run along the perimeter of the glass unit from the inside of the windows. This should be done together - one removes, the other supports the double-glazed window so that it does not fall out. After that, the glass unit is carefully squeezed out. This work should be done with all double-glazed windows, and plastic "plugs" with insulation, which are sometimes placed instead of windows, are also removed in the same way.
How the sash of a plastic window was removed (video)
Next, you should inspect the windows around the perimeter. On the window frame, there are large screwed-in screws that secure the window frame to the walls. For dismantling, it is enough to simply unscrew them and carefully cut the foam in the seams with a construction knife or grinder. It is important that the frame does not fall out. To do this, she is insured by tying her to something.
Source: dekormyhome.ru
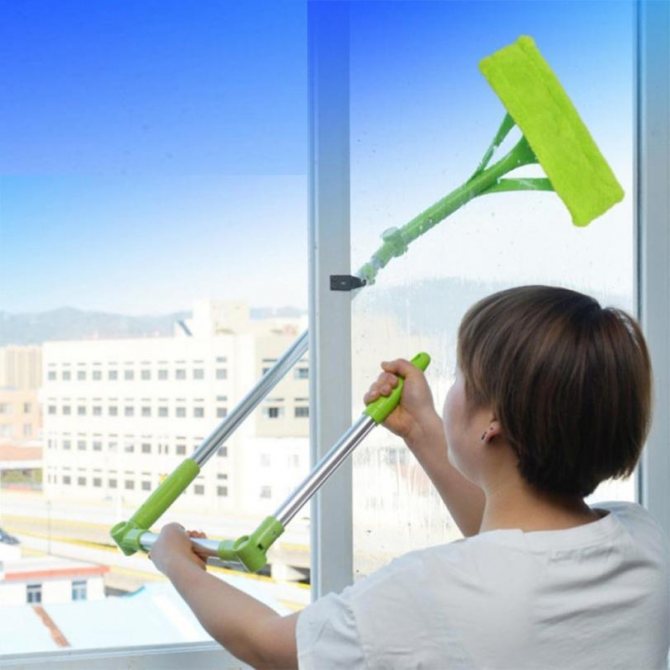
Cleaning hard-to-reach places
To clean hard-to-reach areas of a fixed balcony window, it is recommended to use a mop with a long, curved handle. The double-sided magnetic brush is even more effective. It must be installed so that one magnet is on the outside of the window glass, and the second on the inside.
Washing should be done as usual — moving the mop from top to bottom. It's fast and safe.
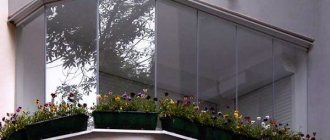
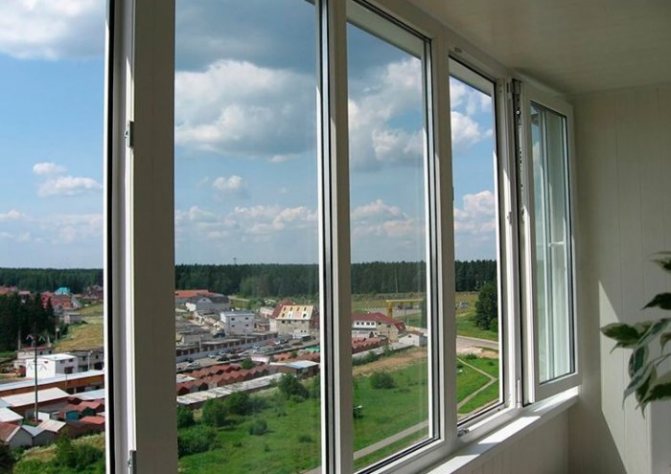
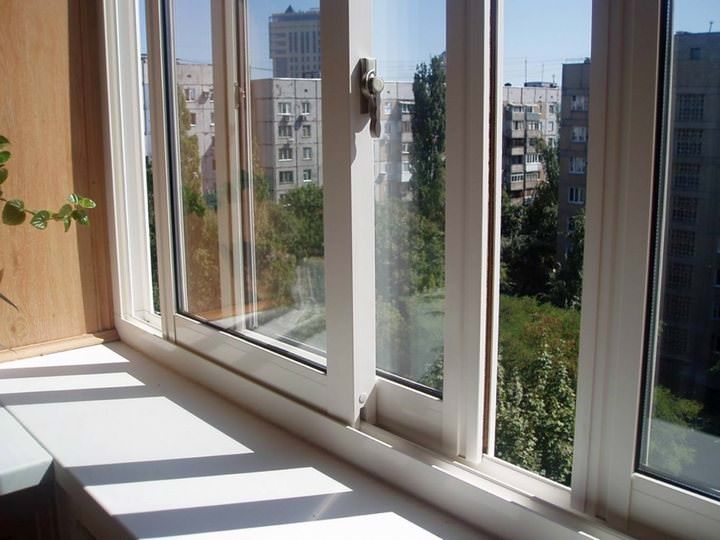
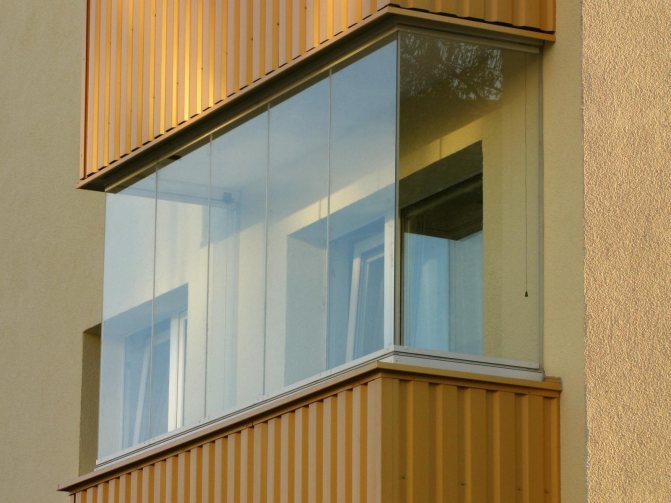
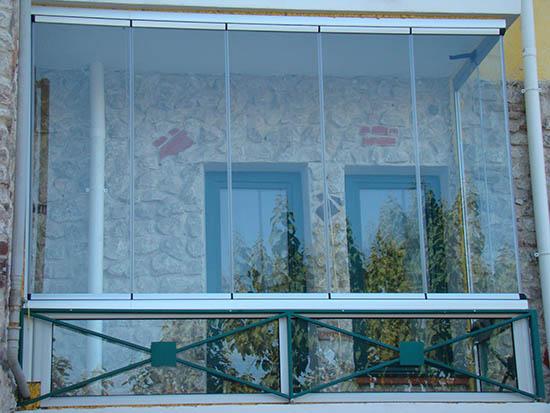
Sliding windows to the balcony and loggia - how the installation is done in 14 photos and how the care is carried out
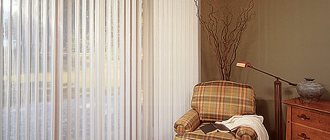
Sliding windows on the balcony and loggia save space
Readers are often interested in how to remove sliding plastic windows on a balcony or loggia and how to install new ones. The key to answering these questions lies in the knowledge of the installation rules. Therefore, I suggest that you familiarize yourself with the installation algorithm for one specific example, where an aluminum structure is installed on a loggia. In addition, you will learn about the advantages of sliding windows and can watch the video in this article.
Pros and cons of aluminum windows and their self-installation
Everything has advantages and disadvantages, the main thing is to prioritize. To begin with, it is worth remembering and knowing that metal structures are not recommended to be installed on high floors. In this regard, they are less resistant to wind than plastic. Here it is not at all important whether you did the installation yourself or resorted to the help of specialists, this is just a design feature.
Aluminum windows are extremely easy to maintain. They are non-flammable, environmentally friendly, do not require lubrication and their service life reaches 80 years. However, if during the installation process you used fittings containing copper, then this will significantly reduce the service life due to accelerated corrosion.
As you can see, you don't need any special talents to do the installation yourself. Everything happens quite simply. However, it is better to thoroughly study the information on the selected profile and its installation before proceeding directly with the process.
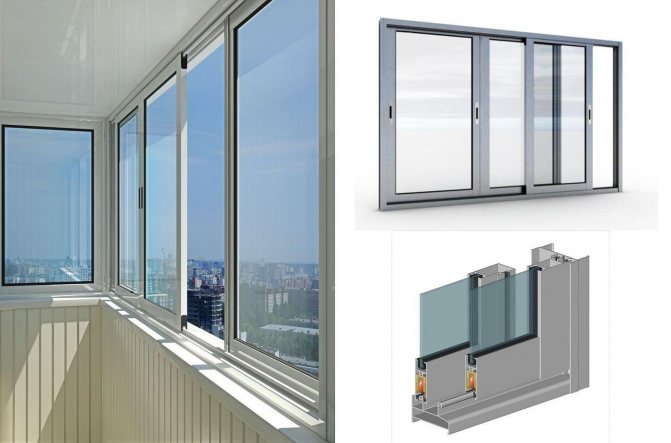
Sliding windows
Installation, adjustment and repair of plastic and aluminum windows is done in almost the same way. That is, the principle of assembly and installation of the structure remains the same, only the material for the frame changes.
Window installation
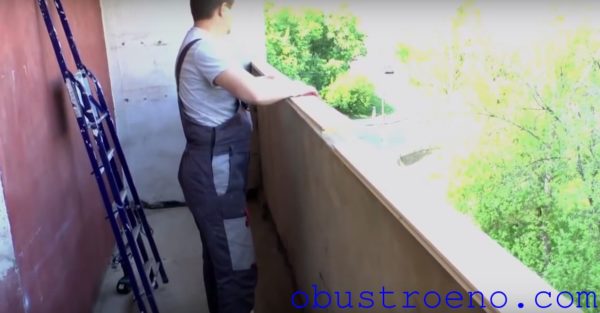
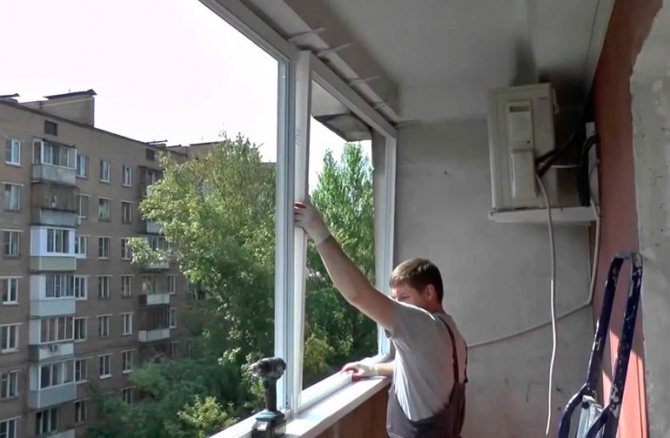
We can say that installing a sliding window on a balcony or loggia with your own hands is quite simple, but you need to follow certain rules.In this case, we will mount the structure on the loggia, but in the course of the description, I will make remarks on the difference with the installation on the balcony.
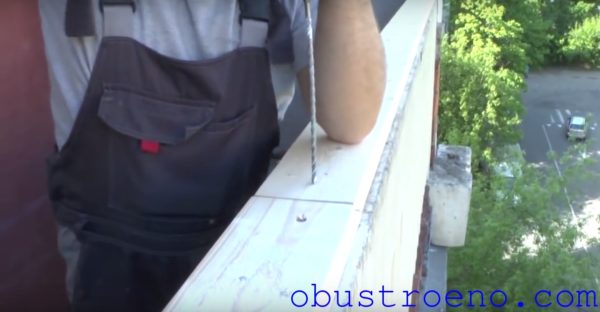
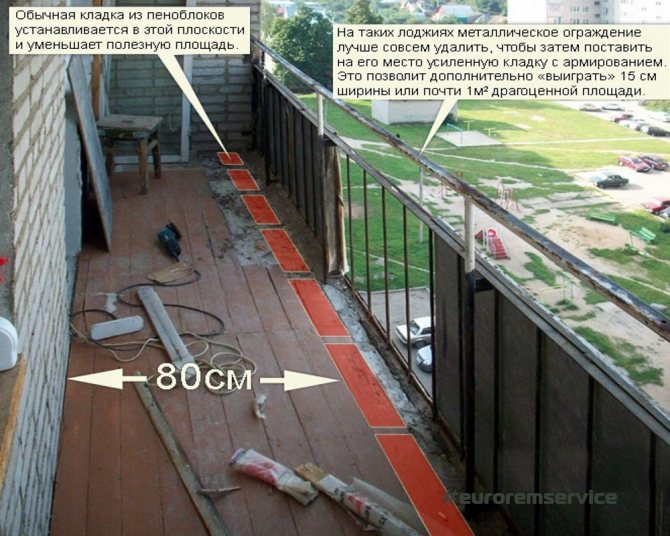
We make holes in the fence through the board
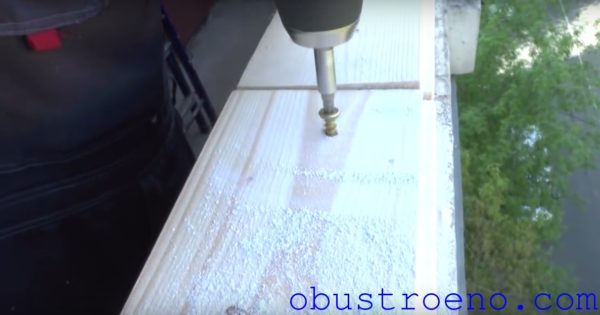
We fix the board with dowels with screws to the fence
Regardless of whether we will mount aluminum or PVC, warm or cold profiles, we need a base, and in this case we will use a board of 30-40 mm for this, which will need to be screwed to the fence with dowels. You see that it is not difficult to do this - drill holes through the board and drive the dowels there, which you fix with thick and long screws.
On the balcony, in such cases, a stretcher is made of metal profiles, and the fasteners are carried out not into the board, but into the metal - everything is the same, only the base material changes.
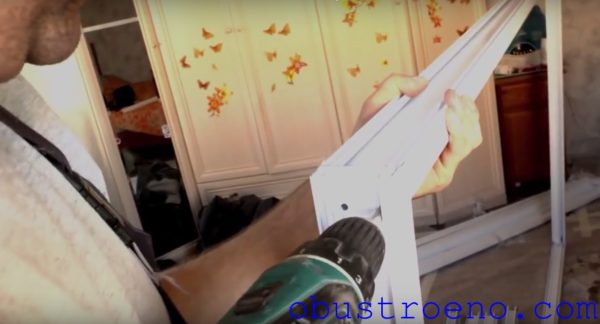
Assembling the aluminum frame
If you have a window made of an aluminum profile, then the frame will have to be assembled at the installation site - it is much more convenient, but the PVC is already assembled and you just have to hang the sashes and insert the double-glazed windows. For assembly, all profiles are numbered, so you just need to fasten them together with the screws that are included in the kit.
Source: obustroeno.com
Construction site
Ideal windows should be practical, comfortable and easy to clean. Modern windows made of aluminum profiles have the listed advantages. In addition, they allow for unusual design solutions while maintaining high performance characteristics.
Content
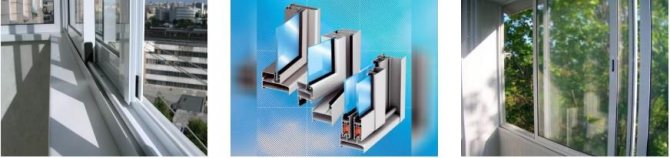
Main characteristics and scope of aluminum windows
Aluminum is an excellent structural material used in the manufacture of facade structures and windows. Products made of aluminum have the following characteristics:
- ease;
- resistance to physical stress;
- corrosion resistance;
- environmental friendliness (no heavy metal impurities);
- resistance to high temperature extremes.
Stages of glass replacement on the balcony
The level of comfort of living in any apartment is directly related to the quality and features of the glazing of a balcony or loggia. Depending on the task and the frequency of use of such a room, the most suitable type of construction, materials and decoration design are selected. Sometimes it is enough to replace the glass on the balcony in order to get an environment that meets all the requirements, but sometimes it is necessary to replace frame structures, which also affect the noise and thermal insulation of the fences.

Three types of balcony glazing
While loggia and balcony glazing specialists offer many options, they are all grouped into three broad categories. If you do not divide the structures into wooden, plastic and aluminum window systems, the following types can be distinguished:

- frameless balcony glazing models.
The latter will not be warm enough, since they are made in one glass, and no matter how unique in its properties, the effectiveness of heat and sound insulation will be inferior to frame multi-chamber windows.
Cold frame structures remain popular due to their availability and ease of installation. At the same time, the balcony remains functional only in the warm season, and therefore is most often used as a storage room or a place for drying clothes. This option effectively increases the thermal insulation of the room to which the balcony adjoins, but the space itself is unsuitable for year-round and comfortable use.
Other types of glazing can be distinguished, which generally fit into the categories presented - these are panoramic structures, and sliding systems, and semi-warm options. Collectively, the choice is primarily between cold and warm models.
Advantages and disadvantages
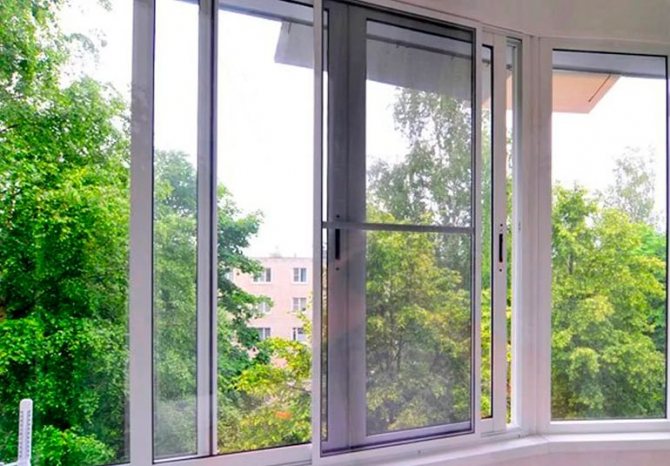
Before buying and installing sliding glass units, you should study their pros and cons. They have the following advantages:
- do not take up space when opened;
- with a sharp gust of wind, the doors do not slam shut like ordinary ones, furniture and flowers will not be damaged;
- they are easy to care for, they do not require special means for this;
- do not fade under the influence of sunlight, do not lose their strength and original appearance for a long time;
- long service life;
- practicality;
- excellent tightness, providing protection against the penetration of dust, dirt, unpleasant odors, noise from the street into the room;
- ease of use.
Problems with this type of windows are the result of poor quality production or improper installation. You may encounter such troubles as:
- change in the parameters of the structure and movement of the sash, skew;
- the result of poor-quality material and coating can be corrosion, swelling, the appearance of fungus and mold;
- with disrupted production technology and improper installation, the service life is reduced, the reliability indicators of the window system decrease.
Why change cold glazing to warm
Improving the thermal insulation of the balcony room also significantly increases the thermal efficiency of any adjacent room. At the same time, the space itself can also serve as a separate area - for work or study, storage of things and food, recreation or for organizing a winter garden, a place for communication, solitude, a personal corner for a hobby.
To use such a room all year round, as well as to preserve things and furniture located here, they choose warm glazing. If it was already done once, but in a cold manner, work can be done to replace the glass or the entire frame structure.
Often, customers ask a question, whether the heater and additional wall cladding with flooring will replace the glazing of the balcony as a whole. If you can make the balcony warm in this way, why change the translucent structures? The benefits of a warm look are many:
- Installation of plastic windows or other frames with double-glazed windows will significantly reduce the cost of heating both the balcony itself and the adjacent premises. Keeping temperatures 10-15% higher than outside will reduce energy costs, which are usually increased with the use of heating appliances. Additional insulation of walls and floors will to the greatest extent allow you to maintain a comfortable temperature, which should not be expected with cold glazing, since the glass allows the cold to pass through significantly. Air conditioning will be just as effective.
- When choosing warm glazing, you can reduce the cost of insulating other structures, although this is a necessary measure, but it can also be implemented in different ways.
- Replacing ordinary glass with a double-glazed window on a balcony or loggia will increase the strength, reliability and durability of structures.
- Not only does the thermal insulation increase, but also the resistance to noise penetration.
- The aesthetics of façade glazing is retained, and sometimes even increased, when glass or window systems are replaced.
- The premises can become residential or more functional within twelve months.
Effective removal of difficult contaminants
If standard cleaning does not work, other methods should be used.
You can prepare a solution for washing windows on the upper floors by taking 30 milliliters of alcohol, as well as 10 milliliters of white cosmetic clay and crushed chalk.
- Stir to a state of gruel and dissolve the smallest grains.
- Apply the mixture evenly to the window surface.
- Soak for five to ten minutes.
- Rinse off the dissolved dirt particles with clean water.
- Wipe dry with a paper towel that absorbs all moisture.
A mixture based on:
- 100 ml of warm boiled water;
- 20 g of rock salt.
Or:
- 1 liter of water;
- 20 ml vinegar;
- 20 g of crushed chalk.
The solution prepared according to the second recipe is necessarily boiled.
Types of warm glazing
Traditionally, warm glazing of balconies and loggias is carried out using metal-plastic structures, which to the greatest extent allow you to keep warm and prevent the penetration of sounds from the street. A variety of profiles, double-glazed windows, frame palettes - all this provides ample opportunities for the implementation of various design projects. At the same time, the facade of the building becomes clearer, neat and well-groomed.
All "warm" designs can be divided into the following types:
- standard glazing (with or without extension), as a rule, hinged type;
- panoramic version - French windows with frames.
Qualitatively, they are no different from each other: you can choose additional glass coatings or filling the chambers with gas to increase the heat and sound insulation properties of structures. The main difference between the presented types is the opening method and the glazing area. The choice depends on the budget, the task, the purpose of using the balcony or loggia, the chosen design.
Design features of PVC doors
Reinforced plastic canvases have their own advantages over their wooden counterparts. They do not swell from moisture, do not fade in the sun, and are also not afraid of wood pests. PVC door blocks are often used for office premises, balconies of residential buildings and other public buildings.
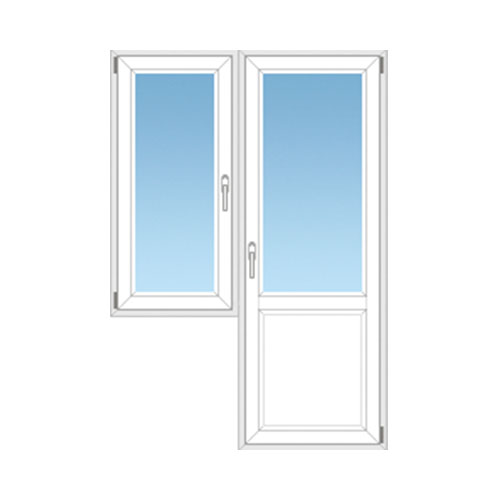
The set of PVC doors includes a box, a solid plastic sheet or double-glazed window, fittings. The design is quite heavy, therefore, when dismantling it yourself, the work must be done carefully.
To fasten the door leaf and evenly distribute the load on the door frame, 3-4 hinges are installed, which are closed with plastic caps of the same color as the product.
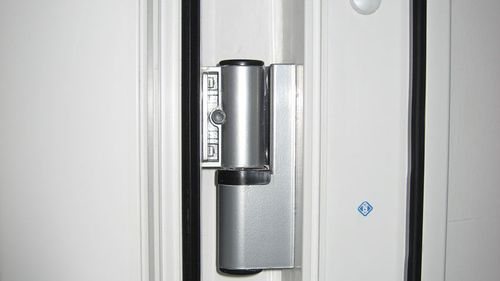
If the door block includes a heavy double-glazed window, then an assistant will definitely be needed to dismantle it.
Stages of replacing cold facade glazing with warm
To fully replace cold glazing with "warm" structures, it is necessary to completely remove the existing frames, since they cannot serve as a frame for heat-efficient glass units. The exception is high-quality wooden fences, which are used both with one glass and with a whole glass unit. But most often cold glazing is made on the basis of a metal frame, then the aluminum structure must be dismantled.
The process of dismantling the old structure in this video:
Installation instructions for warm glazing:
- Corner, end and intermediate posts must be installed. For these purposes, it is convenient to use a wooden bar.
- Next, you need to fix the support posts to the parapet and the upper floor. For fixing, corners and self-tapping screws are usually used.
- The next step is to get the double-glazed windows out of the frames so as not to damage them during the installation process. To get the glass unit out of the frame, you need to pry the glazing beads with a narrow screwdriver, pull them out and dismantle the glass units.
- Next, you need to remove the sash. To do this, squeeze out the pin of the upper window hinge and pull it out with pliers, and then lift the window sash and remove it from the hinge.
- The next step is to fix the base profile to the bottom of the window frame.
- Next, insert the anchor plates from the kit into the grooves of the frame.
- Insert the frames into the prepared openings, make sure there are no distortions and other defects. If distortions are found, level them with wedges.
- Next, you need to fix the frames by screwing the self-tapping screws into the holes of the anchors intended for this.

- Return the sashes and glass units to their places.
- Sealing cracks.
Make sure the system is working. In the end, you just have to foam the grooves, mount the window sill and finish the decorative finish.
Common mistakes when glazing a balcony:
If you do not want to dismantle the old glazing and frames, discuss the possibility of replacing the glass with the masters: perhaps, for your purposes, you can use a special material with additional protection, which increases the thermal insulation of the entire room. At the same time, it will be necessary to better insulate the walls and floor of the balcony or loggia.
Parsing the roof of the balcony
In multi-storey buildings, roofs on the balcony are arranged only on the top floor. For the lower balconies, the roof is the upper balcony slab. In houses of individual series and old buildings, it is also possible to have your own roof.
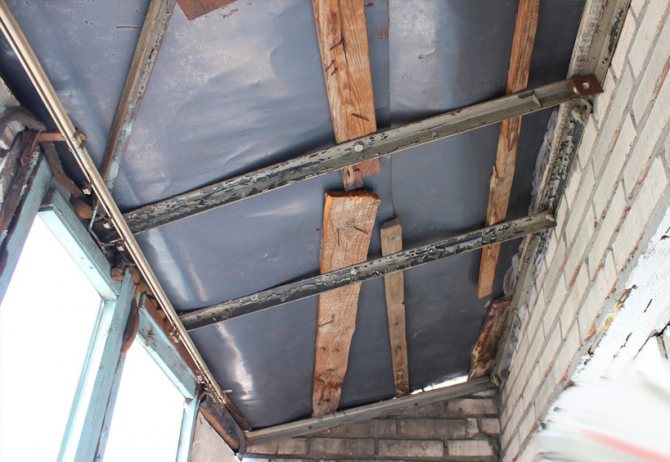
The need to dismantle the roof appears when it ceases to protect the interior space. Water from the common roof enters the balcony, flooding things and decoration. In this case, you have to disassemble the old structure and build a new one.
Balcony roofs are made of two types:
- on racks, or dependent roof;
- fixed to the wall, or independent roof.
To dismantle the dependent structure, they disassemble the interior decoration, insulation from the walls and ceiling, remove the roof covering (metal sheets or profiled sheet), and cut off the rack with an angle grinder.
To disassemble an independent fastening system, the sheathing and insulation are also removed first, then the roofing elements. The next step is to cut off the fastening to the wall and parapet, and remove the frame.
Dismantling the loggia is done without dismantling the roof. In case of severe wear of the balcony slab and the impossibility of using it, a decision is made to dismantle it and disassemble the parapet. To remove the slab, it will be necessary to involve installers with experience in working at height and equipment. It is impossible to carry out such work on your own.
The elimination of the slab is started after disassembling all the other elements on the balcony. Scheme of work on dismantling the slab and parapet:
- first of all, the parapet is disassembled. The structure of the metal corner is cut off at the extreme points with a grinder, cut into separate spans and removed. If the parapet is made of bricks or concrete slabs, you will have to use a hammer drill. The brickwork is removed in rows, holding the bricks while working with a hammer drill. Concrete slabs are knocked down with a jackhammer, after having built a safety deck with a removal beyond the perimeter of the balcony;
- if a leveling screed has been poured onto the surface of the slab, remove it first. To remove the screed, you will need to use a jackhammer or perforator;
- the balcony slab has reinforcement, so the concrete is hollowed out with a jackhammer in squares, gradually releasing the reinforcing mesh. After complete removal of the concrete, the mesh is cut off with a grinder.
When working with a balcony slab, be sure to enclose the space under the balcony and post warning signs.
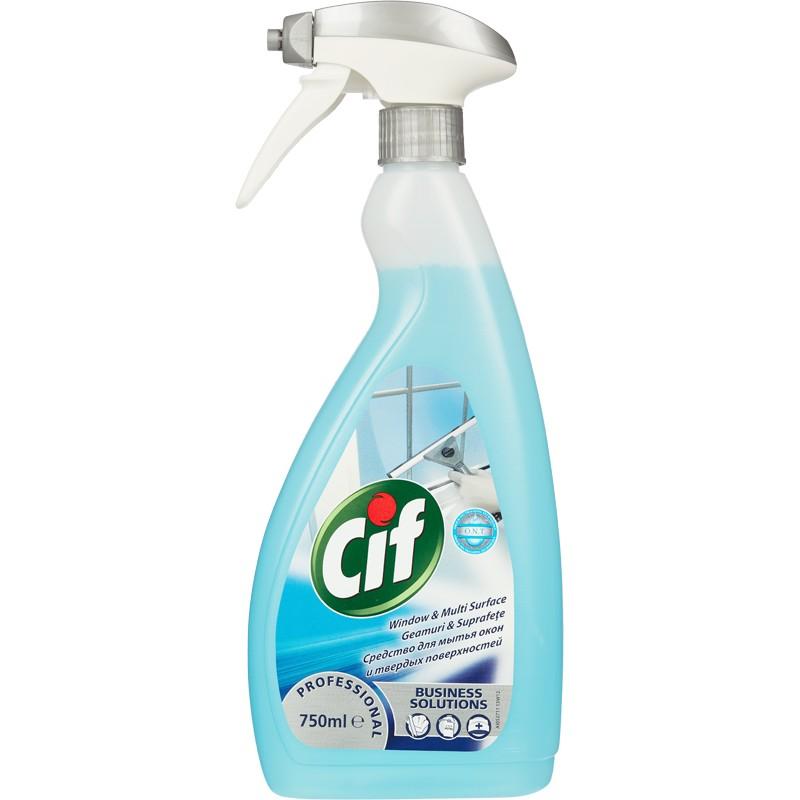
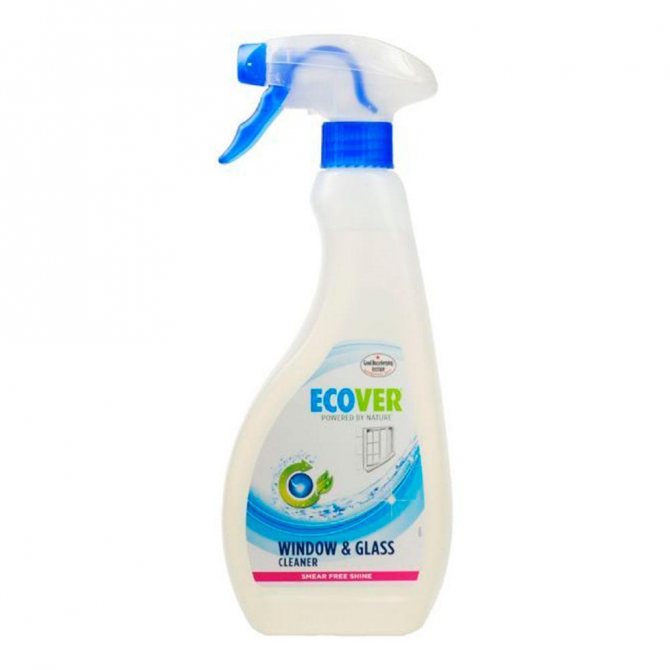
Detergents
Modern cleaning products allow you to efficiently clean glass of any contamination without leaving streaks. In the case of balconies, do not use liquids containing soap, since in order to get rid of traces of foam, you will need to rinse the glass more than once. This can be difficult and dangerous at high altitudes. Use only specialized tools recommended for your type of window.
Household chemicals used for cleaning glass vary in composition and may include:
- isopropyl, benzyl, or ammonia;
- water repellent additives;
- antistatic.
Homemade solutions with the addition of ammonia, vinegar and glycerin are a full-fledged alternative to purchased products. As a rule, the prepared formulations give a result no worse than household chemicals that are sold in stores.
Do not use chalk or starch, as they will be difficult to clean. If the balcony is at a high altitude and far from parking lots, you can get by with warm, but not hot water, adding a little ammonia to it.Such a solution perfectly removes dirt and gives shine, but is not able to remove traces of gasoline and engine oil fumes.


Cleaning procedure for window structures
The standard regular cleaning of balcony windows is done with an aerosol cleaner. It should be sprayed onto a glass surface and wiped off with an absorbent paper towel. During the procedure, you need to pay attention to the corners in which a maximum of dirt, dust and the remains of dried insects accumulate.
The disadvantage of this method is the inability to overcome old traces of stains, soot and other contaminants.
Alternatively, you can prepare the solution yourself. Add table vinegar or a mixture of ammonia and salt to warm water.

Apply the resulting liquid to a foam sponge and spread it over the glass in a circular motion. Then follow these steps:
- A rubber scraper will moisten it in warm water.
- Pass over the glass, moving from the top to the bottom, but not reaching the very bottom.
- Rinse in clean warm water each time.
- Remove dirt residues with a scraper, moving horizontally.
- Finally, wipe the surface with paper towels to avoid streaks.
Inventory for work
It will not be difficult to clean the windows on the outside of the balcony if they are equipped with a rotating mechanism. But this is rare. Most new buildings use euro-glazing with a plastic or aluminum profile, and only one sash opens on such balconies. The system is safer, but more difficult to maintain. In this case, in addition to basins, rags and sponges, you need to stock up on additional tools.
The list of inventory that hardware stores offer for window cleaning is extensive and includes:
- wiper with rubber band and sponge. The tool will help wash away the main dirt, but perfect cleanliness cannot be achieved due to the rigid attachment of the head. The best result is given by devices with an adjustable tilt;
- telescopic squeegee for laminate - optimal for cleaning balcony panes. The rotating head will be able to reach even hard-to-reach places;
- a long-handled construction scraper - will help to remove the remnants of construction tape and stubborn dirt adhering to the glass;
- professional water squeegee - the angle of the working surface is adjustable, so the elastic will help remove water and cleaning solution from remote corners;
- a magnetic sponge is a relatively new device that allows you to wash windows from both sides at once. One part of the tool is held on the outer surface by a magnet.
It is risky to use steam mops and small electric glass washers on balconies with a large glass area, as there is a danger of simply dropping the tool and losing expensive equipment.


Folk recipes

Peroxide and soda are good at removing dirt in the grooves of sliding windows
You can wash a dirty window using means from improvised household substances:
- Sophisticated cleaning mixture... In 1 liter of water, 10-15 ml of vinegar, 50 ml of alcohol and 20-30 g of starch are diluted. Suitable for cleaning glasses and frames.
- A solution of water and crushed chalk... It is used only for heavily soiled glasses. They cannot wash the frames.
- A mixture of tea and vinegar... In a glass of 200 ml of strong tea, add 30-40 ml of table vinegar.
- Glycerin addition... Adding a small amount to any cleaning solution will lead to a decrease in stains on the glass.
- Table vinegar... For removing streaks and shine on washed glass.
- A mixture of baking soda and hydrogen peroxide... To remove accumulations of dirt in the grooves of the sliding windows. The dirty place is sprinkled with soda and filled with peroxide until a liquid gruel is obtained. Together with the absorbed dirt, it is removed with a napkin after 2-3 minutes.
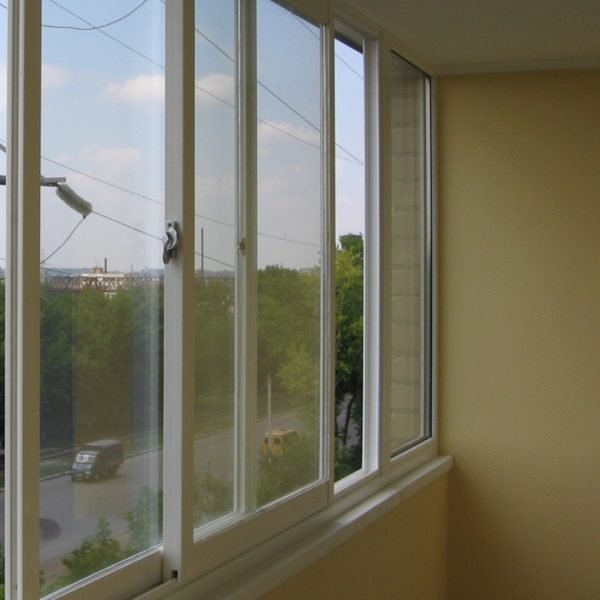
Features of cleaning sliding windows on the balcony
In balconies with sliding structures, washing is difficult because part of the glass is practically inaccessible.In addition, dirt accumulates in the closed grooves, which must also be removed. Most frames are designed in such a way that the moving sash can be removed, and then it will be much easier to wash it. Different glazing methods have their own characteristics, but in most cases, the possibility of removing a part of the window is provided for by the design.
- Raise the sash, holding it with your hands on both sides, until the frame comes out of the grooves.
- Pull the frame towards you so that its lower part is in the room.
- Gently lower the glass to the floor.
If the moving part could not be removed immediately, you must inspect the frame for plugs, additional grooves or special notches. Sometimes you need to align the marks to move the frame up. If there are blockers, they are carefully removed using a screwdriver. After that, the glass is freely removed. This operation is best done with two people, as the sash can be very heavy.
The first step is to clean all grooves and rinse the frames. Soap detergents can be used here, since it is difficult to remove street dirt with ordinary water. For the aluminum profile, alcohol-containing compositions are used.
When cleaning all types of frames, abrasive powders should be avoided, as hard particles can leave scratches that cannot be removed later.
Special gels or petroleum jelly will protect the seals from stubborn dirt, while at the same time extending their life. The funds are applied at the final stage of cleaning.
Source: chistodar.com
Step by step installation
In any work, the main thing is to strictly follow the established rules of action. Small deviations are possible, but if this is your first time installing a window with your own hands, then stick to the plan as much as possible. To get started, find yourself an assistant, so alone you will not succeed, and get to work according to the instructions:
- If you haven't prepared the opening yet, then it's time to do it. Accordingly, free the opening from dust and dirt, and if this has already been done, then go to step two; Insert the frame into the window opening and align it. To do this, use prepared wedges. Do not try to bend the aluminum frame so that you do not have to correct errors; Take measurements between the frame and the opening. The distance from its lateral surface to the wall should be about 5 mm; Secure the frame using anchor plates and self-tapping screws. One of the holes is designed for screwing self-tapping screws into the wall, and the other into the frame;
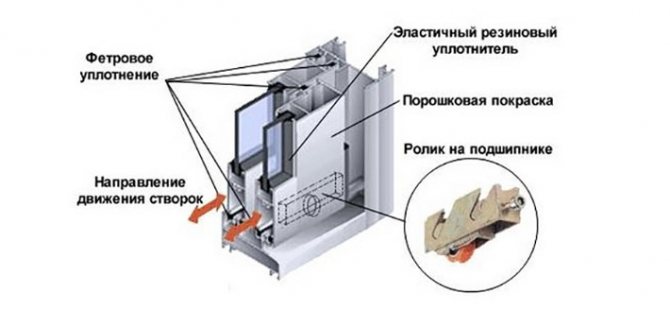
Photo 3. Sectional aluminum profile Filling with foam. This stage must be carried out in two passes. Initially, you foame the entire structure around the perimeter. Now you need to wait for a time equal to two hours, no less. After drying, you need to remove the wedges that you used for leveling from the openings. Next, it remains to foam the resulting cracks.
Important: "Sealing is always done only from the bottom up, otherwise the foam will creep."
The installation of window blocks follows the same plan.
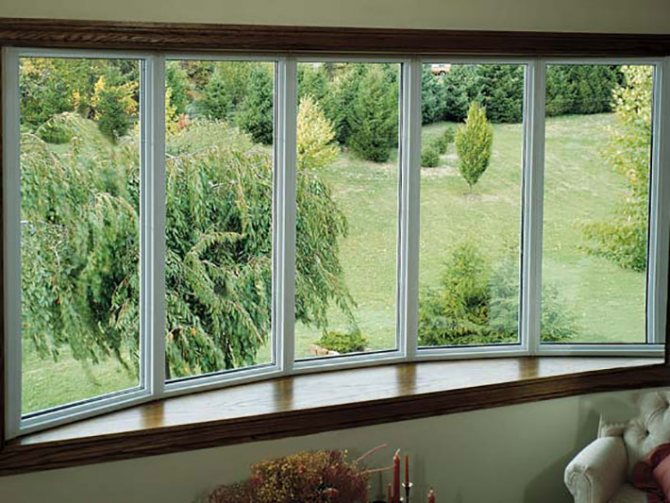
Photo 4: Aluminum structure
How to adjust aluminum sliding frame hardware
After the installation of the aluminum sliding frame of the balcony series or during its operation, a situation may occur when the sashes need to be adjusted.
Two problems can arise:
- The frame is hard to move along the rails
- The latch does not close, that is, the tongue does not go behind the strike plate
You can restore the operation of the sashes yourself, as it is quite simple, but for this you need to know how to adjust the fittings and have the necessary tools.
First, let's look at the reason that led to the problem.
In the first case, when the sash moves with difficulty along the guides, it's all about the rollers that need to be lowered, thereby raising the sash and making it easier to move.
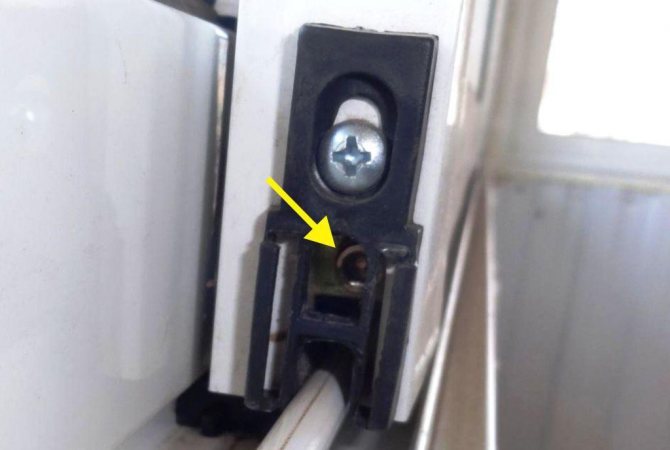
In the second case, we will understand the principle of the locking mechanism.The latch consists of two parts: the bolt tongue on the sash and the striker on the frame. When the window is closed, the tongue snaps into the striker, and it becomes impossible to open the sash from the outside.
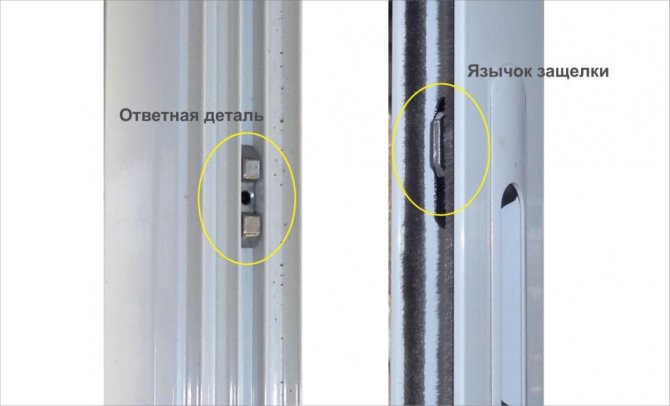
The tongue may not snap into place for the strike plate for two reasons:
- Mating piece screwed in wrong place
- Recessed latch tongue
In both cases, hex adjusting keys will be needed to solve the problem. They are sold in a set at hardware stores. Each key is numbered.
Complete dismantling
If it is not enough just to remove the sash of the plastic window with your own hands, you can try to remove it entirely. If you require that the dismantled window remains intact, it is recommended to hire specialists for this; if the integrity of the glass unit does not matter, you can try
Cutting through the polyurethane foam
remove it on your own. The difficulty lies in the fact that, in the absence of experience, installers very often break the window block itself, and its replacement is expensive. There is a risk of dropping the structure onto the street.
For dismantling you will need:
- Remove the sashes.
- Saw the frame.
- Take it off.
- Remove ebb.
- Remove the window sill.
The reader already knows how to remove the plastic window from the hinges and how to remove the sash of the plastic window. Sawing the frame is more complicated. Each cut is made with a hand saw, for this it is better to use a metal file. Please note that the work is dusty, there will be many small particles.
The cuts will help to easily dismantle the frame, after they are made, the structure can be pry off with a crowbar and pulled out. Before this, it is necessary to cut off all the foam that holds the window; if the frame is screwed on, you can notice this by opening the sash, the fasteners are pre-unscrewed. You can try to get the frame without cuts. This is much more difficult, but there is a chance that the structure will remain intact and useful for installation elsewhere.
Are you going to change windows and do not know which one to give preference to? Rehau windows are the best choice, buyers have long appreciated them, read reviews of real consumers.
Samara windows will be cheaper and no worse in quality than their foreign counterparts. Get to know them better.
Proplex, also a Russian window manufacturer, has been known to consumers since 1999. Read about him by the link
How to adjust aluminum sliding frame hardware
Next, we will consider both situations of occurrence of problems with an aluminum sliding frame and how to solve them.
How to adjust the rollers on the sash of an aluminum sliding frame
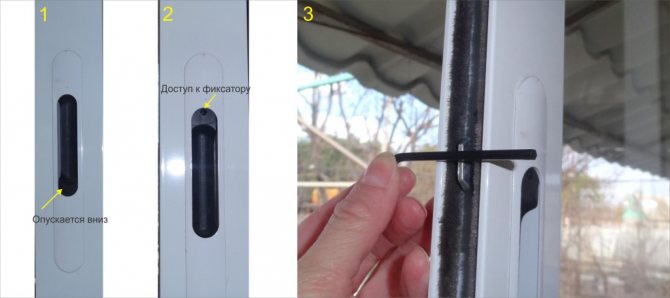
To adjust (raise the sash), you need a key No. 4, that is, 4 mm. At both ends of the sash, there are holes in the frame with a black lining from below, looking into which we see an adjusting screw, it rotates with a 4 mm hexagon.
To raise the sash, you must turn the key counterclockwise. The same is done from the other end. When adjusting the height of the rollers, it is necessary to ensure that the sash does not tilt diagonally, otherwise it will not be latched shut. For this, it is best to use a level or, in extreme cases, a plumb line.
How to adjust the latch of an aluminum sliding frame
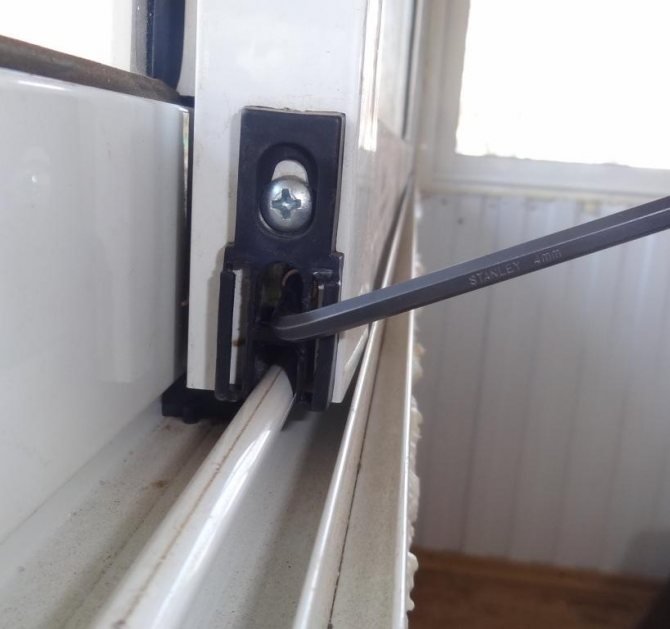
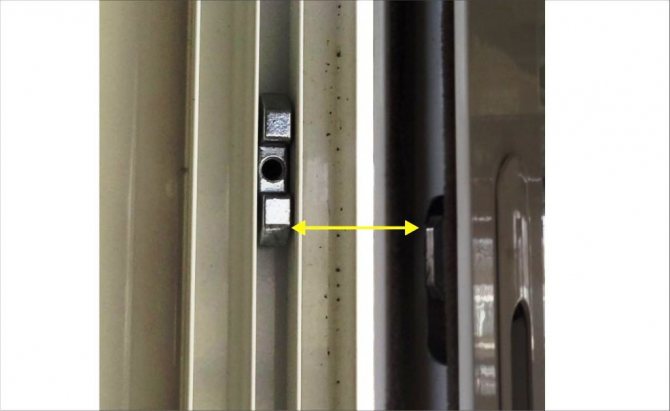
If the problem is that the counterpart is screwed on incorrectly, then it just needs to be twisted. To do this, take a key no. 2.5, insert it into the central hole of the part and unscrew it until the answer moves freely in the frame. Now it needs to be screwed in such a way that the lower part of the otvetka before the bevel is level with the upper part of the tongue before the bevel.
In the second case, when the tongue does not snap into place, you need to pull it out. Take wrench # 3. The tongue holds the retaining screw. To get to it, you need to pull the opening handle down (step 1 in the picture). A hole will appear at the top, into which a 3 mm hexagon is inserted and rotated in the opposite direction to the location of the hardware (step 2 in the picture).For example, if the latch is located on the left end of the sash, then the key rotates to the right and vice versa. By loosening the fixing screw, you can safely pull out the movable tongue outward until it is flush with the edge of the frame (step 3 in the picture).
At the end of the process, the retaining screw is tightened. If everything is done correctly, the sash will close tightly with the latch!
Source: build-effect.ru
Removing from the hinges
It can be useful to know how to remove a plastic window from its hinges, if, for example, you need to replace or repair a sash or remove it to dismantle the window. To carry out this procedure, it is necessary to free the hinges from the plastic pads. After that, the sash will need to be slightly opened to provide convenient access to the hinge. You need to start removing from the top lining, then move on to the bottom.
The top hinge comes apart first. You will need to pull the stem out of it using pliers. After that, tilt the sash towards you, remove it from the lower hinge.