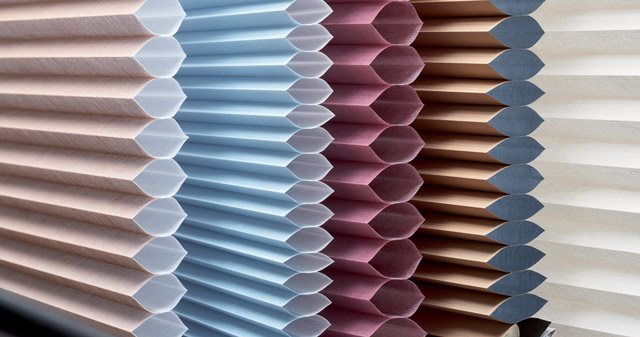
The laconicism and practicality of fabric blinds makes it possible to harmoniously fit them into any interior. But a key factor in their popularity is the excellent performance of their direct sun protection functions.
This type of curtain is irreplaceable in darkened and limited areas. The simple design allows you to maximize the window space, letting in natural light, thereby visually expanding the room.
History and views
Lattice sun shades were invented by the Arawak Indians who lived in the West Indies, on the islands of the Caribbean Sea. The first of the Europeans to see their blinds were the Spanish conquistadors. They liked the establishment, but they killed every one of the Arawaks - for the fact that those gold and spices turned out to be less than the hidalgo, who were foolish with greed, wanted to find, and the Arawaks themselves, in Indian style, preferred death to slavery. However, the history of the conquest, crusades, etc. and so famous.
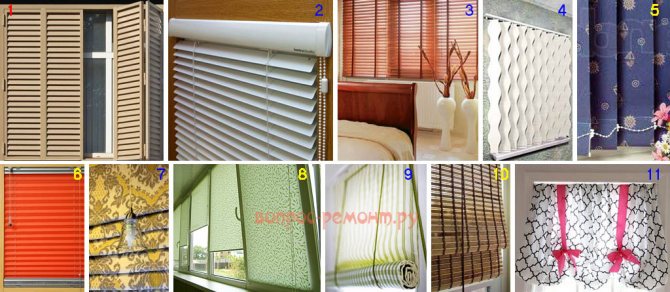
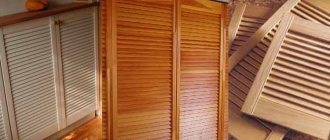
The first historically type of blinds is colonial, pos. 1 in fig. They are just shutters with slanted wooden slats. In the tropics, where summer and the sun are high all year round, they are still in use today. simple, reliable and cheap. In a temperate climate somewhere in the middle of the 18th century. on the basis of the Indian ones, Venetian blinds appeared: the inner long sides of the lamellas were hinged in the frame, and the outer ones were connected with a cord. By sipping on it, the slope of the slats could be changed according to the season and weather. Then the French name of this device, jalousie - "jealousy", stuck. The coquettes of that time, closing the blinds, brought the fans sticking out under the windows to white heat; especially if before that a man's face flashed through the window.
Note: within the same climatic zone (and who carries the blinds with them?), the swing mechanism can be abandoned by making the blinds in Arawak style reliable. How - see below.
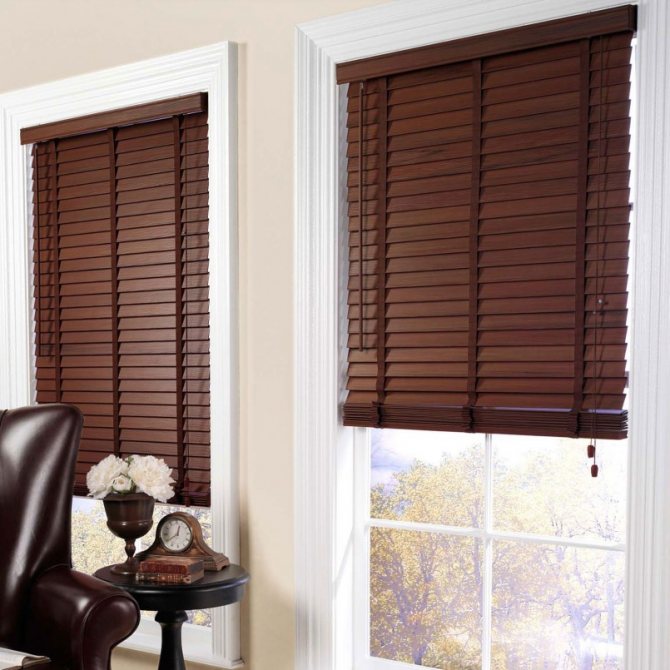
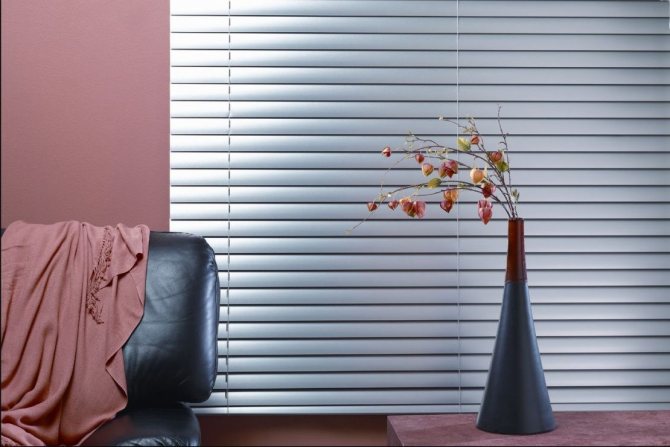
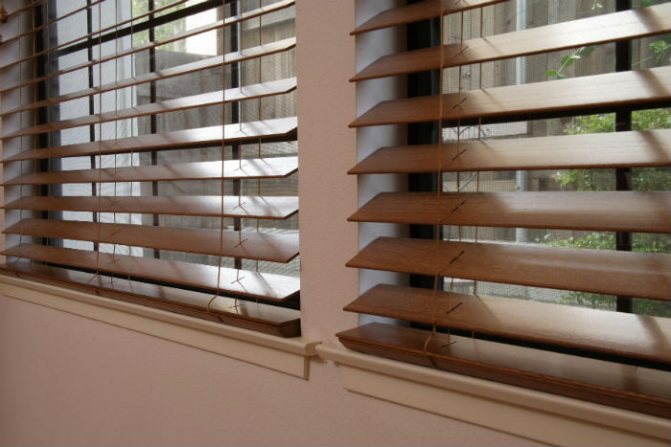
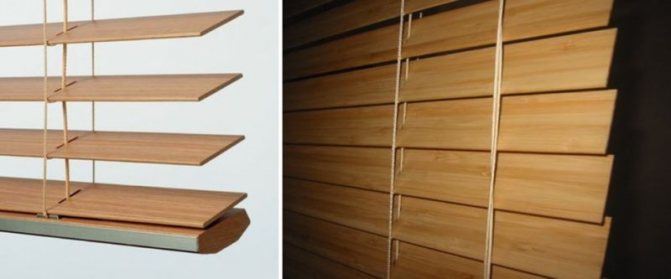
The development of the "Venetian" principle is now horizontal blinds, pos. 2 and 3. The first samples, in which all the lamellas could be collected in a tight package and raised up, appeared on sale in 1841. Bad in them, firstly, the price, up to 5000 rubles. and more for a good model with 1 window. Secondly, steel lamellas, especially the lower ones, are easy to bend to a break, and cannot be restored to their original state. Replacing the same lamella costs about 1/5 of the cost of new blinds. And the good thing, besides suitability for any climate, is the ability to put rigid horizontal blinds on plastic windows without damaging either them or the walls at all, see below.
Note: horizontal lamellas made of Faux material do not break or bend, it is something like MDF with hardening impregnation. But the price of wooden blinds is much higher than that of metal of the same size. In addition, so that the lamellae do not quickly wear out against each other, the so-called. ladders, see fig. on the right, which do not add elegance to wooden blinds.

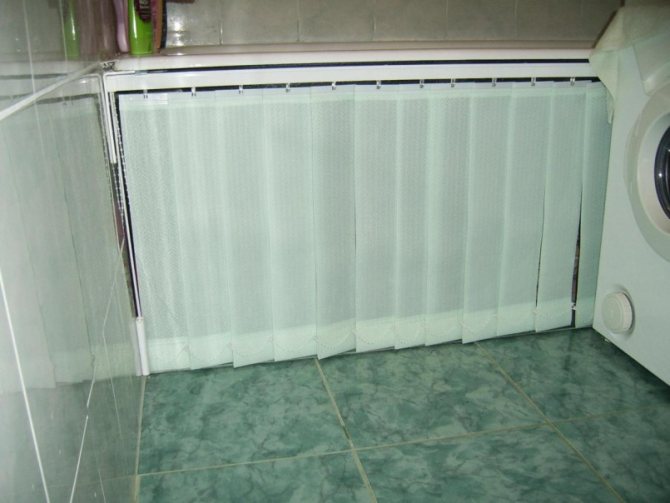
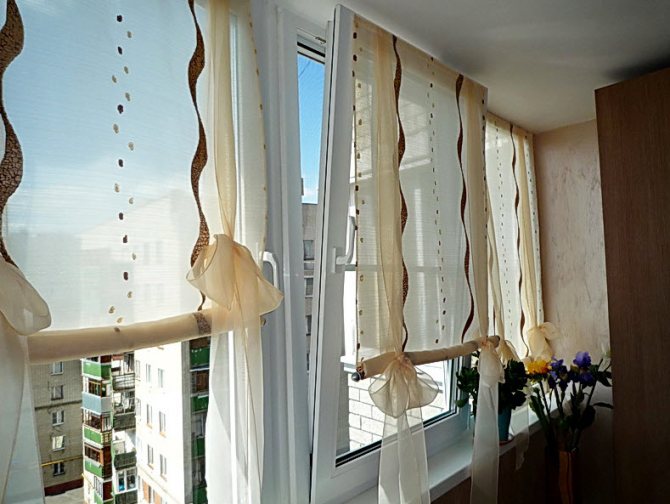
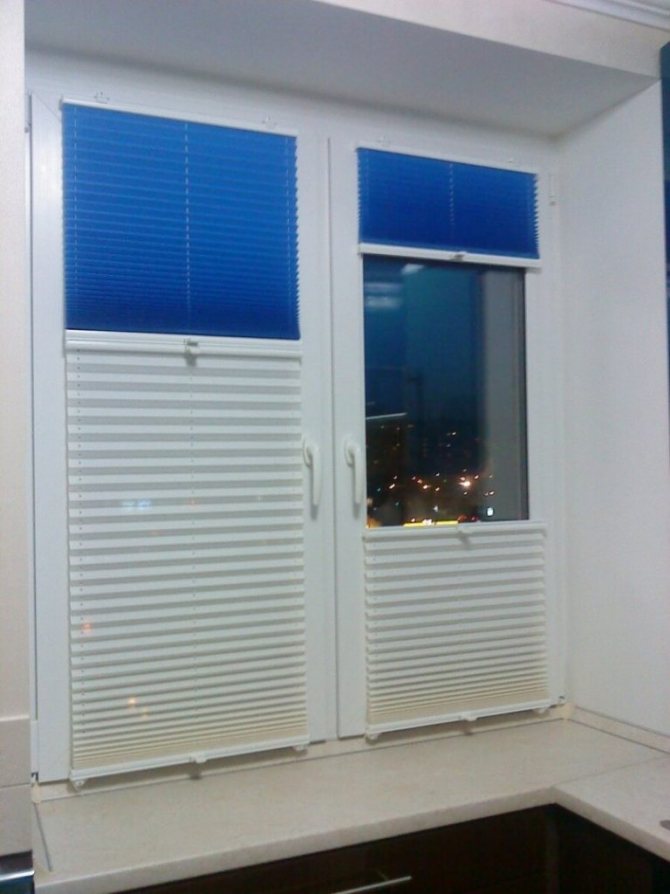
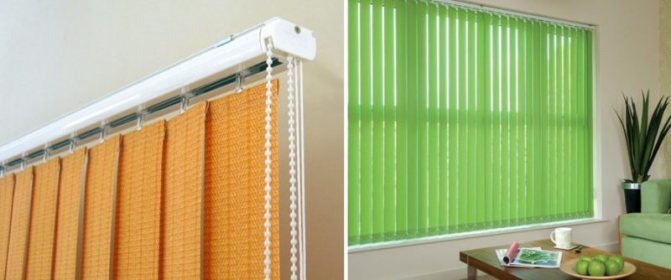
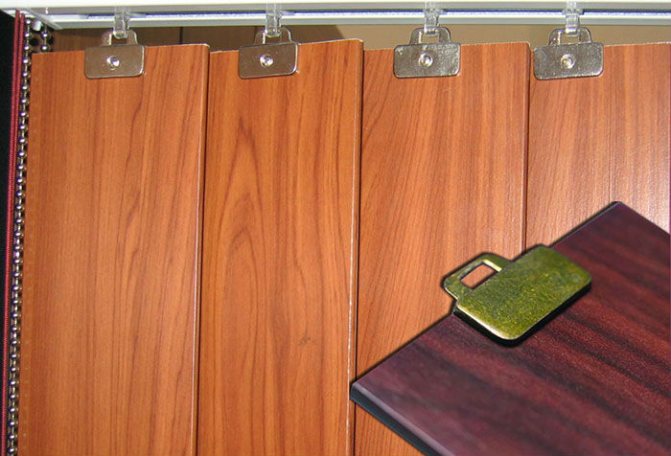
People came up with vertical blinds only by 1960. They are not at all cheaper than horizontal ones, but, firstly, their lamellas are fabric and do not break. Secondly, the lamellas can be independently removed one by one for cleaning and replacement. Thirdly, vertical blinds not only regulate light sweat, but also allow it to be optimally distributed around the room, which, with skillful use, saves electricity. A somewhat "office" type of "vertical" (which, by the way, is not at all "office" than horizontal blinds) easily fits into everyday life with design techniques, pos. 4, 5.If the windows in the room are arched or other "wrong", then there is no alternative to vertical blinds, see next. fig.
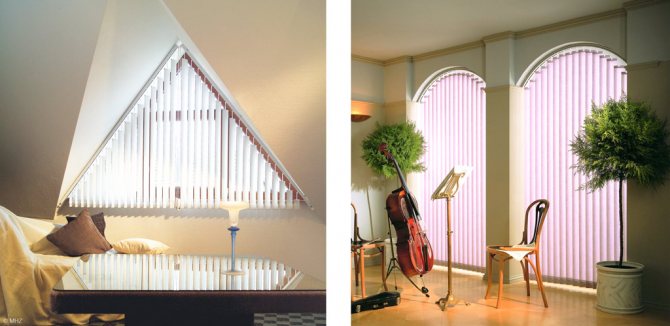
Vertical blinds on complex-shaped windows
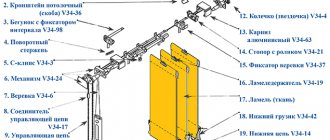
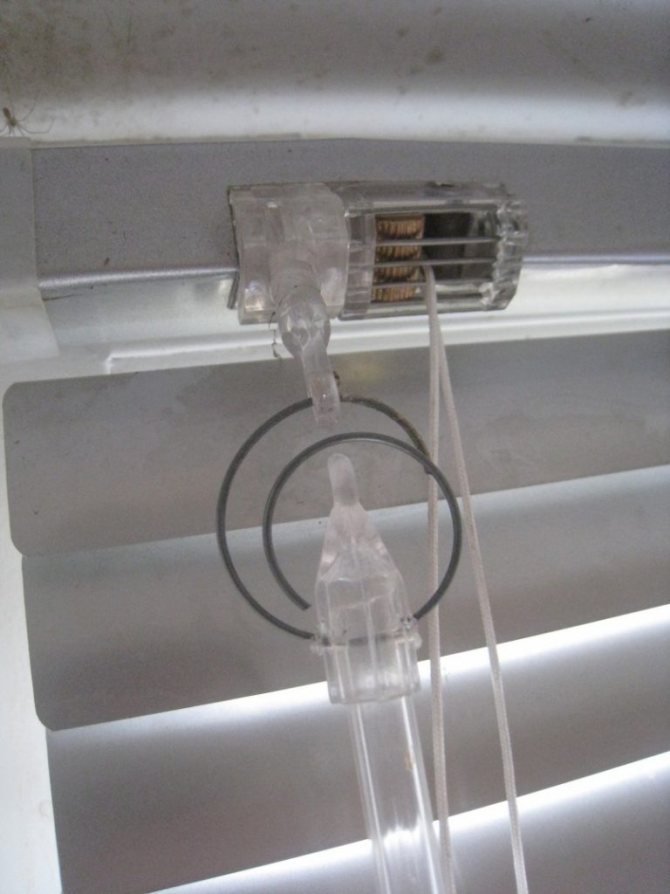
Achilles' heel of blinds with separate slats is a mechanism. First of all, it is rather complicated, see eg. fig. below. Everyone who uses such blinds knows that the world's best brands cannot do without breakdowns. Secondly, there are nodes in the mechanism, for example. ball chain, which you cannot make yourself; buying parts at retail will cost more than turnkey blinds. Therefore, further, within the framework of "our own hands", we will restrict ourselves to the methods of attaching ready-made blinds to windows without drilling and installing them indoors.
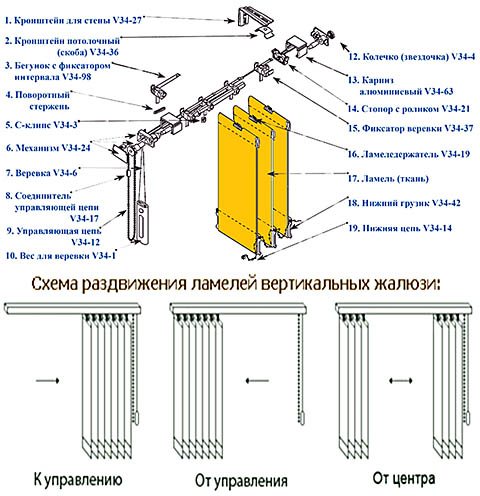
Vertical blinds
In ancient times, there was no robotic production, but the need for blinds was no less than the current one. In different parts of the ecumene, people got out of the situation in their own way. In the East, for example, they came up with pleated blinds, or pleated blinds, pos. 6. in fig. at the beginning. Actually, this is already a curtain, but in order to get around the nit-picking of pedants, we can assume that these blinds have 1 lamella, which rotates with the window frame. For the rich, pleated blinds were made of selected silk; the poor got by with palm leaves (in India) or rice paper (China, Japan). A significant fact: modern wallpaper paper is even better than rice paper, so it is quite possible to make wallpaper blinds from trash with your own hands. Time one lamella, very attractive in appearance, will take no more than an hour, and will last at least all summer, see below.
Silk came to ancient Europe, but at such a price that not every archon or senator could afford curtains from it. The Greeks and Romans escaped the heat by building houses of marble, which they had in abundance, and from the excess of light they were protected by Roman or Romanesque curtains, pos. 7. Although it would be more correct to call them Persian, since in Europe they appeared after the campaigns of Alexander the Great.
Structurally, Roman blinds are real blinds with connected horizontal slats. Their mechanism is elementary simple and quite affordable for making by hand, without expensive purchased parts. However, so that Roman shades do not constantly jam and warp, the fabric from which they are sewn must be dense and tough enough; the Persians used brocade. Therefore, we will briefly touch on the Roman curtains further - they are certainly not openwork.

Blinds on inclined windows
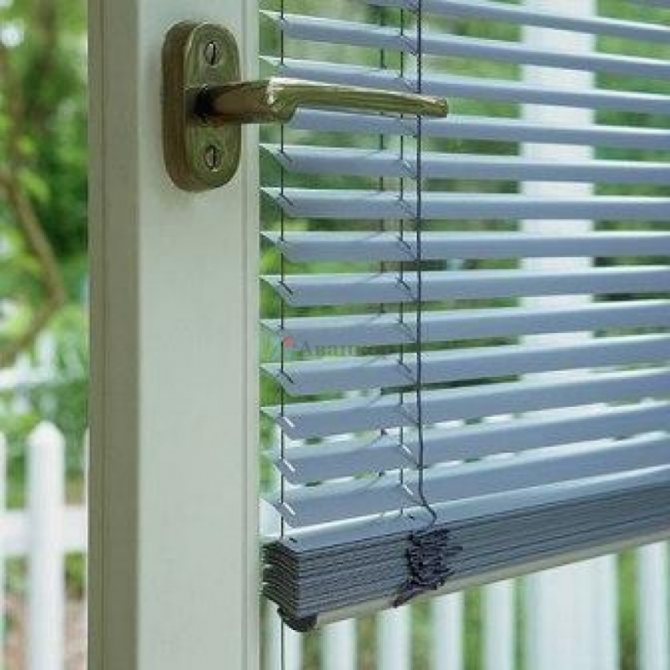
Running a little ahead, take a look at pos. 10. It is also an oriental invention - bamboo curtains. With the blinds, apart from the lamellas (which are also non-rotatable), they have little in common both constructively and functionally. But according to the principle of bamboo curtains, firstly, blinds are made, pos. 8. These are factory products, little available for self-production, but irreplaceable for attics with inclined windows, see fig. left. The roller blind mechanism is much simpler, more reliable, cheaper and lighter than that of blinds with separate lamellas, and it can be mounted on a plastic window on its own, elementary and without tools, see fig. on right.
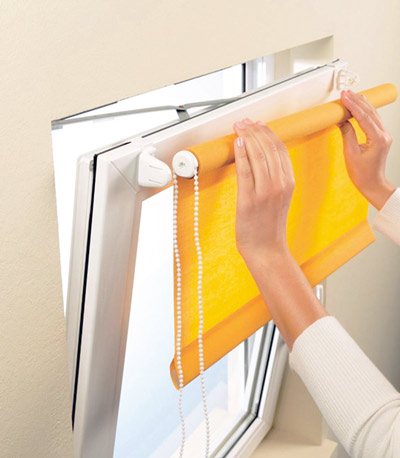
Installation of blinds on a plastic window without drilling
Analogs of a roller blind with a roll of cloth at the bottom - roller blinds, pos. 9 - it is not much more difficult to do it with your own hands than paper blinds, so further we will deal with them. As for the blinds-wings, pos. 11, only the function of adjusting the light transmission remains from the blinds. The device of jalousie-wings, presumably, explanations for pos. 11 doesn't, so that's it.


Common breakdowns and reasons for their occurrence
Subject to the rules of operation, horizontal blinds can last more than 15 years, but sometimes some parts or mechanisms fail earlier than this period. Common malfunctions are associated with improper care or use of louver systems.
Most often, owners of horizontal blinds are faced with the following malfunctions:
- broken hooks or clamps;
- the control cord is frayed or torn;
- the lifting and turning mechanism may fail;
- the eaves strip may break.
In addition, often immediately after buying ready-made blinds, it becomes necessary to adjust the length of the canvas. More often it has to be shortened, which is much easier to do. But sometimes, when moving or changing the place of installation of the structure, the canvas has to be lengthened. This can also be done if there are spare slats.
We make blinds
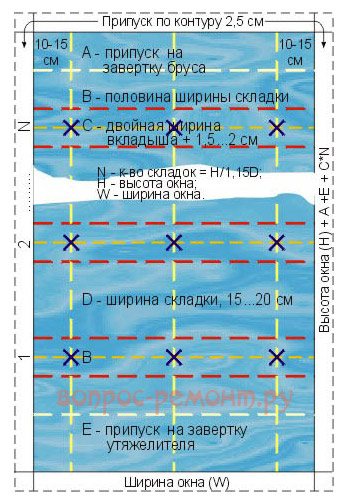
Before tackling any self-made blinds, you need to correctly measure the window opening for them, because most self-made structures do not lend themselves to alteration. The scheme of measurements of the window under the blinds is shown in Fig.
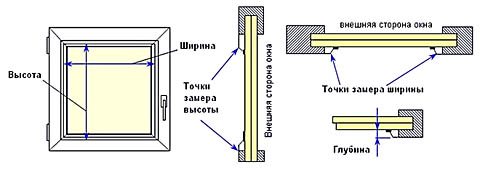
Scheme of measurements of the window opening for the installation of blinds
As for purchased blinds, the measurements of the openings for them, as a rule, are included in the installation cost, and she is included in the selling price. If this service does not reach you, then further, in the section on installing blinds with your own hands, there will be instructions for measurements for certain types; in general, their exact diagrams are given in the proprietary specifications.


Features of the
They attach such a structure to a frame or to a window opening. Despite the fact that they do not look expensive, they look no worse than expensive models. Due to the convenient lifting, roller curtains are used not only in residential buildings, but in offices, kindergartens.
A rod-shaft acts as a curtain, onto which the material (selected fabric) is wound. With the help of special garters, the material is fixed to the upper part of the structure (where the shaft is located). Laces / ribbons are used to make garters. There can be any number of them.
After you have found out what the features and advantages of such a product are in, you can proceed to its manufacture.
Paper
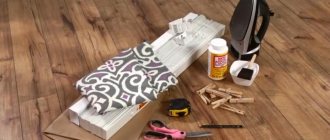
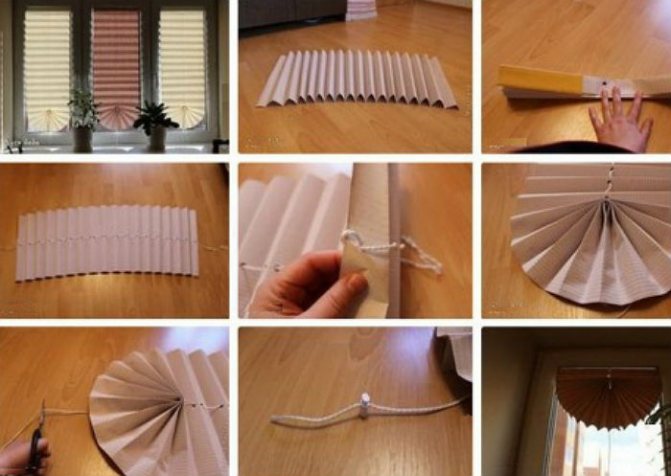
Blinds from paper wallpaper are the easiest and fastest to make. It is the wallpaper that is taken because the wallpaper is strong enough, rigid, resistant and at the same time transmits light a little, i.e. when the blinds are fully lowered, there will be soft diffused lighting in the room. Having picked up the colors of the workpiece, the blinds can be made quite aesthetic, and paper wallpapers are inexpensive. Step-by-step instructions for the manufacture of "wallpaper" blinds are shown in the figure:
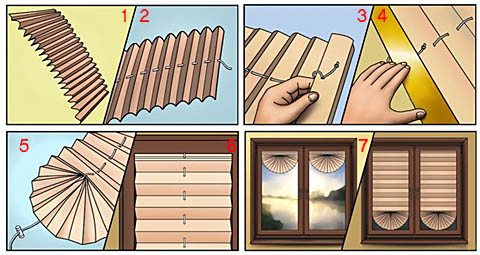
How to quickly make wallpaper blinds with your own hands
- A workpiece with a length of 1.25 of the height of the window and a width equal to its width or, if the window is wide, its entire share, is folded like an accordion. The width of the "lamellas" is in the range of 50-70 mm, so that a whole number of them fit along the length of the workpiece. The first and last strips should be facing outward. Folding the accordion is a very responsible operation: if you do it carelessly, the error accumulates, and the panel comes out crooked. Therefore, before smoothing the next joint, it is best to calibrate according to a template from a long rigid ruler, an even rail left over from the repair of an MDF board, etc., laid next to the workpiece;
- The accordion, while it is still in the form of a foot, is pierced in the middle with a hole punch. The punch is best - round, with a diameter of 8-10 mm, so a clerical punch will not work. A cord with a diameter of 6-8 mm is threaded into the hole. A thinner cord will cut the paper soon;
- Around the upper and adjacent "lamellas", the cord is looped around and fixed with a knot at its end;
- 1 protective film is removed from the tape of double-sided tape with the length and width of the "lamellas" and the upper "lamella" with a cord is sealed with tape;
Adjusting the blinds from the wallpaper with a stopper - The ends of the lower "lamella" are brought together to make something like an unfolded fan ("peacock's tail") and glued with PVA or the same tape. It is impossible to bring the gluing to the innermost bend, the accordion should freely move in and out on the cord! At the end of the cord, first put on a single (it is possible and double, only there will be an extra hole) clamp for the cord, then - an end (end switch), tie a knot at the end of the cord and put the end on it. Its role is not only decorative: if you fix the end of the cord with a simple knot, it will soon get dirty;
- The remaining protective film is removed from the tape and the blinds are glued to the window frame;
- Assemble / unfold the blinds by moving the latch, see also fig. on the right, marked with an arrow.
The process, as we can see, is simple, and if there are pieces of wallpaper from the repair in the pantry, all expenses will be only for scotch tape and a couple of small pieces of accessories. In addition, a master class on making homemade paper curtains can be viewed in the video below. Regular scotch tape is enough for the blinds to last all summer.
Video: do-it-yourself paper blinds
The first drawback of pleated blinds from wallpaper is obvious: to collect them, you need to stretch high up. The second can affect when the blinds are removed - the tape leaves traces on the painting. You can remove them with a cotton swab slightly moistened with vodka, cologne or 70% medical alcohol (alcohol "for injections" in a bottle with a blue cork), but if the window frames are inexpensive, the sticky layer of adhesive tape can stick into the paint so that nothing will reduce.
From this drawback, blinds made of paper of the design shown on the next page are free. fig .:
Original blinds made of paper
Making them more difficult: you need to accurately glue many pipes on the mandrel. For her, by the way, a pair of identical beer cans, stacked at intervals, so that the tapering parts stick out from the ends of the pipe, will do. Similar curtains are arranged according to the type of Roman ones (see below), so you need to punch 3 holes under the cord: 2 10-15 cm from the edge and 1 exactly in the middle. A weighting agent (wooden lath) is inserted into the lower tube and fixed with a couple of drops of glue. Its length is the same 10-15 cm less than the width of the canvas; the ends of the weight should fit between the outer cords. You can generally make a weighting compound from 2 identical pieces laid between the cords. In the upper bar, 3 holes are drilled for the cords, and the bar is attached to the window opening, placing the bosses under its edges so that the cords move freely. The timber is covered with a gap with a piece of the same wallpaper. The design turns out to be quite complicated, but it will last more than one year, especially if the wallpaper is non-woven.
The simplest paper blinds
Another "design" of paper blinds is shown in fig. on right. These are well remembered by the new settlers of the first Khrushchevs; then they were made from newspapers. However, in the same way, without cutting through the sheet to the end, you can quickly make quite decent paper blinds for a summer residence from wallpaper or paper with a pattern. They are to some extent automatic: the breeze blew, the strips (30-70 mm) fluttered. Shading remains, but this primitive curtain does not interfere with airing either.
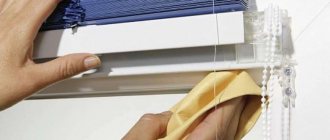
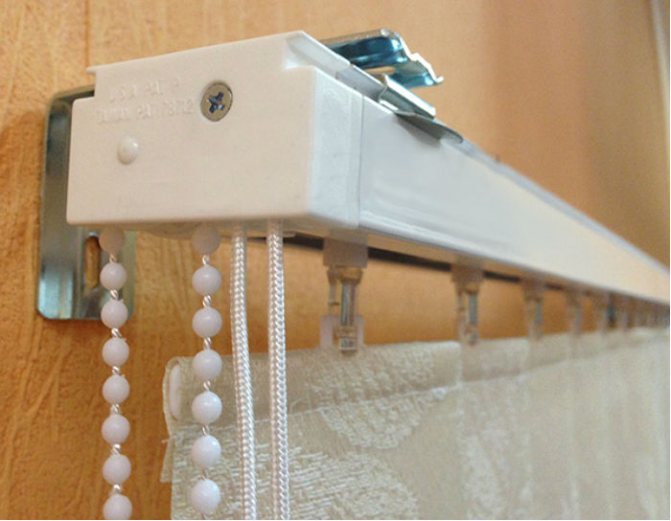
Eliminating clamps and hooks malfunctions
Most often, the question of how to repair horizontal blinds arises from the owners in connection with the breakdown of the lower clamps or hooks that are responsible for turning the slats. To repair the structure, you need to purchase new parts from a specialized store and replace the broken elements with them. When choosing a new lower retainer, pay attention to its size. It should be the same as the broken part, because there are small and large diameter clamps on the market.
The best mobile application for experienced Betters has been updated and you can absolutely use a smartphone with all the new goodies and enjoy sports betting in a new quality.
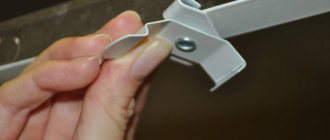
Replacement is easy. You just need to dismantle the old hook, and install a new one in its place. For this purpose, a new hook is inserted into a hole in the swivel mechanism. To make it easier to work, hold the pivot mechanism with one hand so that it does not rotate, and with the other hand thread the hook through the hole. Then insert the adjusting cane into the new hook.
To replace the lower clips, you need to unscrew the fastening mechanism at the bottom. After that, instead of the broken part, new clamps are installed, which are screwed from below with fasteners.
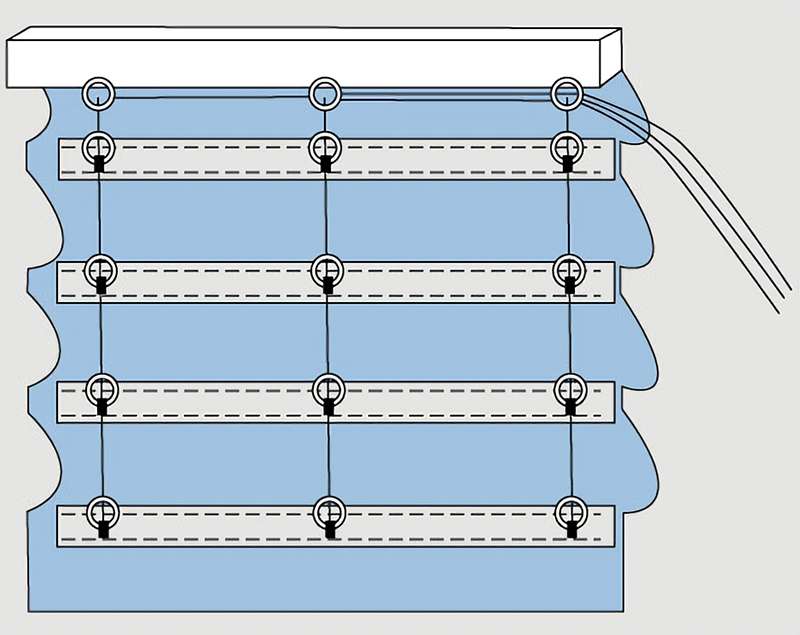
Roman curtains
A diagram of the device of Roman blinds is shown in Fig. Pockets, as a rule, are not sewn separately, but are formed from the masonry of the fabric of the panel.They are sewn either on one side, like on the right, or on two sides, sewing the free edge of the pocket to the panel. In the first case, less fabric is consumed (for each stitching, an allowance of 1-1.5 cm is needed), but on the folds the cloth is wiped faster.
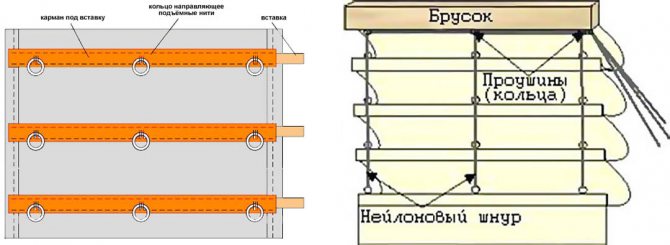
The device of Roman curtains
Fabric cutting pattern for Roman blinds
Roman blinds function reliably if, in addition to sufficient density and rigidity of the fabric, the liners are also rigid, and at the bottom the panel is weighted with a load of about 1-1.5 kg. Therefore, the battens are made from strips of plywood or hard plastic 2.5-3 mm thick and 30-40 mm wide, and the weighting agent is made of plywood strips 4-6 mm thick and 100-150 mm wide. The upper bar (the fabric is wrapped around it) with a section of approximately 40x40 mm. All the edges of the inserts, weighting agent and timber must be rounded off and sanded with sandpaper, otherwise the fabric on them will quickly rub. The pattern of the pattern of the panel of Roman blinds is shown in Fig. on right.
For more information on making Roman blinds yourself, see the video below:
Video: how to make a roman blind with your own hands
Note: lightweight waterproof and waterproof translucent Roman shades are made from a special synthetic fabric, the so-called. calender raincoat fabric. But in the very sunshine in a room with such curtains, to tell the truth, it is too stuffy.
Instructions on how to make vertical blinds from lining or slats
For vertical blinds, you will need to purchase a curtain rod and accessories for it in a hardware store:
- runners;
- distances;
- clamps;
- chains.
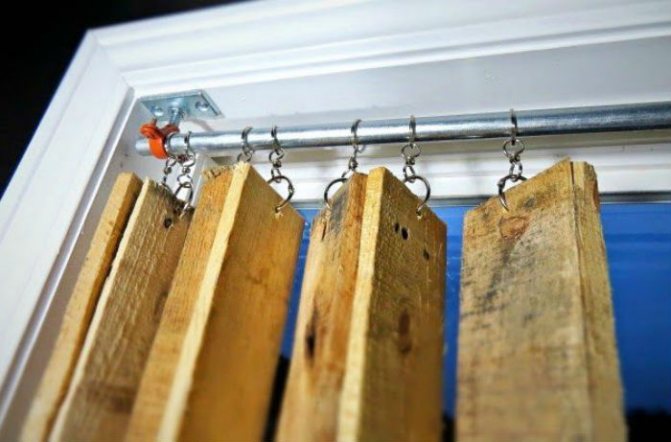
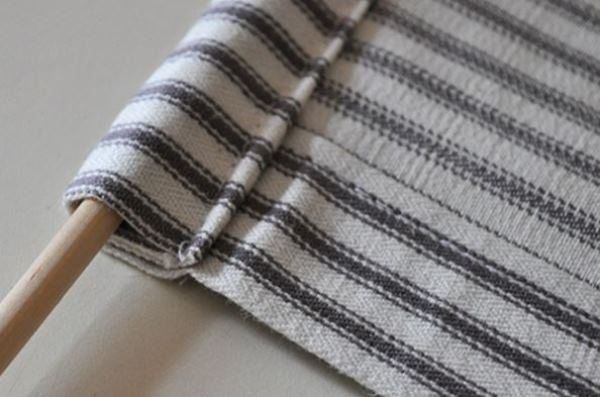
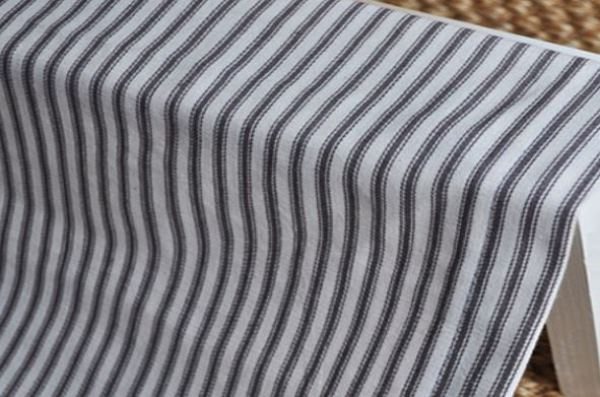
Vertical blinds made of wooden or plastic lining will turn out to be heavy, but very original. If you have a special machine, you can dissolve the slats with your own hands, sand them, tint and varnish. Measure the opening and width of the plank, divide the indicators, so you will determine how many parts are required to make curtains. Trim all planks to the desired length, sand the ends. From the top edge, screw a metal clip onto a small self-tapping screw, as shown in the photo below.
Homemade wood or plastic slats for vertical blinds
Assemble the curtain rod according to the manufacturer's instructions, fix it in the piers above the window and hang homemade slats on the runners. At home, craftswomen can sew slats from thick fabric, or from plastic bottles, cutting them into strips. Lamellas woven from straw or paper tubes also look very beautiful and original.
The photo shows brutal blinds for serious men, women "squeak", men grin
For a detailed master class on how to make such a miracle blinds, and bring your wife to hysterics, see the video below.
[su_youtube url = "https://www.youtube.com/watch?v=YWcbR8aXniU"]
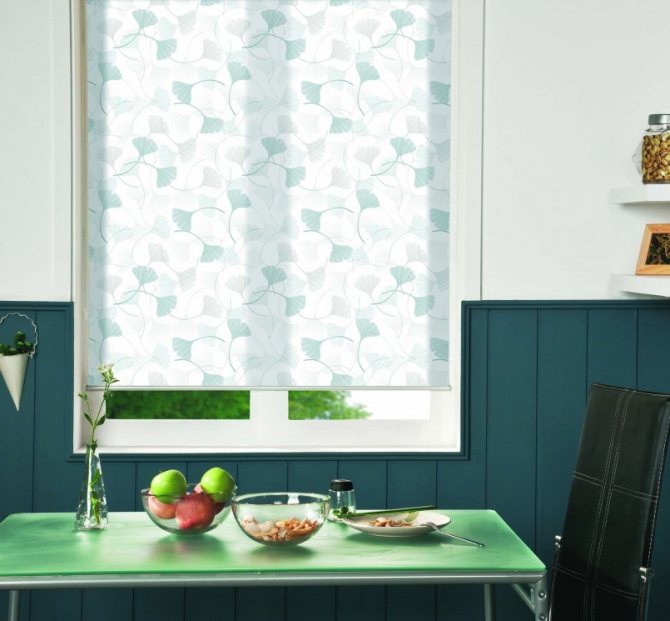
Roller blinds
Fabric cutting pattern for roller blinds
It is much simpler and more economical to roll blinds made of fabric, which in this case can be any, incl. light translucent. The principle of cutting a panel of homemade roller blinds is shown in Fig. They also require an upper fixing bar, but this can be round, approximately 40-50 mm in diameter. The lower weight is the same. The holes for the cord are framed with eyelets for curtains, and the cord itself can be as thin as you like, so long as it does not break off. "For beauty", instead of a cord, you can use a tape, and so that it is not visible at all - a fishing line. In addition, the roller blinds can be suspended / removed from the top hinges at any time. The overall aesthetics are 3+, but for a summer cottage, it is probably the best option.
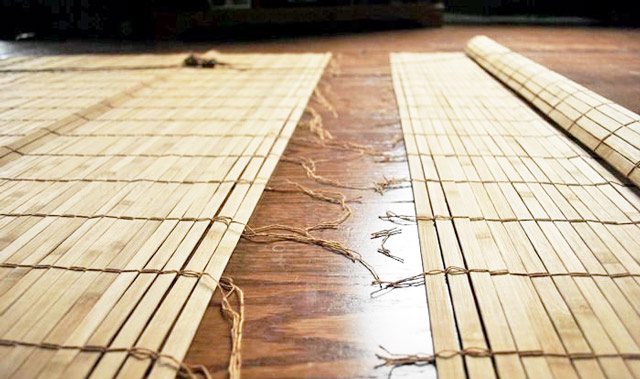
Making roller blinds from bamboo
As already mentioned, roller blinds were originally made from bamboo. If bamboo slats are available, nothing prevents you from making bamboo blinds with your own hands. The technological process is elementary: bamboos on a flat surface are tied with any sufficiently strong cord with a pitch of 30-50 cm, see fig.Bamboo blinds are fixed on a bar in the window opening. In the bar, 3 holes are drilled for the cords for assembling and unfolding the canvas: some ends of the cords are tightly attached to the bar, while the others, traction ones, are looped around the canvas below and passed through the holes.
Materials (edit)
Depending on the appearance and type of product, you will need different materials of any quality. Devices are made of wood, plastic, aluminum or plain paper.
The most durable will be aluminum. They will last for many years. But they also have disadvantages. A distinctive sound will be heard with each opening.
The most fragile are paper and plastic types. Despite this, they are quite popular and have a long service life.
Do-it-yourself wooden blinds will be environmentally friendly. They are the most harmless to humans.
For the manufacture of cloth, special fabrics are used that repel dust.
Colonial advanced
Now let's see how to make simple, cheap and reliable horizontal blinds of the colonial type with fixed slats for middle latitudes with our own hands. First, their grille is assembled in a hinged and / or folding frame, like a window shutter. Then, 3-4 mm thick plywood, twice impregnated with a water-polymer emulsion and painted, will go to the lamellas. The second impregnation is done after the first is completely dry. In an extreme case, say, for a summer cottage, the lamellas can be made of cardboard, processed in the same way, but then blind sashes are also needed on the shutters, which can be closed for the winter.
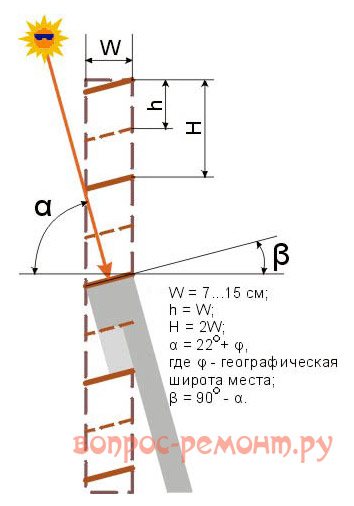
The layout of the lamellae of "moderately colonial" blinds is shown in Fig. on right. Proportions and angles are given for the RF Middle Band; the dashed line shows additional sipes of unshaded windows facing exactly south. In general, it is desirable to maintain the following ratios:
- South windows: h = W.
- South-east and south-west windows: h = 1.5W.
- East and west windows: h = H = 2W.
If you have not forgotten school trigonometry, then you can more accurately calculate both W, h, and the angle of installation of the lamellas β. It is necessary that on the winter solstice on December 21, when the height of the Sun at noon α = φ is 22 degrees, the shadow from the overlying lamella does not reach the inner edge of the lower one, and on the summer solstice on June 22, it sets half its width on the west / east windows, 2/3 in the southwest and southeast, and 3/4 in the south. Then in winter the blinds will practically not shade the room, in the summer in the morning it will be illuminated by direct rays (which is very useful for health), and as the luminary rises, the direct light will be replaced by diffused light. In the afternoon, the nature of the change in lighting will be reversed.
Note: 22 degrees with a certain, in this case completely insignificant, addition - this is the angle of inclination of the Earth's axis of rotation.
Do-it-yourself lifting mechanism installation
In order for the resulting structure to decorate the room, it is necessary to strictly follow the instructions in the process of work.
The process of installing curtains with your own hands is as follows:
- With the help of an iron, the material is smoothed, all folds are eliminated, the seams are ironed. During operation, unlike conventional curtains, rolled curtains do not wrinkle.
- A weight tube is mounted. To do this, a pocket is sewn at the bottom of the material, into which a metal tube is inserted.
The weight tube is inserted into the canvas pocket
- The resulting product is applied to the window so that the bottom of the product is at a distance of five to ten millimeters from the window sill. The top is marked with the place where the structure should be located.
- Then a block is wrapped in the upper part of the curtain. Then the stapleorm is fastened. If there is no stapler in the scrap, then small carnations will do. In the process, care should be taken to ensure that the material remains symmetrical.
Decoration of the upper part of the canvas
We put the blinds
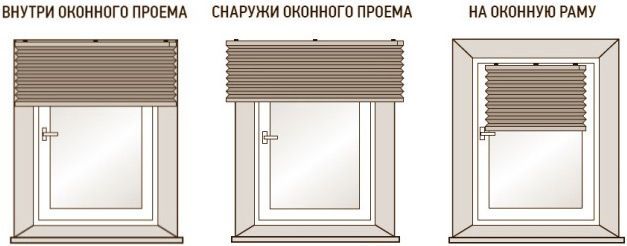
Installation of blinds on plastic windows without drilling
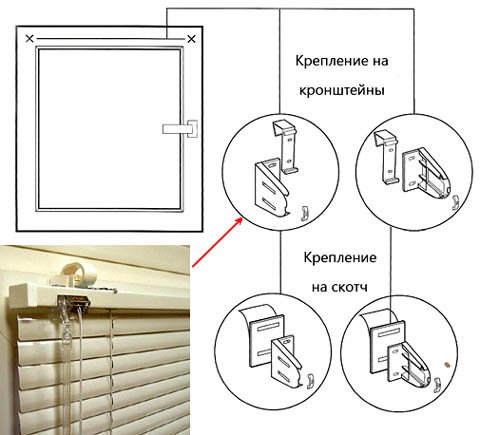
It remains to figure out how to install the purchased blinds yourself. The first thing you want in this case is to do without plumbing and construction work. Why bother with the window frame and / or its opening? Especially if the windows are brand new plastic, and their slopes have just been redecorated. Are there ways to install blinds with your own hands without drilling? Yes, there is such a possibility, see fig. Installation on brackets that cling to the window frame is more expensive. Mounting on a special adhesive tape is no less reliable (up to 5 years of warranty), but indelible marks may remain from it on the frame.
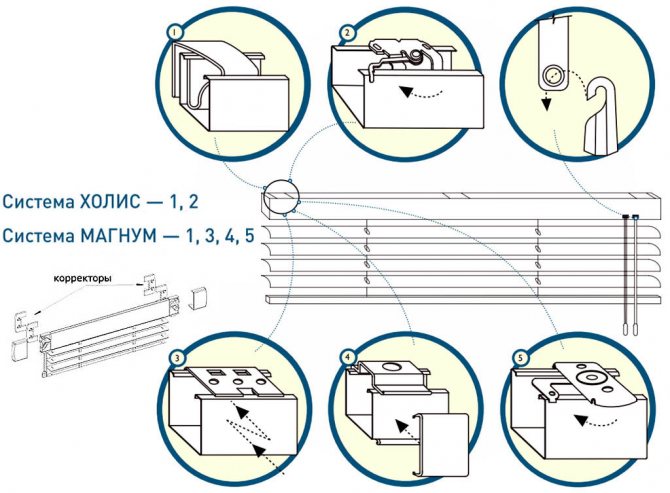
In general, it is better to mount on brackets, but then you need to keep in mind that there are 2 main systems for attaching blinds to plastic windows - HOLIS and MAGNUM, see fig.:
Systems for installing blinds on plastic windows
HOLIS is simpler and cheaper, but MAGNUM allows you to use cornice correctors, and the reliability and durability of the blinds significantly depend on its precise adjustment, especially along the horizontal axis. You can learn more about fixing blinds without drilling from the video:
Video: installing blinds on windows without drilling and self-tapping screws
If you are going to mount oak blinds on self-tapping screws in dowels, keep in mind that it is best to fix their cornice to the ceiling. First, there is some savings on a pair of brackets and the work of installing them, see fig.
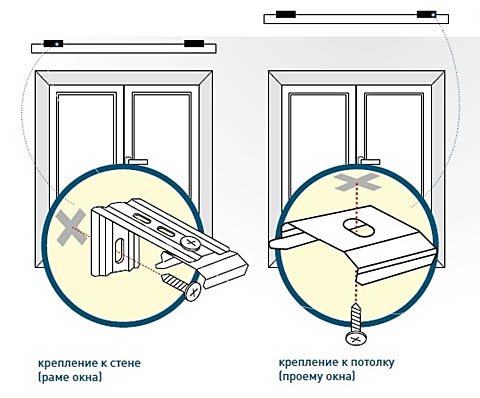
Mounting blinds in the window opening and to the ceiling
The scheme of fixing vertical blinds to the ceiling
Secondly, the attachment to the slope of the window is much less reliable: there is a thick layer of not very strong cement mortar without reinforcement and an even weaker finish. In order to reliably drive the dowel into the main wall, the slope will have to be drilled to such a depth that the laboriousness of installation will be much more than fastening to the ceiling. Branded vertical blinds, for example, according to their specifications, are attached only to the ceiling, see fig. on right.
Preparatory work
Types of fastening of wooden blinds
Before you start making blinds, you should draw up a drawing of the future design. To do this, you need to remove the dimensions of the windows: width and height. Eaves of vertical types of curtains are attached mainly to the wall or ceiling above the window. Their width and length should be 5-10 cm larger than the size of the window block. Horizontal blinds are usually installed in the window opening. In this case, the width of the lamellas should be several centimeters less than the width of the window block itself and somewhat wider than the glazing.

To work you need the following tools:
- Drill with a set of drills.
- Scissors.
- Accessories - clamps, brackets and hooks.
- Universal adhesive.
After you have taken measurements and made drawings with your own hands, you can start actually making the blinds.